 |
PRIDE: Exhibition 1 PBP Commentary |
Undercard bout
|
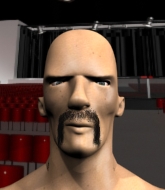
Coming up we have a heavyweight MMA rules bout between Thomas Noham (ranked 0 p4p, 0 weight class) and Greggor Smith (ranked 0 p4p, 0 weight class). Noham kept the crowd waiting but all that was forgotten when his ring entrance music started. The incomparable musical genuis that is Chase The Devil. Both fighters look fresh as a daisy as they make their way towards the ring.
 |
|
 |
| 190 cm
20
220 lbs
1 - 0 - 0 |
|
190 cm
22
250 lbs
0 - 0 - 0 |
BJJ Blue Belt
Counter striker
Big heart |
|
BJJ White Belt
Good kicks
Fast |
|
| |
|
Ladies and gentlemen. This fight is 2 rounds, in the heavyweight division.
Introducing the fighter to my left, fighting out of the red corner.
With a record of
1 - 0 - 0, fighting out of Tokyo, Thomas Noham!
And introducing the fighter to my right, fighting out of the blue corner.
With a record of
0 - 0 - 0, fighting out of Tokyo, Greggor Smith!
The judges for this bout are Shigeki Sano, Taro Takaoka and Sosuke Kotani.

The bell rings for round one and we are underway!
Smith fails with the takedown.
Smith looks for a takedown here. Will he get it? Noham is fending him off so far but Smith persists. Nope, Noham circles away and we're back to standing.

Noham darts in and lands a nice takedown into half guard.
Smith is trying to get back to full guard.
Noham looks over to his corner - he wants some instructions but his corner are not responding.
Smith tries to roll over but Noham keeps him under control.

Smith is looking to sinch up a gullotine here but Noham pulls his head out easily.
The fighters are tangled up in the ropes here. We might need a restart if the fighters can't break free themselves.
Smith gets full guard.
Smith looking for submissions off his back, moving his hips, looking for an opening.
Smith looking for submissions from the bottom but instead Noham passes into side control.

That's one minute gone in the round.
Noham just content to control the position.
Smith is looking for a sweep.
Smith tries to slip a leg under to move to half guard but Noham presses down on the leg and jumps into full mount!
Noham manages to capitalize on a mistake by Smith to take his back!
Smith looks gassed!
Noham landing with strikes.
Can Smith hold on?! Noham is landing more strikes to his hapless foe.
Noham controlling from the back.
Will Noham go for the finish here or will he try and keep control of the position?
Noham has good solid back control here.

That's two minutes gone in the round.

The ref stands the fighters back up, due to lack of action by Thomas Noham.
Smith tries for a takedown but Noham circles away easily
and Noham counters with a takedown into side control.
Thomas Noham has stuffed three takedown attempts in the round now. That's going to take a lot out of Greggor Smith.
Smith is looking for a sweep.

Noham stands up.
Noham shoots in for a takedown and gets it. Oh and he's advanced to full mount straight away.

Smith is rocked!
This is a great period of action - very entertaining stuff!
Smith looking to escape from mount but he's given up his back!
Smith is still on wobbly legs! Can Noham finish him?
Noham is looking cool and calm here, just waiting for a good opportunity to attack and finish the fight from this dominant position.
Smith seems to have recovered his senses.

That's three minutes gone in the round.
Smith is defending well here and trying to improve his position.
Noham slows the pace down here. Having a little breather whilst he's in a dominant position, looking to rest and regain some energy, ready to go for the finish.
Noham is hanging on to Smith's back as he tries to escape.
The crowd hopeful of a finish here - Noham's supporters are on their feet, screaming for him to go for the rear naked choke.
Smith misses with a takedown attempt
and Noham counters with a shoot takedown. Smith fights it but they end up in guard.
Smith looking for submissions off his back, moving his hips, looking for an opening.
Smith looking to sweep here. No luck so far.
Smith working for a triangle but Noham defends it easily.
Smith keeping busy on the bottom but Noham has passed one foot through into half guard.

That's four minutes gone in the round.
Noham prevents Smith from improving his position.
Noham trying to control from half guard but Smith is working away.
Neither fighter is doing enough for the referee's liking and he's decided to stand them back up.
Smith looks for a takedown here. Will he get it? Noham is fending him off so far but Smith persists. Nope, Noham circles away and we're back to standing.
Smith shoots and misses
and Noham counters with a nice shoot takedown that brings the fighters to the ground.
This has been an exciting period of action!
Noham trying to control the position from guard on top but Smith is wriggling around, looking for whatever he can.
Smith looking for a guillotine here but Noham defends easily.

That's five minutes gone in the round.
Noham slips effortlessly into side control - very nice.
Smith is trying to get back to half guard.
Smith is trying to get back to half guard. He's pushing on Noham's leg. He's managed it. Nice work.
Smith tries to roll over but Noham keeps him under control.
Smith looking for submissions from an awkward position here.
Smith tries to roll over but Noham keeps him under control.

That's six minutes gone in the round.
Neither fighter has done anything of merit for a good minute or two here and the crowd are not happy about it.
Smith is persisting with the attempt to improve his position.
Noham is looking to take a break and control but Smith is keeping him honest, looking to work from the bottom.
Neither fighter is doing enough for the referee's liking and he's decided to stand them back up.
Smith shoots and misses
and Noham counters with a single leg into guard. Smith didn't expect that.
Smith working from the bottom, still in full guard. He's managed to get a loose triangle. Noham doesn't seem to be doing much to defend here, obviously he feels comfortable in the position. Noham manages to throw the legs off his shoulder and he's back into guard - no problem.
The fighters are trapped in the ropes so we're going to have a reposition here. The ref calls for a break and repositions the fighters in the center of the ring.
Noham controlling from the guard. I say controlling but really, he's stalling.
Noham preventing the sweep.
Smith is looking to sweep but instead, Noham has passed into half guard.
Noham trying to control the pace.

That's seven minutes gone in the round.
Smith looking for submissions off his back.
Smith looking for subs from the bottom but Noham mounts him!
Noham prevents Smith from getting the reversal.
Smith regains half guard.
Noham wants to control but Smith is keeping him busy.
Smith is looking to get back to full guard here but Noham has managed to pass to side control instead.

That's eight minutes gone in the round.
Smith is wriggling around trying to escape.
Smith slips a leg in and gets back to half guard.
Noham wants to lay and pray for a moment but Smith keeps working.
Smith is looking to regain full guard. Not this time though.
Smith looking for submissions from an awkward position here.
Smith wants to get back to full guard but Noham has passed into side control.
Smith is trying to reverse the position but instead Noham has taken his back - oops!
Smith rolls, trying to escape but Noham keeps control of the position.
Noham is throwing strikes from the back here. Oh that last one was to the back of the head. Noham gets a warning from the referee. He throws another strike to the back of the head straight away though and the referee has seen enough. He breaks up the two fighters and stands them back up. Noham gets a real talking to here and is lucky not to get a point deducted. Noham apologises and we restart here on the feet.

That's nine minutes gone in the round.

Noham clinches with his opponent.
Noham has a body lock and is looking for a takedown. Smith is bouncing around trying to prevent the takedown and somehow he has indeed managed to stay on his feet.
Noham pulls guard successfully.
Smith drops back, looking for a kneebar! Noham looks panicked! The fighters roll across the mat, one looking to finish, one looking to escape. Noham looks to have wriggled free... Yes, he's got his leg free and he's dived into side control! Good work there from Noham!
Noham controlling the position from side mount.
Smith tries to buck Noham off but Noham is having none of it.
Smith is sneaking out the side here. He's bucked Noham off and has taken his back!
The crowd applaud the fighters efforts here as the round comes to an end.
Smith is staying calm and holding on to the back position, whilst working on a rear naked choke. Noham is defending well though. Smith let's go of the attempt for now.
Smith is working for the rear naked choke. He has one arm under the chin but Noham has hold of the other arm. A bit of a stalemate here.
And thats the end of the round the fighters go back to their corners.
Thomas Noham dominated that round.
That's the end of the round. The referee orders the cornermen out of the ring so we can get back down to business. So, we enter the final round. Let's see if either fighter can bring us a finish, or whether we're going to the judges scorecards.

Smith fails with the takedown
and Noham counters with a nice double leg into half guard.
Smith has guillotine here! It looks pretty tight! Could this be all over! No, Noham escapes and passes into side control at the same time. Nice work there by Noham!
Smith tries to slip a leg under to move to half guard but Noham presses down on the leg and jumps into full mount!
Noham is really dominating this fight. Is there anything that Smith can do to turn this around?
Noham trying to control but Smith is having none of it.
Smith is in all sorts of trouble here.
Smith is trying to reverse the position but instead Noham has taken his back - oops!
You can see the frustration on Smith's face
He knows he is in trouble unless he improves his position sooner rather than later.
Noham doesn't have the hooks in and Smith manages to turn into his guard.
Smith stands up and looks to throw the legs aside to pass to side control. Noham swivels though and keeps the full guard.
Smith is trying to work a guillotine from the top, or something like that? Don't know how he thinks he's going to get a finish from there.
Both fighters are absolutely exhausted here.
That's one minute gone in the round.
Noham keeping full guard, as Smith tries to pass.
Well, the referee has seen enough. Neither fighter is active enough on the ground so he's stood them back up.
Smith with a poor takedown
and Noham counters with a nice double leg into side control. Smith won't be happy with that.
Noham working the ground and pound but Smith is defending the strikes.
Noham works to advance to full mount. Smith defends for a few seconds but eventually he succumbs.
Smith tries to improve his position but instead Noham has taken his back!
Smith is trying to break free.
Good control from Noham.
Smith wants to escape the position.
That's two minutes gone in the round.
Noham has good solid back control here.
Smith rolls, trying to escape but Noham keeps control of the position.
So, who will make the next big move? In this position it could be crucial.
Smith manages to reverse the position and now he's in Noham's guard. Nice work there by Smith.
Noham is pulling down on Smith's head. It's preventing any offense from Smith, at least for the moment.
Smith passes easily into side control. Nice work.
Smith goes for an armbar here - this could be all over! But no, Noham has escaped beautifully and is now on top in side control! Oh, that's unlucky for Smith but great work by Noham.
That's three minutes gone in the round.
Smith is trying to work for a sweep but Noham has mounted him!
Smith is working to get back to half guard.
Smith slips a leg in and gets back to half guard.
Smith looking to work for a kimura from the bottom.
Smith is trying to get back to full guard.
Smith taking some punishment here, with Noham in his half guard.
Smith tries to roll over but Noham keeps him under control.
Smith looking for submissions off his back.
That's four minutes gone in the round.
A few boos can be heard. I'm sure they will multiply if the fighters don't pick up the pace.
Smith looking to work for a kimura from the bottom.
Smith wants to sweep but Noham has passed to side control!
Smith is looking to regain half guard here but Noham keeps moving and retains side control.
Well, the referee has seen enough. Neither fighter is active enough on the ground so he's stood them back up.
Smith shoots in for a takedown - he's clinched up with Noham but Noham pushes him off and we're back to square one.
Thomas Noham has stuffed three takedown attempts in the round now. That's going to take a lot out of Greggor Smith.
Smith misses with a takedown attempt
and Noham counters with a nice double leg into side control. Smith won't be happy with that.
Smith gets one leg under and gets the fight to half guard.
Smith looking for submissions off his back.
Smith is not content to let Noham control the position.
That's five minutes gone in the round.
Smith wants to get back to full guard.
Smith looking for a kimura from the bottom but Noham passes into side control!
Noham controlling the position from side mount.
Smith is trying to get back to half guard.
Smith gets one leg under and gets the fight to half guard.
Smith looking for submissions off his back.
That's six minutes gone in the round.
A few boos can be heard. I'm sure they will multiply if the fighters don't pick up the pace.
Smith looking for submissions from an awkward position here.
Smith wants to get back to full guard but Noham has mounted him!
Smith is trying to reverse the position but instead Noham has taken his back - oops!
You know, I was talking to some of our celebrities at ringside tonight and they were split right down the middle on who was going to win this fight.
Smith tries to roll but Noham sticks to his back.
Noham controlling from the back.
Smith rolls, trying to escape but Noham keeps control of the position.
Smith is being controlled on the ground here - he must escape this position otherwise surely the end is near.
That's seven minutes gone in the round.
Noham's ground tactics aren't going to win him many fans. Let's hope he's got fireworks for us if he gets back to his feet because he's not doing much on the ground.
The ref stands the fighters back up, due to lack of action by Thomas Noham.
Smith has his takedown stuffed
and Noham counters by moving into the clinch. Good anticipation by Noham.
Noham is trying to stall.
Noham wants to get back to striking at distance but Smith won't allow it.
Noham wants to stall.
Smith tries to take the fight to the ground by pulling guard but can't manage it.
Smith gets underhooks to prevent Noham's takedown attempt.
Smith tries to pull guard but Noham holds him up against the ropes and eventually Smith drops back down to his feet.
That's eight minutes gone in the round.
Neither fighter has done anything of merit for a good minute or two here and the crowd are not happy about it.
Noham is working for a takedown up against the ropes. He can't get it on this occasion though.
Smith successfully pulls guard.
Noham controls the pace of the fight for a moment.
Smith has an active guard here but Noham has managed to pass into half guard.
Thomas Noham overall seems to be getting the better of the ground position in the fight so far.
Noham seems to be working for a kimura but Smith defends the submission attempt.
Smith makes his way to full guard. A much better position for Smith.
That's nine minutes gone in the round.
Smith keeping moving, preventing Noham from controlling successfully.
Smith working for a triangle but Noham defends it easily.
Smith is active off his back here, looking for submissions.
Smith has a loose triangle. He'll be looking to tighten that up but Noham can see exactly what he's planning and manages to posture up and free himself.
Smith working for submissions but it's allowed Noham to get to half guard.
Greggor Smith has stepped it up - he knows he needs a finish here!
Smith actively working from the bottom here.
And that's the end of the fight!
Thomas Noham showed his dominance in that final round.
Well Noham has outscored his opponent in every aspect of the fight today. Only a scarily incompetent judge or two will keep him from a well deserved win... Over to the ring announcer for the scorecards.
Ladies and gentlemen, after 2 rounds of action, we go to the scorecards for a decision.
Judge Shigeki Sano scores the fight for Thomas Noham!
Judge Taro Takaoka scores the fight for Thomas Noham!
Judge Sosuke Kotani scores the fight for Thomas Noham!
Thomas Noham wins by unanimous decision!
|
|
|
|
|
|
|
|
|
|
|
|
|
|
|
|
|
|
|
|
|
|
|
| S |
C
A |
G |
S |
C
B |
G |
|
S |
C |
G |
|
energy
A | B |
|
hype
A | B |
|
pop
A | B |
|
mgr
A | B |
|
FIGHT
RATING
27% |
|
|
|
|
|
|
|
Undercard bout
|
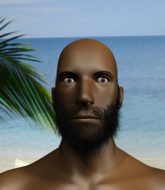
Coming up we have a light heavyweight MMA rules bout between Antonio Lopez (ranked 0 p4p, 0 weight class) and Magne Midgard (ranked 0 p4p, 0 weight class). Antonio Lopez has a significant reach advantage - let's see if he can make it count.
 |
|
 |
| 198 cm
20
205 lbs
0 - 1 - 0 |
|
186 cm
22
215 lbs
0 - 0 - 0 |
BJJ White Belt
Basic striking
Self confident |
|
BJJ Blue Belt
Basic striking
Tends to cut |
|
| |
|
Ladies and gentlemen. This fight is 2 rounds, in the light heavyweight division.
Introducing the fighter to my left, fighting out of the red corner.
With a record of
0 - 1 - 0, fighting out of Tokyo, Antonio Lopez!
And introducing the fighter to my right, fighting out of the blue corner.
With a record of
0 - 0 - 0, fighting out of Tokyo, Magne Midgard!
The judges for this bout are Tatsuya Matsuyama, Yukihiro Shimada and Kenichi Hosakawa.
The bell rings for round one and we are underway!
Lopez scores a takedown into full mount!
Midgard tries to reverse the position but Lopez maintains control.
Lopez scoring with strikes but Midgard is staying in there.

It looks like Magne Midgard has been cut.
Midgard regains half guard.
Lopez wants to take a breather but Midgard is having none of it.
Midgard looking for submissions from an awkward position here.
Lopez knows he needs to get back to his feet asap. He's simply no match for Midgard on the ground.
Midgard wants to improve his position but Lopez is controlling well.
Midgard is persisting with the attempt to improve his position.
Midgard is pressing down on Lopez's left leg trying to get back to full guard. He's managed it.
Midgard controls Lopez momentarily but Lopez frees himself.
Midgard throws his legs up looking for a submission but Lopez uses it to pass to side control.
You can see the frustration on Midgard's face, being in this tough position on the bottom.
That's one minute gone in the round.
Midgard takes a nasty elbow to the side of the head.
The fighters are tangled up in the ropes here. We might need a restart if the fighters can't break free themselves.
Midgard is not content to let Lopez control the position.
Lopez decides to take the fight back to the feet.
A really sloppy takedown attempt there from Lopez.
Midgard gets caught flat footed, as Lopez shoots in with a quick takedown into guard.
Lopez is breathing heavily.
Lopez throwing strikes from guard but Midgard blocks nicely.
The fighters are trapped in the ropes so we're going to have a reposition here. The ref calls for a break and repositions the fighters in the center of the ring.
Lopez tries to stand but Midgard is controlling from the bottom.
Midgard throwing his legs up looking for a triangle.
Lopez has to be careful here, sitting in the guard of a superior BJJ player.
Midgard looking to sweep here. No luck so far.
That's two minutes gone in the round.
Midgard lands a beautiful switch and he's in full mount! That could spell trouble for Lopez!
The fighters are starting to get a bit slippery now, which will make submissions a bit more difficult.
Lopez is wriggling around trying to escape.
Midgard looking to control but Lopez is working nicely, looking to advance position himself.
Midgard might have to switch it up a bit here because his efforts to control Lopez kaven't been going to plan, at least at the current moment in time.
Midgard wants to take Lopez's back but he can't do it this time.
Lopez is working to get back to half guard.
That's three minutes gone in the round.
Lopez defends a decent attempt at a guillotine from Midgard.
Midgard is trying to stand up but he's being controlled by his opponent.
Midgard wants to control the pace but Lopez is squirming around nicely.
Midgard with some aggressive grappling here. He's looking for submissions here, rather than waiting for the opportunity to counter.
Midgard throwing shots from mount but they're not landing.
Midgard stands up from the dominant position, so we're back on the feet.
Lopez throws a leg kick but Midgard sees it coming and moves out of range.
A good leg kick by Midgard.
Midgard is looking to take this fight into the clinch.
Lopez fails with a rather predictable takedown attempt.
Lopez tries for a takedown but Midgard sees it coming a mile off and avoids it easily.
That's three failed takedown attempts in the round for Antonio Lopez. That's going to take a lot out of him.
That's four minutes gone in the round.
Midgard clinches with his opponent.
Midgard wants to strike at distance but he can't break free of the clinch.
Midgard has had enough of the clinch but Lopez keeps him there for the moment.
Midgard with the Thai clinch. He's looking to land a big knee but he's not managed it this time.
Lopez tries to pull guard but can't drag his opponent to the mat. Midgard just stands there and leans against the ropes.
Lopez drops down looking for an ankle pick but Midgard pulls his leg out and moves away.
Lopez looking to shoot here. He's gone for it and he's landed a takedown into mount! Oh, that's bad for Midgard!
Lopez looking to ground and pound his opponent to a finish here.
Midgard takes a big shot to the head but keeps on trying to improve his position.
Lopez will need to keep those long limbs tucked in whilst he's on the ground, to prevent any submissions.
BOOM! Lopez connects with a massive shot to the dome!
The has opened up Magne Midgard's cut even more.Lopez manages to capitalize on a mistake by Midgard to take his back!
Lopez is working really hard to secure the rear naked choke. Midgard defends successfully for a significant amount of time. Both fighters are looking very determined.
Lopez punishes Midgard with strikes from the back mount.
The cut above Magne Midgard's eye is starting to cause him problems now.
Midgard just trying to survive but Lopez is wriggling into a better position, looking to finish.
That's five minutes gone in the round.
The crowd hopeful of a finish here - Lopez's supporters are on their feet, screaming for him to go for the rear naked choke.
Midgard tries to land a front kick but Lopez steps back. That was a bit too telegraphed.
Lopez avoids the clinch attempt nicely.
Lopez slips a jab and a cross from Midgard.
A left lands for Midgard.
Lopez shoots in but Midgard avoids the takedown attempt easily.
Midgard misses with a kick to the body.
Midgard looking to land some kicks to the body here.
Midgard is looking to clinch.
Midgard with a poor takedown
and Lopez counters with a nice shoot takedown that brings the fighters to the ground.
Lopez wants to pass the guard but Midgard is keeping the position.
Midgard wants to control here, rather than go for any submissions from the bottom. At least for now.
Midgard wants to sweep but no luck.
Midgard working from the bottom, still in full guard. He's managed to get a loose triangle. Lopez doesn't seem to be doing much to defend here, obviously he feels comfortable in the position. Lopez manages to throw the legs off his shoulder and he's back into guard - no problem.
Midgard tries to land a sweep but no joy.
That's six minutes gone in the round.
Lopez throwing elbows and punches but not connecting, as Midgard works some decent striking defense from the bottom.
Midgard striking off his back, scoring a few points.
Midgard working for a triangle but Lopez defends it easily.
Lopez wants to control from the top but Midgard keeps moving.
Lopez has a momentary lapse of concentration, allowing Midgard to throw up a leg and lock on what appears to be a pretty tight triangle! Lopez is fighting it off but it's all too little too late - Midgard pulls down on the head and he's put Lopez to sleep! This one is all over!
Ladies and gentlemen, after 6:56 of round 1, we have a winner by way of Submission (Triangle). Magne Midgard!
|
|
|
|
|
|
|
|
|
|
|
|
|
|
|
|
|
|
|
|
|
|
|
| S |
C
A |
G |
S |
C
B |
G |
|
S |
C |
G |
|
energy
A | B |
|
hype
A | B |
|
pop
A | B |
|
mgr
A | B |
|
FIGHT
RATING
59% |
|
|
|
|
|
|
|
Undercard bout
|
Coming up we have a bantamweight MMA rules bout between Spud McKenzie (ranked 0 p4p, 0 weight class) and Ronald McPwnsalot (ranked 0 p4p, 0 weight class). We have two fighters making their debuts here, so let's see who comes out of this one with their first professional victory.
 |
|
 |
| 160 cm
19
135 lbs
0 - 0 - 0 |
|
175 cm
22
135 lbs
0 - 0 - 0 |
BJJ Blue Belt
Brawler
Good chin |
|
BJJ White Belt
Brawler
Solid chin |
|
| |
|
Ladies and gentlemen. This fight is 2 rounds, in the bantamweight division.
Introducing the fighter to my left, fighting out of the red corner.
With a record of
0 - 0 - 0, fighting out of Tokyo, Spud McKenzie!
And introducing the fighter to my right, fighting out of the blue corner.
With a record of
0 - 0 - 0, fighting out of Tokyo, Ronald McPwnsalot!
The judges for this bout are Hirohito Nitta, Shigeki Fujiwara and Sosuke Kotani.
The bell rings for round one and we are underway!
McPwnsalot misses with a low kick as McKenzie jumps back.
McPwnsalot shoots in for a takedown. "I don't think so" says McKenzie as he avoids it easily.
McKenzie gets the takedown into side control.
McPwnsalot tries to escape but McKenzie is in control.
McPwnsalot looks to move to half guard but instead McKenzie has passed into mount! Damn!
McKenzie content just to control the position here.
McPwnsalot can't escape the position.
McPwnsalot is persisting with the attempt to improve his position.
McPwnsalot wants to control but McKenzie is having none of it.
McKenzie controlling the pace for now.
McPwnsalot really doesn't want to stay on the ground with McKenzie. If he can't get it back to his feet, it's only a matter of time before he'll be tapping out.
That's one minute gone in the round.
McPwnsalot is wriggling around trying to escape.
BOOM! McKenzie connects with a massive shot to the dome!
McKenzie lands a couple of nice shots there from mount.
McKenzie trying to control but McPwnsalot is having none of it.
McKenzie stands up from the dominant position. He obviously fancies his chances standing.
Nice takedown defense from McPwnsalot. No joy for McKenzie on that attempt.
McPwnsalot tries to clinch but is not successful on this occasion.
McKenzie with a lazy takedown attempt
and McPwnsalot counters with a nice uppercut.
McKenzie throws a jab when McPwnsalot was well out of range.
McKenzie fails miserably with a takedown attempt.
That's three failed takedown attempts in the round for Spud McKenzie. That's going to take a lot out of him.
That's two minutes gone in the round.
McKenzie fails with a takedown attempt from distance.
McPwnsalot will have to do better than that with his takedown attempts.
McPwnsalot is looking to clinch but McKenzie is avoiding it.
McPwnsalot shoots and misses
and McKenzie counters with a shoot takedown into half guard.
McKenzie is breathing heavily.
McKenzie wants to pass the guard but McPwnsalot is defending well.
McPwnsalot trying to control here.
McKenzie seems to be taking a bit of a break to think of his next move. He lands a short punch in the meantime.
McKenzie throwing shots but McPwnsalot is blocking nicely.
McKenzie seems content to maintain position for now, rather than mounting any offense.
McPwnsalot is looking to regain full guard. Not this time though.
That's three minutes gone in the round.
McPwnsalot is a painfully thin specimen of a man. You do wonder whether a good body kick would snap him clean in two.
McPwnsalot is trying to control but can't.
It looks like we're going to have a standup here. Neither fight is doing enough on the ground.
Horrible takedown by McPwnsalot or perhaps it was just good defense by McKenzie which made him look bad.
McPwnsalot shoots in but doesn't get the takedown
and McKenzie counters with a takedown into side control.
McKenzie controlling from side mount.
McKenzie blocks the strikes from McPwnsalot.
McPwnsalot is trying to get back to half guard.
McPwnsalot sneaks a leg under to get back to half guard.
That's four minutes gone in the round.
McPwnsalot wants to control but McKenzie is keeping busy and won't allow it.
McPwnsalot is doing well to control the position and prevent McKenzie from advancing to side control.
McKenzie looks over to his corner - he wants some instructions but his corner are not responding.
McPwnsalot is looking to regain full guard. Not this time though.
McPwnsalot wants to control but McKenzie is keeping busy.
McKenzie trying to control the action but McPwnsalot is working from the bottom.
That's five minutes gone in the round.
McPwnsalot is trying to maintain the position but McKenzie is very close to passing his half guard.
The referee has ruled that neither fighter is active enough on the ground and has stood them back up.
McPwnsalot gets his takedown attempt stuffed easily
and McKenzie counters with a shot to the ribs. That looked like it hurt.
McPwnsalot fakes the leg kick and cracks McKenzie in the body.
McKenzie misses with a takedown
and McPwnsalot counters with a single leg into guard. McKenzie didn't expect that.
McPwnsalot trying to control but McKenzie is working from the bottom.
McKenzie is trying to stand up but he's not managed so far.
McPwnsalot trying to pass the guard but can't manage it just yet.
McPwnsalot must be cautious of submissions here, given that his opponent has the superior Jiu Jitsu.
That's six minutes gone in the round.
McKenzie tries to land a sweep but no joy.
McKenzie pulls McPwnsalot in close to prevent any damage.
McKenzie striking off his back, scoring a few points.
McPwnsalot trying to control the position from guard on top but McKenzie is wriggling around, looking for whatever he can.
The referee decides to stand the fighters back up.
McPwnsalot shoots in and drives through. McKenzie sprawls well.
McKenzie drops down and drives through with a powerful takedown into guard.
McPwnsalot wants to stand but McKenzie is controlling the position.
McKenzie works a leg free and moves into half guard.
Fantastic stuff here - a very entertaining period of action, which has drawn cheers from the crowd.
McKenzie missing with the ground and pound from half guard.
The fighters are tangled up in the ropes here. We might need a restart if the fighters can't break free themselves.
McPwnsalot is trying to maintain the position but McKenzie is very close to passing his half guard.
That's seven minutes gone in the round.
McPwnsalot looking to work for a kimura from the bottom.
McPwnsalot tries to get to full guard but McKenzie has control of the leg.
McKenzie lands with an elbow from half guard - that looked like it hurt.
McPwnsalot moves his hips nicely and gets into full guard.
McPwnsalot trying to control the position.
McPwnsalot keeping moving, preventing McKenzie from controlling successfully.
That's eight minutes gone in the round.
The crowd are getting on the fighters' backs, as the pace has dropped off in the last minute or so.
McKenzie stands up from guard. Let's bang!
McPwnsalot bobs and weaves into range and then changes levels and scores with a nice takedown into side control.
McKenzie can't do much from the bottom here.
McPwnsalot creates some space and throws a big elbow, but McKenzie sees it coming and moves his head just enough to avoid the strike.
McPwnsalot wants to stand but McKenzie has his arm trapped.
McKenzie is sneaking out the side here. He's bucked McPwnsalot off and has taken his back!
McKenzie working for a choke but McPwnsalot is defending well.
McKenzie controls the position.
That's nine minutes gone in the round.
McKenzie has the hooks in. McPwnsalot is trying to push off one leg but he has to do so cautiously to avoid being submitted.
McPwnsalot tries to escape the position - he's now mounted. Is that better or worse? Hard to tell!
McKenzie jumps to side control looking for an arm triangle but McPwnsalot manages to avoid the submission attempt.
McPwnsalot misses with an elbow from the bottom.
McPwnsalot struggling a bit here.
And thats the end of the round the fighters go back to their corners.
Spud McKenzie dominated that round.
The fighters get back to their feet, the hooter sounds and we're back to the action! Let's get this one finished - here comes the final round!
McPwnsalot gets his takedown attempt stuffed easily
and McKenzie counters with a nice double leg into side control. McPwnsalot won't be happy with that.
McPwnsalot is not content to let McKenzie control the position.
McKenzie decides to stand back up.
McPwnsalot tries for a takedown but McKenzie circles away easily
and McKenzie counters with a nice double leg into side control. McPwnsalot won't be happy with that.
We've seen a great period of action over the last minute or so - credit to both fighters for leaving it all in the cage!
McPwnsalot throws a couple of strikes even though he's not really in a good position to do so.
McKenzie tries for a kimura. Not really close to a finish though.
Both fighters are absolutely exhausted here.
McPwnsalot is trying to get back to half guard.
That's one minute gone in the round.
McKenzie controlling from side mount.
McPwnsalot is positioning himself to get back to half guard.
The referee has ruled that neither fighter is active enough on the ground and has stood them back up.
McKenzie closes the distance, clinches up and gets a nice trip takedown into side control. Very smooth.
McKenzie decides to stand back up.
That's two minutes gone in the round.
McPwnsalot wants to clinch up but McKenzie keeps it at a distance.
McPwnsalot closes the distance looking to clinch
and McKenzie counters with a one-two to the body.
McKenzie has a takedown stuffed.
McKenzie throws a looping left and ducks down for a takedown. He's got his arms around McPwnsalot's waist but McKenzie gets an underhook and avoids the takedown by throwing McKenzie off to one side.
Spud McKenzie is looking to throw some combinations by the looks of things.
McPwnsalot stalks McKenzie and leaps in with a furious combination of punches. Uppercuts and crosses smash into McKenzie's face. McKenzie staggers backwards, shaken.
McKenzie wants to clinch up but McPwnsalot keeps it at a distance.
McKenzie fails with an attempt to clinch.
McKenzie gets his takedown attempt stuffed easily
and McPwnsalot counters with a takedown into side control.
That's three failed takedown attempts in the round for Spud McKenzie. That's going to take a lot out of him.
The crowd cheering loudly, showing their appreciation for the quality fight we're seeing here.
McKenzie struggling a bit here.
McKenzie is looking to regain half guard here but McPwnsalot keeps moving and retains side control.
That's three minutes gone in the round.
McKenzie pushes McPwnsalot away and creates a bit of space to escape. He's almost out here... but no, McPwnsalot gets a good hold of his legs and remains firmly in side control.
McPwnsalot wants to stand but McKenzie has his arm trapped.
McPwnsalot trying to control the position but McKenzie is working away.
McPwnsalot tries to stand but McKenzie is controlling his head.
The fighters are trapped in the ropes so we're going to have a reposition here. The ref calls for a break and repositions the fighters in the center of the ring.
McPwnsalot working away.
McKenzie might be looking to lock onto one of his opponent's long limbs for a submission, whilst we're on the ground.
McKenzie is positioning himself to get back to half guard.
Well, the referee has seen enough. Neither fighter is active enough on the ground so he's stood them back up.
McPwnsalot with a poor takedown
and McKenzie counters with a three punch combination, finished off with a leg kick. Nice work.
McKenzie gets the takedown into side control.
McKenzie working away.
That's four minutes gone in the round.
McPwnsalot tries to improve position but can't.
McKenzie scoring with punches and elbows.
McKenzie tries to advance to mount but can't.
McKenzie controls the position.
McPwnsalot parries the strikes from McKenzie easily there. McKenzie is wary of posturing up too much because it might enable McPwnsalot to escape.
McPwnsalot sneaks out the side door and pushes McKenzie away - he's back to his feet. The crowd show their appreciation for the escape.
McKenzie gets caught flat footed, as McPwnsalot shoots in with a quick takedown into guard.
McPwnsalot trying to control but McKenzie is working from the bottom.
McPwnsalot stands up over his opponent, looking to dive in with a big punch. Here he comes, superman style! Oh, the punch misses and McKenzie has got him in a triangle choke for good measure! Oh no! McPwnsalot manages to get his head free but now McKenzie has transitioned to an armbar! McPwnsalot grimaces and is forced to tap! Beautiful Jiu Jitsu from McKenzie! I'd be surprised if that didn't end up as submission of the night!
Ladies and gentlemen, after 5:03 of round 2, we have a winner by way of Submission (Armbar). Spud McKenzie!
|
|
|
|
|
|
|
|
|
|
|
|
|
|
|
|
|
|
|
|
|
|
|
| S |
C
A |
G |
S |
C
B |
G |
|
S |
C |
G |
|
energy
A | B |
|
hype
A | B |
|
pop
A | B |
|
mgr
A | B |
|
FIGHT
RATING
47% |
|
|
|
|
|
|
|
Undercard bout
|
Coming up we have a lightweight MMA rules bout between hazem el magic (ranked 0 p4p, 0 weight class) and Gakamori Tomi (ranked 0 p4p, 0 weight class). Over to our ring announcer for the fighter introductions!
 |
|
 |
| 170 cm
22
160 lbs
1 - 1 - 0 |
|
170 cm
20
161 lbs
0 - 0 - 0 |
BJJ Blue Belt
Brawler
Granite chin |
|
BJJ White Belt
Nice elbows
Granite chin |
|
| |
|
Ladies and gentlemen. This fight is 2 rounds, in the lightweight division.
Introducing the fighter to my left, fighting out of the red corner.
With a record of
1 - 1 - 0, fighting out of Tokyo, hazem el magic!
And introducing the fighter to my right, fighting out of the blue corner.
With a record of
0 - 0 - 0, fighting out of Tokyo, Gakamori Tomi!
The judges for this bout are Kenichi Hosakawa, Shigeki Fujiwara and Tatsuya Matsuyama.
The bell rings for round one and we are underway!
Nice sprawl there from Tomi as el magic shoots in.
Tomi scores with a sloppy punch to the body. Not much technique there but it did the business.
Tomi clinches with his opponent.
Tomi wants to strike at distance but he can't break free of the clinch.
Tomi tries to break the clinch but el magic is controlling the position.
Tomi wants to break the clinch but can't.
Tomi stops a takedown attempt from el magic.
Tomi wants to stall.
Tomi wants to get back to striking at distance but el magic won't allow it.
Tomi drags the fight down to the ground.
Tomi trying to strike from the bottom but really, it's not the best position to be doing that from!
el magic sitting in guard, not really doing much.
Tomi looking for submissions from the bottom but instead el magic passes into side control.
el magic has hold of Tomi's arm here. He's working for an Americana. It looks like he might have it! Tomi tries to escape but he's just digging himself in deeper - el magic cranks the arm and Tomi screams in pain! The ref makes a decision and ends the fight before the tap - no complains from Tomi, who is just happy to have his arm attached to his body.
Ladies and gentlemen, after 0:57 of round 1, we have a winner by way of Submission (Americana). hazem el magic!
|
|
|
|
|
|
|
|
|
|
|
|
|
|
|
|
|
|
|
|
|
|
|
| S |
C
A |
G |
S |
C
B |
G |
|
S |
C |
G |
|
energy
A | B |
|
hype
A | B |
|
pop
A | B |
|
mgr
A | B |
|
FIGHT
RATING
56% |
|
|
|
|
|
|
|
Undercard bout
|
Coming up we have a middleweight MMA rules bout between Nintendo Takada (ranked 0 p4p, 0 weight class) and Kuro Endo (ranked 0 p4p, 0 weight class). Endo has chosen Name of the Game by The Crystal Method as his entrance music. Rumors backstage are that the fighters have been paid to keep it standing but we know that would never happen in MMA!
 |
|
 |
| 185 cm
21
193 lbs
0 - 0 - 0 |
|
198 cm
18
193 lbs
1 - 1 - 0 |
BJJ Purple Belt
Improved boxing
Good chin |
|
BJJ Blue Belt
Brawler
Fast |
|
| |
|
Ladies and gentlemen. This fight is 2 rounds, in the middleweight division.
Introducing the fighter to my left, fighting out of the red corner.
With a record of
0 - 0 - 0, fighting out of Tokyo, Nintendo Takada!
And introducing the fighter to my right, fighting out of the blue corner.
With a record of
1 - 1 - 0, fighting out of Tokyo, Kuro Endo!
The judges for this bout are Ren Mimura, Kenichi Hosakawa and Shigeki Fujiwara.
The bell rings for round one and we are underway!
Endo misses with a few strikes there.
Takada throws a right and a left that both miss.
Takada tries to clinch but Endo moves out of range.
Takada fails miserably with a takedown attempt.
Endo lands a slapping body shot.
Endo works his jab well there, keeping his opponent at a distance.
It looks like Nintendo Takada has been cut.
Endo throws a hook but Takada blocks it.
Endo drives through and clinches with Takada against the ropes.

Endo escapes the clinch and we're back to striking.
Takada avoids a punch combination nicely.
Takada shoots in for a takedown. "I don't think so" says Endo as he avoids it easily.
Takada shoots in but no luck this time.
That's three failed takedown attempts in the round for Nintendo Takada. That's going to take a lot out of him.
Endo lands an overhand left. A wild punch that just about connected.
Takada is rocked!Endo swings wildly with a couple of big hooks
and Takada counters with a good right hand that lands right on the jaw.
The fight moves into the clinch position.
Endo escapes the clinch and we're back to striking.
Takada looks frusrated there after his takedown attempt is stuffed easily.
Takada fails with a takedown attempt from distance.
Takada is breathing heavily.
Endo will need to tighten up his combinations if he doesn't want to gas himself out, swinging at thin air.
That's one minute gone in the round.
Takada avoids a punch combination nicely.
Takada has a nice red mark on his side after a thudding body kick by Endo.
Endo misses with a wild combination.
Horrible takedown by Takada or perhaps it was just good defense by Endo which made him look bad.
Takada tries to clinch
and Endo counters by moving into the clinch. Good anticipation by Endo.
Endo breaks the clinch and we return to the middle of the mat.
Endo rushes forward with a series of wild hooks but Takada moves out of range and avoids them all easily.
This is turning into a torrid day at the office for Takada. He's trying desperately to land a takedown but he's failing miserably and getting slapped silly on the feet to compound his misery.
Nice sprawl there from Endo as Takada shoots in.
Endo tries to bum rush Takada with a series of wild strikes but Takada uses good footwork to avoid the assault.
Takada shoots in for a takedown. "I don't think so" says Endo as he avoids it easily.
Takada keeping a good distance there, avoiding the body shot.
Takada has a takedown stuffed.
Endo gets to the clinch - let's see what his plan is here.
Endo breaks from the clinch.
Endo ducks down and throws a hook to the body but Takada moves away.
Well, he's not going to score with shots like that. A lazy body kick attempt from Endo.
Takada throws a right and a left that Endo avoids nicely.
That's two minutes gone in the round.
Endo swings for the body but Takada moves out of range.
Takada tries for a takedown but Endo sees it coming a mile off and avoids it easily.
Takada drives through with a really nice takedown into side control.
This has been an exciting period of action!
Takada is in a dominant position here, looking for a kimura. Endo looks calm but he's in trouble here. Takada gets his head over his opponent's head and yanks on the arm. Endo is tapping like a morse code operator on the titanic! SOS! SOS! Takada lets go of the hold and Endo can pop his arm back in it's socket.
Ladies and gentlemen, after 2:28 of round 1, we have a winner by way of Submission (Kimura). Nintendo Takada!
|
|
|
|
|
|
|
|
|
|
|
|
|
|
|
|
|
|
|
|
|
|
|
| S |
C
A |
G |
S |
C
B |
G |
|
S |
C |
G |
|
energy
A | B |
|
hype
A | B |
|
pop
A | B |
|
mgr
A | B |
|
FIGHT
RATING
100% |
|
|
|
|
|
|
|
Undercard bout
|
Coming up we have a light heavyweight MMA rules bout between Ando Luigano (ranked 0 p4p, 0 weight class) and Tricta Phan (ranked 0 p4p, 0 weight class). The atmosphere really building for this one as we go over to our ring announcer for the fighter introductions!
 |
|
 |
| 197 cm
19
201 lbs
1 - 1 - 0 |
|
191 cm
19
214 lbs
0 - 0 - 0 |
BJJ Blue Belt
Brawler
Granite chin |
|
BJJ Purple Belt
Brawler
Intelligent |
|
| |
|
Ladies and gentlemen. This fight is 2 rounds, in the light heavyweight division.
Introducing the fighter to my left, fighting out of the red corner.
With a record of
1 - 1 - 0, fighting out of Tokyo, Ando Luigano!
And introducing the fighter to my right, fighting out of the blue corner.
With a record of
0 - 0 - 0, fighting out of Tokyo, Tricta Phan!
The judges for this bout are Yukihiro Shimada, Yuuki Gou and Ren Mimura.
The bell rings for round one and we are underway!
Luigano shoots in for a takedown and gets it. Oh and he's advanced to full mount straight away.
The fighters are trapped in the ropes so we're going to have a reposition here. The ref calls for a break and repositions the fighters in the center of the ring.
Luigano controlling from mount.
Luigano misses with a head shot.
Luigano trying to control but Phan is having none of it.
Luigano thuds his fist into the canvas! Oooouch!
Phan slips a leg in and gets back to half guard.
Phan wants to improve his position but Luigano is controlling well.
Phan makes his way to full guard. A much better position for Phan.
That's one minute gone in the round.
Phan is working actively off his back, looking to secure an arm or perhaps work for a triangle.
Phan is trying to control the position but Luigano postures up.
Luigano throws a strike but Phan rolls with it and manages to sweep. Now he's in guard on top.
Luigano knows he needs to get back to his feet asap. He's simply no match for Phan on the ground.
Phan works a leg free and moves into half guard.
Luigano looking to work for a kimura from the bottom.
Phan is looking to take a break and control but Luigano is keeping him honest, looking to work from the bottom.
That's two minutes gone in the round.
Luigano gets full guard.
Phan trying to control but Luigano is working from the bottom.
Phan wants to stand but Luigano has a closed guard, so he can't escape.
Phan stops Luigano from standing up.
Luigano trying to keep a closed guard but Phan is proving a slippery customer.
The fighters are starting to get a bit slippery now, which will make submissions a bit more difficult.
Phan wants to control from the top but Luigano keeps moving.
The referee has ruled that neither fighter is active enough on the ground and has stood them back up.
Luigano has taken the fight to the clinch.
Phan goes for a takedown attempt but Luigano pushes him away and we're back to fighting at a distance.
Luigano looking to shoot here. He's gone for it and he's landed a takedown into mount! Oh, that's bad for Phan!
That's three minutes gone in the round.
Phan is looking to get to half guard.
Phan tries to improve his position but instead Luigano has taken his back!
Phan looks gassed!
Luigano is riding his opponent, not letting Phan buck him off.
Luigano is controlling the position but Phan somehow manages to roll and ends up with half guard.
Luigano thows a huge punch but Phan dodges it nicely.
Luigano controlling the pace.
Phan tries to roll over but Luigano keeps him under control.
That's four minutes gone in the round.
The crowd are showing their displeasure at the lack of action as loud boos ring out around the arena.
Luigano is taking a breather. Phan says something to him but it's hard to make out. Perhaps he's telling him to get on with it and actually do something.
Phan tries to get to full guard but Luigano has control of the leg.
Phan is staying active underneath Luigano, who seems content to just control the action from this position.
The two fighters exchange a few words. I couldn't hear what they were saying but maybe it's more fun if you make it up yourself. Luigano connects with a nice short shot to Phan's temple.
Luigano trying to control the action but Phan is working from the bottom.
The referee decides to stand the fighters back up.
Luigano takes the fight into the clinch.
Luigano keeps control of Phan as he tries to wriggle out of the double underhooks.
Luigano breaks from the clinch.
That's five minutes gone in the round.
Luigano looks for a takedown. He's got it. We're now in half guard.
Luigano is looking to take a break and control but Phan is keeping him honest, looking to work from the bottom.
Phan blocking the ground and pound attempt from Luigano.
Luigano is working for a kimura but Phan is defending it quite comfortably.
Luigano is looking to take a break and control but Phan is keeping him honest, looking to work from the bottom.
Phan missing with punches from the bottom.
Luigano seems content to maintain position for now, rather than mounting any offense.
That's six minutes gone in the round.
Luigano blocks the strikes from Phan.
Phan is looking to improve his position.
The referee has ruled that neither fighter is active enough on the ground and has stood them back up.
Phan clinches but Luigano breaks the clinch
and Luigano counters with a nice double leg into half guard.
Phan wants to control but Luigano passes into side.
Luigano taking a breather here.
Luigano trying to control the action but Phan is working from the bottom.
Phan is trying to improve his position.
That's seven minutes gone in the round.
Luigano wants to stand but Phan is controlling his arm.
Luigano trying to control the position but Phan is working away.
Luigano decides to stand up, so the ref orders Phan to his feet.
Phan has his takedown stuffed
and Luigano counters with a nice single leg takedown and he's in Phan's guard now.
Luigano scoring with some ground and pound.
Phan keeping moving, preventing Luigano from controlling successfully.
That's eight minutes gone in the round.
Phan can't do much from the bottom at the moment, as Luigano controls the pace.
The ref stands the fighters back up, due to lack of action by Ando Luigano.
Luigano fakes an overhand right and shoots for a takedown. Phan sprawls well initially but Luigano persists and gets the takedown into half guard.
Phan looking to work for a kimura from the bottom.
Well, if Luigano is going to just lie there, perhaps we should talk about what we're having for dinner tonight
I'm having a ham and pineapple pizza
Yum. Can't wait.
Phan gets full guard.
Luigano tries to stand but Phan is controlling from the bottom.
There's a bit of a scramble here and now Phan is on top in guard.
That's nine minutes gone in the round.
Luigano not looking particularly offensive just at the moment.
Phan prevents Luigano from getting back to his feet.
Phan slips effortlessly into side control - very nice.
Phan trying to control the action but Luigano is working from the bottom.
Luigano wants to get back to his feet.
Phan has knee on belly and moves into mount.
Phan lands with some strikes.
And thats the end of the round the fighters go back to their corners.
Ando Luigano dominated that round.
OK. That's time! The bell goes and we're back to the action. This is the final round!
Luigano takes a jab right on the kisser.
Phan tries for a takedown but Luigano circles away easily
and Luigano counters with a takedown into full mount! That could mean trouble for Phan!
Luigano wants to control the pace but Phan is squirming around nicely.
Luigano sitting in mount, just looking to control for the moment.
Luigano trying to control but he's not successful this time.
Phan is in all sorts of trouble here.
Both fighters are absolutely exhausted here.
Luigano goes for an armbar but he's not got it
Phan turns into him and now he's in Luigano's guard.
Wooooo! Give it up for these two warriors! They are putting on a show!
Phan trying to control but Luigano is working from the bottom.
That's one minute gone in the round.
Luigano wants to stand and escape but Phan is having none of it.
Luigano keeping moving, preventing Phan from controlling successfully.
Phan is trying to work a guillotine from the top, or something like that? Don't know how he thinks he's going to get a finish from there.
Luigano keeping moving, preventing Phan from controlling successfully.
That's two minutes gone in the round.
The crowd are getting on the fighters' backs, as the pace has dropped off in the last minute or so.
The ref stands the fighters back up, due to lack of action by Tricta Phan.
Phan gets his takedown attempt stuffed easily
and Luigano counters by moving into the clinch.
Luigano is clearly stalling here... Pick up the pace son.
Luigano is pressed up against the ropes. Phan has hold of a leg and is looking to drag Luigano down to the mat. Phan avoids the attempt though and has circled away. We're back to striking at a distance.
Ando Luigano has stuffed three takedown attempts in the round now. That's going to take a lot out of Tricta Phan.
Luigano lands a vicious shot with the stealth of a sniper and the strength of a viper. Are vipers that strong? I can think of lots of things that are stronger than a viper - not many rhyme with sniper though.
Phan misses with a takedown
and Luigano counters into the clinch. Nicely done.
Luigano blocks a body shot from Phan.
Phan fails to pull guard.
Phan struggles to land a body shot inside as Luigano controls his hands.
Phan wants to break the clinch but can't.
Phan tries to pull guard but Luigano won't allow it.
Phan can't break the clinch.
Luigano landing knees to the body. They look like they could hurt.
Phan is working for takedown but Luigano is calmly controlling the position for now.
Phan tries to pull guard but Luigano holds him up against the ropes and eventually Phan drops back down to his feet.
That's three minutes gone in the round.
Luigano manages to break the clinch.
Luigano moves in looking to clinch but Phan pushes him off.
Phan with a lazy takedown attempt
and Luigano counters with a takedown into full mount! That could mean trouble for Phan!
Phan tries to hold on but Luigano pushes him away.
Luigano prevents Phan from getting the reversal.
Luigano looking to control and managing it successfully.
Phan is working to get back to half guard.
Luigano looking for an armbar but decides to keep the dominant position instead.
Luigano controlling from the full mount.
That's four minutes gone in the round.
Phan wants to get back to his feet.
Luigano is standing up, even though he is in mount.
Luigano feints and then dives in with a takedown. That was a long way out but the feint bought him enough time to close the distance and complete the takedown. Now we'll play guard for a bit and see who can get the better of that position.
Phan is looking for a triangle here but Luigano uses the submission attempt to pass into side control.
Luigano tries to move to mount but Phan blocks the move with his legs.
The fighters are tangled up in the ropes here. We might need a restart if the fighters can't break free themselves.
Phan is trying to get back to half guard. He's pushing on Luigano's leg. He's managed it. Nice work.
Phan is looking to control Luigano's leg but it's slowly edging free. Can Phan avoid being mounted?
That's five minutes gone in the round.
Luigano not throwing his punches with enough precision this time.
Phan wants to get back to full guard.
Phan is trying to maintain the position but Luigano is very close to passing his half guard.
Phan manages to get to full guard.
Phan wants to sweep here but Luigano controlling him for the moment.
Luigano is looking to work some ground and pound but Phan has wrist control.
Phan keeping moving, preventing Luigano from controlling successfully.
That's six minutes gone in the round.
The crowd are hurling abuse towards the fighters... You can hardly blame them though because there isn't a lot going on in the fight.
Neither fighter is doing enough for the referee's liking and he's decided to stand them back up.
Phan tries to clinch but Luigano moves out of range.
Luigano looks for a takedown here. Will he get it? Phan is fending him off so far but Luigano persists. Nope, Phan circles away and we're back to standing.
Phan darts in trying to clinch
and Luigano counters by moving into the clinch.
Luigano drags the fight down to the ground.
Phan throwing shots from guard but he's hitting more mat than opponent.
Luigano is trying to control the position but Phan postures up.
Luigano looking for a guillotine here but Phan defends easily.
Phan trying to pass the guard but can't manage it just yet.
That's seven minutes gone in the round.
Luigano keeping moving, preventing Phan from controlling successfully.
Phan working some ground and pound from guard but it's not doing any damage.
Luigano seems keen to control rather than go for a submission, at least for now.
Luigano has controlled the position for a good 20 seconds, which will no doubt be starting to frustrate his opponent.
It looks like we're going to have a standup here. Neither fight is doing enough on the ground.
Phan tries to clinch but Luigano is having none of it.
Phan fails with an attempt to clinch.
Luigano scores a trip takedown into side control. Nice.
Luigano works a knee to the body and follows up with a nice elbow to the head.
Luigano is looking to take a break and control but Phan is keeping him honest, looking to work from the bottom.
Luigano is really struggling to control Phan but he's trying to hold on to the position.
That's eight minutes gone in the round.
Phan takes a big shot right to the temple there but he's taken it well.
You can see the frustration on Phan's face, being in this tough position on the bottom.
Luigano lands a knee to the body and a forearm to the face.
Luigano has had enough of the ground for now and decides to stand.
Phan with a poor takedown
and Luigano counters by clinching up.
Luigano successfully pulls guard.
Phan pushing down on Luigano's thigh, trying to pass to half guard. He's managed it... Nice work.
That's nine minutes gone in the round.
Luigano wants to control but Phan is keeping busy.
Phan is nestled in close to Luigano, controlling him well. He's worked in a nice elbow to the side of the head as well, for good measure.
Luigano controlling the position well.
Luigano trying to control here.
Phan is trying to work for a kimura. He's got his hands clasped together - this could be trouble! No, Luigano has managed to free his arm - good work.
Tricta Phan has stepped it up - he knows he needs a finish here!
Phan looking to pass the half guard. Not this time.
Phan is thinking about going for an arm triangle but he can't free his leg.
And that's the end of the fight!
Ando Luigano showed his dominance in that final round.
I think Luigano has won this one but let's see what the judges have to say. Over to the ring announcer for the scorecards.
Ladies and gentlemen, after 2 rounds of action, we go to the scorecards for a decision.
Judge Yukihiro Shimada scores the fight for Ando Luigano!
Judge Yuuki Gou scores the fight for Ando Luigano!
Judge Ren Mimura scores the fight for Ando Luigano!
Ando Luigano wins by unanimous decision!
|
|
|
|
|
|
|
|
|
|
|
|
|
|
|
|
|
|
|
|
|
|
|
| S |
C
A |
G |
S |
C
B |
G |
|
S |
C |
G |
|
energy
A | B |
|
hype
A | B |
|
pop
A | B |
|
mgr
A | B |
|
FIGHT
RATING
24% |
|
|
|
|
|
|
|
Undercard bout
|
|
|
|
Undercard bout
|
Coming up we have a heavyweight MMA rules bout between Mohamad Najar (ranked 0 p4p, 0 weight class) and Wardor Warlovski (ranked 0 p4p, 0 weight class). Mohamad Najar had a look across the ring there at his opponent. He definitely means business
 |
|
 |
| 215 cm
18
265 lbs
1 - 0 - 0 |
|
189 cm
21
197 lbs
1 - 0 - 0 |
BJJ Blue Belt
Brawler
KO power |
|
BJJ Blue Belt
Basic striking
Granite chin |
|
| |
|
Ladies and gentlemen. This fight is 2 rounds, in the heavyweight division.
Introducing the fighter to my left, fighting out of the red corner.
With a record of
1 - 0 - 0, fighting out of Tokyo, Mohamad Najar!
And introducing the fighter to my right, fighting out of the blue corner.
With a record of
1 - 0 - 0, fighting out of Tokyo, Wardor Warlovski!
The judges for this bout are Tatsuya Matsuyama, Taro Takaoka and Shigeki Fujiwara.
The bell rings for round one and we are underway!
Najar fails to land the takedown.
Left hook, right uppercut from Warlovski.
Nice sprawl there from Warlovski as Najar shoots in.
A solid body kick from Warlovski.
Warlovski lands with a nice combination. Najar backs away looking to recover.
Warlovski gets the takedown into side control.
Najar is looking to reverse the position.
Najar can't do much from the bottom here.
The fighters are tangled up in the ropes here. We might need a restart if the fighters can't break free themselves.
Najar gets one leg under and gets the fight to half guard.
Warlovski is working hard to pass the guard. He's done it - he's now in full mount! Trouble for Najar!
Najar is breathing heavily.
Warlovski misses with a few strikes there.
Warlovski gets a takedown into half guard.
Warlovski is working for a submission of some sort.
Warlovski scores with a couple of good hammerfists.
That's one minute gone in the round.
Najar trying to get back to full guard but Warlovski takes advantage of the position and moves to full mount!
Warlovski can't quite control the action as he would like just now, as Najar is looking to escape.
Both fighters really going for it on the ground here!
Najar is trying desperately to improve position.
Warlovski gets to his feet and calls his opponent to stand. Here come the fireworks!
Warlovski fails with a takedown attempt from distance.
Najar is looking to clinch but Warlovski is avoiding it.
Warlovski has closed the distance and engaged Najar in a clinch.
Warlovski just leaning against Najar, taking a breather.
Najar wants a takedown but no success here.
That's three failed takedown attempts in the round for Mohamad Najar. That's going to take a lot out of him.
Najar jumps guard but Warlovski stands there with Najar around his waist. Najar gives up and drops back to his feet. We remain in the clinch.
Warlovski lands a nice trip takedown into half guard.
Najar is looking to control Warlovski's leg but it's slowly edging free. Can Najar avoid being mounted?
Najar is going to have to think about doing something other than just controlling because Najar is managing to avoid having the position dictated to him.
That's two minutes gone in the round.
Najar is trying to defend against the ground and pound but Warlovski scores with a couple of nice shots.
Najar moves his hips nicely and gets into full guard.
Najar looking for a guillotine here but Warlovski defends easily.
Warlovski keeps in close for a moment and lands a decent shot to the side of Najar's head.
Najar manages to land a sweep and now he's in mount on top!
The fighters are going at a pretty good pace and they're both starting to sweat now.
Warlovski is looking to get to half guard.
Najar is thinking about an arm triangle here, looking to tighten it up before moving to side control. Warlovski can see it coming though and defends well with a couple of strikes to the head and some good arm positioning.
Najar dominating with strikes here.
It looks like Wardor Warlovski has been cut.
This has been an exciting period of action!
Najar working for a submission here. He's tucked his head under his opponent's arm, looking for an arm triangle. He's hopped off into side control, looking to tighten the submission... is it going to work? He's given up a good position looking for it. Warlovski looks OK. Oh, I spoke too soon, he's out! That must have been tighter than I thought! Excellent work there by Najar! Submission of the night perhaps?
Ladies and gentlemen, after 3:01 of round 1, we have a winner by way of Submission (Arm Triangle). Mohamad Najar!
|
|
|
|
|
|
|
|
|
|
|
|
|
|
|
|
|
|
|
|
|
|
|
| S |
C
A |
G |
S |
C
B |
G |
|
S |
C |
G |
|
energy
A | B |
|
hype
A | B |
|
pop
A | B |
|
mgr
A | B |
|
FIGHT
RATING
70% |
|
|
|
|
|
|
|
Co-main event
|
Coming up we have a welterweight MMA rules bout between Quinton Hach (ranked 0 p4p, 0 weight class) and Hoo Dung (ranked 0 p4p, 0 weight class). Dung has a niggling injury. He would have liked to come in 100% fit but that's not always possible. Over to our ring announcer for the fighter introductions!
 |
|
 |
| 175 cm
18
175 lbs
2 - 0 - 0 |
|
178 cm
20
178 lbs
1 - 0 - 0 |
BJJ Blue Belt
Counter striker
Self confident |
|
BJJ White Belt
Excellent MT
Fast |
|
| |
|
Ladies and gentlemen. This fight is 2 rounds, in the welterweight division.
Introducing the fighter to my left, fighting out of the red corner.
With a record of
2 - 0 - 0, fighting out of Tokyo, Quinton Hach!
And introducing the fighter to my right, fighting out of the blue corner.
With a record of
1 - 0 - 0, fighting out of Tokyo, Hoo Dung!
The judges for this bout are Yukihiro Shimada, Hirohito Nitta and Sosuke Kotani.
The bell rings for round one and we are underway!
Dung misses with a straight left.
Hoo Dung seems to be the more aggressive standup fighter in this bout.
Dung looks gassed!
Dung throws a wild body kick that Hach sees coming a mile off.
Hach tries to shoot in for a takedown. He's got hold of a leg but Dung swivels and escapes.
Hach shoots in from a long way out. He's driving through with the takedown attempt and he eventually gets it, landing in Dung's guard.
Dung wants to stand up but Hach is controlling him.
Hach pushes down on Dung's leg and manages to get into half guard.
Hach throwing punches and elbows but they're not doing any damage.
Nice strikes from Hach there.
Neither fighter is being very active at the moment, with Hach in particular looking to stall.
Hach decides to stand up.
That's one minute gone in the round.
Hach checks a low kick from Dung.
Hach moves into range and clinches up with Dung.
Hach lands a hook that snaps the head of Dung backwards.
Hach wants to break the clinch but can't.
Hach drops to a knee looking for a takedown but Dung gets the underhooks and prevents it.
Hach has Dung pressed up against the ropes and is working for takedown. Dung manages to improve position though and keeps the fight standing.
That's three failed takedown attempts in the round for Quinton Hach. That's going to take a lot out of him.
Dung tries to break the clinch but Hach is controlling the position.
Hach is working for a takedown up against the ropes. He can't get it on this occasion though.
Hach wants to get back to striking at distance but Dung won't allow it.
Dung wants to strike at distance but he can't break free of the clinch.
Dung is pressed up against the ropes. Hach has hold of a leg and is looking to drag Dung down to the mat. Hach avoids the attempt though and has circled away. We're back to striking at a distance.
Dung clinches but Hach breaks the clinch
so Hach counters with a double leg into guard. Good agility.
That's two minutes gone in the round.
Hach gets to his feet. Dung looking to butt scoot but the ref puts an end to that. On your feet son!
Hach throws a looping left and ducks down for a takedown. He's got his arms around Dung's waist but Hach gets an underhook and avoids the takedown by throwing Hach off to one side.
Dung misses with a takedown attempt
and Hach counters with a shoot takedown into half guard.
Hach is looking for a kimura here.
Hach performing his best blanket impression for a moment.
Dung is in trouble now - Hach has advanced to mount!
Dung is wriggling around trying to escape.
That's three minutes gone in the round.
Hach is controlling this nicely and is looking to make no mistakes. Dung is trying to wiggle out of this horrible position. Dung flips to his side and attempts to get a leg in for half guard. Hach anticipates the leg and manages to get behind Dung and secures both hooks! This could be bad! Hach slips an arm under Dung chin and tries to position for a rear naked choke. Hach has worked the choke in now and it looks tight. Hach is squeezing on Dung like an anaconda would it's prey. Dung fails to tap and has fallen unconscious! We've got ourselves a winner by way of a rear naked choke!
Ladies and gentlemen, after 3:25 of round 1, we have a winner by way of Submission (RNC). Quinton Hach!
|
|
|
|
|
|
|
|
|
|
|
|
|
|
|
|
|
|
|
|
|
|
|
| S |
C
A |
G |
S |
C
B |
G |
|
S |
C |
G |
|
energy
A | B |
|
hype
A | B |
|
pop
A | B |
|
mgr
A | B |
|
FIGHT
RATING
55% |
|
|
|
|
|
|
|
Main event
|
Coming up we have a heavyweight MMA rules bout between Freddy Spitfire (ranked 0 p4p, 0 weight class) and Kareem O Wheet (ranked 0 p4p, 0 weight class). Both fighter's entrance songs getting the crowd jumping here.
 |
|
 |
| 180 cm
19
245 lbs
2 - 0 - 1 |
|
194 cm
22
255 lbs
1 - 0 - 0 |
BJJ Blue Belt
Counter striker
Big heart |
|
BJJ Purple Belt
Brawler
Likes ground |
|
| |
|
Ladies and gentlemen. This fight is 2 rounds, in the heavyweight division.
Introducing the fighter to my left, fighting out of the red corner.
With a record of
2 - 0 - 1, fighting out of Tokyo, Freddy Spitfire!
And introducing the fighter to my right, fighting out of the blue corner.
With a record of
1 - 0 - 0, fighting out of Tokyo, Kareem O Wheet!
The judges for this bout are Yukihiro Yamamoto, Yuuki Gou and Tatsuya Matsuyama.
The bell rings for round one and we are underway!
O Wheet misses with a few strikes there.
Spitfire showing good head movement there, avoiding the strikes from O Wheet.
Spitfire really is a fat lump.
O Wheet avoids the clinch attempt nicely.
Spitfire fails with an attempt to clinch.
Spitfire scores with a takedown into O Wheet's guard.
O Wheet tries to land a sweep but no joy.
O Wheet seems keen to control rather than go for a submission, at least for now.
Spitfire looking to pass the guard.
O Wheet wants to improve his position but instead Spitfire has moved into half guard.
O Wheet is controlling Spitfire's position as best he can from this difficult position.
That's one minute gone in the round.
O Wheet is trying to get back to full guard.
O Wheet controlling the position well.
O Wheet has no desire to be mounted, so is trying to control. Spitfire is working away from the top position though.
O Wheet wants to control but Spitfire passes into side.
O Wheet tries to improve position but can't.
Spitfire tries for a kimura. Not really close to a finish though.
That's two minutes gone in the round.
The crowd are hurling abuse towards the fighters... You can hardly blame them though because there isn't a lot going on in the fight.
You can see the frustration on O Wheet's face, being in this tough position on the bottom.
The ref stands the fighters back up, due to lack of action by Kareem O Wheet.
O Wheet misses with a takedown attempt
and Spitfire counters with a shoot takedown into half guard.
O Wheet looking for submissions from an awkward position here.
O Wheet looks gassed!
Spitfire throwing punches and elbows but they're not doing any damage.
O Wheet holds on for dear life, maintaining half guard for now.
O Wheet gets full guard.
O Wheet working from the bottom, still in full guard. He's managed to get a loose triangle. Spitfire doesn't seem to be doing much to defend here, obviously he feels comfortable in the position. Spitfire manages to throw the legs off his shoulder and he's back into guard - no problem.
The fighters are going at a pretty good pace and they're both starting to sweat now.
O Wheet looking for submissions from the bottom but instead Spitfire passes into half guard.
The fighters are trapped in the ropes so we're going to have a reposition here. The ref calls for a break and repositions the fighters in the center of the ring.
That's three minutes gone in the round.
Spitfire is looking for an arm triangle, whilst trying to pass to side control. O Wheet doesn't seem that keen to cooperate though. No luck this time Spitfire.
Spitfire wants to lay and pray for a moment but O Wheet keeps working.
O Wheet is trying to get back to full guard.
O Wheet is looking to control Spitfire's leg but it's slowly edging free. Can O Wheet avoid being mounted?
That's four minutes gone in the round.
There's not a lot going on here and the crowd are letting the fighters know they're not willing to tolerate a lack of action.
Spitfire is looking for a kimura here.
O Wheet trying to keep hold of his opponent's head but Spitfire manages to pass to mount!
O Wheet is working to get back to half guard.
That's five minutes gone in the round.
Spitfire can't quite control the action as he would like just now, as O Wheet is looking to escape.
O Wheet is working to get back to half guard.
O Wheet is persisting with the attempt to improve his position.
O Wheet wants to control but Spitfire is having none of it.
O Wheet has given up his back here.
O Wheet turns into Spitfire and is now in his guard.
That's six minutes gone in the round.
The crowd are showing their displeasure at the lack of action as loud boos ring out around the arena.
Spitfire avoiding any damage from the ground and pound.
The referee has ruled that neither fighter is active enough on the ground and has stood them back up.
O Wheet misses with a takedown
and Spitfire counters with a shoot takedown. O Wheet fights it but they end up in guard.
O Wheet working the defensive guard well to avoid strikes from Spitfire.
Spitfire trying to control but O Wheet is working from the bottom.
Spitfire won't allow O Wheet to get back to his feet.
There's a bit of a scramble here and now O Wheet is on top in guard.
O Wheet stands and throws Spitfire's legs to the side, diving into side control.
Spitfire might be looking to lock onto one of his opponent's long limbs for a submission, whilst we're on the ground.
O Wheet tries to advance to mount but Spitfire denies him.
The fighters are tangled up in the ropes here. We might need a restart if the fighters can't break free themselves.
O Wheet is trying to move to mount but Spitfire reverses beautifully and ends up in O Wheet's guard.
That's seven minutes gone in the round.
Spitfire stopping the sweep attempt from O Wheet.
Spitfire looking to pass the guard.
O Wheet has control of Spitfire's left arm, preventing Spitfire from doing any damage.
O Wheet keeping full guard, as Spitfire tries to pass.
O Wheet looking for submissions from the bottom here. Moving his hips around, possibly looking for an armbar.
That's eight minutes gone in the round.
A lull in the action here being met with boos from the crowd.
Spitfire tries to free his leg and advance position but O Wheet is retaining full guard.
O Wheet has Spitfire pulled in close to control his posture.
O Wheet is trying to control the position from the bottom.
Spitfire passes easily into side control. Nice work.
O Wheet gets back to half guard.
O Wheet tries to roll over but Spitfire keeps him under control.
O Wheet wants to control but Spitfire is keeping busy.
That's nine minutes gone in the round.
O Wheet wants to get back to his feet.
O Wheet is looking to improve his position.
O Wheet has no desire to be mounted, so is trying to control. Spitfire is working away from the top position though.
Spitfire wants to control but O Wheet is keeping him busy.
Neither fighter is doing enough for the referee's liking and he's decided to stand them back up.
Spitfire shoots in for a takedown. "I don't think so" says O Wheet as he avoids it easily.
O Wheet with a poor takedown
and Spitfire counters with a single leg into guard. O Wheet didn't expect that.
And thats the end of the round the fighters go back to their corners.
Freddy Spitfire dominated that round.
The referee calls time. The cornermen exit stage left and we're back to business. This is the final round!
O Wheet circles away from the clinch attempt.
O Wheet avoids the clinch attempt nicely.
Spitfire is looking to take this fight into the clinch.
O Wheet misses with an uppercut
and Spitfire decides to take the opportunity to score a takedown. He's landed in O Wheet's guard.
Spitfire thinks about going for a leg but decides against it, in order to maintain the position.
O Wheet trying to control the position.
O Wheet is in a good position here but he's just trying to control... And he's not even managing to do that successfully.
O Wheet looking to control but Spitfire passes into half guard.
O Wheet slips a foot under and gets full guard. Nice work.
Both fighters are absolutely exhausted here.
Spitfire won't allow O Wheet to sweep him here.
That's one minute gone in the round.
Spitfire is holding a leg here, probably looking for an ankle lock - he drops back and goes for it! O Wheet is in trouble! Is it all over??? No! O Wheet has escaped and now he's on top!
O Wheet trying to control but Spitfire is working from the bottom.
O Wheet wants to stand but Spitfire has a closed guard, so he can't escape.
Spitfire working for a triangle but O Wheet defends it easily.
Spitfire trying to control the position.
That's two minutes gone in the round.
Neither fighter has done anything of merit for a good minute or two here and the crowd are not happy about it.
Spitfire is really struggling to control O Wheet but he's trying to hold on to the position.
Spitfire keeping moving, preventing O Wheet from controlling successfully.
Spitfire is working actively off his back, looking to secure an arm or perhaps work for a triangle.
Spitfire keeping moving, preventing O Wheet from controlling successfully.
The referee decides to stand the fighters back up.
Excellent takedown into side control there by Spitfire.
O Wheet is positioning himself to get back to half guard.
That's three minutes gone in the round.
O Wheet gives up the full mount - oops, sloppy defensive grappling there!
Spitfire wants to lay and pray for a moment but O Wheet keeps working.
O Wheet is positioning himself to get back to half guard.
O Wheet is sneaking out the side here. He's bucked Spitfire off and has taken his back!
O Wheet thows a huge left but connects with the canvas and not his opponent.
O Wheet is controlling his opponent, waiting for an opportunity to finish.
That's four minutes gone in the round.
My god... these two guys really need to pick up the pace or everyone will leave to go get a beer.
Spitfire turns into O Wheet and is now in his guard.
Spitfire is holding a leg here, probably looking for an ankle lock - he drops back and goes for it! O Wheet is in trouble! Is it all over??? No! O Wheet has escaped and now he's on top!
O Wheet lands a couple of decent looking shots.
O Wheet stands up and looks to throw the legs aside to pass to side control. Spitfire swivels though and keeps the full guard.
Spitfire is working actively off his back, looking to secure an arm or perhaps work for a triangle.
That's five minutes gone in the round.
Spitfire has a loose triangle. He'll be looking to tighten that up but O Wheet can see exactly what he's planning and manages to posture up and free himself.
O Wheet stopping the sweep attempt from Spitfire.
O Wheet throws a strike but Spitfire rolls with it and manages to sweep. Now he's in guard on top.
O Wheet looking to sweep using the butterfly guard but Spitfire puts pay to that idea as he passes nicely into half guard.
That's six minutes gone in the round.
A lull in the action here being met with boos from the crowd.
O Wheet is refusing to be controlled, as Spitfire sits in half guard.
O Wheet throws a strike from the bottom that misses.
Spitfire is looking to pass the guard... He's managed it - he's now in full mount!
Spitfire jumps to side control looking for an arm triangle but O Wheet manages to avoid the submission attempt.
O Wheet can't do much from the bottom here.
O Wheet gets back to half guard.
Spitfire is looking to take a break and control but O Wheet is keeping him honest, looking to work from the bottom.
That's seven minutes gone in the round.
Spitfire wants to free his trapped foot but O Wheet is holding on for dear life with his legs.
O Wheet is looking to control Spitfire's leg but it's slowly edging free. Can O Wheet avoid being mounted?
Spitfire is trying to work for a kimura. He's got his hands clasped together - this could be trouble! No, O Wheet has managed to free his arm - good work.
The referee decides to stand the fighters back up.
O Wheet looking to shoot here. He's gone for it and he's landed a takedown into mount! Oh, that's bad for Spitfire!
O Wheet throwing sloppy strikes, which aren't doing any damage.
O Wheet swings around for an armbar but it's a sloppy attempt and Spitfire is now in O Wheet's guard. A big mistake from O Wheet there, giving up the dominant position!
That's eight minutes gone in the round.
Spitfire looking to pass the guard.
O Wheet throwing his legs up looking for a triangle.
O Wheet is working actively off his back, looking to secure an arm or perhaps work for a triangle.
O Wheet wants to control the position but Spitfire says "no thanks buddy" and passes to half guard.
O Wheet pushes Spitfire off and gets back to his feet.
That's nine minutes gone in the round.
Spitfire gets to the clinch - let's see what his plan is here.
Spitfire blocks an uppercut.
Spitfire breaks the clinch.
O Wheet circles away from the clinch attempt.
Spitfire tries to clinch but is not successful on this occasion.
O Wheet misses with a double jab
and Spitfire counters with a nice uppercut.
Spitfire wants to clinch.
O Wheet shoots in but doesn't get the takedown
and Spitfire counters into the clinch. Nicely done.
O Wheet keeps control of Spitfire as he tries to wriggle out of the double underhooks.
A head punch on the inside from Spitfire fails to land.
Spitfire tries to score a body lock takedown but O Wheet shows good agility there to stay on his feet.
Spitfire tries to break the clinch but O Wheet is controlling the position.
Spitfire is trying to slow down the pace of the fight but O Wheet is keeping busy.
O Wheet taking a break, stalling in the clinch.
An uppercut on the inside fails to land for Spitfire.
O Wheet tries to pull guard but can't drag his opponent to the mat. Spitfire just stands there and leans against the ropes.
Spitfire misses the knee to the body. Nice hip positioning from O Wheet.
Spitfire changes levels and goes for a takedown here. O Wheet fights it off and pushes away nicely.
And that's the end of the fight!
Freddy Spitfire showed his dominance in that final round.
Well Spitfire has outscored his opponent in every aspect of the fight today. Only a scarily incompetent judge or two will keep him from a well deserved win... Over to the ring announcer for the scorecards.
Ladies and gentlemen, after 2 rounds of action, we go to the scorecards for a decision.
Judge Yukihiro Yamamoto scores the fight for Freddy Spitfire!
Judge Yuuki Gou scores the fight for Freddy Spitfire!
Judge Tatsuya Matsuyama scores the fight for Freddy Spitfire!
Freddy Spitfire wins by unanimous decision!
|
|
|
|
|
|
|
|
|
|
|
|
|
|
|
|
|
|
|
|
|
|
|
| S |
C
A |
G |
S |
C
B |
G |
|
S |
C |
G |
|
energy
A | B |
|
hype
A | B |
|
pop
A | B |
|
mgr
A | B |
|
FIGHT
RATING
20% |
|
|
|
|
|
|
|
|
|
|
