 |
LEGENDS 25: Supernova PBP Commentary |
Undercard bout
|
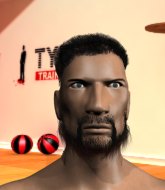
Coming up we have a heavyweight MMA rules bout between Giuseppe Zaluchi (ranked 0 p4p, 0 weight class) and Josh Ferdinand (ranked 0 p4p, 0 weight class). Josh Ferdinand will no doubt be trying to keep this one on the feet, where he has a distinct advantage.
 |
|
 |
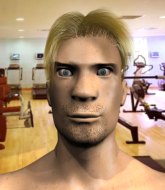
| 191 cm
22
265 lbs
1 - 0 - 0 |
|
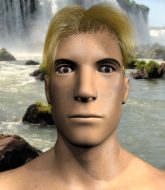
192 cm
22
265 lbs
0 - 1 - 0 |
BJJ Purple Belt
Counter striker
Cuts easily |
|
BJJ Purple Belt
Decent boxing
Solid chin |
|
| |
|
Ladies and gentlemen. This fight is 3 rounds, in the heavyweight division.
Introducing the fighter to my left, fighting out of the red corner.
With a record of
1 - 0 - 0, fighting out of Tokyo, Giuseppe Zaluchi!
And introducing the fighter to my right, fighting out of the blue corner.
With a record of
0 - 1 - 0, fighting out of Tokyo, Josh Ferdinand!
The judges for this bout are Yukihiro Shimada, Yasuomi Hirokawa and Hirohito Nitta.

The bell rings for round one and we are underway!
Ferdinand throws a head kick that misses.
Ferdinand tries to close the distance and clinch up but Zaluchi swats him away and circles back towards the center.
Ferdinand misses with a looping right.
Ferdinand fails to land with a series of punches.
Zaluchi blocks a head kick by Ferdinand.

Zaluchi shoots in for a takedown! He's got it and he's managed to land in full mount! That's better than Zaluchi was expecting from the takedown attempt, I'm sure!
Ferdinand really trying hard to get back to half guard here.
Ferdinand looks gassed!

Zaluchi wants to finish this one by submission but Ferdinand is holding onto his waist, trying to prevent any attacks from Zaluchi.
The fighters are trapped in the ropes so we're going to have a reposition here. The ref calls for a break and repositions the fighters in the center of the ring.
Zaluchi is in full mount, looking to secure a guillotine but Ferdinand is surviving well by controlling Zaluchi's body position as best he can.
Zaluchi working for a submission here. He's tucked his head under his opponent's arm, looking for an arm triangle. He's hopped off into side control, looking to tighten the submission... is it going to work? He's given up a good position looking for it. Ferdinand looks OK. Oh, I spoke too soon, he's out! That must have been tighter than I thought! Excellent work there by Zaluchi! Submission of the night perhaps?
Ladies and gentlemen, after 1:01 of round 1, we have a winner by way of Submission (Arm Triangle). Giuseppe Zaluchi!
|
|
|
|
|
|
|
|
|
|
|
|
|
|
|
|
|
|
|
|
|
|
|
| S |
C
A |
G |
S |
C
B |
G |
|
S |
C |
G |
|
energy
A | B |
|
hype
A | B |
|
pop
A | B |
|
mgr
A | B |
|
FIGHT
RATING
51% |
|
|
|
|
|
|
|
Undercard bout
|
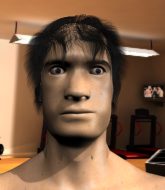
Coming up we have a heavyweight MMA rules bout between Shunsuke Yamamoto (ranked 0 p4p, 0 weight class) and Tatsumi Fujinami (ranked 0 p4p, 0 weight class). Tatsumi Fujinami will no doubt be trying to keep this one on the feet, where he has a distinct advantage.
 |
|
 |
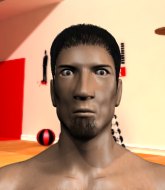
| 194 cm
18
223 lbs
2 - 0 - 1 |
|
183 cm
24
228 lbs
9 - 4 - 0 |
Good wrestling
Basic striking
Big heart |
|
Decent wrestler
Counter striker
Granite chin |
|
| |
|
Ladies and gentlemen. This fight is 3 rounds, in the heavyweight division.
Introducing the fighter to my left, fighting out of the red corner.
With a record of
2 - 0 - 1, fighting out of Tokyo, Shunsuke Yamamoto!
And introducing the fighter to my right, fighting out of the blue corner.
With a record of
9 - 4 - 0, fighting out of Tokyo, Tatsumi Fujinami!
The judges for this bout are Kenichi Hosakawa, Shirou Masuda and Taro Takaoka.
The bell rings for round one and we are underway!
Yamamoto tries to clinch there but Fujinami circles away.
Yamamoto wants to clinch.
Yamamoto wants to clinch up but Fujinami keeps it at a distance.
Yamamoto fails with an attempt to clinch.
Yamamoto is looking to take this fight into the clinch.
Fujinami looks frustrated there after his takedown attempt is stuffed easily.
Yamamoto is looking to take this fight into the clinch.
Yamamoto fails in his attempt to clinch.
We've had a slow start to the round here - hopefully the action picks up.
Nice takedown defense from Yamamoto. No joy for Fujinami on that attempt.
Fujinami should think about turning a few of those tyres round his middle into muscle if he wants people to take him seriously as an athlete.
Fujinami shoots in with a takedown attempt and he has Yamamoto pinned against the cage. Yamamoto gets the underhooks and manages to circle away.
Shunsuke Yamamoto has stuffed three takedown attempts in the round now. That's going to take a lot out of Tatsumi Fujinami.
Yamamoto wants to clinch.

That's one minute gone in the round.

Yamamoto rushes Fujinami and pushes him back against the ropes in a clinch.
Yamamoto lands a nice elbow.

It looks like Tatsumi Fujinami has been cut.
Fujinami blocking some punches.
Fujinami wants a takedown.
Yamamoto swings away with an uppercut that misses.
Yamamoto cracks Fujinami with a nice body shot.
A shot in the inside from Yamamoto.
Fujinami managing to block the knees to the body from Yamamoto.
Yamamoto is leaning against Fujinami and scores with a nice uppercut to the body.
Fujinami looks gassed!
Yamamoto lands an elbow just above Fujinami 's eye.
Yamamoto has a couple of punches blocked by Fujinami.
Yamamoto looking to throw knees to the head but Fujinami is blocking nicely.
Yamamoto swings away with an uppercut that misses.
Yamamoto gets through Fujinami's defenses to land a nice punch to the side of the head.
Yamamoto lands with a short shot to the head.
Fujinami blocks an elbow strike from Yamamoto.

That's two minutes gone in the round.
A body shot lands from Yamamoto.
The fans in attendance giving it up for the two fighters, who have really let it all hang out in the last minute or so!
Yamamoto lands a left hand.
A looping hook to the body misses from Yamamoto. Fujinami does a little dance to reset his feet.
Yamamoto gets a clinch.
Yamamoto lands a nice uppercut.
Yamamoto doesn't land with the attempted body shot.
Yamamoto tries to land a knee to the head but misses.
Yamamoto lands a short shot on the inside that snaps the head of Fujinami backwards.
Yamamoto avoiding damage.
Yamamoto tries a knee to the head but he's missed.
Yamamoto lands a body shot in the clinch.
Yamamoto lands a nice uppercut.
Fujinami blocking some punches.
Yamamoto doesn't land with the attempted body shot.
Fujinami blocking some punches.
A shot in the inside from Yamamoto.
Yamamoto throws a head punch that misses.
Yamamoto misses the knee to the body. Nice hip positioning from Fujinami.
Yamamoto tries a knee to the head but he's missed.

That's three minutes gone in the round.
Yamamoto working aggressively here.
Fujinami fails to pull guard.
A nice left hand lands by Yamamoto.
Fujinami avoids the elbow strike from Yamamoto, against the ropes.
Yamamoto lands a nice elbow from the clinch.
Yamamoto lands a shoulder strike that jolts his opponent's head backwards.
A body shot lands from Yamamoto.
Fujinami managing to block the knees to the body from Yamamoto.
Yamamoto lands an elbow just above Fujinami 's eye.
That has opened up Tatsumi Fujinami's cut even more.
Yamamoto working aggressively here.
Yamamoto pushes Fujinami back against the ropes and lands a hook to the side of the head.
Yamamoto throws an elbow but it misses.
Yamamoto is working Fujinami over against the ropes.
Yamamoto works on Fujinami's body with a couple of short punches.
Yamamoto lands with a left to the head.
Fujinami avoids the elbow strike from Yamamoto, against the ropes.
Fujinami is trying to work for a single leg takedown but Yamamoto pulls him back up using the underhooks.
Yamamoto lands an elbow inside that Fujinami shrugs off.
Yamamoto misses with a body punch.
An uppercut to the body lands inside from Yamamoto.

That's four minutes gone in the round.
A body shot lands from Yamamoto.
Fujinami blocks an uppercut.
Fujinami avoiding damage as Yamamoto throws knees to the body.
Yamamoto creates a bit of distance and throws an elbow that only just misses.
Nice elbow from Yamamoto.
Yamamoto can't find room to land a body shot as Fujinami controls the action.
Yamamoto doesn't land with the attempted body shot.
Fujinami blocks a couple of punches on the inside.
Yamamoto throws an elbow but it misses.
Yamamoto throws a punch but it's blocked by Fujinami.
Yamamoto lands an elbow inside that Fujinami shrugs off.
Yamamoto scores with a hook to the body.
Yamamoto misses with a short punch on the inside.
Yamamoto lands a hook that snaps the head of Fujinami backwards.
Fujinami letting Yamamoto take a breather here.
The crowd applaud the fighters efforts here as the round comes to an end.
Yamamoto lands a body punch in the clinch.
Yamamoto throws an elbow but it's blocked.
Yamamoto fails to land with a short punch on the inside.
Yamamoto is looking to score with knees to the body. Maybe he'll change it up and go body then head. Fujinami is defending well for now.
And thats the end of the round the fighters go back to their corners.
Shunsuke Yamamoto dominated that round.
The cut man is working on Tatsumi Fujinami's cut.
The fighters' corners scream their final instructions, as the referee calls time. Here we go, back to the action!

Yamamoto is looking to clinch.
Yamamoto clinches up against the ropes.
Yamamoto gets underhooks to prevent Fujinami's takedown attempt.
Fujinami dodges an elbow strike from Yamamoto.
Yamamoto throws an elbow but it's blocked.
Fujinami blocks a couple of punches on the inside.
Yamamoto scores with a shoulder strike.
Fujinami blocks a couple of punches on the inside.
Yamamoto misses the knee to the body. Nice hip positioning from Fujinami.
Yamamoto with the Thai clinch. He's looking to land a big knee but he's not managed it this time.
Fujinami blocks a punch to the side of the head.
Yamamoto lands a hook to the side of the head.
Yamamoto scores with an uppercut up the middle.
We've had a slow start to the round here - hopefully the action picks up.
Yamamoto misses with an elbow strike.
A head punch blocked on the inside by Fujinami.
Yamamoto lands on the inside with an uppercut.
Fujinami is breathing heavily.
Yamamoto pushes off and fires off an elbow that misses, before clinching up again, against the ropes.
Fujinami is looking for a takedown up against the ropes. Yamamoto gets underhooks though and prevents the takedown attempt.
Fujinami blocks an elbow strike.
That's one minute gone in the round.
Yamamoto lands a shot to the body.
Yamamoto is trying to wear down his opponent with knees to the body.
Yamamoto looks to throw an elbow but misses.
A head punch on the inside from Yamamoto fails to land.
Yamamoto tries to land knees in the clinch but Fujinami avoids the damage to the body.
A right hook to the body lands for Yamamoto.
Yamamoto lands with a short punch from the clinch.
Yamamoto throws a knee to the head but misses.
Yamamoto misses with an elbow strike.
Yamamoto manages to get underhooks and slows down the pace for a moment.
A right handed body shot lands from Yamamoto.
Yamamoto lands an elbow that stopped Fujinami in his tracks for a moment.
Fujinami blocking some punches.
Yamamoto lands an elbow just above Fujinami 's eye.
Yamamoto tries a body shot but Fujinami blocks it.
Yamamoto misses with an elbow over the top.
Yamamoto presses Fujinami against the ropes and delivers a mid-strength body shot.
That's two minutes gone in the round.
Yamamoto dictating the pace here, as the fighters clinch against the ropes.
Fujinami blocking some punches.
Yamamoto lands with a light punch inside.
Yamamoto lands an elbow inside.
The cut above Tatsumi Fujinami's eye is starting to cause him problems now.
Yamamoto swings wildly with an uppercut but Fujinami uses good head movement to avoid it.
Yamamoto makes some space for himself and lands an uppercut.
Fujinami blocks a knee to the body. He'll have a nicely bruised forearm in the morning.
Yamamoto working aggressively here.
Yamamoto can't find room to land a body shot as Fujinami controls the action.
Yamamoto lands with a right to the head.
Yamamoto working aggressively here.
Yamamoto lands an elbow inside.
Yamamoto lands a nice looking hook to the body, against the ropes.
Shunsuke Yamamoto has scored more points in the clinch so far.
Yamamoto stalling here - the referee won't stand for too much of that.
Yamamoto tried to land a shot to the body but connects with Fujinami's elbow.
Yamamoto working aggressively here.
That's three minutes gone in the round.
A short body shot lands from Yamamoto as the two fighters clinch.
Yamamoto lands a nice looking hook to the body, against the ropes.
Fujinami avoiding damage as Yamamoto throws knees to the body.
Yamamoto lands a body punch.
Yamamoto working aggressively here.
Yamamoto throws an elbow that misses.
Yamamoto lands a hook to the body. It's hard to tell if that hurt Fujinami or not.
Yamamoto gets an overhook and lands an elbow to the side of the head.
Tatsumi Fujinami's cut is absolute horrible now. This looks like something out of a horror film with blood covering both fighters.
The referee calls the doctor in to look at Tatsumi Fujinami's cut. Oh no, the doctor has called an end to the bout!
Ladies and gentlemen, after 3:34 of round 2, we have a winner by way of TKO (Cut). Shunsuke Yamamoto!
|
|
|
|
|
|
|
|
|
|
|
|
|
|
|
|
|
|
|
|
|
|
|
| S |
C
A |
G |
S |
C
B |
G |
|
S |
C |
G |
|
energy
A | B |
|
hype
A | B |
|
pop
A | B |
|
mgr
A | B |
|
FIGHT
RATING
0% |
|
|
|
|
|
|
|
Undercard bout
|
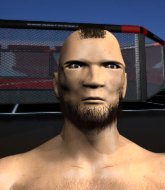
Coming up we have a welterweight MMA rules bout between Mike Mir (ranked 0 p4p, 0 weight class) and Wade Wilson (ranked 0 p4p, 0 weight class). This should be a great matchup!
 |
|
 |
| 189 cm
23
180 lbs
3 - 1 - 0 |
|
190 cm
22
170 lbs
3 - 1 - 0 |
BJJ Blue Belt
Counter striker
Intelligent |
|
BJJ White Belt
Good kicks
Tends to cut |
|
| |
|
Ladies and gentlemen. This fight is 3 rounds, in the welterweight division.
Introducing the fighter to my left, fighting out of the red corner.
With a record of
3 - 1 - 0, fighting out of Tokyo, Mike Mir!
And introducing the fighter to my right, fighting out of the blue corner.
With a record of
3 - 1 - 0, fighting out of Tokyo, Wade Wilson!
The judges for this bout are Taro Takaoka, Tatsuya Matsuyama and Shirou Masuda.
The bell rings for round one and we are underway!
Mir circles away from the clinch attempt.
Mir swats away the attempt to clinch by Wilson.
Wilson tries a head kick but it misses.
Wilson tries to clinch but Mir is having none of it.
Wilson tries to clinch but Mir moves out of range.
Mir swats away the attempt to clinch by Wilson.
Wilson wants to clinch up but Mir keeps it at a distance.
Wilson is a painfully thin specimen of a man. You do wonder whether a good body kick would snap him clean in two.
Wilson doesn't manage to clinch there - Mir circles away.
Wilson does a little shimmy and throws a leg kick. The leg kick missed by a considerable margin though, making him look a little bit silly for doing the shimmy.
Wilson tries to clinch up but Mir circles away and keeps his distance.
Wade Wilson seems to be the more aggressive standup fighter in this bout.
Wilson is looking to clinch.
Wilson tries a head kick but it misses.
We've had a slow start to the round here - hopefully the action picks up.
Mir throws a hard body shot but it just misses.
Wilson tries a switch kick but it misses it's target.
Wilson doesn't manage to clinch there - Mir circles away.
Wilson gets to the clinch - let's see what his plan is here.
Mir tries to score a body lock takedown but Wilson shows good agility there to stay on his feet.
Wilson lands a glancing elbow in the clinch.
Mir jumps guard but Wilson stands there with Mir around his waist. Mir gives up and drops back to his feet. We remain in the clinch.
Wilson controlling the action here for a moment.
That's one minute gone in the round.
Wilson tries to stall but Mir uses the opportunity to gain a better position.
Wilson looking to throw knees to the head but Mir is blocking nicely.
Mir jumps guard but his hands slip and he falls flat on his back. Well, he's made himself look a right mug there, as Wilson walks away with a smile on his face. Mir gets slowly back to his feet and shakes his head.
That's three failed takedown attempts in the round for Mike Mir. That's going to take a lot out of him.
Wilson is looking to take this fight into the clinch.
Wilson tries to close the distance and clinch up against the ropes but Mir paws at him with a jab and circles away.
Wilson is looking to take this fight into the clinch.
Mir shoots in looking for a double leg takedown. Wilson defends it nicely.
The fight stays on the outside here - Wilson looks like he's thinking about clinching though.
Wilson tries to close the distance and clinch up against the ropes but Mir paws at him with a jab and circles away.
Wilson throws a head kick but Mir moves out of range.
Mir connects with a lovely right hand, straight down the pipe.
It looks like Wade Wilson has been cut.
Wilson is looking to clinch.
Mir lands an overhand right.

Wilson is rocked!
That's two minutes gone in the round.
Mir shoots in for a takedown and gets it.
Wilson is still in real trouble! Can Mir finish him?
Mir tries to pass the half guard into mount. Wilson knows what he's doing though and prevents the attempt.
Mir landing with strikes to the body and head, softening up his opponent.
Wilson seems to have recovered his senses.
Wilson really doesn't want to stay on the ground with Mir. If he can't get it back to his feet, it's only a matter of time before he'll be tapping out.
Wilson is trying to defend against the ground and pound but Mir scores with a couple of nice shots.
This has been an exciting period of action!
Mir throwing shots but Wilson is blocking nicely.
The fighters are trapped in the ropes so we're going to have a reposition here. The ref calls for a break and repositions the fighters in the center of the ring.
Wilson is looking to escape.
Mir is looking to take a break and control but Wilson is keeping him honest, looking to work from the bottom.
Wilson is trying to stand up here but Mir is controlling him well.
Mir working some ground and pound from close in. He's looking to maintain this position and strike for a while by the looks of things... although he'll probably advance to full mount in a minute now I've said that.
Mir thows a wild elbow that connects with the canvas.
Mir wants to pass the guard but Wilson is defending well.
That's three minutes gone in the round.
Mir is working hard here to advance position.

It looks like we're going to have a standup here. Neither fighter is doing enough on the ground.
Mir shoots in for a takedown from distance. He catches Wilson napping and manages to drive through into side control!
Mir is breathing heavily.
Wilson is trying to buck Mir off.
Wilson is not content to let Mir control the position.
Mir throwing strikes but missing, from side control.
Mir tries to cartwheel into mount but he doesn't manage it.
Mir is looking for a kimura. He might have it! No, Wilson has escaped the position, nice work there.
That's four minutes gone in the round.
Mir prevents Wilson from escaping the position.
Wilson wants to get back to his feet but Mir is dominant here and he's now got Wilson's back!
Wilson is keeping busy.
Mir working for a RNC but it's not happening just yet.
The fighters are tangled up in the ropes here. We might need a restart if the fighters can't break free themselves.
Wilson wants to get back to his feet.
Wilson is keeping busy.
And thats the end of the round the fighters go back to their corners.
Mike Mir dominated that round.
The cut man is working on Wade Wilson's cut.
The corners get their ten second warning. Both fighters stand from their stools and stare eachother down, ready to get back to the action.
Wilson tries to close the distance and clinch but Mir swats him to one side with an open hand palm strike and circles away.
Wilson tries to close the distance and clinch up against the ropes but Mir paws at him with a jab and circles away.
Wade Wilson is looking to throw some combinations by the looks of things.
Wilson is looking to clinch.
Mir looks for a takedown here. Will he get it? Wilson is fending him off so far but Mir persists. Nope, Wilson circles away and we're back to standing.
Wilson keeping a good distance there, avoiding the body shot.
Wilson tries to clinch up but Mir circles away and keeps his distance.
Mir avoids the clinch attempt nicely.
Mir avoids the clinch attempt nicely.
Mir shoots in with a takedown attempt and he has Wilson pinned against the cage. Wilson gets the underhooks and manages to circle away.
Wilson tries to clinch there but Mir circles away.
We've had a slow start to the round here - hopefully the action picks up.
Wilson throws a head kick that misses and slips in the process. He scrambles back to his feet and the fighters circle.
Wilson fails in his attempt to clinch.
Both fighters are absolutely exhausted here.
Mir closes this distance looking for a takedown but Wilson circles away.
That's three failed takedown attempts in the round for Mike Mir. That's going to take a lot out of him.
That's one minute gone in the round.
Mir missing with a left hand there. Wilson was out of range so wasted energy throwing that one.
Wilson fails in his attempt to clinch.
Wilson tries a head kick but it misses.
Wilson fails with an attempt to clinch.
Mir keeps the fight on the outside.
Wilson tries to clinch there but Mir circles away.
Mir shoots in looking for a takedown. Wilson tries to sprawl out of it but Mir keeps driving through. The fighters are pinned against the ropes. Wilson manages to get underhooks and after a bit of a struggle, circles away and we're back to standing.
Mir circles away from the clinch attempt.
Wilson is looking to clinch but Mir is avoiding it.
Wilson tries to close the distance and clinch up but Mir swats him away and circles back towards the center.
Wilson is looking to clinch.
Wilson tries to clinch but Mir is having none of it.
Wilson is looking to clinch.
Wilson scoring well with a low kick there.
That's two minutes gone in the round.
The crowd are starting to boo a lack of action.
Wilson tries a switch kick but it misses it's target.
Wilson tries to clinch there but Mir circles away.
Wilson tries to clinch but Mir moves out of range.
Wilson tries to close the distance and clinch but Mir swats him to one side with an open hand palm strike and circles away.
Mir shoots in for a takedown but Wilson shows good takedown defense there and keeps this one on the feet.
Wilson tries to clinch there but Mir circles away.
Wade Wilson is looking to keep the fight on the feet at all costs.
Mir fails with a takedown attempt from distance.
Mir swats away the attempt to clinch by Wilson.
Wilson clinches with his opponent.
Wilson with a knee to the head.
Wilson stalling in the clinch but Mir improves position.
Mir fails to pull guard.
Wilson lands an elbow that stopped Mir in his tracks for a moment.
Wilson is trying to wear down his opponent with knees to the body.
Wilson lands a nice elbow from the clinch.
Mir is trying to trip Wilson. He has hold of a leg but Wilson is hopping around, keeping his balance for the moment. Mir persists though and gets the takedown into guard.
Mir won't allow Wilson to get back to his feet.
That's three minutes gone in the round.
Wilson is using up a lot of energy trying to get back to his feet. Perhaps he should improve his position first.
Mir postures up to throw the ground and pound strikes but they don't connect.
Mir trying to control the position from guard on top but Wilson is wriggling around, looking for whatever he can.
Mir tries to free his leg and advance position but Wilson is retaining full guard.
Wilson wants to stand but Mir is controlling the position.
Neither fighter is doing enough for the referee's liking and he's decided to stand them back up.
Mir fails to land with the punch combination there - jab, cross, hook, miss, miss, miss.
Wilson tries to clinch up but Mir circles away and keeps his distance.
That's four minutes gone in the round.
The crowd are getting on the fighters' backs, as the pace has dropped off in the last minute or so.
Wilson instigates a clinch.
Wilson with a knee to the head.
Wilson lands an elbow that stopped Mir in his tracks for a moment.
Mir manages to pull guard. Let's see whether he can land a sub off his back.
Mir has a closed guard, preventing Wilson from standing up.
Wilson must be cautious of submissions here, given that his opponent has the superior Jiu Jitsu.
Mir is looking for a triangle but Wilson pushes his legs off easily.
Wilson tries to stand but Mir is controlling from the bottom.
The crowd thankful this round is nearly over.
Mir is trying to control the position from the bottom.
And thats the end of the round the fighters go back to their corners.
A close second round but Wade Wilson will probably get the nod - 10:9.
The cut man is working on Wade Wilson's cut.
OK. That's time! The bell goes and we're back to the action. This is the final round!

Wilson ducks under a wild hook from Mir.
Wilson closes the distance and pushes Mir back into the ropes.
Wilson with the Thai clinch, lands a knee to the head.
Mir tries to take the fight to the ground by pulling guard but can't manage it.
Mir goes for a takedown attempt but Wilson pushes him away and we're back to fighting at a distance.
Wilson wants to clinch up but Mir keeps it at a distance.
Wilson doesn't manage to clinch there - Mir circles away.
Wilson looking to throw a kick but he's pulled out of it.
Mir scores with a nice head shot.
Wilson tries to clinch up but Mir circles away and keeps his distance.
Wilson tries to clinch there but Mir circles away.
A head kick misses from Wilson.
Both fighters are breathing heavily.
Wilson misses with a head kick.
Wilson wants to clinch.
That's one minute gone in the round.
Wilson fails in his attempt to clinch.
Mir feints and as Wilson raises his hands in defense, Mir changes levels and drives through with a takedown into guard.
Mir stands and throws Wilson's legs to the side, diving into side control.
Wilson is trying to get back to his feet.
Mir tries for an arm triangle. That looks pretty tight to me. Is this one over!?! Possibly, maybe, no Mir has let go of the choke. Obviously it wasn't as tight as we thought!
Mir wants to control but Wilson is keeping him busy.
An elbow from Mir crashes against the mat.
That's two minutes gone in the round.
Wilson is trying to buck Mir off.
Mir misses with the ground and pound.
Mir is looking for a kimura. He might have it! No, Wilson has escaped the position, nice work there.
Wilson is putting a lot of effort into getting back to his feet here.
Mir is looking for a kimura. He might have it! No, Wilson has escaped the position, nice work there.
Wilson is pushing Mir's head away, looking to escape. Mir manages to hold on to the position though.
That's three minutes gone in the round.
Mir wants to control but Wilson is keeping him busy.
Mir tries to move to mount but Wilson blocks the move with his legs.
Mir throws a strike aimed at the side of Wilson's head but Wilson avoids it well.
Mir has been looking to land a fair amount of strikes on the ground. He might be looking to soften his opponent up in order to work for a submission.
Wilson wants to escape from the position here - easier said than done!
Mir looking for an arm triangle but it's way too loose to do anything.
That's four minutes gone in the round.
Well. There's a bit of a lull in the action here and the crowd are starting to get restless.
Wilson is working hard to escape and get back to his feet. After a battle for position, Mir asserts his dominance and retains side control.
Mir is in a dominant position here, looking for a kimura. Wilson looks calm but he's in trouble here. Mir gets his leg over his opponent's head and yanks on the arm. Wilson is tapping like a morse code operator on the titanic! SOS! SOS! Mir lets go of the hold and Wilson can pop his arm back in it's socket.
Ladies and gentlemen, after 4:50 of round 3, we have a winner by way of Submission (Kimura). Mike Mir!
|
|
|
|
|
|
|
|
|
|
|
|
|
|
|
|
|
|
|
|
|
|
|
| S |
C
A |
G |
S |
C
B |
G |
|
S |
C |
G |
|
energy
A | B |
|
hype
A | B |
|
pop
A | B |
|
mgr
A | B |
|
FIGHT
RATING
52% |
|
|
|
|
|
|
|
Undercard bout
|
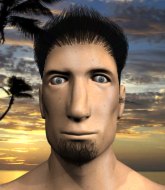
Coming up we have a welterweight MMA rules bout between Shaka Zulu (ranked 0 p4p, 0 weight class) and Kai Watanabe (ranked 0 p4p, 0 weight class). Well, I have no idea who's going to take this one!
 |
|
 |
| 183 cm
22
170 lbs
2 - 0 - 0 |
|
183 cm
19
170 lbs
3 - 0 - 0 |
BJJ Purple Belt
Basic striking
Intelligent |
|
BJJ Purple Belt
Decent boxing
Powerful |
|
| |
|
Ladies and gentlemen. This fight is 3 rounds, in the welterweight division.
Introducing the fighter to my left, fighting out of the red corner.
With a record of
2 - 0 - 0, fighting out of Tokyo, Shaka Zulu!
And introducing the fighter to my right, fighting out of the blue corner.
With a record of
3 - 0 - 0, fighting out of Tokyo, Kai Watanabe!
The judges for this bout are Shigeki Sano, Kenichi Hosakawa and Sosuke Kotani.
The bell rings for round one and we are underway!
Watanabe will need to tighten up his combinations if he doesn't want to gas himself out, swinging at thin air.
Zulu slips under a jab from Watanabe.
Watanabe will need to tighten up his combinations if he doesn't want to gas himself out, swinging at thin air.
Watanabe lands with a cross.
Watanabe throws a leg kick that misses.
Zulu takes one on the chin but seems OK.
Zulu looks to land a right hand but Watanabe moved out of range.
Zulu gets a clinch.
Watanabe goes for a takedown attempt but Zulu pushes him away and we're back to fighting at a distance.
Watanabe throws a jab but it's blocked by Zulu.
Zulu fakes an overhand right and shoots for a takedown. Watanabe sprawls well initially but Zulu persists and gets the takedown into half guard.
Watanabe is looking to improve his position.
Zulu is trying to work for a kimura but Watanabe is defending well.
That's one minute gone in the round.
Watanabe is working on a guillotine. He's managed to get to full guard and he's really squeezing tight! Zulu is tapping! Great win for Watanabe!
Ladies and gentlemen, after 1:09 of round 1, we have a winner by way of Submission (Guillotine). Kai Watanabe!
|
|
|
|
|
|
|
|
|
|
|
|
|
|
|
|
|
|
|
|
|
|
|
| S |
C
A |
G |
S |
C
B |
G |
|
S |
C |
G |
|
energy
A | B |
|
hype
A | B |
|
pop
A | B |
|
mgr
A | B |
|
FIGHT
RATING
72% |
|
|
|
|
|
|
|
Co-main event
|
Coming up we have a light heavyweight MMA rules bout between Vahtang Vmordubidze (ranked 0 p4p, 0 weight class) and Olli Hokkanen (ranked 0 p4p, 0 weight class). I can't wait for this one - let's get the fighter introductions out of the way and get this one started!
 |
|
 |
| 176 cm
22
210 lbs
4 - 3 - 0 |
|
185 cm
23
215 lbs
4 - 4 - 0 |
BJJ Blue Belt
Solid boxing
KO power |
|
BJJ Blue Belt
Decent boxing
Heavy handed |
|
| |
|
Ladies and gentlemen. This fight is 3 rounds, in the light heavyweight division.
Introducing the fighter to my left, fighting out of the red corner.
With a record of
4 - 3 - 0, fighting out of Tokyo, Vahtang Vmordubidze!
And introducing the fighter to my right, fighting out of the blue corner.
With a record of
4 - 4 - 0, fighting out of Tokyo, Olli Hokkanen!
The judges for this bout are Kenichi Hosakawa, Yukihiro Shimada and Sosuke Kotani.
The bell rings for round one and we are underway!
A punch combination from Hokkanen misses.
Vmordubidze scores with a nice looking left hook and follows it up with an uppercut!
It looks like Olli Hokkanen has been cut.
Hokkanen connects with a jab and follows up with a big overhand right! Oh that's hurt Vmordubidze! He's out on his feet! Hokkanen rushes in and drops Vmordubidze with another big right hand, forcing the referee to stop the fight!
Ladies and gentlemen, after 0:08 of round 1, we have a winner by way of TKO (Punches). Olli Hokkanen!
|
|
|
|
|
|
|
|
|
|
|
|
|
|
|
|
|
|
|
|
|
|
|
| S |
C
A |
G |
S |
C
B |
G |
|
S |
C |
G |
|
energy
A | B |
|
hype
A | B |
|
pop
A | B |
|
mgr
A | B |
|
FIGHT
RATING
100% |
|
|
|
|
|
|
|
Main event
|
Coming up we have a featherweight MMA rules bout between Beni Nikaido (ranked 0 p4p, 0 weight class) and Yuu Saga (ranked 0 p4p, 0 weight class). These two fighters really are very evenly matched on the feet - it will be fascinating to see who can assert themselves in that aspect of the fight.
 |
|
 |
| 174 cm
20
150 lbs
6 - 2 - 0 |
|
174 cm
24
158 lbs
9 - 2 - 0 |
BJJ Purple Belt
Brawler
Good chin |
|
Powerful takedowns
Counter striker
Powerful |
|
| |
|
Ladies and gentlemen. This fight is 3 rounds, in the featherweight division.
Introducing the fighter to my left, fighting out of the red corner.
With a record of
6 - 2 - 0, fighting out of Tokyo, Beni Nikaido!
And introducing the fighter to my right, fighting out of the blue corner.
With a record of
9 - 2 - 0, fighting out of Tokyo, Yuu Saga!
The judges for this bout are Yuuki Gou, Shigeki Fujiwara and Sosuke Kotani.
The bell rings for round one and we are underway!
Nikaido has a takedown stuffed.
Nikaido misses with a takedown attempt. He shot from a bit too far out.
Saga feints and then dives in with a takedown. That was a long way out but the feint bought him enough time to close the distance and complete the takedown. Now we'll play guard for a bit and see who can get the better of that position.
Saga passes Nikaido's right leg, so he's now in half guard.
The fighters are battling for position here. Nikaido manages to regain full guard. Nice work.
The fighters are tangled up in the ropes here. We might need a restart if the fighters can't break free themselves.
Saga passes Nikaido's left leg - he's now in half guard.
Saga slows the pace down in half guard.
Saga looking for a kimura but he'll have to free his other leg if he wants to finish that. Perhaps he's just using it as a distraction technique.
Saga prevents Nikaido from improving his position.
That's one minute gone in the round.
Nikaido makes his way to full guard. A much better position for Nikaido.
Nikaido wants to sweep but no luck.
Saga stands up and looks to throw the legs aside to pass to side control. Nikaido swivels though and keeps the full guard.
Saga trying to control but Nikaido is working from the bottom.
Saga stands up and looks to throw the legs aside to pass to side control. Nikaido swivels though and keeps the full guard.
Nikaido is active off his back here, looking for submissions.
Saga tries to free his leg and advance position but Nikaido is retaining full guard.
Both fighters really going for it on the ground here!
Saga won't allow Nikaido to sweep him here.
Saga trying to control the position from guard on top but Nikaido is wriggling around, looking for whatever he can.
Well, the referee has seen enough. Neither fighter is active enough on the ground so he's stood them back up.
Saga slips a jab and a cross from Nikaido.
Nikaido darts in and lands a nice takedown into half guard.
That's two minutes gone in the round.
Nikaido tries to stand but his arm is trapped.
The fighters are trapped in the ropes so we're going to have a reposition here. The ref calls for a break and repositions the fighters in the center of the ring.
Saga is trying to get back to full guard.
The fighters are starting to get a bit slippery now, which will make submissions a bit more difficult.
Saga slips a foot under and gets full guard. Nice work.
Nikaido stands up over Saga, holding his feet. He dives back in and lands a decent shot to the head.
Nikaido pressing down on his opponent's thigh, looking to pass guard. Saga is keeping the position for now.
Saga trying to strike from the bottom but really, it's not the best position to be doing that from!
Nikaido drops back looking for a heel hook - he quickly realises he's not going to get it but Saga manages to dive on top of him before he can escape and now Nikaido has Saga in his guard.
Nikaido is breathing heavily.
Saga looking to pass the guard.
That's three minutes gone in the round.
Nikaido looking to sweep using the butterfly guard but Saga puts pay to that idea as he passes nicely into half guard.
Saga is keeping good posture, landing some ground and pound.
Saga missing with the ground and pound from half guard.
Saga passes the guard and advances to mount!
Nikaido is trying to escape the mount.
Nikaido sneaks a leg under to get to half guard.
Saga trying to pass the guard but Nikaido defending well.
Nikaido is looking to improve his position.
Nikaido is staying active underneath Saga, who seems content to just control the action from this position.
Nikaido tries to get to full guard but Saga has control of the leg.
That's four minutes gone in the round.
Saga is trying for a guillotine from the top but the pressure isn't in the right place so Nikaido is just riding it out for now. Saga eventually gives up the hold.
Nikaido wants to control but Saga is keeping busy.
Saga wants to pass the guard but Nikaido is defending well.
Saga passes the guard and advances to mount!
Saga is in full mount, looking to secure a guillotine but Nikaido is surviving well by controlling Saga's body position as best he can.
Saga has control of Nikaido's right arm, working for a kimura. It's a bit of a token attempt though and Nikaido regains control of the situation pretty easily.
And thats the end of the round the fighters go back to their corners.
Yuu Saga dominated that round.
The fighters' corners scream their final instructions, as the referee calls time. Here we go, back to the action!
Nikaido doesn't succeed with the takedown
and Saga counters with a takedown into full mount! That could mean trouble for Nikaido!
Nikaido tries to hold on but Saga pushes him away.
Nikaido is desperately trying to improve his position but Saga has a good base and remains in mount.
Saga pushing the pace here, looking to move to his opponents back and work for a finish.
Saga takes Nikaido's back.
Saga keeps control of the position as Nikaido tries to break free.
Saga not allowing Nikaido to control his hands.
Saga looking for the RNC.
Nikaido trying to control but not successfully.
Saga is breathing heavily.
Saga keeps control of the position as Nikaido tries to break free.
That's one minute gone in the round.
Saga doesn't have the hooks in and Nikaido manages to turn into his guard.
Nikaido postures up.
Nikaido trying to control the position from guard on top but Saga is wriggling around, looking for whatever he can.
Nikaido drops back for a leg! It's a sloppy attempt though and Nikaido jumps back into guard quickly, to retain the dominant position.
Saga seems keen to control rather than go for a submission, at least for now.
Saga is trying to keep Nikaido in close.
Yuu Saga has got the better of the ground game so far.
The referee decides to stand the fighters back up.
Nikaido tries for a takedown but Saga circles away easily
and Saga counters with a takedown into side control.
Nikaido sneaks back into half guard.
Saga seems to be working for a kimura but Nikaido defends the submission attempt.
That's two minutes gone in the round.
Nikaido wants to improve his position but Saga is controlling well.
Nikaido tries to kick Saga off but Saga keeps his base steady and stays in half guard.
Saga performing his best blanket impression for a moment.
Saga wants to lay and pray for a moment but Nikaido keeps working.
Saga works his foot free and advances to mount.
Saga working for a guillotine from mount but Nikaido is in no mood to give up.
Saga looking to control but Nikaido is working nicely, looking to advance position himself.
That's three minutes gone in the round.
Saga throwing sloppy strikes, which aren't doing any damage.
Nikaido is trying desperately to improve position.
Nikaido wants to control but Saga is having none of it.
Nikaido is looking to improve his position but Saga isn't that keen on the idea.
Saga trying to control but he's not successful this time.
Nikaido manages to regain half guard. Good work.
Saga is working for submissions here but there's nothing on.
Nikaido wants to get back to full guard.
That's four minutes gone in the round.
The crowd are hurling abuse towards the fighters... You can hardly blame them though because there isn't a lot going on in the fight.
Nikaido trying to hold on to Saga's head to control him but Saga postures up.
Nikaido is in a bad position, trying to hold on for dear life but he is really struggling to maintain any sort of control.
Saga has freed up his trapped foot and advances to mount.
Saga takes Nikaido's back.
Nikaido controlling the position well but he knows he's in a bad position.
Nikaido can't escape the position.
Saga looking for the choke but no joy.
Nikaido showing good submission defense here.
And thats the end of the round the fighters go back to their corners.
Yuu Saga showed his class in that round. I'd imagine he'll take it on all the scorecards.
The minute break is over - no more time for sponges and pep talks - back to the action! Let's hear some noise people - this is the final round!
Nikaido closes the distance and gets a double leg, slamming Saga to the mat! Saga manages to get full guard.
Nikaido stands up and looks to throw the legs aside to pass to side control. Saga swivels though and keeps the full guard.
Saga manages to sweep nicely, so he's now on top. Nikaido manages to get himself to full guard.
Saga won't allow Nikaido to sweep him here.
Saga wants to control from the top but Nikaido keeps moving.
Saga thinks about going for a leg but decides against it, in order to maintain the position.
Nikaido is active off his back here, looking for submissions.
Both fighters are breathing heavily.
Saga avoids a guillotine attempt easily.
That's one minute gone in the round.
Nikaido can't keep his opponent in guard - Saga advances to half guard, no doubt looking to mount.
Saga works his foot free and advances to mount.
Saga wants to take Nikaido's back but he can't do it this time.
Saga looking for an armbar but decides to keep the dominant position instead.
Nikaido tries to hold on but Saga postures up.
Nikaido can't escape the position.
Saga throwing shots from mount but they're not landing.
Nikaido tries to reverse the position but Saga maintains control.
Beni Nikaido has stepped it up - he knows he needs a finish here!
That's two minutes gone in the round.
The crowd are getting on the fighters' backs, as the pace has dropped off in the last minute or so.
Saga looking to control but Nikaido is working nicely, looking to advance position himself.
Nikaido sneaks a leg back under and regains half guard and is working straight away to try and get back to guard. He hasn't managed just yet though.
Saga thows a huge punch but Nikaido dodges it nicely.
Saga passes to side control.
Nikaido is trying to control Saga's posture but Saga avoids it.
Saga staying calm.
Nikaido gets back to half guard.
Saga trying to control the action but Nikaido is working from the bottom.
That's three minutes gone in the round.
Nikaido is looking for a sweep. Saga is wise to his cunning plan and keeps the top position.
Saga wants to take a breather but Nikaido is having none of it.
Nikaido is looking to improve his position.
Nikaido trying to control here.
Yuu Saga is fighting for a decision here - he's started to take the cautious approach.
Nikaido is looking to regain full guard. Not this time though.
Saga works his way into full mount!
Saga working to secure an arm triangle but it's not happening for him just yet.
Nikaido is trying to escape the mount.
That's four minutes gone in the round.
My god... these two guys really need to pick up the pace or everyone will leave to go get a beer.
Saga wants to finish this one by submission but Nikaido is holding onto his waist, trying to prevent any attacks from Saga.
Nikaido is looking to improve his position but Saga isn't that keen on the idea.
Nikaido bucks up and manages to get a nice reversal! He's in guard on the top - nicely done!
Nikaido won't allow Saga to sweep him here.
Saga is trying to control the position from the bottom.
And that's the end of the fight!
That was a close round. You could make an argument for either fighter but I would give it to Beni Nikaido.
Well Saga has outworked and out performed his opponent in all aspects of the game today. He was simply too good and the decision should be no more than a formality. Over to the ring announcer for the scorecards.
Ladies and gentlemen, after 3 rounds of action, we go to the scorecards for a decision.
Judge Yuuki Gou scores the fight 28:29
Judge Shigeki Fujiwara scores the fight 28:29
Judge Sosuke Kotani scores the fight 28:29
In favor of your winner, by unanimous decision... Yuu Saga!
|
|
|
|
|
|
|
|
|
|
|
|
|
|
|
|
|
|
|
|
|
|
|
| S |
C
A |
G |
S |
C
B |
G |
|
S |
C |
G |
|
energy
A | B |
|
hype
A | B |
|
pop
A | B |
|
mgr
A | B |
|
FIGHT
RATING
61% |
|
|
|
|
|
|
|
|
|
|

