 |
FFG 4: Vendetta PBP Commentary |
Undercard bout
|
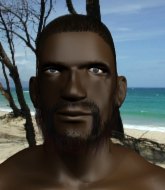
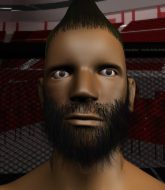
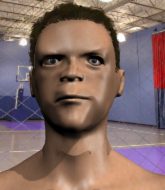
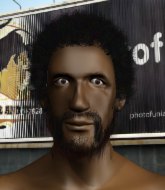
Coming up we have a middleweight MMA rules bout between Stringer Bell (ranked 0 p4p, 0 weight class) and Ludwig Manres (ranked 0 p4p, 0 weight class). The crowd seem to be enjoying Manres's choice of entrance music: Aqualung - Jethro Tull. Over to our ring announcer for the fighter introductions!
 |
|
 |
| 183 cm
22
200 lbs
1 - 0 - 0 |
|
182 cm
18
190 lbs
1 - 0 - 0 |
BJJ White Belt
Excellent boxer
Very strong |
|
BJJ Purple Belt
Basic striking
Good gas tank |
|
| |
|
Ladies and gentlemen. This fight is 3 rounds, in the middleweight division.
Introducing the fighter to my left, fighting out of the red corner.
With a record of
1 - 0 - 0, fighting out of Amsterdam, Stringer Bell!
And introducing the fighter to my right, fighting out of the blue corner.
With a record of
1 - 0 - 0, fighting out of Amsterdam, Ludwig Manres!
The judges for this bout are Albert Achterberg, Saam Ante and Daniel Blasius.

The bell rings for round one and we are underway!
Bell throws the left hand but Manres avoids the punch easily.
Manres shoots in for a takedown. He's persisting with it as Bell sprawls well. Bell wins this battle and keeps the fight standing. Manres gets slowly back to his feet.
Manres uses good footwork to avoid the strikes from Bell.
Manres tries to score a power double leg takedown but Bell sees that one coming and sprawls well. That will dishearten Manres somewhat.
Manres fails with a takedown attempt from distance.
Stringer Bell has stuffed three takedown attempts in the round now. That's going to take a lot out of Ludwig Manres.
Manres shoots in for a takedown - he's clinched up with Bell but Bell pushes him off and we're back to square one.
Bell misses with a body shot. Nice footwork from Manres.
We've had a slow start to the round here - hopefully the action picks up.
Bell lands a body shot.
Bell jabs at Manres's body.
Bell throws a shot to the body.

That's one minute gone in the round.
Bell connects with the punch.
Nice straight punches there by Bell. You know Roy Jones Jr respects the hands of Bell.
Bell scores with a nice one two combo and darts back out of range to avoid anything coming in the opposite direction.

Manres is looking for a takedown here. He's shot in and has managed to get it, finishing up in Bell's half guard.

Manres looking for a kimura but he'll have to free his other leg if he wants to finish that. Perhaps he's just using it as a distraction technique.
Manres looks gassed!
Manres tries to pass to full mount but Bell defends it.

That's two minutes gone in the round.
Manres is trying for a guillotine from the top but the pressure isn't in the right place so Bell is just riding it out for now. Manres eventually gives up the hold.
Bell pushes Manres off looking to stand but Manres dives back in and keeps control.
Bell won't allow Manres to pass to mount.
Manres throwing shots but Bell is blocking nicely.

That's three minutes gone in the round.
Manres is looking to take a break and control but Bell is keeping him honest, looking to work from the bottom.
Manres is looking to stall here but Bell recovers full guard.

The referee has ruled that neither fighter is active enough on the ground and has stood them back up.
Bell keeps the fight standing with a nice sprawl.
Bell throws a looping overhand right but Manres ducks down to avoid it.
Bell lands with a cross.
Nice sprawl there from Bell as Manres shoots in.
Horrible takedown by Manres or perhaps it was just good defense by Bell which made him look bad.
Bell digs a good body shot into Manres's ribs.

That's four minutes gone in the round.
Bell throws a shot from downtown. Manres moves away and avoids it.
Manres drives through with a takedown into guard.
Manres is holding a leg here, probably looking for an ankle lock - he drops back and goes for it! Bell is in trouble! Is it all over??? No! Bell has escaped and now he's on top!
Bell won't allow Manres to sweep him here.
And thats the end of the round the fighters go back to their corners.
Stringer Bell dominated that round.
That's the end of the round. The referee orders the cornermen out of the cage so we can get back down to business.

The fighters are starting to get sweaty, which will make takedowns a bit more tricky.
Bell with a body punch. A glancing blow.
Manres takes a punch right to his stomach. That took the wind out of him momentarily.
Manres drops down and drives through with a powerful takedown into guard.
Bell knows he needs to get back to his feet asap. He's simply no match for Manres on the ground.
Manres is working the ground and pound from guard. He might want to try advancing position though to get more of an impact.
Manres drops back looking for a leg! Bell is in trouble here! The fighters roll with the hold and Bell manages to kick Manres off! Manres jumps back into Bell's guard.
Manres wants to control from the top but Bell keeps moving.
That's one minute gone in the round.
Manres trying to move into half guard but instead Bell has managed to sweep!
Manres throwing his legs up looking for a triangle.
Manres is looking for a guillotine. You can't force these things though and Bell defends well.
That's two minutes gone in the round.
Neither fighter has done anything of merit for a good minute or two here and the crowd are not happy about it.
Manres is throwing his legs up, looking for submissions. Bell is aware though and is defending well.
That's three minutes gone in the round.
Manres looking for submissions from the bottom here. Moving his hips around, possibly looking for an armbar.
Manres looking for submissions from the bottom here. Moving his hips around, possibly looking for an armbar.
That's four minutes gone in the round.
The crowd are showing their displeasure at the lack of action as loud boos ring out around the arena.
Bell got a little sloppy there for a moment and Manres has worked his way into a loose triangle - can he finish it?! No, Bell has managed to get both his arms back between Manres's legs - danger averted.
Manres looking to control.
And thats the end of the round the fighters go back to their corners.
A close second round but Ludwig Manres will probably get the nod - 10:9.
That's the end of the round. The referee orders the cornermen out of the cage so we can get back down to business. And we move into the final round!

Bell is the aggressor but that punch slipped nicely by Manres.
Bell stuffs a takedown. It's all about dictating where the fight takes place and Bell wants it to stay on the feet.
Bell leaves Manres with his face pressed against the mat as he sprawls beautifully, defending against a solid takedown attempt.
Manres misses with a takedown attempt - Bell sprawls well and throws a nice strike on the way out which just misses.
Stringer Bell has stuffed three takedown attempts in the round now. That's going to take a lot out of Ludwig Manres.
Manres shoots in with a lovely double leg takedown. Bell manages to land in full guard to minimise the damage.
Bell keeping moving, preventing Manres from controlling successfully.
Manres pushes down on Bell's leg and manages to get into half guard.
That's one minute gone in the round.
Manres is trying to work for a kimura. He's got his hands clasped together - this could be trouble! No, Bell has managed to free his arm - good work.
Manres takes a big intake of breath there - he's definitely tired.
Manres is working for submissions here but there's nothing on.
Bell keeping his head moving to avoid the ground and pound.
The ref warns both fighters not to hold the cage as they work up against the meshing.
Manres is looking for a kimura here.
Manres is looking to pass Bell's guard but actually Bell recovers to full guard.
That's two minutes gone in the round.
There's not a lot going on here and the crowd are letting the fighters know they're not willing to tolerate a lack of action.
Manres drops back, looking for a kneebar! Bell looks panicked! The fighters roll across the mat, one looking to finish, one looking to escape. Bell looks to have wriggled free... Yes, he's got his leg free and he's dived into side control! Good work there from Bell!
Manres misses with a strike from the bottom.
That's three minutes gone in the round.
Manres is looking to regain half guard here but Bell keeps moving and retains side control.
Bell tries to stand but Manres is controlling his head.
That's four minutes gone in the round.
There's not a lot going on here and the crowd are letting the fighters know they're not willing to tolerate a lack of action.
Manres tries to improve position but can't.
And that's the end of the fight!
Ludwig Manres comfortably won the final round on my scorecard.
I think Manres has won this one but let's see whether the judges agree with me. Over to the ring announcer for the scorecards.
Ladies and gentlemen, after 3 rounds of action, we go to the scorecards for a decision.
Judge Albert Achterberg scores the fight 28:29
Judge Saam Ante scores the fight 28:29
Judge Daniel Blasius scores the fight 28:29
In favor of your winner, by unanimous decision... Ludwig Manres!
|
|
|
|
|
|
|
|
|
|
|
|
|
|
|
|
|
|
|
|
|
|
|
| S |
C
A |
G |
S |
C
B |
G |
|
S |
C |
G |
|
energy
A | B |
|
hype
A | B |
|
pop
A | B |
|
mgr
A | B |
|
FIGHT
RATING
32% |
|
|
|
|
|
|
|
Undercard bout
|
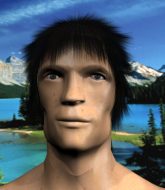
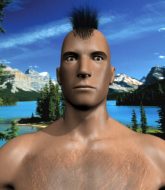
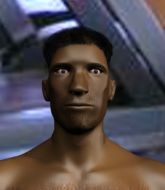
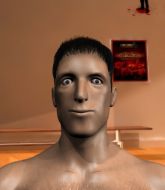
Coming up we have a lightweight MMA rules bout between Kennedy Embers (ranked 0 p4p, 0 weight class) and Luck Chidell (ranked 0 p4p, 0 weight class). Luck Chidell is the more experienced fighter, so let's see if that makes a difference tonight.
 |
|
 |
| 178 cm
23
165 lbs
1 - 0 - 0 |
|
182 cm
22
155 lbs
0 - 2 - 0 |
Good wrestling
Brawler
Granite chin |
|
Dangerous GnP
Decent boxing
Powerful |
|
| |
|
Ladies and gentlemen. This fight is 3 rounds, in the lightweight division.
Introducing the fighter to my left, fighting out of the red corner.
With a record of
1 - 0 - 0, fighting out of Amsterdam, Kennedy Embers!
And introducing the fighter to my right, fighting out of the blue corner.
With a record of
0 - 2 - 0, fighting out of Amsterdam, Luck Chidell!
The judges for this bout are Radbod Blank, Paul Aken and Patrick Alders.
The bell rings for round one and we are underway!
Embers scores with a punch to the gut of his opponent.
Luck Chidell seems to be the more aggressive standup fighter in this bout.
Chidell looks really tired already! That doesn't bode well for a good, competitive fight!
Embers punishes Chidell's body with a nice straight punch.
Embers connects with a looping left hand that seems like it dazed Chidell momentarily.
Embers comes forward and lands a shot to the body, then darts back out of range.
Embers scores with a jab to the head.
This has been an exciting period of action!

Embers drops Chidell with a hook right on the temple. He thinks about going to the ground but Chidell looks back up at him and smiles so Embers waves him back to his feet - he obviously thinks he can knock him out after that shot landed.

Chidell is rocked!

It looks like Luck Chidell has been cut.
Embers digs a good hook to Chidell's body.
Embers bobs and weaves and throws out a fast jab that snaps Chidell's head backwards.
Chidell is still on wobbly legs! Can Embers finish him?
Embers moves in close and cracks Chidell with a massive right hand! Chidell, frozen momentarily in time, tumbles to the canvas, already out cold! A brutal knockout by Embers!
Ladies and gentlemen, after 0:24 of round 1, we have a winner by way of KO (Punch). Kennedy Embers!
|
|
|
|
|
|
|
|
|
|
|
|
|
|
|
|
|
|
|
|
|
|
|
| S |
C
A |
G |
S |
C
B |
G |
|
S |
C |
G |
|
energy
A | B |
|
hype
A | B |
|
pop
A | B |
|
mgr
A | B |
|
FIGHT
RATING
100% |
|
|
|
|
|
|
|
Undercard bout
|
Coming up we have a welterweight MMA rules bout between Remy Dunga (ranked 0 p4p, 0 weight class) and Chad Vader (ranked 0 p4p, 0 weight class). Man, I cannot wait for this one!
 |
|
 |
| 180 cm
18
178 lbs
0 - 1 - 0 |
|
179 cm
22
182 lbs
0 - 0 - 0 |
BJJ Blue Belt
Basic striking
Cardio machine |
|
BJJ White Belt
Good kicks
Solid chin |
|
| |
|
Ladies and gentlemen. This fight is 3 rounds, in the welterweight division.
Introducing the fighter to my left, fighting out of the red corner.
With a record of
0 - 1 - 0, fighting out of Amsterdam, Remy Dunga!
And introducing the fighter to my right, fighting out of the blue corner.
With a record of
0 - 0 - 0, fighting out of Amsterdam, Chad Vader!
The judges for this bout are Aafke Stam, Patrick Alders and Daniel Blasius.
The bell rings for round one and we are underway!
Vader tries to clinch up.
Dunga misses with a jab, cross combination.
Vader paws at his opponent with the jab and then lunges in with a straight, right on the button.
Vader tries to clinch but is not successful on this occasion.
Dunga misses with a wild body shot.
Vader throws a body kick that sends a sickening thudding noise reverberating around the arena.
Dunga changes levels and scores with a jab to the body.
Dunga throws a monster uppercut resembling something out of street fighter but it doesn't land.
Dunga swings wildly with a hook that is half blocked by Vader.
Vader tries to close the distance and clinch up but Dunga swats him away and circles back towards the center.
Dunga scores with a nice looking left hook and follows it up with an uppercut!
Remy Dunga seems to be the more aggressive standup fighter in this bout.
Dunga misses with a jab, cross combination.
Dunga throws a hard body shot but it just misses.
Dunga misses with a few strikes there.
Dunga keeps the fight on the outside.
Vader fails with an attempt to clinch.
Dunga misses with the combination.

Vader tries to keep at a distance but Dunga has taken the fight into the clinch.
This has been an exciting period of action!

Vader breaks the clinch and we're back to striking at distance.
That's one minute gone in the round.
Dunga throws a wild combination but nothing lands.
Vader avoids a punch combination nicely.
Dunga misses with a body shot. Nice footwork from Vader.
Vader avoids a punch combination nicely.
Vader tries to clinch
and Dunga counters with a series of strikes. Vader will be more careful next time no doubt.
Vader has taken the fight to the clinch.
Dunga tries to break free but Vader pushes him back against the cage.
Vader trying to land knees to the body.
Vader tries to land knees in the clinch but Dunga avoids the damage to the body.
Vader tries a knee to the head but Dunga blocks it.
Dunga looks like he'd prefer to be striking at range right now.
Dunga is trying to work out of this bad position, with his back against the cage.
Dunga tries to break free but Vader pushes him back against the cage.
Vader is stalling here.
That's two minutes gone in the round.
Dunga tries to land a shot to the body but it's blocked.
Dunga can't break the clinch.
Vader taking a breather.
Dunga can't break the clinch.
Vader keeps control of Dunga as he tries to wriggle out of the double underhooks.
A nice left hand lands by Dunga.
Vader breaks the clinch and we return to the middle of the mat.
Vader takes a shot right to the liver - Bas would have been proud of that punch.
Dunga misses with a wild combination.
Vader tries a switch kick but it misses it's target.
Vader throws a head kick but Dunga moves out of range.
Vader closes the distance but Dunga moves to the side
and Dunga counters with a two punch combo.
That's three minutes gone in the round.
Dunga misses with a double jab.
Dunga misses with a wild body shot.
Dunga scores with a body shot.
Vader on the wrong end of a decent looking cross there.
Vader throws a sloppy head kick and Dunga moves out of range easily.
Dunga throws a right hand that Vader ducks under and follows up with a left that Vader also avoids with ease.
Vader tries to clinch
and Dunga counters with a crisp hook to the side of the head.
Vader wants to clinch but Dunga slips to the side
and Dunga counters by moving into the clinch.
A frustrated look appears on Dunga's face as he tries to break the clinch.
Dunga gets through Vader's defenses to land a nice punch to the side of the head.
Vader throws an elbow but it's blocked.
Dunga has had enough of the clinch but Vader keeps him there for the moment.
Vader controlling the action here for a moment.
Vader tries to circle away but Dunga has him pinned against the cage.
That's four minutes gone in the round.
Vader looks like he'd prefer to be striking at range right now.
Vader misses with an elbow over the top.
Vader lands a good knee to the midsection. Dunga won't want to take too many of those.
Some stalling of biblical proportions here from Vader.
A battle for position here, against the cage.
Dunga is looking to break free of the clinch but Vader has double underhooks.
Dunga wants to break free. God knows he wants to breaaaak freeee.
Vader putting his Muay Thai to good use. He has Dunga in a tight clinch and is doing some damage with knees to the body.
Vader creates a bit of distance and throws an elbow that only just misses.
Vader trying to land knees to the body.
The crowd applaud the fighters efforts here as the round comes to an end.
Vader pushes off and circles away, back to the middle of the mat.
Dunga tries to clinch up but Vader circles away and keeps his distance.
A jab from Dunga misses.
Dunga is looking to wear down Vader with body shots, infact he's throwing more body shots than head shots at the moment.
Dunga lands the left hand.
And thats the end of the round the fighters go back to their corners.
Remy Dunga dominated that round.
The fighters get back to their feet, the hooter sounds and we're back to the action!
Dunga fakes with an overhand right and moves in to clinch with Vader, pushing him back against the cage.
Vader leaning his opponent against the cage.
Dunga is trying to break free.
Vader is looking to score with knees to the body. Maybe he'll change it up and go body then head. Dunga is defending well for now.
Vader wants to strike at distance but he can't break free of the clinch.
Vader trying to land knees to the body.
Vader is trying to maintain a safe position but Dunga gets an underhook and turns Vader into the cage.
Vader missing with knees to the body.
Vader breaks the clinch and we're back to striking at distance.
We've had a slow start to the round here - hopefully the action picks up.
Dunga misses with a few strikes there.
No joy there for Dunga, who threw a few shots but didn't land.
Dunga looks to score with a combo but nothing lands.
Dunga thuds his right hand into Vader's forehead from close range. That could be painful for both fighters.
Vader ducks low and lands a nice hook to the body of his opponent.
Vader clinches.
That's one minute gone in the round.
Dunga has had enough of the clinch but Vader keeps him there for the moment.
Vader dictating the pace here, as the fighters clinch against the cage.
Vader using the Thai plumb to throw knees but Dunga has his back arched nicely, preventing the strike.
Dunga is trying to work out of this bad position, with his back against the cage.
Vader is trying to maintain a safe position but Dunga gets an underhook and turns Vader into the cage.
Dunga wants to push off and get back to the center of the mat but Vader has him pressed against the cage.
Dunga takes an elbow to the forehead.
It looks like Remy Dunga has been cut.
The pace slowing considerably in the clinch, as Vader takes a break from that fighting nonsense to think about the finer things in life.
Dunga throws a head punch that misses.
Dunga has had enough of the clinch but Vader keeps him there for the moment.
Dunga is trying to force a seperation but Vader has the dominant position.
The referee is keeping an eye on Vader - much more stalling and he will separate the fighters.
Dunga has had enough of the clinch and is looking to separate.
That's two minutes gone in the round.
The crowd are showing their displeasure at the lack of action as loud boos ring out around the arena.
Vader pushes off and circles away, back to the middle of the mat.
Dunga tries to clinch up but Vader circles away and keeps his distance.
Vader pulls out of a head kick attempt.
Vader tries to close the distance and clinch but Dunga swats him to one side with an open hand palm strike and circles away.
Dunga misses with a wild combination.
Dunga rushes Vader and presses him up against the cage.
Dunga is looking to break free of the clinch but Vader has double underhooks.
Dunga is looking to break free of the clinch but Vader has double underhooks.
Vader misses the knee to the body. Nice hip positioning from Dunga.
Vader trying to land knees to the body.
Dunga blocks a knee to the body. He'll have a nicely bruised forearm in the morning.
Vader displaying some good clinch control by pressing Dunga up against the cage.
Vader lands an elbow inside.
That's three minutes gone in the round.
A frustrated look appears on Dunga's face as he tries to break the clinch.
Vader can't break the clinch.
Good anti-grappling being displayed by Dunga as Vader tries to tie him up.
Vader blocking some punches.
Vader manages to break the clinch.
Vader wants to clinch but Dunga slips to the side
and Dunga counters nicely by changing levels and landing a hook to the body.
Vader wants to land a leg kick but Dunga is out of range.
Dunga scores with a nice one two combo and darts back out of range to avoid anything coming in the opposite direction.
Vader is breathing heavily.
Dunga clinches but Vader breaks the clinch
and Vader counters by moving into the clinch. Good anticipation by Vader.
Dunga is looking to break free of the clinch but Vader has double underhooks.
Dunga is trying to work out of this bad position, with his back against the cage.
Dunga has had enough of the clinch and is looking to separate.
That's four minutes gone in the round.
Dunga is trying to break the clinch but Vader has him pressed against the cage.
Dunga is trying to break free.
Vader keeps the fight in the clinch, despite Dunga's efforts to push away.
Dunga avoids a wild elbow strike from Vader.
Dunga is trying to break the clinch but Vader is controlling him.
Dunga managing to block the knees to the body from Vader.
The pace really dropping off here, momentarily.
Dunga wants to get back to striking at distance but Vader won't allow it.
The crowd thankful this round is nearly over.
Vader stalling.
Vader keeps control of Dunga as he tries to wriggle out of the double underhooks.
Dunga is trying to break the clinch but Vader has him pressed against the cage.
Vader lands a good knee to the midsection. Dunga won't want to take too many of those.
And thats the end of the round the fighters go back to their corners.
Remy Dunga dominated that second round.
The cut man is working on Remy Dunga's cut.
That's time! Back to the action! Let's hear some noise people - this is the final round!
Vader moves into the clinch successfully.
Dunga wants to push off and get back to the center of the mat but Vader has him pressed against the cage.
Vader wants to push off and get back to the center of the mat but Dunga has him pressed against the cage.
Vader lands a knee to the body.
Vader with the Thai clinch. He's looking to land a big knee but he's not managed it this time.
Vader misses with a knee strike.
Vader keeps control of Dunga as he tries to wriggle out of the double underhooks.
Vader breaks from the clinch.
Vader misses with a half-hearted attempt at a head kick.
Vader wants to clinch
and Dunga counters into the clinch. Nicely done.
We've had a slow start to the round here - hopefully the action picks up.
Dunga lands a shoulder strike.
Vader missing with knees to the body.
Dunga pushes Vader back against the cage and unloads with a body punch.
Dunga wants to push off and get back to the center of the mat but Vader has him pressed against the cage.
Dunga working hard to break the clinch.
That's one minute gone in the round.
Dunga is clearly stalling here... Pick up the pace son.
Vader lands an elbow inside that Dunga shrugs off.
The referee calls for Vader to work.
Dunga wants to strike at distance but he can't break free of the clinch.
Vader prevents a body shot from Dunga.
Vader is looking to score with knees to the body. Maybe he'll change it up and go body then head. Dunga is defending well for now.
Vader throws a nice elbow but it doesn't land.
Vader is pushing Dunga up against the cage, for a bit of lean and pray action. Action being used the in the loosest possible sense of the word.
Vader lands a nice elbow.
That's two minutes gone in the round.
Neither fighter has done anything of merit for a good minute or two here and the crowd are not happy about it.
Dunga blocks a knee to the body. He'll have a nicely bruised forearm in the morning.
Dunga looks like he'd prefer to be striking at range right now.
Vader missing with knees to the body.
Vader misses the knee to the body. Nice hip positioning from Dunga.
Vader keeps control of Dunga as he tries to wriggle out of the double underhooks.
Vader is looking to control Dunga's arms but Dunga gets an underhook and turns him. Now Vader has his back to the cage.
Vader has Dunga pressed against the cage, preventing Dunga from circling away and getting back to striking at range.
Vader prevents Dunga from breaking the clinch.
Dunga tries to circle away but Vader has him pinned against the cage.
Dunga takes a knee to the side of the body.
Vader prevents Dunga from breaking the clinch.
Dunga wants to break free. God knows he wants to breaaaak freeee.
Vader misses with an elbow strike.
Dunga tries to break the clinch but Vader is controlling the position.
Knees to the body from Vader.
That's three minutes gone in the round.
Vader pushes off and circles away, back to the middle of the mat.
Dunga is looking to clinch but Vader is avoiding it.
Dunga blocks a head kick by Vader.
Vader pushes Dunga up against the cage in a clinch.
Dunga has had enough of the clinch and is looking to separate.
Vader landing knees to the body. They look like they could hurt.
Vader misses with a knee strike.
Dunga avoids the elbow strike from Vader, against the cage.
Dunga tries to break the clinch but Vader is controlling the position.
Dunga goes for a body shot but it's blocked.
Vader controlling the action here for a moment.
Dunga breaks the clinch and we return to the middle of the mat.
Dunga swings away but doesn't land with a series of punches.
That's four minutes gone in the round.
The crowd are starting to boo a lack of action.
Vader instigates a clinch.
Vader holding his opponent close, against the cage.
Vader looking to stall.
Dunga is trying to work out of this bad position, with his back against the cage.
Vader wants to stall.
Vader breaks from the clinch.
Vader tries to clinch up.
Dunga circles away from the clinch attempt
and Dunga counters with a left and a right that stings Vader.
Vader takes a big intake of breath there - he's definitely tired.
The crowd thankful this round is nearly over.
A shot to de liver by Dunga. Beautiful body shot.
Chad Vader has stepped it up - he knows he needs a finish here!
Dunga instigates a clinch.
And that's the end of the fight!
That was a close round. You could make an argument for either fighter but I would give it to Remy Dunga.
Well I reckon that's a shut out for Dunga, winning every round. Will the judges agree? They are the ones who matter, even if they are often depressingly incompetent. Over to the ring announcer for the scorecards.
Ladies and gentlemen, after 3 rounds of action, we go to the scorecards for a decision.
Judge Aafke Stam scores the fight 30:27
Judge Patrick Alders scores the fight 30:27
Judge Daniel Blasius scores the fight 30:27
In favor of your winner, by unanimous decision... Remy Dunga!
|
|
|
|
|
|
|
|
|
|
|
|
|
|
|
|
|
|
|
|
|
|
|
| S |
C
A |
G |
S |
C
B |
G |
|
S |
C |
G |
|
energy
A | B |
|
hype
A | B |
|
pop
A | B |
|
mgr
A | B |
|
FIGHT
RATING
45% |
|
|
|
|
|
|
|
Undercard bout
|
Coming up we have a lightweight MMA rules bout between Fa Sho (ranked 0 p4p, 0 weight class) and Alexander Great (ranked 0 p4p, 0 weight class). Fa Sho could well score a knockout today. He has the power to get to Alexander Great's chin.
 |
|
 |
| 175 cm
22
168 lbs
0 - 1 - 0 |
|
173 cm
23
165 lbs
2 - 2 - 0 |
BJJ White Belt
Excellent boxer
Very strong |
|
BJJ Blue Belt
Decent boxing
Heavy handed |
|
| |
|
Ladies and gentlemen. This fight is 3 rounds, in the lightweight division.
Introducing the fighter to my left, fighting out of the red corner.
With a record of
0 - 1 - 0, fighting out of Amsterdam, Fa Sho!
And introducing the fighter to my right, fighting out of the blue corner.
With a record of
2 - 2 - 0, fighting out of Amsterdam, Alexander Great!
The judges for this bout are Daniel Blasius, Wagner Zegers and Aafke Stam.
The bell rings for round one and we are underway!
Sho throws a body punch but Great moves out of range.
Great looks for a takedown here. Will he get it? Sho is fending him off so far but Great persists. Nope, Sho circles away and we're back to standing.
Sho changes levels and scores with a jab to the body.
Great throws a series of punches but Sho moves out of range.
Great wants to clinch.
Great fails with an attempt to clinch.
Sho stuffs the takedown.
Sho defending well as Great loads up on a big left hand.
Sho lunges in with an uppercut that skims his opponent's chin.
Sho digs a good hook to Great's body.
Great tries to clinch there but Sho circles away.
Sho takes a swing at Great's ribcage but misses.
Great misses with a double jab.
Great lunges in with swinging rights and lefts but Sho circles away quickly and effectively.
That's one minute gone in the round.
Great uses some good footwork to avoid the body shot by Sho.
Sho lands with a straight right. Great didn't see that one coming.
Great tries to bum rush Sho with a series of wild strikes but Sho uses good footwork to avoid the assault.
Sho scores with a punch to the gut of his opponent.
Alexander Great seems to be the more aggressive standup fighter in this bout.
Great looks gassed!
Sho cracks Great with an open hand slap.
Great uses some good footwork to avoid the body shot by Sho.
Great takes a punch right to his stomach. That took the wind out of him momentarily.
Sho misses with a wild body shot.
Sho's corner calls for a 1,2 combination and Sho duly obliges.
Great misses with a combination
and Sho counters with a nice jab to the body that keeps Great thinking.
Sho punishes Great's body with a nice straight punch.
This has been an exciting period of action!
Sho throws a hard body shot but it just misses.
Sho is looking to wear down Great with body shots, infact he's throwing more body shots than head shots at the moment.
That's two minutes gone in the round.
Good shot there by Great.
Great shoots for a double leg takedown but Sho sprawls well. He's pushed Great's face into the mat and manages to get back to his feet relatively easily.
Fa Sho has stuffed three takedown attempts in the round now. That's going to take a lot out of Alexander Great.
Danga de danga de dang - Sho scores with a four punch combination!
Great doesn't react quick enough there as he takes a shot to the body.
Sho digs a good hook to Great's body.
Sho misses the shot to the body.
Sho misses with a wild body shot.
Sho ducks low and lands a nice hook to the body of his opponent.
Sho scores with a reasonable looking shot to the body. Great doesn't seem bothered though.
Sho throws a shot to the body.
Sho lands a with a good body shot.
Great takes a body punch that cleary hurt but he's trying not to show any weakness.
Sho dips down and scores with a jab to the body.
That's three minutes gone in the round.
Sho dips to his left and cracks Great with an uppercut!
Great takes a punch right to his stomach. That took the wind out of him momentarily.
Sho misses with a body shot. Nice footwork from Great.
Great gets cracked there but stands up to it.
Great throws a left and a right that both miss
and Sho counters with a good right hand that lands right on the jaw.
Great takes a body punch that cleary hurt but he's trying not to show any weakness.
Sho scores with a sloppy punch to the body. Not much technique there but it did the business.
Sho darts in and out, connecting with a jab.
Great looks to land a left hand but Sho moved out of range nicely.
Sho scores with a body shot.
Sho throws a jab to the body, straight down the pipe. Boom. That sent Great stumbling backwards but he manages to regain his composure quickly.
Great doesn't react quick enough there as he takes a shot to the body.
That's four minutes gone in the round.
Sho jabs at Great's body.
Fa Sho is looking to keep the fight on the feet at all costs.
Sho looks to score with a jab to the body but Great is just out of range.
Sho misses with a double jab.
Great is on the wrong end of a nice combination from Sho.
Great is trying desperately to land a takedown but Sho is having absolutely none of it. This is turning into a bit of a nightmare for Great.
Wooooo! Give it up for these two warriors! They are putting on a show!
Great uses some good footwork to avoid the body shot by Sho.
Sho changes levels and scores with a jab to the body.
Sho lands a nice shot to the body.
A cross from Sho lands.
Sho fakes a head punch and goes low to the body. Nicely done.
The crowd are going absolutely nuts as the round comes to an end - what a fantastic round of action!
Sho lands a right hook to the body.
Sho throws a shot to the body.
Sho swings and misses with a hook to the body.
And thats the end of the round the fighters go back to their corners.
Fa Sho dominated that round.
The fighters get back to their feet, the hooter sounds and we're back to the action!
Sho throws a hard body shot but it just misses.
Great shoots in for a takedown - he's clinched up with Sho but Sho pushes him off and we're back to square one.
Sho throws a right and a left that both miss.
Great falls off balance throwing a combination
and Sho counters with a lovely straight right hand!
Great walks straight into a jab right on the nose. That one stung - he's blinking and trying to clear his head.
A nice combination there by Sho.
Sho thows a body shot but no joy.
Great throws a combination that misses
and Great takes a counter punch right on the button for his troubles.
Great rushes Sho and presses him up against the cage.
Great misses with a hook to the ribs.
Sho is really dominating this fight. Is there anything that Great can do to turn this around?
Great misses with a hook from the clinch.
That's one minute gone in the round.
Great has a couple of punches blocked by Sho.
Sho blocks a couple of punches on the inside.
Great is breathing heavily.
Sho is trying to break free.
Great breaks from the clinch.
Sho scores with a shot to the body.
Sho lands with a two punch combination before moving back out of range.
Great misses with a hook to the body
enabling Sho to counter with a crisp jab.
Sho with a body punch. A glancing blow.
Sho just misses with a punch to the body.
Sho dips down and scores with a jab to the body.
Sho misses with a body shot. Nice footwork from Great.
Great throws a looping overhand right but Sho ducks down to avoid it.
Sho misses with a body shot.
Sho swings for the body but Great moves out of range.
That's two minutes gone in the round.
Great throws an uppercut from half a mile away. Sho sees it coming and avoids it easily.
Sho misses with a shot to the body
and Great connects with a straight left hand counter down the middle.
Sho just misses with a punch to the body.
Sho lands a nice hook to Great's body. Great takes it in his stride and looks to land his own strikes.
Sho works Great's body with a nice hook.
Great takes a shot right to the bread basket.
Sho swings away with a body shot that misses
and Great counters with a straight right hand.
Sho thows a body shot but no joy.
Sho cracks Great with a right hand to the side of the head.
Sho lands with a right hand.
Sho swings and misses with a hook to the body.
Sho ducks down and throws a hook to the body but Great moves away.
That's three minutes gone in the round.
Great lands with a nice combination. Sho backs away looking to recover.
Great swings wildly with a couple of big hooks
and Sho counters with a stiff right hand.
Great takes one to the chin there.
Great throws a combination that misses
and Sho counters with a left to the body.
Sho fakes high and swings low for a body shot but Great manages to avoid it.
Sho throws a nice hook to the body that draws an oooh from the crowd.
Sho ducks down and throws a hook to the body.
Sho with a hook.
Sho moves into range and connects with a jab.
Sho rushes forward with a series of wild hooks but Great moves out of range and avoids them all easily.
Sho scores with a shot to the body.
That's four minutes gone in the round.
Sho ducks under a wild hook from Great.
Great throws a left and a right that both miss
and Sho connects with a straight left hand counter down the middle.
Great takes an uppercut right on the button but keeps his composure.
Sho takes a swing at Great's ribcage but misses.
Sho wings a very wild body shot but it does the job and lands to the midsection.
Sho with a body punch. A glancing blow.
Great has a pretty nasty looking mouse under his right eye.
Great uses some good footwork to avoid the body shot by Sho.
Sho wings a very wild body shot but it does the job and lands to the midsection.
Sho uses good footwork to get in and out and land a nice right hand before Great has time to react.
Sho slips under a jab.
Alexander Great is looking to throw some combinations by the looks of things.
Sho looks to score with a jab to the body but Great is just out of range.
Sho throws a series of punches but Great avoids them all with ease.
And thats the end of the round the fighters go back to their corners.
Fa Sho dominated that second round.
The referee calls time. The cornermen exit stage left and we're back to business. This is the final round!
Sho cracks a nice hook into Great's ribs.
The fight stays on the outside here - Great looks like he's thinking about clinching though.
Sho lands a body shot.
Sho lands with a nice combination. Great backs away looking to recover.
Sho swings and misses with a hook to the body.
Sho scores with a jab to the jaw of his opponent.
Great is trying hard to land a takedown here. Sho sprawls well and keeps this one on the feet.
Sho lands a nice shot that snaps Great's head back.
Both fighters are breathing heavily.
A lazy left from Sho finds it's target.
Sho throws a two punch combo that lands nicely.
Fa Sho is winning the standup battle so far.
Great on the wrong end of a nice hook.
That's one minute gone in the round.
Sho punishes Great's body with a nice straight punch.
Great misses with a hook to the body
and Sho cracks him with a counter punch right on the button.
Sho scores with a sloppy right hand. Great should have avoided that one.
Great drops his hands and takes a jab to the jaw for his troubles.
Great tries to clinch
letting Sho counter with a right hand.
Great shakes his hands off, looking to compose himself, but takes a jab to the jaw whilst he does it.
Sho lunges in with swinging rights and lefts but Great circles away quickly and effectively.
Sho fakes high and swings low for a body shot but Great manages to avoid it.
Great will have to do better than that with his takedown attempts.
Sho blocks a jab.
Sho stooping low to avoid any incoming strikes and then lunges in with an uppercut come cross that lands flush.
Great takes a body punch that cleary hurt but he's trying not to show any weakness.
That's two minutes gone in the round.
Nice straight punches there by Sho. You know Roy Jones Jr respects the hands of Sho.
Sho lands a jab to Great's midsection.
Great throws a combination that misses
and Great takes a counter punch right on the button for his troubles.
Sho throws a shot to the body.
Sho punishes Great's body with a nice straight punch.
Alexander Great has stepped it up - he knows he needs a finish here!
Sho cracks a nice hook into Great's ribs.
A shot to de liver by Sho. Beautiful body shot.
Great keeping a good distance there, avoiding the body shot.
Sho is moving around nicely and scores here with a single head shot.
Sho scores with a body shot.
Sho thuds a left hand into Great's body.
That's three minutes gone in the round.
Sho cracks Great with a right hand to the side of the head.
Sho dips down and scores with a jab to the body.
Sho lands the left hand.
Sho lands with a hook. Great tried to avoid it but it clipped the top of his head.
Great tries to close the distance and clinch up but Sho swats him away and circles back towards the center.
Sho lands a body shot.
Sho misses the shot to the body.
Sho scores with a nice head shot.
Sho lands a glancing blow to the side of Great's head.
Sho lands a jab to Great's midsection.
Sho misses with a wild body shot.
Sho slips in close and lands a nice hook before moving back out of range.
That's four minutes gone in the round.
Sho moves into range and connects with a jab.
Great gets his head snapped back by a nice shot there.
Great fakes and then throws a beautiful body shot. Sho looks a bit winded and takes a step backwards to take a breath.
Sho scores with a punch to the gut of his opponent.
Sho jabs at Great's body.
A punch combination from Sho misses.
Sho lands a nice looking body shot.
Sho cracks a nice hook into Great's ribs.
The crowd applaud the fighters efforts here as the round comes to an end.
Sho scores with a jab to the jaw of his opponent.
Sho scores with a jab.
And that's the end of the fight!
Fa Sho showed his dominance in that final round.
Well I reckon that's a shut out for Sho, winning every round. Will the judges agree? They are the ones who matter, even if they are often depressingly incompetent. Over to the ring announcer for the scorecards.
Ladies and gentlemen, after 3 rounds of action, we go to the scorecards for a decision.
Judge Daniel Blasius scores the fight 30:25
Judge Wagner Zegers scores the fight 30:26
Judge Aafke Stam scores the fight 30:26
In favor of your winner, by unanimous decision... Fa Sho!
|
|
|
|
|
|
|
|
|
|
|
|
|
|
|
|
|
|
|
|
|
|
|
| S |
C
A |
G |
S |
C
B |
G |
|
S |
C |
G |
|
energy
A | B |
|
hype
A | B |
|
pop
A | B |
|
mgr
A | B |
|
FIGHT
RATING
62% |
|
|
|
|
|
|
|
Undercard bout
|
|
|
|
Undercard bout
|
|
|
|
Undercard bout
|
|
|
|
Undercard bout
|
|
|
|
Co-main event
|
Coming up we have a lightweight MMA rules bout between Henry Tudor (ranked 0 p4p, 0 weight class) and Raul Mendonza (ranked 0 p4p, 0 weight class). Henry Tudor has the edge in experience - let's see if he can make that count tonight.
 |
|
 |
| 175 cm
22
165 lbs
3 - 1 - 0 |
|
179 cm
23
165 lbs
2 - 0 - 0 |
BJJ White Belt
Excellent boxer
Good chin |
|
BJJ Purple Belt
Decent boxing
Granite chin |
|
| |
|
Ladies and gentlemen. This fight is 3 rounds, in the lightweight division.
Introducing the fighter to my left, fighting out of the red corner.
With a record of
3 - 1 - 0, fighting out of Amsterdam, Henry Tudor!
And introducing the fighter to my right, fighting out of the blue corner.
With a record of
2 - 0 - 0, fighting out of Amsterdam, Raul Mendonza!
The judges for this bout are Albert Achterberg, Nard Betker and Patrick Alders.
The bell rings for round one and we are underway!
Tudor fakes high and swings low for a body shot but Mendonza manages to avoid it.
Left hook, right uppercut from Mendonza.
Tudor bobbing and weaving, closes the distance and lands a hook to the side of Mendonza's head.
Mendonza misses with a jab, cross combination.
Mendonza looks to score with a combo but nothing lands.
Mendonza looks to land a right hand but Tudor moved out of range.
Mendonza avoids the body shot from Tudor.
Mendonza misses with a body shot
and Tudor counters with a left to the body.
Mendonza throws a looping overhand right but Tudor ducks down to avoid it.
Tudor throws a right and a left that Mendonza avoids nicely.
Raul Mendonza seems to be the more aggressive standup fighter in this bout.
That's one minute gone in the round.
Mendonza doesn't succeed with the takedown
and Tudor cracks him with a counter punch right on the button.
Tudor throws a wild combination but nothing lands.
Tudor throws a jab, cross combination which is slipped
and Mendonza counters with a nice single leg takedown and he's in Tudor's guard now.
We could do with one of the fighters taking the initiative a bit more on the ground - they're both waiting to capitalize on a mistake.
Mendonza wants to control from the top but Tudor keeps moving.
The ref warns both fighters not to hold the cage as they work up against the meshing.
Mendonza is just sitting in guard, looking to avoid any submissions.
Mendonza wants to control from the top but Tudor keeps moving.
Mendonza working some ground and pound from guard but it's not doing any damage.
That's two minutes gone in the round.
Tudor keeping moving, preventing Mendonza from controlling successfully.
The fighters are pressed up against the cage, both looking to find a bit of space to work.
Mendonza won't allow Tudor to get back to his feet.
The referee has ruled that neither fighter is active enough on the ground and has stood them back up.
Mendonza shoots for a double leg takedown but Tudor sprawls well. He's pushed Mendonza's face into the mat and manages to get back to his feet relatively easily.
Mendonza looks gassed!
Mendonza fakes a head shot and lands one to the body.
Tudor throws a jab, cross combination which is slipped
and Mendonza counters with a three punch combo that has Tudor backing up. Tudor nods at Mendonza to acknowledge the strikes.
Tudor lands with an overhand left.
Tudor lets the fists fly and connects with a left straight followed by a right hook.
That's three minutes gone in the round.
Mendonza closes the distance looking to clinch
and Tudor counters with a lovely straight right hand!
Tudor's corner calls for a 1,2 combination and Tudor duly obliges.
Mendonza closes the distance looking to clinch
and Tudor counters nicely by changing levels and landing a hook to the body.
That's four minutes gone in the round.
Mendonza showing good head movement there, avoiding the strikes from Tudor.
Mendonza swings and misses with a shot to the body
and Tudor counters with a three punch combination, finished off with a leg kick. Nice work.
Tudor lands the left hand.
Tudor lets the fists fly and connects with a left straight followed by a right hook.
The fans in attendance giving it up for the two fighters, who have really let it all hang out in the last minute or so!
Mendonza throws a predictable looking body shot
and Tudor counters with a lovely straight right hand!
Tudor rushes forward with a series of wild hooks but Mendonza moves out of range and avoids them all easily.
As the round comes to an end the crowd are showing their appreciation for a great round of action.
Tudor connects with the punch.
And thats the end of the round the fighters go back to their corners.
Henry Tudor dominated that round.
The corners get their ten second warning. Both fighters stand from their stools and stare eachother down, ready to get back to the action.
Tudor swings away but doesn't land with a series of punches.
Henry Tudor is looking to throw some combinations by the looks of things.
Mendonza misses with a telegraphed body shot
and Tudor counters with a crisp hook to the side of the head.
Mendonza swings wildly with a couple of big hooks
and Tudor counters with a series of strikes. Mendonza will be more careful next time no doubt.
Tudor fails to land with a series of punches.
Mendonza darts in trying to clinch
and Tudor connects with a straight left hand counter down the middle.
Tudor displaying good standup as he scores with a three punch combination.
That's one minute gone in the round.
Mendonza misses with a shot to the body
and Tudor counters with a crisp one two that drops Mendonza! Tudor thinks about following him to the mat for a moment but instead steps back and waves Mendonza to his feet! Mendonza is in big trouble!
Mendonza is rocked!
Mendonza is breathing heavily.
Mendonza misses with a takedown attempt
and Tudor counters with a right hand to the body.
Tudor lands with a right that hurts Mendonza. Mendonza looks to clinch but Tudor throws a short knee that drops Mendonza. This one is all over!
Ladies and gentlemen, after 1:27 of round 2, we have a winner by way of TKO (Punch and Knee). Henry Tudor!
|
|
|
|
|
|
|
|
|
|
|
|
|
|
|
|
|
|
|
|
|
|
|
| S |
C
A |
G |
S |
C
B |
G |
|
S |
C |
G |
|
energy
A | B |
|
hype
A | B |
|
pop
A | B |
|
mgr
A | B |
|
FIGHT
RATING
90% |
|
|
|
|
|
|
|
Main event
|
Coming up we have a light heavyweight MMA rules bout between Kassidy Hayes (ranked 0 p4p, 0 weight class) and Johnny Blaze (ranked 0 p4p, 0 weight class). Kassidy Hayes has a significant reach advantage - let's see if he can make it count.
 |
|
 |
| 190 cm
20
205 lbs
3 - 0 - 0 |
|
174 cm
19
215 lbs
1 - 0 - 0 |
BJJ Blue Belt
Basic striking
Self confident |
|
BJJ White Belt
Brawler
Powerful |
|
| |
|
Ladies and gentlemen. This fight is 3 rounds, in the light heavyweight division.
Introducing the fighter to my left, fighting out of the red corner.
With a record of
3 - 0 - 0, fighting out of Amsterdam, Kassidy Hayes!
And introducing the fighter to my right, fighting out of the blue corner.
With a record of
1 - 0 - 0, fighting out of Amsterdam, Johnny Blaze!
The judges for this bout are Paulsen Ambrosius, Aafke Stam and Wagner Zegers.
The bell rings for round one and we are underway!
Hayes closes the distance and scores a nice trip takedown into half guard. Blaze did well to prevent Hayes getting side control.
The ref warns both fighters not to hold the cage as they work up against the meshing.
Hayes is trying for a guillotine from the top but the pressure isn't in the right place so Blaze is just riding it out for now. Hayes eventually gives up the hold.
Hayes is working for a kimura but Blaze is defending it quite comfortably.
Hayes looking for a kimura but he'll have to free his other leg if he wants to finish that. Perhaps he's just using it as a distraction technique.
Blaze holds on for dear life, maintaining half guard for now.
Hayes seems to be looking for submissions.
Hayes is looking for a kimura here.
Blaze is trying to get back to full guard.
That's one minute gone in the round.
Hayes is looking for a kimura but he's never going to get it from there.
We get told so often about how wrestlers don't like to be on their backs. Let's see if Blaze can do anything to dispel that myth.
Hayes wants to free his trapped foot but Blaze is holding on for dear life with his legs.
Hayes will need to keep those long limbs tucked in whilst he's on the ground, to prevent any submissions.
Hayes wants to work for an arm triangle but Blaze is really keeping half guard well and defending the submission attempt.
Hayes is breathing heavily.
Blaze wants to improve his position but Hayes is controlling well.
Blaze trying to hold on to Hayes's head to control him but Hayes postures up.
The referee decides to stand the fighters back up.
Blaze stuns Hayes with a nice body shot, before stepping back out of range.
A left lands for Blaze.
Hayes looks shocked there as he takes a right hand to the temple.
This has been an exciting period of action!
Hayes moves out of range of the body kick.
Blaze is looking for an opening here. He's unloaded a big left hand that catches Hayes flush on the jaw and sends him tumbling to the canvas! Hayes is out cold! Blaze holds back from landing any unnecessary shots to his unconscious opponent, as the referee reacts slowly to the situation. A brutal knockout and then some excellent sportsmanship - this guy is my new favorite fighter!
Ladies and gentlemen, after 2:04 of round 1, we have a winner by way of KO (Punch). Johnny Blaze!
|
|
|
|
|
|
|
|
|
|
|
|
|
|
|
|
|
|
|
|
|
|
|
| S |
C
A |
G |
S |
C
B |
G |
|
S |
C |
G |
|
energy
A | B |
|
hype
A | B |
|
pop
A | B |
|
mgr
A | B |
|
FIGHT
RATING
90% |
|
|
|
|
|
|
|
|
|
|
