 |
HBP 53 PBP Commentary |
Undercard bout
|
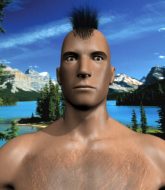
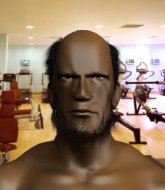
Coming up we have a welterweight MMA rules bout between Jordan The Body (ranked 0 p4p, 0 weight class) and Luka Pele (ranked 0 p4p, 0 weight class). Pele has chosen Beogradski Sindikat-Na bojnom polju as his entrance music. Luka Pele has the better chin. Will he look to stand and bang today?
 |
|
 |
| 175 cm
18
180 lbs
0 - 0 - 0 |
|
176 cm
22
180 lbs
0 - 1 - 0 |
BJJ Purple Belt
Counter striker
Big heart |
|
BJJ Purple Belt
Basic striking
Inexperienced |
|
| |
|
Ladies and gentlemen. This fight is 3 rounds, in the welterweight division.
Introducing the fighter to my left, fighting out of the red corner.
With a record of
0 - 0 - 0, fighting out of Amsterdam, Jordan The Body!
And introducing the fighter to my right, fighting out of the blue corner.
With a record of
0 - 1 - 0, fighting out of Amsterdam, Luka Pele!
The judges for this bout are Aafke Stam, Patrick Alders and Daniel Blasius.

The bell rings for round one and we are underway!

Pele drives through with a takedown into guard.
Pele controls the pace of the fight for a moment.
The fighters are pressed up against the cage, both looking to find a bit of space to work.
The Body keeping full guard, as Pele tries to pass.
Pele trying to land body shots but he keeps hitting the mat.
The Body is working the butterfly guard. He manages to land a nice scissor sweep and is now in half guard on the top. Nice move.
The Body wants to pass the guard but Pele is defending well.

The Body is working for a kimura but Pele is defending it quite comfortably.
The Body seems very keen to just sit and control from half guard but Pele does not like that idea so much and is remaining active off his back.

Pele kicks The Body off and gets back to his feet.
Pele feints and as The Body raises his hands in defense, Pele changes levels and drives through with a takedown into guard.
The Body is trying to keep Pele in close.

That's one minute gone in the round.
Pele wants to control from the top but The Body keeps moving.
The Body controls Pele momentarily but Pele frees himself.
The Body keeping full guard, as Pele tries to pass.
The ref warns both fighters not to hold the cage as they work up against the meshing.
Pele works a leg free and moves into half guard.
Pele is looking for a kimura. It's going to be difficult to finish that from half guard though and The Body defends it well.
Pele missing with the ground and pound from half guard.
The Body trying to control but Pele postures up.

That's two minutes gone in the round.
There's not a lot going on here and the crowd are letting the fighters know they're not willing to tolerate a lack of action.
The Body actively working from the bottom here.
Pele uses his free foot to push down on The Body's thigh. Eventually he works his other foot free and he's advanced to mount - this is trouble for The Body.
Pele raining down hammerfists from mount.
Pele controlling from mount.
The fighters are starting to get a bit slippery now, which will make submissions a bit more difficult.
The Body tries to hold on but Pele pushes him away.
The Body regains half guard.
The Body trying to control from the bottom.

That's three minutes gone in the round.
The Body is trying to get back to full guard.
Pele wants to pass to mount but The Body is defending the position.
Pele is taking a breather. The Body says something to him but it's hard to make out. Perhaps he's telling him to get on with it and actually do something.
Pele trying to mount his opponent but The Body defends it.
The Body trying to control here.

It looks like we're going to have a standup here. Neither fighter is doing enough on the ground.

Pele gets a clinch.

That's four minutes gone in the round.
The crowd are showing their displeasure at the lack of action as loud boos ring out around the arena.
The Body is looking to score with knees to the body. Maybe he'll change it up and go body then head. Pele is defending well for now.
The Body drops to a knee looking for a takedown but Pele gets the underhooks and prevents it.
Pele stops a takedown attempt from The Body.
The Body has hold of a leg and is looking for a trip takedown. Pele avoids it nicely though and we remain in the clinch.
That's three failed takedown attempts in the round for Jordan The Body. That's going to take a lot out of him.
The Body wants a takedown.
The Body is breathing heavily.
Pele taking a break, stalling in the clinch.
Pele wants the takedown. The Body is fighting it off but Pele persists and manages to bring the fight to the ground, ending up in The Body's guard against the cage.
The Body manages to sweep nicely, so he's now on top. Pele manages to get himself to full guard.
Pele has his feet on The Body's hips. He pushes off and gets to his feet. Nice work.
Pele shoots in from a long way out. He's driving through with the takedown attempt and he eventually gets it, landing in The Body's guard.
The crowd applaud the fighters efforts here as the round comes to an end.
Pele looking to pass the guard.
And thats the end of the round the fighters go back to their corners.
Luka Pele dominated that round.
OK. That's time! The bell goes and we're back to the action.

The Body tries for a takedown but Pele circles away easily
and Pele counters with a nice double leg into side control. The Body won't be happy with that.
The Body tries to control the position but he's not in luck - Pele easily slips into full mount!
Pele scoring with strikes but The Body is staying in there.
Pele takes a little breather and maintains the position. The referee will be looking for him to stay active from such a dominant position though.
The Body wants to hold on but Pele pushes him away.
Pele with some aggressive grappling here, looking for the finish.
Pele trying to control but The Body is having none of it.
The Body gets back to half guard.
That's one minute gone in the round.
Pele wants to free his trapped foot but The Body is holding on for dear life with his legs.
The Body is trying to maintain the position but Pele is very close to passing his half guard.
Pele not throwing his punches with enough precision this time.
Pele is looking to advance position but The Body won't allow it.
The Body wants to control but Pele is keeping busy and won't allow it.
Pele performing his best blanket impression for a moment.
Pele wants to take a breather but The Body is having none of it.
That's two minutes gone in the round.
Neither fighter has done anything of merit for a good minute or two here and the crowd are not happy about it.
Pele is figuring out what he wants to do next.
OK we're going to have a standup here. Luka Pele hasn't been effective enough on the ground and the referee wants a restart.
The Body takes a body kick right on the floating rib. Ouchie.
Pele rushes The Body and pushes him back against the cage in a clinch.
The Body goes for a takedown attempt but Pele pushes him away and we're back to fighting at a distance.
Pele scores a takedown into full mount!
Both fighters are absolutely exhausted here.
Pele is landing with some decent strikes but The Body is trying to advance his position so the referee is letting the fight continue.
The Body has given up his back - I dont know if this is a deliberate ploy to try and escape or if he is just struggling down there.
Pele connects with a big shot to the side of The Body's head.
That's three minutes gone in the round.
The Body can't escape the position.
The Body wants to control his opponent's hands but Pele gets his hands free.
Pele is remaining active here, looking for the choke. The more discerning members of the crowd will appreciate his efforts.
Pele somehow managing to miss with a strike from the back.
The Body prevents Pele from getting a body triangle.
The Body is trying to break free.
Pele wants to control but The Body is keeping busy.
Pele has the hooks sunk in and you can see the will to fight slowly draining out of The Body's body.
The Body defending nicely against the rear naked choke attempt.
That's four minutes gone in the round.
Pele has the hooks in. The Body is trying to push off one leg but he has to do so cautiously to avoid being submitted.
The Body is working hard here to advance position.
Pele struggling to keep hold of the position.
Pele scores with punches to the body.
The Body defends a rear naked choke attempt by controlling one of Pele's arms.
The crowd applaud the fighters efforts here as the round comes to an end.
Pele is staying calm and holding on to the back position, whilst working on a rear naked choke. The Body is defending well though. Pele let's go of the attempt for now.
And thats the end of the round the fighters go back to their corners.
Luka Pele showed his class in that round. I'd imagine he'll take it on all the scorecards.
That's the end of the interval. I'm sure that seemed a lot quicker than a minute for our two fighters! Back to the action. This is the final round!

Pele rushes forward with a series of wild hooks but The Body moves out of range and avoids them all easily.
Pele has closed the distance and engaged The Body in a clinch.
Pele gets double underhooks and manages to take the fight to the ground.
The Body is trying to control the position but Pele postures up.
The Body keeping full guard, as Pele tries to pass.
The Body wants to control the position but Pele says "no thanks buddy" and passes to half guard.
The fighters are battling for position here. The Body manages to regain full guard. Nice work.
The Body controls Pele momentarily but Pele frees himself.
Both fighters are breathing heavily.
Pele passes into half guard.
That's one minute gone in the round.
Pele seems very keen to just sit and control from half guard but The Body does not like that idea so much and is remaining active off his back.
Pele tries to pass the half guard into mount. The Body knows what he's doing though and prevents the attempt.
Pele wants to take a breather but The Body is having none of it.
Pele is pressing down on The Body's thigh, looking to free his foot. The Body is holding on for now.
Pele is thwarting The Body's attempts to control the position.
The Body tries to get to full guard but Pele has control of the leg.
Pele tries to pass the half guard into mount. The Body knows what he's doing though and prevents the attempt.
That's two minutes gone in the round.
The crowd are getting on the fighters' backs, as the pace has dropped off in the last minute or so.
The Body wants to control but Pele is keeping busy and won't allow it.
The Body keeping control of the position.
The ref stands the fighters back up. Jordan The Body wasn't doing enough on the ground.
Pele throws a nice looking combination but The Body bobs and weaves to avoid any damage.
The Body gets caught on his heels momentarily as he allows Pele to score an easy takedown into full guard.
Pele stands up and looks to throw the legs aside to pass to side control. The Body swivels though and keeps the full guard.
The Body is trying to keep Pele in close.
That's three minutes gone in the round.
Pele won't allow The Body to sweep him here.
Pele trying to control the position from guard on top but The Body is wriggling around, looking for whatever he can.
The Body is trying to control the position from the bottom.
The ref stands the fighters back up. Jordan The Body wasn't doing enough on the ground.
Pele fakes an overhand right and shoots for a takedown. The Body sprawls well initially but Pele persists and gets the takedown into half guard.
Pele moves nicely into side control.
The Body trying to control but Pele flips him over like a cheap hooker and has his back!
The Body is in bad spot here.
That's four minutes gone in the round.
The Body breaks Pele's hooks off and manages to turn into his guard.
Pele wriggles free and stands up.
The Body looks for a takedown. He's got it. We're now in half guard.
The Body is trying for a guillotine from the top but the pressure isn't in the right place so Pele is just riding it out for now. The Body eventually gives up the hold.
Pele holds on for dear life, maintaining half guard for now.
Pele makes some distance and scrambles quickly back to his feet. Nice work!
The Body darts in and clinches Pele up against the cage.
Jordan The Body has stepped it up - he knows he needs a finish here!
Luka Pele is fighting for a decision here - he's started to take the cautious approach.
Pele blocks a punch to the side of the head.
And that's the end of the fight!
Luka Pele comfortably won the final round on my scorecard.
Well Pele has outworked and out performed his opponent in all aspects of the game today. He was simply too good and the decision should be no more than a formality. Over to the ring announcer for the scorecards.
Ladies and gentlemen, after 3 rounds of action, we go to the scorecards for a decision.
Judge Aafke Stam scores the fight 27:30
Judge Patrick Alders scores the fight 27:30
Judge Daniel Blasius scores the fight 27:30
In favor of your winner, by unanimous decision... Luka Pele!
|
|
|
|
|
|
|
|
|
|
|
|
|
|
|
|
|
|
|
|
|
|
|
| S |
C
A |
G |
S |
C
B |
G |
|
S |
C |
G |
|
energy
A | B |
|
hype
A | B |
|
pop
A | B |
|
mgr
A | B |
|
FIGHT
RATING
66% |
|
|
|
|
|
|
|
Undercard bout
|
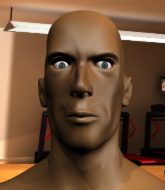
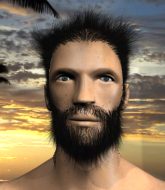
Coming up we have a light heavyweight MMA rules bout between Hiruzen Sarutobi (ranked 0 p4p, 0 weight class) and Andre Young (ranked 0 p4p, 0 weight class). Young is bobbing his head along to his entrance song: Nuthin But A G Thang. Andre Young will no doubt be looking to use his reach advantage to good effect.
 |
|
 |
| 184 cm
21
205 lbs
0 - 2 - 0 |
|
215 cm
26
205 lbs
0 - 1 - 0 |
BJJ White Belt
Solid boxing
Big right hand |
|
BJJ Purple Belt
Decent boxing
Tends to cut |
|
| |
|
Ladies and gentlemen. This fight is 3 rounds, in the light heavyweight division.
Introducing the fighter to my left, fighting out of the red corner.
With a record of
0 - 2 - 0, fighting out of Amsterdam, Hiruzen Sarutobi!
And introducing the fighter to my right, fighting out of the blue corner.
With a record of
0 - 1 - 0, fighting out of Amsterdam, Andre Young!
The judges for this bout are Paul Aken, Aafke Stam and Patrick Alders.
The bell rings for round one and we are underway!
Young misses with a head kick.
Young closes the distance and pushes Sarutobi back into the cage.
Sarutobi looking to slow down the pace here.

Young breaks the clinch and we're back to striking at distance.
Young closes the distance but Sarutobi moves to the side
and Sarutobi counters with a nice uppercut.
Sarutobi clinches.
Young is trying to force a seperation but Sarutobi has the dominant position.
Young wants to break the clinch but can't.
Young goes for a takedown attempt but Sarutobi pushes him away and we're back to fighting at a distance.
Young falls off balance throwing a combination
enabling Sarutobi to counter with a crisp jab.
Young swats away the attempt to clinch by Sarutobi.
Young stuffs a takedown. It's all about dictating where the fight takes place and Young wants it to stay on the feet.
Young shoots in but Sarutobi avoids the takedown attempt easily.
Sarutobi thows a left - swing and a miss!
Young blocks a head kick by Sarutobi.
Young throws a series of punches but Sarutobi moves out of range.
Sarutobi lands a nice hook to Young's body. Young takes it in his stride and looks to land his own strikes.
Sarutobi gets caught on his heels momentarily as he allows Young to score an easy takedown into full guard.
The ref warns both fighters not to hold the cage as they work up against the meshing.
That's one minute gone in the round.
Young has decided he wants to stand but the closed guard of Sarutobi is proving hard to escape from.
Young stands up and waves to Sarutobi to follow him.
Young rushes forward with a series of wild hooks but Sarutobi moves out of range and avoids them all easily.
Young throws a combination that misses
and Sarutobi counters with a quick right hand to the jaw.

It looks like Andre Young has been cut.
Young falls off balance throwing a combination

and Sarutobi counters with a crisp one two that drops Young! Sarutobi thinks about following him to the mat for a moment but instead steps back and waves Young to his feet! Young is in big trouble!

Young is rocked!
Young misses with a series of wild punches.
Young gets to the clinch - let's see what his plan is here.
That's two minutes gone in the round.
Young goes for a takedown attempt but Sarutobi pushes him away and we're back to fighting at a distance.
Hiruzen Sarutobi has stuffed three takedown attempts in the round now. That's going to take a lot out of Andre Young.
Young misses with a jab, cross combination.
Young fails to land the takedown.
Young throws a series of punches but Sarutobi avoids them all with ease.
Young is a painfully thin specimen of a man. You do wonder whether a good body kick would snap him clean in two.
Sarutobi clinches.
Wooooo! Give it up for these two warriors! They are putting on a show!
Young tries to land a knee to the body but he is off balance and Sarutobi avoids it.
Both fighters working to control the clinch.
Sarutobi has Young pressed against the cage, preventing Young from circling away and getting back to striking at range.
Sarutobi lands a hook to the side of the head.
Young tries for a takedown. No joy.
Sarutobi jumps guard but Young stands there with Sarutobi around his waist. Sarutobi gives up and drops back to his feet. We remain in the clinch.
Sarutobi pushes off and circles away, back to the middle of the mat.
Sarutobi closes the distance and clinches up with Young, looking for a takedown. Sarutobi pushes Young against the cage but Young circles to the side and manages to break the clinch.
Young connects with a jab.
Sarutobi showing good head movement there, avoiding the strikes from Young.
That's three minutes gone in the round.
Sarutobi showing good head movement there, avoiding the strikes from Young.
Young moves in looking to clinch but Sarutobi pushes him off.
Young goes to the watering hole and comes back with a big thumbs up from the judges as he scores a three punch combo.
Sarutobi misses with a head kick.
Young lands with a head kick! That's gotta hurt.
Sarutobi tries to close the distance and clinch up against the cage but Young paws at him with a jab and circles away.
Young misses with a combination
and Sarutobi counters into the clinch. Nicely done.
Young wants to strike at distance but he can't break free of the clinch.
Young drops down for a takedown but doesn't get it.
Young manages to break the clinch.
Sarutobi scores with a sloppy right hand. Young should have avoided that one.
Young scores with a takedown into Sarutobi's guard.
Young gets to his feet and steps away from his opponent.
That's four minutes gone in the round.
Young is looking for a takedown here. He's shot in and has managed to get it, finishing up in Sarutobi's half guard.
Young postures up and decides to stand up, from the half guard. The ref calls for Sarutobi to stand up.
Young throws a combination that misses
letting Sarutobi counter with a right hand.
Wooooo! Give it up for these two warriors! They are putting on a show!
Sarutobi moves forwards but Young connects with a nice, crisp jab.
Young misses with a double jab
and Young takes a counter punch right on the button for his troubles.
Sarutobi gets taken down but at least he's managed to land in guard.
Young looks gassed!
As the round comes to an end the crowd are showing their appreciation for a great round of action.
Young stopping the sweep attempt from Sarutobi.
And thats the end of the round the fighters go back to their corners.
Hiruzen Sarutobi dominated that round.
The cut man is working on Andre Young's cut.
That's time! Back to the action!
Sarutobi is looking to clinch but Young is avoiding it.
No joy there for Young, who threw a few shots but didn't land.
Sarutobi shoots in and drives through. Young sprawls well.
Young looking for a takedown here - he's got it.
The fighters are going at a pretty good pace and they're both starting to sweat now.
Sarutobi has a closed guard, preventing Young from standing up.
Sarutobi wants to sweep here but Young controlling him for the moment.
Young wants to stand but Sarutobi has a closed guard, so he can't escape.
That's one minute gone in the round.
Young stands up and waves to Sarutobi to follow him.
Young misses with a jab, cross combination.
Sarutobi stuffs a takedown. It's all about dictating where the fight takes place and Sarutobi wants it to stay on the feet.
Hiruzen Sarutobi is winning the standup battle so far.
Young closes the distance and scores a nice trip takedown into half guard. Sarutobi did well to prevent Young getting side control.
Sarutobi kicks Young off and gets back to his feet.
Both fighters are absolutely exhausted here.
Young tries for a takedown but Sarutobi circles away easily
and Sarutobi makes him pay by landing a nice hook to the body before moving out of range.
Young looks to land a combination but Sarutobi avoids it well.
Young goes to the watering hole and comes back with a big thumbs up from the judges as he scores a three punch combo.
Sarutobi works the jab nicely.
Andre Young is looking to throw some combinations by the looks of things.
That's two minutes gone in the round.
Young fails in his attempt to clinch.
Sarutobi looks to clinch
and Young counters with a two punch combo.
Young moves into range and throws a lovely three punch combination.
Young throws a combination but comes up with nothing but fresh air.
Young looks for a takedown but Sarutobi sprawls well.
Hiruzen Sarutobi has stuffed three takedown attempts in the round now. That's going to take a lot out of Andre Young.
Young throws a jab, cross combination which is slipped
and Sarutobi counters with a nice single leg takedown and he's in Young's guard now.
Andre Young has got the better of the ground game so far.
This has been an exciting period of action!
Young is trying to stand up but he's not managed so far.
Sarutobi pressing down on his opponent's thigh, looking to pass guard. Young is keeping the position for now.
That's three minutes gone in the round.
Sarutobi won't allow Young to get back to his feet.
If this pace continues, the referee will definitely step in and force a standup.
Young pushes Sarutobi off and scrambles back to his feet.
Young pushes forward with a 1-2 combination that forces Sarutobi back to the cage. Young follows up with a solid lead hook to the liver.
Young checks a leg kick nicely.
Sarutobi wants to slow Young down by chopping away at his legs.
Sarutobi swats away the attempt to clinch by Young.
A really sloppy takedown attempt there from Young.
That's four minutes gone in the round.
Well. There's a bit of a lull in the action here and the crowd are starting to get restless.
Sarutobi is looking to chop away at Young's legs.
Young has managed to clinch.
Sarutobi looking to slow down the pace here.
Young is trying to break the clinch but Sarutobi is controlling him.
Young's corner calls for him to break the clinch, which he does.
Sarutobi fails with an attempt to clinch.
Young fails with an attempt to clinch.
Young throws a one two combo.
Young throws a wild combination but nothing lands.
Young throws a jab, cross combination which is slipped
and Sarutobi counters with a nice double leg into half guard.
The crowd applaud the fighters efforts here as the round comes to an end.
Young pushes Sarutobi off and gets back to his feet.
Young lands a jab, followed by a cross and another cross, as Sarutobi backs up against the cage.
And thats the end of the round the fighters go back to their corners.
Hiruzen Sarutobi dominated that second round.
The cut man is working on Andre Young's cut.
That's time! Sarutobi's corner gives him a slap on the ass as he gets ready to fight. This is the final round!
Young has closed the distance and engaged Sarutobi in a clinch.
Young tries for a takedown but Sarutobi manages to get underhooks.
Sarutobi controlling the action here for a moment.
Young escapes the clinch and we're back to striking.
Young dives in and grabs Sarutobi's left leg, looking for a takedown. Sarutobi pushes down on Young's head and hops out.
Sarutobi tries to clinch there but Young circles away.
Young throws a combination that misses
and Sarutobi moves into the clinch.
Sarutobi stops a takedown attempt from Young.
Hiruzen Sarutobi has stuffed three takedown attempts in the round now. That's going to take a lot out of Andre Young.
Sarutobi lands with a light punch inside.
Sarutobi lands a hook to the body. It's hard to tell if that hurt Young or not.
Sarutobi manages to break the clinch.
Sarutobi misses with a double jab.
Young clinches up against the cage.
Both fighters are breathing heavily.
Young pushes off and circles away, back to the middle of the mat.
An inside leg kick from Sarutobi misses.
Young tries to clinch but Sarutobi is having none of it.
Sarutobi looks to land a right hand but Young moved out of range.
Young tries to score a power double leg takedown but Sarutobi sees that one coming and sprawls well. That will dishearten Young somewhat.
That's one minute gone in the round.
Well, he's not going to score with shots like that. A lazy body kick attempt from Young.
Sarutobi tried to score with a low kick but Young checks it.
Young rushes forward with a series of wild hooks but Sarutobi moves out of range and avoids them all easily.
Young fails with a rather predictable takedown attempt.
Young throws a good cross that connects.
Young misses with the combination.
Sarutobi thows a body shot but no joy.
Young moves out of range of the leg kick from Sarutobi.
Sarutobi is looking to clinch but Young is avoiding it.
Sarutobi shoots in for a takedown. "I don't think so" says Young as he avoids it easily.
Young scores with a nice one two combo and darts back out of range to avoid anything coming in the opposite direction.
Young lands with a kick to the temple. Sarutobi shrugs as if to say "is that all you've got?"
That's two minutes gone in the round.
There's not a lot going on here and the crowd are letting the fighters know they're not willing to tolerate a lack of action.
Young will need to tighten up his combinations if he doesn't want to gas himself out, swinging at thin air.
Young fails to land with the punch combination there - jab, cross, hook, miss, miss, miss.
Young lands with a cross to side of his opponent's head.
Young scores with a head kick.
Sarutobi tries to keep at a distance but Young has taken the fight into the clinch.
Young escapes the clinch and we're back to striking.
A punch combination from Young misses.
Young scores to the head and body with a nice combination!
Young keeping his hands up high there, blocking the jab from Sarutobi.
Sarutobi wants to clinch.
Young rushes Sarutobi and pushes him back against the cage in a clinch.
Sarutobi tries to take the fight to the ground by pulling guard but can't manage it.
Young breaks from the clinch.
That's three minutes gone in the round.
Sarutobi tries to clinch but is not successful on this occasion.
Sarutobi tries to sprawl but Young drives through with a takedown into half guard.
Young escapes and gets back to his feet.
Young scores a takedown into full mount!
Young wants to control the pace but Sarutobi is squirming around nicely.
Young sitting in mount, just looking to control for the moment.
Sarutobi knows he needs to get back to his feet asap. He's simply no match for Young on the ground.
That's four minutes gone in the round.
Sarutobi is squirming around, avoiding Young's attempts to control the action.
The fighters are pressed up against the cage, both looking to find a bit of space to work.
Young controlling from the full mount.
Sarutobi on his back here. We all know that wrestlers don't like being on their back so let's see if Sarutobi tries to get out of the position.
And that's the end of the fight!
Andre Young comfortably won the final round on my scorecard.
I think Sarutobi has won this one but let's see what the judges have to say. Over to the ring announcer for the scorecards.
Ladies and gentlemen, after 3 rounds of action, we go to the scorecards for a decision.
Judge Paul Aken scores the fight 29:28
Judge Aafke Stam scores the fight 29:28
Judge Patrick Alders scores the fight 29:28
In favor of your winner, by unanimous decision... Hiruzen Sarutobi!
|
|
|
|
|
|
|
|
|
|
|
|
|
|
|
|
|
|
|
|
|
|
|
| S |
C
A |
G |
S |
C
B |
G |
|
S |
C |
G |
|
energy
A | B |
|
hype
A | B |
|
pop
A | B |
|
mgr
A | B |
|
FIGHT
RATING
88% |
|
|
|
|
|
|
|
Undercard bout
|
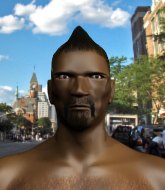
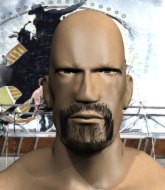
Coming up we have a light heavyweight MMA rules bout between Mooney Rutten (ranked 0 p4p, 0 weight class) and Jacobim Mugatu (ranked 0 p4p, 0 weight class). I can't wait for this one - let's get the fighter introductions out of the way and get this one started!
 |
|
 |
| 186 cm
20
206 lbs
2 - 0 - 0 |
|
190 cm
23
205 lbs
1 - 1 - 0 |
BJJ White Belt
Excellent boxer
Very strong |
|
BJJ Blue Belt
Counter striker
Determined |
|
| |
|
Ladies and gentlemen. This fight is 3 rounds, in the light heavyweight division.
Introducing the fighter to my left, fighting out of the red corner.
With a record of
2 - 0 - 0, fighting out of Amsterdam, Mooney Rutten!
And introducing the fighter to my right, fighting out of the blue corner.
With a record of
1 - 1 - 0, fighting out of Amsterdam, Jacobim Mugatu!
The judges for this bout are Albert Achterberg, Wagner Zegers and Radbod Blank.
The bell rings for round one and we are underway!
Rutten tries to clinch up
and Mugatu counters with a nice uppercut.
Mugatu fails in his attempt to clinch.
Rutten tries to clinch there but Mugatu circles away.
Rutten fails with an attempt to clinch.
Rutten tries to grapple but his opponent circles
and Mugatu counters with a nice shoot takedown that brings the fighters to the ground.
Rutten seems keen to control Mugatu's posture.
Mugatu controlling from the guard. I say controlling but really, he's stalling.
Mugatu trying to control the position from guard on top but Rutten is wriggling around, looking for whatever he can.
That's one minute gone in the round.
Mugatu tries to free his leg and advance position but Rutten is retaining full guard.
Rutten on his back here. We all know that wrestlers don't like being on their back so let's see if Rutten tries to get out of the position.
The ref stands the fighters back up, due to lack of action by Jacobim Mugatu.
Rutten has taken the fight to the clinch.
Mugatu jumps guard but his hands slip and he falls flat on his back. Well, he's made himself look a right mug there, as Rutten walks away with a smile on his face. Mugatu gets slowly back to his feet and shakes his head.
Mugatu looks for a takedown here. Will he get it? Rutten is fending him off so far but Mugatu persists. Nope, Rutten circles away and we're back to standing.
Rutten scores with a nice takedown into half guard. Let's see what he's got on the ground.
Rutten knows he needs to get back to his feet asap. He's simply no match for Mugatu on the ground.
Rutten not landing any meaningful shots this time.
Mugatu is pressing down on Rutten's left leg trying to get back to full guard. He's managed it.
A big thud reverberates around the arena there as Rutten accidentally thumps the mat. Hopefully he's not broken his hand.
Rutten scoring with some ground and pound.
Mugatu looks gassed!
Rutten missing there with some ground and pound from the guard.
The fighters are pressed up against the cage, both looking to find a bit of space to work.
Mugatu has a closed guard, preventing Rutten from standing up.
Rutten pressing down on his opponent's thigh, looking to pass guard. Mugatu is keeping the position for now.
That's two minutes gone in the round.
Rutten tries to stand but Mugatu is controlling from the bottom.
Rutten stands up and looks to throw the legs aside to pass to side control. Mugatu swivels though and keeps the full guard.
Rutten is looking to advance position but Mugatu has hit a scissor sweep - now he's on top in mount!
Rutten tries to lock up and control but Mugatu gives him a forearm to the face and pushes him away.
Mugatu looking to control but Rutten is working nicely, looking to advance position himself.
Mugatu sends his fist crashing into the mat - the crowd let out a collective ooooooh. Let's hope he's not broken it!
That's three minutes gone in the round.
Rutten is looking to improve his position but Mugatu isn't that keen on the idea.
Mugatu postures up and cracks his opponent a couple of times before moving back into close ground control. Rutten looks a forlorn figure.
Rutten is desperately trying to get back to half guard.
Mugatu unloads with some shots from mount but Rutten bucks and avoids them well.
The ref warns both fighters not to hold the cage as they work up against the meshing.
Rutten is desperately trying to get back to half guard.
Mugatu looking to control but Rutten is working nicely, looking to advance position himself.
Rutten is writhing around trying to get back to his feet.
That's four minutes gone in the round.
The crowd are starting to boo a lack of action.
Poor strikes thrown by Mugatu there. More accuracy and less frantic strikes would help!
Rutten is writhing around trying to get back to his feet.
Mugatu lands an elbow that was bordering on illegal but the referee lets it go with a warning.
Mugatu has the superior BJJ but he's also working some ground strikes into his gameplan.
Mugatu looking to control and managing it successfully.
Mugatu fakes a shot to the body and cracks his opponent in the head. Nice ground and pound there!
Rutten tries to hold on but Mugatu postures up.
Mugatu wants to control the pace but Rutten is squirming around nicely.
And thats the end of the round the fighters go back to their corners.
Jacobim Mugatu dominated that round.
The minute break is over - no more time for sponges and pep talks - back to the action!
Mugatu avoids the head kick by Rutten.
Rutten shoots in for a takedown and gets it. Let's see what he's got on the mat.
Rutten wants to control from the top but Mugatu keeps moving.
Rutten is looking to stand up but Mugatu won't let him.
Rutten trying desperately to get back to his feet here but he's not having any joy at all. He's going to tire himself out if he's not careful.
Mugatu working from the bottom, still in full guard. He's managed to get a loose triangle. Rutten doesn't seem to be doing much to defend here, obviously he feels comfortable in the position. Rutten manages to throw the legs off his shoulder and he's back into guard - no problem.
Mugatu has a closed guard, preventing Rutten from standing up.
Mugatu is breathing heavily.
A big thud reverberates around the arena there as Rutten accidentally thumps the mat. Hopefully he's not broken his hand.
That's one minute gone in the round.
Mugatu manages to sweep nicely, so he's now on top. Rutten manages to get himself to full guard.
Mugatu wants to control from the top but Rutten keeps moving.
Rutten controlling Mugatu's posture.
Mugatu wants to control from the top but Rutten keeps moving.
That's two minutes gone in the round.
The crowd are hurling abuse towards the fighters... You can hardly blame them though because there isn't a lot going on in the fight.
Mugatu is in a good position here but he's just trying to control... And he's not even managing to do that successfully.
It looks like we're going to have a standup here. Neither fighter is doing enough on the ground.
Rutten clinches up against the cage.
Rutten jumps guard and drags Mugatu to the mat. He's obviously going to be looking for submissions off his back.
Jacobim Mugatu has got the better of the ground game so far.
Mugatu slips nicely into half guard.
Mugatu prevents Rutten from standing back up.
Mugatu wants to control but Rutten is keeping him busy.
Rutten is holding on to half guard well.
Mugatu is scoring with some nice ground and pound from the dominant position.
That's three minutes gone in the round.
Mugatu seems very keen to just sit and control from half guard but Rutten does not like that idea so much and is remaining active off his back.
Rutten has no desire to be mounted, so is trying to control. Mugatu is working away from the top position though.
Rutten is looking to improve his position.
Mugatu is trying to control the action in half guard but Rutten is working away on the bottom, looking perhaps to get back to full guard.
Rutten desperately trying to maintain half guard.
We've had a lack of effective grappling in the last minute or so, which could well see a referee standup.
Rutten has no desire to be mounted, so is trying to control. Mugatu is working away from the top position though.
Mooney Rutten has forced the referee to step in and bring the fight back to the feet.
Rutten swings for the body but Mugatu moves out of range.
That's four minutes gone in the round.
Well. There's a bit of a lull in the action here and the crowd are starting to get restless.
Rutten throws a half hearted mid kick.
A combination from Rutten does no damage.
Rutten wants to clinch
and Mugatu counters with a nice single leg takedown and he's in Rutten's guard now.
Mugatu engaging in some classic timewasting tactics.
Mugatu throwing shots from guard but he's hitting more mat than opponent.
Mugatu sitting in guard, not really doing much.
Rutten keeping moving, preventing Mugatu from controlling successfully.
And thats the end of the round the fighters go back to their corners.
Jacobim Mugatu showed his class in that round. I'd imagine he'll take it on all the scorecards.
That's the end of the round. The referee orders the cornermen out of the cage so we can get back down to business. This is the final round!
Rutten fails in his attempt to clinch.
Rutten darts in trying to clinch
and Mugatu counters with a nice single leg takedown and he's in Rutten's guard now.
Rutten can't do much from the bottom at the moment, as Mugatu controls the pace.
Mugatu trying to control the position from guard on top but Rutten is wriggling around, looking for whatever he can.
The referee is pacing around the two fighters - he looks like he's thinking about a standup.
Rutten being controlled here, momentarily.
Mugatu takes a big intake of breath there - he's definitely tired.
OK we're going to have a standup here. Jacobim Mugatu hasn't been effective enough on the ground and the referee wants a restart.
Rutten throws a wild combination but nothing lands.
That's one minute gone in the round.
Rutten scores with a sloppy right hand. Mugatu should have avoided that one.
It looks like Jacobim Mugatu has been cut.
Mooney Rutten seems to be the more aggressive standup fighter in this bout.
Mugatu gets tackled into the cage by Rutten. Rutten maintains the clinch.
Rutten lands a shot to the body.
Mugatu tries to pull guard but Rutten holds him up against the cage and eventually Mugatu drops back down to his feet.
Mugatu goes for a takedown in the clinch but Rutten prevents it.
Rutten manages to break the clinch.
Rutten drops Mugatu with a left and a right! Oh, Mugatu is hurt - Rutten dives into side control looking to finish!
The fans in attendance giving it up for the two fighters, who have really let it all hang out in the last minute or so!
Rutten has had enough of the ground for now and decides to stand.
Rutten with a strong takedown there and he's ended up in side control.
Mugatu is rocked!
Rutten wants to stand but Mugatu is controlling his arm.
That's two minutes gone in the round.
Rutten decides to stand back up.
Rutten fails with an attempt to clinch.
Rutten is looking to clinch.
Rutten misses with a series of wild punches.
Rutten throws a body punch but Mugatu moves out of range.
Rutten is looking to take this fight into the clinch.
Rutten lands a jab to the nose.
Rutten fails to land with a series of punches.
Mugatu dives in and grabs Rutten's left leg, looking for a takedown. Rutten pushes down on Mugatu's head and hops out.
Mooney Rutten has stuffed three takedown attempts in the round now. That's going to take a lot out of Jacobim Mugatu.
Rutten is looking to clinch.
Rutten lands with a nice combination. Mugatu backs away looking to recover.
That has opened up Jacobim Mugatu's cut even more.
Rutten tries to close the distance and clinch but Mugatu swats him to one side with an open hand palm strike and circles away.
That's three minutes gone in the round.
Rutten tries to bum rush Mugatu with a series of wild strikes but Mugatu uses good footwork to avoid the assault.
Rutten throws a combination but comes up with nothing but fresh air.
Rutten swings and misses with a hook to the body.
Mugatu swinging wildly here.
Rutten tries to close the distance and clinch but Mugatu swats him to one side with an open hand palm strike and circles away.
The fight stays on the outside here - Rutten looks like he's thinking about clinching though.
Mugatu shoots in for a takedown. "I don't think so" says Rutten as he avoids it easily.
Rutten throws a hook to the body but it doesn't connect.
Rutten fails in his attempt to clinch.
Rutten uses good footwork to get in and out, landing a nice hook.
Rutten moves in looking to clinch but Mugatu pushes him off.
Rutten forces Mugatu back against the cage and clinches.
Mugatu's head jolts backwards as he takes an uppercut right on the button!
That's four minutes gone in the round.
Rutten gets control of Mugatu's arms and successfully pulls guard. Rutten will no doubt be looking for submissions off his back.
Rutten keeping moving, preventing Mugatu from controlling successfully.
Rutten has control of Mugatu's left arm, preventing Mugatu from doing any damage.
Mugatu trying to control the position from guard on top but Rutten is wriggling around, looking for whatever he can.
As the round comes to an end the crowd are showing their appreciation for a great round of action.
The referee is asking the fighters to pick up the pace.
Mooney Rutten has stepped it up - he knows he needs a finish here!
Jacobim Mugatu is fighting for a decision here - he's started to take the cautious approach.
The ref stands the fighters back up, due to lack of action by Jacobim Mugatu.
Rutten moves into range and throws a big uppercut. OH! Mugatu goes down! Can Rutten finish him!?
And that's the end of the fight!
Mooney Rutten showed his dominance in that final round.
I think Mugatu has won this one but let's see whether the judges agree with me. Over to the ring announcer for the scorecards.
Ladies and gentlemen, after 3 rounds of action, we go to the scorecards for a decision.
Judge Albert Achterberg scores the fight 28:29
Judge Wagner Zegers scores the fight 28:29
Judge Radbod Blank scores the fight 28:29
In favor of your winner, by unanimous decision... Jacobim Mugatu!
|
|
|
|
|
|
|
|
|
|
|
|
|
|
|
|
|
|
|
|
|
|
|
| S |
C
A |
G |
S |
C
B |
G |
|
S |
C |
G |
|
energy
A | B |
|
hype
A | B |
|
pop
A | B |
|
mgr
A | B |
|
FIGHT
RATING
68% |
|
|
|
|
|
|
|
Undercard bout
|
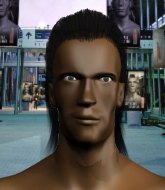
Coming up we have a light heavyweight MMA rules bout between Bas Rutten (ranked 0 p4p, 0 weight class) and Josh Guy (ranked 0 p4p, 0 weight class). Bas Rutten has the better chin. Will he look to stand and bang today?
 |
|
 |
| 187 cm
22
215 lbs
0 - 1 - 0 |
|
185 cm
20
205 lbs
3 - 3 - 0 |
BJJ Blue Belt
Basic striking
Granite chin |
|
BJJ Blue Belt
Counter striker
Determined |
|
| |
|
Ladies and gentlemen. This fight is 3 rounds, in the light heavyweight division.
Introducing the fighter to my left, fighting out of the red corner.
With a record of
0 - 1 - 0, fighting out of Amsterdam, Bas Rutten!
And introducing the fighter to my right, fighting out of the blue corner.
With a record of
3 - 3 - 0, fighting out of Amsterdam, Josh Guy!
The judges for this bout are Daniel Blasius, Nard Betker and Saam Ante.
The bell rings for round one and we are underway!
Rutten shoots in for a takedown and gets it. Let's see what he's got on the mat.
Rutten sitting in guard here, content to control.
Rutten avoids a guillotine attempt easily.
Guy working for submissions but it's allowed Rutten to get to half guard.
Rutten is controlling the pace.
Guy is looking to improve his position.
Rutten slows the pace down in half guard.
That's one minute gone in the round.
Guy wants to improve his position but Rutten is controlling well.
Rutten works his foot free and advances to mount.
Rutten sitting in mount, just looking to control for the moment.
Rutten is standing up, even though he is in mount.
That's two minutes gone in the round.
Rutten looking to shoot here. He's gone for it and he's landed a takedown into mount! Oh, that's bad for Guy!
Rutten prevents Guy from getting the reversal.
Rutten looks like he's working for a submission but he's not found anything just yet.
Rutten tucks in and makes sure he doesn't lose the dominant position.
The fighters are starting to get a bit slippery now, which will make submissions a bit more difficult.
Rutten with good strikes from the mount here!
Guy is trying to escape the mount.
Rutten content just to control the position here.
That's three minutes gone in the round.
Guy is desperately trying to improve his position but Rutten has a good base and remains in mount.
Guy looks gassed!
Rutten controlling the pace for now.
That's four minutes gone in the round.
Well. There's a bit of a lull in the action here and the crowd are starting to get restless.
Guy has given up his back.
Rutten is controlling his opponent, waiting for an opportunity to finish.
Guy is defending well here and trying to improve his position.
Guy is being controlled on the ground here - he must escape this position otherwise surely the end is near.
And thats the end of the round the fighters go back to their corners.
Bas Rutten dominated that round.
The fighters get back to their feet, the hooter sounds and we're back to the action!
A momentary lapse in concentration from Guy enables Rutten to shoot in and score with a neat double leg. Guy manages to secure a closed guard as the fighters hit the mat.
Guy has a loose triangle. He'll be looking to tighten that up but Rutten can see exactly what he's planning and manages to posture up and free himself.
Rutten seems content to control from guard here. He's going to have to remain active though if he doesn't want to get stood back up.
Rutten trying to control but Guy is working from the bottom.
Rutten slows down the pace of the fight, as he sits in guard.
Guy working from the bottom, still in full guard. He's managed to get a loose triangle. Rutten doesn't seem to be doing much to defend here, obviously he feels comfortable in the position. Rutten manages to throw the legs off his shoulder and he's back into guard - no problem.
Rutten sneaks a leg through and gets to half guard. That was like a knife through butter how easily he passed Guy's guard.
Guy is breathing heavily.
That's one minute gone in the round.
Rutten content to sit in half guard and control for a moment.
Rutten passes to full mount!
Rutten looking to control and managing it successfully.
Rutten lands with some strikes.
Rutten controlling the position easily from mount.
That's two minutes gone in the round.
Guy really trying hard to get back to half guard here.
Rutten content just to control the position here.
The fighters are pressed up against the cage, both looking to find a bit of space to work.
Rutten landing strikes from the mount.
Rutten controlling his opponent.
Rutten working for a submission but Guy is keeping him at bay.
That's three minutes gone in the round.
Rutten content just to control the position here.
Guy is desperately trying to improve his position but Rutten has a good base and remains in mount.
Rutten tucks in and makes sure he doesn't lose the dominant position.
Rutten working the ground and pound effectively.
Rutten controlling from mount.
That's four minutes gone in the round.
Rutten is working for a guillotine from mount but Guy frees his head quite easily.
Rutten unloading with bombs!
Rutten controlling from the full mount.
Rutten raining down hammerfists from mount.
And thats the end of the round the fighters go back to their corners.
Bas Rutten dominated that second round.
The referee calls time. The cornermen exit stage left and we're back to business. This is the final round!
Rutten decides to change it up a bit and drives through with a nice takedown into half guard.
Guy is looking to sinch up a guillotine here but Rutten pulls his head out easily.
Rutten is controlling the pace.
The ref warns both fighters not to hold the cage as they work up against the meshing.
Guy takes a big intake of breath there - he's definitely tired.
The referee must be thinking about standing these guys back up.
The ref stands the fighters back up. Bas Rutten wasn't doing enough on the ground.
Rutten closes the distance and scores a nice trip takedown into half guard. Guy did well to prevent Rutten getting side control.
That's one minute gone in the round.
Rutten is just sitting in half guard, waiting for something to happen.
Rutten is working hard to pass the guard. He's done it - he's now in full mount! Trouble for Guy!
Rutten controlling the pace for now.
That's two minutes gone in the round.
It looks like the ref is thinking about a standup.
The ref stands the fighters back up because Bas Rutten just wasn't active enough.
Rutten shoots in for a takedown and gets it. Let's see what he's got on the mat.
Rutten seems content to control from guard here. He's going to have to remain active though if he doesn't want to get stood back up.
That's three minutes gone in the round.
The referee must be thinking about standing these guys back up.
Rutten's ground tactics aren't going to win him many fans. Let's hope he's got fireworks for us if he gets back to his feet because he's not doing much on the ground.
We're going to have a standup here because Bas Rutten wasn't active enough for the referee's liking.
Rutten throws a loose over hand right and dives in with a double leg takedown. Guy tries to sprawl but it's too late and the fighters hit the mat. Rutten is in Guy's guard.
Guy being controlled here, momentarily.
That's four minutes gone in the round.
Bas Rutten is fighting for a decision here - he's started to take the cautious approach.
Guy has a butterfly guard looking to sweep but Rutten has passed into side control.
Rutten controlling the position.
Rutten tries to advance to mount but Guy denies him.
Rutten is moving around in side control but his primary objective seems to be to maintain the position.
And that's the end of the fight!
Bas Rutten showed his dominance in that final round.
Well Rutten has outscored his opponent in every aspect of the fight today. Only a scarily incompetent judge or two will keep him from a well deserved win... Over to the ring announcer for the scorecards.
Ladies and gentlemen, after 3 rounds of action, we go to the scorecards for a decision.
Judge Daniel Blasius scores the fight 30:25
Judge Nard Betker scores the fight 30:25
Judge Saam Ante scores the fight 30:26
In favor of your winner, by unanimous decision... Bas Rutten!
|
|
|
|
|
|
|
|
|
|
|
|
|
|
|
|
|
|
|
|
|
|
|
| S |
C
A |
G |
S |
C
B |
G |
|
S |
C |
G |
|
energy
A | B |
|
hype
A | B |
|
pop
A | B |
|
mgr
A | B |
|
FIGHT
RATING
40% |
|
|
|
|
|
|
|
Undercard bout
|
Coming up we have a heavyweight MMA rules bout between Michael Gleiser (ranked 0 p4p, 0 weight class) and Corey Sabu (ranked 0 p4p, 0 weight class). Sabu has chosen SIC as his entrance music. Both fighter's entrance songs getting the crowd jumping here.
 |
|
 |
| 190 cm
26
231 lbs
0 - 0 - 0 |
|
225 cm
22
269 lbs
1 - 3 - 0 |
BJJ Blue Belt
Solid boxing
Very strong |
|
BJJ Blue Belt
Brawler
Tends to cut |
|
| |
|
Ladies and gentlemen. This fight is 3 rounds, in the heavyweight division.
Introducing the fighter to my left, fighting out of the red corner.
With a record of
0 - 0 - 0, fighting out of Amsterdam, Michael Gleiser!
And introducing the fighter to my right, fighting out of the blue corner.
With a record of
1 - 3 - 0, fighting out of Amsterdam, Corey Sabu!
The judges for this bout are Patrick Alders, Radbod Blank and Paul Aken.
The bell rings for round one and we are underway!
Sabu lands a jab.
It looks like Michael Gleiser has been cut.
Gleiser moves out of range as Sabu strikes.
Corey Sabu seems to be the more aggressive standup fighter in this bout.
Sabu throws a poor cross that misses
and Gleiser counters with a good right hand that lands right on the jaw.
It looks like Corey Sabu has been cut.
Sabu circles away from the clinch attempt.
Sabu thows a left - swing and a miss!
Sabu misses with a hook
and Gleiser counters with a crisp right that sends Sabu to the canvas! Gleiser follows up with punches from the mount and this one is all over!
Ladies and gentlemen, after 0:17 of round 1, we have a winner by way of TKO (Strikes). Michael Gleiser!
|
|
|
|
|
|
|
|
|
|
|
|
|
|
|
|
|
|
|
|
|
|
|
| S |
C
A |
G |
S |
C
B |
G |
|
S |
C |
G |
|
energy
A | B |
|
hype
A | B |
|
pop
A | B |
|
mgr
A | B |
|
FIGHT
RATING
100% |
|
|
|
|
|
|
|
Undercard bout
|
Coming up we have a welterweight MMA rules bout between Georges St Pierre (ranked 0 p4p, 0 weight class) and Kavkaz Nurmagomedgadjiev (ranked 0 p4p, 0 weight class). Kavkaz Nurmagomedgadjiev struggled to make weight for this fight. He only made it down to 172.0lbs at the first attempt and had to take the additional two hours to make the official bout weight. Let's see how much it's taken out of him. Over to our ring announcer for the fighter introductions!
 |
|
 |
| 178 cm
21
170 lbs
2 - 1 - 0 |
|
180 cm
26
175 lbs
2 - 2 - 0 |
Good takedowns
Counter striker
Cuts easily |
|
Good wrestler
Brawler
Heavy handed |
|
| |
|
Ladies and gentlemen. This fight is 3 rounds, in the welterweight division.
Introducing the fighter to my left, fighting out of the red corner.
With a record of
2 - 1 - 0, fighting out of Amsterdam, Georges St Pierre!
And introducing the fighter to my right, fighting out of the blue corner.
With a record of
2 - 2 - 0, fighting out of Amsterdam, Kavkaz Nurmagomedgadjiev!
The judges for this bout are Paulsen Ambrosius, Paul Aken and Albert Achterberg.
The bell rings for round one and we are underway!
Nice uppercut lands for Nurmagomedgadjiev. That snapped St Pierre's head back.
Nurmagomedgadjiev looks really tired already! That doesn't bode well for a good, competitive fight!
Nurmagomedgadjiev tries to grapple but his opponent circles
letting St Pierre counter with a right hand.
St Pierre throws a combination but it was largely blocked by Nurmagomedgadjiev.
St Pierre is looking for a takedown here. He's shot in and has managed to get it, finishing up in Nurmagomedgadjiev's half guard.
St Pierre looking for a kimura but he'll have to free his other leg if he wants to finish that. Perhaps he's just using it as a distraction technique.
We get told so often about how wrestlers don't like to be on their backs. Let's see if Nurmagomedgadjiev can do anything to dispel that myth.
Nurmagomedgadjiev is trying to stand back up but St Pierre is controlling him
St Pierre has hold of the far side arm. He's working for the Kimura, can Nurmagomedgadjiev defend it? St Pierre steps over the head and cranks it - Nurmagomedgadjiev is tapping out! That was textbook stuff right there - nice submission victory for St Pierre!
Ladies and gentlemen, after 0:49 of round 1, we have a winner by way of Submission (Kimura). Georges St Pierre!
|
|
|
|
|
|
|
|
|
|
|
|
|
|
|
|
|
|
|
|
|
|
|
| S |
C
A |
G |
S |
C
B |
G |
|
S |
C |
G |
|
energy
A | B |
|
hype
A | B |
|
pop
A | B |
|
mgr
A | B |
|
FIGHT
RATING
55% |
|
|
|
|
|
|
|
Undercard bout
|
|
|
|
Undercard bout
|
Coming up we have a welterweight MMA rules bout between Ernesto Guevara (ranked 0 p4p, 0 weight class) and Chris Hassel (ranked 0 p4p, 0 weight class). These two fighters really are very evenly matched on the feet - it will be fascinating to see who can assert themselves in that aspect of the fight.
 |
|
 |
| 183 cm
27
180 lbs
4 - 1 - 0 |
|
170 cm
20
176 lbs
2 - 0 - 0 |
BJJ Purple Belt
Excellent boxer
Cuts easily |
|
BJJ White Belt
Decent boxing
Granite chin |
|
| |
|
Ladies and gentlemen. This fight is 3 rounds, in the welterweight division.
Introducing the fighter to my left, fighting out of the red corner.
With a record of
4 - 1 - 0, fighting out of Amsterdam, Ernesto Guevara!
And introducing the fighter to my right, fighting out of the blue corner.
With a record of
2 - 0 - 0, fighting out of Amsterdam, Chris Hassel!
The judges for this bout are Saam Ante, Wagner Zegers and Patrick Alders.
The bell rings for round one and we are underway!
Guevara thows a body shot but no joy.
Hassel swings wildly with a couple of big hooks
and Guevara counters with a straight right hand.
Hassel defending well as Guevara loads up on a big left hand.
Guevara keeps the fight on the outside.
Hassel falls off balance throwing a combination
and Guevara counters with a left and a right that stings Hassel.
Guevara throws a combination that misses
and Hassel counters with a nice uppercut.
It looks like Ernesto Guevara has been cut.
Hassel throws a left and a right that both miss
and Guevara cracks him with a counter punch right on the button.
Guevara looks to land a combination but Hassel avoids it well.
Hassel throws a lazy uppercut
and Guevara counters with a lovely straight right hand!
Guevara misses with a double jab.
Guevara rushes forward with a series of wild hooks but Hassel moves out of range and avoids them all easily.
That's one minute gone in the round.
Guevara shoots in for a takedown but doesn't get it.
Guevara closes this distance looking for a takedown but Hassel circles away.
Guevara showing good head movement there, avoiding the strikes from Hassel.
Guevara misses with a double jab.
Chris Hassel is looking to keep the fight on the feet at all costs.
Hassel closes the distance but Guevara moves to the side
and Guevara counters with a quick right hand to the jaw.
Hassel fails with an attempt to clinch.
Hassel stuffs a takedown. It's all about dictating where the fight takes place and Hassel wants it to stay on the feet.
That's three failed takedown attempts in the round for Ernesto Guevara. That's going to take a lot out of him.
A combination from Guevara does no damage.
That's two minutes gone in the round.
A few boos can be heard. I'm sure they will multiply if the fighters don't pick up the pace.
Guevara closes the distance and clinches.
Hassel scores with an uppercut up the middle.
Hassel stalling here - the referee won't stand for too much of that.
Hassel blocks a couple of punches on the inside.
Guevara blocks a couple of punches on the inside.
Hassel manages to get underhooks and slows down the pace for a moment.
A body shot lands from Hassel.
A body shot lands from Hassel.
Hassel holding his opponent close, against the cage.
Hassel misses with some punches.
Guevara lands punches inside but they're not really causing much damage.
That's three minutes gone in the round.
Hassel blocking some punches.
Hassel is struggling to control the position.
Guevara lands a hook to the body. It's hard to tell if that hurt Hassel or not.
Good anti-grappling being displayed by Hassel as Guevara tries to tie him up.
Guevara doesn't land with the attempted body shot.
Hassel displaying some good clinch control by pressing Guevara up against the cage.
Guevara manages to get underhooks and slows down the pace for a moment.
A head punch on the inside from Hassel fails to land.
Hassel effectively controlling the action here.
A short right hand to the side of the head by Hassel.
That's four minutes gone in the round.
Hassel leaning against his opponent.
The ref breaks the fighters up, due to lack of action by Chris Hassel.
Guevara tries to land with a swinging hook to the body but Hassel was well out of range. Poor timing from Guevara.
Hassel on the wrong end of a nice hook.
Some wild striking there from Guevara.
Guevara will need to tighten up his combinations if he doesn't want to gas himself out, swinging at thin air.
Hassel bobs and weaves well there to avoid the strikes.
Guevara tests Hassel's chin there with a solid looking shot.
Hassel tries to clinch there but Guevara circles away.
And thats the end of the round the fighters go back to their corners.
A close round but Chris Hassel will probably get the nod.
The cut man is working on Ernesto Guevara's cut.
That's the end of the interval. I'm sure that seemed a lot quicker than a minute for our two fighters! Back to the action.
Guevara lands a slapping body shot.
Guevara looks to land a combination. Hassel sees it coming but can only parry a couple of the shots.
Guevara tries to shoot in for a takedown. He's got hold of a leg but Hassel swivels and escapes.
Hassel misses with the combination.
Guevara with a lazy takedown attempt
and Hassel counters with a crisp hook to the side of the head.
Nice sprawl there from Hassel as Guevara shoots in.
That's three failed takedown attempts in the round for Ernesto Guevara. That's going to take a lot out of him.
Hassel rushes in with a sloppy looking punch
and Guevara counters with a one-two to the body.
Guevara misses with the combination.
Guevara lands three nice shots there - that looked like it hurt!
Ernesto Guevara is looking to throw some combinations by the looks of things.
That's one minute gone in the round.
Hassel throws a big shot that misses.
Guevara misses with a takedown attempt - Hassel sprawls well and throws a nice strike on the way out which just misses.
Hassel misses with a double jab
enabling Guevara to counter with a crisp jab.
Hassel throws a left and a right that both miss
and Hassel takes a counter punch right on the button for his troubles.
Guevara showing good head movement there, avoiding the strikes from Hassel.
Ernesto Guevara seems to be the more aggressive standup fighter in this bout.
Hassel misses with a combination
and Guevara counters with a nice jab to the body that keeps Hassel thinking.
Guevara tries for a takedown but Hassel sees it coming a mile off and avoids it easily.
Hassel walks into a jab.
That's two minutes gone in the round.
Hassel swings wildly with a couple of big hooks
and Guevara cracks him with a counter punch right on the button.
Hassel misses with a combination
letting Guevara counter with a right hand.
Guevara uses good footwork to get in and out and land a nice right hand before Hassel has time to react.
Guevara fails to land with a series of punches.
Hassel throws a combination that misses
and Guevara counters with a left and a right that stings Hassel.
A punch lands to the side of Hassel 's head but he takes it in his stride.
Hassel throws a jab, cross combination which is slipped
and Guevara cracks him with a counter punch right on the button.
Guevara throws a combination that misses
and Hassel counters with a left and a right that stings Guevara.
That's three minutes gone in the round.
Guevara closes the distance and scores a nice trip takedown into half guard. Hassel did well to prevent Guevara getting side control.
Guevara seems to be looking for submissions.
Guevara is looking for a kimura here.
Guevara has freed up his trapped foot and advances to mount.
Guevara has hold of an arm here, looking to extend it. He's committed to the armbar attempt here! Will he get it?! Yes! Hassel is forced to tap!
Ladies and gentlemen, after 3:58 of round 2, we have a winner by way of Submission (Armbar). Ernesto Guevara!
|
|
|
|
|
|
|
|
|
|
|
|
|
|
|
|
|
|
|
|
|
|
|
| S |
C
A |
G |
S |
C
B |
G |
|
S |
C |
G |
|
energy
A | B |
|
hype
A | B |
|
pop
A | B |
|
mgr
A | B |
|
FIGHT
RATING
29% |
|
|
|
|
|
|
|
Co-main event
|
Coming up we have a light heavyweight MMA rules bout between Vladimir Krenik (ranked 0 p4p, 0 weight class) and Tony Mac (ranked 0 p4p, 0 weight class). Krenik comes to the cage accompanied by Pain. Both fighters look fresh as a daisy as they make their way towards the cage.
 |
|
 |
| 190 cm
24
205 lbs
4 - 1 - 0 |
|
188 cm
23
215 lbs
2 - 0 - 0 |
BJJ Purple Belt
Solid boxing
KO power |
|
Powerful takedowns
Counter striker
Powerful |
|
| |
|
Ladies and gentlemen. This fight is 3 rounds, in the light heavyweight division.
Introducing the fighter to my left, fighting out of the red corner.
With a record of
4 - 1 - 0, fighting out of Amsterdam, Vladimir Krenik!
And introducing the fighter to my right, fighting out of the blue corner.
With a record of
2 - 0 - 0, fighting out of Amsterdam, Tony Mac!
The judges for this bout are Paul Aken, Daniel Blasius and Radbod Blank.
The bell rings for round one and we are underway!
Mac shoots and misses
and Krenik counters with a quick right hand to the jaw.
Mac takes a body punch but keeps moving.
Mac has his takedown stuffed
and Krenik counters with a left and a right that stings Mac.
Nice defenses there by Krenik.
Mac moves out of range as Krenik strikes.
Mac bobs and weaves into range and then changes levels and scores with a nice takedown into side control.
Krenik looking for a sweep but Mac has passed into full mount! Oh no!
Krenik is looking to improve his position but Mac isn't that keen on the idea.
That's one minute gone in the round.
Mac looks like he's working for a submission but he's not found anything just yet.
Krenik tries to hold on but Mac postures up.
Mac with some aggressive grappling here. He's looking for submissions here, rather than waiting for the opportunity to counter.
Mac has hold of Krenik's left arm, perhaps looking for a submission. The two fighters tussle over control of the isolated limb and Krenik manages to get his arm back to his side and away from danger.
That's two minutes gone in the round.
Krenik wants to hold on but Mac pushes him away.
Krenik working to try and regain half guard.
Mac goes for an armbar but he's fallen flat on his backside there and now Krenik is on top in guard.
Krenik pressing down on his opponent's thigh, looking to pass guard. Mac is keeping the position for now.
The fighters are pressed up against the cage, both looking to find a bit of space to work.
Mac looking for subs off his back but Krenik has passed one foot through into half guard.
The ref warns both fighters not to hold the cage as they work up against the meshing.
Mac regains full guard. Nicely done.
That's three minutes gone in the round.
Mac looking for submissions off his back, moving his hips, looking for an opening.
Krenik works a leg free and moves into half guard.
Krenik is looking for a kimura. It's going to be difficult to finish that from half guard though and Mac defends it well.
Krenik wants to pass the guard but Mac is defending well.
Krenik seems to be working for a kimura but Mac defends the submission attempt.
Mac is looking to sinch up a guillotine here but Krenik pulls his head out easily.
Both fighters really going for it on the ground here!
Mac looking to work for a kimura from the bottom.
Mac looking for submissions off his back.
That's four minutes gone in the round.
Krenik wants to work for an arm triangle but Mac is really keeping half guard well and defending the submission attempt.
Mac is looking to regain full guard. Not this time though.
Krenik seems to be working for a kimura but Mac defends the submission attempt.
Krenik is breathing heavily.
Mac actively working from the bottom here.
Mac trying to control here.
Mac works his way to full guard. Good work.
And thats the end of the round the fighters go back to their corners.
A close round but Tony Mac will probably get the nod.
That's the end of the round. The referee orders the cornermen out of the cage so we can get back down to business.
Krenik looks to land a right hand but Mac moved out of range.
Mac misses with a takedown
and Krenik counters with a one-two to the body.
Donk. Krenik catches Mac right on the button with a cross.
Krenik bobs and weaves and unloads with a good uppercut.
Mac with a poor takedown
and Krenik counters with a stiff right hand.
Krenik misses with an uppercut. Mac saw that one coming.
Krenik misses with a straight left.
Decent striking displayed by Krenik there.
Mac shoots in but doesn't get the takedown
and Krenik counters with a left and a right that stings Mac.
Vladimir Krenik has stuffed three takedown attempts in the round now. That's going to take a lot out of Tony Mac.
That's one minute gone in the round.
The fighters circle momentarily. Krenik darts into range and connects with a nice straight punch.
Krenik tries to bum rush Mac with a series of wild strikes but Mac uses good footwork to avoid the assault.
Mac moves his head to the side to avoid a jab but walks straight into a cross.
Krenik throws a right and a left that both miss.
Mac throws a left and a right that both miss
and Krenik counters with a shot to the ribs. That looked like it hurt.
Krenik lands an overhand left. A wild punch that just about connected.
Mac tries for a takedown but Krenik circles away easily
and Krenik counters with a lovely straight right hand!
Mac is breathing heavily.
Krenik scores with a decent looking hook.
That's two minutes gone in the round.
Krenik looks to land a right hand but Mac moved out of range.
Krenik tests Mac's chin there with a solid looking shot.
Krenik moves out of range as Mac strikes.
Mac shoots in but doesn't get the takedown
and Krenik counters with a crisp hook to the side of the head.
Krenik tries to bum rush Mac with a series of wild strikes but Mac uses good footwork to avoid the assault.
Nice shot lands for Krenik.
Vladimir Krenik seems to be the more aggressive standup fighter in this bout.
Krenik scores with a crisp jab that stopped Mac in his tracks.
That's three minutes gone in the round.
Mac misses with a half-hearted attempt at a head kick.
Krenik lands a right hook to the body.
Mac wants to clinch.
Krenik is moving around nicely and scores here with a single head shot.
Krenik getting the better of the striking in that exchange.
A decent looking cross lands there for Krenik.
Mac bobs and weaves well there to avoid the strikes.
Vladimir Krenik is winning the standup battle so far.
Mac throws the kick towards the body but Krenik avoids it.
That's four minutes gone in the round.
Krenik lands a jab followed by a nice looking cross.
Krenik just misses with a punch to the body.
Nice body punch from Krenik.
Mac shoots in but doesn't get the takedown
and Krenik connects with a straight left hand counter down the middle.
Mac fails with the takedown
and Krenik counters with a nice uppercut.
The crowd applaud the fighters efforts here as the round comes to an end.
A swing and a miss from Krenik.
Mac has a pretty nasty looking mouse under his right eye.
Krenik cracks Mac with a good jab.
And thats the end of the round the fighters go back to their corners.
Vladimir Krenik dominated that second round.
That's the end of the round. The referee orders the cornermen out of the cage so we can get back down to business. This is the final round!
Krenik with a body punch. A glancing blow.
Mac with a poor takedown
and Krenik counters with a lovely straight right hand!
Krenik misses with an uppercut. Mac saw that one coming.
A left and a right from Krenik both land. Nice combination.
Mac changes levels and drives through with a really nice takedown into side control. Krenik looks really pissed at himself for not defending that better.
Mac misses with a strike but at least he's keeping busy, looking to cause some damage - that will still help him when it comes to the judges scorecards.
Mac looking for an arm triangle but it's way too loose to do anything.
Krenik explodes and escapes back to his feet! Nice escape there!
That's one minute gone in the round.
Krenik lands a nice shot that snaps Mac's head back.
Mac takes a big intake of breath there - he's definitely tired.
Mac takes one on the chin but seems OK.
Nice shot lands for Krenik.
Krenik is the aggressor but that punch slipped nicely by Mac.
Mac misses with a takedown
and Krenik cracks him with a counter punch right on the button.
Krenik throws a shot to the body.
Mac uses good footwork to avoid the strikes from Krenik.
Mac throws a right hand that misses
and Krenik counters with a straight right hand.
Vladimir Krenik is looking to keep the fight on the feet at all costs.
That's two minutes gone in the round.
Krenik swinging wildly here.
Krenik throws a hook but Mac blocks it.
Krenik misses the jab.
Krenik throws a right and a left that Mac avoids nicely.
Krenik ducks low and lands a nice hook to the body of his opponent.
Mac gets his takedown attempt stuffed easily
letting Krenik counter with a right hand.
Vladimir Krenik has stuffed three takedown attempts in the round now. That's going to take a lot out of Tony Mac.
Mac defending well as Krenik loads up on a big left hand.
That's three minutes gone in the round.
Krenik lands a nice hook to Mac's body. Mac takes it in his stride and looks to land his own strikes.
Mac uses good head movement to avoid the hook from Krenik.
Mac doesn't succeed with the takedown
and Krenik cracks him with a counter punch right on the button.
Krenik takes a swing at Mac's ribcage but misses.
Krenik with a jab.
Mac slips under a jab.
Mac ducks under a wild hook from Krenik.
Krenik throws a jab when Mac was well out of range.
Mac shoots in for a takedown and gets it. Oh and he's advanced to full mount straight away.
That's four minutes gone in the round.
Krenik can't escape the position.
Mac working for a guillotine from mount but Krenik is in no mood to give up.
Krenik really trying hard to get back to half guard here.
Krenik manages to regain half guard whilst avoiding the strikes.
Mac is looking for a kimura but he's never going to get it from there.
Mac seems to be looking for submissions.
And that's the end of the fight!
That was a close round. You could make an argument for either fighter but I would give it to Vladimir Krenik.
I think Krenik has won this one but let's see what the judges have to say. Over to the ring announcer for the scorecards.
Ladies and gentlemen, after 3 rounds of action, we go to the scorecards for a decision.
Judge Paul Aken scores the fight 29:27
Judge Daniel Blasius scores the fight 29:27
Judge Radbod Blank scores the fight 29:27
In favor of your winner, by unanimous decision... Vladimir Krenik!
|
|
|
|
|
|
|
|
|
|
|
|
|
|
|
|
|
|
|
|
|
|
|
| S |
C
A |
G |
S |
C
B |
G |
|
S |
C |
G |
|
energy
A | B |
|
hype
A | B |
|
pop
A | B |
|
mgr
A | B |
|
FIGHT
RATING
50% |
|
|
|
|
|
|
|
Main event
|
Coming up we have a heavyweight MMA rules bout between Hoelie Gan (ranked 0 p4p, 0 weight class) and Marek Pudzianiszyn (ranked 0 p4p, 0 weight class). The fight MMA fans around the world have waited their entire lives for!
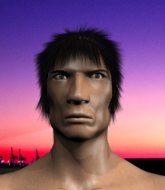 |
|
 |
| 198 cm
19
248 lbs
3 - 1 - 0 |
|
200 cm
25
270 lbs
2 - 0 - 0 |
BJJ Purple Belt
Counter striker
KO power |
|
BJJ White Belt
Decent boxing
Granite chin |
|
| |
|
Ladies and gentlemen. This fight is 3 rounds, in the heavyweight division.
Introducing the fighter to my left, fighting out of the red corner.
With a record of
3 - 1 - 0, fighting out of Amsterdam, Hoelie Gan!
And introducing the fighter to my right, fighting out of the blue corner.
With a record of
2 - 0 - 0, fighting out of Amsterdam, Marek Pudzianiszyn!
The judges for this bout are Wagner Zegers, Nard Betker and Patrick Alders.
The bell rings for round one and we are underway!
Pudzianiszyn looks to clinch
and Gan counters with a nice uppercut.
Pudzianiszyn moves to clinch but Gan breaks away
and Gan cracks him with a counter punch right on the button.
Gan keeping his hands up high there, blocking the jab from Pudzianiszyn.
Gan scores with a nice takedown into half guard. Let's see what he's got on the ground.
Gan is trying to control. Pudzianiszyn wants to improve his position but can't escape this time.
Gan controlling the action here.
Pudzianiszyn pushes Gan off and gets back to his feet.
Pudzianiszyn decides to change it up a bit and drives through with a nice takedown into half guard.
Gan gets full guard.
The fighters are pressed up against the cage, both looking to find a bit of space to work.
Pudzianiszyn is trying to tuck his arms in to keep them safe but Gan has managed to isolate one of them and has got a loose triangle. Pudzianiszyn is looking to defend but Gan has done well to lock his legs together - this could be big trouble for Pudzianiszyn! Gan pulls down on the head and a little smile comes across his face - he knows he's got it. Yep, Pudzianiszyn taps out and this one is all over!
Ladies and gentlemen, after 0:58 of round 1, we have a winner by way of Submission (Triangle). Hoelie Gan!
|
|
|
|
|
|
|
|
|
|
|
|
|
|
|
|
|
|
|
|
|
|
|
| S |
C
A |
G |
S |
C
B |
G |
|
S |
C |
G |
|
energy
A | B |
|
hype
A | B |
|
pop
A | B |
|
mgr
A | B |
|
FIGHT
RATING
84% |
|
|
|
|
|
|
|
|
|
|
