 |
B!26: Flick! PBP Commentary |
Undercard bout
|
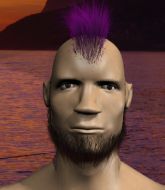
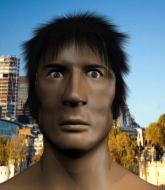
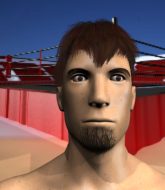
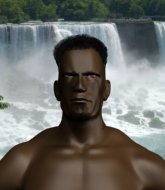
Coming up we have a bantamweight MMA rules bout between Esta me Dinero (ranked 0 p4p, 0 weight class) and Will Messinger (ranked 0 p4p, 0 weight class). These two fighters really are very evenly matched on the feet - it will be fascinating to see who can assert themselves in that aspect of the fight.
 |
|
 |
| 185 cm
28
130 lbs
4 - 7 - 0 |
|
170 cm
29
139 lbs
7 - 14 - 0 |
BJJ Purple Belt
Excellent MT
Very strong |
|
BJJ Purple Belt
Good kicks
Solid chin |
|
| |
|
Ladies and gentlemen. This fight is 3 rounds, in the bantamweight division.
Introducing the fighter to my left, fighting out of the red corner.
With a record of
4 - 7 - 0, fighting out of Sydney, Esta me Dinero!
And introducing the fighter to my right, fighting out of the blue corner.
With a record of
7 - 14 - 0, fighting out of Sydney, Will Messinger!
The judges for this bout are Bruno Hogan, Donatello Bradman and Steve Erwin.

The bell rings for round one and we are underway!
Good leg kick by Messinger there. It's the ones that make that thud noise that hurt and that was an almighty thud.
Dinero looks exhausted already! Oh dear, he should have come in in better shape than this!

Messinger drops Dinero with a left right combo! Messinger follows him down to the ground into side control.

Dinero is rocked!
We must be close to a standup if these guys don't pick up the pace.

Messinger is trying to land an Americana. He has the arm isolated but Dinero is keeping cool and he's avoided the danger for now.
Oh Dinero is still in real trouble! Will he be able to recover?!!
We've seen a great period of action over the last minute or so - credit to both fighters for going all out!
Messinger scores with a big shot from side control... and another... and another! Oh Dinero is done here - save him referee! More strikes land and eventually the ref does step in and Messinger can finally stop beating on his defenseless opponent!
Ladies and gentlemen, after 0:23 of round 1, we have a winner by way of TKO (Strikes). Will Messinger!
|
|
|
|
|
|
|
|
|
|
|
|
|
|
|
|
|
|
|
|
|
|
|
| S |
C
A |
G |
S |
C
B |
G |
|
S |
C |
G |
|
energy
A | B |
|
hype
A | B |
|
pop
A | B |
|
mgr
A | B |
|
FIGHT
RATING
100% |
|
|
|
|
|
|
|
Undercard bout
|
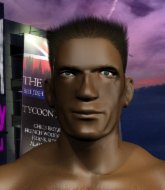
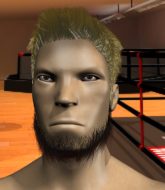
Coming up we have a middleweight MMA rules bout between Michael Soares (ranked 0 p4p, 0 weight class) and Marshall Arts (ranked 0 p4p, 0 weight class). Over to our ring announcer for the fighter introductions!
 |
|
 |
| 183 cm
24
186 lbs
2 - 1 - 1 |
|
196 cm
19
190 lbs
1 - 2 - 0 |
BJJ Blue Belt
Solid Muay Thai
KO power |
|
BJJ White Belt
Excellent MT
Determined |
|
| |
|
Ladies and gentlemen. This fight is 3 rounds, in the middleweight division.
Introducing the fighter to my left, fighting out of the red corner.
With a record of
2 - 1 - 1, fighting out of Sydney, Michael Soares!
And introducing the fighter to my right, fighting out of the blue corner.
With a record of
1 - 2 - 0, fighting out of Sydney, Marshall Arts!
The judges for this bout are Donatello Bradman, Winston Howard and Hugh Johnson.
The bell rings for round one and we are underway!
Arts moves into range and lands a nice leg kick.
Arts throws a right high kick that is partially blocked by Soares.

It looks like Michael Soares has been cut.
Soares shoots in looking for a double leg takedown. Arts defends it nicely.
Soares shoots in for a takedown. He's persisting with it as Arts sprawls well. Arts wins this battle and keeps the fight standing. Soares gets slowly back to his feet.
Arts scores with a leg kick.
Arts scores with a three punch combo!
Wooooo! Give it up for these two warriors! They are putting on a show!
Soares shoots in for a takedown. "Ole!" shouts Arts as he jumps to the side.
That's three failed takedown attempts in the round for Michael Soares. That's going to take a lot out of him.
Like a baseball bat into the meat of his leg there - nice leg kick by Arts.

That's one minute gone in the round.
Arts throws a head kick that misses and slips in the process. He scrambles back to his feet and the fighters circle.
Arts plants his feet and lands a nice head kick!
Soares is rocked!
Arts circles to his right before unloading a perfect head kick! Soares drops to the canvas, hurt badly! Arts follows Soares to the ground and unloads with a series of strikes that force the referee to step in and end the fight! This one is all over!
Ladies and gentlemen, after 1:17 of round 1, we have a winner by way of TKO (Strikes). Marshall Arts!
|
|
|
|
|
|
|
|
|
|
|
|
|
|
|
|
|
|
|
|
|
|
|
| S |
C
A |
G |
S |
C
B |
G |
|
S |
C |
G |
|
energy
A | B |
|
hype
A | B |
|
pop
A | B |
|
mgr
A | B |
|
FIGHT
RATING
64% |
|
|
|
|
|
|
|
Undercard bout
|
Coming up we have a light heavyweight MMA rules bout between Zef Tanghe (ranked 0 p4p, 0 weight class) and Hempii Sapponen (ranked 0 p4p, 0 weight class). Tanghe comes into the arena with blaring out of the sound system. Over to our ring announcer for the fighter introductions!
 |
|
 |
| 190 cm
24
223 lbs
3 - 0 - 0 |
|
180 cm
26
213 lbs
12 - 13 - 0 |
BJJ Purple Belt
Excellent boxer
Granite chin |
|
Good takedowns
Excellent boxer
Heavy handed |
|
| |
|
Ladies and gentlemen. This fight is 3 rounds, in the light heavyweight division.
Introducing the fighter to my left, fighting out of the red corner.
With a record of
3 - 0 - 0, fighting out of Sydney, Zef Tanghe!
And introducing the fighter to my right, fighting out of the blue corner.
With a record of
12 - 13 - 0, fighting out of Sydney, Hempii Sapponen!
The judges for this bout are Donatello Bradman, Skip Squint and Damien Edna.
The bell rings for round one and we are underway!
Sapponen will have to do better than that with his takedown attempts.
Sapponen takes a head kick and keeps coming.

It looks like Hempii Sapponen has been cut.
Tanghe throws a mid kick that lands with a slap.
We've seen a great period of action over the last minute or so - credit to both fighters for going all out!
Tanghe tries a head kick but it misses.
Tanghe looks to land a body kick but Sapponen moved away.
Sapponen moves out of range as Tanghe throws a body kick.
Tanghe misses with a half-hearted attempt at a head kick.
Sapponen tries to clinch up but Tanghe circles away and keeps his distance.
Tanghe swats away the attempt to clinch by Sapponen.
Tanghe keeps the fight on the outside.
Sapponen closes the distance and clinches up with Tanghe, looking for a takedown. Sapponen pushes Tanghe against the cage but Tanghe circles to the side and manages to break the clinch.
Tanghe throws a looping overhand right but Sapponen ducks down to avoid it.
Sapponen checks a leg kick nicely.
That's one minute gone in the round.
Sapponen changes levels and looks for a double leg takedown. Tanghe tries to avoid it but Sapponen manages to keep hold of a leg and drag Tanghe to the ground. Tanghe escapes though and pops straight back up to his feet.
Zef Tanghe has stuffed three takedown attempts in the round now. That's going to take a lot out of Hempii Sapponen.
Sapponen looks frustrated there after his takedown attempt is stuffed easily.
A head kick misses from Tanghe.
Tanghe on the wrong end of an overhand right that came out of nowhere.
Sapponen moves in looking to clinch but Tanghe pushes him off.
Sapponen is looking to take this fight into the clinch.
Sapponen wants to clinch but Tanghe slips to the side
and Tanghe counters with a series of strikes. Sapponen will be more careful next time no doubt.
Tanghe scores with a nice head shot.
This has been an exciting period of action!
Tanghe throws a body punch but Sapponen moves out of range.
Tanghe throws a head kick that misses and slips in the process. He scrambles back to his feet and the fighters circle.

Tanghe fakes a strike and closes the distance, dragging Sapponen to the ground. Tanghe is now in Sapponen's guard.

That's two minutes gone in the round.
Sapponen not looking particularly offensive just at the moment.
The fighters are pressed up against the cage, both looking to find a bit of space to work.
Tanghe controls from within his opponent's guard.
Tanghe wants to stand but Sapponen is controlling his posture from full guard.
Sapponen is trying to keep Tanghe in close.
Tanghe looking to sit in guard and control but Sapponen gets the butterfly guard and sweeps. He's now in the guard on the top.

That's three minutes gone in the round.
Sapponen postures up in Tanghe's guard and throws a big left but Tanghe blocks it.

Sapponen has a momentary lapse of concentration, allowing Tanghe to throw up a leg and lock on what appears to be a pretty tight triangle! Sapponen is fighting it off but it's all too little too late - Tanghe pulls down on the head and he's put Sapponen to sleep! This one is all over!
Ladies and gentlemen, after 3:45 of round 1, we have a winner by way of Submission (Triangle). Zef Tanghe!
|
|
|
|
|
|
|
|
|
|
|
|
|
|
|
|
|
|
|
|
|
|
|
| S |
C
A |
G |
S |
C
B |
G |
|
S |
C |
G |
|
energy
A | B |
|
hype
A | B |
|
pop
A | B |
|
mgr
A | B |
|
FIGHT
RATING
40% |
|
|
|
|
|
|
|
Undercard bout
|
Coming up we have a middleweight MMA rules bout between Dan Bach (ranked 0 p4p, 0 weight class) and Jordan Sood (ranked 0 p4p, 0 weight class). The crowd seem to be enjoying Sood's choice of entrance music: Rap Beat. Both fighters look fresh as a daisy as they make their way towards the cage.
 |
|
 |
| 180 cm
20
190 lbs
2 - 0 - 0 |
|
185 cm
26
185 lbs
5 - 2 - 0 |
BJJ White Belt
Counter striker
Cuts easily |
|
BJJ Blue Belt
Brawler
Determined |
|
| |
|
Ladies and gentlemen. This fight is 3 rounds, in the middleweight division.
Introducing the fighter to my left, fighting out of the red corner.
With a record of
2 - 0 - 0, fighting out of Sydney, Dan Bach!
And introducing the fighter to my right, fighting out of the blue corner.
With a record of
5 - 2 - 0, fighting out of Sydney, Jordan Sood!
The judges for this bout are John Mangel, Hugh Johnson and Damien Edna.
The bell rings for round one and we are underway!
Bach looks for a takedown but Sood sprawls well.
Sood fails with an attempt to clinch.
Sood misses with a body shot. Nice footwork from Bach.
Bach fails with a takedown attempt from distance.

Sood shoots in with a lovely double leg takedown. Bach manages to land in full guard to minimise the damage.
The referee is pacing around the two fighters - he looks like he's thinking about a standup.
Bach is trying to control the position but Sood postures up.
Sood is stalling in the full guard.

Sood stands up from Bach's guard - Sood perhaps looking for a knockout.
That's one minute gone in the round.
Sood tries a switch kick but it misses it's target.
Sood shoots in looking for a takedown. Bach tries to sprawl out of it but Sood keeps driving through. The fighters are pinned against the cage. Bach manages to get underhooks and after a bit of a struggle, circles away and we're back to standing.
Bach shoots in looking for a takedown but Sood manages to keep the fight standing, pushing Bach's face into the canvas for good measure before circling away.
That's three failed takedown attempts in the round for Dan Bach. That's going to take a lot out of him.
Bach with a poor takedown

and Sood counters into the clinch. Nicely done.
Sood prevents Bach from breaking the clinch.
Sood stops a takedown attempt from Bach.
Sood keeps the fight in the clinch, despite Bach's efforts to push away.
Sood can't get the takedown.
That's two minutes gone in the round.

Sood's corner calls for him to break the clinch, which he does.
Bach misses with a takedown attempt - Sood sprawls well and throws a nice strike on the way out which just misses.
Bach shoots in with a takedown attempt and he has Sood pinned against the cage. Sood gets the underhooks and manages to circle away.
Sood drops down and drives through with a powerful takedown into guard.
Sood gets to his feet. Bach looking to butt scoot but the ref puts an end to that. On your feet son!
Wooooo! Give it up for these two warriors! They are putting on a show!
Bach looks frustrated there after his takedown attempt is stuffed easily.
Sood doesn't manage to clinch there - Bach circles away.
That's three minutes gone in the round.
Sood tries a head kick but it misses.
Sood defends well against a solid takedown attempt from Bach.
Bach with a lazy takedown attempt
and Sood counters with a nice body kick.
Bach is breathing heavily.
Bach wants to clinch.
Sood looks to score with a combo but nothing lands.
Sood throws a right high kick that is partially blocked by Bach.
It looks like Dan Bach has been cut.
Bach closes the distance and gets a double leg, slamming Sood to the mat! Sood manages to get full guard.
Sood is trying to control the position from the bottom.
The fans in attendance giving it up for the two fighters, who have really let it all hang out in the last minute or so!
Sood manages to escape and get back to his feet.

That's four minutes gone in the round.
Sood drives through with a really nice takedown into side control.
Sood in side control, just content to control the action for now.
Bach on his back here. We all know that wrestlers don't like being on their back so let's see if Bach tries to get out of the position.
Sood scores with punches from side control.
As the round comes to an end the crowd are showing their appreciation for a great round of action.
Bach is working hard to escape and get back to his feet. After a battle for position, Sood asserts his dominance and retains side control.
And thats the end of the round the fighters go back to their corners.
Jordan Sood dominated that round.
The cut man is working on Dan Bach's cut.
Well, the break between rounds is over. Let's get back to the scrappin!

Sood clinches up with Bach and pushes him back against the cage.
Bach wants to push off and get back to the center of the mat but Sood has him pressed against the cage.
Sood misses with a knee strike.
Sood tries to score a body lock takedown but Bach shows good agility there to stay on his feet.
Bach can't get the takedown.
Bach tries for a takedown. No joy.
Sood breaks the clinch and we return to the middle of the mat.
Bach shoots in for a takedown. "I don't think so" says Sood as he avoids it easily.
That's three failed takedown attempts in the round for Dan Bach. That's going to take a lot out of him.
Bach has his takedown stuffed
and Sood counters with a body kick.
Both fighters are absolutely exhausted here.
A shot to the liver by Sood. Beautiful body shot.
Sood fakes with an overhand right and moves in to clinch with Bach, pushing him back against the cage.
That's one minute gone in the round.
Sood breaks the clinch.
Jordan Sood seems to be getting the better of the standup.
Sood drives through and clinches with Bach against the cage.
Bach tries to pull guard but Sood won't allow it.
Bach is trying to drag Sood to the mat but Sood just about manages to keep his footing. He used the cage to his advantage there.
Sood pulls guard.
Bach avoids a guillotine attempt easily.
Sood has a closed guard, preventing anything of note from happening. Perhaps he's looking to stall.
This is a great period of action - very entertaining stuff!
Sood manages to sweep nicely, so he's now on top. Bach manages to get himself to full guard.
That's two minutes gone in the round.
Bach is wriggling around but Sood manages to pass to half guard.
Sood content to control rather than advance.
Bach keeping his head moving to avoid the ground and pound.
That's three minutes gone in the round.
Sood decides to stand and escape the position.
Sood displays good takedown defense there as he swats away a double leg from Bach.
Sood tries to close the distance and clinch up but Bach swats him away and circles back towards the center.
Sood tries to close the distance and clinch up against the cage but Bach paws at him with a jab and circles away.
Bach shoots for a takedown but Sood saw that one coming a mile off and avoided it easily.
Bach tries for a takedown but Sood circles away easily
enabling Sood to counter with a crisp jab.
That's four minutes gone in the round.
The fight moves into the clinch position.
Sood breaks the clinch.
Sood fails to land the takedown.
Bach with a poor takedown
and Sood counters with a nice leg kick.
Sood closes the distance, clinches up and gets a nice trip takedown into side control. Very smooth.
Wooooo! Give it up for these two warriors! They are putting on a show!
Sood working the head with strikes.
As the round comes to an end the crowd are showing their appreciation for a great round of action.
Sood has knee on belly and moves into mount.
Sood raining down hammerfists from mount.
And thats the end of the round the fighters go back to their corners.
Jordan Sood showed his class in that round. I'd imagine he'll take it on all the scorecards.
The cut man is working on Dan Bach's cut.
Well, the break between rounds is over. Let's get back to the scrappin! So, we enter the final round. Let's see if either fighter can bring us a finish, or whether we're going to the judges scorecards.

Sood throws a sloppy head kick and Bach moves out of range easily.
Sood circles away from the clinch attempt.
Bach doesn't succeed with the takedown
and Sood counters into the clinch. Nicely done.
Sood lands with a light punch inside.
Sood has managed to pull guard. Let's see whether he can work an aggressive guard. It will also be interesting to see what tactics Bach uses from the top position.
Sood keeping moving, preventing Bach from controlling successfully.
Bach knows he needs to get back to his feet asap. He's simply no match for Sood on the ground.
Bach works over Sood with some ground and pound from guard.
Bach has to be careful here, sitting in the guard of a superior BJJ player.
Sood working for a triangle but Bach defends it easily.
Sood looking for a triangle here. Bach is fighting it but it looks tight! Sood pulls the arm across and this one won't last much longer! Nope, Bach is tapping out - this one is all over!
Ladies and gentlemen, after 1:04 of round 3, we have a winner by way of Submission (Triangle Choke). Jordan Sood!
|
|
|
|
|
|
|
|
|
|
|
|
|
|
|
|
|
|
|
|
|
|
|
| S |
C
A |
G |
S |
C
B |
G |
|
S |
C |
G |
|
energy
A | B |
|
hype
A | B |
|
pop
A | B |
|
mgr
A | B |
|
FIGHT
RATING
100% |
|
|
|
|
|
|
|
Undercard bout
|
Coming up we have a heavyweight MMA rules bout between Brock Ransel (ranked 0 p4p, 0 weight class) and Ghetto Zombie (ranked 0 p4p, 0 weight class). Brock Ransel could well score a knockout today. He has the power to get to Ghetto Zombie's chin.
 |
|
 |
| 193 cm
26
280 lbs
3 - 3 - 0 |
|
200 cm
28
270 lbs
4 - 2 - 0 |
Good wrestling
Counter striker
KO power |
|
Decent wrestler
Decent boxing
Powerful |
|
| |
|
Ladies and gentlemen. This fight is 3 rounds, in the heavyweight division.
Introducing the fighter to my left, fighting out of the red corner.
With a record of
3 - 3 - 0, fighting out of Sydney, Brock Ransel!
And introducing the fighter to my right, fighting out of the blue corner.
With a record of
4 - 2 - 0, fighting out of Sydney, Ghetto Zombie!
The judges for this bout are Winston Howard, Damien Edna and Steve Erwin.
The bell rings for round one and we are underway!
Ransel just misses with a punch to the body.
Ransel looking for a takedown here - he's got it.
Ransel is trying to work a guillotine from the top, or something like that? Don't know how he thinks he's going to get a finish from there.
Zombie keeping moving, preventing Ransel from controlling successfully.
Ransel scoring with punches to the head and body.
Zombie keeping full guard, as Ransel tries to pass.
Ransel trying to control the position from guard on top but Zombie is wriggling around, looking for whatever he can.
The ref warns both fighters not to hold the cage as they work up against the meshing.
Ransel drops back for a leg but he's not going to get it - he lets go and Zombie dives on top into guard.
That's one minute gone in the round.
Ransel is pulling down on Zombie's head to control his posture.
Ransel is working the butterfly guard. He manages to land a nice scissor sweep and is now in half guard on the top. Nice move.
Zombie trying to control but Ransel postures up.
Ransel moves nicely into side control.
Ransel trying to control the action but Zombie is working from the bottom.
Zombie is not in a great position here, taking some shots.
It looks like Ghetto Zombie has been cut.
That's two minutes gone in the round.
Ransel trying to control the action but Zombie is working from the bottom.
Ransel is trying to land an Americana. He has the arm isolated but Zombie is keeping cool and he's avoided the danger for now.
Ransel is looking for a kimura. He might have it! No, Zombie has escaped the position, nice work there.
We've seen a great period of action over the last minute or so - credit to both fighters for going all out!
Ransel works to advance to full mount. Zombie defends for a few seconds but eventually he succumbs.
That's three minutes gone in the round.
Ransel jumps to side control looking for an arm triangle but Zombie manages to avoid the submission attempt.
Zombie manages to get one leg in to regain half guard.
Ransel is pressing down on Zombie's thigh, looking to free his foot. Zombie is holding on for now.
Zombie is looking to control Ransel's leg but it's slowly edging free. Can Zombie avoid being mounted?
Ransel thumps the canvas. Not on purpose obviously - he just missed Zombie's head.
Ransel is looking for a kimura but Zombie is holding onto that half guard position, so it's hard for Ransel to get the leverage.
That's four minutes gone in the round.
Ransel is trying to work for a kimura. This could be trouble! No, Zombie has managed to free his arm - good work.
Ransel is trying for a guillotine from the top but the pressure isn't in the right place so Zombie is just riding it out for now. Ransel eventually gives up the hold.
Well, if Ransel is going to just lie there, perhaps we should talk about what we're having for dinner tonight
I'm having a ham and pineapple pizza
Yum. Can't wait.
The crowd applaud the fighters efforts here as the round comes to an end.
Zombie is in trouble now - Ransel has advanced to mount!
And thats the end of the round the fighters go back to their corners.
Brock Ransel dominated that round.
The cut man is working on Ghetto Zombie's cut.
OK. That's time! The bell goes and we're back to the action.
Zombie throws a combination but comes up with nothing but fresh air.
Some wild striking there from Zombie.
Ransel looks to land a left hand but Zombie moved out of range nicely.
Zombie scores with a nice head shot.
Zombie misses with a few strikes there.
Zombie with a lazy takedown attempt
and Ransel counters with a shoot takedown into half guard.
Ransel is thinking about going for an arm triangle but he can't free his leg.
Ransel perhaps working for something from half guard, or maybe not. It looks like he's just sitting there.
That's one minute gone in the round.
Ransel wants to free his trapped foot but Zombie is holding on for dear life with his legs.
Ransel is looking for a kimura but Zombie is holding onto that half guard position, so it's hard for Ransel to get the leverage.
Ransel is trying a forearm choke
I don't think that's going to do much at this level of the game.
Ransel trying to control the pace.
Zombie is breathing heavily.
That's two minutes gone in the round.
Ransel is trying to control. Zombie wants to improve his position but can't escape this time.
Ransel takes a deep breath and rests his weight momentarily on top of his opponent, to control the position.
Ransel passes to side control.
Ransel tries for an arm triangle. That looks pretty tight to me. Is this one over!?! Possibly, maybe, no Ransel has let go of the choke. Obviously it wasn't as tight as we thought!
Ransel wants to work for a kimura but he's foiled early by Zombie, who protects the arm well.
That's three minutes gone in the round.
Ransel advances to full mount.
Ransel landing strikes from the mount and Zombie is in trouble!
Ransel has hold of Zombie's left arm, perhaps looking for a submission. The two fighters tussle over control of the isolated limb and Zombie manages to get his arm back to his side and away from danger.
Ransel working for a guillotine from mount but Zombie is in no mood to give up.
That's four minutes gone in the round.
Ransel landing strikes from the mount.
This is a great period of action - very entertaining stuff!
Ransel wants to control the pace but Zombie is squirming around nicely.
Ransel tucks in and makes sure he doesn't lose the dominant position.
Ransel is really dominating this fight. Is there anything that Zombie can do to turn this around?
Zombie defends a decent attempt at a guillotine from Ransel.
The fighters are pressed up against the cage, both looking to find a bit of space to work.
As the round comes to an end the crowd are showing their appreciation for a great round of action.
Ransel working for a submission but Zombie is keeping him at bay.
And thats the end of the round the fighters go back to their corners.
Brock Ransel dominated that second round.
The cut man is working on Ghetto Zombie's cut.
The minute break is over - no more time for sponges and pep talks - back to the action! Ladies and gentlemen, this is the final round!
Ransel moves forwards but Zombie connects with a nice, crisp jab.
Zombie swats away the attempt to clinch by Ransel.
Zombie swings away but doesn't land with a series of punches.
Zombie gets his takedown attempt stuffed easily

and Ransel moves into the clinch.
Zombie is trying to break the clinch but Ransel is controlling him.
Ransel throws a punch but it's blocked by Zombie.
Ransel gets a nice trip takedown into half guard.
Ransel is trying to control. Zombie wants to improve his position but can't escape this time.
That's one minute gone in the round.
Ransel is trying a forearm choke
I don't think that's going to do much at this level of the game.
Zombie is defending against the submission attempts here by Ransel.
Zombie takes a big intake of breath there - he's definitely tired.
Ransel is trying a forearm choke
I don't think that's going to do much at this level of the game.
Ransel is thinking about going for an arm triangle but he can't free his leg.
That's two minutes gone in the round.
Ransel looking to pass the half guard. Not this time.
Zombie trying to keep hold of his opponent's head but Ransel manages to pass to mount!
Brock Ransel overall seems to be getting the better of the ground position in the fight so far.
Ransel tries to control but Zombie wriggling away.
That's three minutes gone in the round.
Ransel landing strikes from the mount.
The cut above Ghetto Zombie's eye is starting to cause him problems now.
The referee calls the doctor in to look at Ghetto Zombie's cut. Oh no, the doctor has called an end to the bout!
Ladies and gentlemen, after 3:35 of round 3, we have a winner by way of TKO (Cut). Brock Ransel!
|
|
|
|
|
|
|
|
|
|
|
|
|
|
|
|
|
|
|
|
|
|
|
| S |
C
A |
G |
S |
C
B |
G |
|
S |
C |
G |
|
energy
A | B |
|
hype
A | B |
|
pop
A | B |
|
mgr
A | B |
|
FIGHT
RATING
51% |
|
|
|
|
|
|
|
Undercard bout
|
Coming up we have a heavyweight MMA rules bout between Billy Badass (ranked 0 p4p, 0 weight class) and Les Stroud (ranked 0 p4p, 0 weight class). Billy Badass has a significant reach advantage - let's see if he can make it count.
 |
|
 |
| 215 cm
23
278 lbs
7 - 6 - 0 |
|
200 cm
22
273 lbs
7 - 6 - 0 |
BJJ Brown Belt
Excellent boxer
Very strong |
|
BJJ Brown Belt
World class boxer
Good gas tank |
|
| |
|
Ladies and gentlemen. This fight is 3 rounds, in the heavyweight division.
Introducing the fighter to my left, fighting out of the red corner.
With a record of
7 - 6 - 0, fighting out of Sydney, Billy Badass!
And introducing the fighter to my right, fighting out of the blue corner.
With a record of
7 - 6 - 0, fighting out of Sydney, Les Stroud!
The judges for this bout are Damien Edna, Eliza Hachem and Bruno Hogan.
The bell rings for round one and we are underway!
Badass tries to clinch up against the cage, rushing in the close the distance. Stroud manages to break the clinch and circles back to the middle of the mat.
Stroud fails to land with the punch combination there - jab, cross, hook, miss, miss, miss.
Badass fails with an attempt to clinch.
Stroud circles away from the clinch attempt
and Stroud counters with a left to the body.
Badass is looking to clinch.
Stroud loads up on a big right hand but Badass slips the punch.
Stroud connects with a body shot.
Stroud cracks Badass with a good jab.
Badass tries to clinch but Stroud is having none of it.
Stroud swats away the attempt to clinch by Badass.
Badass moves out of range as Stroud strikes.
Stroud bobs and weaves and unloads with a good uppercut.
We've seen a great period of action over the last minute or so - credit to both fighters for going all out!
Stroud misses with a body shot.
Stroud thows a body shot but no joy.
Badass is looking to clinch.
Stroud throws a nice looking combination but Badass bobs and weaves to avoid any damage.
Badass tries to clinch up.
Badass wants to clinch up but Stroud keeps it at a distance.
Badass tries to clinch there but Stroud circles away.
Badass dodges the punch combination from Stroud.
That's one minute gone in the round.
Badass fails with an attempt to clinch.
Stroud throws a combination but it was largely blocked by Badass.
Badass wants to clinch up but Stroud keeps it at a distance.
Wow, both these guys are really going for it!
Stroud circles away from the clinch attempt.
Stroud misses with a series of wild punches.
Badass wants to clinch up but Stroud keeps it at a distance.
Badass avoids the body shot from Stroud.
Stroud looks to land a combination but Badass avoids it well.
Badass tries to move into range but Stroud moves to the side and lands with a nice right hand.
Stroud moves into range and throws a combination. A nice jab followed by a hook to the body.
Badass takes a punch to the jaw and another one to the bread basket.
Stroud throws a hook to the body but it doesn't connect.
Badass moves in looking to clinch but Stroud pushes him off.
Badass tries to close the distance and clinch up against the cage but Stroud paws at him with a jab and circles away.
Stroud fails to land with the punch combination there - jab, cross, hook, miss, miss, miss.
Stroud throws the left hand but Badass avoids the punch easily.
Badass fails in his attempt to clinch.
Stroud misses the body punch
and Badass holds on and brings the fighters into a clinch.
That's two minutes gone in the round.
This is a great period of action - very entertaining stuff!
Stroud lands with a quick shot inside that doesn't really do much damage.
Badass missing with knees to the body.
Stroud lands a shoulder strike that jolts his opponent's head backwards.
With the fighters clinched against the cage, Stroud creates a bit of distance for himself and scores with a nice uppercut.
Stroud lands with a short shot to the head.
A short left from Stroud.
Badass throws an elbow that misses.
Stroud blocks the elbow strike.
Stroud working aggressively here.
Stroud breaks from the clinch.
Nice defenses there by Badass.
Stroud throws a monster uppercut resembling something out of street fighter but it doesn't land.
Badass tries to clinch up but Stroud circles away and keeps his distance.
Badass takes a jab right on the nose. That must have hurt but he shrugs his shoulders and looks to return the favor.
Stroud throws a wild combination but nothing lands.
Badass takes a big uppercut there. He seems a bit wobbly but no, he's OK.
Badass is rocked!
Stroud throws a monster overhand right that drops Badass! Stroud follows up with more strikes from mount and the fight is all over!
Ladies and gentlemen, after 2:56 of round 1, we have a winner by way of TKO (Strikes). Les Stroud!
|
|
|
|
|
|
|
|
|
|
|
|
|
|
|
|
|
|
|
|
|
|
|
| S |
C
A |
G |
S |
C
B |
G |
|
S |
C |
G |
|
energy
A | B |
|
hype
A | B |
|
pop
A | B |
|
mgr
A | B |
|
FIGHT
RATING
85% |
|
|
|
|
|
|
|
Undercard bout
|
Coming up we have a welterweight MMA rules bout between Bors De Camlan (ranked 0 p4p, 0 weight class) and God Devil (ranked 0 p4p, 0 weight class). Bors De Camlan has the better chin. Will he look to stand and bang today?
 |
|
 |
| 190 cm
19
170 lbs
3 - 1 - 0 |
|
180 cm
19
178 lbs
3 - 1 - 0 |
BJJ Purple Belt
Brawler
Granite chin |
|
Good wrestler
Basic striking
Experienced |
|
| |
|
Ladies and gentlemen. This fight is 3 rounds, in the welterweight division.
Introducing the fighter to my left, fighting out of the red corner.
With a record of
3 - 1 - 0, fighting out of Sydney, Bors De Camlan!
And introducing the fighter to my right, fighting out of the blue corner.
With a record of
3 - 1 - 0, fighting out of Sydney, God Devil!
The judges for this bout are Donatello Bradman, Steve Erwin and John Mangel.
The bell rings for round one and we are underway!
Donk. Devil catches De Camlan right on the button with a cross.
De Camlan misses with a head kick.
Devil showing good head movement there, avoiding the strikes from De Camlan.
Devil cracks De Camlan with a nice right hand that draws applause from the crowd.
Devil stuffs the takedown.
Devil connects with a right hand. De Camlan shakes it off.
Devil fakes a jab and then connects with a hook.
De Camlan doesn't succeed with the takedown
and Devil counters with a nice shoot takedown that brings the fighters to the ground.
This is a great period of action - very entertaining stuff!
The referee is asking the fighters to pick up the pace.
De Camlan keeping moving, preventing Devil from controlling successfully.
Devil with a flurry of punches that miss.
Devil really doesn't want to stay on the ground with De Camlan. If he can't get it back to his feet, it's only a matter of time before he'll be tapping out.
Devil trying to land body shots but he keeps hitting the mat.
De Camlan is throwing his legs up, looking for submissions. Devil is aware though and is defending well.
De Camlan is looking for a triangle but Devil pushes his legs off easily.
Devil stands up and looks to throw the legs aside to pass to side control. De Camlan swivels though and keeps the full guard.
Devil working some ground and pound from guard but it's not doing any damage.
That's one minute gone in the round.
De Camlan is working an open guard here, looking to improve his position. No doubt that will leave him open to counters but at least he's being more offensive.
Devil postures up to throw the ground and pound strikes but they don't connect.
Devil lands a nice shot whilst sitting in his opponent's guard.
Devil lands a couple of digs.
Devil working some strikes from top position.
Devil is working De Camlan over from the guard. He should look to pass the guard and do a little more damage with these strikes.
De Camlan preventing the ground and pound from doing any damage.
Devil throwing strikes but missing.
Devil working in close now, lands a nice elbow to the side of De Camlan's head.
This is a great period of action - very entertaining stuff!
De Camlan is active off his back here, looking for submissions.
Both fighters really going for it on the ground here!
De Camlan not looking particularly offensive just at the moment.
Devil content to strike from guard, landing some decent shots.
Devil avoids a guillotine attempt easily.
Devil works over De Camlan with some ground and pound from guard.
That's two minutes gone in the round.
The fighters are going at a pretty good pace and they're both starting to sweat now.
Devil with a couple of shots to the head there. Not particularly brutal.
Devil is in close to De Camlan's body, working some short punches and elbows.
Devil working in close now, lands a nice elbow to the side of De Camlan's head.
De Camlan is active off his back here, looking for submissions.
De Camlan is looking for a triangle but Devil pushes his legs off easily.
De Camlan is breathing heavily.
Devil postures up.
Devil thows a big elbow that misses.
Devil distracts De Camlan with his right hand and drops a big elbow with his other arm.
Devil avoids a guillotine attempt easily.
Devil makes a bit of distance and scores with some ground and pound, still in guard.
Devil scoring with punches to the head and body.
The fighters are pressed up against the cage, both looking to find a bit of space to work.
That's three minutes gone in the round.
De Camlan wants to sweep but no luck.
Devil postures up and lands a big shot to De Camlan's brow.
Devil is in close to De Camlan's body, working some short punches and elbows.
Devil must be cautious of submissions here, given that his opponent has the superior Jiu Jitsu.
Devil throwing strikes but missing.
Devil content to strike from guard, landing some decent shots.
Devil with a nice head shot there.
Devil postures up to throw the ground and pound strikes but they don't connect.
De Camlan is looking for a guillotine. You can't force these things though and Devil defends well.
Devil distracts De Camlan with his right hand and drops a big elbow with his other arm.
Devil trying to control the position from guard on top but De Camlan is wriggling around, looking for whatever he can.
De Camlan looking for submissions from the bottom here. Moving his hips around, possibly looking for an armbar.
The crowd are loving this. Great action here.
Devil lands a nice shot whilst sitting in his opponent's guard.
That's four minutes gone in the round.
Devil scoring with some ground and pound.
The ref warns both fighters not to hold the cage as they work up against the meshing.
De Camlan working the defensive guard well to avoid strikes from Devil.
Devil got a little sloppy there for a moment and De Camlan has worked his way into a loose triangle - can he finish it?! No, Devil has managed to get both his arms back between De Camlan's legs - danger averted.
Devil postures up.
De Camlan looking to sweep here. No luck so far.
Devil postures up and scores with a shot to the body and a follow up elbow to the head.
Devil is working the ground and pound from guard. He might want to try advancing position though to get more of an impact.
Devil lands a couple of elbows.
Devil trying to control the position from guard on top but De Camlan is wriggling around, looking for whatever he can.
Devil throwing shots from guard but he's hitting more mat than opponent.
Devil is trying to work a guillotine from the top, or something like that? Don't know how he thinks he's going to get a finish from there.
The crowd are going absolutely nuts as the round comes to an end - what a fantastic round of action!
Devil chips away with some ground and pound.
Devil cracks De Camlan with a solid left hand.
And thats the end of the round the fighters go back to their corners.
God Devil dominated that round.
That's time! De Camlan's corner gives him a slap on the ass as he gets ready to fight.
De Camlan shuffles to his left behind two crisp jabs. Devil eats them both and turns towards De Camlan to reposition himself and eats a stinging right hand-left hook combo.
Devil lands the left hand.
Devil misses with a hook. De Camlan ducked under it nicely.
Devil shoots in for a takedown! He's got it and he's managed to land in full mount! That's better than Devil was expecting from the takedown attempt, I'm sure!
De Camlan tries to get back to half guard but can't.
Devil lands an elbow that was bordering on illegal but the referee lets it go with a warning.
De Camlan can't escape the position.
De Camlan is working hard here to advance position.
Devil dominating with strikes here.
The crowd are loving this. Great action here.
De Camlan is looking to improve his position but Devil isn't that keen on the idea.
Devil working De Camlan over with strikes here.
De Camlan is wriggling around trying to escape.
Devil with good strikes from the mount here!
De Camlan is rocked!
Devil with a couple of short strikes.
Oh De Camlan is still in real trouble! Will he be able to recover?!!
Devil has been the more effective fighter overall so far.
That's one minute gone in the round.
De Camlan is trying desperately to improve position.
Both fighters are absolutely exhausted here.
Devil landing shots from mount.
Devil controlling from mount.
Devil postures up and lands a whopping elbow - oh that's hurt De Camlan bigstyle! Two more strikes land for Devil and the fight is over!
Ladies and gentlemen, after 1:35 of round 2, we have a winner by way of TKO (Strikes). God Devil!
|
|
|
|
|
|
|
|
|
|
|
|
|
|
|
|
|
|
|
|
|
|
|
| S |
C
A |
G |
S |
C
B |
G |
|
S |
C |
G |
|
energy
A | B |
|
hype
A | B |
|
pop
A | B |
|
mgr
A | B |
|
FIGHT
RATING
100% |
|
|
|
|
|
|
|
Undercard bout
|
Coming up we have a middleweight MMA rules bout between Travis Barker (ranked 0 p4p, 0 weight class) and Mick Trout (ranked 0 p4p, 0 weight class). Over to our ring announcer for the fighter introductions!
 |
|
 |
| 186 cm
23
190 lbs
4 - 1 - 0 |
|
181 cm
20
200 lbs
3 - 1 - 0 |
BJJ Blue Belt
Excellent boxer
Very strong |
|
Powerful takedowns
Counter striker
Good gas tank |
|
| |
|
Ladies and gentlemen. This fight is 3 rounds, in the middleweight division.
Introducing the fighter to my left, fighting out of the red corner.
With a record of
4 - 1 - 0, fighting out of Sydney, Travis Barker!
And introducing the fighter to my right, fighting out of the blue corner.
With a record of
3 - 1 - 0, fighting out of Sydney, Mick Trout!
The judges for this bout are Donatello Bradman, Hugh Johnson and John Mangel.
The bell rings for round one and we are underway!
Trout shoots in looking for a takedown but Barker manages to keep the fight standing, pushing Trout's face into the canvas for good measure before circling away.
Barker lands with a head kick! That's gotta hurt.
Barker throws a leg kick which misses Trout's front leg but catches the back leg as Trout tries to avoid it.
Barker connects with a crisp jab.
Trout drives through with a really nice takedown into side control.
Trout advances to full mount.
The crowd are loving this. Great action here.
Trout misses with a head shot.
Barker tries to buck Trout off but he can't manage it.
Trout thowing strikes but they're hitting the gloves, not doing any damage.
Trout misses with a series of strikes from mount. He'll no doubt be working on his ground and pound when he gets back to the gym.
That's one minute gone in the round.
Barker blocking the ground and pound.
Trout punching from mount but Barker doing a good job of avoiding damage.
Trout sends his fist crashing into the mat - the crowd let out a collective ooooooh. Let's hope he's not broken it!
Trout landing shots from mount.
Trout breaks from Barker's wrist control and lands an elbow.
The fighters are pressed up against the cage, both looking to find a bit of space to work.
Trout landing shots from mount.
Trout throwing sloppy strikes here. Perhaps if he tightened up his striking from such a dominant position, he'd be able to finish easier.
Barker can't escape the position.
The crowd are loving this. Great action here.
A nice elbow there by Trout.
Barker is in a horrible position here, under a barrage of strikes, he's managing to avoid any damage.
Trout is landing with some decent strikes but Barker is trying to advance his position so the referee is letting the fight continue.
Trout scores with a couple of good head shots there.
That's two minutes gone in the round.
Trout throwing shots from mount but they're not landing.
Barker knows he needs to get back to his feet asap. He's simply no match for Trout on the ground.
Barker is breathing heavily.
Trout raining down shots from the mount!
Poor strikes thrown by Trout there. More accuracy and less frantic strikes would help!
The ref warns both fighters not to hold the cage as they work up against the meshing.
Trout looking to ground and pound but Barker is blocking nicely.
Barker blocking the ground and pound.
Trout throwing sloppy strikes, which aren't doing any damage.
Trout thowing strikes but they're hitting the gloves, not doing any damage.
Trout with shots to the head and body - Barker looks very uncomfortable down there.
Trout looking to ground and pound but Barker is blocking nicely.
Trout thowing strikes but they're hitting the gloves, not doing any damage.
That's three minutes gone in the round.
The crowd growing excited in anticipation of a finish here! Right on cue, Trout cracks his opponent with a massive right hand that draws loud cheers!
Barker wriggling around on the bottom manages to avoid the strikes thrown by Trout.
Poor strikes thrown by Trout there. More accuracy and less frantic strikes would help!
Barker on his back here. We all know that wrestlers don't like being on their back so let's see if Barker tries to get out of the position.
Trout connects with a couple of good shots from mount.
Barker is rocked!
This is a great period of action - very entertaining stuff!
Trout looking to ground and pound but Barker is blocking nicely.
Oh Barker is still in real trouble! Will he be able to recover?!!
Trout connects with a bit shot that sees Barker covering up! More strikes from Trout and the referee jumps in to stop the fight! Trout is our winner by TKO!
Ladies and gentlemen, after 3:54 of round 1, we have a winner by way of TKO (Strikes). Mick Trout!
|
|
|
|
|
|
|
|
|
|
|
|
|
|
|
|
|
|
|
|
|
|
|
| S |
C
A |
G |
S |
C
B |
G |
|
S |
C |
G |
|
energy
A | B |
|
hype
A | B |
|
pop
A | B |
|
mgr
A | B |
|
FIGHT
RATING
74% |
|
|
|
|
|
|
|
Co-main event
|
Coming up we have a light heavyweight MMA rules bout between Tony Stark (ranked 0 p4p, 0 weight class) and Nick Vasa (ranked 0 p4p, 0 weight class). Vasa has chosen Highway to Hell(AC/DC) as his entrance music. I'm sure you'll be fascinated to know that I was talking to some pointless Z list celebrity before the fight and he thought that Nick Vasa was going to win. Let's see if he was right.
 |
|
 |
| 190 cm
24
220 lbs
11 - 6 - 0 |
|
187 cm
23
209 lbs
7 - 10 - 0 |
Abu Dhabi Champ
Solid boxing
Insanely flexible |
|
BJJ Purple Belt
Excellent boxer
Heavy handed |
|
| |
|
Ladies and gentlemen. This fight is 3 rounds, in the light heavyweight division.
Introducing the fighter to my left, fighting out of the red corner.
With a record of
11 - 6 - 0, fighting out of Sydney, Tony Stark!
And introducing the fighter to my right, fighting out of the blue corner.
With a record of
7 - 10 - 0, fighting out of Sydney, Nick Vasa!
The judges for this bout are Winston Howard, Eliza Hachem and Damien Edna.
The bell rings for round one and we are underway!
Vasa scores with a nice takedown into half guard. Let's see what he's got on the ground.
The fighters are pressed up against the cage, both looking to find a bit of space to work.
Stark gets back to full guard.
Vasa wants to control from the top but Stark keeps moving.
Vasa postures up to throw the ground and pound strikes but they don't connect.
Vasa wants to stand up, so he's looking to wriggle free of Stark's closed guard. He's half up but Stark has locked on to an arm! Uh oh! Stark pivots and extends the arm, Vasa falls face first to the mat and taps??... does he?? YES! He's tapping! Excellent counter grappling there by Stark! Well done that man!
Ladies and gentlemen, after 0:39 of round 1, we have a winner by way of Submission (Armbar). Tony Stark!
|
|
|
|
|
|
|
|
|
|
|
|
|
|
|
|
|
|
|
|
|
|
|
| S |
C
A |
G |
S |
C
B |
G |
|
S |
C |
G |
|
energy
A | B |
|
hype
A | B |
|
pop
A | B |
|
mgr
A | B |
|
FIGHT
RATING
49% |
|
|
|
|
|
|
|
Main event
|
Coming up we have a light heavyweight MMA rules bout between Alberto Daniels (ranked 0 p4p, 0 weight class) and Handles Mcgee (ranked 0 p4p, 0 weight class). Mcgee has chosen Otis by: Jay-Z f. Kanye West as his entrance music. Handles Mcgee acknowledges the crowd's support as he enters the cage.
 |
|
 |
| 185 cm
22
210 lbs
4 - 0 - 0 |
|
194 cm
20
213 lbs
4 - 1 - 0 |
Good wrestling
Basic striking
Cardio machine |
|
BJJ Purple Belt
Counter striker
Determined |
|
| |
|
Ladies and gentlemen. This fight is 3 rounds, in the light heavyweight division.
Introducing the fighter to my left, fighting out of the red corner.
With a record of
4 - 0 - 0, fighting out of Sydney, Alberto Daniels!
And introducing the fighter to my right, fighting out of the blue corner.
With a record of
4 - 1 - 0, fighting out of Sydney, Handles Mcgee!
The judges for this bout are Skip Squint, Summer Carpenter and Steve Erwin.
The bell rings for round one and we are underway!
Daniels fakes high and swings low for a body shot but Mcgee manages to avoid it.
Daniels ducks down and throws a hook to the body but Mcgee moves away.
Mcgee fails to land with a series of punches.
Daniels stumbles momentarily as he takes a strong leg kick from Mcgee.
Daniels shoots in but doesn't get the takedown
and Mcgee counters with a left to the body.
Daniels dodges the punch combination from Mcgee.
A really sloppy takedown attempt there from Daniels.
Daniels ducks down and throws a hook to the body but Mcgee moves away.
Daniels shoots in for a takedown! He's got it and he's managed to land in full mount! That's better than Daniels was expecting from the takedown attempt, I'm sure!
Daniels trying to control but he's not successful this time.
Daniels lands a shot to the body, followed up by a shot to the exposed head of his trapped opponent.
That's one minute gone in the round.
Daniels unloading with bombs!
Mcgee wants to hold on but Daniels pushes him away.
Daniels lands a big elbow.
Daniels loads up with a big shot that hurts Mcgee! He's pulled Daniels in close but Daniels has postured up and lands more strikes. Can Mcgee survive? More strikes from Daniels and Mcgee is out! The ref jumps in to save him! Brutal ground and pound!
Ladies and gentlemen, after 1:36 of round 1, we have a winner by way of KO (Strikes). Alberto Daniels!
|
|
|
|
|
|
|
|
|
|
|
|
|
|
|
|
|
|
|
|
|
|
|
| S |
C
A |
G |
S |
C
B |
G |
|
S |
C |
G |
|
energy
A | B |
|
hype
A | B |
|
pop
A | B |
|
mgr
A | B |
|
FIGHT
RATING
50% |
|
|
|
|
|
|
|
|
|
|
