 |
PFA 43: Brute Force PBP Commentary |
Undercard bout
|
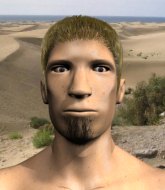
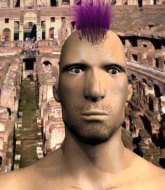
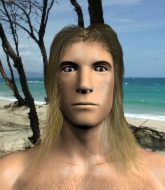
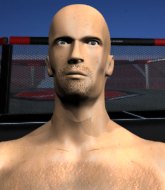
Coming up we have a lightweight MMA rules bout between Mark Jones (ranked 0 p4p, 0 weight class) and Sammy Turbs (ranked 0 p4p, 0 weight class). Both fighters look fresh as a daisy as they make their way towards the cage.
 |
|
 |
| 176 cm
28
153 lbs
9 - 8 - 0 |
|
178 cm
18
153 lbs
0 - 1 - 0 |
BJJ White Belt
Excellent MT
Experienced |
|
BJJ Brown Belt
Basic striking
Solid chin |
|
| |
|
Ladies and gentlemen. This fight is 3 rounds, in the lightweight division.
Introducing the fighter to my left, fighting out of the red corner.
With a record of
9 - 8 - 0, fighting out of London, Mark Jones!
And introducing the fighter to my right, fighting out of the blue corner.
With a record of
0 - 1 - 0, fighting out of London, Sammy Turbs!
The judges for this bout are Donald Grub, Sam Margolis and William Gold.

The bell rings for round one and we are underway!
Jones lunges in with an uppercut that skims his opponent's chin.

Jones rushes Turbs and pushes him back against the cage in a clinch.
Jones lands a damaging elbow.
Turbs is working for takedown but Jones is calmly controlling the position for now.
Jones scores with a knee to the head.
Jones crunches a lovely knee into Turbs's ribcage.
Fantastic stuff here - a very entertaining period of action, which has drawn cheers from the crowd.
A knee to the head by Jones.
Jones with a knee to the head.
Jones with the Thai clinch, lands a knee to the head.

Turbs is rocked!
Jones lands an elbow that stopped Turbs in his tracks for a moment.
Turbs is still on wobbly legs! Can Jones finish him?
Jones connects with a nasty looking knee right to Turbs's face.
Turbs fails to pull guard.
Turbs is pressed against the cage. Jones pushes back and unleashes a big elbow that really hurts Turbs! Two more big strikes from Jones and Turbs crumples to the mat and taps out furiously due to the strikes!
Ladies and gentlemen, after 0:50 of round 1, we have a winner by way of Submission (Strikes). Mark Jones!
|
|
|
|
|
|
|
|
|
|
|
|
|
|
|
|
|
|
|
|
|
|
|
| S |
C
A |
G |
S |
C
B |
G |
|
S |
C |
G |
|
energy
A | B |
|
hype
A | B |
|
pop
A | B |
|
mgr
A | B |
|
FIGHT
RATING
89% |
|
|
|
|
|
|
|
Undercard bout
|
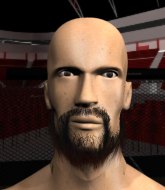
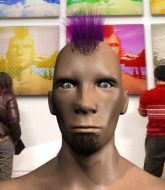
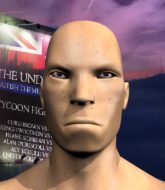
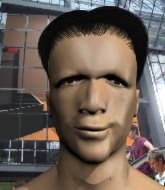
Coming up we have a welterweight MMA rules bout between Danny Haze (ranked 0 p4p, 0 weight class) and Giggs Hollowman (ranked 0 p4p, 0 weight class). Hollowman is bobbing his head along to his entrance song: Movado. Over to our ring announcer for the fighter introductions!
 |
|
 |
| 178 cm
18
178 lbs
2 - 0 - 0 |
|
173 cm
27
154 lbs
6 - 7 - 0 |
Good wrestling
Brawler
Self confident |
|
Decent wrestler
Decent boxing
Granite chin |
|
| |
|
Ladies and gentlemen. This fight is 3 rounds, in the welterweight division.
Introducing the fighter to my left, fighting out of the red corner.
With a record of
2 - 0 - 0, fighting out of London, Danny Haze!
And introducing the fighter to my right, fighting out of the blue corner.
With a record of
6 - 7 - 0, fighting out of London, Giggs Hollowman!
The judges for this bout are Richard Clark, James Atkins and Colin Fotheringham.
The bell rings for round one and we are underway!

Haze shoots in and bounces Hollowman off the cage to secure the takedown into guard.
The referee wants the fighters to be more active or he's going to reset them on the feet.
Hollowman working the defensive guard well to avoid strikes from Haze.
Hollowman preventing the ground and pound from doing any damage.
Haze connects with a couple of short punches.
Haze tries to free his leg and advance position but Hollowman is retaining full guard.
Haze missing there with some ground and pound from the guard.
Hollowman pulls Haze in close to prevent any damage.
Hollowman really doesn't want to stay on the ground with Haze. If he can't get it back to his feet, it's only a matter of time before he'll be tapping out.
Haze postures up and scores with a shot to the body and a follow up elbow to the head.
Hollowman keeping moving, preventing Haze from controlling successfully.
Haze working some ground and pound from guard but it's not doing any damage.

That's one minute gone in the round.
Haze in full guard, throwing the ground and pound. No damage this time.
Hollowman keeping moving, preventing Haze from controlling successfully.
Haze thows a big elbow that misses.
A big thud reverberates around the arena there as Haze accidentally thumps the mat. Hopefully he's not broken his hand.
Hollowman trying to control the position.
Haze trying to control the position from guard on top but Hollowman is wriggling around, looking for whatever he can.
Hollowman working the defensive guard well to avoid strikes from Haze.

That's two minutes gone in the round.
Haze content to strike from guard, landing some decent shots.
Haze sitting in guard here, content to control.
The ref warns both fighters not to hold the cage as they work up against the meshing.
Haze content to strike from guard, landing some decent shots.
Hollowman avoiding any damage from the ground and pound.
Haze chips away with some ground and pound.

Haze drops back looking for a leg! Hollowman is in trouble here! The fighters roll with the hold and Hollowman manages to kick Haze off! Haze jumps back into Hollowman's guard.
Haze is working the ground and pound from guard. He might want to try advancing position though to get more of an impact.

That's three minutes gone in the round.
Hollowman keeping full guard, as Haze tries to pass.
Haze thows a big elbow that misses.
The fighters are pressed up against the cage, both looking to find a bit of space to work.
Hollowman working a defensive guard here.
We get told so often about how wrestlers don't like to be on their backs. Let's see if Hollowman can do anything to dispel that myth.
Haze is looking to work some ground and pound but Hollowman has wrist control.
Hollowman is working from a closed guard but he's struggling to control his opponent.
Haze wants to pass the guard but Hollowman is keeping the position.

That's four minutes gone in the round.
Haze drops back for a leg! It's a sloppy attempt though and Haze jumps back into guard quickly, to retain the dominant position.
Haze throwing elbows and punches but not connecting, as Hollowman works some decent striking defense from the bottom.
Haze throwing strikes from guard but Hollowman blocks nicely.
Hollowman controls Haze momentarily but Haze frees himself.
The crowd applaud the fighters efforts here as the round comes to an end.
Hollowman is in a good position here but he's just trying to control... And he's not even managing to do that successfully.
And thats the end of the round the fighters go back to their corners.
Danny Haze dominated that round.
The fighters get back to their feet, the hooter sounds and we're back to the action!

Haze closes the distance and after a bit of a stuggle, scores a takedown into Hollowman's guard.
Haze throwing elbows and punches but not connecting, as Hollowman works some decent striking defense from the bottom.
Haze trying to land body shots but he keeps hitting the mat.
Haze has been looking to land a fair amount of strikes on the ground. He might be looking to soften his opponent up in order to work for a submission.
Haze thows a big elbow that misses.
Haze thows a big elbow that misses.
Haze with a nice head shot there.
Hollowman trying to keep a closed guard but Haze is proving a slippery customer.
Haze landing some decent shots from guard.
Danny Haze overall seems to be getting the better of the ground position in the fight so far.
Haze thows a big elbow that misses.
That's one minute gone in the round.
Haze throwing elbows and punches but not connecting, as Hollowman works some decent striking defense from the bottom.
Hollowman preventing the ground and pound from doing any damage.
Haze throws a big right hand that misses.
A big thud reverberates around the arena there as Haze accidentally thumps the mat. Hopefully he's not broken his hand.
Haze throws a big right hand that misses.
Haze throwing elbows and punches but not connecting, as Hollowman works some decent striking defense from the bottom.
Haze loading up with the ground and pound but he's missing more than he's landing in this flurry.
Hollowman is trying to control the position but Haze postures up.
Haze throws a big right hand that misses.
That's two minutes gone in the round.
Haze thows a big elbow that misses.
A big thud reverberates around the arena there as Haze accidentally thumps the mat. Hopefully he's not broken his hand.
Hollowman seems keen to control Haze's posture.
Haze trying to control the position from guard on top but Hollowman is wriggling around, looking for whatever he can.
Haze throws a big right hand that misses.
Haze is trying to work a guillotine from the top, or something like that? Don't know how he thinks he's going to get a finish from there.
Haze is frustrating his opponent with some stalling tactics from top position.
That's three minutes gone in the round.
Haze passes Hollowman's right leg, so he's now in half guard.
Hollowman trying to control but Haze postures up.
Hollowman blocking the ground and pound attempt from Haze.
Hollowman has hold of Haze's hands but Haze slips his arm to the side and lands an elbow.
Haze throwing punches and elbows but they're not doing any damage.
That's four minutes gone in the round.
Haze is working for a submission of some sort.
Both fighters are absolutely exhausted here.
Haze passes the half guard and he's now in mount! Big trouble for Hollowman!
Haze throws an elbow from mount that misses. Lucky escape for Hollowman because Haze loaded up on that one.
The crowd applaud the fighters efforts here as the round comes to an end.
Haze connects with a couple of good shots from mount.
And thats the end of the round the fighters go back to their corners.
Danny Haze dominated that second round.
The fighters get back to their feet, the hooter sounds and we're back to the action! This is the final round!

Haze scores a takedown into full mount!
BOOM! Haze connects with a massive shot to the dome!
Haze is landing with some decent strikes but Hollowman is trying to advance his position so the referee is letting the fight continue.
Haze unloading with bombs!
Haze throws some wild stikes that Hollowman manages to avoid easily.
Haze has his opponent pinned against the cage, landing some nasty ground and pound that is really making a bit of a mess out of Hollowman's face.
The crowd cheering loudly, showing their appreciation for the quality fight we're seeing here.
Haze working from mount. He moves in close and looks like he might be going for an arm triangle... He's hopped off to the side and he's transitioned into an Anaconda choke. Hollowman turning a nasty shade of purple. He's refusing to tap but he's gone! He's out! The ref rips Haze off and cradles Hollowman's limp body as Haze celebrates with his corner.
Ladies and gentlemen, after 1:03 of round 3, we have a winner by way of Submission (Anaconda Choke). Danny Haze!
Danny Haze was full of energy after the big win and talked about how he thinks he can do big things in this sport. The crowd were appreciative of his determination to succeed.
|
|
|
|
|
|
|
|
|
|
|
|
|
|
|
|
|
|
|
|
|
|
|
| S |
C
A |
G |
S |
C
B |
G |
|
S |
C |
G |
|
energy
A | B |
|
hype
A | B |
|
pop
A | B |
|
mgr
A | B |
|
FIGHT
RATING
100% |
|
|
|
|
|
|
|
Undercard bout
|
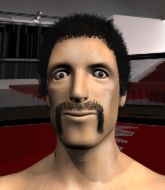
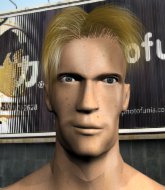
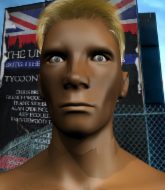
Coming up we have a lightweight MMA rules bout between Junichi Emmeraldo (ranked 0 p4p, 0 weight class) and Scott Wright (ranked 0 p4p, 0 weight class). Emmeraldo comes into the arena with Mystic Forces blaring out of the sound system. Wright has chosen Bullet for my Valentine - Scream Aim And Fire as his entrance music. Buckle up people - heeeeeeeeeere we go!
 |
|
 |
| 178 cm
26
152 lbs
13 - 4 - 0 |
|
176 cm
29
150 lbs
7 - 7 - 0 |
BJJ Purple Belt
Basic striking
Good chin |
|
BJJ Purple Belt
Good kicks
Determined |
|
| |
|
Ladies and gentlemen. This fight is 3 rounds, in the lightweight division.
Introducing the fighter to my left, fighting out of the red corner.
With a record of
13 - 4 - 0, fighting out of London, Junichi Emmeraldo!
And introducing the fighter to my right, fighting out of the blue corner.
With a record of
7 - 7 - 0, fighting out of London, Scott Wright!
The judges for this bout are Sam Margolis, Paul Tew and William Gold.
The bell rings for round one and we are underway!
Emmeraldo bobs and weaves into range and then changes levels and scores with a nice takedown into side control.
The referee is asking the fighters to pick up the pace.
Emmeraldo looking for an arm triangle but it's way too loose to do anything.
Wright wants to escape from the position here - easier said than done!
Emmeraldo is looking for a kimura. He might have it! No, Wright has escaped the position, nice work there.
Wright is trying to escape and get back to his feet.
Wright is looking for a sweep.
Emmeraldo is trying to get an arm triangle but Wright is defending well.
Emmeraldo is looking for a kimura. He might have it! No, Wright has escaped the position, nice work there.
Emmeraldo has hold of Wright's arm here. He's working for an Americana. It looks like he might have it! Wright tries to escape but he's just digging himself in deeper - Emmeraldo cranks the arm and Wright screams in pain! The ref makes a decision and ends the fight before the tap - no complains from Wright, who is just happy to have his arm attached to his body.
Ladies and gentlemen, after 1:03 of round 1, we have a winner by way of Submission (Americana). Junichi Emmeraldo!
|
|
|
|
|
|
|
|
|
|
|
|
|
|
|
|
|
|
|
|
|
|
|
| S |
C
A |
G |
S |
C
B |
G |
|
S |
C |
G |
|
energy
A | B |
|
hype
A | B |
|
pop
A | B |
|
mgr
A | B |
|
FIGHT
RATING
52% |
|
|
|
|
|
|
|
Undercard bout
|
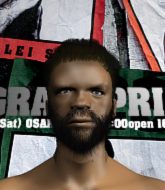
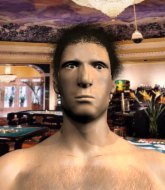
Coming up we have a welterweight MMA rules bout between Tayeb Taheri (ranked 0 p4p, 0 weight class) and Da Mian (ranked 0 p4p, 0 weight class). Da Mian is staring across the cage at his opponent, tweaking his nipples.
 |
|
 |
| 185 cm
23
180 lbs
7 - 9 - 0 |
|
175 cm
25
180 lbs
6 - 4 - 0 |
Powerful takedowns
Counter striker
Very strong |
|
Powerful takedowns
Excellent boxer
Granite chin |
|
| |
|
Ladies and gentlemen. This fight is 3 rounds, in the welterweight division.
Introducing the fighter to my left, fighting out of the red corner.
With a record of
7 - 9 - 0, fighting out of London, Tayeb Taheri!
And introducing the fighter to my right, fighting out of the blue corner.
With a record of
6 - 4 - 0, fighting out of London, Da Mian!
The judges for this bout are Sam Margolis, William Gold and Daniel Bishop.
The bell rings for round one and we are underway!
Mian throws a nice looking combination but Taheri bobs and weaves to avoid any damage.

Mian throws the overhand right but ducks down into a quick takedown attempt. Taheri was covering up waiting for the punch and Mian finishes the takedown easily into guard.
Mian got a little sloppy there for a moment and Taheri has worked his way into a loose triangle - can he finish it?! No, Mian has managed to get both his arms back between Taheri's legs - danger averted.
Mian lands a couple of digs.
Taheri throwing his legs up looking for a triangle.
Mian trying to control the position from guard on top but Taheri is wriggling around, looking for whatever he can.
Mian stands up over Taheri, holding his feet. He dives back in and lands a decent shot to the head.
Mian trying to control but Taheri is working from the bottom.
Taheri has a loose triangle. He'll be looking to tighten that up but Mian can see exactly what he's planning and manages to posture up and free himself.
This is a great period of action - very entertaining stuff!
Taheri is working actively off his back, looking to secure an arm or perhaps work for a triangle.
That's one minute gone in the round.
Mian is pushing down on Taheri's leg trying to pass to half guard. Taheri is fighting to maintain full guard but Mian has managed to sneak the leg through.
Mian missing with the ground and pound from half guard.
Taheri is looking to improve his position.
Mian seems very keen to just sit and control from half guard but Taheri does not like that idea so much and is remaining active off his back.

Mian looking for a kimura but he'll have to free his other leg if he wants to finish that. Perhaps he's just using it as a distraction technique.
The ref warns both fighters not to hold the cage as they work up against the meshing.
Taheri looking for submissions off his back.
The fighters are starting to get a bit slippery now, which will make submissions a bit more difficult.
Mian is working for a submission of some sort.
That's two minutes gone in the round.
Mian trying to control the action but Taheri is working from the bottom.
Mian working Taheri over with strikes.
Taheri is looking to sinch up a guillotine here but Mian pulls his head out easily.
Taheri actively working from the bottom here.
Taheri makes his way to full guard. A much better position for Taheri.
Mian wants to control from the top but Taheri keeps moving.
Mian postures up and lands a big shot to Taheri's brow.
That's three minutes gone in the round.
Taheri throwing rabbit punches from the bottom - showing the judges that he's keeping busy.
Taheri is trying to keep Mian in close.
Mian throwing strikes but missing.
Taheri keeping full guard, as Mian tries to pass.
Taheri has his foot on Mian's thigh. He's trying to push off and get in position for a triangle, I think. Mian works his way back into a safe position though.
Mian looking to pass the guard.
Mian trying to control the position from guard on top but Taheri is wriggling around, looking for whatever he can.
Mian works a leg free and moves into half guard.
Mian seems to be looking for submissions.
Mian is working for a kimura but Taheri is defending it quite comfortably.
Taheri trying to control here.
That's four minutes gone in the round.
Taheri gets full guard.
Mian drops back for a leg! It's a sloppy attempt though and Mian jumps back into guard quickly, to retain the dominant position.
Mian drops back looking for a leg! Taheri is in trouble here! The fighters roll with the hold and Taheri manages to kick Mian off! Mian jumps back into Taheri's guard.
Mian landing with the ground and pound.
This has been an exciting period of action!
As the round comes to an end the crowd are showing their appreciation for a great round of action.
Mian trying to control the position from guard on top but Taheri is wriggling around, looking for whatever he can.
Taheri looking for submissions from the bottom here. Moving his hips around, possibly looking for an armbar.
And thats the end of the round the fighters go back to their corners.
Da Mian dominated that round.
The corners get their ten second warning. Both fighters stand from their stools and stare eachother down, ready to get back to the action.
Mian lands with a two punch combination before moving back out of range.

It looks like Tayeb Taheri has been cut.
Mian keeps the fight on the outside.
A lazy left from Mian finds it's target.
Da Mian seems to be the more aggressive standup fighter in this bout.
Taheri gets in close and instigates a clinch.
The two fighters are working to gain dominance in the clinch.
Taheri wants to break the clinch but can't.
Taheri lands a nice trip takedown into half guard.
Da Mian has got the better of the ground game so far.
Taheri is trying to work for a kimura. This could be trouble! No, Mian has managed to free his arm - good work.
Mian is looking to sinch up a guillotine here but Taheri pulls his head out easily.
The crowd are loving this. Great action here.
Mian actively working from the bottom here.
Mian actively working from the bottom here.
That's one minute gone in the round.
It looks like Taheri is going to stand back up.
Mian actively working from the bottom here.
Taheri is looking to take a break and control but Mian is keeping him honest, looking to work from the bottom.
Taheri is sneakily working for an arm triangle but Mian sees it coming and defends easily.
The fighters are battling for position here. Mian manages to regain full guard. Nice work.
Taheri is taking a break and basically stalling. The referee will not allow him to do that for long.
Mian is active off his back here, looking for submissions.
Mian tries to land a sweep but no joy.
That's two minutes gone in the round.
Taheri postures up in Mian's guard and throws a big left but Mian blocks it.
Taheri distracts Mian with his right hand and drops a big elbow with his other arm.
Taheri trying to control but Mian is working from the bottom.
Mian is trying to control the position but Taheri postures up.
Mian looking for submissions from the bottom here. Moving his hips around, possibly looking for an armbar.
The fighters are pressed up against the cage, both looking to find a bit of space to work.
Mian is looking for a triangle here but Taheri uses the submission attempt to pass into side control.
Mian is breathing heavily.
The crowd cheering loudly, showing their appreciation for the quality fight we're seeing here.
Mian is sneaking out the side here. He's bucked Taheri off and has taken his back!
Taheri trying to control the position but Mian manages to sink in the hooks.
Taheri tries to escape the position - he's now mounted. Is that better or worse? Hard to tell!
Taheri wants to hold on but Mian pushes him away.
Taheri is trying to escape but when you're mounted that's not too easy.
That's three minutes gone in the round.
Mian wants to control the pace but Taheri is squirming around nicely.
Taheri is writhing around trying to get back to his feet.
Mian working for a guillotine from mount but Taheri is in no mood to give up.
Taheri tries to hold on but Mian postures up.
Taheri is not a happy chappy
he wants out of there.
Mian looking to secure an arm triangle but Taheri defends it well.
Taheri really wants to buck Mian off and get back to his feet.
That's four minutes gone in the round.
Mian working away from the top, dropping strikes.
Mian is working for a guillotine from mount but Taheri frees his head quite easily.
Mian looking to control but Taheri is working nicely, looking to advance position himself.
Mian scores with a couple of good head shots there.
This has been an exciting period of action!
Taheri sneaks a leg under to get to half guard.
Taheri is looking to regain full guard. Not this time though.
As the round comes to an end the crowd are showing their appreciation for a great round of action.
Ground and pound from Mian.
Taheri is trying to control but can't.
Mian wants to take a breather but Taheri is having none of it.
And thats the end of the round the fighters go back to their corners.
A close second round but Da Mian will probably get the nod - 10:9.
The cut man is working on Tayeb Taheri's cut.
That's time! Taheri's corner gives him a slap on the ass as he gets ready to fight. And we move into the final round!
Taheri closes the distance and clinches up, looking for a takedown. He shifts his weight and gets a nice trip into half guard.
Both fighters really going for it on the ground here!
Mian is trying to defend against the ground and pound but Taheri scores with a couple of nice shots.
Mian wants to get back to his feet.
Taheri is working for a kimura but Mian is defending it quite comfortably.

Mian kicks Taheri off and gets back to his feet.
Taheri clinches with his opponent.
Mian has Taheri pressed up against the cage. He's trying to work for a single leg takedown. Mian pulls back from the cage and twists to the side, sending Taheri tumbling to the mat - Mian dives into Taheri's guard.
Fantastic stuff here - a very entertaining period of action, which has drawn cheers from the crowd.
Taheri looking to control.
Mian trying to control but Taheri is working from the bottom.
That's one minute gone in the round.
Mian connects with a couple of short punches.
Taheri can't do much from the bottom at the moment, as Mian controls the pace.
Taheri working from the bottom, still in full guard. He's managed to get a loose triangle. Mian doesn't seem to be doing much to defend here, obviously he feels comfortable in the position. Mian manages to throw the legs off his shoulder and he's back into guard - no problem.
Mian sitting in guard here, content to control.
Mian is trying to work a guillotine from the top, or something like that? Don't know how he thinks he's going to get a finish from there.
Mian advances position into side control!
Taheri can't do much from the bottom here.
That's two minutes gone in the round.
Taheri is not content to let Mian control the position.
Mian wants to work for a kimura but he's foiled early by Taheri, who protects the arm well.
Taheri is trying to get back to half guard.
Mian is trying to get an arm triangle but Taheri is defending well.
Mian tries to cartwheel into mount but he doesn't manage it.
Mian working away.
That's three minutes gone in the round.
Mian working the head with strikes.
Taheri is not content to let Mian control the position.
Mian working the body and head with strikes.
Mian grinds an elbow into Taheri's temple.
Taheri is trying to control Mian's posture but Mian avoids it.
Mian slows the pace down.
Mian is trying to land an Americana. He has the arm isolated but Taheri is keeping cool and he's avoided the danger for now.
Taheri is trying to improve his position.
That's four minutes gone in the round.
Mian working hard here to secure a kimura but he's not really in the right position for it.
Mian lands a few punches from side control.
We've seen a great period of action over the last minute or so - credit to both fighters for going all out!
Mian is looking to finish here, going for an Americana. Taheri knows the correct defense though, so he's OK.
Mian takes a big intake of breath there - he's definitely tired.
Mian is looking to finish here, going for an Americana. Taheri knows the correct defense though, so he's OK.
Tayeb Taheri has stepped it up - he knows he needs a finish here!
Da Mian is fighting for a decision - hopefully he's judged it right and he's actually winning the fight.
As the round comes to an end the crowd are showing their appreciation for a great round of action.
Taheri wings away with a couple of strikes but they don't land.
And that's the end of the fight!
Da Mian comfortably won the final round on my scorecard.
I've got Mian winning every round here. Surely the decision will go his way and he'll pick up a well deserved decision victory. Over to the ring announcer for the scorecards.
Ladies and gentlemen, after 3 rounds of action, we go to the scorecards for a decision.
Judge Sam Margolis scores the fight 27:30
Judge William Gold scores the fight 27:30
Judge Daniel Bishop scores the fight 27:30
In favor of your winner, by unanimous decision... Da Mian!
|
|
|
|
|
|
|
|
|
|
|
|
|
|
|
|
|
|
|
|
|
|
|
| S |
C
A |
G |
S |
C
B |
G |
|
S |
C |
G |
|
energy
A | B |
|
hype
A | B |
|
pop
A | B |
|
mgr
A | B |
|
FIGHT
RATING
84% |
|
|
|
|
|
|
|
Undercard bout
|
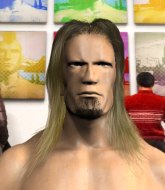
Coming up we have a featherweight MMA rules bout between Keast Durden (ranked 0 p4p, 0 weight class) and Gerald T Inglewood (ranked 0 p4p, 0 weight class). Durden's entrance music is Demon Hunter - Collapsing . A fine choice. Inglewood has chosen Cant Be touched as his entrance music. Both these guys have solid standup skills and neither is particularly fantastic on the ground, so let's hope for a nice standup war!
 |
|
 |
| 176 cm
22
156 lbs
3 - 2 - 0 |
|
187 cm
23
155 lbs
11 - 5 - 0 |
Good wrestling
Great low kicks
KO power |
|
BJJ Blue Belt
Excellent MT
Powerful |
|
| |
|
Ladies and gentlemen. This fight is 3 rounds, in the featherweight division.
Introducing the fighter to my left, fighting out of the red corner.
With a record of
3 - 2 - 0, fighting out of London, Keast Durden!
And introducing the fighter to my right, fighting out of the blue corner.
With a record of
11 - 5 - 0, fighting out of London, Gerald T Inglewood!
The judges for this bout are Daniel Bishop, James Ackerman and Steven Brown.
The bell rings for round one and we are underway!
Inglewood uses good footwork to avoid the strikes from Durden.
Durden looks to land a right hand but Inglewood moved out of range.
Durden misses the jab.
Durden throws a lazy head kick
and Inglewood counters with a lovely straight right hand!
Durden is moving around nicely and scores here with a single head shot.
Durden throws out a token jab with nothing on it.
Inglewood moves away from the strike by Durden.
Inglewood darts in trying to clinch
and Durden moves into the clinch.
Inglewood tries a knee to the head but he's missed.
Inglewood throws a punch but it's blocked by Durden.

Durden manages to break the clinch.
Durden misses the jab.

Inglewood darts in and clinches Durden up against the cage.
That's one minute gone in the round.
Durden manages to break the clinch.
Durden tests Inglewood's chin there with a solid looking shot.
Durden scores with a big left there. The judges will like that one.
Inglewood is rocked!
Durden dances in quickly and lands a nice inside leg kick on Inglewood. That did some damage!
Inglewood is still on wobbly legs! Can Durden finish him?
Inglewood looks gassed!
The fans in attendance giving it up for the two fighters, who have really let it all hang out in the last minute or so!
Durden has Inglewood up against the cage in a clinch.
Durden breaks the clinch and we return to the middle of the mat.
A kick lands to the mid section there for Durden.
Durden takes the fight into the clinch.
Durden pushes off and circles away, back to the middle of the mat.
A chopping leg kick lands by Durden.
Durden shoots in for a takedown. Oh, that's a huge slam! Inglewood is on queer street and Durden is pounding down on him with a barage of strikes. The ref is forced to step in and stop the fight. Great finish!
Ladies and gentlemen, after 1:37 of round 1, we have a winner by way of TKO (Slam). Keast Durden!
Keast Durden decided to thank the fans in attendance for making a great atmosphere. It seemed to go down pretty well.
|
|
|
|
|
|
|
|
|
|
|
|
|
|
|
|
|
|
|
|
|
|
|
| S |
C
A |
G |
S |
C
B |
G |
|
S |
C |
G |
|
energy
A | B |
|
hype
A | B |
|
pop
A | B |
|
mgr
A | B |
|
FIGHT
RATING
100% |
|
|
|
|
|
|
|
Undercard bout
|
Coming up we have a middleweight MMA rules bout between Pete Dunham (ranked 0 p4p, 0 weight class) and Gary Macgregor (ranked 0 p4p, 0 weight class). Macgregor is bobbing his head along to his entrance song: Dragonforce - operation ground and pound. Pete Dunham has a significant reach advantage - let's see if he can make it count.
 |
|
 |
| 185 cm
23
195 lbs
12 - 6 - 0 |
|
170 cm
29
185 lbs
9 - 9 - 0 |
BJJ Blue Belt
Solid boxing
Experienced |
|
Decent wrestler
Decent boxing
Knockout power |
|
| |
|
Ladies and gentlemen. This fight is 3 rounds, in the middleweight division.
Introducing the fighter to my left, fighting out of the red corner.
With a record of
12 - 6 - 0, fighting out of London, Pete Dunham!
And introducing the fighter to my right, fighting out of the blue corner.
With a record of
9 - 9 - 0, fighting out of London, Gary Macgregor!
The judges for this bout are Chris Edwards, James Glass and Sam Margolis.
The bell rings for round one and we are underway!
Macgregor shoots in for a takedown. "Ole!" shouts Dunham as he jumps to the side.
Macgregor gets caught napping as Dunham dives in and scores a takedown. Macgregor manages to retain guard.
The referee must be thinking about standing these guys back up.
Macgregor wants to stand up but Dunham is controlling him.
Macgregor manages to sweep nicely, so he's now on top. Dunham manages to get himself to full guard.
Macgregor content to strike from guard, landing some decent shots.
Dunham keeping moving, preventing Macgregor from controlling successfully.
Macgregor sitting in guard here, content to control.
Dunham avoiding any damage from the ground and pound.
Macgregor trying to control but Dunham is working from the bottom.
That's one minute gone in the round.
Macgregor postures up in Dunham's guard and throws a big left but Dunham blocks it.
Macgregor lands a nice shot whilst sitting in his opponent's guard.
Macgregor drops back for a leg! It's a sloppy attempt though and Macgregor jumps back into guard quickly, to retain the dominant position.
Macgregor stopping the sweep attempt from Dunham.
Macgregor trying to control the position from guard on top but Dunham is wriggling around, looking for whatever he can.
The fighters are pressed up against the cage, both looking to find a bit of space to work.
Dunham tries to land a sweep but no joy.
Macgregor stays in close to Dunham's body and controls the position.
Macgregor distracts Dunham with his right hand and drops a big elbow with his other arm.
That's two minutes gone in the round.
Macgregor lands a couple of elbows.
A big thud reverberates around the arena there as Macgregor accidentally thumps the mat. Hopefully he's not broken his hand.
Macgregor trying to land body shots but he keeps hitting the mat.
Dunham has Macgregor pulled in close to control his posture.
Dunham is breathing heavily.
Macgregor postures up and lands a big shot to Dunham's brow.
Macgregor is pushing down on Dunham's leg trying to pass to half guard. Dunham is fighting to maintain full guard but Macgregor has managed to sneak the leg through.
Fantastic stuff here - a very entertaining period of action, which has drawn cheers from the crowd.
Macgregor stalling.
Macgregor slips a nice elbow through Dunham's hands, connecting with Dunham's forehead.
Macgregor working over Dunham with some ground and pound. Dunham looks like he wants out of this position, which is understandable.
Macgregor throwing shots but they're hitting the canvas more than the man.
That's three minutes gone in the round.
Macgregor thows a huge punch but Dunham dodges it nicely.
Macgregor not landing any meaningful shots this time.
Dunham has hold of Macgregor's hands but Macgregor slips his arm to the side and lands an elbow.
Macgregor thumps the canvas. Not on purpose obviously - he just missed Dunham's head.
Macgregor is nestled in close to Dunham, controlling him well. He's worked in a nice elbow to the side of the head as well, for good measure.
Macgregor working some ground and pound from close in. He's looking to maintain this position and strike for a while by the looks of things... although he'll probably advance to full mount in a minute now I've said that.
Dunham is looking to improve his position.
Macgregor lands with an elbow from half guard - that looked like it hurt.
Macgregor moves into full mount! Dunham won't be happy about that!
Macgregor is landing with some decent strikes but Dunham is trying to advance his position so the referee is letting the fight continue.
That's four minutes gone in the round.
Macgregor with good strikes from the mount here!
The fans in attendance giving it up for the two fighters, who have really let it all hang out in the last minute or so!
Dunham takes a big shot to the head but keeps on trying to improve his position.

Dunham is rocked!
Macgregor with a couple of short strikes.
Oh Dunham is still in real trouble! Will he be able to recover?!!
Oooooh, big shot lands for Macgregor! Dunham is hurt baaadly! Macgregor is firing away with more strikes - Dunham is covering up... the ref is warning him to do something. He's just covering up though still and the ref has to step in to end the fight! This one is all over!
Ladies and gentlemen, after 4:39 of round 1, we have a winner by way of TKO (Strikes). Gary Macgregor!
|
|
|
|
|
|
|
|
|
|
|
|
|
|
|
|
|
|
|
|
|
|
|
| S |
C
A |
G |
S |
C
B |
G |
|
S |
C |
G |
|
energy
A | B |
|
hype
A | B |
|
pop
A | B |
|
mgr
A | B |
|
FIGHT
RATING
56% |
|
|
|
|
|
|
|
Undercard bout
|
Coming up we have a welterweight MMA rules bout between Oliver Strong (ranked 0 p4p, 0 weight class) and Nils Englund (ranked 0 p4p, 0 weight class). Fingers crossed for an exciting fight - I'm sure both fighters are looking for a nice under the table bonus!
 |
|
 |
| 180 cm
29
180 lbs
13 - 10 - 1 |
|
187 cm
26
180 lbs
8 - 11 - 0 |
BJJ Purple Belt
Solid boxing
Very strong |
|
BJJ Blue Belt
Brawler
Solid chin |
|
| |
|
Ladies and gentlemen. This fight is 3 rounds, in the welterweight division.
Introducing the fighter to my left, fighting out of the red corner.
With a record of
13 - 10 - 1, fighting out of London, Oliver Strong!
And introducing the fighter to my right, fighting out of the blue corner.
With a record of
8 - 11 - 0, fighting out of London, Nils Englund!
The judges for this bout are William Gold, Chris Edwards and Daniel Bishop.
The bell rings for round one and we are underway!
Englund will need to close the distance a bit before he attacks - that leg kick was thrown from too far away.
Englund tries to clinch but is not successful on this occasion.
A jab from Englund misses.
A combination from Englund does no damage.
Nils Englund seems to be the more aggressive standup fighter in this bout.
Englund tries to clinch but Strong is having none of it.
Englund swings for the body but Strong moves out of range.
Strong lands with a cross to side of his opponent's head.
Strong swats away the attempt to clinch by Englund.
Englund fails in his attempt to clinch.
Englund looks for a takedown but Strong sprawls well.
Strong uses good head movement to avoid the hook from Englund.
Wow, both these guys are really going for it!
Englund takes a swing at Strong's ribcage but misses.
Strong fakes a head shot and lands one to the body.
Englund doesn't react quick enough there as he takes a shot to the body.
Strong thuds a left hand into Englund's body.
Englund takes a body punch but keeps moving.
Englund moves in looking to clinch but Strong pushes him off.
The crowd are loving this. Great action here.
Strong lands with a cross.
Strong connects with a body shot.
Strong scores with a jab to the head.
Strong lands a jab.
Strong comes forward and lands a shot to the body, then darts back out of range.
That's one minute gone in the round.
Englund swings away but doesn't land with a series of punches.
Strong connects with a hook to the side of his opponent's head.
Strong fakes a jab and then connects with a hook.
Englund fails with a takedown attempt.
Englund looks gassed!
No luck with that takedown attempt from Englund.
Oliver Strong has stuffed three takedown attempts in the round now. That's going to take a lot out of Nils Englund.
Strong lands a lovely overhand right.
Strong lands with a right hand.
Strong fakes a head shot and lands one to the body.
Strong connects with a body shot that sends Englund's belly button to the back.
Strong dips down and scores with a jab to the body.
This has been an exciting period of action!
Strong throws a shot to the body.
Englund takes one to the chin there.
Nice uppercut lands for Strong. That snapped Englund's head back.
Englund takes a body punch that cleary hurt but he's trying not to show any weakness.
Strong fakes a head punch and goes low to the body. Nicely done.
Strong lands a vicious shot with the stealth of a sniper and the strength of a viper. Are vipers that strong? I can think of lots of things that are stronger than a viper - not many rhyme with sniper though.
Strong works Englund's body with a nice hook.
That's two minutes gone in the round.
A jab from Strong finds it's way through Englund's defenses.
Strong lands a jab to Englund's midsection.
Strong cracks Englund with a good shot that sees him stumbling back into the cage.
Englund takes one to the chin there.
Strong lands a beauty of a right hand that gets the crowd cheering.
Englund looks to score with a combo but nothing lands.
Englund walks into a left hand.
Strong with a hook.
Strong with a body punch. A glancing blow.
Strong connects with a jab.
Strong changes levels and scores with a jab to the body.
Strong digs a good hook to Englund's body.
Englund takes a jab on the nose. He smiles like he loves it and keeps coming.
Englund takes one to the chin there.
Jab from Strong.
Englund has his head snapped back a nice jab. A little nod from Englund there as he acknowledges the shot.
Strong scores with a nice right hand.
Strong scores with a shot to the body.
Strong swings wildly with a hook that is half blocked by Englund.
That's three minutes gone in the round.
A chopping leg kick lands by Strong.
Strong connects with a good right hand that stumbles Englund. Englund circles away out of range and recomposes himself.
Strong lands with a thumping leg kick.
Englund takes one to the chin there.
Strong scores with a hook to the body. Englund takes a step back and tries to catch his breath.
Strong tests Englund's chin there with a solid looking shot.
Englund misses with a body kick.
Strong scores with a punch to the gut of his opponent.
Englund throws out a token jab with nothing on it.
Strong with a nice cross.
Strong works his jab well there, keeping his opponent at a distance.
Strong wings a very wild body shot but it does the job and lands to the midsection.
This is a great period of action - very entertaining stuff!
Strong jabs at Englund's body.
Strong lands a nice shot to the body.
Strong dips down and scores with a jab to the body.
Strong scores with a sloppy punch to the body. Not much technique there but it did the business.
Strong lands with a good body shot.
Strong connects with a body shot.
That's four minutes gone in the round.
Englund takes a jab right on the kisser.
Strong keeping a good distance there, avoiding the body shot.
Strong connects with a leg kick. Englund looked like he was expecting something else and didn't defend it.
Strong digs a good body shot into Englund's ribs.
Englund is trying desperately to land a takedown but Strong is having absolutely none of it. This is turning into a bit of a nightmare for Englund.
Strong throws a shot to the body.
A shot to the liver by Strong. Beautiful body shot.
Englund takes a shot right to the liver - Bas would have been proud of that punch.
Nice body punch from Strong.
Englund takes a shot to the body in his stride.
Strong jabs at Englund's body.
Strong bobs and weaves into range and then changes levels and scores with a nice takedown into side control.
Strong is in a dominant position here, looking for a kimura. Englund looks calm but he's in trouble here. Strong gets his leg over his opponent's head and yanks on the arm. Englund is tapping like a morse code operator on the titanic! SOS! SOS! Strong lets go of the hold and Englund can pop his arm back in it's socket.
Ladies and gentlemen, after 4:58 of round 1, we have a winner by way of Submission (Kimura). Oliver Strong!
|
|
|
|
|
|
|
|
|
|
|
|
|
|
|
|
|
|
|
|
|
|
|
| S |
C
A |
G |
S |
C
B |
G |
|
S |
C |
G |
|
energy
A | B |
|
hype
A | B |
|
pop
A | B |
|
mgr
A | B |
|
FIGHT
RATING
78% |
|
|
|
|
|
|
|
Undercard bout
|
Coming up we have a featherweight MMA rules bout between Minanda Passmoor (ranked 0 p4p, 0 weight class) and Paul Grant (ranked 0 p4p, 0 weight class). Minanda Passmoor had a look across the cage there at his opponent. He definitely means business
 |
|
 |
| 164 cm
27
154 lbs
11 - 7 - 0 |
|
182 cm
28
152 lbs
9 - 3 - 0 |
Good wrestling
Great elbows
Cardio machine |
|
BJJ White Belt
Good kicks
Solid chin |
|
| |
|
Ladies and gentlemen. This fight is 3 rounds, in the featherweight division.
Introducing the fighter to my left, fighting out of the red corner.
With a record of
11 - 7 - 0, fighting out of London, Minanda Passmoor!
And introducing the fighter to my right, fighting out of the blue corner.
With a record of
9 - 3 - 0, fighting out of London, Paul Grant!
The judges for this bout are James Atkins, Andrew Berry and Daniel Bishop.
The bell rings for round one and we are underway!
A nice leg kick lands there from Grant.
Passmoor staying out of range there.
Passmoor gets to the clinch - let's see what his plan is here.
A right handed body shot lands from Passmoor.
Passmoor with the Thai clinch, lands a knee to the head.

It looks like Paul Grant has been cut.
Passmoor gets an overhook and lands an elbow to the side of the head.
Passmoor scores with a shoulder strike.
Passmoor lands a good knee to the midsection. Grant won't want to take too many of those.
This has been an exciting period of action!
Grant trying to land knees to the body.
Passmoor gets an overhook and lands an elbow to the side of the head.
Passmoor lands a nice elbow from the clinch.
Grant connects with a nasty looking knee right to Passmoor's face.
Passmoor working on landing some head shots here - that one got through nicely.
Grant misses with a knee to the head.
Passmoor lands an elbow just above Grant 's eye.
Passmoor lands a nice elbow from the clinch.
Nice elbow from Passmoor.
Knees to the body from Passmoor.
Grant looks gassed!
Passmoor landing knees to the head.
Grant holding his opponent close, against the cage.
Grant is a painfully thin specimen of a man. You do wonder whether a good body kick would snap him clean in two.
Passmoor is trying to wear down his opponent with knees to the body.
That's one minute gone in the round.
Knees in the clinch landing for Passmoor.
Knees in the clinch landing for Passmoor.

Passmoor lands a big knee to the head and Grant goes down! Passmoor is looking to finish!
Grant is rocked!
Passmoor scores with a big shot from side control... and another... and another! Oh Grant is done here - save him referee! More strikes land and eventually the ref does step in and Passmoor can finally stop beating on his defenseless opponent!
Ladies and gentlemen, after 1:29 of round 1, we have a winner by way of TKO (Strikes). Minanda Passmoor!
Minanda Passmoor got down on his knees post fight and begged the management for a title shot. 'Please, I want that title shot so bad! Give it to me!'
|
|
|
|
|
|
|
|
|
|
|
|
|
|
|
|
|
|
|
|
|
|
|
| S |
C
A |
G |
S |
C
B |
G |
|
S |
C |
G |
|
energy
A | B |
|
hype
A | B |
|
pop
A | B |
|
mgr
A | B |
|
FIGHT
RATING
100% |
|
|
|
|
|
|
|
Co-main event
|
Coming up we have a heavyweight MMA rules bout between Craig Broffy (ranked 0 p4p, 0 weight class) and Niall William Quinn (ranked 0 p4p, 0 weight class). Both fighters look fresh as a daisy as they make their way towards the cage.
 |
|
 |
| 198 cm
30
265 lbs
17 - 11 - 0 |
|
191 cm
30
265 lbs
18 - 6 - 0 |
Good wrestling
Excellent boxer
KO power |
|
BJJ Brown Belt
Good kicks
Powerful |
|
| |
|
Ladies and gentlemen. This fight is 3 rounds, in the heavyweight division.
Introducing the fighter to my left, fighting out of the red corner.
With a record of
17 - 11 - 0, fighting out of London, Craig Broffy!
And introducing the fighter to my right, fighting out of the blue corner.
With a record of
18 - 6 - 0, fighting out of London, Niall William Quinn!
The judges for this bout are Chris Edwards, Steven Brown and Sam Margolis.
The bell rings for round one and we are underway!
Quinn stuffs a takedown. It's all about dictating where the fight takes place and Quinn wants it to stay on the feet.
Broffy fails to land the takedown.
An inside leg kick from Quinn misses.
Broffy fails with a takedown attempt from distance.
That's three failed takedown attempts in the round for Craig Broffy. That's going to take a lot out of him.
Quinn stuffs the takedown attempt from Broffy. Broffy gets slowly back to his feet.
Quinn gets caught flat footed, as Broffy shoots in with a quick takedown into guard.
Quinn has his foot on Broffy's thigh. He's trying to push off and get in position for a triangle, I think. Broffy works his way back into a safe position though.
Broffy postures up to throw the ground and pound strikes but they don't connect.
Broffy is in close to Quinn's body, working some short punches and elbows.
The fans in attendance giving it up for the two fighters, who have really let it all hang out in the last minute or so!
Quinn escapes his hips to the side and looks to be working for an armbar. Broffy gives him a little smile and shakes his head. No chance.
Quinn has momentary wrist control but Broffy slips an elbow through the middle.
Broffy throws a big right hand that misses.
Broffy with a flurry of punches that miss.
Quinn preventing the ground and pound from doing any damage.
Broffy throwing strikes but missing.
Broffy content to strike from guard, landing some decent shots.
Broffy throwing shots from guard but he's hitting more mat than opponent.
Broffy preventing the sweep.
That's one minute gone in the round.
Quinn is looking for a triangle but Broffy pushes his legs off easily.
Quinn utilising some decent striking defenses from the guard, preventing the ground and pound.
Quinn is working actively off his back, looking to secure an arm or perhaps work for a triangle.
Quinn preventing the ground and pound from doing any damage.
Broffy with a flurry of punches that miss.
The ref warns both fighters not to hold the cage as they work up against the meshing.
Broffy avoids a guillotine attempt easily.
Quinn is looking for a triangle but Broffy pushes his legs off easily.
We've seen a great period of action over the last minute or so - credit to both fighters for going all out!
Broffy thows a big elbow that misses.
Broffy working some ground and pound from guard but it's not doing any damage.
Quinn is looking for a guillotine. You can't force these things though and Broffy defends well.
Broffy is working the ground and pound from guard. He might want to try advancing position though to get more of an impact.
Broffy knows he needs to get back to his feet asap. He's simply no match for Quinn on the ground.
Broffy content to strike from guard, landing some decent shots.
That's two minutes gone in the round.
Broffy is looking to work some ground and pound but Quinn has wrist control.
Broffy trying to land body shots but he keeps hitting the mat.
Broffy drops back for a leg! It's a sloppy attempt though and Broffy jumps back into guard quickly, to retain the dominant position.
Broffy is sitting in close to Quinn's body. Quinn has gone for a guillotine from the bottom. Oh damn, that looks pretty tight! Broffy is panicking - it looks like this one could be all over! Yes, Broffy is tapping! That was a very nice submission by Quinn.
Ladies and gentlemen, after 2:27 of round 1, we have a winner by way of Submission (Guillotine). Niall William Quinn!
Niall William Quinn decided to go for the less than humble approach in his post fight interview, telling everyone how he is going to conquer the world. The crowd seemed to like it when really that sort of approach could have gone either way.
|
|
|
|
|
|
|
|
|
|
|
|
|
|
|
|
|
|
|
|
|
|
|
| S |
C
A |
G |
S |
C
B |
G |
|
S |
C |
G |
|
energy
A | B |
|
hype
A | B |
|
pop
A | B |
|
mgr
A | B |
|
FIGHT
RATING
100% |
|
|
|
|
|
|
|
Main event
|
Coming up we have a featherweight MMA rules bout between Handsome Cpw (ranked 0 p4p, 0 weight class) and Jake LaMotta (ranked 0 p4p, 0 weight class). Chooooooooon! I think Cpw might be my favorite fighter, now he's come out to Steve McQueen. LaMotta comes into a darkened arena with his song building. Cavalleria Rusticana: Intermezzo kicks in, the lights come on and the crowd goes wild! What a showman! Over to our ring announcer for the fighter introductions!
 |
|
 |
| 170 cm
24
146 lbs
16 - 2 - 0 |
|
173 cm
31
153 lbs
20 - 6 - 0 |
Good wrestling
Excellent boxer
Cardio machine |
|
BJJ Purple Belt
Good kicks
Powerful |
|
| |
|
Ladies and gentlemen. This fight is 5 rounds, for the featherweight championship of the world!
Introducing the champion to my left, fighting out of the red corner.
With a record of
16 - 2 - 0, fighting out of London, Handsome Cpw!
And introducing the challenger to my right, fighting out of the blue corner.
With a record of
20 - 6 - 0, fighting out of London, Jake LaMotta!
The judges for this bout are Chris Edwards, Andrew Berry and Paul Tew.
The bell rings for round one and we are underway!
Cpw lands with a cross.
LaMotta uses decent footwork to sidestep a right hand from Cpw.
Cpw thows a body shot but no joy.
Cpw ducks low and lands a nice hook to the body of his opponent.
Cpw scores with a hook to the body. LaMotta takes a step back and tries to catch his breath.
Cpw lands a nice hook to LaMotta's body. LaMotta takes it in his stride and looks to land his own strikes.
LaMotta shoots in but Cpw avoids the takedown attempt easily.
Cpw misses with a two punch combination.
The crowd cheers as Cpw lands an impressive looking overhand right. LaMotta doesn't seem phased though.
Cpw throws a hook to the body but it doesn't connect.
LaMotta takes a jab on the nose. He smiles like he loves it and keeps coming.
The crowd cheering loudly, showing their appreciation for the quality fight we're seeing here.
Cpw connects with a lovely jab that went straight through the gap between LaMotta's hands.
Handsome Cpw seems to be the more aggressive standup fighter in this bout.
Cpw cracks a nice hook into LaMotta's ribs.
That's one minute gone in the round.
LaMotta shoots in looking for a double leg takedown. Cpw defends it nicely.
LaMotta gets cracked there but stands up to it.
LaMotta takes a jab on the nose. He smiles like he loves it and keeps coming.
LaMotta dives in and grabs Cpw's left leg, looking for a takedown. Cpw pushes down on LaMotta's head and hops out.
Handsome Cpw has stuffed three takedown attempts in the round now. That's going to take a lot out of Jake LaMotta.
LaMotta is looking for a takedown here. He's shot in and has managed to get it, finishing up in Cpw's half guard.
LaMotta seems to be working for a kimura but Cpw defends the submission attempt.
LaMotta prevents Cpw from standing back up.
That's two minutes gone in the round.
LaMotta not throwing his punches with enough precision this time.
LaMotta missing with some ground and pound from the half guard.
LaMotta thows a huge punch but Cpw dodges it nicely.
LaMotta wants to free his trapped foot but Cpw is holding on for dear life with his legs.
The fans in attendance giving it up for the two fighters, who have really let it all hang out in the last minute or so!
LaMotta with the ground and pound but Cpw uses the opportunity to regain guard.
Cpw wants to get back to his feet but LaMotta is in a dominant position and won't allow it.
The fighters are pressed up against the cage, both looking to find a bit of space to work.
That's three minutes gone in the round.
LaMotta tries to free his leg and advance position but Cpw is retaining full guard.
LaMotta is trying to work a guillotine from the top, or something like that? Don't know how he thinks he's going to get a finish from there.
Cpw keeping full guard, as LaMotta tries to pass.
Cpw wants to stand and escape but LaMotta is having none of it.
LaMotta has gone for a leg lock! Cpw slips out almost immediately though and dives into LaMotta's guard.
That's four minutes gone in the round.
LaMotta looking for a triangle here. Cpw is fighting it but it looks tight! LaMotta pulls the arm across and this one won't last much longer! Nope, Cpw is tapping out - this one is all over!
Ladies and gentlemen, after 4:21 of round 1, we have a winner by way of Submission (Triangle Choke). Jake LaMotta!
Jake LaMotta is the new featherweight champion!
|
|
|
|
|
|
|
|
|
|
|
|
|
|
|
|
|
|
|
|
|
|
|
| S |
C
A |
G |
S |
C
B |
G |
|
S |
C |
G |
|
energy
A | B |
|
hype
A | B |
|
pop
A | B |
|
mgr
A | B |
|
FIGHT
RATING
36% |
|
|
|
|
|
|
|
|
|
|
