 |
Ring Rage 1 - Durham vs. Hara PBP Commentary |
Undercard bout
|
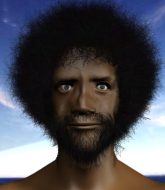
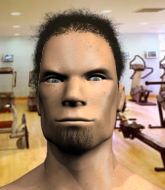
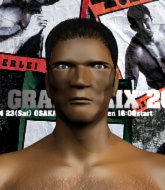
Coming up we have a lightweight MMA rules bout between Gathii Kumanda (ranked 0 p4p, 0 weight class) and Baldong Dado (ranked 0 p4p, 0 weight class). Kumanda kept the crowd waiting but all that was forgotten when his ring entrance music started. The incomparable musical genius that is Buffalo Soldier. The key to victory for Gathii Kumanda has got to be keeping the fight on the feet.
 |
|
 |
| 179 cm
19
157 lbs
0 - 0 - 0 |
|
183 cm
28
164 lbs
1 - 3 - 0 |
BJJ Brown Belt
Great low kicks
Very quick |
|
Good wrestler
Brawler
Determined |
|
| |
|
Ladies and gentlemen. This fight is 3 rounds, in the lightweight division.
Introducing the fighter to my left, fighting out of the red corner.
With a record of
0 - 0 - 0, fighting out of Tokyo, Gathii Kumanda!
And introducing the fighter to my right, fighting out of the blue corner.
With a record of
1 - 3 - 0, fighting out of Tokyo, Baldong Dado!
The judges for this bout are Tatsuya Matsuyama, Yukihiro Yamamoto and Shirou Masuda.

The bell rings for round one and we are underway!
Kumanda misses with a head kick.
Kumanda throws a head kick that Dado semi-blocks.

Dado closes the distance and after a bit of a stuggle, scores a takedown into Kumanda's guard.
The referee is asking the fighters to pick up the pace.
Kumanda is trying to control the position from the bottom.
Dado tries to free his leg and advance position but Kumanda is retaining full guard.
Kumanda bucks up whilst keeping hold of a body lock, managing to reverse the position. Now he's in top in Dado's guard.
Dado wants to get back to his feet but Kumanda is in a dominant position and won't allow it.
The fighters are trapped in the ropes so we're going to have a reposition here. The ref calls for a break and repositions the fighters in the center of the ring.
Dado doesn't do any damage with a couple of strikes from the bottom.
Dado really doesn't want to stay on the ground with Kumanda. If he can't get it back to his feet, it's only a matter of time before he'll be tapping out.
Kumanda tries to free his leg and advance position but Dado is retaining full guard.
Dado keeping moving, preventing Kumanda from controlling successfully.
Kumanda looking to pass the guard.

That's one minute gone in the round.
Kumanda wants to control from the top but Dado keeps moving.

The referee decides to stand the fighters back up, due to lack of activity on the part of Gathii Kumanda.
Kumanda gets caught flat footed, as Dado shoots in with a quick takedown into guard.
Kumanda wants to sweep but no luck.
Dado missing there with some ground and pound from the guard.
Kumanda is trying to keep Dado in close.

Kumanda is active off his back here, looking for submissions.

That's two minutes gone in the round.
Dado stands up and looks to throw the legs aside to pass to side control. Kumanda swivels though and keeps the full guard.
Dado trying to control but Kumanda is working from the bottom.
Kumanda controls Dado momentarily but Dado frees himself.
Dado wants to pass the guard but Kumanda is keeping the position.
Dado must be cautious of submissions here, given that his opponent has the superior Jiu Jitsu.
Kumanda controls Dado momentarily but Dado frees himself.
The referee looks like he's ready to step in and stand the fighters back up.
Kumanda is throwing his legs up, looking for submissions. Dado is aware though and is defending well.

That's three minutes gone in the round.
Dado controlling from the guard. I say controlling but really, he's stalling.
Kumanda keeping moving, preventing Dado from controlling successfully.

The ref calls for a clean break and stands the fighters back up. Baldong Dado wasn't active enough on the ground.
Dado throws a combination but it was largely blocked by Kumanda.
Dado takes a head kick and shrugs it off.
Kumanda lands with a slapping head kick.
Dado shoots in but no luck this time.
Dado shoots in for a takedown but doesn't get it.
Dado misses with a body shot. Nice footwork from Kumanda.
Kumanda fakes a couple of low kicks, before throwing one on the third attempt. It connects and Dado has to reset his feet before getting ready to engage.
Kumanda throws a head kick that misses and slips in the process. He scrambles back to his feet and the fighters circle.
This has been an exciting period of action!
Dado wants to clinch up but Kumanda keeps it at a distance.

That's four minutes gone in the round.
Kumanda lands a leg kick that knocks Dado off balance momentarily.
Kumanda lands a nice leg kick that just misses Dado's sensitive parts.
Kumanda throws a front kick that sends Dado stumbling back into the ropes.
Dado looks gassed!
Dado closes the distance, clinches up and gets a nice trip takedown into side control. Very smooth.
You can see the frustration on Kumanda's face, being in this tough position on the bottom.
Kumanda tries to improve position but can't.
Kumanda manages to get one leg in to regain half guard.
Kumanda looking to work for a kimura from the bottom.
Kumanda gets full guard.
The crowd are going absolutely nuts as the round comes to an end - what a fantastic round of action!
Kumanda is trying to control the position but Dado postures up.
And thats the end of the round the fighters go back to their corners.
Gathii Kumanda dominated that round.
Well, the break between rounds is over. Let's get back to the scrappin!

Dado blocks a head kick by Kumanda.
Dado takes a head kick and keeps coming.
Dado shoots in for a double leg but Kumanda sprawls well. That's going to sap some energy.
Kumanda throws a quick inside leg kick.
A telegraphed takedown attempt from Dado is defended easily by Kumanda.
Ooooh, nice body kick lands from Kumanda. Dado shrugs it off though.
Dado keeping a good distance there, avoiding the body shot.
Kumanda lands with a kick to the temple. Dado shrugs as if to say "is that all you've got?"
This is a great period of action - very entertaining stuff!
Dado doesn't manage to clinch there - Kumanda circles away.
A nice leg kick lands there from Kumanda.

Kumanda lands a big head kick that sends Dado tumbling to the mat! Kumanda takes a step backwards and waves Dado back to his feet - he wants the finish!

Dado is rocked!
Nice takedown defense from Kumanda. No joy for Dado on that attempt.
Dado is still on wobbly legs! Can Kumanda finish him?
Gathii Kumanda has stuffed three takedown attempts in the round now. That's going to take a lot out of Baldong Dado.
Dado drops his hands momentarily and Kumanda needs no second invitation. He sets himself and throws a perfect high kick, that clips Dado just on the top of the head. Dado drops like a sack of potatoes to the canvas, out cold! Oooooooh yeah! Stick a fork in Dado - he's done!
Ladies and gentlemen, after 1:05 of round 2, we have a winner by way of KO (Head Kick). Gathii Kumanda!
After winning the bout, Gathii Kumanda thanked all his fans and promised he'd do even better in his next fight. The crowd seemed to love his humility.
|
|
|
|
|
|
|
|
|
|
|
|
|
|
|
|
|
|
|
|
|
|
|
| S |
C
A |
G |
S |
C
B |
G |
|
S |
C |
G |
|
energy
A | B |
|
hype
A | B |
|
pop
A | B |
|
mgr
A | B |
|
FIGHT
RATING
100% |
|
|
|
|
|
|
|
Undercard bout
|
|
|
|
Undercard bout
|
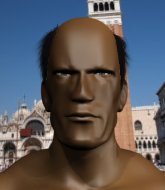
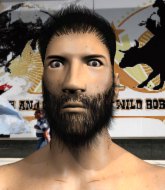
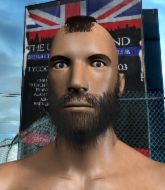
Coming up we have a light heavyweight MMA rules bout between Kurt Orbiso (ranked 0 p4p, 0 weight class) and Stone Cold Steve Austin (ranked 0 p4p, 0 weight class). These two fighters really are very evenly matched on the feet - it will be fascinating to see who can assert themselves in that aspect of the fight.
 |
|
 |
| 193 cm
20
207 lbs
1 - 0 - 0 |
|
185 cm
18
219 lbs
0 - 0 - 0 |
BJJ Purple Belt
Solid boxing
Good chin |
|
BJJ White Belt
Excellent MT
Heavy handed |
|
| |
|
Ladies and gentlemen. This fight is 3 rounds, in the light heavyweight division.
Introducing the fighter to my left, fighting out of the red corner.
With a record of
1 - 0 - 0, fighting out of Tokyo, Kurt Orbiso!
And introducing the fighter to my right, fighting out of the blue corner.
With a record of
0 - 0 - 0, fighting out of Tokyo, Stone Cold Steve Austin!
The judges for this bout are Shigeki Sano, Hirohito Nitta and Shigeki Fujiwara.
The bell rings for round one and we are underway!
Steve Austin lunges in with swinging rights and lefts but Orbiso circles away quickly and effectively.
Orbiso tries to clinch there but Steve Austin circles away.
Steve Austin scores with a sloppy right hand. Orbiso should have avoided that one.

It looks like Kurt Orbiso has been cut.
Orbiso throws a hard body shot but it just misses.
Orbiso misses with a jab and misses with a cross straight after too.
Steve Austin connects with a jab.
Orbiso is looking to clinch but Steve Austin is avoiding it.
Kurt Orbiso seems to be the more aggressive standup fighter in this bout.
Orbiso looks to land a body kick but Steve Austin moved away.
Orbiso fails with an attempt to clinch.
Orbiso tries to clinch but is not successful on this occasion.
Orbiso throws a head kick that misses and slips in the process. He scrambles back to his feet and the fighters circle.
Steve Austin slips a jab and a cross from Orbiso.
The crowd are loving this. Great action here.
Orbiso tries a head kick but it misses.
Orbiso tries to clinch but is not successful on this occasion.
That's one minute gone in the round.
Steve Austin connects with a leg kick. Orbiso looked like he was expecting something else and didn't defend it.
Orbiso throws a left and a right that both miss

and Steve Austin counters with a crisp one two that drops Orbiso! Steve Austin thinks about following him to the mat for a moment but instead steps back and waves Orbiso to his feet! Orbiso is in big trouble!
This has been an exciting period of action!
Steve Austin has his hands up protecting his head but a hook from Orbiso finds it's way round the side to connect with Steve Austin's head.
A slow jab from Orbiso misses its intended target.
Orbiso fails in his attempt to clinch.
Orbiso swings away but doesn't land with a series of punches.
Jab, jab by Steve Austin - just one landing.
Steve Austin lands a right hook to the body.
Orbiso is breathing heavily.
Steve Austin drops Orbiso with a hook right on the temple. He thinks about going to the ground but Orbiso looks back up at him and smiles so Steve Austin waves him back to his feet - he obviously thinks he can knock him out after that shot landed.

Orbiso is rocked!
Steve Austin lands with a massive overhand right! Stick a fork in Orbiso - he's out cold! Ermm... I think I just mixed my metaphors but yeah... That was a nice KO! Big win for Steve Austin!
Ladies and gentlemen, after 1:57 of round 1, we have a winner by way of KO (Punch). Stone Cold Steve Austin!
|
|
|
|
|
|
|
|
|
|
|
|
|
|
|
|
|
|
|
|
|
|
|
| S |
C
A |
G |
S |
C
B |
G |
|
S |
C |
G |
|
energy
A | B |
|
hype
A | B |
|
pop
A | B |
|
mgr
A | B |
|
FIGHT
RATING
82% |
|
|
|
|
|
|
|
Undercard bout
|
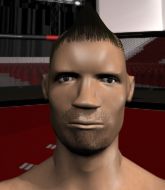
Coming up we have a featherweight MMA rules bout between Naruto Uzumaki (ranked 0 p4p, 0 weight class) and Terrance Pingshaw (ranked 0 p4p, 0 weight class). Pingshaw comes into a darkened arena with his song building. Heart of a Champion kicks in, the lights come on and the crowd goes wild! What a showman! Terrance Pingshaw is the more experienced fighter, so let's see if that makes a difference tonight.
 |
|
 |
| 177 cm
23
150 lbs
3 - 3 - 0 |
|
190 cm
22
159 lbs
6 - 5 - 0 |
BJJ White Belt
World class boxer
Experienced |
|
Good wrestler
Counter striker
Determined |
|
| |
|
Ladies and gentlemen. This fight is 3 rounds, in the featherweight division.
Introducing the fighter to my left, fighting out of the red corner.
With a record of
3 - 3 - 0, fighting out of Tokyo, Naruto Uzumaki!
And introducing the fighter to my right, fighting out of the blue corner.
With a record of
6 - 5 - 0, fighting out of Tokyo, Terrance Pingshaw!
The judges for this bout are Yuuki Gou, Shigeki Fujiwara and Kenichi Hosakawa.
The bell rings for round one and we are underway!
Uzumaki scores with a body shot.
Uzumaki connects with a body shot.
Uzumaki throws a series of punches but Pingshaw avoids them all with ease.
Pingshaw fails with a takedown attempt from distance.
Uzumaki lands a nice shot to the body.
Uzumaki lands with a two punch combination before moving back out of range.
Uzumaki thuds a left hand into Pingshaw's body.
Uzumaki works Pingshaw's body with a nice hook.
Pingshaw closes this distance looking for a takedown but Uzumaki circles away.
Uzumaki lands a jab to the nose.
Good exchange - Uzumaki coming out on top.
Pingshaw is a painfully thin specimen of a man. You do wonder whether a good body kick would snap him clean in two.
Uzumaki shuffles to his left behind two crisp jabs. Pingshaw eats them both and turns towards Uzumaki to reposition himself and eats a stinging right hand-left hook combo.
Naruto Uzumaki seems to be the more aggressive standup fighter in this bout.
A left and a right from Uzumaki both land. Nice combination.
Uzumaki connects with a body shot that sends Pingshaw's belly button to the back.
That's one minute gone in the round.
Uzumaki cracks a nice hook into Pingshaw's ribs.
Uzumaki sizes up Pingshaw with a pawing jab and scores with a straight right down the middle.
Uzumaki scores to the head and body with a nice combination!
Uzumaki lands with a two punch combination before moving back out of range.
Uzumaki swings away but doesn't land with a series of punches.
Uzumaki lands with a shot to the body.
Pingshaw doesn't succeed with the takedown
and Uzumaki counters with a three punch combo that has Pingshaw backing up. Pingshaw nods at Uzumaki to acknowledge the strikes.
Naruto Uzumaki has stuffed three takedown attempts in the round now. That's going to take a lot out of Terrance Pingshaw.
Uzumaki throws a right and a left that Pingshaw avoids nicely.
Uzumaki with a body punch. A glancing blow.
Uzumaki cracks a nice hook into Pingshaw's ribs.
That's two minutes gone in the round.
Pingshaw shoots for a takedown but Uzumaki saw that one coming a mile off and avoided it easily.
Uzumaki rushes forward with a series of wild hooks but Pingshaw moves out of range and avoids them all easily.
Some wild striking there from Uzumaki.
Uzumaki dips down and scores with a jab to the body.
Uzumaki's corner calls for a 1-2. Uzumaki obliges with the 1 part as he scores the single shot and moves back out of range.
Nice sprawl there from Uzumaki as Pingshaw shoots in.
Pingshaw looks gassed!
Uzumaki misses with a jab and misses with a cross straight after too.
Uzumaki scores with a jab.
Wooooo! Give it up for these two warriors! They are putting on a show!
Uzumaki cracks a nice hook into Pingshaw's ribs.
Uzumaki lands a jab to Pingshaw's midsection.
That's three minutes gone in the round.
Pingshaw will have to do better than that with his takedown attempts.
Nice body punch from Uzumaki.
Uzumaki looks to land a combination. Pingshaw sees it coming but can only parry a couple of the shots.
Uzumaki scores with the left hand. Pingshaw knows he should have avoided that one.
Pingshaw has a takedown stuffed.
Uzumaki lands a nice shot to the body.
Uzumaki scores with a shot to the body.
Uzumaki lands a lovely overhand right.
A nice combination there by Uzumaki.
Pingshaw has his takedown stuffed
and Uzumaki counters with a lovely shot to the body.
Pingshaw is trying desperately to land a takedown but Uzumaki is having absolutely none of it. This is turning into a bit of a nightmare for Pingshaw.
That's four minutes gone in the round.
Uzumaki throws a series of punches but Pingshaw avoids them all with ease.
Uzumaki scores with a nice one two combo and darts back out of range to avoid anything coming in the opposite direction.
Uzumaki lands with a two punch combination before moving back out of range.
Uzumaki goes to the watering hole and comes back with a big thumbs up from the judges as he scores a three punch combo.
Uzumaki scores with a three punch combo!
Uzumaki lands a jab, followed by a cross and another cross, as Pingshaw backs up against the ropes.
Fantastic stuff here - a very entertaining period of action, which has drawn cheers from the crowd.
Uzumaki scores with a nice one two combo and darts back out of range to avoid anything coming in the opposite direction.
A left lands for Uzumaki.
As the round comes to an end the crowd are showing their appreciation for a great round of action.
Uzumaki jabs Pingshaw to the body, keeping him at a distance.
Pingshaw takes a hook to the side of the head. I wonder if that's got his ears ringing.
And thats the end of the round the fighters go back to their corners.
Naruto Uzumaki dominated that round.
The referee calls time. The cornermen exit stage left and we're back to business.
Uzumaki lands with a nice combination. Pingshaw backs away looking to recover.
Uzumaki moves into range and throws a lovely three punch combination.
Uzumaki lands a beauty of a right hand that gets the crowd cheering.
Pingshaw looks for a takedown here. Will he get it? Uzumaki is fending him off so far but Pingshaw persists. Nope, Uzumaki circles away and we're back to standing.
Uzumaki pushes forward with a 1-2 combination that forces Pingshaw back to the ropes. Uzumaki follows up with a solid lead hook to the liver.
Pingshaw tries to move into range but Uzumaki moves to the side and lands with a nice right hand.
Uzumaki throws a right and a left that both miss.
Pingshaw ducks right into an uppercut from Uzumaki.
Uzumaki misses with a wild combination.
Pingshaw shoots in looking for a takedown but Uzumaki manages to keep the fight standing, pushing Pingshaw's face into the canvas for good measure before circling away.
Both these guys seem content to just stand up and trade with eachother but Pingshaw might want to think about changing up his gameplan a bit because over the course of the fight, Uzumaki has got the better of the exchanges.
Pingshaw is breathing heavily.
That's one minute gone in the round.
Uzumaki misses with a wild body shot.
Uzumaki moves into range and throws a combination. A nice jab followed by a hook to the body.
Uzumaki ducks down and throws a hook to the body but Pingshaw moves away.
Uzumaki looks to land a combination but Pingshaw avoids it well.
Pingshaw tries to shoot in for a takedown. He's got hold of a leg but Uzumaki swivels and escapes.
Naruto Uzumaki has stuffed three takedown attempts in the round now. That's going to take a lot out of Terrance Pingshaw.
Uzumaki lands a body shot.
Uzumaki digs a good hook to Pingshaw's body.
Pingshaw has a pretty nasty looking mouse under his right eye.
Pingshaw with a poor takedown
and Uzumaki counters with a nice body shot.
Nice body punch from Uzumaki.
Uzumaki scores with a jab to the body.
That's two minutes gone in the round.
Uzumaki goes to the watering hole and comes back with a big thumbs up from the judges as he scores a three punch combo.
Uzumaki dips down and scores with a jab to the body.
Pingshaw avoids a punch combination nicely.
Pingshaw fails with the takedown
letting Uzumaki counter with a right hand.
Uzumaki lands a slapping body shot.
Uzumaki feints a jab promting Pingshaw to slip. Uzumaki then demonstrates his capabilities by jabbing again. Pingshaw slips again and ducks right into an uppercut.
Excellent takedown into side control there by Pingshaw.
This is a great period of action - very entertaining stuff!

Pingshaw goes for an armbar here - this could be all over! But no, Uzumaki has escaped beautifully and is now on top in side control! Oh, that's unlucky for Pingshaw but great work by Uzumaki.
That's three minutes gone in the round.

Uzumaki decides to stand back up.
Uzumaki lands with a nice combination. Pingshaw backs away looking to recover.
Pingshaw gets his head snapped back by a nice shot there.
Uzumaki scores with a reasonable looking shot to the body. Pingshaw doesn't seem bothered though.
Pingshaw avoids the body shot from Uzumaki.
Pingshaw tries for a takedown but Uzumaki sees it coming a mile off and avoids it easily.
Naruto Uzumaki is looking to keep the fight on the feet at all costs.
Pingshaw tries to shoot in for a takedown. He's got hold of a leg but Uzumaki swivels and escapes.
Uzumaki pushes forward with a 1-2 combination that forces Pingshaw back to the ropes. Uzumaki follows up with a solid lead hook to the liver.
Uzumaki looks to land a combination. Pingshaw sees it coming but can only parry a couple of the shots.
That's four minutes gone in the round.
Pingshaw tries to move into range but Uzumaki moves to the side and lands with a nice right hand.
Uzumaki throws a one two combo.
Uzumaki is looking to wear down Pingshaw with body shots, infact he's throwing more body shots than head shots at the moment.
Pingshaw on the wrong end of a decent looking cross there.
Pingshaw on the wrong end of a vicious looking body shot.
A right-left combo lands from Uzumaki.
Uzumaki throws a series of punches but Pingshaw avoids them all with ease.
Uzumaki lands with a cross to side of his opponent's head.
Uzumaki connects with a good right hand that stumbles Pingshaw. Pingshaw circles away out of range and recomposes himself.
The fans in attendance giving it up for the two fighters, who have really let it all hang out in the last minute or so!
As the round comes to an end the crowd are showing their appreciation for a great round of action.
A left and a right from Uzumaki both land. Nice combination.
Uzumaki scores with a jab.
Pingshaw shoots in looking for a takedown but Uzumaki manages to keep the fight standing, pushing Pingshaw's face into the canvas for good measure before circling away.
And thats the end of the round the fighters go back to their corners.
Naruto Uzumaki dominated that second round.
The referee calls time. The cornermen exit stage left and we're back to business. Let's get this one finished - here comes the final round!

Uzumaki throws a series of punches but Pingshaw avoids them all with ease.
Pingshaw with poor footwork there. He got himself in a bit of a tangle, enabling Uzumaki to score with a decent uppercut.
Pingshaw shoots in but no luck this time.
Pingshaw takes a shot right to the liver - Bas would have been proud of that punch.
Uzumaki throws a shot to the body.
Uzumaki is really dominating this fight. Is there anything that Pingshaw can do to turn this around?
Uzumaki lands a jab to the nose.
Uzumaki looks to land a combination but Pingshaw avoids it well.
Naruto Uzumaki is looking to throw some combinations by the looks of things.
Pingshaw fakes high and shoots in for a takedown but Uzumaki avoids it really well and circles away.
Uzumaki lands with a good body shot.
Pingshaw takes a big intake of breath there - he's definitely tired.
That's one minute gone in the round.
A left and a right from Uzumaki both land. Nice combination.
Uzumaki looks to score with a combo but nothing lands.
Uzumaki lands a lovely overhand right.
Some wild striking there from Uzumaki.
Uzumaki shuffles to his left behind two crisp jabs. Pingshaw eats them both and turns towards Uzumaki to reposition himself and eats a stinging right hand-left hook combo.
Uzumaki lands a jab-cross combination.
Pingshaw will have to do better than that with his takedown attempts.
Naruto Uzumaki has stuffed three takedown attempts in the round now. That's going to take a lot out of Terrance Pingshaw.
Uzumaki stooping low to avoid any incoming strikes and then lunges in with an uppercut come cross that lands flush.
Uzumaki feints a straight left to the body, then turns around with a flashy move and hits Pingshaws jaw with a dramatic spinning back fist!
Pingshaw closes this distance looking for a takedown but Uzumaki circles away.
That's two minutes gone in the round.
Uzumaki cracks Pingshaw with a right hand to the side of the head.
Nice cross by Uzumaki.
Uzumaki throws a combination but it was largely blocked by Pingshaw.
Uzumaki jabs Pingshaw to the body, keeping him at a distance.
Uzumaki fakes low and throws an overhand right that catches Pingshaw on the side of the head.
Uzumaki is working the combinations to good effect here.
Pingshaw walks into a left hand.
Pingshaw shoots in for a double leg but Uzumaki sprawls well. That's going to sap some energy.
Uzumaki fakes low and throws an overhand right that catches Pingshaw on the side of the head.
Uzumaki lands a jab-cross combination.
Uzumaki scores to the head and body with a nice combination!
Terrance Pingshaw has stepped it up - he knows he needs a finish here!
That's three minutes gone in the round.
Uzumaki lands with a two punch combination before moving back out of range.
Pingshaw fails with the takedown
and Uzumaki counters with a three punch combo that has Pingshaw backing up. Pingshaw nods at Uzumaki to acknowledge the strikes.
Pingshaw takes a punch right to his stomach. That took the wind out of him momentarily.
Uzumaki changes levels and scores with a jab to the body.
A jab from Uzumaki does it's job there.
A right-left combo lands from Uzumaki.
Uzumaki lands three nice shots there - that looked like it hurt!
Pingshaw shoots in for a takedown. "I don't think so" says Uzumaki as he avoids it easily.
Pingshaw on the wrong end of an overhand right that came out of nowhere.
That's four minutes gone in the round.
Uzumaki misses with a series of wild punches.
Uzumaki scores to the head and body with a nice combination!
Uzumaki getting the better of the striking in that exchange.
Uzumaki looks to land a combination. Pingshaw sees it coming but can only parry a couple of the shots.
Uzumaki misses with a body shot.
Uzumaki scores with a body shot.
Pingshaw misses the shot to the body.
The crowd applaud the fighters efforts here as the round comes to an end.
Uzumaki throws a nice looking combination but Pingshaw bobs and weaves to avoid any damage.
Uzumaki fails to land with the punch combination there - jab, cross, hook, miss, miss, miss.
And that's the end of the fight!
Naruto Uzumaki showed his dominance in that final round.
Well I reckon that's a shut out for Uzumaki, winning every round. Will the judges agree? They are the ones who matter, even if they are often depressingly incompetent. Over to the ring announcer for the scorecards.
Ladies and gentlemen, after 3 rounds of action, we go to the scorecards for a decision.
Judge Yuuki Gou scores the fight 30:27
Judge Shigeki Fujiwara scores the fight 30:27
Judge Kenichi Hosakawa scores the fight 30:27
In favor of your winner, by unanimous decision... Naruto Uzumaki!
|
|
|
|
|
|
|
|
|
|
|
|
|
|
|
|
|
|
|
|
|
|
|
| S |
C
A |
G |
S |
C
B |
G |
|
S |
C |
G |
|
energy
A | B |
|
hype
A | B |
|
pop
A | B |
|
mgr
A | B |
|
FIGHT
RATING
43% |
|
|
|
|
|
|
|
Undercard bout
|
Coming up we have a lightweight MMA rules bout between Yoshi Doi (ranked 0 p4p, 0 weight class) and Tobirama Katsushiro (ranked 0 p4p, 0 weight class). Tobirama Katsushiro has the power to score a knockout today if he connects clean with Yoshi Doi's chin.
 |
|
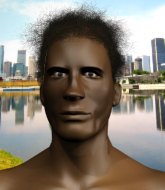 |
| 170 cm
22
155 lbs
2 - 0 - 0 |
|
195 cm
20
165 lbs
1 - 2 - 0 |
BJJ Blue Belt
Brawler
Cuts easily |
|
BJJ Blue Belt
Brawler
Prefers standup |
|
| |
|
Ladies and gentlemen. This fight is 3 rounds, in the lightweight division.
Introducing the fighter to my left, fighting out of the red corner.
With a record of
2 - 0 - 0, fighting out of Tokyo, Yoshi Doi!
And introducing the fighter to my right, fighting out of the blue corner.
With a record of
1 - 2 - 0, fighting out of Tokyo, Tobirama Katsushiro!
The judges for this bout are Kenichi Hosakawa, Shirou Masuda and Yukihiro Yamamoto.
The bell rings for round one and we are underway!
Katsushiro lands an overhand right.
It looks like Yoshi Doi has been cut.

Doi gets a takedown into half guard.
Katsushiro looks like he's trying to stand up.
Doi wants to control but Katsushiro is keeping him busy.
Katsushiro pushes Doi off looking to stand but Doi dives back in and keeps control.
Katsushiro is a painfully thin specimen of a man. You do wonder whether a good body kick would snap him clean in two.
Still in half guard, Doi seems content to control.
Katsushiro is holding on to half guard well.
The crowd are loving this. Great action here.
Doi lands strikes from half guard.
Doi prevents Katsushiro from standing back up.
Doi controlling the action here.
Doi thows a huge punch but Katsushiro dodges it nicely.
Doi missing with some ground and pound from the half guard.
Doi lands with an elbow from half guard - that looked like it hurt.
The fighters are trapped in the ropes so we're going to have a reposition here. The ref calls for a break and repositions the fighters in the center of the ring.
That's one minute gone in the round.
Doi is trying to control. Katsushiro wants to improve his position but can't escape this time.
Katsushiro wants to get back to his feet.
Doi wants to stand up but Katsushiro has a hold of him and won't allow it.
Doi wants to work for an arm triangle but Katsushiro is really keeping half guard well and defending the submission attempt.
Doi trying to control the action but Katsushiro is working from the bottom.
Doi controlling the action here.
Doi has freed up his trapped foot and advances to mount.
Doi tries to control but Katsushiro wriggling away.
That's two minutes gone in the round.
Katsushiro is desperately trying to improve his position but Doi has a good base and remains in mount.
The fighters are going at a pretty good pace and they're both starting to sweat now.
Doi scoring with strikes but Katsushiro is staying in there.
Doi cracks Katsushiro with a nasty head shot there - the crowd let out an audible gasp there, as the noise reverberated around the arena.
Katsushiro in a bad spot here, taking shots to the head.
The fans in attendance giving it up for the two fighters, who have really let it all hang out in the last minute or so!
Doi unloads with some vicious shots from mount and Katsushiro wants out - he looks towards the referee who steps in to save him! Doi celebrates on the ropes and the crowd goes wild!
Ladies and gentlemen, after 2:38 of round 1, we have a winner by way of TKO (Strikes). Yoshi Doi!
|
|
|
|
|
|
|
|
|
|
|
|
|
|
|
|
|
|
|
|
|
|
|
| S |
C
A |
G |
S |
C
B |
G |
|
S |
C |
G |
|
energy
A | B |
|
hype
A | B |
|
pop
A | B |
|
mgr
A | B |
|
FIGHT
RATING
54% |
|
|
|
|
|
|
|
Undercard bout
|
|
|
|
Undercard bout
|
|
|
|
Undercard bout
|
Coming up we have a featherweight MMA rules bout between Xavier Zdyrko (ranked 0 p4p, 0 weight class) and Igor I Got No Second Name (ranked 0 p4p, 0 weight class). Zdyrko kept the crowd waiting but all that was forgotten when his ring entrance music started. The incomparable musical genius that is Paris. Man, I cannot wait for this one!
 |
|
 |
| 170 cm
25
145 lbs
1 - 0 - 0 |
|
188 cm
27
143 lbs
4 - 4 - 0 |
BJJ White Belt
Solid boxing
Prefers standup |
|
BJJ Brown Belt
Dangerous knees
Good gas tank |
|
| |
|
Ladies and gentlemen. This fight is 3 rounds, in the featherweight division.
Introducing the fighter to my left, fighting out of the red corner.
With a record of
1 - 0 - 0, fighting out of Tokyo, Xavier Zdyrko!
And introducing the fighter to my right, fighting out of the blue corner.
With a record of
4 - 4 - 0, fighting out of Tokyo, Igor I Got No Second Name!
The judges for this bout are Yukihiro Shimada, Taro Takaoka and Shigeki Sano.
The bell rings for round one and we are underway!
Zdyrko displays good takedown defense there as he swats away a double leg from I Got No Second Name.
Zdyrko looks exhausted already! Oh dear, he should have come in in better shape than this!
I Got No Second Name fakes high and shoots in for a takedown but Zdyrko avoids it really well and circles away.
I Got No Second Name fails to land the takedown.
Xavier Zdyrko has stuffed three takedown attempts in the round now. That's going to take a lot out of Igor I Got No Second Name.
I Got No Second Name fails to land the takedown.
I Got No Second Name fakes high and shoots in for a takedown but Zdyrko avoids it really well and circles away.
I Got No Second Name is looking to clinch.
That's one minute gone in the round.
I Got No Second Name looks frustrated there after his takedown attempt is stuffed easily.
I Got No Second Name closes the distance and after a bit of a stuggle, scores a takedown into Zdyrko's guard.
I Got No Second Name working some ground and pound from guard but it's not doing any damage.
I Got No Second Name pushes down on Zdyrko's leg and manages to get into half guard.
I Got No Second Name thows a huge punch but Zdyrko dodges it nicely.
I Got No Second Name is working for a submission of some sort.
Zdyrko might be looking to lock onto one of his opponent's long limbs for a submission, whilst we're on the ground.
I Got No Second Name throwing shots but Zdyrko is blocking nicely.
The fighters are trapped in the ropes so we're going to have a reposition here. The ref calls for a break and repositions the fighters in the center of the ring.
That's two minutes gone in the round.
I Got No Second Name maintaining the dominant position here and is working for a kimura. He's locked it up! Zdyrko could be in real trouble here! He's trying to wriggle out but I Got No Second Name has cracked it and Zdyrko is screaming in pain - he's tapped out! Great finish by I Got No Second Name!
Ladies and gentlemen, after 2:28 of round 1, we have a winner by way of Submission (Kimura). Igor I Got No Second Name!
|
|
|
|
|
|
|
|
|
|
|
|
|
|
|
|
|
|
|
|
|
|
|
| S |
C
A |
G |
S |
C
B |
G |
|
S |
C |
G |
|
energy
A | B |
|
hype
A | B |
|
pop
A | B |
|
mgr
A | B |
|
FIGHT
RATING
32% |
|
|
|
|
|
|
|
Co-main event
|
Coming up we have a heavyweight MMA rules bout between Charles King (ranked 0 p4p, 0 weight class) and Dagonet Rondell (ranked 0 p4p, 0 weight class). The crowd giving both fighters a great reception on their way into the arena. That's good to see.
 |
|
 |
| 190 cm
24
240 lbs
2 - 0 - 0 |
|
225 cm
23
275 lbs
2 - 0 - 0 |
BJJ Blue Belt
Basic striking
KO power |
|
BJJ Blue Belt
Decent boxing
Granite chin |
|
| |
|
Ladies and gentlemen. This fight is 3 rounds, in the heavyweight division.
Introducing the fighter to my left, fighting out of the red corner.
With a record of
2 - 0 - 0, fighting out of Tokyo, Charles King!
And introducing the fighter to my right, fighting out of the blue corner.
With a record of
2 - 0 - 0, fighting out of Tokyo, Dagonet Rondell!
The judges for this bout are Kenichi Hosakawa, Hirohito Nitta and Yuuki Gou.
The bell rings for round one and we are underway!
Rondell swings for the body but King moves out of range.
King misses with a hook. Rondell ducked under it nicely.
King feints and as Rondell raises his hands in defense, King changes levels and drives through with a takedown into guard.
Rondell wants to get back to his feet but King is in a dominant position and won't allow it.
Rondell keeping moving, preventing King from controlling successfully.
King is looking to work some ground and pound but Rondell has wrist control.
King tries to free his leg and advance position but Rondell is retaining full guard.
King trying to control the position from guard on top but Rondell is wriggling around, looking for whatever he can.
Rondell working the defensive guard well to avoid strikes from King.
That's one minute gone in the round.
King loading up with the ground and pound but he's missing more than he's landing in this flurry.
Rondell keeping moving, preventing King from controlling successfully.
King throws a big right hand that misses.
King engaging in some classic timewasting tactics.
The referee decides to stand the fighters back up, due to lack of activity on the part of Charles King.
Rondell fakes and then throws a beautiful body shot. King looks a bit winded and takes a step backwards to take a breath.
Rondell tries to close the distance and clinch up against the ropes but King paws at him with a jab and circles away.
King fakes a jab and throws a low kick but Rondell checks it well.

Rondell instigates a clinch.
Rondell lands with a good tight uppercut to the head.
That's two minutes gone in the round.
King drops to a knee looking for a takedown but Rondell gets the underhooks and prevents it.
Rondell presses King against the ropes and delivers a mid-strength body shot.
Rondell working on landing some head shots here - that one got through nicely.
We've seen a great period of action over the last minute or so - credit to both fighters for going all out!
King drops down looking for an ankle pick but Rondell pulls his leg out and moves away.
Rondell tries to clinch but is not successful on this occasion.
Rondell moves into the clinch successfully.
Rondell lands a shoulder strike.
King pushes off and fires off an elbow that misses, before clinching up again, against the ropes.
King has had enough of the clinch but Rondell keeps him there for the moment.
Good anti-grappling being displayed by Rondell as King tries to tie him up.
Rondell works on King's body with a couple of short punches.
King is breathing heavily.
Rondell stays in close to his opponent and throws a right hand to the body.
Rondell lands a nice looking hook to the body, against the ropes.
Rondell lands punches inside but they're not really causing much damage.
A short right hand to the side of the head by Rondell.
A quick uppercut on the inside from Rondell.
Rondell is a painfully thin specimen of a man. You do wonder whether a good body kick would snap him clean in two.
That's three minutes gone in the round.
King takes a shot to the head.
Rondell softening up his opponent with strikes, against the ropes.
Rondell working some nice short punches in the clinch.
Rondell lands a nice looking hook to the body, against the ropes.
A hook to the body from Rondell.
Rondell lands a nice uppercut.
Rondell lands a body punch.
Nice body punch from Rondell.
Fantastic stuff here - a very entertaining period of action, which has drawn cheers from the crowd.
A hook to the body from Rondell.
A right hook to the body lands for Rondell.
Rondell lands a nice looking hook to the body, against the ropes.
A short uppercut from Rondell.
A right hook to the body lands for Rondell.
A right hand to the body from Rondell.
King takes a shot to the head.
Rondell scores with a shot to the side of King's head.
Rondell lands with a short punch from the clinch.
A right hand to the body from Rondell.
King takes a shot to the head.
A short right from Rondell.
A right handed body shot lands from Rondell.
That's four minutes gone in the round.
A nice left hand lands by Rondell.
Rondell lands with a left to the head.
Rondell lands a body punch.
Rondell lands a body shot in the clinch.
Rondell gets through King's defenses to land a nice punch to the side of the head.
King is rocked!
Rondell scores with a shoulder strike.
Oh King is still all over the place! His legs are completely gone! Will he be able to recover?!!
A shot in the inside from Rondell.
Rondell lands a body shot in the clinch.
Rondell dips a shoulder and cracks King with a mighty uppercut! King falls back against the ropes and Rondell unloads with a barrage of strikes! King is completely out with his eyes open, only supported by the ropes! Save him ref! Eventually the ref decides to do his job and jumps in - Rondell screams abuse at the incompetent official before going over to celebrate with his corner. Brutal stuff!
Ladies and gentlemen, after 4:30 of round 1, we have a winner by way of TKO (Strikes). Dagonet Rondell!
|
|
|
|
|
|
|
|
|
|
|
|
|
|
|
|
|
|
|
|
|
|
|
| S |
C
A |
G |
S |
C
B |
G |
|
S |
C |
G |
|
energy
A | B |
|
hype
A | B |
|
pop
A | B |
|
mgr
A | B |
|
FIGHT
RATING
100% |
|
|
|
|
|
|
|
Main event
|
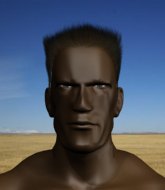
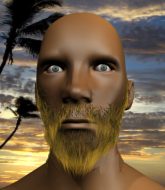
Coming up we have a light heavyweight MMA rules bout between James Durham (ranked 0 p4p, 0 weight class) and Josh Hara (ranked 0 p4p, 0 weight class). Durham's entrance music is Dreamer. A fine choice. Hara is bobbing his head along to his entrance song: The Rolling Stones - Gimme Shelter. Josh Hara has the better chin. Will he look to stand and bang today?
 |
|
 |
| 193 cm
20
201 lbs
6 - 2 - 0 |
|
185 cm
25
205 lbs
7 - 4 - 0 |
BJJ Blue Belt
Solid boxing
Experienced |
|
Good takedowns
Counter striker
Solid chin |
|
| |
|
Ladies and gentlemen. This fight is 3 rounds, in the light heavyweight division.
Introducing the fighter to my left, fighting out of the red corner.
With a record of
6 - 2 - 0, fighting out of Tokyo, James Durham!
And introducing the fighter to my right, fighting out of the blue corner.
With a record of
7 - 4 - 0, fighting out of Tokyo, Josh Hara!
The judges for this bout are Shirou Masuda, Tatsuya Matsuyama and Yukihiro Shimada.
The bell rings for round one and we are underway!
Hara throws a loose over hand right and dives in with a double leg takedown. Durham tries to sprawl but it's too late and the fighters hit the mat. Hara is in Durham's guard.
Durham can't keep his opponent in guard - Hara advances to half guard, no doubt looking to mount.
The fighters are trapped in the ropes so we're going to have a reposition here. The ref calls for a break and repositions the fighters in the center of the ring.
Hara is working for submissions here but there's nothing on.
Durham trying to hold on to Hara's head to control him but Hara postures up.
The fighters are tangled up in the ropes here. We might need a restart if the fighters can't break free themselves.
Hara is trying to work for a kimura but Durham is defending well.
Hara is looking for a kimura but Durham is holding onto that half guard position, so it's hard for Hara to get the leverage.
Durham is trying to control but can't.
Hara is trying to work for a kimura. This could be trouble! No, Durham has managed to free his arm - good work.
This is a great period of action - very entertaining stuff!
Hara is looking for a kimura but Durham is holding onto that half guard position, so it's hard for Hara to get the leverage.
That's one minute gone in the round.
Hara seems to be looking for submissions.
Durham is defending against the submission attempts here by Hara.
Hara is working for a submission of some sort.
Durham is trying to stand up here but Hara is controlling him well.
Hara is trying for a guillotine from the top but the pressure isn't in the right place so Durham is just riding it out for now. Hara eventually gives up the hold.
Durham looks like he's trying to stand up.
That's two minutes gone in the round.
Durham is defending against the submission attempts here by Hara.
Durham pushes Hara off looking to stand but Hara dives back in and keeps control.
Hara looking for a kimura but he'll have to free his other leg if he wants to finish that. Perhaps he's just using it as a distraction technique.
Hara is sneakily working for an arm triangle but Durham sees it coming and defends easily.
That's three minutes gone in the round.
Hara is looking for a kimura but he's never going to get it from there.
Hara is trying for a kimura here. Durham looks like he's in a lot of pain... and he's tapping out! Hara wins by kimura!
Ladies and gentlemen, after 3:46 of round 1, we have a winner by way of Submission (Kimura). Josh Hara!
Josh Hara got down on his knees post fight and begged the management for a title shot. 'Please, I want that title shot so bad! Give it to me!'
|
|
|
|
|
|
|
|
|
|
|
|
|
|
|
|
|
|
|
|
|
|
|
| S |
C
A |
G |
S |
C
B |
G |
|
S |
C |
G |
|
energy
A | B |
|
hype
A | B |
|
pop
A | B |
|
mgr
A | B |
|
FIGHT
RATING
39% |
|
|
|
|
|
|
|
|
|
|
