 |
Pride 23: Lunar PBP Commentary |
Undercard bout
|
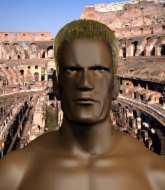
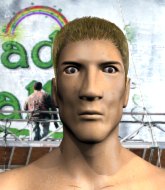
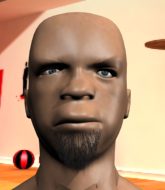
Coming up we have a middleweight MMA rules bout between Taka Sho (ranked 0 p4p, 0 weight class) and Kenjiro Akiyama (ranked 0 p4p, 0 weight class). Kenjiro Akiyama has the eye of the tiger tonight.
 |
|
 |
| 184 cm
19
198 lbs
3 - 1 - 0 |
|
200 cm
24
197 lbs
0 - 4 - 0 |
Good wrestling
Brawler
Big heart |
|
BJJ Blue Belt
Basic striking
Granite chin |
|
| |
|
Ladies and gentlemen. This fight is 3 rounds, in the middleweight division.
Introducing the fighter to my left, fighting out of the red corner.
With a record of
3 - 1 - 0, fighting out of Tokyo, Taka Sho!
And introducing the fighter to my right, fighting out of the blue corner.
With a record of
0 - 4 - 0, fighting out of Tokyo, Kenjiro Akiyama!
The judges for this bout are Shigeki Fujiwara, Yasuomi Hirokawa and Hirohito Nitta.

The bell rings for round one and we are underway!
Sho misses with a takedown

and Akiyama moves into the clinch.

Akiyama jumps guard.
Sho is pushing down on Akiyama's leg trying to pass to half guard. Akiyama is fighting to maintain full guard but Sho has managed to sneak the leg through.

Sho is looking for a kimura here.
Sho wants to lay and pray for a moment but Akiyama keeps working.
We get told so often about how wrestlers don't like to be on their backs. Let's see if Akiyama can do anything to dispel that myth.
Sho seems to be looking for submissions.
Sho looks over to his corner - he wants some instructions but his corner are not responding.
Akiyama is looking for a sweep. Sho is wise to his cunning plan and keeps the top position.
The fighters are trapped in the ropes so we're going to have a reposition here. The ref calls for a break and repositions the fighters in the center of the ring.

That's one minute gone in the round.
Sho is thinking about going for an arm triangle but he can't free his leg.
Sho is keen to just control but Akiyama is a slippery customer.
Sho is looking to advance position but Akiyama won't allow it.
Sho is thinking about going for an arm triangle but he can't free his leg.
Akiyama trying to get back to full guard but Sho takes advantage of the position and moves to full mount!

That's two minutes gone in the round.
Akiyama is squirming around, avoiding Sho's attempts to control the action.
Sho controlling from mount.
Sho landing strikes from the mount.
A nice elbow there by Sho.
The fighters are tangled up in the ropes here. We might need a restart if the fighters can't break free themselves.

That's three minutes gone in the round.
Sho can't quite control the action as he would like just now, as Akiyama is looking to escape.
Sho controlling from mount.
Sho's ground tactics aren't going to win him many fans. Let's hope he's got fireworks for us if he gets back to his feet because he's not doing much on the ground.

That's four minutes gone in the round.
Akiyama really doesn't want to stay on the ground with Sho. If he can't get it back to his feet, it's only a matter of time before he'll be tapping out.

We're going to have a standup here because Taka Sho wasn't active enough for the referee's liking.
Sho shoots in but Akiyama avoids the takedown attempt easily.
Sho tries to shoot in for a takedown. He's got hold of a leg but Akiyama swivels and escapes.
That's three failed takedown attempts in the round for Taka Sho. That's going to take a lot out of him.
Akiyama scores with a nice takedown into half guard. Let's see what he's got on the ground.
Akiyama wants to free his trapped foot but Sho is holding on for dear life with his legs.
Sho trying to control but Akiyama postures up.
As the round comes to an end the crowd are showing their appreciation for a great round of action.
Sho looking for submissions from an awkward position here.
Sho manages to get to full guard.
And thats the end of the round the fighters go back to their corners.
Taka Sho dominated that round.
Well, the break between rounds is over. Let's get back to the scrappin!


Akiyama gets caught flat footed, as Sho shoots in with a quick takedown into guard.
Sho might be looking to lock onto one of his opponent's long limbs for a submission, whilst we're on the ground.
Sho passes into half guard.
Sho is controlling the pace.
The two fighters exchange a few words. I couldn't hear what they were saying but maybe it's more fun if you make it up yourself. Sho connects with a nice short shot to Akiyama's temple.
Sho passes the guard and advances to mount!
Sho lands an elbow that was bordering on illegal but the referee lets it go with a warning.
That's one minute gone in the round.
Sho trying to control but Akiyama is having none of it.
Sho controlling the position easily from mount.
Sho putting on the heat here with some good ground and pound!
Sho lands with some vicious ground and pound - can Akiyama hang on?
Taka Sho overall seems to be getting the better of the ground position in the fight so far.
Sho postures up and throws a couple of big shots that have Akiyama in real trouble here! The ref calls for Akiyama to improve his position which he doesn't do, so the referee has no choice but to end the fight due to the strikes!
Ladies and gentlemen, after 2:59 of round 2, we have a winner by way of TKO (Strikes). Taka Sho!
|
|
|
|
|
|
|
|
|
|
|
|
|
|
|
|
|
|
|
|
|
|
|
| S |
C
A |
G |
S |
C
B |
G |
|
S |
C |
G |
|
energy
A | B |
|
hype
A | B |
|
pop
A | B |
|
mgr
A | B |
|
FIGHT
RATING
46% |
|
|
|
|
|
|
|
Undercard bout
|
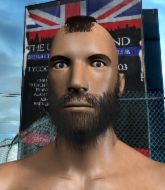
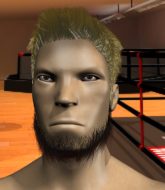
Coming up we have a welterweight MMA rules bout between Hiroki Ishakima (ranked 0 p4p, 0 weight class) and Archie Parchi (ranked 0 p4p, 0 weight class). Both fighters look fresh as a daisy as they make their way towards the ring.
 |
|
 |
| 175 cm
22
175 lbs
5 - 3 - 0 |
|
179 cm
29
178 lbs
6 - 5 - 0 |
BJJ White Belt
Excellent boxer
Big right hand |
|
Good wrestler
Counter striker
Knockout power |
|
| |
|
Ladies and gentlemen. This fight is 3 rounds, in the welterweight division.
Introducing the fighter to my left, fighting out of the red corner.
With a record of
5 - 3 - 0, fighting out of Tokyo, Hiroki Ishakima!
And introducing the fighter to my right, fighting out of the blue corner.
With a record of
6 - 5 - 0, fighting out of Tokyo, Archie Parchi!
The judges for this bout are Yukihiro Shimada, Kenichi Hosakawa and Yuuki Gou.
The bell rings for round one and we are underway!
Ishakima slaps away a takedown attempt from Parchi, before circling back to the center of the mat.
Ishakima tries to clinch but Parchi moves out of range.
Parchi shoots in looking for a double leg takedown. Ishakima defends it nicely.
Ishakima misses with a jab, cross combination.
Parchi fails with a rather predictable takedown attempt.
Hiroki Ishakima has stuffed three takedown attempts in the round now. That's going to take a lot out of Archie Parchi.
Parchi tries for a takedown but Ishakima circles away easily

and Ishakima counters into the clinch. Nicely done.
Ishakima misses with a punch to the body.
Parchi is looking for a takedown up against the ropes. Ishakima gets underhooks though and prevents the takedown attempt.
Ishakima lands a hook to the side of the head.
Parchi is trying to trip Ishakima. He has hold of a leg but Ishakima is hopping around, keeping his balance for the moment. Parchi persists though and gets the takedown into guard.
That's one minute gone in the round.
Parchi postures up in Ishakima's guard and throws a big left but Ishakima blocks it.
Ishakima controls Parchi momentarily but Parchi frees himself.
Parchi postures up to throw the ground and pound strikes but they don't connect.
Ishakima is working an open guard here, looking to improve his position. No doubt that will leave him open to counters but at least he's being more offensive.
Parchi throwing strikes but missing.
Parchi has the superior BJJ but he's also working some ground strikes into his gameplan.
Parchi is pushing down on Ishakima's leg trying to pass to half guard. Ishakima is fighting to maintain full guard but Parchi has managed to sneak the leg through.
Parchi not doing much here.
That's two minutes gone in the round.
Parchi missing with the ground and pound from half guard.
Parchi takes advantage of the dominant position to land a couple of big hammer fists.
Parchi frees up his trapped foot and advances to mount.
Ishakima knows he needs to get back to his feet asap. He's simply no match for Parchi on the ground.
Parchi connects with a couple of good shots from mount.
Parchi controlling the position easily from mount.
That's three minutes gone in the round.
Parchi scores with a couple of good head shots there.
The fighters are tangled up in the ropes here. We might need a restart if the fighters can't break free themselves.
Parchi putting on the heat here with some good ground and pound!
Parchi putting on the heat here with some good ground and pound!
Parchi has his opponent pinned against the ropes, landing some nasty ground and pound that is really making a bit of a mess out of Ishakima's face.
Parchi throwing sloppy strikes, which aren't doing any damage.
That's four minutes gone in the round.
Parchi throwing sloppy strikes here. Perhaps if he tightened up his striking from such a dominant position, he'd be able to finish easier.
Ishakima is in a horrible position here, under a barrage of strikes, he's managing to avoid any damage.
Ishakima is in a horrible position here, under a barrage of strikes, he's managing to avoid any damage.
Ishakima is desperately trying to improve his position but Parchi has a good base and remains in mount.
Parchi looking to control and managing it successfully.
Fantastic stuff here - a very entertaining period of action, which has drawn cheers from the crowd.
Parchi raining down hammerfists from mount.
As the round comes to an end the crowd are showing their appreciation for a great round of action.
BOOM! Parchi connects with a massive shot to the dome!
Ishakima is in a horrible position here, under a barrage of strikes, he's managing to avoid any damage.
And thats the end of the round the fighters go back to their corners.
Archie Parchi dominated that round.
The corners get their ten second warning. Both fighters stand from their stools and stare eachother down, ready to get back to the action.
Ishakima tries to close the distance and clinch up against the ropes but Parchi paws at him with a jab and circles away.
Ishakima stuffs a takedown. It's all about dictating where the fight takes place and Ishakima wants it to stay on the feet.
Parchi shoots in for a takedown - he's clinched up with Ishakima but Ishakima pushes him off and we're back to square one.
Parchi tries for a takedown but Ishakima sees it coming a mile off and avoids it easily.
Hiroki Ishakima has stuffed three takedown attempts in the round now. That's going to take a lot out of Archie Parchi.
Parchi keeps the fight on the outside.
Ishakima is looking to take this fight into the clinch.
Parchi has a takedown stuffed.
The fight stays on the outside here - Ishakima looks like he's thinking about clinching though.
Parchi is breathing heavily.
That's one minute gone in the round.
Ishakima scores with a one two! Parchi had his feet all tangled up there and couldn't avoid the strikes.

It looks like Archie Parchi has been cut.
Ishakima doesn't manage to clinch there - Parchi circles away.
The fight stays on the outside here - Ishakima looks like he's thinking about clinching though.
Ishakima fails with an attempt to clinch.
Ishakima doesn't manage to clinch there - Parchi circles away.
Parchi shoots in for a takedown but Ishakima shows good takedown defense there and keeps this one on the feet.
Hiroki Ishakima is looking to keep the fight on the feet at all costs.
Ishakima tries to close the distance and clinch but Parchi swats him to one side with an open hand palm strike and circles away.
Ishakima lands three nice shots there - that looked like it hurt!
That's two minutes gone in the round.
Ishakima Rushes Parchi and starts throwing punches like they are going out of style! Parchi is up against the ropes and has nowhere to go. Ishakima Piles on the pressure and Parchi crumples to the floor! This one is all over!
Ladies and gentlemen, after 2:11 of round 2, we have a winner by way of TKO (Strikes). Hiroki Ishakima!
|
|
|
|
|
|
|
|
|
|
|
|
|
|
|
|
|
|
|
|
|
|
|
| S |
C
A |
G |
S |
C
B |
G |
|
S |
C |
G |
|
energy
A | B |
|
hype
A | B |
|
pop
A | B |
|
mgr
A | B |
|
FIGHT
RATING
52% |
|
|
|
|
|
|
|
Undercard bout
|
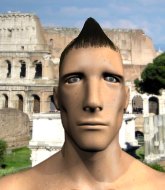
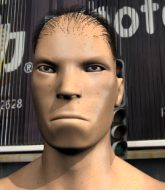
Coming up we have a light heavyweight MMA rules bout between Tim Capone (ranked 0 p4p, 0 weight class) and Carl Sizzou (ranked 0 p4p, 0 weight class). These two fighters really are very evenly matched on the feet - it will be fascinating to see who can assert themselves in that aspect of the fight.
 |
|
 |
| 187 cm
23
215 lbs
4 - 4 - 0 |
|
195 cm
24
216 lbs
7 - 4 - 0 |
Decent wrestler
Excellent boxer
Very strong |
|
BJJ White Belt
Excellent boxer
Granite chin |
|
| |
|
Ladies and gentlemen. This fight is 3 rounds, in the light heavyweight division.
Introducing the fighter to my left, fighting out of the red corner.
With a record of
4 - 4 - 0, fighting out of Tokyo, Tim Capone!
And introducing the fighter to my right, fighting out of the blue corner.
With a record of
7 - 4 - 0, fighting out of Tokyo, Carl Sizzou!
The judges for this bout are Yukihiro Yamamoto, Yuuki Gou and Hirohito Nitta.
The bell rings for round one and we are underway!
Capone takes an uppercut right on the button but keeps his composure.
Capone misses with the combination.
Capone avoids the body shot from Sizzou.
Capone avoids the body shot from Sizzou.
Sizzou looks to score with a jab to the body but Capone is just out of range.
Capone rushes forward with a series of wild hooks but Sizzou moves out of range and avoids them all easily.
A big right from Capone misses.
Capone misses with the combination.
Capone moves out of range as Sizzou strikes.
Capone dips down and scores with a jab to the body.
Sizzou looks to score with a jab to the body but Capone is just out of range.
Sizzou thuds his right hand into Capone's forehead from close range. That could be painful for both fighters.
Capone throws an overhand right that lands on Sizzou's shoulder, as Sizzou tries to avoid the shot.
Capone has his head snapped back a nice jab. A little nod from Capone there as he acknowledges the shot.
Fantastic stuff here - a very entertaining period of action, which has drawn cheers from the crowd.
Sizzou thuds a left hand into Capone's body.
Capone throws a wild combination but nothing lands.
Capone needs to keep his hands up - Sizzou had a free shot at his head there.
Capone throws a right and a left that both miss.
Sizzou misses with a wild body shot.
That's one minute gone in the round.
Sizzou scores with a reasonable looking shot to the body. Capone doesn't seem bothered though.
Capone throws out a loose jab but Sizzou uses good head movement to avoid it.
Capone takes a jab right on the nose. That must have hurt but he shrugs his shoulders and looks to return the favor.
Capone swings and misses with a hook to the body.
Sizzou lands with a right hand.
Capone on the wrong end of an overhand right that came out of nowhere.
Sizzou catches Capone with a nice straight right. He seems pissed - ooooh, it's on now! On like donkey kong!
Capone throws a hook but Sizzou avoids it easily.
Capone throws a jab, cross combination which is slipped
and Sizzou counters with a three punch combination, finished off with a leg kick. Nice work.
This has been an exciting period of action!
Sizzou ducks low and lands a nice hook to the body of his opponent.
Sizzou has used his reach advantage pretty well so far tonight.
Sizzou misses with a two punch combination.
Capone goes to the watering hole and comes back with a big thumbs up from the judges as he scores a three punch combo.
It looks like Carl Sizzou has been cut.
Capone misses with a wild body shot.
Sizzou lands a two punch combo.
Tim Capone seems to be the more aggressive standup fighter in this bout.
Capone misses with a telegraphed body shot
and Sizzou counters with a lovely straight right hand!
Capone throws a combination but it was largely blocked by Sizzou.
Capone swings wildly with a hook that is half blocked by Sizzou.
That's two minutes gone in the round.
Sizzou throws a wild combination but nothing lands.
Sizzou connects with a looping left hand that seems like it dazed Capone momentarily.
Sizzou stooping low to avoid any incoming strikes and then lunges in with an uppercut come cross that lands flush.
Sizzou clobbers Capone with an overhand right that has the crowd gasping. That made a horrendous noise.
Sizzou misses with a body shot.
Capone fails to land with the punch combination there - jab, cross, hook, miss, miss, miss.
Good exchange - Sizzou coming out on top.
Capone ducks under a wild hook from Sizzou.
Sizzou blocks a jab.
Capone throws a right and a left that Sizzou avoids nicely.
Sizzou lands a jab to Capone's midsection.
A big left from Capone misses.
Capone is really struggling to find his range with his punches. Sizzou's reach advantage is clearly causing him problems.
Capone keeping a good distance there, avoiding the body shot.
Capone connects with a single shot there.
Capone misses the jab.
Nice defenses there by Sizzou.
That's three minutes gone in the round.
Capone throws a right and a left that Sizzou avoids nicely.
Sloppy strikes from Sizzou. Those never looked like landing.
Sizzou takes a body punch but keeps moving.
Sizzou looks gassed!
Sizzou dodges the punch combination from Capone.
Capone misses with a wild body shot.
A big right from Capone misses.
Some wild striking there from Capone.
Sizzou darts in and out, connecting with a jab.
Capone displays some good footwork, moving neatly out of range as Sizzou throws out the jab.
Capone lunges in with swinging rights and lefts but Sizzou circles away quickly and effectively.
Capone uses some good footwork to avoid the body shot by Sizzou.
Sizzou takes a swing at Capone's ribcage but misses.
Sizzou with a hook.
Capone takes a punch to the jaw and another one to the bread basket.
That's four minutes gone in the round.
Capone takes a swing at Sizzou's ribcage but misses.
Sizzou tries to land with a swinging hook to the body but Capone was well out of range. Poor timing from Sizzou.
The crowd cheering loudly, showing their appreciation for the quality fight we're seeing here.
Capone keeping a good distance there, avoiding the body shot.
A punch combination from Sizzou misses.
Capone rushes forward with a series of wild hooks but Sizzou moves out of range and avoids them all easily.
Capone takes a solid shot to the body. That one hurt him but he's trying not to show it.
Jab, jab by Sizzou - just one landing.
Sizzou lands a body shot.
Sizzou needs to keep his hands up - Capone had a free shot at his head there.
Capone swings for the body but Sizzou moves out of range.
Sizzou throws a hard body shot but it just misses.
Sizzou on the wrong end of an overhand right that came out of nowhere.
The crowd are going absolutely nuts as the round comes to an end - what a fantastic round of action!
Capone ducks under an overhand right and circles away with a smile on his face.
Sizzou is landing a lot of head punches in this opening round! Capone had better start moving his head a bit unless he wants his face to turn into pâté.
Capone works his jab well there, keeping his opponent at a distance.
Capone scores with the left hand. Sizzou knows he should have avoided that one.
Capone throws a series of punches but Sizzou moves out of range.
And thats the end of the round the fighters go back to their corners.
A close round but Carl Sizzou will probably get the nod.
The cut man is working on Carl Sizzou's cut.
That's the end of the round. The referee orders the cornermen out of the ring so we can get back down to business.
Capone jabs at Sizzou's body.
Capone throws a big shot that misses.
Sizzou connects with the punch.
Sizzou misses the jab.
Capone comes forward and lands a shot to the body, then darts back out of range.
Capone takes a shot to the nose. Hopefully that hasn't broken it.
Capone misses with the combination.
A jab from Sizzou misses.
Sizzou swings for the body but Capone moves out of range.
Sizzou throws a right hand that Capone ducks under and follows up with a left that Capone also avoids with ease.
Capone swinging wildly here.
Capone fails to land with a series of punches.
Left hook, right uppercut from Capone.
Sizzou is breathing heavily.
The fans in attendance giving it up for the two fighters, who have really let it all hang out in the last minute or so!
Capone connects with a single shot there.
Some wild striking there from Capone.
That's one minute gone in the round.
Capone throws out a powerful jab.
That has opened up Carl Sizzou's cut even more.
Sizzou moves out of range as Capone strikes.
Capone fails to land with a series of punches.
A looping hook to the body misses from Sizzou. Capone does a little dance to reset his feet.
Capone throws a jab to the body, straight down the pipe. Boom. That sent Sizzou stumbling backwards but he manages to regain his composure quickly.
Capone keeping a good distance there, avoiding the body shot.
Tim Capone is looking to throw some combinations by the looks of things.
Capone lands with a cross.
Capone looks like he's developed a pretty tasty lump over his left eye. He'll need to avoid taking much more damage to that.
Sizzou lands with a cross to side of his opponent's head.
Capone fakes low and throws an overhand right that catches Sizzou on the side of the head.
Capone throws a nice hook to the body that draws an oooh from the crowd.
This has been an exciting period of action!
Sizzou throws a series of punches but Capone avoids them all with ease.
Capone tries to land with a swinging hook to the body but Sizzou was well out of range. Poor timing from Capone.
Capone thows a body shot but no joy.
Capone steps to the side to avoid the strikes from Sizzou.
Capone misses with a body shot. Nice footwork from Sizzou.
That's two minutes gone in the round.
Capone throws a nice looking combination but Sizzou bobs and weaves to avoid any damage.
Sizzou looks to land a left hand but Capone moved out of range nicely.
Capone misses with a hook.
Sizzou takes a shot right to the liver - Bas would have been proud of that punch.
Capone lands with a cross to side of his opponent's head.
Sizzou swings wildly with a right hand that was never going to find it's target.
Sizzou looks shocked there as he takes a right hand to the temple.
The fighters are starting to get sweaty, which will make takedowns a bit more tricky.
Sizzou ducks down and throws a hook to the body but Capone moves away.
Capone ducks down and throws a hook to the body but Sizzou moves away.
Sizzou uses some good footwork to avoid the body shot by Capone.
Capone lands a jab-cross combination.
The cut above Carl Sizzou's eye is starting to cause him problems now.
Sizzou tries to move into range but Capone moves to the side and lands with a nice right hand.
Capone throws a combination but it was largely blocked by Sizzou.
Sizzou slips under a jab from Capone.
Capone falls off balance throwing a combination
and Capone takes a counter punch right on the button for his troubles.
That's three minutes gone in the round.
Sizzou moves out of range of the strikes.
Sizzou scores with a three punch combo!
Sizzou fails to land with the punch combination there - jab, cross, hook, miss, miss, miss.
Sizzou stuns Capone with a nice body shot, before stepping back out of range.
Sizzou dodges the punch combination from Capone.
Capone lands with a right hand.
Capone misses with a wild combination.
Capone misses with a wild combination.
Sizzou uses good footwork to get in and out, landing a nice hook.
Sizzou lands a head shot.
Nice uppercut there from Sizzou.
That's four minutes gone in the round.
Sizzou fakes high and swings low for a body shot but Capone manages to avoid it.
Capone pushing out the jab but it's not landing.
Capone uses some good footwork to avoid the body shot by Sizzou.
No joy there for Sizzou, who threw a few shots but didn't land.
Capone throws a couple of head shots and lands with the final one - a decent hook, which struck Sizzou on the side of the head.
The crowd are loving this. Great action here.
Sizzou thows a body shot but no joy.
Sizzou slips a jab and a cross from Capone.
Capone swings wildly with a right hand that was never going to find it's target.
Sizzou moves out of range as Capone strikes.
Capone misses with a body shot. Nice footwork from Sizzou.
Sizzou throws a hook to the body but it doesn't connect.
Sizzou thuds a left hand into Capone's body.
The crowd are going absolutely nuts as the round comes to an end - what a fantastic round of action!
Capone feints a straight left to the body, then turns around with a flashy move and hits Sizzous jaw with a dramatic spinning back fist!
Sizzou takes one to the chin there.
Carl Sizzou's cut is absolute horrible now. This looks like something out of a horror film with blood covering both fighters.
No joy there for Capone, who threw a few shots but didn't land.
Sizzou scores with a straight right hand, right through his opponent's guard.
And thats the end of the round the fighters go back to their corners.
Tim Capone dominated that second round.
The cut man is working on Carl Sizzou's cut.
That's the end of the interval. I'm sure that seemed a lot quicker than a minute for our two fighters! Back to the action. This is the final round!

Capone takes a body punch but keeps moving.
This fight brought to you by 5M nutrition - it's mmmmm tasty. Nice jab by Capone.
Capone keeps his opponent at a distance with a nice jab.
Sizzou goes to the watering hole and comes back with a big thumbs up from the judges as he scores a three punch combo.
A left lands for Capone.
This is a great period of action - very entertaining stuff!
Capone takes one to the side of the head.
Capone will need to tighten up his combinations if he doesn't want to gas himself out, swinging at thin air.
Tim Capone is winning the standup battle so far.
Sizzou misses with a hook. Capone ducked under it nicely.
Sizzou looks to throw the jab but Capone is out of range.
Capone tries to land with a swinging hook to the body but Sizzou was well out of range. Poor timing from Capone.
Capone catches Sizzou with a nice straight right. He seems pissed - ooooh, it's on now! On like donkey kong!
Sizzou misses with a body shot. Nice footwork from Capone.
Both fighters are breathing heavily.
Sizzou takes a jab on the nose there. A little bit of blood seems to be coming out. Hopefully that won't affect his breathing.
The referee calls the doctor in to look at Carl Sizzou's cut. Oh no, the doctor has called an end to the bout!
Ladies and gentlemen, after 0:59 of round 3, we have a winner by way of TKO (Cut). Tim Capone!
|
|
|
|
|
|
|
|
|
|
|
|
|
|
|
|
|
|
|
|
|
|
|
| S |
C
A |
G |
S |
C
B |
G |
|
S |
C |
G |
|
energy
A | B |
|
hype
A | B |
|
pop
A | B |
|
mgr
A | B |
|
FIGHT
RATING
100% |
|
|
|
|
|
|
|
Undercard bout
|
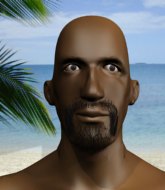
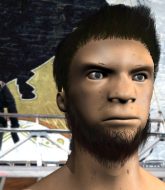
Coming up we have a welterweight MMA rules bout between Masahiko Kimura (ranked 0 p4p, 0 weight class) and Thiago Alves (ranked 0 p4p, 0 weight class). Thiago Alves has the power to score a knockout today if he connects clean with Masahiko Kimura's chin.
 |
|
 |
| 170 cm
24
187 lbs
4 - 1 - 0 |
|
180 cm
27
181 lbs
10 - 11 - 0 |
Powerful takedowns
Excellent boxer
Cardio machine |
|
Good wrestler
Excellent boxer
Good gas tank |
|
| |
|
Ladies and gentlemen. This fight is 3 rounds, in the welterweight division.
Introducing the fighter to my left, fighting out of the red corner.
With a record of
4 - 1 - 0, fighting out of Tokyo, Masahiko Kimura!
And introducing the fighter to my right, fighting out of the blue corner.
With a record of
10 - 11 - 0, fighting out of Tokyo, Thiago Alves !
The judges for this bout are Shirou Masuda, Taro Takaoka and Shigeki Fujiwara.
The bell rings for round one and we are underway!
Kimura closes the distance and clinches up with Alves , looking for a takedown. Kimura pushes Alves against the ropes but Alves circles to the side and manages to break the clinch.
Alves swings wildly with a right hand that was never going to find it's target.
Kimura with a poor takedown
and Alves counters with a crisp hook to the side of the head.
Alves throws a two punch combo that lands nicely.
Kimura fails with a takedown attempt.
That's three failed takedown attempts in the round for Masahiko Kimura. That's going to take a lot out of him.
Kimura tries to keep at a distance but Alves has taken the fight into the clinch.
Kimura is working for a takedown up against the ropes. He can't get it on this occasion though.
Alves pushes Kimura back against the ropes and lands a hook to the side of the head.
Kimura is trying to work for a single leg takedown but Alves pulls him back up using the underhooks.
Alves swings away with an uppercut that misses.

Alves 's corner calls for him to break the clinch, which he does.
That's one minute gone in the round.
Alves scores with a slapping inside leg kick.
Kimura tries for a takedown but Alves circles away easily
and Alves counters with a nice uppercut.
Kimura takes a shot right to the bread basket.
Kimura is breathing heavily.
Alves uses good head movement to avoid the hook from Kimura.
Kimura fakes high and swings low for a body shot but Alves manages to avoid it.
Kimura bobs and weaves well there to avoid the strikes.
Kimura takes a swing at Alves 's ribcage but misses.
Alves tests Kimura's chin there with a solid looking shot.
Kimura changes levels and looks for a double leg takedown. Alves tries to avoid it but Kimura manages to keep hold of a leg and drag Alves to the ground. Alves escapes though and pops straight back up to his feet.
Kimura misses with a jab to the body
and Alves counters with a two punch combo.

Kimura is rocked!
This has been an exciting period of action!
Kimura takes an uppercut right on the jaw but it doesn't phase him.
Oh Kimura is still all over the place! His legs are completely gone! Will he be able to recover?!!
That's two minutes gone in the round.
Alves dips down and scores with a jab to the body.
Alves fakes the body blow, causing Kimura to drop his hands! Left hook to the temple! Kimura goes stiff, and falls face first into the mat. Goodnight!
Ladies and gentlemen, after 2:10 of round 1, we have a winner by way of KO (Punch). Thiago Alves !
|
|
|
|
|
|
|
|
|
|
|
|
|
|
|
|
|
|
|
|
|
|
|
| S |
C
A |
G |
S |
C
B |
G |
|
S |
C |
G |
|
energy
A | B |
|
hype
A | B |
|
pop
A | B |
|
mgr
A | B |
|
FIGHT
RATING
61% |
|
|
|
|
|
|
|
Undercard bout
|
Coming up we have a welterweight MMA rules bout between Ritsuko Asuke (ranked 0 p4p, 0 weight class) and Michael Rourk (ranked 0 p4p, 0 weight class). The fight MMA fans around the world have waited their entire lives for!
 |
|
 |
| 163 cm
20
170 lbs
4 - 1 - 0 |
|
190 cm
24
176 lbs
8 - 9 - 0 |
BJJ Brown Belt
Excellent boxer
Experienced |
|
Powerful takedowns
Decent boxing
Granite chin |
|
| |
|
Ladies and gentlemen. This fight is 3 rounds, in the welterweight division.
Introducing the fighter to my left, fighting out of the red corner.
With a record of
4 - 1 - 0, fighting out of Tokyo, Ritsuko Asuke!
And introducing the fighter to my right, fighting out of the blue corner.
With a record of
8 - 9 - 0, fighting out of Tokyo, Michael Rourk!
The judges for this bout are Yuuki Gou, Tatsuya Matsuyama and Shirou Masuda.
The bell rings for round one and we are underway!
Asuke throws a wild combination but nothing lands.
The fight stays on the outside here - Rourk looks like he's thinking about clinching though.
Asuke misses with a hook
and Rourk makes him pay by landing a nice hook to the body before moving out of range.
A combination from Asuke does no damage.
Rourk dodges the punch combination from Asuke.
Asuke swings wildly with a right hand that was never going to find it's target.
Rourk has a takedown stuffed.
Asuke scores with a jab to the jaw of his opponent.
Asuke looks to land a right hand but Rourk moved out of range.
Rourk tries to close the distance and clinch but Asuke swats him to one side with an open hand palm strike and circles away.
Rourk fails with a takedown attempt.
Rourk on the wrong end of a nice jab.
That's one minute gone in the round.
Asuke thuds a left hand into Rourk's body.
Rourk will have to do better than that with his takedown attempts.
Ritsuko Asuke has stuffed three takedown attempts in the round now. That's going to take a lot out of Michael Rourk.
Rourk shoots in looking for a takedown. Asuke tries to sprawl out of it but Rourk keeps driving through. The fighters are pinned against the ropes. Asuke manages to get underhooks and after a bit of a struggle, circles away and we're back to standing.
Rourk keeping his hands up high there, blocking the jab from Asuke.
Rourk looks for a takedown here. Will he get it? Asuke is fending him off so far but Rourk persists. Nope, Asuke circles away and we're back to standing.
Rourk misses with a takedown
enabling Asuke to counter with a crisp jab.
Rourk will have to do better than that with his takedown attempts.
Rourk drives through with a takedown into Asuke's guard. Let's see what he can do from the top position.
Rourk is pushing down on Asuke's leg trying to pass to half guard. Asuke is fighting to maintain full guard but Rourk has managed to sneak the leg through.
Rourk tries to pass the half guard into mount. Asuke knows what he's doing though and prevents the attempt.
That's two minutes gone in the round.
Asuke wants to get back to his feet.
Fantastic stuff here - a very entertaining period of action, which has drawn cheers from the crowd.
Rourk slows the pace down in half guard.
Asuke is looking to regain full guard. Not this time though.
Asuke trying to control but Rourk postures up.
Asuke pushes Rourk off looking to stand but Rourk dives back in and keeps control.
Asuke actively working from the bottom here.
Asuke looking to work for a kimura from the bottom.
Rourk looks over to his corner - he wants some instructions but his corner are not responding.
The fighters are trapped in the ropes so we're going to have a reposition here. The ref calls for a break and repositions the fighters in the center of the ring.
That's three minutes gone in the round.
Asuke is looking to sinch up a guillotine here but Rourk pulls his head out easily.
Rourk sitting and controlling from the half guard.
Asuke wants to get back to his feet.
Rourk is taking a breather. Asuke says something to him but it's hard to make out. Perhaps he's telling him to get on with it and actually do something.
Asuke looking for submissions from an awkward position here.
Asuke trying to control from the bottom.
Asuke is trying to get back to full guard.
The fighters are starting to get a bit slippery now, which will make submissions a bit more difficult.
Asuke wants to control but Rourk passes into side.
Rourk trying to control the action but Asuke is working from the bottom.
That's four minutes gone in the round.
Check out the look on Rourk's face as he threw that strike - that's one determined fighter!
Asuke wants to escape from the position here - easier said than done!
Asuke is trying to escape the position but Rourk is controlling the position.
Rourk working the ground and pound.
The crowd cheering loudly, showing their appreciation for the quality fight we're seeing here.
Asuke tries to bench press Rourk off him but Rourk keeps the position.
Rourk working away.
Rourk controlling the position from side mount.
As the round comes to an end the crowd are showing their appreciation for a great round of action.
Asuke is trying to control Rourk's posture but Rourk avoids it.
And thats the end of the round the fighters go back to their corners.
A close round but Michael Rourk will probably get the nod.
The fighters get back to their feet, the hooter sounds and we're back to the action!
The fighters circling - Asuke throws out the jab but it was never going to land.
Rourk doesn't succeed with the takedown
letting Asuke counter with a right hand.
Rourk shoots in for a takedown but Asuke shows good takedown defense there and keeps this one on the feet.
Rourk shoots in and gets a takedown into Asuke's guard.
Asuke had isolated an arm as going for a kimura. Rourk defends it easily.
Asuke has a loose triangle. He'll be looking to tighten that up but Rourk can see exactly what he's planning and manages to posture up and free himself.
The fighters are tangled up in the ropes here. We might need a restart if the fighters can't break free themselves.
Rourk preventing the sweep.
Asuke looking for submissions from the bottom here. Moving his hips around, possibly looking for an armbar.
Asuke is working an open guard here, looking to improve his position. No doubt that will leave him open to counters but at least he's being more offensive.
Asuke might be looking to lock onto one of his opponent's long limbs for a submission, whilst we're on the ground.
That's one minute gone in the round.
Asuke throws his legs up looking for a submission but Rourk uses it to pass to side control.
Both fighters are absolutely exhausted here.
Asuke is trying to escape and get back to his feet.
Rourk cracks Asuke with a big elbow.

Rourk tries for a kimura. Not really close to a finish though.
Rourk controls the position.
Asuke manages to work his way to half guard, despite Rourk's best efforts.
Rourk is pressing down on Asuke's thigh, looking to free his foot. Asuke is holding on for now.
Asuke is refusing to be controlled, as Rourk sits in half guard.
That's two minutes gone in the round.
Rourk has freed up his trapped foot and advances to mount.
Rourk takes his opponent's back. Perhaps a chance to lock up a rear naked choke here.
Rourk is working for the choke. I would put my money on him to finish from this position. He's rolled onto his back and has dragged Asuke with him. Asuke is trying to defend but Rourk has an arm under the chin now! Asuke grimaces and is forced to tap out!
Ladies and gentlemen, after 2:43 of round 2, we have a winner by way of Submission (RNC). Michael Rourk!
|
|
|
|
|
|
|
|
|
|
|
|
|
|
|
|
|
|
|
|
|
|
|
| S |
C
A |
G |
S |
C
B |
G |
|
S |
C |
G |
|
energy
A | B |
|
hype
A | B |
|
pop
A | B |
|
mgr
A | B |
|
FIGHT
RATING
58% |
|
|
|
|
|
|
|
Undercard bout
|
Coming up we have a light heavyweight MMA rules bout between Jarek Thrun (ranked 0 p4p, 0 weight class) and Diziz Sparta (ranked 0 p4p, 0 weight class). Sparta has chosen Just like you imagined - 300 theme as his entrance music, which hasn't gone down very well with the crowd. Both fighter's entrance songs getting the crowd jumping here.
 |
|
 |
| 191 cm
23
224 lbs
7 - 2 - 0 |
|
190 cm
31
220 lbs
16 - 20 - 0 |
BJJ Brown Belt
Excellent boxer
Granite chin |
|
Good wrestler
Excellent boxer
Granite chin |
|
| |
|
Ladies and gentlemen. This fight is 3 rounds, in the light heavyweight division.
Introducing the fighter to my left, fighting out of the red corner.
With a record of
7 - 2 - 0, fighting out of Tokyo, Jarek Thrun!
And introducing the fighter to my right, fighting out of the blue corner.
With a record of
16 - 20 - 0, fighting out of Tokyo, Diziz Sparta!
The judges for this bout are Tatsuya Matsuyama, Shirou Masuda and Taro Takaoka.
The bell rings for round one and we are underway!
Sparta staying out of range there.
Jarek Thrun seems to be the more aggressive standup fighter in this bout.
Thrun uses decent footwork to sidestep a right hand from Sparta.
Thrun throws a monster uppercut resembling something out of street fighter but it doesn't land.
Sparta looks to land a right hand but Thrun moved out of range.
Thrun connects with the punch.
Thrun will need to tighten up his combinations if he doesn't want to gas himself out, swinging at thin air.
Thrun swings wildly with a right hand that was never going to find it's target.
Sparta throws a jab to the body, straight down the pipe. Boom. That sent Thrun stumbling backwards but he manages to regain his composure quickly.
Thrun throws a sloppy body shot
and Sparta counters with a stiff right hand.
Wooooo! Give it up for these two warriors! They are putting on a show!
Sparta scores with a takedown into Thrun's guard.
We could do with one of the fighters taking the initiative a bit more on the ground - they're both waiting to capitalize on a mistake.
The referee is pacing around the two fighters - he looks like he's thinking about a standup.
Sparta trying to land body shots but he keeps hitting the mat.
Sparta is working Thrun over from the guard. He should look to pass the guard and do a little more damage with these strikes.
Sparta in full guard, throwing the ground and pound. No damage this time.
Hammerfist, elbow! yells Sparta's corner. There ya go! There ya go!
Sparta looking to pass the guard.
Sparta landing some decent shots from guard.
That's one minute gone in the round.
Sparta in full guard, throwing the ground and pound. No damage this time.
Thrun pulls Sparta in close to prevent any damage.
Thrun wants to sweep but no luck.
Sparta makes a bit of distance and scores with some ground and pound, still in guard.
Sparta throws an elbow that misses. Thrun uses the momentum to reverse the position. He's now in Sparta's guard. Nice move by Thrun!
Sparta looking to control.
Sparta is working an open guard here, looking to improve his position. No doubt that will leave him open to counters but at least he's being more offensive.
Thrun with a flurry of punches that miss.
Thrun is pushing down on Sparta's leg trying to pass to half guard. Sparta is fighting to maintain full guard but Thrun has managed to sneak the leg through.
The fighters are tangled up in the ropes here. We might need a restart if the fighters can't break free themselves.
Sparta wants to control but Thrun is keeping busy.
Sparta manages to get to full guard.
That's two minutes gone in the round.
Thrun trying to control the position from guard on top but Sparta is wriggling around, looking for whatever he can.
Sparta pulls Thrun in close to his closed guard and prevents Thrun from doing any damage or advancing position.
There's a bit of a scramble here and now Sparta is on top in guard.
Fantastic stuff here - a very entertaining period of action, which has drawn cheers from the crowd.
Sparta content to strike from guard, landing some decent shots.
Thrun preventing the ground and pound from doing any damage.
Sparta postures up in Thrun's guard and throws a big left but Thrun blocks it.
Thrun keeping moving, preventing Sparta from controlling successfully.
Sparta loading up with the ground and pound but he's missing more than he's landing in this flurry.
That's three minutes gone in the round.
Thrun utilising some decent striking defenses from the guard, preventing the ground and pound.
Sparta thinks about going for a leg but decides against it, in order to maintain the position.
Sparta missing there with some ground and pound from the guard.
Thrun is working from a closed guard but he's struggling to control his opponent.
Sparta is holding a leg here, probably looking for an ankle lock - he drops back and goes for it! Thrun is in trouble! Is it all over??? No! Thrun has escaped and now he's on top!
Sparta is working an open guard here, looking to improve his position. No doubt that will leave him open to counters but at least he's being more offensive.
Sparta manages to land a sweep and now he's in mount on top!
Thrun takes a big shot to the head but keeps on trying to improve his position.
That's four minutes gone in the round.
The crowd cheering loudly, showing their appreciation for the quality fight we're seeing here.
Thrun taking shots to the head.
Sparta landing strikes from the mount and Thrun is in trouble!
Sparta dominating with strikes here.
The crowd growing excited in anticipation of a finish here! Right on cue, Sparta cracks his opponent with a massive right hand that draws loud cheers!
Thrun is working to get back to half guard.
Sparta dominating with strikes here.
Thrun is looking to improve his position but Sparta isn't that keen on the idea.
Sparta lands a shot to the body, followed up by a shot to the exposed head of his trapped opponent.
Thrun is rocked!
The crowd are going absolutely nuts as the round comes to an end - what a fantastic round of action!
Sparta lands a big elbow.
Oh Thrun is still in real trouble! Will he be able to recover?!!
Sparta raining down shots from the mount!
Sparta prevents Thrun from getting the reversal.
And thats the end of the round the fighters go back to their corners.
Diziz Sparta dominated that round.
That's time! Thrun's corner gives him a slap on the ass as he gets ready to fight.
Sparta closes the distance, clinches up and gets a nice trip takedown into side control. Very smooth.
Thrun seems to have got his legs back now.
Sparta scoring with punches and elbows.
Sparta creates some space and throws a big elbow, but Thrun sees it coming and moves his head just enough to avoid the strike.
Sparta misses with a strike but at least he's keeping busy, looking to cause some damage - that will still help him when it comes to the judges scorecards.
Thrun is sneaking out the side here. He's bucked Sparta off and has taken his back!
Sparta staying busy and making it hard for Thrun to control.
The fighters are trapped in the ropes so we're going to have a reposition here. The ref calls for a break and repositions the fighters in the center of the ring.
Sparta wants to escape the position.
Thrun not allowing Sparta to control his hands.
Diziz Sparta has got the better of the ground game so far.
Thrun working for a RNC but it's not happening just yet.
Sparta trying to control the hands but Thrun breaks the grip.
Sparta has been the more effective fighter overall so far.
This is a great period of action - very entertaining stuff!
Thrun patiently working for the choke. Which fighter will keep their nerve here?
Both fighters are absolutely exhausted here.
Thrun is not going to allow Sparta to sit and survive in this position.
That's one minute gone in the round.
Sparta looking very determined here, making life difficult for Thrun.
Thrun doesn't have the hooks in and Sparta manages to turn into his guard.
Sparta stands up over Thrun, holding his feet. He dives back in and lands a decent shot to the head.
Sparta with a couple of shots to the head there. Not particularly brutal.
Thrun tries to land a sweep but no joy.
Thrun working from the bottom, still in full guard. He's managed to get a loose triangle. Sparta doesn't seem to be doing much to defend here, obviously he feels comfortable in the position. Sparta manages to throw the legs off his shoulder and he's back into guard - no problem.
Sparta landing with the ground and pound.
Sparta scoring with punches to the head and body.
Sparta works over Thrun with some ground and pound from guard.
Sparta lands a couple of digs.
Sparta keeps in close for a moment and lands a decent shot to the side of Thrun's head.
That's two minutes gone in the round.
The fans in attendance giving it up for the two fighters, who have really let it all hang out in the last minute or so!
Sparta in full guard, throwing the ground and pound. No damage this time.
Thrun looking to control.
Sparta throws a big elbow that misses.
Sparta landing some decent shots from guard.
Sparta throws an elbow that misses. Thrun uses the momentum to reverse the position. He's now in Sparta's guard. Nice move by Thrun!
Thrun looking to pass the guard.
Sparta manages to land a sweep and now he's in mount on top!
Sparta is landing with some decent strikes but Thrun is trying to advance his position so the referee is letting the fight continue.
Thrun taking shots to the head.
Sparta working the ground and pound effectively.
That's three minutes gone in the round.
Sparta landing strikes, looking to finish!
Sparta connects with a bit shot that sees Thrun covering up! More strikes from Sparta and the referee jumps in to stop the fight! Sparta is our winner by TKO!
Ladies and gentlemen, after 3:27 of round 2, we have a winner by way of TKO (Strikes). Diziz Sparta!
Diziz Sparta took some time post fight to say the following; 'This fight is kind of my comeback. After some let down, I\'m more focused and motivated than ever!! I will become the best 205 of Tokyo!'.
|
|
|
|
|
|
|
|
|
|
|
|
|
|
|
|
|
|
|
|
|
|
|
| S |
C
A |
G |
S |
C
B |
G |
|
S |
C |
G |
|
energy
A | B |
|
hype
A | B |
|
pop
A | B |
|
mgr
A | B |
|
FIGHT
RATING
100% |
|
|
|
|
|
|
|
Undercard bout
|
Coming up we have a welterweight MMA rules bout between Jose Aldo (ranked 0 p4p, 0 weight class) and Jonathan Hawkes (ranked 0 p4p, 0 weight class). Aldo kept the crowd waiting but all that was forgotten when his ring entrance music started. The incomparable musical genius that is Rough Rida. Hawkes comes into a darkened arena with his song building. I'm Shipping Up to Boston kicks in, the lights come on and the crowd goes wild! What a showman! Over to our ring announcer for the fighter introductions!
 |
|
 |
| 180 cm
28
179 lbs
10 - 5 - 0 |
|
180 cm
27
181 lbs
12 - 11 - 0 |
Good wrestling
World class boxer
Granite chin |
|
Good wrestler
Lethal high kicks
Granite chin |
|
| |
|
Ladies and gentlemen. This fight is 3 rounds, in the welterweight division.
Introducing the fighter to my left, fighting out of the red corner.
With a record of
10 - 5 - 0, fighting out of Tokyo, Jose Aldo!
And introducing the fighter to my right, fighting out of the blue corner.
With a record of
12 - 11 - 0, fighting out of Tokyo, Jonathan Hawkes!
The judges for this bout are Yukihiro Yamamoto, Shigeki Fujiwara and Taro Takaoka.
The bell rings for round one and we are underway!
Hawkes throws a head kick but Aldo moves out of range.
Hawkes throws a body punch but Aldo moves out of range.
Hawkes avoids a punch combination nicely.
Aldo avoids the head kick by Hawkes.
Hawkes looks to throw the jab but Aldo is out of range.
Hawkes takes the fight into the clinch.
Aldo tries to take the fight to the ground by pulling guard but can't manage it.
Aldo fails to land with a short punch on the inside.
Aldo tries to pull guard but Hawkes forces him back to his feet, against the ropes.
A quick uppercut on the inside from Hawkes.
Aldo misses with a hook from the clinch.
Hawkes missing with knees to the body.
Hawkes is defending well against a takedown attempt.
That's three failed takedown attempts in the round for Jose Aldo. That's going to take a lot out of him.
A short right hand to the side of the head by Hawkes.
Hawkes with the Thai clinch, lands a knee to the head.

It looks like Jose Aldo has been cut.
Aldo tries to pull guard but Hawkes holds him up against the ropes and eventually Aldo drops back down to his feet.
Hawkes scores with a nice hook to the head.
Aldo misses with a punch on the inside.
That's one minute gone in the round.
Aldo is working Hawkes over against the ropes.
Aldo lands with a left to the head.
Aldo lands a nice looking hook to the body, against the ropes.
Aldo misses with a punch to the body.
Aldo working aggressively here.
Aldo misses with a punch on the inside.
Aldo lands a hook to the body. It's hard to tell if that hurt Hawkes or not.
Aldo throws a head punch that misses.
Aldo tries to jump guard but he falls flat on his backside. Hawkes smiles and moves away.
Aldo slips a straight right by Hawkes.
Hawkes scores with a push kick.
The crowd are loving this. Great action here.
Hawkes darts in and clinches Aldo up against the ropes.
Hawkes misses with the head strike.
Aldo misses with a hook from the clinch.
Hawkes with the Thai clinch. He's looking to land a big knee but he's not managed it this time.
Hawkes digs a right hand into Aldo's ribs. Those have got to be taking their toll on Aldo's gas tank.
That's two minutes gone in the round.
Hawkes throws a knee to the head but misses.
Hawkes is pressed up against the ropes. Aldo has hold of a leg and is looking to drag Hawkes down to the mat. Hawkes avoids the attempt though and has circled away. We're back to striking at a distance.
Hawkes rushes in with a sloppy looking punch
and Aldo counters with a nice jab to the body that keeps Hawkes thinking.
Hawkes throws a solid leg kick but Aldo takes the impact on his shin and smiles at Hawkes.
Hawkes goes for a spinning back kick but it misses.
The fight moves into the clinch position.
A quick uppercut on the inside from Hawkes.
Aldo blocking some punches.
Aldo gets through Hawkes's defenses to land a nice punch to the side of the head.
Aldo lands with a short punch from the clinch.
Aldo lands punches inside but they're not really causing much damage.
Aldo scores with an uppercut up the middle.
A head punch on the inside from Hawkes fails to land.
Aldo tries for a takedown but Hawkes manages to get underhooks.
Hawkes softening up his opponent with strikes, against the ropes.
Hawkes with an attempt at a knee that misses.
Aldo lands a shoulder strike.
That's three minutes gone in the round.
Aldo blocking some punches.
Aldo manages to pull guard. Let's see whether he can land a sub off his back.
The referee is asking the fighters to pick up the pace.
Hawkes tries to stand but Aldo is controlling from the bottom.
Hawkes looks gassed!
Hawkes postures up.
Hawkes trying to control the position from guard on top but Aldo is wriggling around, looking for whatever he can.
Aldo wants to sweep here but Hawkes controlling him for the moment.
Aldo is trying to control the position from the bottom.

OK we're going to have a standup here. Jonathan Hawkes hasn't been effective enough on the ground and the referee wants a restart.
Hawkes throws a head kick that misses and slips in the process. He scrambles back to his feet and the fighters circle.
That's four minutes gone in the round.
Hawkes throws a body kick but he was well out of range there.
Jonathan Hawkes is looking to keep the fight on the feet at all costs.
Aldo scores with a straight right hand, right through his opponent's guard.
Hawkes tries a head kick but it misses.
A head kick misses from Hawkes.
Nice shot lands for Aldo.
A combination from Hawkes does no damage.
Hawkes needs to keep his hands up - Aldo had a free shot at his head there.
Aldo forces Hawkes back against the ropes and clinches.
The crowd are loving this. Great action here.
An uppercut on the inside fails to land for Aldo.
Aldo looking for a takedown.
The crowd are going absolutely nuts as the round comes to an end - what a fantastic round of action!
Hawkes looks to throw an elbow but misses.
Aldo pushes Hawkes back against the ropes and lands a hook to the side of the head.
Hawkes throws a vicious knee straight up the middle but Aldo blocks it with crossed arms.
Aldo tries to land a shot to the body but it's blocked.
Aldo drags the fight down to the ground.
Hawkes pressing down on his opponent's thigh, looking to pass guard. Aldo is keeping the position for now.
And thats the end of the round the fighters go back to their corners.
That was a close round but I would say that Jose Aldo will probably get the nod.
The cut man is working on Jose Aldo's cut.
That's the end of the interval. I'm sure that seemed a lot quicker than a minute for our two fighters! Back to the action.
Hawkes throws a push kick but Aldo slaps the foot to one side.
The crowd cheers as Aldo lands an impressive looking overhand right. Hawkes doesn't seem phased though.
Aldo swings wildly with a hook that is half blocked by Hawkes.
Hawkes tries to clinch there but Aldo circles away.
Aldo's jab looks to have found its range, popping Hawkes under the eye.
A looping hook to the body misses from Aldo. Hawkes does a little dance to reset his feet.
Aldo comes forward and lands a shot to the body, then darts back out of range.
Hawkes has his hands up protecting his head but a hook from Aldo finds it's way round the side to connect with Hawkes's head.
Hawkes misses with a half-hearted attempt at a head kick.
Hawkes throws a push kick but Aldo slaps the foot to one side.
Jonathan Hawkes seems to be the more aggressive standup fighter in this bout.
Hawkes bobs and weaves well there to avoid the strikes.
Aldo connects with a looping right hand.
Aldo moves out of range as Hawkes throws a body kick.
That's one minute gone in the round.
Hawkes throws an uppercut from half a mile away. Aldo sees it coming and avoids it easily.
Hawkes keeps the fight standing with a nice sprawl.
Aldo with a poor takedown
and Hawkes counters with a nice body shot.
Aldo moves into the clinch.
Aldo blocks a couple of punches on the inside.
Aldo pulls guard successfully.
Hawkes trying to control but Aldo is working from the bottom.
Hawkes throws a big right hand that misses.
Aldo trying to keep a closed guard but Hawkes is proving a slippery customer.
Aldo has momentary wrist control but Hawkes slips an elbow through the middle.
Aldo working a defensive guard here.
That's two minutes gone in the round.
Aldo has his foot on Hawkes's thigh. He's trying to push off and get in position for a triangle, I think. Hawkes works his way back into a safe position though.
Hawkes cracks Aldo with a solid left hand.
Aldo looking to sweep here. No luck so far.
Wooooo! Give it up for these two warriors! They are putting on a show!
Hawkes tries to free his leg and advance position but Aldo is retaining full guard.
Hawkes stays in close to Aldo's body and controls the position.
Aldo has an active guard here but Hawkes has managed to pass into half guard.
Both fighters are absolutely exhausted here.
Hawkes throwing shots but they're hitting the canvas more than the man.
Hawkes frees up his trapped foot and advances to mount.
That's three minutes gone in the round.
Aldo is wriggling around trying to escape.
Hawkes dominating with strikes here.
Hawkes tries to control but Aldo wriggling away.
Hawkes dominating with strikes here.
Hawkes scores with a couple of good head shots there.
Hawkes with shots to the head and body - Aldo looks very uncomfortable down there.
We've seen a great period of action over the last minute or so - credit to both fighters for going all out!
Hawkes has his opponent pinned against the ropes, landing some nasty ground and pound that is really making a bit of a mess out of Aldo's face.
Hawkes lands with some vicious ground and pound - can Aldo hang on?
Aldo is working to get back to half guard.
That's four minutes gone in the round.
Hawkes has the superior BJJ but he's also working some ground strikes into his gameplan.
Hawkes raining down hammerfists from mount.
Aldo tries to get back to half guard but can't.
Hawkes lands a big shot there that rocks Aldo but he's holding on and managing to survive for now.
The fighters are tangled up in the ropes here. We might need a restart if the fighters can't break free themselves.
BOOM! Hawkes connects with a massive shot to the dome!
Hawkes working away from the top, dropping strikes.
Hawkes controlling from the full mount.
The referee warns Aldo that he has to improve his position here as he takes two more clean shots to the head.
The crowd are going absolutely nuts as the round comes to an end - what a fantastic round of action!
Hawkes trying to control but Aldo is having none of it.
And thats the end of the round the fighters go back to their corners.
Jonathan Hawkes showed his class in that round. I'd imagine he'll take it on all the scorecards.
The cut man is working on Jose Aldo's cut.
That's the end of the interval. I'm sure that seemed a lot quicker than a minute for our two fighters! Back to the action. This is the final round!
Hawkes throws a sloppy head kick and Aldo moves out of range easily.
Aldo looks for a takedown but Hawkes sprawls well.
Hawkes keeps the fight standing with a nice sprawl.
Aldo is on the wrong end of a nice combination from Hawkes.
Hawkes throws a head kick that misses and slips in the process. He scrambles back to his feet and the fighters circle.
Aldo shoots in for a takedown! He's got it and he's managed to land in full mount! That's better than Aldo was expecting from the takedown attempt, I'm sure!
Aldo prevents Hawkes from getting the reversal.
Both fighters are breathing heavily.
Aldo is looking to secure an arm. He's managed it! He's pivoting for an armbar - that looks tight! But Hawkes has managed to get out of it and now he's in a dominant position. Nice work from Hawkes!
That's one minute gone in the round.
Hawkes landing with the ground and pound.
Aldo not looking particularly offensive just at the moment.
Hawkes with a nice head shot there.
Hawkes wanted to stand there but Aldo had control of the position.
Aldo is trying to control the position from the bottom.
Hawkes postures up and lands some nice ground and pound.
Hawkes working from the guard for now, landing some ground and pound.
That's two minutes gone in the round.
Aldo not looking particularly offensive just at the moment.
Hawkes trying to control the position from guard on top but Aldo is wriggling around, looking for whatever he can.
Hawkes lands a couple of elbows.
Aldo is trying to control the position from the bottom.
The fighters are trapped in the ropes so we're going to have a reposition here. The ref calls for a break and repositions the fighters in the center of the ring.
If this pace continues, the referee will definitely step in and force a standup.
Aldo utilising some decent striking defenses from the guard, preventing the ground and pound.
Hawkes stopping the sweep attempt from Aldo.
Hawkes tries to free his leg and advance position but Aldo is retaining full guard.
That's three minutes gone in the round.
Aldo looking to control.
The ref stands the fighters back up because Jose Aldo just wasn't active enough.
Hawkes has taken the fight to the clinch.
Aldo's head jolts backwards as he takes an uppercut right on the button!
Aldo on the defensive, avoiding the knees to the body.
Hawkes with an attempt at a knee that misses.
Aldo lands an uppercut.
A head punch blocked on the inside by Aldo.
Aldo has dropped down and is looking to force the takedown but it's defended by Hawkes after a bit of a struggle.
That's three failed takedown attempts in the round for Jose Aldo. That's going to take a lot out of him.
Hawkes misses with a knee strike.
Aldo swings away with an uppercut that misses.
A hook to the body from Aldo.
Jose Aldo has scored more points in the clinch so far.
Aldo lands a hook that snaps the head of Hawkes backwards.
Aldo lands a short shot on the inside that snaps the head of Hawkes backwards.
Aldo lands with a quick shot inside that doesn't really do much damage.
Fantastic stuff here - a very entertaining period of action, which has drawn cheers from the crowd.
Hawkes lands with a short shot to the head.
Aldo swings away with an uppercut that misses.
Hawkes has a couple of punches blocked by Aldo.
That's four minutes gone in the round.
Aldo works on Hawkes's body with a couple of short punches.
Still in the clinch, Hawkes scores with a nice short uppercut.
Aldo lands a body shot.
Hawkes takes a shot to the head.
Aldo lands with a right to the head.
Aldo scores with a shoulder strike.
Aldo jumps guard and drags Hawkes to the mat. He's obviously going to be looking for submissions off his back.
Hawkes is looking to advance position but Aldo has hit a scissor sweep - now he's on top in mount!
Aldo fails to move to back control.
Aldo looking to secure an arm triangle but Hawkes defends it well.
The crowd are going absolutely nuts as the round comes to an end - what a fantastic round of action!
Aldo working to secure an arm triangle but it's not happening for him just yet.
And that's the end of the fight!
That was a close round. You could make an argument for either fighter but I would give it to Jose Aldo.
I think Aldo has won this one but let's see what the judges have to say. Over to the ring announcer for the scorecards.
Ladies and gentlemen, after 3 rounds of action, we go to the scorecards for a decision.
Judge Yukihiro Yamamoto scores the fight 29:28
Judge Shigeki Fujiwara scores the fight 29:28
Judge Taro Takaoka scores the fight 29:29
In favor of your winner, by majority decision... Jose Aldo!
|
|
|
|
|
|
|
|
|
|
|
|
|
|
|
|
|
|
|
|
|
|
|
| S |
C
A |
G |
S |
C
B |
G |
|
S |
C |
G |
|
energy
A | B |
|
hype
A | B |
|
pop
A | B |
|
mgr
A | B |
|
FIGHT
RATING
100% |
|
|
|
|
|
|
|
Undercard bout
|
Coming up we have a heavyweight MMA rules bout between Said Jaffar (ranked 0 p4p, 0 weight class) and Steve Austin (ranked 0 p4p, 0 weight class). Austin is bobbing his head along to his entrance song: Motorhead-Killed by death. Both fighters look fresh as a daisy as they make their way towards the ring.
 |
|
 |
| 192 cm
23
235 lbs
9 - 2 - 0 |
|
187 cm
25
255 lbs
3 - 0 - 0 |
Good wrestling
Counter striker
Very strong |
|
Decent wrestler
Decent boxing
Heavy handed |
|
| |
|
Ladies and gentlemen. This fight is 3 rounds, in the heavyweight division.
Introducing the fighter to my left, fighting out of the red corner.
With a record of
9 - 2 - 0, fighting out of Tokyo, Said Jaffar!
And introducing the fighter to my right, fighting out of the blue corner.
With a record of
3 - 0 - 0, fighting out of Tokyo, Steve Austin!
The judges for this bout are Sosuke Kotani, Yukihiro Yamamoto and Shigeki Sano.
The bell rings for round one and we are underway!
Austin lands three nice shots there - that looked like it hurt!
It looks like Said Jaffar has been cut.
No joy there for Austin, who threw a few shots but didn't land.
Austin swinging wildly here.
Jaffar closes this distance looking for a takedown but Austin circles away.
Austin scores with a nice one two combo and darts back out of range to avoid anything coming in the opposite direction.
Austin throws a one two combo.
We've seen a great period of action over the last minute or so - credit to both fighters for going all out!
Austin tries to bum rush Jaffar with a series of wild strikes but Jaffar uses good footwork to avoid the assault.
Jaffar takes a jab right on the kisser.
Austin swings away but doesn't land with a series of punches.
Austin fails to land with a series of punches.
Jaffar misses with a takedown attempt - Austin sprawls well and throws a nice strike on the way out which just misses.
Austin misses with a jab and misses with a cross straight after too.
That's one minute gone in the round.
Jab, cross, leg kick. Nice combination by Austin!
Austin throws a wild combination but nothing lands.
Austin scores with a decent looking hook.
Austin cracks Jaffar with a hook to the jaw. Both fighters smile at eachother and high-five before getting back down to business.
Austin lands with an overhand left.
Austin throws a combination but it was largely blocked by Jaffar.
Austin throws a combination but comes up with nothing but fresh air.
Austin throws a combination but it was largely blocked by Jaffar.
Austin connects with a nice looking jab.
Jaffar dodges the punch combination from Austin.
Austin lands a jab, followed by a cross and another cross, as Jaffar backs up against the ropes.
Said Jaffar's cut is getting worse.
That's two minutes gone in the round.
The fans in attendance giving it up for the two fighters, who have really let it all hang out in the last minute or so!
Jaffar displays some good footwork, moving neatly out of range as Austin throws out the jab.
Austin moves into range and throws a combination. A nice jab followed by a hook to the body.
Jaffar fails with a takedown attempt.
That's three failed takedown attempts in the round for Said Jaffar. That's going to take a lot out of him.
Austin will need to tighten up his combinations if he doesn't want to gas himself out, swinging at thin air.
Austin misses with a wild combination.
This is turning into a torrid day at the office for Jaffar. He's trying desperately to land a takedown but he's failing miserably and getting slapped silly on the feet to compound his misery.
Austin stuns Jaffar with a nice body shot, before stepping back out of range.
Austin throws a right and a left that both miss.
That's three minutes gone in the round.
Austin throws a series of strikes that have Jaffar backpedaling.
Austin bobbing and weaving, closes the distance and lands a hook to the side of Jaffar's head.
Jaffar showing good head movement there, avoiding the strikes from Austin.
Austin misses with a jab and misses with a cross straight after too.
Austin tries to bum rush Jaffar with a series of wild strikes but Jaffar uses good footwork to avoid the assault.
Jaffar looking to score a takedown here. Austin is defending well but Jaffar drives through and ends up in Austin's guard.
Jaffar passes into half guard.
Jaffar is working hard to pass the guard. He's done it - he's now in full mount! Trouble for Austin!
Austin defends a decent attempt at a guillotine from Jaffar.
We've seen a great period of action over the last minute or so - credit to both fighters for going all out!
Austin keeping his composure momentarily, calmly looking to get back to half guard.
That's four minutes gone in the round.
Austin has given up his back - I dont know if this is a deliberate ploy to try and escape or if he is just struggling down there.
Austin tries to escape the position.
Jaffar is working for a rear naked choke. Austin is not defending it well and Jaffar has tightened it up quickly! This could be all over! Austin refuses to tap and goes to sleep, forcing the referee to intervene. A little trickle of blood came out of Austin's nose as his head slumped to the floor. That is naaaasty!
Ladies and gentlemen, after 4:51 of round 1, we have a winner by way of Submission (RNC). Said Jaffar!
|
|
|
|
|
|
|
|
|
|
|
|
|
|
|
|
|
|
|
|
|
|
|
| S |
C
A |
G |
S |
C
B |
G |
|
S |
C |
G |
|
energy
A | B |
|
hype
A | B |
|
pop
A | B |
|
mgr
A | B |
|
FIGHT
RATING
44% |
|
|
|
|
|
|
|
Co-main event
|
Coming up we have a welterweight MMA rules bout between Kyle Eder (ranked 0 p4p, 0 weight class) and George St Pierre (ranked 0 p4p, 0 weight class). Eder comes to the ring accompanied by You're the best around. St Pierre comes into a darkened arena with his song building. Make Smash Ya Tap! kicks in, the lights come on and the crowd goes wild! What a showman! Kyle Eder had a look across the ring there at his opponent. He definitely means business
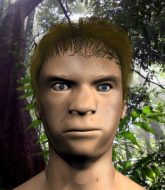 |
|
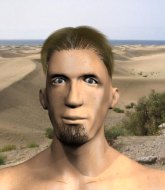 |
| 178 cm
24
179 lbs
11 - 8 - 1 |
|
175 cm
29
185 lbs
12 - 6 - 0 |
BJJ Purple Belt
Solid boxing
Very strong |
|
Powerful takedowns
Counter striker
Good gas tank |
|
| |
|
Ladies and gentlemen. This fight is 3 rounds, in the welterweight division.
Introducing the fighter to my left, fighting out of the red corner.
With a record of
11 - 8 - 1, fighting out of Tokyo, Kyle Eder!
And introducing the fighter to my right, fighting out of the blue corner.
With a record of
12 - 6 - 0, fighting out of Tokyo, George St Pierre!
The judges for this bout are Yasuomi Hirokawa, Kenichi Hosakawa and Yukihiro Shimada.
The bell rings for round one and we are underway!
Eder displays good takedown defense there as he swats away a double leg from St Pierre.
Eder misses with a series of wild punches.
Eder ducks down and throws a hook to the body but St Pierre moves away.
St Pierre shoots in for a takedown but Eder shows good takedown defense there and keeps this one on the feet.
Eder lands a head shot.
It looks like George St Pierre has been cut.
Eder throws a sloppy head kick and St Pierre moves out of range easily.
The crowd cheers as Eder lands an impressive looking overhand right. St Pierre doesn't seem phased though.
St Pierre closes the distance and clinches up with Eder, looking for a takedown. St Pierre pushes Eder against the ropes but Eder circles to the side and manages to break the clinch.
Kyle Eder has stuffed three takedown attempts in the round now. That's going to take a lot out of George St Pierre.
St Pierre takes a shot to the nose. Hopefully that hasn't broken it.
St Pierre blocks a head kick by Eder.
Eder lands a leg kick and bounces back out of range.
This is a great period of action - very entertaining stuff!
St Pierre fails to land the takedown.
Eder throws the left hand but St Pierre avoids the punch easily.
That's one minute gone in the round.
Eder scores with a spinning back kick!
St Pierre on the receiving end of a decent leg kick there by Eder. Eder obviously looking to wear him down.
St Pierre fails with the takedown
and Eder counters with a quick right hand to the jaw.
St Pierre looks gassed!
Eder misses with a jab and misses with a cross straight after too.
Eder looking to land some kicks to the body here.
A head kick misses from St Pierre.
Eder throws a leg kick but St Pierre moved away.
Eder throws a jab to the body, straight down the pipe. Boom. That sent St Pierre stumbling backwards but he manages to regain his composure quickly.
Eder clobbers St Pierre with an overhand right that has the crowd gasping. That made a horrendous noise.
Wooooo! Give it up for these two warriors! They are putting on a show!
Eder loads up on a big right hand but St Pierre slips the punch.
St Pierre moves out of range of the body kick from Eder.
St Pierre is trying desperately to land a takedown but Eder is having absolutely none of it. This is turning into a bit of a nightmare for St Pierre.
That's two minutes gone in the round.
A solid leg kick lands there for Eder.
Eder lands a front kick.
Eder scoring well with a low kick there.
A decent looking cross lands there for Eder.
St Pierre takes a hook to the side of the head. I wonder if that's got his ears ringing.
St Pierre takes one on the chin but keeps coming.
St Pierre doesn't succeed with the takedown
and Eder counters with a slapping leg kick.
Eder lands a glancing blow to the side of St Pierre's head.

St Pierre is rocked!
Eder throws a monster overhand right that drops St Pierre! Eder follows up with more strikes from mount and the fight is all over!
Ladies and gentlemen, after 2:49 of round 1, we have a winner by way of TKO (Strikes). Kyle Eder!
Kyle Eder made sure to give a little speech post fight, saying 'How many of you bet against me again? Still undefeated at 170, bitches!'.
|
|
|
|
|
|
|
|
|
|
|
|
|
|
|
|
|
|
|
|
|
|
|
| S |
C
A |
G |
S |
C
B |
G |
|
S |
C |
G |
|
energy
A | B |
|
hype
A | B |
|
pop
A | B |
|
mgr
A | B |
|
FIGHT
RATING
60% |
|
|
|
|
|
|
|
Main event
|
Coming up we have a lightweight MMA rules bout between Xavier Cid (ranked 0 p4p, 0 weight class) and Gracie Jitsu (ranked 0 p4p, 0 weight class). Cid comes to the ring accompanied by There's No Home for You Here. Over to our ring announcer for the fighter introductions!
 |
|
 |
| 175 cm
25
155 lbs
12 - 3 - 0 |
|
179 cm
29
157 lbs
10 - 5 - 0 |
Decent wrestler
Lethal high kicks
Granite chin |
|
BJJ Brown Belt
Counter striker
Good gas tank |
|
| |
|
Ladies and gentlemen. This fight is 5 rounds, for the lightweight championship of the world!
Introducing the champion to my left, fighting out of the red corner.
With a record of
12 - 3 - 0, fighting out of Tokyo, Xavier Cid!
And introducing the challenger to my right, fighting out of the blue corner.
With a record of
10 - 5 - 0, fighting out of Tokyo, Gracie Jitsu!
The judges for this bout are Yukihiro Shimada, Shirou Masuda and Shigeki Sano.
The bell rings for round one and we are underway!
Cid slips a straight right by Jitsu.
Cid throws a right and a left that both miss.
Cid throws a sloppy head kick and Jitsu moves out of range easily.
Cid lands a head shot.
Jitsu takes an uppercut right on the button but keeps his composure.
Cid throws a series of punches but Jitsu avoids them all with ease.
Cid swings wildly with a couple of big hooks
and Jitsu counters with a driving takedown into guard. Nice work there by Jitsu.
Jitsu landing with the ground and pound.
This has been an exciting period of action!
Cid is trying to control the position from the bottom.
Jitsu trying to control the position from guard on top but Cid is wriggling around, looking for whatever he can.
That's one minute gone in the round.
Jitsu looking to sit in guard and control but Cid gets the butterfly guard and sweeps. He's now in the guard on the top.
Jitsu is looking for a triangle but Cid pushes his legs off easily.
Jitsu throws his legs up looking for a submission but Cid uses it to pass to side control.
Jitsu is moving his hips around well on the bottom and has managed to get back to half guard.
Jitsu looking for submissions off his back.
Jitsu wants to control but Cid is keeping busy and won't allow it.
That's two minutes gone in the round.
Jitsu looking for submissions from an awkward position here.
The fighters are battling for position here. Jitsu manages to regain full guard. Nice work.
Jitsu is looking for a triangle but Cid pushes his legs off easily.
Cid wants to pass the guard but Jitsu is keeping the position.
Jitsu working for a triangle but Cid defends it easily.
Jitsu controls Cid momentarily but Cid frees himself.
That's three minutes gone in the round.
Cid won't allow Jitsu to sweep him here.
Jitsu keeping moving, preventing Cid from controlling successfully.
Jitsu is doing well to control the posture of his opponent and prevent any damage.
Jitsu wants to control but instead he gets his guard passed and Cid is now in half guard.
The fighters are tangled up in the ropes here. We might need a restart if the fighters can't break free themselves.
Jitsu is staying active underneath Cid, who seems content to just control the action from this position.
Jitsu is trying to get back to full guard.
Jitsu is working for an escape here. He's hooked one of Cid's legs and he's managed to sneak out and take Cid's back!
That's four minutes gone in the round.
Even with his hooks in, Jitsu manages to miss with strikes from the back.
Jitsu is working for the rear naked choke. He has one arm under the chin but Cid has hold of the other arm. A bit of a stalemate here.
Cid breaks Jitsu's hooks off and manages to turn into his guard.
Jitsu keeping moving, preventing Cid from controlling successfully.
Jitsu is looking for a triangle here but Cid uses the submission attempt to pass into side control.
As the round comes to an end the crowd are showing their appreciation for a great round of action.
Jitsu is trying to control Cid's posture but Cid avoids it.
And thats the end of the round the fighters go back to their corners.
Gracie Jitsu dominated that round.
That's the end of the round. The referee orders the cornermen out of the ring so we can get back down to business.
Cid steps to the side to avoid the strikes from Jitsu.
Cid throws a hard body shot but it just misses.
An inside leg kick lands from Cid.
Jitsu pulls out of a head kick attempt.
Cid misses with a head kick.
Cid scores with a slapping inside leg kick.
Good leg kick by Cid there. It's the ones that make that thud noise that hurt and that was an almighty thud.
Cid connects with a good right hand that stumbles Jitsu. Jitsu circles away out of range and recomposes himself.
Jitsu throws a head kick that misses and slips in the process. He scrambles back to his feet and the fighters circle.
Cid displays good takedown defense there as he swats away a double leg from Jitsu.
That's one minute gone in the round.
Cid lands with a nice low kick. That'll leave a bruise.
Jitsu fails with a rather predictable takedown attempt.
Jitsu on the receiving end of a decent leg kick there by Cid. Cid obviously looking to wear him down.
Xavier Cid seems to be the more aggressive standup fighter in this bout.
Jitsu moves into the clinch.
Cid lands an elbow just above Jitsu 's eye.
It looks like Gracie Jitsu has been cut.
Cid is trying to wear down his opponent with knees to the body.
Jitsu is breathing heavily.
Jitsu tries a knee to the head but Cid blocks it.
Cid lands a knee to the head there! That was nasty!
Cid throws a hook to the body. More of an arm punch but it's all scoring with the judges.
This has been an exciting period of action!
Cid lands an elbow that stopped Jitsu in his tracks for a moment.
Cid scores with a knee to the head.
Jitsu is rocked!
Jitsu missing with knees to the body.
Jitsu is still on wobbly legs! Can Cid finish him?
A short body shot lands from Cid as the two fighters clinch.
Jitsu seems to have recovered his senses.
That's two minutes gone in the round.
Kneeeeees! The crowd are calling for knees to the body. Cid obliges.
Jitsu takes a knee to the side of the body.
Cid makes some space for himself and lands an uppercut.
Cid displaying some good clinch control by pressing Jitsu up against the ropes.
Cid with a knee to the head.
Cid has the Thai clinch. He lands a big knee to the head that stumbles Jitsu - he's in trouble! Another big knee to the head from Cid, and another! Jitsu is out on his feet - the ref jumps in to save him and ends the fight!
Ladies and gentlemen, after 2:32 of round 2, we have a winner by way of TKO (Knees). Xavier Cid!
Xavier Cid retains his lightweight title!
|
|
|
|
|
|
|
|
|
|
|
|
|
|
|
|
|
|
|
|
|
|
|
| S |
C
A |
G |
S |
C
B |
G |
|
S |
C |
G |
|
energy
A | B |
|
hype
A | B |
|
pop
A | B |
|
mgr
A | B |
|
FIGHT
RATING
53% |
|
|
|
|
|
|
|
|
|
|
