 |
Rivals V PBP Commentary |
Undercard bout
|
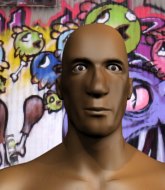
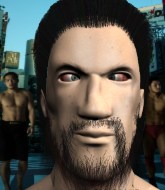
Coming up we have a lightweight MMA rules bout between Kenichi Atoshi (ranked 0 p4p, 0 weight class) and Boy Bastos (ranked 0 p4p, 0 weight class). Atoshi's ring entrance music is that housewives' favourite, Samourai. On his way into the cage it seems that Kenichi Atoshi has been attacked by a crazed fan! It looks like it might have been the just bleed guy! Luckily Kenichi Atoshi seems to be OK! I thought that lunatic was in prison!?
 |
|
 |
| 168 cm
22
162 lbs
0 - 1 - 0 |
|
176 cm
18
150 lbs
0 - 2 - 0 |
BJJ Purple Belt
Brawler
Good in bed |
|
BJJ Blue Belt
Basic striking
Granite chin |
|
| |
|
Ladies and gentlemen. This fight is 3 rounds, in the lightweight division.
Introducing the fighter to my left, fighting out of the red corner.
With a record of
0 - 1 - 0, fighting out of Tokyo, Kenichi Atoshi!
And introducing the fighter to my right, fighting out of the blue corner.
With a record of
0 - 2 - 0, fighting out of Tokyo, Boy Bastos!
The judges for this bout are Sosuke Kotani, Yasuomi Hirokawa and Tatsuya Matsuyama.

The bell rings for round one and we are underway!
Bastos throws a front kick aimed at Atoshi's knee but Atoshi avoids it well.

Atoshi dives in and scores a takedown into Bastos's guard.
Bastos keeping moving, preventing Atoshi from controlling successfully.
Atoshi advances position into side control!
A bit of a lull in the action. I'm sure it will pick up again soon... even if the ref has to physically pick them up and put them back on their feet.

Atoshi has had enough of the ground for now and decides to stand.
Atoshi fails miserably with a takedown attempt.
Bastos is looking to chop away at Atoshi's legs.
Bastos takes a really solid shot there but just smiles back and shrugs his shoulders.
This has been an exciting period of action!
Bastos falls off balance throwing a combination
and Atoshi makes him pay by landing a nice hook to the body before moving out of range.
Bastos looks gassed!
Atoshi fails with the takedown.
The fight stays on the outside here - Atoshi looks like he's thinking about clinching though.

That's one minute gone in the round.
Atoshi on the receiving end of a decent leg kick there by Bastos. Bastos obviously looking to wear him down.
Bastos misses with a low kick.
Bastos throws a quick inside leg kick.
Atoshi is looking to clinch.
Atoshi shoots in looking for a double leg takedown. Bastos defends it nicely.
That's three failed takedown attempts in the round for Kenichi Atoshi. That's going to take a lot out of him.
Bastos will need to close the distance a bit before he attacks - that leg kick was thrown from too far away.
Atoshi wants to clinch up but Bastos keeps it at a distance.
Atoshi checks a leg kick.
Atoshi gets a double leg takedown into Bastos's guard.
Bastos wants to get back to his feet but Atoshi is in a dominant position and won't allow it.
The ref warns both fighters not to hold the cage as they work up against the meshing.
Bastos can't do much from the bottom at the moment, as Atoshi controls the pace.

That's two minutes gone in the round.
Atoshi stops Bastos from standing up.
Atoshi advances to half guard.
The two fighters exchange a few words. I couldn't hear what they were saying but maybe it's more fun if you make it up yourself. Atoshi connects with a nice short shot to Bastos's temple.
Atoshi not doing much here.
This has been an exciting period of action!
Atoshi looks to score some points with some ground and pound.
Atoshi moves nicely into side control.
Bastos being controlled for a moment.
Atoshi decides to stand back up. Atoshi steps back and let's Bastos get back to his feet.

That's three minutes gone in the round.
Atoshi lands a jab. Then a cross. Then finally a nice hook to the body. Good work there by Atoshi.

It looks like Boy Bastos has been cut.
Boy Bastos is looking to keep the fight on the feet at all costs.
Bastos has his head snapped back a nice jab. A little nod from Bastos there as he acknowledges the shot.
Atoshi shoots in looking for a takedown but Bastos manages to keep the fight standing, pushing Atoshi's face into the canvas for good measure before circling away.
Atoshi checks the leg kick nicely there.
Atoshi lands a high kick!
Atoshi tries to clinch up but Bastos circles away and keeps his distance.
Atoshi fails with the takedown.

Atoshi gets a clinch.
Bastos has had enough of the clinch but Atoshi keeps him there for the moment.
Atoshi has Bastos pushed against the cage.

That's four minutes gone in the round.
Bastos has had enough of the clinch and is looking to separate.

Atoshi breaks from the clinch.
Atoshi shoots in for a takedown. He's persisting with it as Bastos sprawls well. Bastos wins this battle and keeps the fight standing. Atoshi gets slowly back to his feet.
This has been an exciting period of action!
Atoshi fakes a head punch and goes low to the body. Nicely done.
Atoshi throws a looping left and ducks down for a takedown. He's got his arms around Bastos's waist but Bastos gets an underhook and avoids the takedown by throwing Atoshi off to one side.
Boy Bastos seems to be the more aggressive standup fighter in this bout.
Horrible takedown by Atoshi or perhaps it was just good defense by Bastos which made him look bad.
Bastos feints with a shoulder and throws a nice leg kick to Atoshi's calf.
The crowd are going absolutely nuts as the round comes to an end - what a fantastic round of action!
Atoshi tries to close the distance and clinch but Bastos swats him to one side with an open hand palm strike and circles away.
Bastos lands with a nice low kick. That'll leave a bruise.
An inside leg kick from Bastos misses.
And thats the end of the round the fighters go back to their corners.
Kenichi Atoshi dominated that round.
The cut man is working on Boy Bastos's cut.
The fighters' corners scream their final instructions, as the referee calls time. Here we go, back to the action!

Bastos thows a leg kick but Atoshi checks it
and Atoshi counters with a crisp hook to the side of the head.
Bastos fakes a couple of low kicks, before throwing one on the third attempt. It connects and Atoshi has to reset his feet before getting ready to engage.
Nice sprawl there from Bastos as Atoshi shoots in.
Atoshi tries to clinch up against the cage, rushing in the close the distance. Bastos manages to break the clinch and circles back to the middle of the mat.
Atoshi shoots in and drives through. Bastos sprawls well.
Atoshi checks a leg kick nicely.
Bastos misses with a half-hearted attempt at a head kick.
The sound of bone on bone echoes around the arena as Atoshi checks a leg kick.
Atoshi bobs and weaves into range and then changes levels and scores with a nice takedown into side control.
Bastos is pushing Atoshi's head away, looking to escape. Atoshi manages to hold on to the position though.
Bastos really doesn't want to stay on the ground with Atoshi. If he can't get it back to his feet, it's only a matter of time before he'll be tapping out.
Both fighters are absolutely exhausted here.
Atoshi stands up and beckons Bastos to his feet.
Bastos keeps the fight standing with a nice sprawl.
That's three failed takedown attempts in the round for Kenichi Atoshi. That's going to take a lot out of him.
That's one minute gone in the round.
Atoshi fails in his attempt to clinch.
Atoshi tries a switch kick but it misses it's target.
Bastos throws a series of punches but Atoshi avoids them all with ease.
Atoshi scores a takedown into full mount!
Bastos wants to get back to his feet.
Bastos is squirming around, avoiding Atoshi's attempts to control the action.
The fighters are pressed up against the cage, both looking to find a bit of space to work.
Atoshi cracks Bastos with a nasty head shot there - the crowd let out an audible gasp there, as the noise reverberated around the arena.
Bastos in a bad spot here, taking shots to the head.
That's two minutes gone in the round.
Bastos really wants to buck Atoshi off and get back to his feet.
Bastos is using up a lot of energy trying to get back to his feet. Perhaps he should improve his position first.
Atoshi working away from the top, dropping strikes.
The crowd growing excited in anticipation of a finish here! Right on cue, Atoshi cracks his opponent with a massive right hand that draws loud cheers!
Atoshi lands a big elbow.
Atoshi trying to control but Bastos is having none of it.
Fantastic stuff here - a very entertaining period of action, which has drawn cheers from the crowd.
Atoshi working Bastos over with strikes here.
Atoshi tries to control but Bastos wriggling away.
Bastos's corner are shouting for him to stand up but that's bad cornering - how is he meant to stand up when he's mounted? He should be looking to improve his position on the ground before trying to stand back up.
Atoshi controlling from mount.
That's three minutes gone in the round.
Bastos is trying to stand but he's not in a good position to be doing that! Atoshi has taken his back!
Bastos holding both Atoshi 's hands and preventing any damage.

Atoshi working for the rear naked choke here. He's got one arm under but Bastos is defending well. A couple of punches soften him up though and Atoshi has tightened the hold! This one could be all over! It is! Bastos taps out!
Ladies and gentlemen, after 3:53 of round 2, we have a winner by way of Submission (RNC). Kenichi Atoshi!
After winning the bout, Kenichi Atoshi thanked all his fans and promised he'd do even better in his next fight. The crowd seemed to love his humility.
|
|
|
|
|
|
|
|
|
|
|
|
|
|
|
|
|
|
|
|
|
|
|
| S |
C
A |
G |
S |
C
B |
G |
|
S |
C |
G |
|
energy
A | B |
|
hype
A | B |
|
pop
A | B |
|
mgr
A | B |
|
FIGHT
RATING
47% |
|
|
|
|
|
|
|
Undercard bout
|
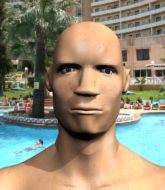
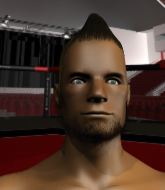
Coming up we have a middleweight MMA rules bout between Roger Xu (ranked 0 p4p, 0 weight class) and Joe McGraw (ranked 0 p4p, 0 weight class). Xu comes to the cage accompanied by Metallica - Creeping Death. I'm sure you'll be fascinated to know that I was talking to some pointless Z list celebrity before the fight and he thought that Joe McGraw was going to win. Let's see if he was right.
 |
|
 |
| 180 cm
18
185 lbs
0 - 1 - 0 |
|
183 cm
19
184 lbs
0 - 2 - 0 |
BJJ White Belt
Solid Muay Thai
Very strong |
|
BJJ Blue Belt
Basic striking
Enjoys gardening |
|
| |
|
Ladies and gentlemen. This fight is 3 rounds, in the middleweight division.
Introducing the fighter to my left, fighting out of the red corner.
With a record of
0 - 1 - 0, fighting out of Tokyo, Roger Xu!
And introducing the fighter to my right, fighting out of the blue corner.
With a record of
0 - 2 - 0, fighting out of Tokyo, Joe McGraw!
The judges for this bout are Ren Mimura, Shirou Masuda and Taro Takaoka.
The bell rings for round one and we are underway!
Xu looks for the body kick but McGraw saw that one coming.
McGraw changes levels and looks for a double leg takedown. Xu tries to avoid it but McGraw manages to keep hold of a leg and drag Xu to the ground. Xu escapes though and pops straight back up to his feet.
Xu stuffs the takedown attempt from McGraw. McGraw gets slowly back to his feet.
A really sloppy takedown attempt there from McGraw.
Roger Xu has stuffed three takedown attempts in the round now. That's going to take a lot out of Joe McGraw.
Xu fails with a takedown attempt.
Xu misses with a takedown attempt - McGraw sprawls well and throws a nice strike on the way out which just misses.
Xu tries to close the distance and clinch up against the cage but McGraw paws at him with a jab and circles away.
Xu moves into the clinch.
Xu tries a body shot but McGraw blocks it.
McGraw has had enough of the clinch but Xu keeps him there for the moment.
McGraw trying to control the position but instead, Xu has worked for underhooks and has pushed McGraw into the cage.
Xu tries a body shot but McGraw blocks it.
That's one minute gone in the round.
Xu is looking to score with knees to the body. Maybe he'll change it up and go body then head. McGraw is defending well for now.
Xu can't find room to land a body shot as McGraw controls the action.
Xu tries to land knees in the clinch but McGraw avoids the damage to the body.
Xu prevents McGraw from breaking the clinch.
McGraw tries to break free but Xu pushes him back against the cage.
Xu trying to land knees to the body.
Xu tries to land knees in the clinch but McGraw avoids the damage to the body.
McGraw being controlled against the cage.
Xu prevents the takedown attempt.
McGraw using the Thai plumb to throw knees but Xu has his back arched nicely, preventing the strike.
The pace really dropping off here, momentarily.
That's two minutes gone in the round.
Xu putting his Muay Thai to good use. He has McGraw in a tight clinch and is doing some damage with knees to the body.
Xu lands a good knee to the midsection. McGraw won't want to take too many of those.
McGraw looks gassed!
The crowd are loving this. Great action here.
Xu with a knee to the head.
It looks like Joe McGraw has been cut.
Xu using the Thai clinch to land knees to the body.
Xu putting his Muay Thai to good use. He has McGraw in a tight clinch and is doing some damage with knees to the body.
Xu stalling against the cage.
Xu landing knees to the body. They look like they could hurt.
Xu scores a nice knee to the body.
Xu using the Thai clinch to land knees to the body.
Xu misses with an elbow over the top.
McGraw blocks a couple of punches on the inside.
That's three minutes gone in the round.
McGraw wants to strike at distance but he can't break free of the clinch.
Xu using the Thai clinch to land knees to the body.
Xu scores a nice knee to the body.
Xu swings wildly with an uppercut but McGraw uses good head movement to avoid it.
With the two fighters working up against the cage, Xu just misses with a elbow thrown towards McGraw's brow.
Xu trying to land knees to the body.
Xu is trying to wear down his opponent with knees to the body.
Kneeeeees! The crowd are calling for knees to the body. Xu obliges.
Fantastic stuff here - a very entertaining period of action, which has drawn cheers from the crowd.
Xu lands a good knee to the midsection. McGraw won't want to take too many of those.
Xu unloads a knee to the mid-section.
McGraw takes a knee right on the jaw!
Xu landing some nice looking knees to the body.
That's four minutes gone in the round.
Xu missing with knees to the body.
Xu connects with a nasty looking knee right to McGraw's face.
Xu content to slow the pace in the clinch.
Xu misses with the head strike.
McGraw being controlled against the cage.
Xu is trying to wear down his opponent with knees to the body.
Xu connects with a nasty looking knee right to McGraw's face.
The crowd are going absolutely nuts as the round comes to an end - what a fantastic round of action!
Xu connects with a knee to the head.

McGraw is rocked!
Xu scores a nice knee to the body.
McGraw is still on wobbly legs! Can Xu finish him?
Xu misses with some punches.
Xu working the clinch nicely. McGraw is working for position but Xu cracks him with a big knee to the head! McGraw crumples up against the cage and Xu lands two more shots before the ref can save McGraw! This one is all over!
Ladies and gentlemen, after 4:59 of round 1, we have a winner by way of TKO (Knee & Punches). Roger Xu!
After the big win, Roger Xu made sure to do all the important stuff like thanking his sponsors [GTI] Divine Clothing [8.95$ MORALE BOOSTERS] and telling the interviewer how much he loves him.
|
|
|
|
|
|
|
|
|
|
|
|
|
|
|
|
|
|
|
|
|
|
|
| S |
C
A |
G |
S |
C
B |
G |
|
S |
C |
G |
|
energy
A | B |
|
hype
A | B |
|
pop
A | B |
|
mgr
A | B |
|
FIGHT
RATING
62% |
|
|
|
|
|
|
|
Undercard bout
|
Coming up we have a heavyweight MMA rules bout between Chad Johnson (ranked 0 p4p, 0 weight class) and Jewbaby Mcdaniels (ranked 0 p4p, 0 weight class). Mcdaniels is bobbing his head along to his entrance song: Blood runs cold by Cannibal Corpse. We have two fighters making their debuts here, so let's see who comes out of this one with their first professional victory.
 |
|
 |
| 190 cm
25
273 lbs
0 - 0 - 0 |
|
200 cm
25
265 lbs
0 - 0 - 0 |
Good wrestling
Basic striking
Granite chin |
|
Good wrestler
Basic striking
Inexperienced |
|
| |
|
Ladies and gentlemen. This fight is 3 rounds, in the heavyweight division.
Introducing the fighter to my left, fighting out of the red corner.
With a record of
0 - 0 - 0, fighting out of Tokyo, Chad Johnson!
And introducing the fighter to my right, fighting out of the blue corner.
With a record of
0 - 0 - 0, fighting out of Tokyo, Jewbaby Mcdaniels!
The judges for this bout are Shigeki Sano, Taro Takaoka and Tatsuya Matsuyama.
The bell rings for round one and we are underway!
Mcdaniels lunges at Johnson with a hook that half lands and is half blocked by Johnson's hand.
Some wild striking there from Mcdaniels.
Mcdaniels looks to score with a jab to the body but Johnson is just out of range.
Johnson takes an uppercut right on the button but keeps his composure.
Mcdaniels closes the distance and lands a one-two.
Johnson gets cracked with a nice right hand there by Mcdaniels.
Some wild striking there from Mcdaniels.
Mcdaniels works Johnson's body with a nice hook.
Johnson uses some good footwork to avoid the body shot by Mcdaniels.
The fans in attendance giving it up for the two fighters, who have really let it all hang out in the last minute or so!
Mcdaniels checks a low kick from Johnson.
Mcdaniels misses with a jab, cross combination.
Chad Johnson seems to be the more aggressive standup fighter in this bout.
Johnson tries to score with a leg kick but it misses it's target.
Mcdaniels throws a hook but Johnson avoids it easily.
Johnson keeping a good distance there, avoiding the body shot.
Mcdaniels swings for the body but Johnson moves out of range.
Mcdaniels lands a jab to Johnson's midsection.
Johnson pushing out the jab but it's not landing.
Johnson throws a hook to the body but it doesn't connect.
Mcdaniels misses the shot to the body.
Mcdaniels swings and misses with a hook to the body.
That's one minute gone in the round.
Mcdaniels thows a body shot but no joy.
Mcdaniels fakes high and swings low for a body shot but Johnson manages to avoid it.
Mcdaniels misses with a looping right.
Jewbaby Mcdaniels is looking to keep the fight on the feet at all costs.
Johnson fakes high and swings low for a body shot but Mcdaniels manages to avoid it.
Mcdaniels misses with a hook.
Mcdaniels is throwing a lot of body shots here, looking to wear down Johnson rather than just go for the knockout.
Mcdaniels misses with a jab, cross combination.
Mcdaniels rushes forward with a series of wild hooks but Johnson moves out of range and avoids them all easily.
Johnson fakes high and swings low for a body shot but Mcdaniels manages to avoid it.
Johnson misses the shot to the body.
Johnson misses the shot to the body.
Johnson closes the distance, clinches up and gets a nice trip takedown into side control. Very smooth.
The fighters are pressed up against the cage, both looking to find a bit of space to work.
We've had a lack of effective grappling in the last minute or so, which could well see a referee standup.
Johnson working the head with strikes.
Johnson working away diligently from side control. Landing strikes effectively there - that will score him some points on the judges scorecards.
Mcdaniels is looking to work his way out of this bad position but Johnson is controlling him well.
This has been an exciting period of action!
Johnson working the head with strikes.
Mcdaniels really doesn't want to stay on the ground with Johnson. If he can't get it back to his feet, it's only a matter of time before he'll be tapping out.
That's two minutes gone in the round.
Johnson works a knee to the body and follows up with a nice elbow to the head.
Johnson has been looking to land a fair amount of strikes on the ground. He might be looking to soften his opponent up in order to work for a submission.
Johnson works a knee to the body and follows up with a nice elbow to the head.
Mcdaniels is trying to escape and get back to his feet.
Mcdaniels on the wrong end of some ground and pound.
Johnson lands a nice forearm strike.
Mcdaniels avoids any damage from the ground and pound of Johnson.
Johnson working the head with strikes.
Mcdaniels is looking to regain half guard here but Johnson keeps moving and retains side control.
Johnson working the ground and pound but Mcdaniels is defending the strikes.
Johnson in side control lands a nice looking series of punches and elbows.
Johnson in side control lands a nice looking series of punches and elbows.
Both fighters really going for it on the ground here!
Johnson creates some space and throws a big elbow, but Mcdaniels sees it coming and moves his head just enough to avoid the strike.
Johnson in side control lands a decent elbow.
That's three minutes gone in the round.
Mcdaniels sneaks back into half guard.
Mcdaniels has hold of Johnson's hands but Johnson slips his arm to the side and lands an elbow.
Johnson passes to full mount!
Johnson lands an elbow that was bordering on illegal but the referee lets it go with a warning.
Mcdaniels working to try and regain half guard.
Johnson with shots to the head and body - Mcdaniels looks very uncomfortable down there.
Fantastic stuff here - a very entertaining period of action, which has drawn cheers from the crowd.
Johnson is in full mount looking to finish with strikes. He lands a big shot, followed by another and Mcdaniels goes limp! The ref jumps in to end the fight - a big win for Johnson!
Ladies and gentlemen, after 3:50 of round 1, we have a winner by way of KO (Strikes). Chad Johnson!
|
|
|
|
|
|
|
|
|
|
|
|
|
|
|
|
|
|
|
|
|
|
|
| S |
C
A |
G |
S |
C
B |
G |
|
S |
C |
G |
|
energy
A | B |
|
hype
A | B |
|
pop
A | B |
|
mgr
A | B |
|
FIGHT
RATING
82% |
|
|
|
|
|
|
|
Undercard bout
|
|
|
|
Undercard bout
|
Coming up we have a light heavyweight MMA rules bout between Joe Mammoth (ranked 0 p4p, 0 weight class) and Yugi Kantana (ranked 0 p4p, 0 weight class). These two fighters really are very evenly matched on the feet - it will be fascinating to see who can assert themselves in that aspect of the fight.
 |
|
 |
| 180 cm
19
218 lbs
1 - 1 - 0 |
|
190 cm
24
212 lbs
1 - 0 - 0 |
BJJ Blue Belt
Brawler
Good chin |
|
BJJ Blue Belt
Brawler
Enjoys gardening |
|
| |
|
Ladies and gentlemen. This fight is 3 rounds, in the light heavyweight division.
Introducing the fighter to my left, fighting out of the red corner.
With a record of
1 - 1 - 0, fighting out of Tokyo, Joe Mammoth!
And introducing the fighter to my right, fighting out of the blue corner.
With a record of
1 - 0 - 0, fighting out of Tokyo, Yugi Kantana!
The judges for this bout are Hirohito Nitta, Yuuki Gou and Yasuomi Hirokawa.
The bell rings for round one and we are underway!
Kantana is looking to take this fight into the clinch.
Kantana has a takedown stuffed.
Nice straight punches there by Kantana. You know Roy Jones Jr respects the hands of Kantana.
Mammoth darts in and lands a nice takedown into half guard.
We must be close to a standup if these guys don't pick up the pace.
Mammoth seems to be looking for submissions.
Mammoth is working for a submission of some sort.
Kantana manages to get to full guard.

Kantana escapes his hips to the side and looks to be working for an armbar. Mammoth gives him a little smile and shakes his head. No chance.
The crowd are loving this. Great action here.
Mammoth is holding a leg here, probably looking for an ankle lock - he drops back and goes for it! Kantana is in trouble! Is it all over??? No! Kantana has escaped and now he's on top!
That's one minute gone in the round.
Mammoth throwing his legs up looking for a triangle.
Mammoth is throwing his legs up, looking for submissions. Kantana is aware though and is defending well.
Kantana looking to pass the guard.
Kantana drops back for a leg! It's a sloppy attempt though and Kantana jumps back into guard quickly, to retain the dominant position.
Kantana looks gassed!
Mammoth throwing his legs up looking for a triangle.
Mammoth isolates an arm and boxes in a triangle. Kantana stacks Mammoth on his neck as he steps over and passes to the side. He's now in a much more dominant position where he can look to do some serious damage. Nice move by Kantana!
That's two minutes gone in the round.
Mammoth tries to get back to half guard but can't.
The crowd are loving this. Great action here.
The strikes coming from Kantana are missing the target in this wave of attacks.
Mammoth is sneaking out the side here. He's bucked Kantana off and has taken his back!
Mammoth is working for the rear naked choke. He has one arm under the chin but Kantana has hold of the other arm. A bit of a stalemate here.
Mammoth is hanging on to Kantana's back as he tries to escape.
Kantana won't enjoy being in this position. Mammoth looking for the choke. Oh... he's slipped the arm under the neck - Kantana is tapping - it's over boys! Mammoth picks up the submission victory!
Ladies and gentlemen, after 3:58 of round 1, we have a winner by way of Submission (RNC). Joe Mammoth!
|
|
|
|
|
|
|
|
|
|
|
|
|
|
|
|
|
|
|
|
|
|
|
| S |
C
A |
G |
S |
C
B |
G |
|
S |
C |
G |
|
energy
A | B |
|
hype
A | B |
|
pop
A | B |
|
mgr
A | B |
|
FIGHT
RATING
56% |
|
|
|
|
|
|
|
Undercard bout
|
Coming up we have a welterweight MMA rules bout between Chuck Bass (ranked 0 p4p, 0 weight class) and Marcus Baldridge (ranked 0 p4p, 0 weight class). Marcus Baldridge has the power to score a knockout today if he connects clean with Chuck Bass's chin.
 |
|
 |
| 187 cm
21
168 lbs
1 - 0 - 0 |
|
182 cm
25
180 lbs
1 - 1 - 0 |
Good wrestling
Brawler
Big heart |
|
Good wrestler
Counter striker
Experienced |
|
| |
|
Ladies and gentlemen. This fight is 3 rounds, in the welterweight division.
Introducing the fighter to my left, fighting out of the red corner.
With a record of
1 - 0 - 0, fighting out of Tokyo, Chuck Bass!
And introducing the fighter to my right, fighting out of the blue corner.
With a record of
1 - 1 - 0, fighting out of Tokyo, Marcus Baldridge!
The judges for this bout are Yasuomi Hirokawa, Sosuke Kotani and Yukihiro Yamamoto.
The bell rings for round one and we are underway!
Bass tries for a takedown but Baldridge circles away easily
and Bass takes a counter punch right on the button for his troubles.
Bass avoids a low kick by using good footwork.
Bass misses with a takedown

and Baldridge decides to take the opportunity to score a takedown. He's landed in Bass's guard.
The fighters are pressed up against the cage, both looking to find a bit of space to work.
Bass working the defensive guard well to avoid strikes from Baldridge.
Baldridge trying to control but Bass is working from the bottom.
Baldridge content to strike from guard, landing some decent shots.
Baldridge throws a big right hand that misses.
Bass working the defensive guard well to avoid strikes from Baldridge.
Baldridge postures up to throw the ground and pound strikes but they don't connect.
Baldridge throwing strikes but missing.
Bass on his back here. We all know that wrestlers don't like being on their back so let's see if Bass tries to get out of the position.
This has been an exciting period of action!
Baldridge working in close now, lands a nice elbow to the side of Bass's head.
That's one minute gone in the round.
Baldridge throws a big elbow that misses.
Baldridge working some ground and pound from guard but it's not doing any damage.
Baldridge has the superior BJJ but he's also working some ground strikes into his gameplan.
Bass is breathing heavily.
Baldridge keeps in close for a moment and lands a decent shot to the side of Bass's head.
Baldridge throwing shots from guard but he's hitting more mat than opponent.
Baldridge tries to free his leg and advance position but Bass is retaining full guard.
Bass wants to stand up but Baldridge is controlling him.
Baldridge lands a couple of elbows.
Baldridge postures up to throw the ground and pound strikes but they don't connect.
Baldridge throws a big elbow that misses.
Baldridge loading up with the ground and pound but he's missing more than he's landing in this flurry.
Baldridge is sitting in guard, working some ground and pound.
That's two minutes gone in the round.
Baldridge postures up and lands a big shot to Bass's brow.
Bass keeping moving, preventing Baldridge from controlling successfully.
Baldridge working some ground and pound from guard but it's not doing any damage.
Baldridge with a nice head shot there.
Baldridge throws a big right hand that misses.
Fantastic stuff here - a very entertaining period of action, which has drawn cheers from the crowd.
Baldridge connects with a couple of short punches.
Baldridge wants to control from the top but Bass keeps moving.
Baldridge landing with the ground and pound.
A big thud reverberates around the arena there as Baldridge accidentally thumps the mat. Hopefully he's not broken his hand.
Baldridge connects with a couple of short punches.
The ref warns both fighters not to hold the cage as they work up against the meshing.
Baldridge is in close to Bass's body, working some short punches and elbows.
That's three minutes gone in the round.
Baldridge throws a big right hand that misses.
Baldridge working from the guard for now, landing some ground and pound.
Baldridge cracks Bass with a solid left hand.
Baldridge throwing shots from guard but he's hitting more mat than opponent.
Hammerfist, elbow! yells Baldridge's corner. There ya go! There ya go!
Baldridge forces his way into half guard.
The two fighters exchange a few words. I couldn't hear what they were saying but maybe it's more fun if you make it up yourself. Baldridge connects with a nice short shot to Bass's temple.
Baldridge is nestled in close to Bass, controlling him well. He's worked in a nice elbow to the side of the head as well, for good measure.
Nice strikes from Baldridge there.
Baldridge is trying to control the action in half guard but Bass is working away on the bottom, looking perhaps to get back to full guard.
Bass taking some punishment here, with Baldridge in his half guard.
The crowd are loving this. Great action here.
Baldridge working some ground and pound from close in. He's looking to maintain this position and strike for a while by the looks of things... although he'll probably advance to full mount in a minute now I've said that.
That's four minutes gone in the round.
Neither fighter is being very active at the moment, with Baldridge in particular looking to stall.
Ground and pound from Baldridge.
Baldridge works his foot free and advances to mount.
Baldridge scoring with strikes but Bass is staying in there.
Baldridge is in the full mount, landing strikes.
Bass knows he needs to get back to his feet asap. He's simply no match for Baldridge on the ground.
Baldridge scores with a couple of good head shots there.
The crowd are going absolutely nuts as the round comes to an end - what a fantastic round of action!
Baldridge connects with a couple of good shots from mount.
Baldridge landing strikes from the mount and Bass is in trouble!
Baldridge with shots to the head and body - Bass looks very uncomfortable down there.
Baldridge landing strikes, looking to finish!
And thats the end of the round the fighters go back to their corners.
Marcus Baldridge dominated that round.
That's time! Back to the action!
Baldridge shoots in with a lovely double leg takedown. Bass manages to land in full guard to minimise the damage.
Baldridge throwing strikes but missing.
Bass utilising some decent striking defenses from the guard, preventing the ground and pound.
Bass is looking to get back to his feet but can't, whilst Baldridge is controlling him.
Baldridge loading up with the ground and pound but he's missing more than he's landing in this flurry.
Baldridge postures up and lands a big shot to Bass's brow.
Baldridge is looking to work some ground and pound but Bass has wrist control.
Baldridge stands up over Bass, holding his feet. He dives back in and lands a decent shot to the head.
Baldridge wants to control from the top but Bass keeps moving.
Baldridge passes into half guard.
Both fighters are absolutely exhausted here.
That's one minute gone in the round.
Baldridge frees up his trapped foot and advances to mount.
Baldridge working the ground and pound effectively.
Baldridge looking to ground and pound his opponent to a finish here.
Baldridge landing strikes, looking to finish!
Baldridge working away from the top, dropping strikes.

Bass is rocked!
Baldridge looking to control but Bass is working nicely, looking to advance position himself.
Oh Bass is still in real trouble! Will he be able to recover?!!
Baldridge lands a shot to the body, followed up by a shot to the exposed head of his trapped opponent.
We've seen a great period of action over the last minute or so - credit to both fighters for going all out!
Baldridge lands a big shot to the head and Bass winces in pain. He's tapped out due to strikes!
Ladies and gentlemen, after 2:59 of round 2, we have a winner by way of Submission (Strikes). Marcus Baldridge!
|
|
|
|
|
|
|
|
|
|
|
|
|
|
|
|
|
|
|
|
|
|
|
| S |
C
A |
G |
S |
C
B |
G |
|
S |
C |
G |
|
energy
A | B |
|
hype
A | B |
|
pop
A | B |
|
mgr
A | B |
|
FIGHT
RATING
100% |
|
|
|
|
|
|
|
Undercard bout
|
Coming up we have a heavyweight MMA rules bout between Rick Rude (ranked 0 p4p, 0 weight class) and Chang Sun Son (ranked 0 p4p, 0 weight class). Rude comes to the cage accompanied by Face fucked by PISSING RAZORS. Both fighters look fresh as a daisy as they make their way towards the cage.
 |
|
 |
| 195 cm
25
260 lbs
2 - 1 - 0 |
|
180 cm
26
236 lbs
1 - 0 - 0 |
Good wrestling
Solid boxing
Big right hand |
|
BJJ Blue Belt
Decent boxing
Prefers standup |
|
| |
|
Ladies and gentlemen. This fight is 3 rounds, in the heavyweight division.
Introducing the fighter to my left, fighting out of the red corner.
With a record of
2 - 1 - 0, fighting out of Tokyo, Rick Rude!
And introducing the fighter to my right, fighting out of the blue corner.
With a record of
1 - 0 - 0, fighting out of Tokyo, Chang Sun Son!
The judges for this bout are Yasuomi Hirokawa, Shigeki Fujiwara and Tatsuya Matsuyama.
The bell rings for round one and we are underway!
Son throws a hook but Rude blocks it.
Son showing good head movement there, avoiding the strikes from Rude.
Rude thows a body shot but no joy.
Rick Rude seems to be the more aggressive standup fighter in this bout.
Rude connects with a looping left hand that seems like it dazed Son momentarily.
Son misses with a wild body shot.
Rude throws a hard body shot but it just misses.
Rude shoots in looking for a double leg takedown. Son defends it nicely.
Son lands with a cross.
Rude walks into a stiff left hand from Son.
The crowd are loving this. Great action here.
Son fails to land with the punch combination there - jab, cross, hook, miss, miss, miss.
Rude tries to land with a swinging hook to the body but Son was well out of range. Poor timing from Rude.
Son slips a jab and a cross from Rude.
Son dodges the punch combination from Rude.
Son takes a shot right to the liver - Bas would have been proud of that punch.
That's one minute gone in the round.
Rude throws a hard body shot but it just misses.
Son tests Rude's chin there with a solid looking shot.
Son works the jab nicely.
Son changes levels and scores with a jab to the body.
Rude takes a jab right on the nose. That must have hurt but he shrugs his shoulders and looks to return the favor.
Rude is rocked!
This has been an exciting period of action!
Son lands a jab to Rude's midsection.
Rude is breathing heavily.
Son getting the better of the striking in that exchange.
Oh Rude is still all over the place! His legs are completely gone! Will he be able to recover?!!
Rude takes a shot to the body in his stride.
Son moves in close and cracks Rude with a massive right hand! Rude, frozen momentarily in time, tumbles to the canvas, already out cold! A brutal knockout by Son!
Ladies and gentlemen, after 1:36 of round 1, we have a winner by way of KO (Punch). Chang Sun Son!
|
|
|
|
|
|
|
|
|
|
|
|
|
|
|
|
|
|
|
|
|
|
|
| S |
C
A |
G |
S |
C
B |
G |
|
S |
C |
G |
|
energy
A | B |
|
hype
A | B |
|
pop
A | B |
|
mgr
A | B |
|
FIGHT
RATING
100% |
|
|
|
|
|
|
|
Co-main event
|
Coming up we have a lightweight MMA rules bout between Alexander Shlemenko (ranked 0 p4p, 0 weight class) and Kenji Yoshihira (ranked 0 p4p, 0 weight class). Shlemenko comes to the cage accompanied by Guf - Ice Baby. Both fighters look fresh as a daisy as they make their way towards the cage.
 |
|
 |
| 181 cm
23
155 lbs
1 - 1 - 0 |
|
185 cm
24
160 lbs
3 - 2 - 0 |
BJJ Blue Belt
Brawler
Intelligent |
|
BJJ Blue Belt
Basic striking
Determined |
|
| |
|
Ladies and gentlemen. This fight is 3 rounds, in the lightweight division.
Introducing the fighter to my left, fighting out of the red corner.
With a record of
1 - 1 - 0, fighting out of Tokyo, Alexander Shlemenko!
And introducing the fighter to my right, fighting out of the blue corner.
With a record of
3 - 2 - 0, fighting out of Tokyo, Kenji Yoshihira!
The judges for this bout are Tatsuya Matsuyama, Hirohito Nitta and Yuuki Gou.
The bell rings for round one and we are underway!
Yoshihira keeps the fight standing with a nice sprawl.
Yoshihira shoots in for a takedown! He's got it and he's managed to land in full mount! That's better than Yoshihira was expecting from the takedown attempt, I'm sure!
Yoshihira thowing strikes but they're hitting the gloves, not doing any damage.
Yoshihira sends his fist crashing into the mat - the crowd let out a collective ooooooh. Let's hope he's not broken it!
The fighters are pressed up against the cage, both looking to find a bit of space to work.
Yoshihira throws an elbow from mount that misses. Lucky escape for Shlemenko because Yoshihira loaded up on that one.
Yoshihira can't quite control the action as he would like just now, as Shlemenko is looking to escape.
Shlemenko avoids a series of strikes thrown by Yoshihira.
Yoshihira scoring with some good ground and pound from mount here. Will he manage to finish Shlemenko?
Yoshihira jumps to side control looking for an arm triangle but Shlemenko manages to avoid the submission attempt.
That's one minute gone in the round.
Yoshihira tries for a kimura. Not really close to a finish though.
Yoshihira throwing strikes but missing, from side control.
Yoshihira throws an elbow but Shlemenko slips to the side and avoids it well.
Yoshihira tries to advance to mount but Shlemenko denies him.
Yoshihira trying to control the position but Shlemenko is working away.
That's two minutes gone in the round.
Yoshihira working the ground and pound but Shlemenko is defending the strikes.
Shlemenko is trying to improve his position.
Yoshihira taking a breather here.
The fighters are going at a pretty good pace and they're both starting to sweat now.
Yoshihira wants to lay and pray for a moment but Shlemenko keeps working.
That's three minutes gone in the round.
Shlemenko tries to escape but Yoshihira is in control.
Shlemenko prevents Yoshihira from moving into mount.
Yoshihira taking a break here but Shlemenko is having none of it and regains half guard.
Shlemenko tries to kick Yoshihira off but Yoshihira keeps his base steady and stays in half guard.
That's four minutes gone in the round.
Yoshihira has freed up his trapped foot and advances to mount.
Shlemenko is looking to improve his position but Yoshihira isn't that keen on the idea.
Yoshihira looking to control and managing it successfully.
The crowd applaud the fighters efforts here as the round comes to an end.
Yoshihira unloading with bombs!
And thats the end of the round the fighters go back to their corners.
Kenji Yoshihira dominated that round.
Well, the break between rounds is over. Let's get back to the scrappin!
Shlemenko fails with the takedown.
Yoshihira is looking to clinch but Shlemenko is avoiding it.

Yoshihira clinches with his opponent.
Shlemenko wants to break free. God knows he wants to breaaaak freeee.
Yoshihira has hold of one of Shlemenko's legs. Shlemenko is fighting the takedown attempt but Yoshihira gets the trip and lands the takedown into guard.
Yoshihira wants to pass the guard but Shlemenko is keeping the position.
Shlemenko wants to stand up but Yoshihira is controlling him.
Yoshihira controlling from the guard. I say controlling but really, he's stalling.
Kenji Yoshihira has got the better of the ground game so far.
Yoshihira in full guard, throwing the ground and pound. No damage this time.
Shlemenko on his back here. We all know that wrestlers don't like being on their back so let's see if Shlemenko tries to get out of the position.
That's one minute gone in the round.
Yoshihira postures up and scores with a shot to the body and a follow up elbow to the head.
Yoshihira tries to free his leg and advance position but Shlemenko is retaining full guard.
Yoshihira has the superior BJJ but he's also working some ground strikes into his gameplan.
Shlemenko looking to control.
Yoshihira throwing strikes but missing.
Shlemenko is looking to stand up but Yoshihira isn't so interested in that idea.
That's two minutes gone in the round.
Shlemenko keeping moving, preventing Yoshihira from controlling successfully.

It looks like we're going to have a standup here. Neither fighter is doing enough on the ground.
Shlemenko shoots in for a takedown and gets it. Let's see what he's got on the mat.
Both fighters are absolutely exhausted here.
Yoshihira keeping moving, preventing Shlemenko from controlling successfully.
Shlemenko got a little sloppy there for a moment and Yoshihira has worked his way into a loose triangle - can he finish it?! No, Shlemenko has managed to get both his arms back between Yoshihira's legs - danger averted.
The crowd cheering loudly, showing their appreciation for the quality fight we're seeing here.
Shlemenko postures up and scores with a shot to the body and a follow up elbow to the head.
Shlemenko pushing down on Yoshihira's thigh, trying to pass to half guard. He's managed it... Nice work.
Yoshihira gets full guard.
That's three minutes gone in the round.
Yoshihira looking for submissions off his back, moving his hips, looking for an opening.
Yoshihira looking for a guillotine here but Shlemenko defends easily.
Shlemenko got a little sloppy there for a moment and Yoshihira has worked his way into a loose triangle - can he finish it?! No, Shlemenko has managed to get both his arms back between Yoshihira's legs - danger averted.
Yoshihira is throwing his legs up, looking for submissions. Shlemenko is aware though and is defending well.
Yoshihira working for a triangle but Shlemenko defends it easily.
Yoshihira keeping moving, preventing Shlemenko from controlling successfully.
Shlemenko stands up and waves to Yoshihira to follow him.
That's four minutes gone in the round.
The crowd are loving this. Great action here.
Shlemenko fakes a strike and closes the distance, dragging Yoshihira to the ground. Shlemenko is now in Yoshihira's guard.
Yoshihira wants to stand and escape but Shlemenko is having none of it.
Shlemenko trying to control the position from guard on top but Yoshihira is wriggling around, looking for whatever he can.
Yoshihira keeping full guard, as Shlemenko tries to pass.
Shlemenko is working Yoshihira over from the guard. He should look to pass the guard and do a little more damage with these strikes.
Yoshihira trying to strike from the bottom but really, it's not the best position to be doing that from!
Yoshihira is trying to control the position from the bottom.
As the round comes to an end the crowd are showing their appreciation for a great round of action.
Yoshihira manages to land a sweep and now he's in mount on top!
Shlemenko wriggling around on the bottom manages to avoid the strikes thrown by Yoshihira.
And thats the end of the round the fighters go back to their corners.
Kenji Yoshihira showed his class in that round. I'd imagine he'll take it on all the scorecards.
That's time! Back to the action! This is the final round!

Shlemenko changes levels and looks for a double leg takedown. Yoshihira tries to avoid it but Shlemenko manages to keep hold of a leg and drag Yoshihira to the ground. Yoshihira escapes though and pops straight back up to his feet.
Alexander Shlemenko is looking to throw some combinations by the looks of things.
Yoshihira tries to close the distance and clinch up but Shlemenko swats him away and circles back towards the center.
Yoshihira has taken the fight to the clinch.
Shlemenko looking for a takedown.
Shlemenko goes for a takedown in the clinch but Yoshihira prevents it.
That's three failed takedown attempts in the round for Alexander Shlemenko. That's going to take a lot out of him.
Yoshihira swings wildly with an uppercut but Shlemenko uses good head movement to avoid it.
Yoshihira is trying to stall.
Yoshihira scores a nice knee to the body.
Shlemenko changes levels and goes for a takedown here. Yoshihira fights it off and pushes away nicely.
Yoshihira fails to land with a series of punches.
Yoshihira tries to clinch but Shlemenko is having none of it.
That's one minute gone in the round.
Yoshihira fails in his attempt to clinch.
Yoshihira tries to close the distance and clinch up but Shlemenko swats him away and circles back towards the center.
The fight stays on the outside here - Yoshihira looks like he's thinking about clinching though.
Shlemenko shoots in for a takedown but Yoshihira shows good takedown defense.
Both fighters are breathing heavily.
Nice sprawl there from Yoshihira as Shlemenko shoots in.
Yoshihira tries to close the distance and clinch but Shlemenko swats him to one side with an open hand palm strike and circles away.
Yoshihira shoots in from a long way out. He's driving through with the takedown attempt and he eventually gets it, landing in Shlemenko's guard.
Yoshihira prevents Shlemenko from getting back to his feet.
Yoshihira trying to control but Shlemenko is working from the bottom.
A big thud reverberates around the arena there as Yoshihira accidentally thumps the mat. Hopefully he's not broken his hand.
That's two minutes gone in the round.
Yoshihira throwing strikes but missing.
The ref warns both fighters not to hold the cage as they work up against the meshing.
Yoshihira trying to control but Shlemenko is working from the bottom.
Yoshihira lands a couple of decent looking shots.
Yoshihira controlling from the top position.
Yoshihira postures up to throw the ground and pound strikes but they don't connect.
That's three minutes gone in the round.
Yoshihira controlling from the guard. I say controlling but really, he's stalling.
If this pace continues, the referee will definitely step in and force a standup.

OK we're going to have a standup here. Kenji Yoshihira hasn't been effective enough on the ground and the referee wants a restart.
A momentary lapse in concentration from Shlemenko enables Yoshihira to shoot in and score with a neat double leg. Shlemenko manages to secure a closed guard as the fighters hit the mat.
Yoshihira wants to pass the guard but Shlemenko is keeping the position.
Yoshihira passes Shlemenko's right leg, so he's now in half guard.
The referee walks around the fighters to get a better view of the action. Yoshihira lands a nice short elbow.
Yoshihira is working hard to pass the guard. He's done it - he's now in full mount! Trouble for Shlemenko!
Yoshihira controlling the pace for now.
That's four minutes gone in the round.
Yoshihira trying to control but he's not successful this time.
Alexander Shlemenko has stepped it up - he knows he needs a finish here!
Yoshihira raining down shots from the mount!
Yoshihira putting on the heat here with some good ground and pound!
We've seen a great period of action over the last minute or so - credit to both fighters for going all out!
The crowd applaud the fighters efforts here as the round comes to an end.
Yoshihira pausing momentarily but resumes with a couple of decent strikes that do a bit of damage.
Kenji Yoshihira is fighting for a decision - hopefully he's judged it right and he's actually winning the fight.
Shlemenko takes a big shot to the head but keeps on trying to improve his position.
And that's the end of the fight!
Kenji Yoshihira comfortably won the final round on my scorecard.
Well Yoshihira has outworked and out performed his opponent in all aspects of the game today. He was simply too good and the decision should be no more than a formality. Over to the ring announcer for the scorecards.
Ladies and gentlemen, after 3 rounds of action, we go to the scorecards for a decision.
Judge Tatsuya Matsuyama scores the fight 27:30
Judge Hirohito Nitta scores the fight 27:30
Judge Yuuki Gou scores the fight 27:30
In favor of your winner, by unanimous decision... Kenji Yoshihira!
|
|
|
|
|
|
|
|
|
|
|
|
|
|
|
|
|
|
|
|
|
|
|
| S |
C
A |
G |
S |
C
B |
G |
|
S |
C |
G |
|
energy
A | B |
|
hype
A | B |
|
pop
A | B |
|
mgr
A | B |
|
FIGHT
RATING
62% |
|
|
|
|
|
|
|
Main event
|
Coming up we have a middleweight MMA rules bout between Jake Wallace (ranked 0 p4p, 0 weight class) and Mark Munoz (ranked 0 p4p, 0 weight class). Wallace comes to the cage accompanied by "Cinderella Man" by Eminem. Munoz has chosen Bebot as his entrance music. Jake Wallace has the better chin. Will he look to stand and bang today?
 |
|
 |
| 186 cm
25
190 lbs
1 - 0 - 0 |
|
183 cm
25
196 lbs
4 - 1 - 0 |
BJJ White Belt
Excellent MT
Very quick |
|
Good takedowns
Counter striker
Determined |
|
| |
|
Ladies and gentlemen. This fight is 3 rounds, in the middleweight division.
Introducing the fighter to my left, fighting out of the red corner.
With a record of
1 - 0 - 0, fighting out of Tokyo, Jake Wallace!
And introducing the fighter to my right, fighting out of the blue corner.
With a record of
4 - 1 - 0, fighting out of Tokyo, Mark Munoz!
The judges for this bout are Yasuomi Hirokawa, Tatsuya Matsuyama and Sosuke Kotani.
The bell rings for round one and we are underway!
Munoz shoots in for a takedown but Wallace shows good takedown defense there and keeps this one on the feet.
The fight moves into the clinch position.
Wallace content to slow the pace in the clinch.
A short uppercut from Wallace.
Wallace breaks from the clinch.
Munoz shoots in for a takedown but Wallace shows good takedown defense there and keeps this one on the feet.
Wallace tries to clinch but Munoz moves out of range.
Wallace is looking to clinch but Munoz is avoiding it.
Wallace has managed to clinch.
Wallace lands a hook to the body. It's hard to tell if that hurt Munoz or not.
That's one minute gone in the round.
Munoz has a body lock and is looking for a takedown. Wallace is bouncing around trying to prevent the takedown and somehow he has indeed managed to stay on his feet.
Jake Wallace has stuffed three takedown attempts in the round now. That's going to take a lot out of Mark Munoz.
Munoz is working for a takedown up against the cage. He can't get it on this occasion though.
A hook to the body from Wallace.
A short right hand to the side of the head by Wallace.
Wallace breaks the clinch and we return to the middle of the mat.
Wallace moves into the clinch.
Munoz goes for a takedown attempt but Wallace pushes him away and we're back to fighting at a distance.
Munoz shoots for a double leg takedown but Wallace sprawls well. He's pushed Munoz's face into the mat and manages to get back to his feet relatively easily.
That's two minutes gone in the round.
Wallace has taken the fight to the clinch.
Wallace lands a right hand.
Wallace lands a right uppercut that snaps the head of Munoz backwards.
Wallace cracks Munoz with a nice body shot.
With the fighters clinched against the cage, Wallace creates a bit of distance for himself and scores with a nice uppercut.
Wallace lands a shoulder strike.
The fans in attendance giving it up for the two fighters, who have really let it all hang out in the last minute or so!
Wallace lands a hook to the side of the head.
Munoz changes levels and goes for a takedown here. Wallace fights it off and pushes away nicely.
Nice sprawl there from Wallace as Munoz shoots in.
Munoz looks gassed!
That's three minutes gone in the round.
Wallace punishes Munoz's body with a nice straight punch.
Wallace tries to clinch up against the cage, rushing in the close the distance. Munoz manages to break the clinch and circles back to the middle of the mat.
Wallace tries to clinch but is not successful on this occasion.
Wallace gets in close and instigates a clinch.
Wallace lands with a good tight uppercut to the head.
Wallace lands with a left to the head.
Wallace pushes Munoz back against the cage and lands a hook to the side of the head.
That's four minutes gone in the round.
A short uppercut from Wallace.
Munoz goes for a takedown in the clinch but Wallace prevents it.
Wallace scores with an uppercut up the middle.
Wallace scores with a nice hook to the head.
Wallace lands with a quick shot inside that doesn't really do much damage.
Wallace digs a right hand underneath Munoz's ribcage. Munoz let out a lung full of air as it connected.
This is a great period of action - very entertaining stuff!
Munoz letting Wallace take a breather here.
As the round comes to an end the crowd are showing their appreciation for a great round of action.
Wallace breaks from the clinch.
Wallace tries to clinch up against the cage, rushing in the close the distance. Munoz manages to break the clinch and circles back to the middle of the mat.
And thats the end of the round the fighters go back to their corners.
Jake Wallace dominated that round.
That's the end of the interval. I'm sure that seemed a lot quicker than a minute for our two fighters! Back to the action.
Wallace scores with a sloppy punch to the body. Not much technique there but it did the business.
Wallace tries to clinch but Munoz moves out of range.
Wallace rushes Munoz and presses him up against the cage.
A left hand lands to the body for Wallace.
Wallace lands with a left to the head.
A hook to the body from Wallace.
Munoz tries for a takedown but Wallace manages to get underhooks.
Wallace works on Munoz's body with a couple of short punches.
Munoz is breathing heavily.
Wooooo! Give it up for these two warriors! They are putting on a show!
The two fighters are working to gain dominance in the clinch.
That's one minute gone in the round.
Wallace gets a warning from the ref for wasting time.
The ref breaks the fighters up, due to lack of action by Jake Wallace.
Munoz tries to score a power double leg takedown but Wallace sees that one coming and sprawls well. That will dishearten Munoz somewhat.
That's two minutes gone in the round.
Wallace moves into range and clinches up with Munoz.
Wallace lands a right hand.
Munoz's head jolts backwards as he takes an uppercut right on the button!
Wallace lands an uppercut.
Wallace breaks the clinch and we return to the middle of the mat.
Jake Wallace is looking to keep the fight on the feet at all costs.
Munoz avoids a punch combination nicely.
Wallace clinches.
Wallace is really dominating this fight. Is there anything that Munoz can do to turn this around?
That's three minutes gone in the round.
Wallace scores with a shot to the side of Munoz's head.
Wallace controlling the action here for a moment.
Munoz takes a shot to the head.
A nice right hand lands inside from Wallace.
Wallace scores with a shot to the side of Munoz's head.
A shot in the inside from Wallace.
That's four minutes gone in the round.
Wallace taking a break, stalling in the clinch.
Jake Wallace has scored more points in the clinch so far.
Wallace lands with a short shot to the head.
Still in the clinch, Wallace scores with a nice short uppercut.
Wallace scores with a shot to the side of Munoz's head.
Wallace pushes Munoz back against the cage and lands a hook to the side of the head.
Wallace lands a body punch in the clinch.
Wallace breaks from the clinch.
Wallace stuffs a takedown. It's all about dictating where the fight takes place and Wallace wants it to stay on the feet.
Jake Wallace has stuffed three takedown attempts in the round now. That's going to take a lot out of Mark Munoz.
The crowd applaud the fighters efforts here as the round comes to an end.
A jab from Wallace does it's job there.
Munoz is rocked!
We've seen a great period of action over the last minute or so - credit to both fighters for going all out!
Wallace tries to clinch up.
And thats the end of the round the fighters go back to their corners.
Jake Wallace dominated that second round.
Well, the break between rounds is over. Let's get back to the scrappin! The crowd applaud as we get ready to start the final round!
Munoz fails miserably with a takedown attempt.
A cross from Wallace lands.
Munoz is still on wobbly legs! Can Wallace finish him?
Wallace instigates a clinch.
Munoz seems to have recovered his senses.
Wallace leaning against his opponent.
Munoz takes a shot to the head.
Wallace lands with a good tight uppercut to the head.
Wallace softening up his opponent with strikes, against the cage.
Wallace lands a right uppercut that snaps the head of Munoz backwards.
Wallace lands an uppercut.
That's one minute gone in the round.
Wallace scores with a hook to the body.
Wallace makes some space for himself and lands an uppercut.

Wallace drops Munoz onto one knee with a big uppercut from the clinch! Munoz is propped up by the cage and works his way back to his feet!
Wallace scores with an uppercut up the middle.
This has been an exciting period of action!
Wallace breaks from the clinch.
Mark Munoz seems to be the more aggressive standup fighter in this bout.
Wallace tries to close the distance and clinch up against the cage but Munoz paws at him with a jab and circles away.
Munoz circles away from the clinch attempt.
Munoz fails with a takedown attempt.
Wallace cracks Munoz with a big right hand that sends him to the floor! Munoz looks wobbly but he's sprung back up to his feet straight away
can Wallace finish him?
Munoz takes a big intake of breath there - he's definitely tired.
That's two minutes gone in the round.
Wallace is looking to clinch.
Munoz is wiping some vaseline out of his eye. Wallace doesn't give a rats ass about fair play and cracks him with a massive hook to the side of the head! Munoz crumples to the floor out cold! The cornerman is going to be in Munoz's bad books for that mishap!
Ladies and gentlemen, after 2:42 of round 3, we have a winner by way of KO (Punch). Jake Wallace!
Jake Wallace spent the whole post fight interview bigging himself up. It didn't go down that well with the fans after a while as they thought it was a bit arrogant.
|
|
|
|
|
|
|
|
|
|
|
|
|
|
|
|
|
|
|
|
|
|
|
| S |
C
A |
G |
S |
C
B |
G |
|
S |
C |
G |
|
energy
A | B |
|
hype
A | B |
|
pop
A | B |
|
mgr
A | B |
|
FIGHT
RATING
57% |
|
|
|
|
|
|
|
|
|
|
