 |
Epic: Machina vs. Byndom 2 PBP Commentary |
Undercard bout
|
|
|
|
Undercard bout
|
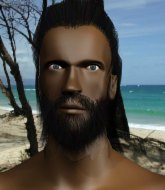
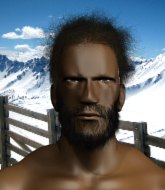
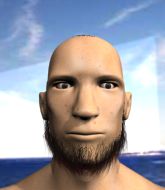
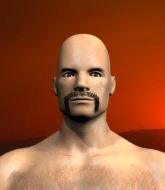
Coming up we have a welterweight MMA rules bout between Tony Jones Stark (ranked 0 p4p, 0 weight class) and Leor Nadav (ranked 0 p4p, 0 weight class). Over to our ring announcer for the fighter introductions!
 |
|
 |
| 180 cm
19
175 lbs
1 - 4 - 0 |
|
186 cm
18
180 lbs
1 - 3 - 0 |
BJJ Blue Belt
Brawler
Experienced |
|
BJJ Blue Belt
Brawler
Determined |
|
| |
|
Ladies and gentlemen. This fight is 3 rounds, in the welterweight division.
Introducing the fighter to my left, fighting out of the red corner.
With a record of
1 - 4 - 0, fighting out of Los Angeles, Tony Jones Stark!
And introducing the fighter to my right, fighting out of the blue corner.
With a record of
1 - 3 - 0, fighting out of Los Angeles, Leor Nadav!
The judges for this bout are Frank Antenori, Jack Bonds and Don Winkell.

The bell rings for round one and we are underway!
Nadav takes a head kick and shrugs it off.
Nadav shoots in for a takedown but Stark shows good takedown defense there and keeps this one on the feet.
Nadav is looking to clinch but Stark is avoiding it.
No luck for Nadav with that takedown attempt.

Nadav tries to keep at a distance but Stark has taken the fight into the clinch.

Stark decides to pull guard.
It looks like the ref is thinking about a standup.
Nadav is fighting to break Stark's control of his arms but Stark is doing a good job of controlling the position at the moment.

Stark throwing his legs up looking for a triangle.
The fighters are pressed up against the cage, both looking to find a bit of space to work.
Nadav stands up and looks to throw the legs aside to pass to side control. Stark swivels though and keeps the full guard.
Nadav is persisting with the attempt to improve his position.

That's one minute gone in the round.
Nadav stopping the sweep attempt from Stark.
Nadav throwing shots from guard but he's hitting more mat than opponent.
Stark trying to keep a closed guard but Nadav is proving a slippery customer.

That's two minutes gone in the round.

We're going to have a standup here because Tony Jones Stark wasn't active enough for the referee's liking.
A really sloppy takedown attempt there from Nadav.
Tony Jones Stark has stuffed three takedown attempts in the round now. That's going to take a lot out of Leor Nadav.
Stark closes the distance and presses his opponent up against the cage.
Nadav is working on a leg, looking for a takedown but Stark is defending well.
Nadav is trying to drag Stark to the mat but Stark just about manages to keep his footing. He used the cage to his advantage there.
Nadav wants to break free but Stark has control.
Stark stalling in the clinch.
Stark keeps the fight in the clinch, despite Nadav's efforts to push away.

Stark escapes the clinch and we're back to striking.
Nadav fails with a takedown attempt.
Nadav shoots in for a takedown. He's persisting with it as Stark sprawls well. Stark wins this battle and keeps the fight standing. Nadav gets slowly back to his feet.

That's three minutes gone in the round.
Nadav is on the wrong end of a nice combination from Stark.

It looks like Leor Nadav has been cut.
Nadav looks gassed!
Stark moves into the clinch.
Nadav wants to get back to striking at distance but Stark won't allow it.
Stark comes over the top with an elbow. That landed flush.
Stark is pushing Nadav up against the cage, for a bit of lean and pray action. Action being used the in the loosest possible sense of the word.
Stark gets underhooks to prevent Nadav's takedown attempt.
Stark leaning his opponent against the cage.
Stark pushes Nadav back against the cage and unloads with a body punch.
This is a great period of action - very entertaining stuff!
Stark working Nadav over with knees to the body.
Stark landing knees to the body.

That's four minutes gone in the round.
Stark breaks from the clinch.
Stark closes the distance and clinches.
Stark lands a left hand.
Stark landing some nice looking knees to the body.
Stark with a knee to the head.
Stark crunches a lovely knee into Nadav's ribcage.
Stark's corner calls for him to break the clinch, which he does.
Nadav takes a hook to the side of the head. I wonder if that's got his ears ringing.
Nadav shoots in but Stark avoids the takedown attempt easily.
The fighters are starting to get sweaty, which will make takedowns a bit more tricky.
Nadav gets tackled into the cage by Stark. Stark maintains the clinch.
Stark stalling against the cage.
Stark breaks the clinch.
Stark gets a clinch.

That's five minutes gone in the round.
Stark blocks a couple of punches on the inside.
Stalling in the clinch from Stark.
Nadav is looking to take this one to the mat.
Stark pushes off and circles away, back to the middle of the mat.
Stark doesn't manage to clinch there - Nadav circles away.
Nadav tries to clinch but Stark moves out of range.
Stark avoids the body shot from Nadav.
Stark has Nadav up against the cage in a clinch.
Nadav tries to take the fight to the ground by pulling guard but can't manage it.
Stark breaks the clinch and we return to the middle of the mat.
Stark scores with a straight right hand, right through his opponent's guard.
Stark closes the distance and clinches.
Stark unloads a knee to the mid-section. Nadav lets out a prehistoric sounding urrrrgh.
Nadav is trying desperately to land a takedown but Stark is having absolutely none of it. This is turning into a bit of a nightmare for Nadav.
Stark is pushing Nadav up against the cage, for a bit of lean and pray action. Action being used the in the loosest possible sense of the word.
Stark has clasped his hands together around Nadav's back... aaand, he's got a takedown into side control. Nicely done.

That's six minutes gone in the round.
The crowd are loving this. Great action here.
Stark trying to control the action but Nadav is working from the bottom.
Nadav prevents Stark from improving position.
Stark wants to work for a kimura but he's foiled early by Nadav, who protects the arm well.
Stark creates a bit of distance and throws down some hard shots.
Stark is trying to land an Americana. He has the arm isolated but Nadav is keeping cool and he's avoided the danger for now.
Stark working away.

That's seven minutes gone in the round.
Nadav is trying to get back to half guard.

Stark stands up and we're back to a striking position.
Stark moves into range and clinches up with Nadav.
Knees in the clinch landing for Stark.
Stark manages to pull guard. Let's see whether he can land a sub off his back.
Stark controlling the position.
There's a bit of a scramble here and now Stark is on top in guard.
Stark advances position into side control!

That's eight minutes gone in the round.
Stark is looking to take a break and control but Nadav is keeping him honest, looking to work from the bottom.
Stark is trying to land an Americana. He has the arm isolated but Nadav is keeping cool and he's avoided the danger for now.
Stark working away.
We've seen a great period of action over the last minute or so - credit to both fighters for going all out!
Nadav is trying to buck Stark off.
Stark is looking to finish here, going for an Americana. Nadav knows the correct defense though, so he's OK.
Nadav is not content to let Stark control the position.

That's nine minutes gone in the round.
Stark tries to advance to mount but can't.
Nadav sneaks a leg under to get back to half guard.
Stark is thinking about going for an arm triangle but he can't free his leg.
Stark works his way into full mount!
The crowd are going absolutely nuts as the round comes to an end - what a fantastic round of action!
Stark lands a couple of nice shots there from mount.
And thats the end of the round the fighters go back to their corners.
Tony Jones Stark dominated that round.
The cut man is working on Leor Nadav's cut.
That's time! Back to the action!

Nadav tries to shoot in for a takedown. He's got hold of a leg but Stark swivels and escapes.
Nice defenses there by Stark.
Stark gets to the clinch - let's see what his plan is here.
Nadav is working on a leg, looking for a takedown but Stark is defending well.
Stark breaks from the clinch.
Stark shoots in but Nadav avoids the takedown attempt easily.
Stark has closed the distance and engaged Nadav in a clinch.
Nadav tries to take the fight to the ground by pulling guard but can't manage it.
Tony Jones Stark has stuffed three takedown attempts in the round now. That's going to take a lot out of Leor Nadav.
A bit of stalling here from Stark.
Stark manages to break the clinch.
Nadav is breathing heavily.
Nice sprawl there from Stark as Nadav shoots in.
Nadav fails in his attempt to clinch.
Nadav throws a push kick but Stark slaps the foot to one side.
Stark swings away but doesn't land with a series of punches.
Stark tries a switch kick but it misses it's target.
That's one minute gone in the round.
Stark closes the distance and clinches.
Tony Jones Stark has scored more points in the clinch so far.
Nadav wants a takedown.
Stark gets the body lock takedown. After a quick scramble, Nadav regains guard.
Stark trying to pass the guard but can't manage it just yet.
The ref warns both fighters not to hold the cage as they work up against the meshing.
Stark is pushing down on Nadav's leg trying to pass to half guard. Nadav is fighting to maintain full guard but Stark has managed to sneak the leg through.
Nadav is trying to stand back up but Stark is controlling him
Stark is working for a kimura but Nadav is defending it quite comfortably.
Nice strikes from Stark there.
Stark is working hard to pass the guard. He's done it - he's now in full mount! Trouble for Nadav!
Stark dominating with strikes here.
That's two minutes gone in the round.
We've seen a great period of action over the last minute or so - credit to both fighters for going all out!
Stark raining down hammerfists from mount.
Nadav defends a decent attempt at a guillotine from Stark.
Stark is going oldschool here, as he tries to force Nadav to tap using a forearm choke. This isn't 1993 though, so Nadav shrugs it off.
Nadav is trying to escape the mount.
Stark is in full mount, looking to secure a guillotine but Nadav is surviving well by controlling Stark's body position as best he can.
Nadav is desperately trying to get back to half guard.
That's three minutes gone in the round.
Stark looking for an armbar but decides to keep the dominant position instead.
Stark is in full mount, looking to secure a guillotine but Nadav is surviving well by controlling Stark's body position as best he can.
Stark cracks Nadav with a nasty head shot there - the crowd let out an audible gasp there, as the noise reverberated around the arena.
Stark scoring with some good ground and pound from mount here. Will he manage to finish Nadav?
Nadav is trying to escape the mount.
Stark with the ground and pound from mount.
That's four minutes gone in the round.
Stark working for a submission but Nadav is keeping him at bay.
Stark lands with some vicious ground and pound - can Nadav hang on?
Stark avoids the attempt from Nadav to control.
Stark is really dominating this fight. Is there anything that Nadav can do to turn this around?
Wooooo! Give it up for these two warriors! They are putting on a show!
BOOM! Stark connects with a massive shot to the dome!
Nadav takes a big shot to the head but keeps on trying to improve his position.
Tony Jones Stark overall seems to be getting the better of the ground position in the fight so far.
Stark can't quite control the action as he would like just now, as Nadav is looking to escape.
Nadav keeping his composure momentarily, calmly looking to get back to half guard.
That's five minutes gone in the round.
Nadav wants to control but Stark is having none of it.
Nadav is desperately trying to get back to half guard.
Stark looking to ground and pound his opponent to a finish here.
Stark working the ground and pound effectively.
Stark working to secure an arm triangle but it's not happening for him just yet.
That's six minutes gone in the round.
Nadav keeping his composure momentarily, calmly looking to get back to half guard.
Stark with the ground and pound from mount.
Stark connects with a couple of good shots from mount.
Wooooo! Give it up for these two warriors! They are putting on a show!
Stark can't quite control the action as he would like just now, as Nadav is looking to escape.
Nadav tries to hold on but Stark postures up.
Stark is controlling this nicely and is looking to make no mistakes. Nadav is trying to wiggle out of this horrible position. Nadav flips to his side and attempts to get a leg in for half guard. Stark anticipates the leg and manages to get behind Nadav and secures both hooks! This could be bad! Stark slips an arm under Nadav chin and tries to position for a rear naked choke. Stark has worked the choke in now and it looks tight. Stark is squeezing on Nadav like an anaconda would it's prey. Nadav fails to tap and has fallen unconscious! We've got ourselves a winner by way of a rear naked choke!
Ladies and gentlemen, after 7:58 of round 2, we have a winner by way of Submission (RNC). Tony Jones Stark!
|
|
|
|
|
|
|
|
|
|
|
|
|
|
|
|
|
|
|
|
|
|
|
| S |
C
A |
G |
S |
C
B |
G |
|
S |
C |
G |
|
energy
A | B |
|
hype
A | B |
|
pop
A | B |
|
mgr
A | B |
|
FIGHT
RATING
44% |
|
|
|
|
|
|
|
Undercard bout
|
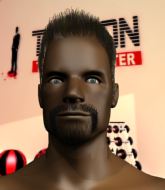
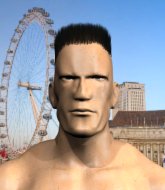
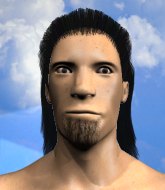
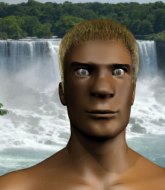
Coming up we have a super heavyweight MMA rules bout between Brian Larsson (ranked 0 p4p, 0 weight class) and Herschel Walker (ranked 0 p4p, 0 weight class). Herschel Walker has the power to score a knockout today if he connects clean with Brian Larsson's chin.
 |
|
 |
| 205 cm
21
250 lbs
2 - 6 - 0 |
|
185 cm
23
218 lbs
1 - 4 - 0 |
BJJ White Belt
Excellent boxer
Big right hand |
|
BJJ Blue Belt
Excellent MT
Solid chin |
|
| |
|
Ladies and gentlemen. This fight is 3 rounds, in the super heavyweight division.
Introducing the fighter to my left, fighting out of the red corner.
With a record of
2 - 6 - 0, fighting out of Los Angeles, Brian Larsson!
And introducing the fighter to my right, fighting out of the blue corner.
With a record of
1 - 4 - 0, fighting out of Los Angeles, Herschel Walker!
The judges for this bout are Frank Antenori, Jack Bonds and Timothy Bukovac.
The bell rings for round one and we are underway!
Larsson closes the distance and clinches.
Walker drops down for a takedown but doesn't get it.
Larsson is trying to break the clinch but Walker is controlling him.
Larsson is looking to break free of the clinch but Walker has double underhooks.
Larsson looks like he'd prefer to be striking at range right now.
Larsson working hard to break the clinch.
Larsson wants to strike at distance but he can't break free of the clinch.
Walker lands a body punch in the clinch.
Larsson tries to break free but Walker pushes him back against the cage.
Larsson takes a knee to the side of the body.
Larsson avoiding damage as Walker throws knees to the body.
Walker keeps the fight in the clinch, despite Larsson's efforts to push away.
Larsson is pressed up against the cage. Walker has hold of a leg and is looking to drag Larsson down to the mat. Larsson avoids the attempt though and has circled away. We're back to striking at a distance.
That's one minute gone in the round.
Sloppy strikes from Larsson. Those never looked like landing.
Walker dodges the punch combination from Larsson.
Brian Larsson seems to be the more aggressive standup fighter in this bout.
Larsson throws a combination but it was largely blocked by Walker.
Larsson leaves Walker with his face pressed against the mat as he sprawls beautifully, defending against a solid takedown attempt.
Brian Larsson has stuffed three takedown attempts in the round now. That's going to take a lot out of Herschel Walker.
Larsson has taken the fight to the clinch.

Walker pulls Larsson into guard.
Larsson is looking to stand up but Walker won't let him.

Walker looking for submissions off his back, moving his hips, looking for an opening.
Walker bucks up whilst keeping hold of a body lock, managing to reverse the position. Now he's in top in Larsson's guard.
The fighters are pressed up against the cage, both looking to find a bit of space to work.
Larsson is trying to stand up but he's not managed so far.
Walker cracks Larsson with a solid left hand.
The ref warns both fighters not to hold the cage as they work up against the meshing.
That's two minutes gone in the round.
The fans in attendance giving it up for the two fighters, who have really let it all hang out in the last minute or so!
Walker is trying to work a guillotine from the top, or something like that? Don't know how he thinks he's going to get a finish from there.
Larsson is looking to stand up but Walker isn't so interested in that idea.
Walker throwing shots from guard but he's hitting more mat than opponent.
Larsson wants to get back to his feet but Walker is in a dominant position and won't allow it.
Walker drops back looking for a heel hook - he quickly realises he's not going to get it but Larsson manages to dive on top of him before he can escape and now Walker has Larsson in his guard.
That's three minutes gone in the round.
Larsson avoids a guillotine attempt easily.
Walker has a closed guard, preventing Larsson from standing up.
Walker has his feet on Larsson's thighs here. He's pushed Larsson off and worked for a very quick armbar from the bottom! He's flipped onto his stomach and he's cranking hard on the arm! Larsson screams in pain and taps out! This one is all over!
Ladies and gentlemen, after 4:59 of round 1, we have a winner by way of Submission (Armbar). Herschel Walker!
|
|
|
|
|
|
|
|
|
|
|
|
|
|
|
|
|
|
|
|
|
|
|
| S |
C
A |
G |
S |
C
B |
G |
|
S |
C |
G |
|
energy
A | B |
|
hype
A | B |
|
pop
A | B |
|
mgr
A | B |
|
FIGHT
RATING
46% |
|
|
|
|
|
|
|
Undercard bout
|
Coming up we have a welterweight MMA rules bout between Joeli Babitu (ranked 0 p4p, 0 weight class) and Paul Ribiero (ranked 0 p4p, 0 weight class). Buckle up people - heeeeeeeeeere we go!
 |
|
 |
| 188 cm
18
180 lbs
2 - 0 - 0 |
|
178 cm
19
155 lbs
3 - 4 - 0 |
BJJ White Belt
Excellent MT
Good chin |
|
BJJ Blue Belt
Brawler
Knockout power |
|
| |
|
Ladies and gentlemen. This fight is 3 rounds, in the welterweight division.
Introducing the fighter to my left, fighting out of the red corner.
With a record of
2 - 0 - 0, fighting out of Los Angeles, Joeli Babitu!
And introducing the fighter to my right, fighting out of the blue corner.
With a record of
3 - 4 - 0, fighting out of Los Angeles, Paul Ribiero!
The judges for this bout are , Timothy Bukovac and Don Winkell.
The bell rings for round one and we are underway!
No joy there for Ribiero, who threw a few shots but didn't land.
A telegraphed takedown attempt from Ribiero is defended easily by Babitu.
Ribiero shoots in looking for a double leg takedown. Babitu defends it nicely.
Ribiero closes this distance looking for a takedown but Babitu circles away.
Joeli Babitu has stuffed three takedown attempts in the round now. That's going to take a lot out of Paul Ribiero.
Ribiero shoots for a double leg takedown but Babitu sprawls well. He's pushed Ribiero's face into the mat and manages to get back to his feet relatively easily.
Babitu is looking to slow Ribiero down with leg kicks.
Babitu throws a body kick that sends a sickening thudding noise reverberating around the arena.
Joeli Babitu seems to be the more aggressive standup fighter in this bout.
Ribiero looks gassed!
Babitu lands a leg kick that knocks Ribiero off balance momentarily.
This is a great period of action - very entertaining stuff!
A kick lands to the mid section there for Babitu.
Ribiero takes a nice looking leg kick right on the meat of his thigh there.
Babitu with a nice looking leg kick. You could hear that one land in a back row.
Babitu lands a front kick.
Babitu throws a nice inside leg kick.
A nice leg kick lands there from Babitu.
A decent looking body kick lands there for Babitu.
That's one minute gone in the round.
A nice leg kick lands there from Babitu.
Babitu thows a body kick. Ribiero tries to catch it but that hurt him.
Ribiero takes a kick to the side of the head.
It looks like Paul Ribiero has been cut.
The crowd cheering loudly, showing their appreciation for the quality fight we're seeing here.
Ribiero wants to stay close but Babitu steps back to make room for something. Ribiero seems frozen to the spot and bam! huge swing of the leg from Babitu and Ribiero drops like he has been shot! A huge head kick and it's all over!
Ladies and gentlemen, after 1:18 of round 1, we have a winner by way of KO (Head Kick). Joeli Babitu!
After winning the bout, Joeli Babitu thanked all his fans and promised he'd do even better in his next fight. The crowd seemed to love his humility.
|
|
|
|
|
|
|
|
|
|
|
|
|
|
|
|
|
|
|
|
|
|
|
| S |
C
A |
G |
S |
C
B |
G |
|
S |
C |
G |
|
energy
A | B |
|
hype
A | B |
|
pop
A | B |
|
mgr
A | B |
|
FIGHT
RATING
100% |
|
|
|
|
|
|
|
Undercard bout
|
Coming up we have a super heavyweight MMA rules bout between Darren Barrow (ranked 0 p4p, 0 weight class) and Lou Ferrigno (ranked 0 p4p, 0 weight class). Darren Barrow looks tired to me. Hopefully he has got enough gas left in the tank to put in a good performance.
 |
|
 |
| 188 cm
21
211 lbs
3 - 6 - 0 |
|
200 cm
26
265 lbs
4 - 1 - 0 |
BJJ Purple Belt
Brawler
Experienced |
|
BJJ Blue Belt
Excellent boxer
Granite chin |
|
| |
|
Ladies and gentlemen. This fight is 3 rounds, in the super heavyweight division.
Introducing the fighter to my left, fighting out of the red corner.
With a record of
3 - 6 - 0, fighting out of Los Angeles, Darren Barrow!
And introducing the fighter to my right, fighting out of the blue corner.
With a record of
4 - 1 - 0, fighting out of Los Angeles, Lou Ferrigno!
The judges for this bout are Frank Antenori, Jack Bonds and Timothy Bukovac.
The bell rings for round one and we are underway!
Barrow closes this distance looking for a takedown but Ferrigno circles away.
Barrow shoots and misses

and Ferrigno counters with a big right hook, that lands right on the temple! Barrow goes down! Ferrigno rushes to a neutral corner to get the count going quickly. This one's going to be close! 3,4,5,6,7... Barrow is up to one knee.... 8,9.... He's up! The referee says he's good to go, so we're back to the action!

It looks like Darren Barrow has been cut.
Barrow is breathing heavily.
We've seen a great period of action over the last minute or so - credit to both fighters for going all out!
Barrow gets his takedown attempt stuffed easily
and Ferrigno counters with a big right hook, that lands right on the temple! Barrow goes down! Ferrigno rushes to a neutral corner to get the count going quickly. This one's going to be close! 3,4,5,6,7... Barrow is up to one knee.... 8,9.... He's up! The referee says he's good to go, so we're back to the action!

Barrow is rocked!
That's three failed takedown attempts in the round for Darren Barrow. That's going to take a lot out of him.
Ferrigno looks to land a combination but Barrow avoids it well.
Oh Barrow is still all over the place! His legs are completely gone! Will he be able to recover?!!
Barrow leaves his chin hanging out and Ferrigno seizes the opportunity with an uppercut! Barrow crumbles to the floor in a heap! The referee steps in and tends to the downed fighter! What a knockout!
Ladies and gentlemen, after 0:23 of round 1, we have a winner by way of KO (Punch). Lou Ferrigno!
After the big win, Lou Ferrigno made sure to do all the important stuff like thanking his sponsors Conviction and telling the interviewer how much he loves him.
|
|
|
|
|
|
|
|
|
|
|
|
|
|
|
|
|
|
|
|
|
|
|
| S |
C
A |
G |
S |
C
B |
G |
|
S |
C |
G |
|
energy
A | B |
|
hype
A | B |
|
pop
A | B |
|
mgr
A | B |
|
FIGHT
RATING
100% |
|
|
|
|
|
|
|
Co-main event
|
Coming up we have a welterweight MMA rules bout between Eli Savage (ranked 0 p4p, 0 weight class) and Rick Rich (ranked 0 p4p, 0 weight class). Eli Savage has the better chin. Will he look to stand and bang today?
 |
|
 |
| 171 cm
19
143 lbs
4 - 2 - 0 |
|
177 cm
19
180 lbs
4 - 1 - 0 |
BJJ Blue Belt
Brawler
KO power |
|
BJJ Blue Belt
Brawler
Determined |
|
| |
|
Ladies and gentlemen. This fight is 3 rounds, in the welterweight division.
Introducing the fighter to my left, fighting out of the red corner.
With a record of
4 - 2 - 0, fighting out of Los Angeles, Eli Savage!
And introducing the fighter to my right, fighting out of the blue corner.
With a record of
4 - 1 - 0, fighting out of Los Angeles, Rick Rich!
The judges for this bout are Jack Bonds, Don Winkell and .
The bell rings for round one and we are underway!
Savage scores with a jab to the jaw of his opponent.
Rich fails with the takedown.
The fighters circle momentarily. Savage darts into range and connects with a nice straight punch.
Rich shoots in but no luck this time.
Rich stalks Savage and leaps in with a furious combination of punches. Uppercuts and crosses smash into Savage's face. Savage staggers backwards, shaken.

Oooooh!!! Savage has knocked Rich down with a huge combo! Savage steps away and waves a wobbly Rich back to his feet! This one might not go much longer!

Rich is rocked!
It looks like Rick Rich has been cut.
We've seen a great period of action over the last minute or so - credit to both fighters for going all out!
Rich fails miserably with a takedown attempt.
Rich is still on wobbly legs! Can Savage finish him?
Eli Savage has stuffed three takedown attempts in the round now. That's going to take a lot out of Rick Rich.
Savage takes the fight into the clinch.
Rich seems to have recovered his senses.
Rich is trying desperately to land a takedown but Savage is having absolutely none of it. This is turning into a bit of a nightmare for Rich.

Rich breaks the clinch and we return to the middle of the mat.
Rich dives in and grabs Savage's left leg, looking for a takedown. Savage pushes down on Rich's head and hops out.
Savage goes to the watering hole and comes back with a big thumbs up from the judges as he scores a three punch combo.
Rich shoots in for a takedown but doesn't get it.
Savage throws a leg kick but Rich moved away.
Savage turns his hip over beautifully as he lands a nice leg kick.
That's one minute gone in the round.
Savage lands a left and a right that send Rich crashing to the mat, dazed. Savage thinks about following him to the mat but decides to wave him back up to his feet!
The crowd cheering loudly, showing their appreciation for the quality fight we're seeing here.
Savage dances in with a quick combination. Rich is being worked over with jabs and crosses. Oooh, a right straight from Savage snaps Rich's head back. Rich stumbles backwards against the cage. Savage steps forward and delivers a right cross that connects with Rich's jaw, simultaneously knocking him out and sending his mouthpiece into the crowd! There's a worthy souvenir for the fans. This one is over folks. Rich just didn't come prepared.
Ladies and gentlemen, after 1:12 of round 1, we have a winner by way of KO (Punches). Eli Savage!
|
|
|
|
|
|
|
|
|
|
|
|
|
|
|
|
|
|
|
|
|
|
|
| S |
C
A |
G |
S |
C
B |
G |
|
S |
C |
G |
|
energy
A | B |
|
hype
A | B |
|
pop
A | B |
|
mgr
A | B |
|
FIGHT
RATING
100% |
|
|
|
|
|
|
|
Main event
|
Coming up we have a welterweight MMA rules bout between Deus Ex Machina (ranked 0 p4p, 0 weight class) and Carrington Byndom (ranked 0 p4p, 0 weight class). Machina comes to the cage accompanied by In Flames / Reroute To Remain. The key to victory for Deus Ex Machina has got to be keeping the fight on the feet.
 |
|
 |
| 178 cm
19
178 lbs
4 - 0 - 0 |
|
178 cm
26
148 lbs
4 - 1 - 0 |
BJJ Blue Belt
Excellent boxer
Very strong |
|
Decent wrestler
Decent boxing
Granite chin |
|
| |
|
Ladies and gentlemen. This fight is 3 rounds, for the welterweight championship of the world!
Introducing the champion to my left, fighting out of the red corner.
With a record of
4 - 0 - 0, fighting out of Los Angeles, Deus Ex Machina!
And introducing the challenger to my right, fighting out of the blue corner.
With a record of
4 - 1 - 0, fighting out of Los Angeles, Carrington Byndom!
The judges for this bout are , Don Winkell and Timothy Bukovac.
The bell rings for round one and we are underway!
Like a baseball bat into the meat of his leg there - nice leg kick by Byndom.
Machina lands a glancing blow to the side of Byndom's head.
Byndom closes the distance and lands a one-two.
Machina walks into a straight right hand from Byndom.
Byndom swings widly with a right hand
and Machina counters with a nice body shot.
Byndom takes a shot right to the bread basket.
Left hook, right uppercut from Byndom.
Machina throws a monster uppercut resembling something out of street fighter but it doesn't land.
Machina lands a beauty of a right hand that gets the crowd cheering.
It looks like Carrington Byndom has been cut.
We've seen a great period of action over the last minute or so - credit to both fighters for going all out!
Byndom staying out of range there.
Byndom looks to throw the jab but Machina is out of range.
Machina scores with a jab. Byndom acknowledges it with a nod of the head.
That's one minute gone in the round.
Crunch! Byndom slams his shin into Machina's torso.
Machina keeps the fight standing with a nice sprawl.
Carrington Byndom seems to be the more aggressive standup fighter in this bout.
Machina stooping low to avoid any incoming strikes and then lunges in with an uppercut come cross that lands flush.
Byndom tries to clinch there but Machina circles away.
Byndom thuds his right hand into Machina's forehead from close range. That could be painful for both fighters.
Machina scores with a crisp jab that stopped Byndom in his tracks.
Machina misses the body punch
enabling Byndom to counter with a crisp jab.

Byndom clinches with his opponent.
Machina blocks a punch to the side of the head.
Byndom letting Machina take a breather here.
That's two minutes gone in the round.
Machina gets a warning from the ref for wasting time.
Machina's corner calls for him to break the clinch, which he does.
Wooooo! Give it up for these two warriors! They are putting on a show!
Machina throws a jab but it's blocked by Byndom.
Byndom moves into range and throws a combination. A nice jab followed by a hook to the body.
Machina connects nicely with a jab. Noted by the judges no doubt.
Byndom throws a sloppy head kick and Machina moves out of range easily.
Byndom on the wrong end of a vicious looking body shot.
Byndom fakes high and swings low for a body shot but Machina manages to avoid it.
Deus Ex Machina is looking to keep the fight on the feet at all costs.
Machina throws a series of punches but Byndom moves out of range.
That's three minutes gone in the round.
Machina misses with a two punch combination.
Byndom wants to clinch but Machina slips to the side
and Byndom takes a counter punch right on the button for his troubles.
Machina jabs Byndom right on the nose. Byndom blinks but takes it well.
Byndom uses good footwork to avoid the strikes from Machina.
Byndom misses with a body shot.
Nice shot by Machina.
Machina sizes up Byndom with a pawing jab and scores with a straight right down the middle.
That has opened up Carrington Byndom's cut even more.
Byndom closes the distance and clinches up with Machina, looking for a takedown. Byndom pushes Machina against the cage but Machina circles to the side and manages to break the clinch.
Byndom looks to land a body kick but Machina moved away.
Byndom displaying good standup as he scores with a three punch combination.
That's four minutes gone in the round.
Byndom throws a right hand that misses
and Machina cracks him with a counter punch right on the button.
Wooooo! Give it up for these two warriors! They are putting on a show!
Byndom lands a kick to the ribs of his opponent. Nice work there - in and out in a flash.
Machina closes the distance and lands a one-two.
Byndom lands a nice shot to the body.
Decent striking displayed by Machina there.
Byndom defending well as Machina loads up on a big left hand.
Machina displays some good footwork, moving neatly out of range as Byndom throws out the jab.
Machina is really peppering his opponent's head with punches.
Machina scores with a jab.
Machina misses with the combination.
That's five minutes gone in the round.
Byndom thows a body shot but no joy.
Machina misses with a body shot.
Machina misses the body punch
and Byndom counters with a good low kick that Machina was not able to check.
Machina throws a jab when Byndom was well out of range.
Byndom tries a head kick but it misses.
Byndom looks to score with a jab to the body but Machina is just out of range.
Byndom tries to clinch but Machina moves out of range.
Byndom defending well as Machina loads up on a big left hand.
Byndom fails to land with a series of punches.
That's six minutes gone in the round.
Machina fakes high and swings low for a body shot but Byndom manages to avoid it.
Machina scores with a jab to the jaw.
The cut above Carrington Byndom's eye is starting to cause him problems now.
Machina misses with a hook. Byndom ducked under it nicely.
Byndom tries to close the distance and clinch up against the cage but Machina paws at him with a jab and circles away.
Byndom looks to land a right hand but Machina moved out of range.
Machina takes a hook to the side of the head. I wonder if that's got his ears ringing.
Machina avoids the head kick by Byndom.
Machina avoids the clinch attempt nicely.
Byndom moves in looking to clinch but Machina pushes him off.
That's seven minutes gone in the round.
Byndom tries to clinch but Machina is having none of it.
Byndom slips under a jab from Machina.
A swing and a miss from Machina.
Byndom throws a hard body shot but it just misses.
Byndom pushing out the jab but it's not landing.
Byndom is pinned up against the cage taking some big shots here. The referee is looking closely deciding whether he should stop the fight.
Byndom buckles his opponent's knee momentarily with a nice leg kick.
Machina checks a low kick. Bone on bone - not my idea of a good time.
Byndom tries to score with a leg kick but it misses it's target.
A shot to the liver by Byndom. Beautiful body shot.
That's eight minutes gone in the round.
Machina misses the jab.
Machina throws a hook to the body but it doesn't connect.
Byndom pulls out of a head kick attempt.
Byndom throws a nice hook to the body that draws an oooh from the crowd.
Byndom swings wildly with a hook that is half blocked by Machina.
Byndom fails in his attempt to clinch.
Machina pushing out the jab but it's not landing.
Machina misses the body punch
enabling Byndom to counter with a crisp jab.
Machina moves into range and throws a combination. A nice jab followed by a hook to the body.
We've seen a great period of action over the last minute or so - credit to both fighters for going all out!
Byndom tries to clinch up against the cage, rushing in the close the distance. Machina manages to break the clinch and circles back to the middle of the mat.
That's nine minutes gone in the round.
Byndom throws a head kick but Machina moves out of range.
Machina throws a hard body shot but it just misses.
Machina keeping a good distance there, avoiding the body shot.
A really sloppy takedown attempt there from Byndom.
Deus Ex Machina has stuffed three takedown attempts in the round now. That's going to take a lot out of Carrington Byndom.
Byndom misses with the combination.
No luck for Byndom with that takedown attempt.
As the round comes to an end the crowd are showing their appreciation for a great round of action.
Byndom slips under a jab from Machina.
And thats the end of the round the fighters go back to their corners.
Deus Ex Machina dominated that round.
The cut man is working on Carrington Byndom's cut.
That's time! Back to the action!
Byndom moves out of range of the strikes.
Machina takes a swing at Byndom's ribcage but misses.
Byndom ducks low and lands a nice hook to the body of his opponent.
Byndom fakes high and swings low for a body shot but Machina manages to avoid it.
Byndom moves in looking to clinch but Machina pushes him off.
Machina lunges in with swinging rights and lefts but Byndom circles away quickly and effectively.
Carrington Byndom is looking to throw some combinations by the looks of things.
Byndom is the aggressor but that punch slipped nicely by Machina.
Byndom walks into a left hand.
Byndom shoots in and gets a takedown into half guard. Byndom showed some decent athleticism there.
Byndom not doing much here.
That's one minute gone in the round.
Machina wants to get back to full guard.
Byndom is looking to take a break and control but Machina is keeping him honest, looking to work from the bottom.
Byndom throws a strike but Machina avoids it easily and moves to full guard.
Byndom looking to pass the guard.
The ref warns both fighters not to hold the cage as they work up against the meshing.
That's two minutes gone in the round.
Machina wants to control here, rather than go for any submissions from the bottom. At least for now.

The referee has ruled that neither fighter is active enough on the ground and has stood them back up.
The fighters are starting to get sweaty, which will make takedowns a bit more tricky.
Machina missing with a left hand there. Byndom was out of range so wasted energy throwing that one.
Machina throws a hard body shot but it just misses.
Machina misses with a straight right.
That's three minutes gone in the round.
Machina blocks a low kick nicely.
Machina thows a body shot but no joy.
Machina throws an off balance right hand
and Byndom counters with a lovely shot to the body.
Byndom throws a jab to the body, straight down the pipe. Boom. That sent Machina stumbling backwards but he manages to regain his composure quickly.
Machina misses with a straight right.
Machina swings for the body but Byndom moves out of range.
Byndom ducks under an overhand right and circles away with a smile on his face.
Byndom looks to land a left hand but Machina moved out of range nicely.
Byndom takes a swing at Machina's ribcage but misses.
That's four minutes gone in the round.
Machina moves out of range of the body kick.
Byndom displays some good footwork, moving neatly out of range as Machina throws out the jab.
Machina checks a low kick from Byndom.
Byndom fails with a takedown attempt.
Deus Ex Machina is winning the standup battle so far.
Machina throws a lazy right hand but Byndom sees it coming a mile off and sidesteps it easily.
Machina looks to score with a jab to the body but Byndom is just out of range.
Byndom tries to clinch but Machina is having none of it.
Machina scores with a jab to the body.
That's five minutes gone in the round.
Byndom scores with a jab to the body.
Machina throws a series of punches but Byndom moves out of range.
Byndom throws a nice inside leg kick.
Byndom uses some good footwork to avoid the body shot by Machina.
Byndom wants to clinch up but Machina keeps it at a distance.
Byndom misses with a takedown attempt. He shot from a bit too far out.
Byndom pulls out of a head kick attempt.
Byndom tries to score with an inside leg kick but telegraphs it and Machina is able to avoid easily.
That's six minutes gone in the round.
Machina bobbing and weaving, closes the distance and lands a hook to the side of Byndom's head.
Byndom throws a head kick that misses.
Byndom defending well as Machina loads up on a big left hand.
Jab, jab by Machina - just one landing.
Byndom tries to clinch but fails miserably
and Machina cracks him with a counter punch right on the button.
Machina displays some good footwork, moving neatly out of range as Byndom throws out the jab.
Byndom looks to land a body kick but Machina moved away.
Machina moves out of range as Byndom throws a body kick.
Byndom throws a low kick but his opponent is out of range.
That's seven minutes gone in the round.
Byndom dives in and grabs Machina's left leg, looking for a takedown. Machina pushes down on Byndom's head and hops out.
Deus Ex Machina has stuffed three takedown attempts in the round now. That's going to take a lot out of Carrington Byndom.
Byndom throws a series of punches but Machina moves out of range.
Byndom moves out of range as Machina strikes.
Machina tries to land with a swinging hook to the body but Byndom was well out of range. Poor timing from Machina.
Byndom wants to clinch.
Machina lands with a nice body punch.
Byndom looks to score with a jab to the body but Machina is just out of range.
That's eight minutes gone in the round.
Machina throws a right hand that Byndom ducks under and follows up with a left that Byndom also avoids with ease.
Byndom tries to land with a swinging hook to the body but Machina was well out of range. Poor timing from Byndom.
The sound of bone on bone echoes around the arena as Machina checks a leg kick.
Machina throws a hard body shot but it just misses.
Byndom misses with a jab and misses with a cross straight after too.
Good shot there by Byndom.
Byndom bobs and weaves well there to avoid the strikes.
Byndom throws a body kick but he was well out of range there.
Machina throws a lazy right hand but Byndom sees it coming a mile off and sidesteps it easily.
That's nine minutes gone in the round.
Machina throws a body punch but Byndom moves out of range.
Machina tries to land with a swinging hook to the body but Byndom was well out of range. Poor timing from Machina.
Machina misses with an uppercut.
Byndom throws a predictable looking body shot
and Machina counters with a straight right hand.
Byndom shoots in for a double leg but Machina sprawls well. That's going to sap some energy.
A jab from Byndom finds it's way through Machina's defenses.
Good exchange - Machina coming out on top.
The crowd applaud the fighters efforts here as the round comes to an end.
Byndom slips a jab from Machina.
Machina swings away but doesn't land with a series of punches.
And thats the end of the round the fighters go back to their corners.
That was a close second round but I would say that Deus Ex Machina will probably get the nod.
The cut man is working on Carrington Byndom's cut.
That's the end of the interval. I'm sure that seemed a lot quicker than a minute for our two fighters! Back to the action. Let's hear some noise people - this is the final round!

Machina shakes his hands off, looking to compose himself, but takes a jab to the jaw whilst he does it.
Byndom throws a good cross that connects.
Byndom has a pretty nasty looking mouse under his right eye.
Byndom looks frustrated there after his takedown attempt is stuffed easily.
Machina stuns Byndom with a nice body shot, before stepping back out of range.
Machina misses with a jab, cross combination.
Byndom jabs away that one connects to the head of his opponent.
Byndom scores with a decent looking hook.
Machina stuffs a takedown. It's all about dictating where the fight takes place and Machina wants it to stay on the feet.
Machina thuds a left hand into Byndom's body.
That's one minute gone in the round.
Byndom on the wrong end of a decent looking cross there.
Byndom misses with a low kick.
Machina uses good footwork to get in and out and land a nice right hand before Byndom has time to react.
A looping hook to the body misses from Machina. Byndom does a little dance to reset his feet.
Machina throws a hook to the body but it doesn't connect.
Byndom on the wrong end of a vicious looking body shot.
Machina swats away the attempt to clinch by Byndom.
Machina gets tackled into the cage by Byndom. Byndom maintains the clinch.
That's two minutes gone in the round.
Machina is pushing Byndom up against the cage, for a bit of lean and pray action. Action being used the in the loosest possible sense of the word.
A head punch blocked on the inside by Machina.
Machina is trying to stall.
Byndom is working on a leg, looking for a takedown but Machina is defending well.
Deus Ex Machina has stuffed three takedown attempts in the round now. That's going to take a lot out of Carrington Byndom.
Machina is pressed up against the cage. Byndom has hold of a leg and is looking to drag Machina down to the mat. Machina avoids the attempt though and has circled away. We're back to striking at a distance.
Byndom takes a big intake of breath there - he's definitely tired.
Machina swings wildly with a right hand that was never going to find it's target.
Machina lands a really nice looking cross but Byndom seems unphased.
Byndom throws a low kick, looking for Machina's leg but Machina calmly moves out of range.
We've seen a great period of action over the last minute or so - credit to both fighters for going all out!
Machina misses with a body punch
and Byndom counters with a series of strikes. Machina will be more careful next time no doubt.
That's three minutes gone in the round.
Machina takes a step towards his opponent and connects with a left hand, before circling away.
Byndom throws a nice head kick!
An inside leg kick lands from Byndom.
Byndom takes a body punch but keeps moving.
Byndom moves forwards but Machina connects with a nice, crisp jab.
Carrington Byndom's cut is absolute horrible now. This looks like something out of a horror film with blood covering both fighters.
Byndom avoids a lazy jab quite easily.
Machina defending well as Byndom loads up on a big left hand.
Machina throws a good cross that connects.
That's four minutes gone in the round.
This has been an exciting period of action!
A head kick misses from Byndom.
Byndom takes a big uppercut there. He seems a bit wobbly but no, he's OK.
The referee calls the doctor in to look at Carrington Byndom's cut. Oh no, the doctor has called an end to the bout!
Ladies and gentlemen, after 4:19 of round 3, we have a winner by way of TKO (Cut). Deus Ex Machina!
Deus Ex Machina retains his welterweight title!
Our winner, Deus Ex Machina, made sure he spent some time buttering up the crowd during his post fight interview, which will no doubt bring him a few more fans.
|
|
|
|
|
|
|
|
|
|
|
|
|
|
|
|
|
|
|
|
|
|
|
| S |
C
A |
G |
S |
C
B |
G |
|
S |
C |
G |
|
energy
A | B |
|
hype
A | B |
|
pop
A | B |
|
mgr
A | B |
|
FIGHT
RATING
67% |
|
|
|
|
|
|
|
|
|
|
