 |
xXx 27 PBP Commentary |
Undercard bout
|
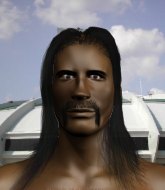
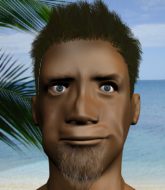
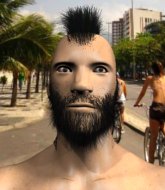
Coming up we have a light heavyweight MMA rules bout between Yang Lee (ranked 0 p4p, 0 weight class) and Krk Mrd (ranked 0 p4p, 0 weight class). Lee comes into the arena with Japanese National Anthem blaring out of the sound system. Over to our ring announcer for the fighter introductions!
 |
|
 |
| 183 cm
22
205 lbs
1 - 3 - 0 |
|
184 cm
29
215 lbs
9 - 9 - 1 |
BJJ Blue Belt
Good kicks
KO power |
|
BJJ Purple Belt
Basic striking
Good gas tank |
|
| |
|
Ladies and gentlemen. This fight is 3 rounds, in the light heavyweight division.
Introducing the fighter to my left, fighting out of the red corner.
With a record of
1 - 3 - 0, fighting out of Amsterdam, Yang Lee!
And introducing the fighter to my right, fighting out of the blue corner.
With a record of
9 - 9 - 1, fighting out of Amsterdam, Krk Mrd!
The judges for this bout are Patrick Alders, Nard Betker and Wagner Zegers.

The bell rings for round one and we are underway!

Mrd closes the distance and gets a trip takedown into side control. Lee quickly recovers to half guard.
Mrd trying to control from half guard but Lee is working away.
Mrd not landing any meaningful shots this time.
Lee is looking to regain full guard. Not this time though.
Mrd has the superior BJJ but he's also working some ground strikes into his gameplan.

Mrd is looking for a kimura but Lee is holding onto that half guard position, so it's hard for Mrd to get the leverage.
Mrd wants to take a breather but Lee is having none of it.
Mrd is working for a submission here. He's got hold of the far side arm and he's looking for a kimura. He's cranking on the arm and he's got it! Lee is tapping out! Ouch, that looked like it hurt!
Ladies and gentlemen, after 0:52 of round 1, we have a winner by way of Submission (Kimura). Krk Mrd!
|
|
|
|
|
|
|
|
|
|
|
|
|
|
|
|
|
|
|
|
|
|
|
| S |
C
A |
G |
S |
C
B |
G |
|
S |
C |
G |
|
energy
A | B |
|
hype
A | B |
|
pop
A | B |
|
mgr
A | B |
|
FIGHT
RATING
37% |
|
|
|
|
|
|
|
Undercard bout
|
|
|
|
Undercard bout
|
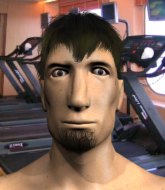
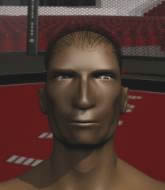
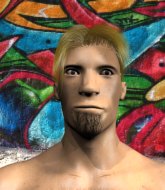
Coming up we have a bantamweight MMA rules bout between Doctor Frankenstein (ranked 0 p4p, 0 weight class) and Issac Oliver (ranked 0 p4p, 0 weight class). Issac Oliver acknowledges the crowd's support as he enters the cage.
 |
|
 |
| 188 cm
29
130 lbs
4 - 4 - 0 |
|
175 cm
24
145 lbs
5 - 9 - 0 |
Powerful takedowns
Excellent boxer
Very strong |
|
BJJ Purple Belt
Solid Muay Thai
Good gas tank |
|
| |
|
Ladies and gentlemen. This fight is 3 rounds, in the bantamweight division.
Introducing the fighter to my left, fighting out of the red corner.
With a record of
4 - 4 - 0, fighting out of Amsterdam, Doctor Frankenstein!
And introducing the fighter to my right, fighting out of the blue corner.
With a record of
5 - 9 - 0, fighting out of Amsterdam, Issac Oliver!
The judges for this bout are Paulsen Ambrosius, Saam Ante and Nard Betker.
The bell rings for round one and we are underway!
Oliver swats away the attempt to clinch by Frankenstein.
Oliver shoots in for a takedown! He's got it and he's managed to land in full mount! That's better than Oliver was expecting from the takedown attempt, I'm sure!
We may be looking at a referee standup if the pace doesn't pick up soon.
Frankenstein can't escape the position.
Oliver throwing strikes here but Frankenstein is writhing around nicely and avoiding any serious damage.
Oliver prevents Frankenstein from getting the reversal.
Oliver trying to control but he's not successful this time.
Frankenstein working to try and regain half guard.
Oliver has control of Frankenstein's right arm, working for a kimura. It's a bit of a token attempt though and Frankenstein regains control of the situation pretty easily.
Frankenstein working to try and regain half guard.

That's one minute gone in the round.
Oliver lands a couple of nice shots there from mount.
Oliver with a couple of short strikes.
Oliver has the superior BJJ but he's also working some ground strikes into his gameplan.
Frankenstein wants to control but Oliver is having none of it.
Frankenstein is wriggling around trying to escape.
Frankenstein wants to control but Oliver is having none of it.
Oliver trying to control but Frankenstein is having none of it.

That's two minutes gone in the round.
Oliver might have to switch it up a bit here because his efforts to control Frankenstein kaven't been going to plan, at least at the current moment in time.
Oliver avoids the attempt from Frankenstein to control.
Oliver controlling the pace for now.
Oliver misses with a head shot.
Oliver controlling the position easily from mount.

That's three minutes gone in the round.
Oliver is controlling this nicely and is looking to make no mistakes. Frankenstein is trying to wiggle out of this horrible position. Frankenstein flips to his side and attempts to get a leg in for half guard. Oliver anticipates the leg and manages to get behind Frankenstein and secures both hooks! This could be bad! Oliver slips an arm under Frankenstein chin and tries to position for a rear naked choke. Oliver has worked the choke in now and it looks tight. Oliver is squeezing on Frankenstein like an anaconda would it's prey. Frankenstein fails to tap and has fallen unconscious! We've got ourselves a winner by way of a rear naked choke!
Ladies and gentlemen, after 3:23 of round 1, we have a winner by way of Submission (RNC). Issac Oliver!
|
|
|
|
|
|
|
|
|
|
|
|
|
|
|
|
|
|
|
|
|
|
|
| S |
C
A |
G |
S |
C
B |
G |
|
S |
C |
G |
|
energy
A | B |
|
hype
A | B |
|
pop
A | B |
|
mgr
A | B |
|
FIGHT
RATING
31% |
|
|
|
|
|
|
|
Undercard bout
|
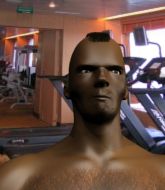
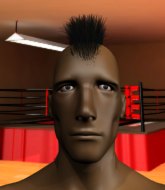
Coming up we have a welterweight MMA rules bout between Piotr Mitas (ranked 0 p4p, 0 weight class) and Kyle Nelson (ranked 0 p4p, 0 weight class). Mitas's entrance music is Motorhead - Iron Fist. A fine choice. Nelson has chosen Gin and Juice the country version as his entrance music. I'm sure you'll be fascinated to know that I was talking to some pointless Z list celebrity before the fight and he thought that Kyle Nelson was going to win. Let's see if he was right.
 |
|
 |
| 170 cm
21
178 lbs
2 - 4 - 0 |
|
188 cm
27
175 lbs
3 - 4 - 0 |
BJJ Blue Belt
Brawler
Experienced |
|
BJJ Purple Belt
Brawler
Granite chin |
|
| |
|
Ladies and gentlemen. This fight is 3 rounds, in the welterweight division.
Introducing the fighter to my left, fighting out of the red corner.
With a record of
2 - 4 - 0, fighting out of Amsterdam, Piotr Mitas!
And introducing the fighter to my right, fighting out of the blue corner.
With a record of
3 - 4 - 0, fighting out of Amsterdam, Kyle Nelson!
The judges for this bout are Saam Ante, Paul Aken and Wagner Zegers.
The bell rings for round one and we are underway!
Mitas shoots for a double leg takedown but Nelson sprawls well. He's pushed Mitas's face into the mat and manages to get back to his feet relatively easily.
Nelson tries to move into range but Mitas moves to the side and lands with a nice right hand.
Mitas has his head snapped back a nice jab. A little nod from Mitas there as he acknowledges the shot.

It looks like Piotr Mitas has been cut.

Mitas has closed the distance and engaged Nelson in a clinch.

Mitas pushes off and circles away, back to the middle of the mat.
Nelson gets a takedown into half guard.
Mitas wants to get back to his feet.
Nelson looking for a kimura but he'll have to free his other leg if he wants to finish that. Perhaps he's just using it as a distraction technique.
The crowd are loving this. Great action here.
Mitas is looking for a sweep. Nelson is wise to his cunning plan and keeps the top position.
The ref warns both fighters not to hold the cage as they work up against the meshing.
That's one minute gone in the round.
Nelson is trying to work for a kimura. This could be trouble! No, Mitas has managed to free his arm - good work.
Nelson is keen to just control but Mitas is a slippery customer.
Mitas regains full guard. Nicely done.
Mitas on his back here. We all know that wrestlers don't like being on their back so let's see if Mitas tries to get out of the position.
Nelson pressing down on his opponent's thigh, looking to pass guard. Mitas is keeping the position for now.
The fighters are pressed up against the cage, both looking to find a bit of space to work.
Mitas preventing the ground and pound from doing any damage.
Nelson trying to control but Mitas is working from the bottom.
Nelson stands up and looks to throw the legs aside to pass to side control. Mitas swivels though and keeps the full guard.
That's two minutes gone in the round.
Mitas avoiding any damage from the ground and pound.
Nelson slips effortlessly into side control - very nice.
Nelson lands a knee to the body and follows it up with some ground and pound to the head. That will wear Mitas down.
Mitas knows he needs to get back to his feet asap. He's simply no match for Nelson on the ground.
Mitas is positioning himself to get back to half guard.
Nelson taking a break here but Mitas is having none of it and regains half guard.
We've seen a great period of action over the last minute or so - credit to both fighters for going all out!
Nelson wants to control but Mitas is keeping him busy.
That's three minutes gone in the round.
Nelson is sneakily working for an arm triangle but Mitas sees it coming and defends easily.
Nelson is looking for a kimura but he's never going to get it from there.
Nelson stalling away here and it's allowed Mitas to slip out his trapped foot and regain full guard.
Mitas keeping moving, preventing Nelson from controlling successfully.

Nelson gets to his feet - Mitas follows without any prompting.
Mitas tries for a takedown but Nelson sees it coming a mile off and avoids it easily.
A telegraphed takedown attempt from Mitas is defended easily by Nelson.
That's three failed takedown attempts in the round for Piotr Mitas. That's going to take a lot out of him.
Mitas uses good footwork to avoid the strikes from Nelson.

That's four minutes gone in the round.

Nelson has managed to clinch.

Mitas successfully pulls guard.
Nelson trying to pass the guard but can't manage it just yet.
Mitas keeping moving, preventing Nelson from controlling successfully.
Nelson drops back, looking for a kneebar! Mitas looks panicked! The fighters roll across the mat, one looking to finish, one looking to escape. Mitas looks to have wriggled free... Yes, he's got his leg free and he's dived into side control! Good work there from Mitas!
We've seen a great period of action over the last minute or so - credit to both fighters for going all out!
Nelson is trying to get back to half guard. He's pushing on Mitas's leg. He's managed it. Nice work.
As the round comes to an end the crowd are showing their appreciation for a great round of action.
Mitas seems very keen to just sit and control from half guard but Nelson does not like that idea so much and is remaining active off his back.
Mitas with the ground and pound but Nelson uses the opportunity to regain guard.
And thats the end of the round the fighters go back to their corners.
Kyle Nelson dominated that round.
The cut man is working on Piotr Mitas's cut.
OK. That's time! The bell goes and we're back to the action.

Nelson keeps the fight on the outside.
Nelson gets the takedown into side control.
Mitas is trying to get back to half guard.
Nelson wants to work for a kimura but he's foiled early by Mitas, who protects the arm well.
Nelson working away.
Mitas takes a nasty elbow to the side of the head.
Mitas manages to work his way to half guard, despite Nelson's best efforts.
Mitas tries to roll over but Nelson keeps him under control.
Mitas keeps control of the position for the meantime.
That's one minute gone in the round.
Nelson is looking for a kimura but he's never going to get it from there.
Mitas wants to get back to his feet.
Mitas is staying active underneath Nelson, who seems content to just control the action from this position.
Nelson stands up from half guard... He's had enough of that ground malarky for the time being.
Mitas is looking to clinch.
Nelson throws a body punch but Mitas moves out of range.
Mitas closes the distance and looks for a trip takedown... aaaand he's got it - Mitas lands in his opponent's guard.
Nelson is throwing his legs up, looking for submissions. Mitas is aware though and is defending well.
That's two minutes gone in the round.
Mitas working some strikes from top position.
Nelson looking for a triangle here. Mitas is fighting it but it looks tight! Nelson pulls the arm across and this one won't last much longer! Nope, Mitas is tapping out - this one is all over!
Ladies and gentlemen, after 2:32 of round 2, we have a winner by way of Submission (Triangle Choke). Kyle Nelson!
Kyle Nelson decided to thank the fans in attendance for making a great atmosphere. It seemed to go down pretty well.
|
|
|
|
|
|
|
|
|
|
|
|
|
|
|
|
|
|
|
|
|
|
|
| S |
C
A |
G |
S |
C
B |
G |
|
S |
C |
G |
|
energy
A | B |
|
hype
A | B |
|
pop
A | B |
|
mgr
A | B |
|
FIGHT
RATING
58% |
|
|
|
|
|
|
|
Undercard bout
|
Coming up we have a bantamweight MMA rules bout between Mack Junior (ranked 0 p4p, 0 weight class) and Joe Crazy (ranked 0 p4p, 0 weight class). Junior's entrance music is I Come Thru: 50 cent feat. Maino, Dubs Dollah . A fine choice. Crazy is bouncing up and down as he enters the arena, backed by Crazy Train. Both these guys have solid standup skills and neither is particularly fantastic on the ground, so let's hope for a nice standup war!
 |
|
 |
| 190 cm
23
147 lbs
13 - 8 - 0 |
|
170 cm
28
145 lbs
13 - 13 - 0 |
BJJ Purple Belt
Excellent boxer
Very strong |
|
BJJ Purple Belt
World class MT
Good gas tank |
|
| |
|
Ladies and gentlemen. This fight is 3 rounds, in the bantamweight division.
Introducing the fighter to my left, fighting out of the red corner.
With a record of
13 - 8 - 0, fighting out of Amsterdam, Mack Junior!
And introducing the fighter to my right, fighting out of the blue corner.
With a record of
13 - 13 - 0, fighting out of Amsterdam, Joe Crazy!
The judges for this bout are Saam Ante, Daniel Blasius and Paulsen Ambrosius.
The bell rings for round one and we are underway!
Junior tries to clinch
and Crazy counters with a crisp hook to the side of the head.
It looks like Mack Junior has been cut.
Junior is looking to clinch but Crazy is avoiding it.
Joe Crazy seems to be the more aggressive standup fighter in this bout.
Junior tries to clinch up but Crazy circles away and keeps his distance.
Crazy throws an off balance right hand
and Junior counters with a three punch combination, finished off with a leg kick. Nice work.
Junior takes a swing at Crazy's ribcage but misses.
Junior tries to clinch there but Crazy circles away.
Crazy avoids the head kick by Junior.
Crazy throws a jab, cross combination which is slipped
and Junior counters by moving into the clinch. Good anticipation by Junior.

Crazy breaks the clinch and we return to the middle of the mat.
Junior displays some good footwork, moving neatly out of range as Crazy throws out the jab.
Crazy will need to tighten up his combinations if he doesn't want to gas himself out, swinging at thin air.
Crazy getting the better of the striking in that exchange.
Junior tries to close the distance and clinch but Crazy swats him to one side with an open hand palm strike and circles away.
Junior tries to clinch up but Crazy circles away and keeps his distance.
Crazy ducks low and lands a nice hook to the body of his opponent.
Fantastic stuff here - a very entertaining period of action, which has drawn cheers from the crowd.
Crazy moves into the clinch successfully.
Junior really does look like a pencil wearing a pair of gloves. Let's hope he has a gameplan to suit that ridiculous body shape.
That's one minute gone in the round.
Crazy blocks an uppercut.
Junior misses with a body punch.
Junior lands a shoulder strike that jolts his opponent's head backwards.
Crazy breaks the clinch.
Junior tries to clinch but Crazy moves away
and Crazy counters with a crisp hook to the side of the head.
Crazy lands with a hook. Junior tried to avoid it but it clipped the top of his head.

Junior is rocked!
BOOM! Crazy lands a beautiful left hook that drops Junior. Junior tries to recover but Crazy is having none of it, landing more punishing shots from mount. One final crushing shot and Junior lies motionless on the canvas. The fight is over!
Ladies and gentlemen, after 1:27 of round 1, we have a winner by way of TKO (Strikes). Joe Crazy!
|
|
|
|
|
|
|
|
|
|
|
|
|
|
|
|
|
|
|
|
|
|
|
| S |
C
A |
G |
S |
C
B |
G |
|
S |
C |
G |
|
energy
A | B |
|
hype
A | B |
|
pop
A | B |
|
mgr
A | B |
|
FIGHT
RATING
79% |
|
|
|
|
|
|
|
Undercard bout
|
Coming up we have a bantamweight MMA rules bout between Jake Nelson (ranked 0 p4p, 0 weight class) and Wilhelm Reich (ranked 0 p4p, 0 weight class). The crowd seem to be enjoying Reich's choice of entrance music: Wilhelm Reich in Hell. Buckle up people - heeeeeeeeeere we go!
 |
|
 |
| 150 cm
24
148 lbs
14 - 4 - 0 |
|
170 cm
28
138 lbs
14 - 12 - 0 |
Good wrestling
Excellent boxer
Cardio machine |
|
Good takedowns
Decent boxing
Granite chin |
|
| |
|
Ladies and gentlemen. This fight is 3 rounds, in the bantamweight division.
Introducing the fighter to my left, fighting out of the red corner.
With a record of
14 - 4 - 0, fighting out of Amsterdam, Jake Nelson!
And introducing the fighter to my right, fighting out of the blue corner.
With a record of
14 - 12 - 0, fighting out of Amsterdam, Wilhelm Reich!
The judges for this bout are Daniel Blasius, Radbod Blank and Aafke Stam.
The bell rings for round one and we are underway!
Reich has his takedown stuffed
and Nelson counters with a shot to the ribs. That looked like it hurt.
Nelson throws a body punch but Reich moves out of range.
Reich gets his takedown attempt stuffed easily
and Nelson counters with a takedown into side control.
Nelson looks up at the clock and then as Reich takes his cue and looks up at the clock too, Nelson smacks him right in the chops with a big elbow! How rude!
Reich is working hard to escape and get back to his feet. After a battle for position, Nelson asserts his dominance and retains side control.
Nelson is looking to take a break and control but Reich is keeping him honest, looking to work from the bottom.
Wooooo! Give it up for these two warriors! They are putting on a show!
Nelson in side control, throwing shots but Reich defends.
Reich takes an elbow right on the bridge of the nose and winces in pain.
Nelson working the ground and pound but Reich is defending the strikes.
That's one minute gone in the round.

Nelson is trying to get an arm triangle but Reich is defending well.
Reich gets back to half guard.
Reich blocking the ground and pound attempt from Nelson.
Nelson looks towards his corner to check for any instructions. The corner give him nothing to work with, so he cracks Reich with a short hammerfist. I guess that's as good as any advice he could get in this position.
Reich is trying to maintain the position but Nelson is very close to passing his half guard.
Nelson is trying to control the action in half guard but Reich is working away on the bottom, looking perhaps to get back to full guard.
Reich is looking to control Nelson's leg but it's slowly edging free. Can Reich avoid being mounted?
The fighters are battling for position here. Reich manages to regain full guard. Nice work.
Nelson throwing shots from guard but he's hitting more mat than opponent.
That's two minutes gone in the round.
Nelson scoring with punches to the head and body.
Nelson throwing shots from guard but he's hitting more mat than opponent.
Nelson postures up.
Nelson throwing strikes from guard but Reich blocks nicely.
Nelson throws a big elbow that misses.
Reich has momentary wrist control but Nelson slips an elbow through the middle.
This is a great period of action - very entertaining stuff!
Reich utilising some decent striking defenses from the guard, preventing the ground and pound.
Nelson throws an elbow that misses. Reich uses the momentum to reverse the position. He's now in Nelson's guard. Nice move by Reich!
Nelson trying to control the position here.
Reich controlling from the top position.
That's three minutes gone in the round.
Nelson looking to hit a scissor sweep but Reich is one step ahead there.
Reich wants to pass the guard but Nelson is keeping the position.
Nelson might be looking to lock onto one of his opponent's long limbs for a submission, whilst we're on the ground.
Nelson is pulling down on Reich's head. It's preventing any offense from Reich, at least for the moment.
The ref warns both fighters not to hold the cage as they work up against the meshing.
That's four minutes gone in the round.

The ref stands the fighters back up. Jake Nelson wasn't doing enough on the ground.
The fighters circle momentarily. Nelson darts into range and connects with a nice straight punch.
Nice uppercut there from Nelson.
Reich fails with a rather predictable takedown attempt.
Jake Nelson has stuffed three takedown attempts in the round now. That's going to take a lot out of Wilhelm Reich.
Reich slips a straight right by Nelson.
A bone on bone clash there as Reich blocks the leg kick.
Nelson fakes a jab and then connects with a hook.
As the round comes to an end the crowd are showing their appreciation for a great round of action.
Nelson drives through with a takedown into guard.
We've seen a great period of action over the last minute or so - credit to both fighters for going all out!
Nelson prevents Reich from getting back to his feet.
Nelson throws a big right hand that misses.
Nelson with a flurry of punches that miss.
And thats the end of the round the fighters go back to their corners.
Jake Nelson dominated that round.
Well, the break between rounds is over. Let's get back to the scrappin!
Reich dives in and grabs Nelson's left leg, looking for a takedown. Nelson pushes down on Reich's head and hops out.
Reich has his takedown stuffed
and Nelson counters with a single leg into guard. Reich didn't expect that.
Reich looking to control but Nelson passes into half guard.
Reich is looking for a sweep. Nelson is wise to his cunning plan and keeps the top position.
Nelson missing with some ground and pound from the half guard.
Nelson throwing shots but Reich is blocking nicely.
Reich keeping his head moving to avoid the ground and pound.
Nelson is keen to just control but Reich is a slippery customer.
Reich trying to control here but he's found himself mounted! Oh no!
Reich can't escape the position.
We've seen a great period of action over the last minute or so - credit to both fighters for going all out!
Nelson is in the full mount, landing strikes.
BOOM! Nelson connects with a massive shot to the dome!
That's one minute gone in the round.
Nelson landing strikes from the mount and Reich is in trouble!
Nelson putting on the heat here with some good ground and pound!
Nelson unloading with bombs!
Reich wants to hold on but Nelson pushes him away.
Nelson postures up and connects with a big shot that has rocked Reich badly. He's trying desperately to grab hold of Nelson around the waist but Nelson pushes him off and unloads with more strikes, forcing the referee to jump in and save him! Nelson is the winner by TKO! Nelson jumps onto the cage and shouts into the camera. "We did it momma!"
Ladies and gentlemen, after 1:39 of round 2, we have a winner by way of TKO (Strikes). Jake Nelson!
A loyal slave to those sponsorship dollars, Jake Nelson made sure he mentioned Wolfpack Blood Labs, along with how happy he was to win his fight.
|
|
|
|
|
|
|
|
|
|
|
|
|
|
|
|
|
|
|
|
|
|
|
| S |
C
A |
G |
S |
C
B |
G |
|
S |
C |
G |
|
energy
A | B |
|
hype
A | B |
|
pop
A | B |
|
mgr
A | B |
|
FIGHT
RATING
81% |
|
|
|
|
|
|
|
Undercard bout
|
Coming up we have a lightweight MMA rules bout between Eric Draven (ranked 0 p4p, 0 weight class) and Amir Dunham (ranked 0 p4p, 0 weight class). Dunham has chosen Omar Khairat - Alexandria as his entrance music, which hasn't gone down very well with the crowd. Well, I have no idea who's going to take this one!
 |
|
 |
| 180 cm
24
169 lbs
10 - 4 - 0 |
|
180 cm
26
156 lbs
13 - 9 - 0 |
Good wrestling
World class boxer
Cardio machine |
|
Powerful takedowns
Good kicks
Heavy handed |
|
| |
|
Ladies and gentlemen. This fight is 5 rounds, for the lightweight championship of the world!
Introducing the champion to my left, fighting out of the red corner.
With a record of
10 - 4 - 0, fighting out of Sydney, Eric Draven!
And introducing the challenger to my right, fighting out of the blue corner.
With a record of
13 - 9 - 0, fighting out of Amsterdam, Amir Dunham!
The judges for this bout are Patrick Alders, Daniel Blasius and Albert Achterberg.
The bell rings for round one and we are underway!
Dunham fails with a rather predictable takedown attempt.
Draven swings and misses with a shot to the body
and Dunham counters with a driving takedown into guard. Nice work there by Dunham.
Dunham won't allow Draven to sweep him here.
The fighters are pressed up against the cage, both looking to find a bit of space to work.
A real slowdown in the pace of the fight for a moment, as Draven holds on and takes a little breather.
Dunham drops back for a leg! It's a sloppy attempt though and Dunham jumps back into guard quickly, to retain the dominant position.
Draven pulls Dunham in to control the position.
Dunham is looking to work some ground and pound but Draven has wrist control.
Dunham wants to control from the top but Draven keeps moving.
Draven wants to stand up but Dunham is controlling him.
Dunham has the superior BJJ but he's also working some ground strikes into his gameplan.
Dunham with a couple of shots to the head there. Not particularly brutal.
Wooooo! Give it up for these two warriors! They are putting on a show!
Dunham trying to land body shots but he keeps hitting the mat.
Dunham drops back, looking for a kneebar! Draven looks panicked! The fighters roll across the mat, one looking to finish, one looking to escape. Draven looks to have wriggled free... Yes, he's got his leg free and he's dived into side control! Good work there from Draven!
Draven trying to control the position but Dunham is working away.
That's one minute gone in the round.
Dunham manages to get back to half guard.
Draven seems to have lost interest with the ground game and is thinking about standing back up.
Both fighters really going for it on the ground here!
Dunham makes his way to full guard. A much better position for Dunham.
Draven is trying to tuck his arms in to keep them safe but Dunham has managed to isolate one of them and has got a loose triangle. Draven is looking to defend but Dunham has done well to lock his legs together - this could be big trouble for Draven! Dunham pulls down on the head and a little smile comes across his face - he knows he's got it. Yep, Draven taps out and this one is all over!
Ladies and gentlemen, after 1:38 of round 1, we have a winner by way of Submission (Triangle). Amir Dunham!
Amir Dunham is the new lightweight champion!
Amir Dunham decided to thank the fans in attendance for making a great atmosphere. It seemed to go down pretty well.
|
|
|
|
|
|
|
|
|
|
|
|
|
|
|
|
|
|
|
|
|
|
|
| S |
C
A |
G |
S |
C
B |
G |
|
S |
C |
G |
|
energy
A | B |
|
hype
A | B |
|
pop
A | B |
|
mgr
A | B |
|
FIGHT
RATING
53% |
|
|
|
|
|
|
|
Co-main event
|
Coming up we have a light heavyweight MMA rules bout between Cerventes Bison (ranked 0 p4p, 0 weight class) and Apollo Greed (ranked 0 p4p, 0 weight class). Bison comes into the arena with The Beast by Tech N9ne blaring out of the sound system. Greed has chosen James Brown - Living In America as his entrance music. Buckle up people - heeeeeeeeeere we go!
 |
|
 |
| 190 cm
26
215 lbs
13 - 6 - 0 |
|
196 cm
25
209 lbs
14 - 5 - 0 |
Good wrestling
World class MT
Cardio machine |
|
Good wrestler
World class boxer
Good gas tank |
|
| |
|
Ladies and gentlemen. This fight is 3 rounds, in the light heavyweight division.
Introducing the fighter to my left, fighting out of the red corner.
With a record of
13 - 6 - 0, fighting out of Amsterdam, Cerventes Bison!
And introducing the fighter to my right, fighting out of the blue corner.
With a record of
14 - 5 - 0, fighting out of Amsterdam, Apollo Greed!
The judges for this bout are Radbod Blank, Daniel Blasius and Albert Achterberg.
The bell rings for round one and we are underway!
Bison moves into range and clinches up with Greed.
Bison tries a body shot but Greed blocks it.
Bison landing some nice looking knees to the body.
Greed has had enough of the clinch but Bison keeps him there for the moment.
Greed lands a glancing elbow in the clinch.
Greed misses with a hook to the ribs.
Bison missing with knees to the body.
Greed misses with a hook to the ribs.
Bison tries a knee to the head but Greed blocks it.
Greed throws a head punch that misses.
Bison tries to land a knee to the head but misses.
Bison misses with a knee strike.
Bison tries to land a knee to the head but Greed blocks with his arms.
A short right hand to the side of the head by Greed.
Greed prevents a body shot from Bison.
Greed lands with a left to the head.
Greed lands a shot to the body.
Greed is trying to break free.
Greed manages to break the clinch.
This has been an exciting period of action!
Bison motions for Greed to come forward. Bison throws a leg kick but it misses it's target.
Greed tests Bison's chin there with a solid looking shot.
Greed thows a body shot but no joy.
That's one minute gone in the round.
Decent striking displayed by Bison there.
Greed lands a right hook to the body.
Bison misses with a jab to the body
and Greed counters with a right hand to the body.
Bison misses with an attempted mid kick.
Greed scores with a jab.
Bison lunges in with an uppercut that skims his opponent's chin.
Greed looks for the body kick but Bison saw that one coming.
Greed connects with a leg kick. He turned his hip over nicely there.
Bison blocks a head kick by Greed.
Greed slips a jab from Bison.
Greed throws a hard body shot but it just misses.
Greed misses with a hook. Bison ducked under it nicely.
Bison on the wrong end of a vicious looking body shot.
The crowd cheering loudly, showing their appreciation for the quality fight we're seeing here.
Greed tries a head kick but it misses.
Greed connects with a leg kick. Bison looked like he was expecting something else and didn't defend it.
Bison throws a head kick but Greed moves out of range.
That's two minutes gone in the round.
Bison throws a body kick that sends a sickening thudding noise reverberating around the arena.
Bison throws a hard body shot but it just misses.
Greed blocks a head kick by Bison.
Greed throws a low kick, looking for Bison's leg but Bison calmly moves out of range.
A looping hook to the body misses from Greed. Bison does a little dance to reset his feet.
Greed misses with a half-hearted attempt at a head kick.
Greed throws a head kick that misses.
Bison has a nice red mark on his side after a thudding body kick by Greed.
Apollo Greed is looking to keep the fight on the feet at all costs.
Greed sees a low kick coming and goes to check it, but it's actually a body kick and it thuds into his unprotected ribs.
Greed is throwing a lot of body shots here, looking to wear down Bison rather than just go for the knockout.
Greed throws a body kick that digs right into the meat.
Bison throws a body kick that misses.
Bison lands a head shot.
Greed is looking to chop away at Bison's legs.
Bison moves out of range as Greed strikes.
Bison takes a head kick and shrugs it off.
Apollo Greed seems to be the more aggressive standup fighter in this bout.
Greed blocks a jab.
That's three minutes gone in the round.
Bison throws an overhand right that lands on Greed's shoulder, as Greed tries to avoid the shot.
Greed throws a sloppy head kick and Bison moves out of range easily.
Greed throws a sloppy head kick and Bison moves out of range easily.
Bison keeping a good distance there, avoiding the body shot.
Greed blocks a head kick by Bison.
Bison ducks right into an uppercut from Greed.
Greed blocks a low kick nicely.
Greed lands a nice shot to the body.
Bison checks the leg kick nicely there.
Bison misses with a looping right.
Greed scores with a reasonable looking shot to the body. Bison doesn't seem bothered though.
Bison dodges the punch combination from Greed.
Greed throws a right high kick that is partially blocked by Bison.
Greed takes a swing at Bison's ribcage but misses.
Good standup being displayed there by Bison as he connects with a hook.
That's four minutes gone in the round.
Bison throws a hard body shot but it just misses.
Bison looks to land a body kick but Greed moved away.
Greed just misses with a punch to the body.
Greed waving his hands out in front of him, looking to distract Bison.
Bison lands a glancing blow to the side of Greed's head.
Greed dances in quickly and lands a nice inside leg kick on Bison. That did some damage!
This is a great period of action - very entertaining stuff!
Greed thumps Bison with a low kick.
Greed throws a wild combination but nothing lands.
Greed blocks a head kick by Bison.
Bison throws a hard body shot but it just misses.
Greed jabs at Bison's body.
A head kick misses from Bison.
The crowd are going absolutely nuts as the round comes to an end - what a fantastic round of action!
Greed takes a swing at Bison's ribcage but misses.
Greed tries to land with a swinging hook to the body but Bison was well out of range. Poor timing from Greed.
Bison closes the distance and clinches up with Greed, looking for a takedown. Bison pushes Greed against the cage but Greed circles to the side and manages to break the clinch.
Greed pulls out of a head kick attempt.
And thats the end of the round the fighters go back to their corners.
Apollo Greed dominated that round.
The corners get their ten second warning. Both fighters stand from their stools and stare eachother down, ready to get back to the action.
Greed bobs and weaves and then throws a good body kick.
Greed tries to work over Bison's front leg with a kick but Bison checks it.
Greed takes a swing at Bison's ribcage but misses.
Greed blocks a head kick by Bison.
Bison throws a sloppy head kick and Greed moves out of range easily.
Greed avoids the head kick by Bison.
Greed keeping his hands up high there, blocking the jab from Bison.
Jab, jab by Bison - just one landing.
Bison swings widly with a right hand
and Greed counters nicely by changing levels and landing a hook to the body.
Bison misses with a body kick.
A slow jab from Bison misses its intended target.
Bison misses with a body kick.
A slapping body kick lands there for Bison.
Greed slips a jab from Bison.
Greed fakes with a right hand and throws a good leg kick, right into the thigh. That had to hurt Bison.
Bison misses the jab.
Greed fakes high and swings low for a body shot but Bison manages to avoid it.
That's one minute gone in the round.
Jab from Bison.
Some bone on bone action there as Bison checks a low kick. Luckily it wasn't a particularly hard one.
Bison throws a head kick but Greed moves out of range.
Apollo Greed seems to be getting the better of the standup.
Greed tries to land with a swinging hook to the body but Bison was well out of range. Poor timing from Greed.
Bison is looking to land body kicks.
Greed throws a body kick that misses.
Greed moves into range and lands a nice leg kick.
Greed throws a lazy uppercut
letting Bison counter with a right hand.
Greed connects with a nice looking jab.
Greed sizes up Bison with a pawing jab and scores with a straight right down the middle.
Greed misses with a body punch
and Bison counters with a quick right hand to the jaw.
Bison lands with a good body shot.
Greed shapes like he's going to throw a leg kick but settles back down.
Bison tries to clinch but Greed is having none of it.
Greed lands with a nice low kick. That'll leave a bruise.
Greed misses with a half-hearted attempt at a head kick.
That's two minutes gone in the round.
Bison walks into a left hand.
The fans in attendance giving it up for the two fighters, who have really let it all hang out in the last minute or so!
Bison ducks down and throws a hook to the body but Greed moves away.
Greed connects nicely with a jab. Noted by the judges no doubt.
Greed throws a shot to the body.
Greed fakes a head punch and goes low to the body. Nicely done.
Greed takes a step towards his opponent and connects with a left hand, before circling away.
Bison throws a monster uppercut resembling something out of street fighter but it doesn't land.
Greed blocks the body kick.
Greed blocks a leg kick.
Bison rushes Greed and presses him up against the cage.
Bison blocks an elbow strike.
Bison using the Thai plumb to throw knees but Greed has his back arched nicely, preventing the strike.
Bison tries to land knees in the clinch but Greed avoids the damage to the body.
Bison with the Thai clinch. He's looking to land a big knee but he's not managed it this time.
Bison tries to land a knee to the head but misses.
Both fighters are absolutely exhausted here.
A short body shot lands from Greed as the two fighters clinch.
Bison with an attempt at a knee that misses.
That's three minutes gone in the round.
Greed is struggling to control the position.
Greed tries to break the clinch but Bison is controlling the position.
Bison with an attempt at a knee that misses.
Bison blocks a body shot from Greed.
Bison throws a knee to the head but misses.
Bison misses with a knee to the head.
Greed lands with a good tight uppercut to the head.
Greed breaks the clinch and we return to the middle of the mat.
Like a baseball bat into the meat of his leg there - nice leg kick by Greed.
Bison is hobbling a little on that front leg after taking quite a few leg kicks so far in this fight.
Greed fakes high and swings low for a body shot but Bison manages to avoid it.
Greed moves out of range of the body kick.
Bison keeping a good distance there, avoiding the body shot.
Greed lands a right hook to the body.
Greed takes a swing at Bison's ribcage but misses.
Greed misses with a wild body shot.
Nice body punch from Greed.
That's four minutes gone in the round.
Bison keeping a good distance there, avoiding the body shot.
Greed swings for the body but Bison moves out of range.
Greed swings for the body but Bison moves out of range.
Bison avoids a low kick by using good footwork.
Greed throws out a token jab with nothing on it.
Greed throws a sloppy head kick and Bison moves out of range easily.
Bison checks a low kick from Greed.
Bison tries to clinch up but Greed circles away and keeps his distance.
Wooooo! Give it up for these two warriors! They are putting on a show!
A swing and a miss from Bison.
Nice straight punches there by Greed. You know Roy Jones Jr respects the hands of Greed.
Bison misses the jab.
Greed throws a sloppy head kick and Bison moves out of range easily.
The crowd are going absolutely nuts as the round comes to an end - what a fantastic round of action!
Bison moves out of range of the leg kick from Greed.
Greed tries to land a front kick but Bison steps back. That was a bit too telegraphed.
Good standup being displayed there by Greed as he connects with a hook.
Greed tests Bison's chin there with a solid looking shot.
And thats the end of the round the fighters go back to their corners.
Apollo Greed showed his class in that round. I'd imagine he'll take it on all the scorecards.
That's the end of the interval. I'm sure that seemed a lot quicker than a minute for our two fighters! Back to the action. Let's hear some noise people - this is the final round!

Bison connects with a crisp jab.
Greed moves out of range as Bison throws a body kick.
Donk. Greed catches Bison right on the button with a cross.
Greed looks to land a body kick but Bison moved away.
Bison moving in and out of range nicely, whilst landing the scoring shot.
The crowd cheers as Bison lands an impressive looking overhand right. Greed doesn't seem phased though.
Bison checks a low kick. Bone on bone - not my idea of a good time.
Greed avoids a kick to the body.
Greed avoids a kick to the body.
Bison walks into a jab.
Bison misses with an uppercut.
Greed swings away with a leg kick that misses.
Greed feints and then cracks Bison's leading leg with a nice low kick. He's obviously looking to slow Bison down.
Bison moves into range and lands a nice leg kick.
Greed bobs and weaves and then throws a good body kick.
That's one minute gone in the round.
Greed lands a leg kick that knocks Bison off balance momentarily.
Greed fakes a jab and scores with a low kick.
A nice leg kick lands there from Bison.
Greed comes forward and lands a shot to the body, then darts back out of range.
Greed lands with a thumping leg kick.
Both fighters are breathing heavily.
Greed throws a right and a left that both miss.
Bison swings wildly with a right hand that was never going to find it's target.
Greed misses with a straight left.
Greed throws a sloppy head kick and Bison moves out of range easily.
Greed on the wrong end of a nice low kick. He's acting like it's no big deal but he doesn't want to take many more of those.
Greed moves away from the strike by Bison.
A telegraphed right hand from Bison misses the target.
Greed looks to land a combination but Bison avoids it well.
Good standup being displayed there by Greed as he connects with a hook.
A nice inside leg kick there by Bison. That's going to slow Greed down.
Greed pulls out of a head kick attempt.
Cerventes Bison has stepped it up - he knows he needs a finish here!
That's two minutes gone in the round.
Bison avoids a kick to the body.
The crowd cheering loudly, showing their appreciation for the quality fight we're seeing here.
Greed tries to land with a swinging hook to the body but Bison was well out of range. Poor timing from Greed.
Greed lands a body shot.
Greed pulls out of a head kick attempt.
Bison thumps Greed with a low kick.
Decent striking displayed by Bison there.
Bison fails miserably with a takedown attempt.
Greed dances in quickly and lands a nice inside leg kick on Bison. That did some damage!
Greed lands a high kick!
A big right from Greed misses.
Greed throws a nice inside leg kick.
Bison closes the distance and clinches.
Bison misses with the head strike.
That's three minutes gone in the round.
Greed takes a knee right on the jaw!
A knee to the head by Bison.
Greed lands with a short punch from the clinch.
Greed lands a nice shot to the body.
Bison misses with a knee to the head.
A right handed body shot lands from Greed.
Bison tries a knee to the head but Greed blocks it.
Greed breaks the clinch and we return to the middle of the mat.
Bison misses with a low kick.
Bison takes a kick to the side of the head.
Bison takes a kick to the body and keeps moving.
Bison throws the left hand but Greed avoids the punch easily.
Greed scores with a leg kick.
Greed ducks down and throws a hook to the body but Bison moves away.
Greed avoids the body shot from Bison.
Bison throws a sloppy head kick and Greed moves out of range easily.
That's four minutes gone in the round.
Bison throws a body kick that misses.
Fantastic stuff here - a very entertaining period of action, which has drawn cheers from the crowd.
Greed lands with a good body shot.
Greed lands with a shot to the body.
A nice inside leg kick there by Greed. That's going to slow Bison down.
Greed lands a right hook to the body.
Greed lands with a head kick! That's gotta hurt.
Greed dips down and scores with a jab to the body.
Greed connects with a body shot.
Bison takes a head kick and keeps coming.
Bison takes a big uppercut there. He seems a bit wobbly but no, he's OK.
Greed lands a leg kick and bounces back out of range.
The crowd are going absolutely nuts as the round comes to an end - what a fantastic round of action!
Greed throws a body kick that sends a sickening thudding noise reverberating around the arena.
Greed jabs Bison to the body, keeping him at a distance.
Bison throws an off balance right hand
and Greed counters with a good, hard body kick but Bison shrugs it off.
Apollo Greed is fighting for a decision - hopefully he's judged it right and he's actually winning the fight.
Greed thows a body shot but no joy.
And that's the end of the fight!
Apollo Greed comfortably won the final round on my scorecard.
Well Greed has outworked and out performed his opponent in all aspects of the game today. He was simply too good and the decision should be no more than a formality. Over to the ring announcer for the scorecards.
Ladies and gentlemen, after 3 rounds of action, we go to the scorecards for a decision.
Judge Radbod Blank scores the fight 27:30
Judge Daniel Blasius scores the fight 27:30
Judge Albert Achterberg scores the fight 27:30
In favor of your winner, by unanimous decision... Apollo Greed!
After winning the bout, Apollo Greed thanked all his fans and promised he'd do even better in his next fight. The crowd seemed to love his humility.
|
|
|
|
|
|
|
|
|
|
|
|
|
|
|
|
|
|
|
|
|
|
|
| S |
C
A |
G |
S |
C
B |
G |
|
S |
C |
G |
|
energy
A | B |
|
hype
A | B |
|
pop
A | B |
|
mgr
A | B |
|
FIGHT
RATING
100% |
|
|
|
|
|
|
|
Main event
|
Coming up we have a heavyweight MMA rules bout between Marcus Plant (ranked 0 p4p, 0 weight class) and Philo Beddoe (ranked 0 p4p, 0 weight class). Plant's entrance music is Au innebunit salcamii. A fine choice. Marcus Plant has the edge in experience - let's see if he can make that count tonight.
 |
|
 |
| 192 cm
26
240 lbs
15 - 12 - 0 |
|
199 cm
22
290 lbs
6 - 1 - 0 |
Good wrestling
Excellent boxer
Cardio machine |
|
Decent wrestler
Excellent boxer
Good gas tank |
|
| |
|
Ladies and gentlemen. This fight is 3 rounds, in the heavyweight division.
Introducing the fighter to my left, fighting out of the red corner.
With a record of
15 - 12 - 0, fighting out of Amsterdam, Marcus Plant!
And introducing the fighter to my right, fighting out of the blue corner.
With a record of
6 - 1 - 0, fighting out of Helsinki, Philo Beddoe!
The judges for this bout are Nard Betker, Saam Ante and Wagner Zegers.
The bell rings for round one and we are underway!
Plant rushes Beddoe and pushes him back against the cage in a clinch.
The fighters are pressed against the cage, as the pace of the fight slows.
A short right hand to the side of the head by Plant.
A short uppercut from Plant.
Beddoe is trying to break the clinch but Plant has him pressed against the cage.
Plant blocks a punch to the side of the head.
Plant lands an elbow just above Beddoe 's eye.
Plant lands with a short shot to the head.
Beddoe throws a punch but it's blocked by Plant.
Beddoe goes for a body shot but it's blocked.
Beddoe lands an uppercut.
Plant's corner are urging him to control the action in the clinch for a moment, rather than mount any serious offense. I'm sure the crowd appreciate those instructions... not.
Plant lands on the inside with an uppercut.
Beddoe's head jolts backwards as he takes an uppercut right on the button!
The fans in attendance giving it up for the two fighters, who have really let it all hang out in the last minute or so!
The two fighters are working to gain dominance in the clinch.
Beddoe takes an elbow to the temple.
A head punch blocked on the inside by Plant.
Plant lands a hook to the body. It's hard to tell if that hurt Beddoe or not.
That's one minute gone in the round.
Beddoe lands with a right to the head.
A short uppercut from Beddoe.
Beddoe tries to land a shot to the body but it's blocked.
Plant lands a left hand that snaps the head of Beddoe backwards.
Plant blocks an uppercut.
Plant lands with a quick shot inside that doesn't really do much damage.
The crowd are loving this. Great action here.
Plant stalling the fight.
Plant has moved round to his opponent's back and is looking for a suplex! Oh snap! He's tossed Beddoe clear over his head and slammed him to the mat!
Plant missing with punches from the back.
Beddoe is staying cool under pressure, defending well against the rear naked choke attempt from his opponent.
Beddoe really doesn't want to stay on the ground with Plant. If he can't get it back to his feet, it's only a matter of time before he'll be tapping out.
Plant has his hand under the chin of his opponent looking for the choke. He's nearly got it! This one could be all over! But no, Beddoe has freed his hand and lives to survive another
well, another couple of seconds at least!
That's two minutes gone in the round.
Plant is cranking Beddoe's head sideways - that looks painful. He's managed to get his other arm under the chin and this looks bad for Beddoe! He's tightened the choke and Beddoe is tapping out!
Ladies and gentlemen, after 2:23 of round 1, we have a winner by way of Submission (RNC). Marcus Plant!
A very excited looking Marcus Plant made sure he remembered to thank all the fans both in the arena and on the internet. He said all the coolest people spend all day on MMA websites, which got a big reaction.
|
|
|
|
|
|
|
|
|
|
|
|
|
|
|
|
|
|
|
|
|
|
|
| S |
C
A |
G |
S |
C
B |
G |
|
S |
C |
G |
|
energy
A | B |
|
hype
A | B |
|
pop
A | B |
|
mgr
A | B |
|
FIGHT
RATING
77% |
|
|
|
|
|
|
|
|
|
|

