 |
Wednesday Night Warriors: 9 PBP Commentary |
Undercard bout
|
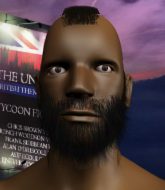
Coming up we have a heavyweight MMA rules bout between Tim Tebow (ranked 0 p4p, 0 weight class) and Clubber Lane (ranked 0 p4p, 0 weight class). Tebow kept the crowd waiting but all that was forgotten when his ring entrance music started. The incomparable musical genius that is Tim Tebow's Fire. The key to victory for Tim Tebow has got to be keeping the fight on the feet.
 |
|
 |
| 190 cm
18
235 lbs
4 - 6 - 0 |
|
183 cm
18
250 lbs
2 - 4 - 0 |
BJJ White Belt
Excellent boxer
KO power |
|
BJJ White Belt
Decent boxing
Heavy handed |
|
| |
|
Ladies and gentlemen. This fight is 3 rounds, in the heavyweight division.
Introducing the fighter to my left, fighting out of the red corner.
With a record of
4 - 6 - 0, fighting out of Sydney, Tim Tebow!
And introducing the fighter to my right, fighting out of the blue corner.
With a record of
2 - 4 - 0, fighting out of Sydney, Clubber Lane!
The judges for this bout are Eliza Hachem, Skip Squint and John Mangel.

The bell rings for round one and we are underway!

Lane closes the distance and pushes Tebow back into the cage.

Lane manages to pull guard. Let's see whether he can land a sub off his back.
We may be looking at a referee standup if the pace doesn't pick up soon.
Lane throws a couple of shots from the bottom but they don't land.
The ref warns both fighters not to hold the cage as they work up against the meshing.
Lane is trying to control the position but Tebow postures up.
Lane can't do much from the bottom at the moment, as Tebow controls the pace.
Lane utilising some decent striking defenses from the guard, preventing the ground and pound.
Tebow trying to control but Lane is working from the bottom.
Tebow sitting in guard here, content to control.

The ref stands the fighters back up. Tim Tebow wasn't doing enough on the ground.
Lane clinches up with Tebow and pushes him back against the cage.
Tebow is looking to break free of the clinch but Lane has double underhooks.
Lane has managed to pull guard. Let's see whether he can work an aggressive guard. It will also be interesting to see what tactics Tebow uses from the top position.
Lane is trying to control the position but Tebow postures up.

That's one minute gone in the round.

Tebow has gone for a leg lock! Lane slips out almost immediately though and dives into Tebow's guard.
Lane throws a big right hand that misses.
Lane stopping the sweep attempt from Tebow.
Tebow utilising some decent striking defenses from the guard, preventing the ground and pound.
Lane postures up and lands some nice ground and pound.
Lane stands up over Tebow, holding his feet. He dives back in and lands a decent shot to the head.
Lane sitting in guard, not really doing much.

That's two minutes gone in the round.
Lane trying to control the position from guard on top but Tebow is wriggling around, looking for whatever he can.
Lane lands a couple of elbows.
Fantastic stuff here - a very entertaining period of action, which has drawn cheers from the crowd.

Lane drops back, looking for a kneebar! Tebow looks panicked! The fighters roll across the mat, one looking to finish, one looking to escape. Tebow looks to have wriggled free... Yes, he's got his leg free and he's dived into side control! Good work there from Tebow!
Tebow throwing strikes but Lane manages to buck up and roll into a nice reversal - now he's on top in side control!
Lane has the superior BJJ but he's also working some ground strikes into his gameplan.
Lane scores with a couple of nice shots to the head there. The referee takes a look at Tebow to see if he's OK.

Lane stands up and beckons Tebow to his feet.

That's three minutes gone in the round.
Lane misses with a combination
and Tebow counters with a two punch combo.
Tebow looking to land some kicks to the body here.
Lane looks to score with a combo but nothing lands.
Tebow cracks Lane with a right hand to the side of the head.
Lane misses with a combination
and Tebow counters with a left and a right that stings Lane.
Lane looks gassed!
Tebow lands a leg kick. The shin dug right into the meat of the thigh.
Tebow bobs and weaves and throws out a fast jab that snaps Lane's head backwards.
Wooooo! Give it up for these two warriors! They are putting on a show!
Lane misses with a wild combination.
Lane fails with the takedown.

That's four minutes gone in the round.
Tebow pushes forward with a 1-2 combination that forces Lane back to the cage. Tebow follows up with a solid lead hook to the liver.

It looks like Clubber Lane has been cut.
Lane takes a push kick to the midsection and stumbles backwards.
Tim Tebow is looking to keep the fight on the feet at all costs.
A head kick misses from Tebow.
Tebow scores with a nice one two combo and darts back out of range to avoid anything coming in the opposite direction.

Lane is rocked!
Lane drops his hands momentarily and Tebow needs no second invitation. He sets himself and throws a perfect high kick, that clips Lane just on the top of the head. Lane drops like a sack of potatoes to the canvas, out cold! Oooooooh yeah! Stick a fork in Lane - he's done!
Ladies and gentlemen, after 4:31 of round 1, we have a winner by way of KO (Head Kick). Tim Tebow!
As Tim Tebow got his breath back, he grabbed the microphone and managed to blurt out the following: I would like to thank my Lord and Savior Jesus Christ. GB2'.
|
|
|
|
|
|
|
|
|
|
|
|
|
|
|
|
|
|
|
|
|
|
|
| S |
C
A |
G |
S |
C
B |
G |
|
S |
C |
G |
|
energy
A | B |
|
hype
A | B |
|
pop
A | B |
|
mgr
A | B |
|
FIGHT
RATING
61% |
|
|
|
|
|
|
|
Undercard bout
|
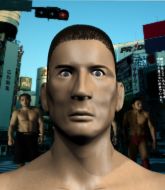
Coming up we have a light heavyweight MMA rules bout between Kasey Ballard (ranked 0 p4p, 0 weight class) and Shane Blankenship (ranked 0 p4p, 0 weight class). Ballard comes to the cage accompanied by Eye of the Tiger. Blankenship has chosen Crazy Train as his entrance music. Kasey Ballard is staring across the cage at his opponent, tweaking his nipples... Tweaking his own nipples that is.
 |
|
 |
| 193 cm
18
215 lbs
5 - 4 - 0 |
|
183 cm
18
210 lbs
1 - 9 - 0 |
BJJ White Belt
Brawler
Very strong |
|
BJJ White Belt
Brawler
Solid chin |
|
| |
|
Ladies and gentlemen. This fight is 3 rounds, in the light heavyweight division.
Introducing the fighter to my left, fighting out of the red corner.
With a record of
5 - 4 - 0, fighting out of Sydney, Kasey Ballard!
And introducing the fighter to my right, fighting out of the blue corner.
With a record of
1 - 9 - 0, fighting out of Sydney, Shane Blankenship!
The judges for this bout are Hugh Johnson, Donatello Bradman and Steve Erwin.
The bell rings for round one and we are underway!
Ballard fails with a rather predictable takedown attempt.
Ballard fails with a takedown attempt from distance.
Blankenship misses with a jab, cross combination.
Blankenship moves into the clinch.

Ballard breaks from the clinch.
Blankenship blocks a leg kick.
Ballard shoots in for a takedown but doesn't get it.
That's three failed takedown attempts in the round for Kasey Ballard. That's going to take a lot out of him.
Ballard stuffs the takedown attempt from Blankenship. Blankenship gets slowly back to his feet.

Ballard takes the fight into the clinch.
A short right from Ballard on the inside.
Ballard comes over the top with an elbow. That landed flush.
Ballard missing with knees to the body.
That's one minute gone in the round.
Blankenship gets double underhooks and manages to take the fight to the ground.
Ballard keeping moving, preventing Blankenship from controlling successfully.
Blankenship wants to stand but Ballard is controlling his posture from full guard.
Ballard keeping moving, preventing Blankenship from controlling successfully.
The ref warns both fighters not to hold the cage as they work up against the meshing.
Blankenship looking to sit in guard and control but Ballard gets the butterfly guard and sweeps. He's now in the guard on the top.

Ballard stands and steps away. Blankenship gets to his feet too and we're back to the striking game.
That's two minutes gone in the round.
Blankenship throws a sloppy head kick and Ballard moves out of range easily.
Ballard clinches up with Blankenship and pushes him back against the cage.
Ballard is trying to break the clinch but Blankenship is controlling him.
Ballard taking a breather.
Blankenship lands an elbow inside that Ballard shrugs off.

It looks like Kasey Ballard has been cut.
Blankenship jumps into guard, dragging Ballard to the mat.
Wooooo! Give it up for these two warriors! They are putting on a show!
Blankenship is trying to control the position but Ballard postures up.
Ballard wants to control from the top but Blankenship keeps moving.
Ballard controlling from the guard. I say controlling but really, he's stalling.
Blankenship pulls Ballard in to control the position.
That's three minutes gone in the round.

The referee decides to stand the fighters back up.
Blankenship misses with a takedown attempt - Ballard sprawls well and throws a nice strike on the way out which just misses.
Ballard is looking to clinch.
Ballard defends well against a solid takedown attempt from Blankenship.
Ballard fails to land the takedown.
Blankenship closes the distance and clinches up with Ballard, looking for a takedown. Blankenship pushes Ballard against the cage but Ballard circles to the side and manages to break the clinch.
A jab from Blankenship misses.
Ballard gets his takedown attempt stuffed easily
and Blankenship counters with a nice single leg takedown and he's in Ballard's guard now.
Blankenship looks gassed!
That's four minutes gone in the round.
Blankenship trying to control but Ballard is working from the bottom.
Ballard has a loose triangle. He'll be looking to tighten that up but Blankenship can see exactly what he's planning and manages to posture up and free himself.
The fans in attendance giving it up for the two fighters, who have really let it all hang out in the last minute or so!
Ballard has butterfly guard. He's looking to stand up here. He pushes Blankenship off him and springs to his feet nicely. The crowd applauds.
As the round comes to an end the crowd are showing their appreciation for a great round of action.
Blankenship has closed the distance and engaged Ballard in a clinch.
Ballard trying to control the position but instead, Blankenship has worked for underhooks and has pushed Ballard into the cage.
And thats the end of the round the fighters go back to their corners.
A close round but Shane Blankenship will probably get the nod.
The cut man is working on Kasey Ballard's cut.
That's time! Ballard's corner gives him a slap on the ass as he gets ready to fight.

Blankenship throws a series of punches but Ballard moves out of range.
Nice sprawl there from Blankenship as Ballard shoots in.
Blankenship misses with a takedown attempt. He shot from a bit too far out.
A leg kick checked by Ballard.
Blankenship closes this distance looking for a takedown but Ballard circles away.
Blankenship stuffs the takedown.
Blankenship is trying hard to land a takedown here. Ballard sprawls well and keeps this one on the feet.
Kasey Ballard has stuffed three takedown attempts in the round now. That's going to take a lot out of Shane Blankenship.
Ballard will need to tighten up his combinations if he doesn't want to gas himself out, swinging at thin air.
Blankenship stuffs the takedown attempt from Ballard. Ballard gets slowly back to his feet.
That's one minute gone in the round.
Ballard tries to clinch up.
Blankenship tries to clinch up.
Ballard fails in his attempt to clinch.
Ballard clinches up against the cage.
Blankenship content to slow the pace in the clinch.
Blankenship drags the fight down to the ground.
Ballard is stalling in the full guard.
Ballard trying to control but Blankenship is working from the bottom.
That's two minutes gone in the round.
Ballard stands up and looks to throw the legs aside to pass to side control. Blankenship swivels though and keeps the full guard.
Blankenship working the defensive guard well to avoid strikes from Ballard.
Blankenship is looking for a triangle but Ballard pushes his legs off easily.
Blankenship really doesn't want to stay on the ground with Ballard. If he can't get it back to his feet, it's only a matter of time before he'll be tapping out.
Blankenship trying to strike off his back.
Ballard tries to free his leg and advance position but Blankenship is retaining full guard.
Blankenship has his foot on Ballard's thigh. He's trying to push off and get in position for a triangle, I think. Ballard works his way back into a safe position though.
Blankenship is breathing heavily.
Ballard trying to control the position from guard on top but Blankenship is wriggling around, looking for whatever he can.
That's three minutes gone in the round.
Blankenship has momentary wrist control but Ballard slips an elbow through the middle.
The fighters are pressed up against the cage, both looking to find a bit of space to work.
Ballard trying to control the position from guard on top but Blankenship is wriggling around, looking for whatever he can.
Ballard pressing down on his opponent's thigh, looking to pass guard. Blankenship is keeping the position for now.
Blankenship is working an open guard here, looking to improve his position. No doubt that will leave him open to counters but at least he's being more offensive.
Blankenship is working the butterfly guard. He manages to land a nice scissor sweep and is now in half guard on the top. Nice move.
That's four minutes gone in the round.
Blankenship lands a big shot. The thud that echoes around the arena is like music to the fans' ears.
Ballard connecting with a few gentle strikes.
Blankenship throws a strike but Ballard avoids it easily and moves to full guard.
Ballard throws a couple of weedy looking strikes off his back.
Blankenship missing there with some ground and pound from the guard.
Ballard controlling the position.
The crowd applaud the fighters efforts here as the round comes to an end.
And thats the end of the round the fighters go back to their corners.
Kasey Ballard dominated that second round.
The cut man is working on Kasey Ballard's cut.
That's time! Back to the action! This is the final round!

Blankenship tries a head kick but it misses.
Blankenship misses with a takedown attempt - Ballard sprawls well and throws a nice strike on the way out which just misses.
Ballard lands with a head kick! That's gotta hurt.
It looks like Shane Blankenship has been cut.
Blankenship is looking to clinch.
Blankenship misses with a takedown attempt - Ballard sprawls well and throws a nice strike on the way out which just misses.
Ballard closes the distance and clinches.
The fighters are pressed against the cage, as the pace of the fight slows.

Blankenship breaks from the clinch.
That's one minute gone in the round.
Blankenship misses with a takedown attempt - Ballard sprawls well and throws a nice strike on the way out which just misses.
Kasey Ballard has stuffed three takedown attempts in the round now. That's going to take a lot out of Shane Blankenship.
Blankenship takes a big intake of breath there - he's definitely tired.
Blankenship shoots in for a takedown but doesn't get it.
Kasey Ballard is looking to throw some combinations by the looks of things.
Donk. Ballard catches Blankenship right on the button with a cross.
Ballard takes the fight into the clinch.
A short uppercut from Blankenship.
Blankenship prevents the takedown attempt.
Blankenship trying to stall but Ballard improves his position.
Ballard drops down looking for an ankle pick but Blankenship pulls his leg out and moves away.
Blankenship closes the distance and clinches up with Ballard, looking for a takedown. Blankenship pushes Ballard against the cage but Ballard circles to the side and manages to break the clinch.
That's two minutes gone in the round.
Ballard fails miserably with a takedown attempt.
Ballard tries to clinch but Blankenship moves out of range.

Ballard fakes a strike and closes the distance, dragging Blankenship to the ground. Ballard is now in Blankenship's guard.
Wooooo! Give it up for these two warriors! They are putting on a show!
Blankenship looking for a sweep. Not yet Blankenship, not yet.
Blankenship is looking to stand up but Ballard isn't so interested in that idea.
Blankenship working for submissions but it's allowed Ballard to get to half guard.
Ballard is looking to take a break and control but Blankenship is keeping him honest, looking to work from the bottom.
That's three minutes gone in the round.
Ballard is going to have to think about doing something other than just controlling because Blankenship is managing to avoid having the position dictated to him.
Ballard passes to full mount!
Ballard sitting in mount, just looking to control for the moment.
Blankenship is trying to stand.
That's four minutes gone in the round.
Ballard mounts Blankenship! Really nice guard pass there!
Blankenship is working to get back to half guard.
Ballard cracks Blankenship with a nasty head shot there - the crowd let out an audible gasp there, as the noise reverberated around the arena.
Ballard scoring with some good ground and pound from mount here. Will he manage to finish Blankenship?
Ballard can't quite control the action as he would like just now, as Blankenship is looking to escape.
As the round comes to an end the crowd are showing their appreciation for a great round of action.
Ballard controlling his opponent.
And that's the end of the fight!
Kasey Ballard showed his dominance in that final round.
Well Ballard has outscored his opponent in every aspect of the fight today. Only a scarily incompetent judge or two will keep him from a well deserved win... Over to the ring announcer for the scorecards.
Ladies and gentlemen, after 3 rounds of action, we go to the scorecards for a decision.
Judge Hugh Johnson scores the fight 29:28
Judge Donatello Bradman scores the fight 29:28
Judge Steve Erwin scores the fight 29:28
In favor of your winner, by unanimous decision... Kasey Ballard!
Kasey Ballard really struggled to get his t-shirt on before his hand was raised. Making sure that Nature's Edge Nutrition logo gets some air time is pretty tricky when you're all sweaty.
|
|
|
|
|
|
|
|
|
|
|
|
|
|
|
|
|
|
|
|
|
|
|
| S |
C
A |
G |
S |
C
B |
G |
|
S |
C |
G |
|
energy
A | B |
|
hype
A | B |
|
pop
A | B |
|
mgr
A | B |
|
FIGHT
RATING
52% |
|
|
|
|
|
|
|
Undercard bout
|
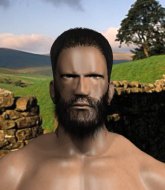
Coming up we have a light heavyweight MMA rules bout between Del Estep (ranked 0 p4p, 0 weight class) and Kenny Blankenship (ranked 0 p4p, 0 weight class). These two fighters really are very evenly matched on the feet - it will be fascinating to see who can assert themselves in that aspect of the fight.
 |
|
 |
| 171 cm
18
205 lbs
5 - 3 - 1 |
|
183 cm
18
210 lbs
3 - 3 - 0 |
BJJ Blue Belt
Brawler
Granite chin |
|
BJJ White Belt
Brawler
Tends to cut |
|
| |
|
Ladies and gentlemen. This fight is 3 rounds, in the light heavyweight division.
Introducing the fighter to my left, fighting out of the red corner.
With a record of
5 - 3 - 1, fighting out of Sydney, Del Estep!
And introducing the fighter to my right, fighting out of the blue corner.
With a record of
3 - 3 - 0, fighting out of Sydney, Kenny Blankenship!
The judges for this bout are Eliza Hachem, Damien Edna and Summer Carpenter.
The bell rings for round one and we are underway!
Estep fakes with an overhand right and moves in to clinch with Blankenship, pushing him back against the cage.
Estep is trying to push Blankenship away but Blankenship has him pressed against the cage, so he's going nowhere.
Estep looking to throw knees to the head but Blankenship is blocking nicely.
Blankenship keeps control of Estep as he tries to wriggle out of the double underhooks.
Blankenship managing to block the knees to the body from Estep.
Estep taking a breather.
Estep ties up his opponent against the cage and manages to drag the fight down to the ground. Estep no doubt will be looking to work submissions from his guard.
The referee wants the fighters to be more active or he's going to reset them on the feet.
Blankenship trying to control but Estep is working from the bottom.
Blankenship wants to pass the guard but Estep is keeping the position.
Estep is throwing his legs up, looking for submissions. Blankenship is aware though and is defending well.
Blankenship really doesn't want to stay on the ground with Estep. If he can't get it back to his feet, it's only a matter of time before he'll be tapping out.
Estep trying to control the position.
The fighters are pressed up against the cage, both looking to find a bit of space to work.
Blankenship loading up with the ground and pound but he's missing more than he's landing in this flurry.
Blankenship looking to pass the guard.
Estep trying to control the position.
That's one minute gone in the round.
Estep working from the bottom, still in full guard. He's managed to get a loose triangle. Blankenship doesn't seem to be doing much to defend here, obviously he feels comfortable in the position. Blankenship manages to throw the legs off his shoulder and he's back into guard - no problem.
Estep is looking to sinch up a triangle. Blankenship throws the leg off to one side though and gets in tight to Estep's body to avoid the submission. Estep has instead reached around Blankenship's neck and now has a guillotine! Oh, this is biiiig trouble! Estep arches his back and squeezes and forces the tap from his hapless opponent.
Ladies and gentlemen, after 1:30 of round 1, we have a winner by way of Submission (Guillotine). Del Estep!
|
|
|
|
|
|
|
|
|
|
|
|
|
|
|
|
|
|
|
|
|
|
|
| S |
C
A |
G |
S |
C
B |
G |
|
S |
C |
G |
|
energy
A | B |
|
hype
A | B |
|
pop
A | B |
|
mgr
A | B |
|
FIGHT
RATING
44% |
|
|
|
|
|
|
|
Co-main event
|
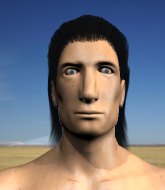
Coming up we have a heavyweight MMA rules bout between Lenny Butler (ranked 0 p4p, 0 weight class) and Andrew Barker (ranked 0 p4p, 0 weight class). The key to victory for Lenny Butler has got to be keeping the fight on the feet.
 |
|
 |
| 190 cm
18
213 lbs
5 - 6 - 0 |
|
180 cm
18
216 lbs
5 - 5 - 0 |
BJJ Blue Belt
Brawler
Experienced |
|
BJJ Blue Belt
Brawler
Granite chin |
|
| |
|
Ladies and gentlemen. This fight is 3 rounds, in the heavyweight division.
Introducing the fighter to my left, fighting out of the red corner.
With a record of
5 - 6 - 0, fighting out of Sydney, Lenny Butler!
And introducing the fighter to my right, fighting out of the blue corner.
With a record of
5 - 5 - 0, fighting out of Sydney, Andrew Barker!
The judges for this bout are Hugh Johnson, Donatello Bradman and Bruno Hogan.
The bell rings for round one and we are underway!
Barker fails in his attempt to clinch.
Barker tries to clinch up but Butler circles away and keeps his distance.
Butler shoots in and bounces Barker off the cage to secure the takedown into guard.
The referee must be thinking about standing these guys back up.
Barker keeping moving, preventing Butler from controlling successfully.
Barker manages to escape and get back to his feet.
Barker throws a head kick that connects with a bit of head and a bit of hand.
Barker looking to shoot here. He's gone for it and he's landed a takedown into mount! Oh, that's bad for Butler!
We've seen a great period of action over the last minute or so - credit to both fighters for going all out!
Barker controlling the position easily from mount.
Barker raining down hammerfists from mount.
Barker looking to ground and pound but Butler is blocking nicely.
Butler wants to control but Barker is having none of it.
That's one minute gone in the round.
Butler really trying hard to get back to half guard here.
The fighters are pressed up against the cage, both looking to find a bit of space to work.
Barker wants to control the pace but Butler is squirming around nicely.
Butler on his back here. We all know that wrestlers don't like being on their back so let's see if Butler tries to get out of the position.
Butler is desperately trying to get back to half guard.
Barker thowing strikes but they're hitting the gloves, not doing any damage.
Barker lands with some vicious ground and pound - can Butler hang on?
Barker in mount throwing good strikes here, bouncing his opponent's head off the canvas.
Barker putting on the heat here with some good ground and pound!
Barker raining down shots from the mount!
This is a great period of action - very entertaining stuff!
Barker looking to finish Butler with some ground and pound. This is bad for Butler!
That's two minutes gone in the round.
Barker lands a nice shot to the head.
Barker has the superior BJJ but he's also working some ground strikes into his gameplan.
Butler is writhing around trying to get back to his feet.
Barker trying to control but Butler is having none of it.
Barker with shots to the head and body - Butler looks very uncomfortable down there.
The crowd growing excited in anticipation of a finish here! Right on cue, Barker cracks his opponent with a massive right hand that draws loud cheers!
Barker has control of Butler's right arm, working for a kimura. It's a bit of a token attempt though and Butler regains control of the situation pretty easily.
Barker punching from mount but Butler doing a good job of avoiding damage.
Barker looking to finish Butler with some ground and pound. This is bad for Butler!
Barker tries to control but Butler wriggling away.
That's three minutes gone in the round.
Barker looking to secure an arm triangle but Butler defends it well.
The crowd growing excited in anticipation of a finish here! Right on cue, Barker cracks his opponent with a massive right hand that draws loud cheers!
Butler is desperately trying to get back to half guard.
Barker lands a heavy elbow.
Barker wants to control the pace but Butler is squirming around nicely.
Barker landing punches.
Barker with the ground and pound from mount.
Butler knows he needs to get back to his feet asap. He's simply no match for Barker on the ground.
Barker is in the full mount, landing strikes.
Butler is desperately trying to get back to half guard.
That's four minutes gone in the round.
Fantastic stuff here - a very entertaining period of action, which has drawn cheers from the crowd.
Barker with shots to the head and body - Butler looks very uncomfortable down there.
Barker is working on an americana here. Ooh, that looks pretty nasty! Nope, Butler has managed to escape the submission attempt.
Butler wants to hold on but Barker pushes him away.
Butler is breathing heavily.
Barker has his opponent pinned against the cage, landing some nasty ground and pound that is really making a bit of a mess out of Butler's face.
Butler wants to control but Barker is having none of it.
Barker is in the full mount, landing strikes.
Barker working for a submission but Butler is keeping him at bay.
The crowd are going absolutely nuts as the round comes to an end - what a fantastic round of action!
Barker lands a heavy elbow.
And thats the end of the round the fighters go back to their corners.
Andrew Barker dominated that round.
The corners get their ten second warning. Both fighters stand from their stools and stare eachother down, ready to get back to the action.
Barker shoots for a double leg takedown but Butler sprawls well. He's pushed Barker's face into the mat and manages to get back to his feet relatively easily.
A thudding body kick lands there by Butler!
Barker tries to shoot in for a takedown. He's got hold of a leg but Butler swivels and escapes.
Lenny Butler is looking to throw some combinations by the looks of things.
Barker misses with a takedown attempt - Butler sprawls well and throws a nice strike on the way out which just misses.
Lenny Butler has stuffed three takedown attempts in the round now. That's going to take a lot out of Andrew Barker.
Butler shoots in and gets a takedown into half guard. Butler showed some decent athleticism there.
Barker missing with punches from the bottom.
Barker missing with punches from the bottom.
Barker punching from the bottom.
Barker looks like he's trying to stand up.
Barker is breathing heavily.
That's one minute gone in the round.
Butler passes to full mount!
Barker is trying to escape but when you're mounted that's not too easy.
Barker reaches up to try and control the position but Butler seems to have an arm triangle now! Uh oh! Barker rolls and tries to escape and now Butler has his back!
Butler lands with a hammerfist to the side of Barker's head.
The ref warns both fighters not to hold the cage as they work up against the meshing.
I really don't envy Barker right now.
A bit of a pause in the action here. Butler controlling the positon.
Barker breaks Butler's hooks off and manages to turn into his guard.
Butler throwing strikes off his back to little effect.
That's two minutes gone in the round.
Barker stands up and looks to throw the legs aside to pass to side control. Butler swivels though and keeps the full guard.
Barker should think about turning a few of those tyres round his middle into muscle if he wants people to take him seriously as an athlete.
Butler keeping moving, preventing Barker from controlling successfully.
Butler is working an open guard here, looking to improve his position. No doubt that will leave him open to counters but at least he's being more offensive.
Barker wants to stand but Butler has a closed guard, so he can't escape.
Butler looking to control.
The referee decides to stand the fighters back up.
Butler shoots in and bounces Barker off the cage to secure the takedown into guard.
We've seen a great period of action over the last minute or so - credit to both fighters for going all out!
Barker is controlling Butler's posture.
That's three minutes gone in the round.
Barker controls Butler momentarily but Butler frees himself.
The referee looks like he's ready to step in and stand the fighters back up.
Barker can't do much from the bottom at the moment, as Butler controls the pace.

The ref stands the fighters back up, due to lack of action by Andrew Barker.
Barker fails with a takedown attempt.
Butler throws a nice looking combination but Barker bobs and weaves to avoid any damage.
Barker scores a takedown into full mount!
Butler squirming around on the bottom, looking to escape.
That's four minutes gone in the round.
Barker content just to control the position here.
Barker in mount throwing good strikes here, bouncing his opponent's head off the canvas.
Barker putting on the heat here with some good ground and pound!
Barker dominating with strikes here.
The fans in attendance giving it up for the two fighters, who have really let it all hang out in the last minute or so!
Barker has hold of Butler's left arm, perhaps looking for a submission. The two fighters tussle over control of the isolated limb and Butler manages to get his arm back to his side and away from danger.
Barker avoids the attempt from Butler to control.
As the round comes to an end the crowd are showing their appreciation for a great round of action.
Barker tries to control but Butler wriggling away.
And thats the end of the round the fighters go back to their corners.
A close second round but Andrew Barker will probably get the nod - 10:9.
The fighters' corners scream their final instructions, as the referee calls time. Here we go, back to the action! And we move into the final round!
Butler shoots in for a double leg but Barker sprawls well. That's going to sap some energy.
Barker closes the distance and gets a trip takedown into side control. Butler quickly recovers to half guard.
Barker thumps the canvas. Not on purpose obviously - he just missed Butler's head.
Barker stands up and beckons Butler to join him on the feet.
Butler scores a takedown into full mount!
Butler prevents Barker from getting the reversal.
Barker wants to control but Butler is having none of it.
Barker has been the more effective fighter overall so far.
Butler working for a guillotine from mount but Barker is in no mood to give up.
Both fighters are breathing heavily.
Fantastic stuff here - a very entertaining period of action, which has drawn cheers from the crowd.
Barker is working to get back to half guard.
That's one minute gone in the round.
Butler wants to control the pace but Barker is squirming around nicely.
Barker is wriggling around trying to escape.
Butler cracks Barker with a nasty head shot there - the crowd let out an audible gasp there, as the noise reverberated around the arena.
Butler has his opponent pinned against the cage, landing some nasty ground and pound that is really making a bit of a mess out of Barker's face.
That's two minutes gone in the round.
Butler moves into side control, trying to work for a kimura. That looks painful! Will he finish!!?? No, Barker has worked his arm free - good work by Barker!
Butler wants to take a breather but Barker manages to regain guard - a lesson learnt for Butler.
Barker looking to hit a scissor sweep but Butler is one step ahead there.
Barker is trying to control the position but Butler postures up.
Barker is in a good position here but he's just trying to control... And he's not even managing to do that successfully.
Barker had isolated an arm as going for a kimura. Butler defends it easily.
That's three minutes gone in the round.
Barker is trying to keep Butler in close.
We must be close to a standup if these guys don't pick up the pace.
Barker had isolated an arm as going for a kimura. Butler defends it easily.
Barker strikes from his own guard.
Barker avoiding any damage from the ground and pound.
Butler decides he's had enough of playing guard and decides to stand. Come on Barker, up you get!
Barker tries to clinch but Butler is having none of it.
That's four minutes gone in the round.
Barker has a takedown stuffed.
Barker gets cracked there but stands up to it.
Butler moves into the clinch successfully.
Butler pushes off and circles away, back to the middle of the mat.
Butler fails with a takedown attempt from distance.
Butler tries to clinch but Barker is having none of it.
Barker closes the distance and looks for a trip takedown... aaaand he's got it - Barker lands in his opponent's guard.
This has been an exciting period of action!
Barker throwing strikes but missing.
Lenny Butler has stepped it up - he knows he needs a finish here!
Andrew Barker is fighting for a decision - hopefully he's judged it right and he's actually winning the fight.
As the round comes to an end the crowd are showing their appreciation for a great round of action.
Butler looking for submissions from the bottom but instead Barker passes into side control.
And that's the end of the fight!
Andrew Barker comfortably won the final round on my scorecard.
I've got Barker winning every round here. Surely the decision will go his way and he'll pick up a well deserved decision victory. Over to the ring announcer for the scorecards.
Ladies and gentlemen, after 3 rounds of action, we go to the scorecards for a decision.
Judge Hugh Johnson scores the fight 27:30
Judge Donatello Bradman scores the fight 27:30
Judge Bruno Hogan scores the fight 27:30
In favor of your winner, by unanimous decision... Andrew Barker!
Andrew Barker made sure to mention his sponsor, Saving Grace Clothing in his post fight interview.
|
|
|
|
|
|
|
|
|
|
|
|
|
|
|
|
|
|
|
|
|
|
|
| S |
C
A |
G |
S |
C
B |
G |
|
S |
C |
G |
|
energy
A | B |
|
hype
A | B |
|
pop
A | B |
|
mgr
A | B |
|
FIGHT
RATING
95% |
|
|
|
|
|
|
|
Main event
|
Coming up we have a heavyweight MMA rules bout between Chris Morris (ranked 0 p4p, 0 weight class) and Wyatt Earp (ranked 0 p4p, 0 weight class). Both these guys are coming into the fight with injuries so let's see if that has a bearing on the fight. These two fighters really are very evenly matched on the feet - it will be fascinating to see who can assert themselves in that aspect of the fight.
 |
|
 |
| 179 cm
18
216 lbs
8 - 5 - 0 |
|
185 cm
18
235 lbs
6 - 3 - 0 |
BJJ Purple Belt
Brawler
Experienced |
|
BJJ Purple Belt
Brawler
Determined |
|
| |
|
Ladies and gentlemen. This fight is 3 rounds, in the heavyweight division.
Introducing the fighter to my left, fighting out of the red corner.
With a record of
8 - 5 - 0, fighting out of Sydney, Chris Morris!
And introducing the fighter to my right, fighting out of the blue corner.
With a record of
6 - 3 - 0, fighting out of Sydney, Wyatt Earp!
The judges for this bout are Winston Howard, Skip Squint and Donatello Bradman.
The bell rings for round one and we are underway!
Morris has closed the distance and engaged Earp in a clinch.
Earp lands with a short shot to the head.
Earp wants the takedown. Morris is fighting it off but Earp persists and manages to bring the fight to the ground, ending up in Morris's guard against the cage.
We've had a lack of effective grappling in the last minute or so, which could well see a referee standup.
Earp is fighting to break Morris's control of his arms but Morris is doing a good job of controlling the position at the moment.
The ref warns both fighters not to hold the cage as they work up against the meshing.
Morris is trying to control the position from the bottom.
Morris had isolated an arm as going for a kimura. Earp defends it easily.
Earp is looking to work some ground and pound but Morris has wrist control.
Earp looks gassed!
Morris lands a couple of decent looking body shots there.
Earp trying to control the position from guard on top but Morris is wriggling around, looking for whatever he can.
Earp throwing elbows and punches but not connecting, as Morris works some decent striking defense from the bottom.
That's one minute gone in the round.
Morris working from the bottom, still in full guard. He's managed to get a loose triangle. Earp doesn't seem to be doing much to defend here, obviously he feels comfortable in the position. Earp manages to throw the legs off his shoulder and he's back into guard - no problem.
Earp has the superior BJJ but he's also working some ground strikes into his gameplan.
Morris wants to control here, rather than go for any submissions from the bottom. At least for now.
Morris not looking particularly offensive just at the moment.
Earp throws a sloppy strike and Morris has hooked up an armbar on the loose arm! He's turned and extended fully! Earp is forced to tap! Great BJJ from Morris!
Ladies and gentlemen, after 1:46 of round 1, we have a winner by way of Submission (Armbar). Chris Morris!
Chris Morris managed to slip a mention for his sponsors, Saving Grace Clothing, into his post fight interview.
|
|
|
|
|
|
|
|
|
|
|
|
|
|
|
|
|
|
|
|
|
|
|
| S |
C
A |
G |
S |
C
B |
G |
|
S |
C |
G |
|
energy
A | B |
|
hype
A | B |
|
pop
A | B |
|
mgr
A | B |
|
FIGHT
RATING
46% |
|
|
|
|
|
|
|
|
|
|
