 |
C W C 50 PBP Commentary |
Undercard bout
|
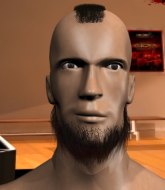
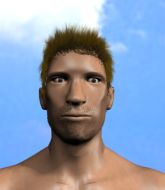
Coming up we have a featherweight MMA rules bout between Rex Williams (ranked 0 p4p, 0 weight class) and Tycho Brahe (ranked 0 p4p, 0 weight class). Brahe has chosen Astronomy by Metallica as his entrance music. Over to our ring announcer for the fighter introductions!
 |
|
 |
| 173 cm
27
155 lbs
12 - 13 - 0 |
|
170 cm
27
158 lbs
9 - 5 - 0 |
Good wrestling
Excellent boxer
Very strong |
|
Good wrestler
World class MT
Good gas tank |
|
| |
|
Ladies and gentlemen. This fight is 3 rounds, in the featherweight division.
Introducing the fighter to my left, fighting out of the red corner.
With a record of
12 - 13 - 0, fighting out of Hilo, Rex Williams!
And introducing the fighter to my right, fighting out of the blue corner.
With a record of
9 - 5 - 0, fighting out of Hilo, Tycho Brahe!
The judges for this bout are Paul Gruel, Roger Salmon and Colin Fray.

The bell rings for round one and we are underway!
Williams shoots in for a takedown but Brahe shows good takedown defense there and keeps this one on the feet.
Good standup being displayed there by Brahe as he connects with a hook.
Brahe connects with a good right hand that stumbles Williams. Williams circles away out of range and recomposes himself.
Brahe misses with a body shot. Nice footwork from Williams.
Williams throws a series of punches but Brahe moves out of range.
Brahe misses with a straight right.
Williams throws a series of punches but Brahe moves out of range.
Brahe's jab looks to have found its range, popping Williams under the eye.
Williams lunges in with swinging rights and lefts but Brahe circles away quickly and effectively.

Brahe moves into range and clinches up with Williams.
A battle for position here, against the cage.
Brahe comes over the top with an elbow. That landed flush.

Williams is rocked!

That's one minute gone in the round.
Brahe using the Thai clinch to land knees to the body.
Brahe lands an elbow inside.
Oh Williams is still all over the place! His legs are completely gone! Will he be able to recover?!!
Brahe has the Thai clinch. He lands a big knee to the head that stumbles Williams - he's in trouble! Another big knee to the head from Brahe, and another! Williams is out on his feet - the ref jumps in to save him and ends the fight!
Ladies and gentlemen, after 1:14 of round 1, we have a winner by way of TKO (Knees). Tycho Brahe!
A pretty intense looking Tycho Brahe took the opportunity post-fight to ask for a shot at the title.
|
|
|
|
|
|
|
|
|
|
|
|
|
|
|
|
|
|
|
|
|
|
|
| S |
C
A |
G |
S |
C
B |
G |
|
S |
C |
G |
|
energy
A | B |
|
hype
A | B |
|
pop
A | B |
|
mgr
A | B |
|
FIGHT
RATING
51% |
|
|
|
|
|
|
|
Undercard bout
|
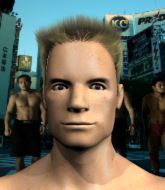
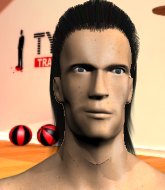
Coming up we have a welterweight MMA rules bout between Eyelove Fucked up (ranked 0 p4p, 0 weight class) and Caio Gimenez (ranked 0 p4p, 0 weight class). Fucked up comes to the cage accompanied by call to prayer. Over to our ring announcer for the fighter introductions!
 |
|
 |
| 178 cm
23
182 lbs
5 - 4 - 1 |
|
183 cm
30
170 lbs
12 - 8 - 0 |
Good wrestling
Excellent boxer
Cardio machine |
|
BJJ Brown Belt
Good kicks
Powerful |
|
| |
|
Ladies and gentlemen. This fight is 3 rounds, in the welterweight division.
Introducing the fighter to my left, fighting out of the red corner.
With a record of
5 - 4 - 1, fighting out of Helsinki, Eyelove Fucked up!
And introducing the fighter to my right, fighting out of the blue corner.
With a record of
12 - 8 - 0, fighting out of Hilo, Caio Gimenez!
The judges for this bout are Ryoma Takatsuka, Chris Saunders and Jeff Smith.
The bell rings for round one and we are underway!
Fucked up listening to his corner there, landing a nice uppercut.
Fucked up fails to land with a series of punches.
Fucked up throws a combination that misses
and Gimenez counters with a one-two to the body.
Gimenez throws a combination but it was largely blocked by Fucked up.
Gimenez stooping low to avoid any incoming strikes and then lunges in with an uppercut come cross that lands flush.
Gimenez misses with the combination.
Gimenez throws a nice looking combination but Fucked up bobs and weaves to avoid any damage.
Gimenez throws a chopping leg kick but Fucked up manages to avoid taking any serious damage.
Nice cross by Fucked up.
Fucked up throws an uppercut from half a mile away. Gimenez sees it coming and avoids it easily.
Gimenez avoids a punch combination nicely.
This is a great period of action - very entertaining stuff!
Fucked up misses with an uppercut.
Gimenez takes a shot to the eye socket. That's gotta hurt.
Fucked up throws a lazy uppercut
and Gimenez counters with a head kick.
Fucked up is rocked!
No joy there for Gimenez, who threw a few shots but didn't land.
Oh Fucked up is still all over the place! His legs are completely gone! Will he be able to recover?!!
Gimenez lands a big right hand and follows it up with an uppercut. Oh and another big punch and a knee - Fucked up can't take much more of this! Another big shot to the jaw from Gimenez and Fucked up drops to the floor. Beaten and bloodied - he had enough there. A vicious beatdown by Gimenez.
Ladies and gentlemen, after 1:55 of round 1, we have a winner by way of TKO (Strikes). Caio Gimenez!
Caio Gimenez very nearly forgot to thank Milwaukee's Best 160 amongst all the excitement of his win but just as the interview came to a close, he screamed their name. Hopefully he'll get a few nice freebies in the mail as a thank you.
|
|
|
|
|
|
|
|
|
|
|
|
|
|
|
|
|
|
|
|
|
|
|
| S |
C
A |
G |
S |
C
B |
G |
|
S |
C |
G |
|
energy
A | B |
|
hype
A | B |
|
pop
A | B |
|
mgr
A | B |
|
FIGHT
RATING
83% |
|
|
|
|
|
|
|
Undercard bout
|
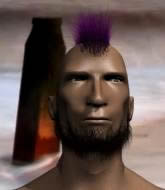
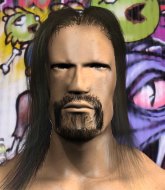
Coming up we have a welterweight MMA rules bout between Patty O Fernacher (ranked 0 p4p, 0 weight class) and Nikolai Lagutin (ranked 0 p4p, 0 weight class). This should be a great matchup!
 |
|
 |
| 192 cm
26
185 lbs
5 - 4 - 0 |
|
183 cm
22
179 lbs
4 - 6 - 0 |
BJJ White Belt
Excellent MT
Very strong |
|
BJJ Blue Belt
Brawler
Solid chin |
|
| |
|
Ladies and gentlemen. This fight is 3 rounds, in the welterweight division.
Introducing the fighter to my left, fighting out of the red corner.
With a record of
5 - 4 - 0, fighting out of Hilo, Patty O Fernacher!
And introducing the fighter to my right, fighting out of the blue corner.
With a record of
4 - 6 - 0, fighting out of Hilo, Nikolai Lagutin!
The judges for this bout are Chris Saunders, Ryoma Takatsuka and Micheangelo Fripello.
The bell rings for round one and we are underway!

O Fernacher closes the distance and clinches.
O Fernacher lands a good knee to the midsection. Lagutin won't want to take too many of those.
Come on O Fernacher - let's have some action - none of this stalling nonsense.
Lagutin drops to a knee looking for a takedown but O Fernacher gets the underhooks and prevents it.
O Fernacher putting his Muay Thai to good use. He has Lagutin in a tight clinch and is doing some damage with knees to the body.
O Fernacher lands a nice elbow.
Lagutin drops down looking for an ankle pick but O Fernacher pulls his leg out and moves away.
Lagutin tries to shoot in for a takedown. He's got hold of a leg but O Fernacher swivels and escapes.
Patty O Fernacher has stuffed three takedown attempts in the round now. That's going to take a lot out of Nikolai Lagutin.
Lagutin pulls out of a head kick attempt.
This is a great period of action - very entertaining stuff!
Lagutin has O Fernacher up against the cage in a clinch.
Lagutin has hold of a leg and is looking for a trip takedown. O Fernacher avoids it nicely though and we remain in the clinch.
O Fernacher using the Thai clinch to land knees to the body.
Lagutin looks gassed!
O Fernacher scores with a knee to the head.

It looks like Nikolai Lagutin has been cut.
A knee to the head by O Fernacher.
O Fernacher lands a nice knee to the body.
O Fernacher lands a knee to the body.
That's one minute gone in the round.
Lagutin takes an elbow to the forehead.
O Fernacher gets an overhook and lands an elbow to the side of the head.
O Fernacher connects with a knee to the head.
O Fernacher comes over the top with an elbow. That landed flush.
O Fernacher with a knee to the head.
O Fernacher connects with a knee to the head.
That has opened up Nikolai Lagutin's cut even more.
O Fernacher gets an overhook and lands an elbow to the side of the head.
A nice glancing elbow lands by O Fernacher.
O Fernacher lands a glancing elbow in the clinch.
O Fernacher lands an elbow inside.

Lagutin is rocked!
O Fernacher scores a nice knee to the body.
Knees in the clinch landing for O Fernacher.
O Fernacher lands a knee to the head there! That was nasty!
We've seen a great period of action over the last minute or so - credit to both fighters for going all out!
O Fernacher lands a nice elbow from the clinch.
Knees in the clinch landing for O Fernacher.
O Fernacher comes over the top with an elbow. That landed flush.
O Fernacher lands an elbow inside.
The cut above Nikolai Lagutin's eye is starting to cause him problems now.
O Fernacher scores with a knee to the head.
Lagutin is still on wobbly legs! Can O Fernacher finish him?

That's two minutes gone in the round.
O Fernacher scores a nice knee to the body.
Lagutin seems to have recovered his senses.
O Fernacher prevents a takedown attempt there.
O Fernacher comes over the top with an elbow. That landed flush.
O Fernacher connects with a knee to the head.
O Fernacher is stalling here.
O Fernacher landing knees to the body. They look like they could hurt.
Lagutin is working for a takedown up against the cage. He can't get it on this occasion though.
O Fernacher lands a knee to the head there! That was nasty!
O Fernacher connects with a nasty looking knee right to Lagutin's face.
Nice elbow from O Fernacher.
O Fernacher with the Thai clinch, lands a knee to the head.
O Fernacher stops a takedown attempt from Lagutin.
O Fernacher pressing his opponent against the cage.
Lagutin drops down for a takedown but doesn't get it.

That's three minutes gone in the round.
O Fernacher is trying to wear down his opponent with knees to the body.
O Fernacher gets double underhooks to prevent a takedown attempt from Lagutin.
Lagutin drops down for a takedown but doesn't get it.
Lagutin changes levels and goes for a takedown here. O Fernacher fights it off and pushes away nicely.
O Fernacher instigates a clinch.
O Fernacher creates a bit of space for himself and sneaks an elbow through Lagutin's defenses.
The two fighters are working to gain dominance in the clinch.
O Fernacher connects with a knee to the head.
Nikolai Lagutin's cut is absolute horrible now. This looks like something out of a horror film with blood covering both fighters.
Lagutin takes an elbow to the temple.

That's four minutes gone in the round.
Lagutin can't get the takedown.
O Fernacher unloads a knee to the mid-section. Lagutin lets out a prehistoric sounding urrrrgh.
Lagutin takes an elbow to the forehead.
The fighters are pressed against the cage, as the pace of the fight slows.
O Fernacher lands a good knee to the midsection. Lagutin won't want to take too many of those.
O Fernacher with a knee to the head.
The fans in attendance giving it up for the two fighters, who have really let it all hang out in the last minute or so!
O Fernacher lands a damaging elbow.
Lagutin has O Fernacher pressed up against the cage and is working for takedown. O Fernacher manages to improve position though and keeps the fight standing.
O Fernacher dictating the pace here, as the fighters clinch against the cage.
O Fernacher lands a glancing elbow in the clinch.
The referee calls the doctor in to look at Nikolai Lagutin's cut. Oh no, the doctor has called an end to the bout!
Ladies and gentlemen, after 4:53 of round 1, we have a winner by way of TKO (Cut). Patty O Fernacher!
A relieved looking Patty O Fernacher thanked the fans for their support and gave the usual line about them being amazing. They seemed to believe that he actually meant it.
|
|
|
|
|
|
|
|
|
|
|
|
|
|
|
|
|
|
|
|
|
|
|
| S |
C
A |
G |
S |
C
B |
G |
|
S |
C |
G |
|
energy
A | B |
|
hype
A | B |
|
pop
A | B |
|
mgr
A | B |
|
FIGHT
RATING
71% |
|
|
|
|
|
|
|
Undercard bout
|
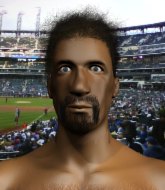
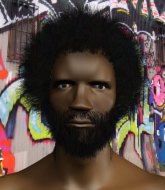
Coming up we have a featherweight MMA rules bout between Malcolm Master (ranked 0 p4p, 0 weight class) and Chen Lebeng (ranked 0 p4p, 0 weight class). I can't wait for this one - let's get the fighter introductions out of the way and get this one started!
 |
|
 |
| 225 cm
25
150 lbs
2 - 0 - 0 |
|
173 cm
23
146 lbs
1 - 0 - 0 |
BJJ Brown Belt
Counter striker
Good chin |
|
BJJ Purple Belt
Counter striker
Solid chin |
|
| |
|
Ladies and gentlemen. This fight is 3 rounds, in the featherweight division.
Introducing the fighter to my left, fighting out of the red corner.
With a record of
2 - 0 - 0, fighting out of Hilo, Malcolm Master!
And introducing the fighter to my right, fighting out of the blue corner.
With a record of
1 - 0 - 0, fighting out of Hilo, Chen Lebeng!
The judges for this bout are Jeff Smith, Micheangelo Fripello and Roger Salmon.
The bell rings for round one and we are underway!

Master shoots in and bounces Lebeng off the cage to secure the takedown into guard.
If this pace continues, the referee will definitely step in and force a standup.

Master drops back looking for a heel hook - he quickly realises he's not going to get it but Lebeng manages to dive on top of him before he can escape and now Master has Lebeng in his guard.
Lebeng pressing down on his opponent's thigh, looking to pass guard. Master is keeping the position for now.
Master will need to keep those long limbs tucked in whilst he's on the ground, to prevent any submissions.
Master is looking for a guillotine. You can't force these things though and Lebeng defends well.
Master really does look like a pencil wearing a pair of gloves. Let's hope he has a gameplan to suit that ridiculous body shape.
Lebeng wants to control from the top but Master keeps moving.
Lebeng throws a big right hand that misses.
Master keeping moving, preventing Lebeng from controlling successfully.
Master isolates an arm and boxes in a triangle. Lebeng stacks Master on his neck as he steps over and passes to the side. He's now in a much more dominant position where he can look to do some serious damage. Nice move by Lebeng!
That's one minute gone in the round.
Lebeng taking a breather here.

Lebeng is looking to finish here, going for an Americana. Master knows the correct defense though, so he's OK.
Master tries to get back to half guard but can't.
Master sneaks a leg under to get back to half guard.
Master gets full guard.
Master has a loose triangle. He'll be looking to tighten that up but Lebeng can see exactly what he's planning and manages to posture up and free himself.
Lebeng throws a big right hand that misses.
That's two minutes gone in the round.
Lebeng passes easily into side control. Nice work.
The ref warns both fighters not to hold the cage as they work up against the meshing.
Lebeng working hard here to secure a kimura but he's not really in the right position for it.
Lebeng tries for a kimura. Not really close to a finish though.
Master manages to work his way to half guard, despite Lebeng's best efforts.
The crowd are loving this. Great action here.
Master is looking to sinch up a guillotine here but Lebeng pulls his head out easily.
Lebeng is trying to work for a kimura but Master is defending well.
Master looking for submissions from an awkward position here.
That's three minutes gone in the round.
Master is looking to regain full guard. Not this time though.
Master is staying active underneath Lebeng, who seems content to just control the action from this position.
The fighters are pressed up against the cage, both looking to find a bit of space to work.
Lebeng maintaining the dominant position here and is working for a kimura. He's locked it up! Master could be in real trouble here! He's trying to wriggle out but Lebeng has cracked it and Master is screaming in pain - he's tapped out! Great finish by Lebeng!
Ladies and gentlemen, after 3:37 of round 1, we have a winner by way of Submission (Kimura). Chen Lebeng!
|
|
|
|
|
|
|
|
|
|
|
|
|
|
|
|
|
|
|
|
|
|
|
| S |
C
A |
G |
S |
C
B |
G |
|
S |
C |
G |
|
energy
A | B |
|
hype
A | B |
|
pop
A | B |
|
mgr
A | B |
|
FIGHT
RATING
50% |
|
|
|
|
|
|
|
Undercard bout
|
Coming up we have a light heavyweight MMA rules bout between Lucas Vilas Boas (ranked 0 p4p, 0 weight class) and Andrew Winter (ranked 0 p4p, 0 weight class). I can't wait for this one - let's get the fighter introductions out of the way and get this one started!
 |
|
 |
| 194 cm
25
217 lbs
10 - 10 - 1 |
|
191 cm
28
205 lbs
6 - 2 - 1 |
BJJ Blue Belt
Dangerous knees
Cardio machine |
|
Dangerous GnP
Decent boxing
Knockout power |
|
| |
|
Ladies and gentlemen. This fight is 3 rounds, in the light heavyweight division.
Introducing the fighter to my left, fighting out of the red corner.
With a record of
10 - 10 - 1, fighting out of Hilo, Lucas Vilas Boas !
And introducing the fighter to my right, fighting out of the blue corner.
With a record of
6 - 2 - 1, fighting out of Hilo, Andrew Winter!
The judges for this bout are Jeff Smith, Josh West and Paul Gruel.
The bell rings for round one and we are underway!
Winter closes the distance and takes a jab right on the nose as he does so.

Winter drives through with a takedown into guard.
The referee must be thinking about standing these guys back up.
Winter won't allow Vilas Boas to get back to his feet.
Winter trying to control the position from guard on top but Vilas Boas is wriggling around, looking for whatever he can.

Vilas Boas has his feet on Winter's hips. He pushes off and gets to his feet. Nice work.
Wow, both these guys are really going for it!
Winter misses with a jab and misses with a cross straight after too.
Nice straight punches there by Vilas Boas . You know Roy Jones Jr respects the hands of Vilas Boas .
Vilas Boas wants to clinch up but Winter keeps it at a distance.
Winter shoots in for a takedown. He's persisting with it as Vilas Boas sprawls well. Vilas Boas wins this battle and keeps the fight standing. Winter gets slowly back to his feet.
Vilas Boas swings away but doesn't land with a series of punches.
Vilas Boas moves into the clinch successfully.
A bit of stalling here from Vilas Boas .
A short right from Vilas Boas on the inside.
The crowd are loving this. Great action here.
Vilas Boas is pressed up against the cage. Winter has hold of a leg and is looking to drag Vilas Boas down to the mat. Vilas Boas avoids the attempt though and has circled away. We're back to striking at a distance.
That's one minute gone in the round.
Winter fakes an overhand right and shoots for a takedown. Vilas Boas sprawls well initially but Winter persists and gets the takedown into half guard.
Winter is looking for a kimura but Vilas Boas is holding onto that half guard position, so it's hard for Winter to get the leverage.
Winter trying to mount his opponent but Vilas Boas defends it.
Winter stops Vilas Boas from getting back to his feet.
The ref warns both fighters not to hold the cage as they work up against the meshing.
Winter is thinking about going for an arm triangle but he can't free his leg.
Vilas Boas is staying active underneath Winter, who seems content to just control the action from this position.
Winter seems content to maintain position for now, rather than mounting any offense.
Winter prevents Vilas Boas from standing back up.
That's two minutes gone in the round.
Winter lands a big shot. The thud that echoes around the arena is like music to the fans' ears.
The referee walks around the fighters to get a better view of the action. Winter lands a nice short elbow.
The crowd cheering loudly, showing their appreciation for the quality fight we're seeing here.
Winter not landing any meaningful shots this time.
Winter throwing shots but Vilas Boas is blocking nicely.
Winter stops Vilas Boas from getting back to his feet.
Winter tries to pass to full mount but Vilas Boas defends it.
That's three minutes gone in the round.
Winter wants to control but Vilas Boas is keeping him busy.
Vilas Boas wants to get back to his feet.
Vilas Boas pushes Winter off but Winter dives into side control.
Winter looking for an arm triangle but it's way too loose to do anything.
Vilas Boas defending against the ground and pound.
That's four minutes gone in the round.
Winter has worked his way into a potential kimura here. Vilas Boas is trying to get out of the position but his squirming has just got him deeper into trouble. Winter yanks on the arm and Vilas Boas is forced to tap due to a very painful looking submission! Nice work by Winter.
Ladies and gentlemen, after 4:20 of round 1, we have a winner by way of Submission (Kimura). Andrew Winter!
|
|
|
|
|
|
|
|
|
|
|
|
|
|
|
|
|
|
|
|
|
|
|
| S |
C
A |
G |
S |
C
B |
G |
|
S |
C |
G |
|
energy
A | B |
|
hype
A | B |
|
pop
A | B |
|
mgr
A | B |
|
FIGHT
RATING
35% |
|
|
|
|
|
|
|
Undercard bout
|
Coming up we have a welterweight MMA rules bout between Luca Fuschini (ranked 0 p4p, 0 weight class) and Royston McDonald (ranked 0 p4p, 0 weight class). McDonald has chosen Nicole - By Ash as his entrance music. I'm sure you'll be fascinated to know that I was talking to some pointless Z list celebrity before the fight and he thought that Royston McDonald was going to win. Let's see if he was right.
 |
|
 |
| 178 cm
32
180 lbs
20 - 14 - 1 |
|
177 cm
24
181 lbs
11 - 6 - 0 |
Powerful takedowns
Solid boxing
Very strong |
|
Good wrestler
Excellent MT
Granite chin |
|
| |
|
Ladies and gentlemen. This fight is 3 rounds, in the welterweight division.
Introducing the fighter to my left, fighting out of the red corner.
With a record of
20 - 14 - 1, fighting out of Hilo, Luca Fuschini!
And introducing the fighter to my right, fighting out of the blue corner.
With a record of
11 - 6 - 0, fighting out of Hilo, Royston McDonald!
The judges for this bout are Ryoma Takatsuka, Chris Saunders and Roger Salmon.
The bell rings for round one and we are underway!
McDonald lands a jab to Fuschini's midsection.
Fuschini shoots in but doesn't get the takedown
and McDonald counters with a straight right hand.
Fuschini connects with a good right hand that stumbles McDonald. McDonald circles away out of range and recomposes himself.
McDonald tries to clinch up but Fuschini circles away and keeps his distance.
McDonald gets to the clinch - let's see what his plan is here.
McDonald lands with a short punch from the clinch.
McDonald lands with a good tight uppercut to the head.
McDonald tries a shoulder strike but it doesn't do any damage.
Fuschini is working for takedown but McDonald is calmly controlling the position for now.
Fuschini lands with a light punch inside.
McDonald lands a left hand that snaps the head of Fuschini backwards.
The crowd are loving this. Great action here.
McDonald gets double underhooks to prevent a takedown attempt from Fuschini.
That's three failed takedown attempts in the round for Luca Fuschini. That's going to take a lot out of him.
McDonald digs a right hand into Fuschini's ribs. Those have got to be taking their toll on Fuschini's gas tank.
McDonald lands a hook to the body. It's hard to tell if that hurt Fuschini or not.
McDonald lands a nice looking hook to the body, against the cage.
That's one minute gone in the round.
Fuschini misses with a hook to the ribs.
Fuschini goes for a takedown attempt but McDonald pushes him away and we're back to fighting at a distance.
McDonald misses with a few strikes there.
Fuschini walks straight into a jab right on the nose. That one stung - he's blinking and trying to clear his head.
McDonald avoids a punch combination nicely.
Fuschini looks for the body kick but McDonald saw that one coming.
Fuschini fails with a takedown attempt.
McDonald has taken the fight to the clinch.
Fuschini misses with a short punch on the inside.
Come on Fuschini - let's have some action - none of this stalling nonsense.
Fuschini wants to get back to striking at distance but McDonald won't allow it.
A short uppercut from McDonald.

It looks like Luca Fuschini has been cut.
That's two minutes gone in the round.
McDonald lands an uppercut.
Fuschini drops to a knee looking for a takedown but McDonald gets the underhooks and prevents it.
Fuschini tries to throw a body punch but McDonald avoids it by throwing Fuschini back against the cage.
McDonald lands a right hand that snaps the head of Fuschini backwards.
Fuschini fails to pull the fight into his guard.
The crowd cheering loudly, showing their appreciation for the quality fight we're seeing here.
McDonald is working Fuschini over against the cage.

Fuschini breaks the clinch and we're back to striking at distance.
McDonald thuds his right hand into Fuschini's forehead from close range. That could be painful for both fighters.
McDonald works Fuschini's body with a nice hook.
Fuschini is breathing heavily.
Fuschini takes an uppercut right on the button but keeps his composure.
McDonald getting the better of the striking in that exchange.
Fuschini is rocked!
McDonald fakes a head punch and goes low to the body. Nicely done.
Oh Fuschini is still all over the place! His legs are completely gone! Will he be able to recover?!!

McDonald lands a jab followed by a vicious hook that sends Fuschini sprawling to the canvas. McDonald follows him down, looking for the kill. Can Fuschini hang on?
McDonald works his way into side control.
That's three minutes gone in the round.
Fuschini parries the strikes from McDonald easily there. McDonald is wary of posturing up too much because it might enable Fuschini to escape.
McDonald cracks Fuschini with a big right hand but Fuschini just smiles back at him and invites him to have another go.
Fuschini wants to escape from the position here - easier said than done!
McDonald working the ground and pound.
McDonald in side control, just content to control the action for now.
You can see the frustration on Fuschini's face, being in this tough position on the bottom.
Fuschini seems to have got his legs back now.
That's four minutes gone in the round.
Fuschini being controlled for a moment.
Fuschini taking a bit of punishment here - McDonald scoring with strikes.
Fuschini tries to slip a leg under to move to half guard but McDonald presses down on the leg and jumps into full mount!
McDonald raining down hammerfists from mount.
We've seen a great period of action over the last minute or so - credit to both fighters for going all out!
Fuschini manages to regain half guard. Good work.
McDonald looks to score some points with some ground and pound.
Luca Fuschini's cut is bleeding quite badly. He's got to try and protect it.
The crowd are going absolutely nuts as the round comes to an end - what a fantastic round of action!
McDonald prevents Fuschini from standing back up.
Fuschini is staying active underneath McDonald, who seems content to just control the action from this position.
And thats the end of the round the fighters go back to their corners.
Royston McDonald dominated that round.
The cut man is working on Luca Fuschini's cut.
Well, the break between rounds is over. Let's get back to the scrappin!

McDonald throws a right hand that Fuschini ducks under and follows up with a left that Fuschini also avoids with ease.
McDonald moves into range and throws a lovely three punch combination.
McDonald lands a nice leg kick that just misses Fuschini's sensitive parts.
McDonald throws a body punch but Fuschini moves out of range.
Fuschini throws a body kick but he was well out of range there.
Royston McDonald seems to be the more aggressive standup fighter in this bout.
Fuschini takes a thudding leg kick, right into the meat of the thigh.
Fuschini looks to land a body kick but McDonald moved away.
Fuschini looks frustrated there after his takedown attempt is stuffed easily.
Fuschini looks to land a combination but McDonald avoids it well.
McDonald drops down and drives through with a powerful takedown into guard.
The fighters are pressed up against the cage, both looking to find a bit of space to work.
McDonald trying to control but Fuschini is working from the bottom.
McDonald pushes down on Fuschini's leg and manages to get into half guard.
McDonald scores with a couple of good hammerfists.
That's one minute gone in the round.
McDonald perhaps working for something from half guard, or maybe not. It looks like he's just sitting there.
McDonald lands strikes from half guard.
The two fighters exchange a few words. I couldn't hear what they were saying but maybe it's more fun if you make it up yourself. McDonald connects with a nice short shot to Fuschini's temple.
McDonald has been the more effective fighter overall so far.
Fuschini wants to get back to his feet.
Fuschini actively working from the bottom here.
McDonald is figuring out what he wants to do next.
Fuschini manages to get to full guard.
McDonald keeps in close for a moment and lands a decent shot to the side of Fuschini's head.
McDonald wants to control from the top but Fuschini keeps moving.
That's two minutes gone in the round.
McDonald working in close now, lands a nice elbow to the side of Fuschini's head.
McDonald in full guard, throwing the ground and pound. No damage this time.
McDonald works over Fuschini with some ground and pound from guard.
The crowd cheering loudly, showing their appreciation for the quality fight we're seeing here.
McDonald tries to free his leg and advance position but Fuschini is retaining full guard.
McDonald throwing shots from guard but he's hitting more mat than opponent.
McDonald connects with a couple of short punches.
McDonald has the superior BJJ but he's also working some ground strikes into his gameplan.
McDonald postures up to throw the ground and pound strikes but they don't connect.
Fuschini keeping full guard, as McDonald tries to pass.
The ref warns both fighters not to hold the cage as they work up against the meshing.
McDonald working some ground and pound from guard but it's not doing any damage.
Fuschini wants to stand and escape but McDonald is having none of it.
That's three minutes gone in the round.
McDonald with a flurry of punches that miss.
Fuschini is trying to keep McDonald in close.
McDonald wants to control from the top but Fuschini keeps moving.
McDonald postures up and scores with a shot to the body and a follow up elbow to the head.
McDonald postures up and lands a big shot to Fuschini's brow.
McDonald throwing strikes from guard but Fuschini blocks nicely.
McDonald throwing strikes from guard but Fuschini blocks nicely.
Fuschini has momentary wrist control but McDonald slips an elbow through the middle.
Jeez, Luca Fuschini's cut is really nasty now. The referee must be thinking about getting that checked.
Fuschini has a loose triangle. He'll be looking to tighten that up but McDonald can see exactly what he's planning and manages to posture up and free himself.
That's four minutes gone in the round.
Fuschini looking for submissions from the bottom but instead McDonald passes into half guard.
Both fighters are absolutely exhausted here.
Fuschini trying to control here.
McDonald not throwing his punches with enough precision this time.
Fuschini trying to control here.
This has been an exciting period of action!
Fuschini looking for submissions from an awkward position here.
Royston McDonald has got the better of the ground game so far.
As the round comes to an end the crowd are showing their appreciation for a great round of action.
Fuschini trying to control from the bottom.
McDonald working Fuschini over with strikes.
And thats the end of the round the fighters go back to their corners.
Royston McDonald showed his class in that round. I'd imagine he'll take it on all the scorecards.
The cut man is working on Luca Fuschini's cut.
That's the end of the interval. I'm sure that seemed a lot quicker than a minute for our two fighters! Back to the action. This is the final round!

A jab from McDonald does it's job there.
McDonald throws a leg kick which misses Fuschini's front leg but catches the back leg as Fuschini tries to avoid it.
McDonald lands with a thumping leg kick.
McDonald throws a head kick but Fuschini moves out of range.
McDonald scoring well with a low kick there.
Fuschini swats away the attempt to clinch by McDonald.
Fuschini throws a right hand that misses
and McDonald counters with a head kick that drops Fuschini - he's looking to finish, following his stunned foe to the ground!
This is a great period of action - very entertaining stuff!
McDonald lands a big shot. The thud that echoes around the arena is like music to the fans' ears.
McDonald lands a big elbow - Fuschini is out of it! He's waving his arms around but his eyes are closed and he's not intelligently defending himself - the ref has no choice but to jump in and stop the fight! This one is in the books! A TKO win for McDonald!
Ladies and gentlemen, after 0:50 of round 3, we have a winner by way of TKO (Strikes). Royston McDonald!
Royston McDonald made sure to mention his sponsor, Hellbent in his post fight interview.
|
|
|
|
|
|
|
|
|
|
|
|
|
|
|
|
|
|
|
|
|
|
|
| S |
C
A |
G |
S |
C
B |
G |
|
S |
C |
G |
|
energy
A | B |
|
hype
A | B |
|
pop
A | B |
|
mgr
A | B |
|
FIGHT
RATING
100% |
|
|
|
|
|
|
|
Co-main event
|
Coming up we have a super heavyweight MMA rules bout between Jake Blues (ranked 0 p4p, 0 weight class) and Khalifa Khan (ranked 0 p4p, 0 weight class). Blues comes to the cage accompanied by Soul Man. Khan has chosen Prodigal Son as his entrance music. Khalifa Khan has the better chin. Will he look to stand and bang today?
 |
|
 |
| 209 cm
21
295 lbs
7 - 6 - 0 |
|
196 cm
20
290 lbs
4 - 2 - 0 |
Decent wrestler
Solid boxing
Very strong |
|
BJJ Blue Belt
Solid Muay Thai
Granite chin |
|
| |
|
Ladies and gentlemen. This fight is 3 rounds, in the super heavyweight division.
Introducing the fighter to my left, fighting out of the red corner.
With a record of
7 - 6 - 0, fighting out of Hilo, Jake Blues!
And introducing the fighter to my right, fighting out of the blue corner.
With a record of
4 - 2 - 0, fighting out of Hilo, Khalifa Khan!
The judges for this bout are Josh West, Ryoma Takatsuka and Roger Salmon.
The bell rings for round one and we are underway!
A chopping leg kick lands by Khan.
Khan tries to move into range but Blues moves to the side and lands with a nice right hand.
Blues tries to land with a swinging hook to the body but Khan was well out of range. Poor timing from Blues.
Blues misses with a double jab.
Sloppy strikes from Khan. Those never looked like landing.
Blues closes the distance and clinches.
Blues has managed to pull guard. Let's see whether he can work an aggressive guard. It will also be interesting to see what tactics Khan uses from the top position.
Blues has a loose triangle. He'll be looking to tighten that up but Khan can see exactly what he's planning and manages to posture up and free himself.
Both fighters really going for it on the ground here!
Blues manages to escape and get back to his feet.
A telegraphed takedown attempt from Blues is defended easily by Khan.
Khan shoots in for a takedown but Blues shows good takedown defense there and keeps this one on the feet.
Khan with a lazy takedown attempt
and Blues counters with a nice single leg takedown and he's in Khan's guard now.
We've seen a great period of action over the last minute or so - credit to both fighters for going all out!
Khan wants to sweep here but Blues controlling him for the moment.
Blues wants to control from the top but Khan keeps moving.
That's one minute gone in the round.
Khan utilising some decent striking defenses from the guard, preventing the ground and pound.
Blues loading up with the ground and pound but he's missing more than he's landing in this flurry.
The ref warns both fighters not to hold the cage as they work up against the meshing.
Khan trying to keep a closed guard but Blues is proving a slippery customer.
Khan has his foot on Blues's thigh. He's trying to push off and get in position for a triangle, I think. Blues works his way back into a safe position though.
Khan avoiding any damage from the ground and pound.
Blues wants to get up but he can't break Khan's closed guard. He needs to be careful trying to break the legs open, as he's open to submissions here.
There's a bit of a scramble here and now Khan is on top in guard.
The fighters are pressed up against the cage, both looking to find a bit of space to work.
Blues is avoiding any damage by keeping wrist control.
Khan throws a big right hand that misses.
Khan distracts Blues with his right hand and drops a big elbow with his other arm.
Blues trying to control the position here.
Blues wants to sweep here but Khan controlling him for the moment.
That's two minutes gone in the round.
Blues scores with a nice shot.
Wooooo! Give it up for these two warriors! They are putting on a show!
A big thud reverberates around the arena there as Khan accidentally thumps the mat. Hopefully he's not broken his hand.
Blues looking to sweep here. No luck so far.
Khan postures up.
Blues wants to sweep here but Khan controlling him for the moment.
Blues trying to strike off his back.
Blues trying to punch from his back but it's not doing any damage.
Blues is trying to keep Khan in close.
Khan advances position into side control!
Khan in side control, throwing shots but Blues defends.
Blues is looking to reverse the position.
Khan advances to mount.
Blues is desperately trying to get back to half guard.
Blues on his back here. We all know that wrestlers don't like being on their back so let's see if Blues tries to get out of the position.
That's three minutes gone in the round.
Blues bucks up and manages to get a nice reversal! He's in guard on the top - nicely done!
Blues has decided he wants to stand but the closed guard of Khan is proving hard to escape from.
Blues chips away with some ground and pound.
Khan is throwing his legs up, looking for submissions. Blues is aware though and is defending well.
Blues gets to his feet - Khan follows without any prompting.
Blues will have to do better than that with his takedown attempts.
Blues manages to get an easy takedown there - catching Khan on his heels. He'll look to pass Khan's guard now, I'm sure.
This has been an exciting period of action!
Blues trying to pass the guard but can't manage it just yet.
Blues wants to stand but Khan is controlling his posture from full guard.
Blues is breathing heavily.
A big thud reverberates around the arena there as Blues accidentally thumps the mat. Hopefully he's not broken his hand.
Khan manages to sweep nicely, so he's now on top. Blues manages to get himself to full guard.
Blues will need to keep those long limbs tucked in whilst he's on the ground, to prevent any submissions.
That's four minutes gone in the round.
Blues looking to hit a scissor sweep but Khan is one step ahead there.
Khan trying to land body shots but he keeps hitting the mat.
Khan trying to control but Blues is working from the bottom.
Khan scoring with some ground and pound.
Blues doesn't do any damage with a couple of strikes from the bottom.
Khan cracks Blues with a solid left hand.
Blues looking to sweep here. No luck so far.
Blues scrambles and gets back to his feet.
The crowd are going absolutely nuts as the round comes to an end - what a fantastic round of action!
Blues slips a jab and a cross from Khan.
Khan throws a nice outside leg kick.
And thats the end of the round the fighters go back to their corners.
Jake Blues dominated that round.
OK. That's time! The bell goes and we're back to the action.
Blues shoots in looking for a takedown. Khan tries to sprawl out of it but Blues keeps driving through. The fighters are pinned against the cage. Khan manages to get underhooks and after a bit of a struggle, circles away and we're back to standing.
Blues swats away the attempt to clinch by Khan.
Khan closes the distance and clinches.
Khan can't get the takedown.
Khan misses with a punch to the body.
Khan cracks Blues with a nice body shot.
Blues prevents a body shot from Khan.
A short right from Blues on the inside.
A left hand lands to the body for Khan.
Blues blocks a body shot from Khan.
Good body shot from Khan.
Both fighters are absolutely exhausted here.
Wooooo! Give it up for these two warriors! They are putting on a show!
A short body shot lands from Khan as the two fighters clinch.
That's one minute gone in the round.
Khan pushes Blues back against the cage and unloads with a body punch.
Khan lands a nice shot to the body.
Khan has hold of a leg and is looking for a trip takedown. Blues avoids it nicely though and we remain in the clinch.
Khan tries to throw a body punch but Blues avoids it by throwing Khan back against the cage.
Khalifa Khan seems to be working more effectively in the clinch in the fight so far.
Khan lands a shoulder strike.
Khan tries to work over Blues's body with a swooping hook but it only glances the target.
Khan misses with a shot to the kidneys.
Blues misses with an elbow strike.
The crowd are loving this. Great action here.
Khan goes for a body shot but it's blocked.
Khan lands with a good tight uppercut to the head.
Khan is looking for a takedown up against the cage. Blues gets underhooks though and prevents the takedown attempt.
Jake Blues has stuffed three takedown attempts in the round now. That's going to take a lot out of Khalifa Khan.
Blues breaks the clinch and we're back to striking at distance.
Blues uses good footwork to get in and out and land a nice right hand before Khan has time to react.
Khan's corner calls for a 1, 2 combination and Khan duly obliges.
It looks like Jake Blues has been cut.
Khan closes this distance looking for a takedown but Blues circles away.
That's two minutes gone in the round.
Khan lands a beauty of a right hand that gets the crowd cheering.
Donk. Blues catches Khan right on the button with a cross.
Blues has a takedown stuffed.
Khan defends well against a solid takedown attempt from Blues.
Khan tries to close the distance and clinch up but Blues swats him away and circles back towards the center.
Khan feints and as Blues raises his hands in defense, Khan changes levels and drives through with a takedown into guard.
Blues is rocked!
Khan keeps in close for a moment and lands a decent shot to the side of Blues's head.
Oh Blues is still in real trouble! Will he be able to recover?!!
Blues can't do much from the bottom at the moment, as Khan controls the pace.
Khan arches his back and unloads with a massive left and a right! Blues's eyes roll back into his head, he's out cold! The ref dives in to stop the fight - wow, they were hard shots!
Ladies and gentlemen, after 2:56 of round 2, we have a winner by way of KO (Strikes). Khalifa Khan!
An out of breath Khalifa Khan thanked his loyal fans in his post fight interview, giving them credit for his success over the course of his career.
|
|
|
|
|
|
|
|
|
|
|
|
|
|
|
|
|
|
|
|
|
|
|
| S |
C
A |
G |
S |
C
B |
G |
|
S |
C |
G |
|
energy
A | B |
|
hype
A | B |
|
pop
A | B |
|
mgr
A | B |
|
FIGHT
RATING
100% |
|
|
|
|
|
|
|
Main event
|
Coming up we have a heavyweight MMA rules bout between Billy Madison (ranked 0 p4p, 0 weight class) and Robert Dominator (ranked 0 p4p, 0 weight class). The crowd seem to be enjoying Dominator's choice of entrance music: Condemned 84 - Face the Aggression. Over to our ring announcer for the fighter introductions!
 |
|
 |
| 200 cm
32
280 lbs
15 - 13 - 0 |
|
200 cm
28
268 lbs
9 - 7 - 0 |
BJJ Blue Belt
Excellent MT
Very quick |
|
Good wrestler
Excellent boxer
Heavy handed |
|
| |
|
Ladies and gentlemen. This fight is 3 rounds, in the heavyweight division.
Introducing the fighter to my left, fighting out of the red corner.
With a record of
15 - 13 - 0, fighting out of Hilo, Billy Madison!
And introducing the fighter to my right, fighting out of the blue corner.
With a record of
9 - 7 - 0, fighting out of Hilo, Robert Dominator!
The judges for this bout are Chris Saunders, Josh West and Colin Fray.
The bell rings for round one and we are underway!
Madison avoids the clinch attempt nicely.
Madison fakes with an overhand right and moves in to clinch with Dominator, pushing him back against the cage.
The referee calls for Dominator to work.
Dominator blocks an uppercut.
Dominator can't find room to land a body shot as Madison controls the action.
Dominator with the Thai clinch. He's looking to land a big knee but he's not managed it this time.
Madison has a couple of punches blocked by Dominator.
Dominator lands a nice looking hook to the body, against the cage.
Madison lands a damaging elbow.
It looks like Robert Dominator has been cut.
A short right from Madison on the inside.
Madison misses with a hook to the ribs.
Madison trying to control the position but instead, Dominator has worked for underhooks and has pushed Madison into the cage.
Dominator trying to land knees to the body.
The crowd are loving this. Great action here.
Madison swings wildly with an uppercut but Dominator uses good head movement to avoid it.
Dominator blocking some punches.
Dominator blocking some punches.
Dominator looking to stall.
Dominator blocking some punches.
That's one minute gone in the round.
Madison on the defensive, avoiding the knees to the body.
A short right hand to the side of the head by Madison.
With the fighters clinched against the cage, Madison creates a bit of distance for himself and scores with a nice uppercut.
Dominator takes a shot to the head.
Dominator trying to land knees to the body.
Madison misses with some punches.
The referee calls for Dominator to work.
Madison tries a shoulder strike but it doesn't do any damage.
A short uppercut from Madison.
Madison misses with a punch to the body.
Dominator stalling in the clinch but Madison improves position.
Dominator is trying to slow the pace down but that's a couple of times in a row that he's tried to get underhooks and Madison has denied him.
Dominator misses with a hook to the ribs.
An uppercut on the inside fails to land for Madison.
Madison is clearly stalling here... Pick up the pace son.
Both guys are working to get underhooks.
Madison lands with a left to the head.
That's two minutes gone in the round.
Madison lands punches inside but they're not really causing much damage.
Madison blocks a knee to the body. He'll have a nicely bruised forearm in the morning.
We've seen a great period of action over the last minute or so - credit to both fighters for going all out!
A head punch on the inside from Madison fails to land.
Dominator blocks a couple of punches on the inside.
Dominator lands a body punch.
Madison tries to stall but Dominator uses the opportunity to gain a better position.
Madison misses with a short punch on the inside.
Madison tries a body shot but Dominator blocks it.
A shot in the inside from Madison.
Dominator is looking to score with knees to the body. Maybe he'll change it up and go body then head. Madison is defending well for now.
Madison tries a knee to the head but he's missed.
A head punch blocked on the inside by Dominator.
Madison misses with a punch on the inside.
Dominator blocks a punch to the side of the head.
Madison prevents Dominator from breaking the clinch.
Dominator looks like he'd prefer to be striking at range right now.
Dominator tries a knee to the head but he's missed.
Madison misses with a hook from the clinch.
Madison misses with a hook from the clinch.
Madison misses with a punch to the body.
That's three minutes gone in the round.
Good anti-grappling being displayed by Madison as Dominator tries to tie him up.
Madison lands a nice elbow.
Madison misses with some punches.
Dominator's head jolts backwards as he takes an uppercut right on the button!
Madison lands a hook to the body. It's hard to tell if that hurt Dominator or not.
Dominator looks gassed!
Madison throws a knee to the head but misses.
Nice body punch from Madison - that landed with a thud.
The crowd cheering loudly, showing their appreciation for the quality fight we're seeing here.
Dominator misses with a shot to the kidneys.
Dominator blocks a punch to the side of the head.
Madison working aggressively here.
A quick uppercut on the inside from Madison.
Madison throws a punch but it's blocked by Dominator.
A quick uppercut on the inside from Madison.
Dominator is trying to slow down the pace of the fight but Madison is keeping busy.
Madison lands with a light punch inside.
A real battle for position is taking place between these two warriors.
Madison throws a knee to the head but misses.
That's four minutes gone in the round.
Madison tries to work over Dominator's body with a swooping hook but it only glances the target.
Dominator is trying to stall.
Madison fails to land with a short punch on the inside.
Madison lands with a short head shot on the inside.
Madison lands a left hand that snaps the head of Dominator backwards.
Dominator misses with a hook from the clinch.
An uppercut on the inside fails to land for Madison.
A short uppercut from Madison.
Madison has a couple of punches blocked by Dominator.
Madison misses with a hook from the clinch.
Madison swings away with an uppercut that misses.
A nice right hand lands inside from Madison.
Madison swings wildly with an uppercut but Dominator uses good head movement to avoid it.
The crowd are going absolutely nuts as the round comes to an end - what a fantastic round of action!
Dominator blocking some punches.
Madison prevents a body shot from Dominator.
Dominator tried to land a shot to the body but connects with Madison's elbow.
Dominator tries a knee to the head but he's missed.
And thats the end of the round the fighters go back to their corners.
Billy Madison dominated that round.
The cut man is working on Robert Dominator's cut.
Well, the break between rounds is over. Let's get back to the scrappin!
Boom, another hit is landed. "You're gunna get knocked out" taunts Madison, as that shot connected.
Madison misses with a wild body shot.
Madison thuds a left hand into Dominator's body.
Madison rushes Dominator and pushes him back against the cage in a clinch.
Dominator lands a right hand that snaps the head of Madison backwards.
Madison digs a right hand underneath Dominator's ribcage. Dominator let out a lung full of air as it connected.
Madison lands with a good tight uppercut to the head.
We've seen a great period of action over the last minute or so - credit to both fighters for going all out!
Madison working aggressively here.
Dominator tries to work over Madison's body with a swooping hook but it only glances the target.
Dominator avoids the elbow strike from Madison, against the cage.
Madison can't find room to land a body shot as Dominator controls the action.
An uppercut to the body lands inside from Madison.
Madison tries a body shot but Dominator blocks it.
Madison throws a blind hook that connects with the side of Dominators head.
Dominator looking to stall.
Dominator is breathing heavily.
A knee to the head by Madison.
Madison presses Dominator against the cage and delivers a mid-strength body shot.
Madison misses with the head strike.
A nice left hand lands by Madison.
That's one minute gone in the round.
A right hook to the body lands for Madison.
Dominator blocks a couple of punches on the inside.
A head punch on the inside from Madison fails to land.
Dominator is working hard here but doesn't seem to be able to control effectively, up against the cage.
Nice body punch from Madison.
Madison tries a shoulder strike but it doesn't do any damage.
Madison misses with a hook from the clinch.
Madison lands a hook that snaps the head of Dominator backwards.
Madison is stalling here. The referee will be looking to step in if he doesn't pick up the pace.
An uppercut on the inside fails to land for Madison.
Dominator taking a breather.
Madison cracks Dominator with a nice body shot.
This has been an exciting period of action!
Madison with a knee to the head.
Madison throws a head punch that misses.
Madison misses with the head strike.
Dominator is working hard here but doesn't seem to be able to control effectively, up against the cage.
Dominator misses the knee to the body. Nice hip positioning from Madison.
That's two minutes gone in the round.
Madison lands a knee to the head.
Madison has Dominator pressed against the cage.
Madison lands on the inside with an uppercut.
Madison has a couple of punches blocked by Dominator.
Madison tries a shoulder strike but it doesn't do any damage.
Madison lands on the inside with an uppercut.
Dominator blocks a punch to the side of the head.
Madison tries a shoulder strike but it doesn't do any damage.
Dominator misses with a hook to the ribs.
Madison throws a head punch that misses.
A quick uppercut on the inside from Madison.
Madison struggles to land a body shot inside as Dominator controls his hands.
Madison swings away with an uppercut that misses.
A short body shot lands from Madison as the two fighters clinch.
A hook to the body from Madison.
Madison is leaning against Dominator and scores with a nice uppercut to the body.
Madison has a couple of punches blocked by Dominator.
That's three minutes gone in the round.
A short right from Madison on the inside.
Dominator is trying to slow down the pace in the clinch, to catch his breath.
Madison lands with a left to the head.
Dominator blocking some punches.
Madison prevents Dominator from breaking the clinch.
Madison has a couple of punches blocked by Dominator.
Madison working aggressively here.
Madison throws a head punch that misses.
Billy Madison has scored more points in the clinch so far.
Madison misses with some punches.
Madison goes for a body shot but it's blocked.
Madison lands a right hand.
Dominator takes a shot to the head.
Wooooo! Give it up for these two warriors! They are putting on a show!
Dominator slows down the pace here.
Madison lands a left hand.
Madison scores with a shoulder strike.
That's four minutes gone in the round.
Dominator tries a knee to the head but he's missed.
Madison looking to slow down the pace here.
Dominator goes for a body shot but it's blocked.
Dominator tries to land a knee to the head but misses.
Madison can't find room to land a body shot as Dominator controls the action.

Madison drops Dominator onto one knee with a big uppercut from the clinch! Dominator is propped up by the cage and works his way back to his feet!
Dominator is rocked!
Madison lands a hook to the side of the head.
Dominator is still on wobbly legs! Can Madison finish him?
Madison fails to land with a short punch on the inside.
Dominator tries a body shot but Madison blocks it.
Madison working aggressively here.
Madison throws a big uppercut that drops Dominator! More strikes from Madison and the referee jumps in to stop the fight! Dominator lies dazed against the cage as Madison celebrates with his cornermen!
Ladies and gentlemen, after 4:41 of round 2, we have a winner by way of TKO (Strikes). Billy Madison!
|
|
|
|
|
|
|
|
|
|
|
|
|
|
|
|
|
|
|
|
|
|
|
| S |
C
A |
G |
S |
C
B |
G |
|
S |
C |
G |
|
energy
A | B |
|
hype
A | B |
|
pop
A | B |
|
mgr
A | B |
|
FIGHT
RATING
54% |
|
|
|
|
|
|
|
|
|
|
