 |
ALWC1 Beat Down At The Bar PBP Commentary |
Undercard bout
|
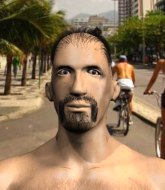
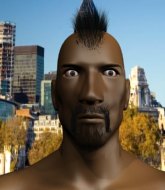
Coming up we have a lightweight MMA rules bout between Cristiano Ronaldo (ranked 0 p4p, 0 weight class) and Pj Veenstra (ranked 0 p4p, 0 weight class). Over to our ring announcer for the fighter introductions!
 |
|
 |
| 170 cm
25
165 lbs
5 - 8 - 0 |
|
165 cm
26
160 lbs
3 - 7 - 0 |
Good wrestling
Excellent boxer
Granite chin |
|
Good takedowns
Good kicks
Heavy handed |
|
| |
|
Ladies and gentlemen. This fight is 3 rounds, in the lightweight division.
Introducing the fighter to my left, fighting out of the red corner.
With a record of
5 - 8 - 0, fighting out of Amsterdam, Cristiano Ronaldo!
And introducing the fighter to my right, fighting out of the blue corner.
With a record of
3 - 7 - 0, fighting out of Amsterdam, Pj Veenstra!
The judges for this bout are Saam Ante, Wagner Zegers and Nard Betker.

The bell rings for round one and we are underway!
Horrible takedown by Veenstra or perhaps it was just good defense by Ronaldo which made him look bad.
A right-left combo lands from Ronaldo.
Ronaldo misses with a series of wild punches.
Veenstra showing good head movement there, avoiding the strikes from Ronaldo.
Veenstra tries a head kick but it misses.
Veenstra shoots in for a takedown but Ronaldo shows good takedown defense.
Veenstra fails with a takedown attempt from distance.
Cristiano Ronaldo has stuffed three takedown attempts in the round now. That's going to take a lot out of Pj Veenstra.
Veenstra walks straight into a jab right on the nose. That one stung - he's blinking and trying to clear his head.
Veenstra is looking to take this fight into the clinch.
Wow, both these guys are really going for it!
Ronaldo looks to land a combination but Veenstra avoids it well.
Veenstra scores with a jab to the jaw of his opponent.

It looks like Cristiano Ronaldo has been cut.
Pj Veenstra seems to be the more aggressive standup fighter in this bout.
We've seen a great period of action over the last minute or so - credit to both fighters for going all out!
Veenstra tries a switch kick but it misses it's target.
Ronaldo throws a leg kick but Veenstra sees it coming and checks it nicely.
Veenstra throws a right and a left that both miss.
Veenstra throws a head kick that misses.
Veenstra blocks a head kick by Ronaldo.

That's one minute gone in the round.
Ronaldo throws a head kick that looked like it stung.
Ronaldo misses with a jab and misses with a cross straight after too.
Ronaldo connects with a body shot that sends Veenstra's belly button to the back.
Ronaldo throws a series of punches but Veenstra avoids them all with ease.
Veenstra darts in trying to clinch
and Ronaldo counters with a left and a right that stings Veenstra.

Ronaldo lands a left and a right that send Veenstra crashing to the mat, dazed. Ronaldo thinks about following him to the mat but decides to wave him back up to his feet!

Veenstra is rocked!
The crowd are loving this. Great action here.
Ronaldo moves away from the strike by Veenstra.
Veenstra is still on wobbly legs! Can Ronaldo finish him?
Ronaldo looks to land a combination but Veenstra avoids it well.
Veenstra takes a shot to the body in his stride.
Oooooooooooh, not good. A low kick from Veenstra lands where it shouldn't have, right in the... well, you know what he did? He kicked him in the penis. He's injured, injured bad. The referee sends both fighters to their corners and Ronaldo has 5 minutes to recover. He's OK now though... a thumbs up from Ronaldo and we're back underway with a touch of gloves.
Veenstra seems to have recovered his senses.
Ronaldo tries a switch kick but it misses it's target.
Veenstra lands an overhand left. A wild punch that just about connected.
Ronaldo uses decent footwork to sidestep a right hand from Veenstra.
Like a baseball bat into the meat of his leg there - nice leg kick by Veenstra.
Ronaldo is breathing heavily.
Veenstra misses with a wild combination.

That's two minutes gone in the round.
Veenstra wants to clinch up but Ronaldo keeps it at a distance.
Ronaldo fakes low and throws an overhand right that catches Veenstra on the side of the head.
Ronaldo misses with an attempted mid kick.

Veenstra drives through with a takedown into Ronaldo's guard. Let's see what he can do from the top position.
The referee wants the fighters to be more active or he's going to reset them on the feet.
Veenstra passes easily into side control. Nice work.
Veenstra advances to full mount.

Veenstra is going oldschool here, as he tries to force Ronaldo to tap using a forearm choke. This isn't 1993 though, so Ronaldo shrugs it off.
Ronaldo is trying to get back to his feet but can't.
Veenstra putting on the heat here with some good ground and pound!
Veenstra looking for a guillotine from mount but Ronaldo is having none of it.

That's three minutes gone in the round.
Ronaldo in a bad spot here, taking shots to the head.
Veenstra has isolated one of Ronaldo's arms. Ronaldo looking to fight him off but Veenstra twists into an armbar. It's tight... Will he tap?? YES, he's tapped! This one is all over!
Ladies and gentlemen, after 3:38 of round 1, we have a winner by way of Submission (Armbar). Pj Veenstra!
|
|
|
|
|
|
|
|
|
|
|
|
|
|
|
|
|
|
|
|
|
|
|
| S |
C
A |
G |
S |
C
B |
G |
|
S |
C |
G |
|
energy
A | B |
|
hype
A | B |
|
pop
A | B |
|
mgr
A | B |
|
FIGHT
RATING
87% |
|
|
|
|
|
|
|
Undercard bout
|
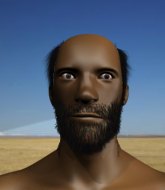
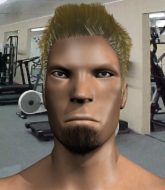
Coming up we have a bantamweight MMA rules bout between Brais Punk (ranked 0 p4p, 0 weight class) and Chris Blair (ranked 0 p4p, 0 weight class). Chris Blair will no doubt be looking to use his reach advantage to good effect.
 |
|
 |
| 170 cm
21
145 lbs
5 - 7 - 0 |
|
185 cm
23
140 lbs
0 - 1 - 0 |
BJJ Blue Belt
Brawler
Very quick |
|
BJJ Blue Belt
Counter striker
Very confident |
|
| |
|
Ladies and gentlemen. This fight is 3 rounds, in the bantamweight division.
Introducing the fighter to my left, fighting out of the red corner.
With a record of
5 - 7 - 0, fighting out of Amsterdam, Brais Punk!
And introducing the fighter to my right, fighting out of the blue corner.
With a record of
0 - 1 - 0, fighting out of Amsterdam, Chris Blair!
The judges for this bout are Daniel Blasius, Aafke Stam and Paul Aken.
The bell rings for round one and we are underway!
Blair misses with a two punch combination.
Blair misses with a few strikes there.
Blair is looking to land body kicks.
Blair closes the distance and clinches up with Punk, looking for a takedown. Blair pushes Punk against the cage but Punk circles to the side and manages to break the clinch.

Punk gets in close and instigates a clinch.

Punk pulls Blair into guard.
Punk avoiding any damage from the ground and pound.
Blair wants to stand but Punk has a closed guard, so he can't escape.
Punk is pulling down on Blair's head. It's preventing any offense from Blair, at least for the moment.
Blair throwing strikes but missing.
Punk has his hands on Blair's head, controlling the position.
Blair has the superior BJJ but he's also working some ground strikes into his gameplan.
That's one minute gone in the round.
Blair is looking to work some ground and pound but Punk has wrist control.
Punk manages to sweep nicely, so he's now on top. Blair manages to get himself to full guard.
Blair trying to control the position.
Punk pushes down on Blair's leg and manages to get into half guard.

Punk decides he's had enough of the ground and stands up.
Nice body kick there by Blair.
Punk tries to clinch up against the cage, rushing in the close the distance. Blair manages to break the clinch and circles back to the middle of the mat.
That's two minutes gone in the round.
Punk fails with a takedown attempt.
Punk lands a big head kick that sends Blair tumbling to the mat! Punk takes a step backwards and waves Blair back to his feet - he wants the finish!
Blair is rocked!
This is a great period of action - very entertaining stuff!
Punk misses with a few strikes there.
Brais Punk seems to be the more aggressive standup fighter in this bout.
Punk misses the shot to the body.
Blair gets taken down but at least he's managed to land in guard.
Blair wants to stand up but Punk is controlling him.
Blair working a defensive guard here.
Punk landing some decent shots from guard.
That's three minutes gone in the round.
Punk content to stall in guard here.
Blair bucks up whilst keeping hold of a body lock, managing to reverse the position. Now he's in top in Punk's guard.
Punk utilising some decent striking defenses from the guard, preventing the ground and pound.
Punk manages to sweep nicely, so he's now on top. Blair manages to get himself to full guard.
Punk trying to control but Blair is working from the bottom.
Punk with a nice head shot there.
Blair is trying to control the position from the bottom.
Punk is frustrating his opponent with some stalling tactics from top position.

That's four minutes gone in the round.
Blair throwing some rather feeble looking strikes off his back.
Punk might be looking to lock onto one of his opponent's long limbs for a submission, whilst we're on the ground.
Blair is working the butterfly guard. He manages to land a nice scissor sweep and is now in half guard on the top. Nice move.
Punk works his way to full guard. Good work.
Punk bucks up whilst keeping hold of a body lock, managing to reverse the position. Now he's in top in Blair's guard.
We've seen a great period of action over the last minute or so - credit to both fighters for going all out!
Punk postures up.
Punk scoring with some ground and pound.
Punk not doing a lot at the moment. He'll have to show some more aggression or the fight will get stood up.
The crowd are going absolutely nuts as the round comes to an end - what a fantastic round of action!
Punk wants to control from the top but Blair keeps moving.
Blair controls Punk momentarily but Punk frees himself.
And thats the end of the round the fighters go back to their corners.
Brais Punk dominated that round.
That's the end of the interval. I'm sure that seemed a lot quicker than a minute for our two fighters! Back to the action.

Blair dives in and grabs Punk's left leg, looking for a takedown. Punk pushes down on Blair's head and hops out.
Punk lands a big head kick that sends Blair tumbling to the mat! Punk takes a step backwards and waves Blair back to his feet - he wants the finish!
Blair is still on wobbly legs! Can Punk finish him?
Wooooo! Give it up for these two warriors! They are putting on a show!
Punk misses with a hook.
Punk shoots in for a takedown but doesn't get it.
Punk shoots in from a long way out. He's driving through with the takedown attempt and he eventually gets it, landing in Blair's guard.
The fighters are pressed up against the cage, both looking to find a bit of space to work.
Punk is stalling in the full guard.
Punk decides to stand up and beckons his opponent to follow.
Blair displays good takedown defense there as he swats away a double leg from Punk.
Blair fails in his attempt to clinch.
Blair seems to have recovered his senses.
Blair misses with a half-hearted attempt at a head kick.
Punk is looking to clinch.
That's one minute gone in the round.
Punk clinches with his opponent.
Blair wants to strike at distance but he can't break free of the clinch.
Punk manages to pull guard.
Punk not looking particularly offensive just at the moment.
Punk pulls Blair in to control the position.
Blair throwing strikes from guard but Punk blocks nicely.
Punk is trying to keep Blair in close.

The ref stands the fighters back up because Brais Punk just wasn't active enough.

Blair moves into range and clinches up with Punk.
That's two minutes gone in the round.
Punk decides to pull guard.
Punk can't keep his opponent in guard - Blair advances to half guard, no doubt looking to mount.
The ref warns both fighters not to hold the cage as they work up against the meshing.
Blair lands with a punch from half guard.
Punk tries to roll over but Blair keeps him under control.
The crowd cheering loudly, showing their appreciation for the quality fight we're seeing here.
Punk is working hard here to advance position.
Punk works his way to full guard. Good work.
Punk preventing the ground and pound from doing any damage.
Blair has decided he wants to stand but the closed guard of Punk is proving hard to escape from.
Blair is a painfully thin specimen of a man. You do wonder whether a good body kick would snap him clean in two.
That's three minutes gone in the round.
Punk is trying to control the position but Blair postures up.
Blair throws an elbow that misses. Punk uses the momentum to reverse the position. He's now in Blair's guard. Nice move by Punk!
Blair escapes his hips to the side and looks to be working for an armbar. Punk gives him a little smile and shakes his head. No chance.
Blair wants to sweep but no luck.
Punk looking to pass the guard.
Blair trying to control the position.
Punk got a little sloppy there for a moment and Blair has worked his way into a loose triangle - can he finish it?! No, Punk has managed to get both his arms back between Blair's legs - danger averted.
Blair is breathing heavily.
That's four minutes gone in the round.
Punk cracks Blair with a solid left hand.
Blair looks to be working for a triangle here. Oh, it looks like he might have it! Punk has picked Blair up and slammed him! Blair can't keep hold of the triangle and Punk manages to pass to side control!
Punk tries to move into full mount but can't pass Blair's legs.
Punk trying to control the action but Blair is working from the bottom.
Punk working the ground and pound.
Punk is looking to take a break and control but Blair is keeping him honest, looking to work from the bottom.
The crowd are going absolutely nuts as the round comes to an end - what a fantastic round of action!
And thats the end of the round the fighters go back to their corners.
Brais Punk dominated that second round.
The fighters' corners scream their final instructions, as the referee calls time. Here we go, back to the action! And we move into the final round!

Punk darts in and clinches Blair up against the cage.
Punk ties up his opponent against the cage and manages to drag the fight down to the ground. Punk no doubt will be looking to work submissions from his guard.
Punk has control of Blair's left arm, preventing Blair from doing any damage.
Blair is looking to stand up but Punk won't let him.

Punk is throwing his legs up, looking for submissions. Blair is aware though and is defending well.
Blair throwing strikes but missing.
Punk pulls Blair in close to prevent any damage.
Punk trying to control the position.
That's one minute gone in the round.
Blair trying to control but Punk is working from the bottom.
Blair is sitting in guard, working some ground and pound.
Blair is looking to work some ground and pound but Punk has wrist control.
Blair wants to pass the guard but Punk is keeping the position.
Punk keeping moving, preventing Blair from controlling successfully.
There's a bit of a scramble here and now Punk is on top in guard.
Brais Punk overall seems to be getting the better of the ground position in the fight so far.
Punk works a leg free and moves into half guard.
That's two minutes gone in the round.
Punk passes the half guard and he's now in mount! Big trouble for Blair!
Blair tries to hold on but Punk postures up.
Blair is in all sorts of trouble here.
Blair is trying to reverse the position but instead Punk has taken his back - oops!
Blair takes a big intake of breath there - he's definitely tired.
I really don't envy Blair right now.
Blair trying to control the action but Punk just sinks the hooks in.
Blair is trying to break free.
We've seen a great period of action over the last minute or so - credit to both fighters for going all out!
Punk trying to control.
Punk lands with a nice looking elbow that stuns Blair.
That's three minutes gone in the round.
Punk lands with a nice looking elbow that stuns Blair.
Blair holding both Punk 's hands and preventing any damage.
Blair grimaces as he takes a shot to the body.
Punk avoiding Blair 's attempts to control his hands.
Blair might have to switch it up a bit here because his efforts to control Punk kaven't been going to plan, at least at the current moment in time.
Punk has his opponent's back and is working for the choke.
The crowd hopeful of a finish here - Punk's supporters are on their feet, screaming for him to go for the rear naked choke.
That's four minutes gone in the round.
Blair is trying to control the position but Punk manages to sink in the RNC - Blair is forced to tap!
Ladies and gentlemen, after 4:16 of round 3, we have a winner by way of Submission (RNC). Brais Punk!
|
|
|
|
|
|
|
|
|
|
|
|
|
|
|
|
|
|
|
|
|
|
|
| S |
C
A |
G |
S |
C
B |
G |
|
S |
C |
G |
|
energy
A | B |
|
hype
A | B |
|
pop
A | B |
|
mgr
A | B |
|
FIGHT
RATING
74% |
|
|
|
|
|
|
|
Undercard bout
|
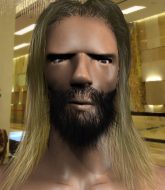
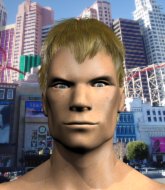
Coming up we have a featherweight MMA rules bout between Viimeinen Toivo (ranked 0 p4p, 0 weight class) and Bruce Lee (ranked 0 p4p, 0 weight class). Over to our ring announcer for the fighter introductions!
 |
|
 |
| 178 cm
29
151 lbs
11 - 17 - 0 |
|
172 cm
25
155 lbs
1 - 3 - 0 |
BJJ White Belt
Excellent MT
Experienced |
|
BJJ Purple Belt
Dangerous knees
Heavy handed |
|
| |
|
Ladies and gentlemen. This fight is 3 rounds, in the featherweight division.
Introducing the fighter to my left, fighting out of the red corner.
With a record of
11 - 17 - 0, fighting out of Amsterdam, Viimeinen Toivo!
And introducing the fighter to my right, fighting out of the blue corner.
With a record of
1 - 3 - 0, fighting out of Amsterdam, Bruce Lee!
The judges for this bout are Paulsen Ambrosius, Daniel Blasius and Nard Betker.
The bell rings for round one and we are underway!
Toivo throws a feint and then finishes with a kick to the body.
Lee is looking to clinch but Toivo is avoiding it.
Toivo scores with a head kick. Lee tried to block it but didn't get his arm up in time.
Lee tries for a takedown but Toivo sees it coming a mile off and avoids it easily.
Toivo pulls out of a head kick attempt.
Lee checks a leg kick.
Lee drives through with a takedown into Toivo's guard. Let's see what he can do from the top position.
We've had a lack of effective grappling in the last minute or so, which could well see a referee standup.
Lee drops back for a leg here. A bit of a high risk move... He's looking for a kneebar by the looks of things. Now both of them are looking for submissions. Lee seems to have locked his on tight now - Toivo screams in pain and taps out furiously! It certainly was a high risk move but it's paid off for Lee, as he picks up the win!
Ladies and gentlemen, after 0:46 of round 1, we have a winner by way of Submission (Kneebar). Bruce Lee!
|
|
|
|
|
|
|
|
|
|
|
|
|
|
|
|
|
|
|
|
|
|
|
| S |
C
A |
G |
S |
C
B |
G |
|
S |
C |
G |
|
energy
A | B |
|
hype
A | B |
|
pop
A | B |
|
mgr
A | B |
|
FIGHT
RATING
49% |
|
|
|
|
|
|
|
Undercard bout
|
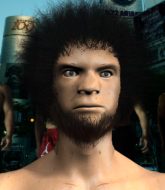
Coming up we have a bantamweight MMA rules bout between Josh Harper (ranked 0 p4p, 0 weight class) and Beavis BB (ranked 0 p4p, 0 weight class). These two fighters really are very evenly matched on the feet - it will be fascinating to see who can assert themselves in that aspect of the fight.
 |
|
 |
| 177 cm
27
145 lbs
4 - 3 - 0 |
|
175 cm
19
142 lbs
0 - 0 - 0 |
BJJ White Belt
Solid boxing
Experienced |
|
Good wrestler
Decent boxing
Inexperienced |
|
| |
|
Ladies and gentlemen. This fight is 3 rounds, in the bantamweight division.
Introducing the fighter to my left, fighting out of the red corner.
With a record of
4 - 3 - 0, fighting out of Amsterdam, Josh Harper!
And introducing the fighter to my right, fighting out of the blue corner.
With a record of
0 - 0 - 0, fighting out of Amsterdam, Beavis BB!
The judges for this bout are Nard Betker, Wagner Zegers and Aafke Stam.
The bell rings for round one and we are underway!
Harper lands a jab-cross combination.
A shot to the liver by BB. Beautiful body shot.
Harper lands a two punch combo.
Harper keeping a good distance there, avoiding the body shot.
Harper scores with a push kick.
BB misses with a body shot
and Harper makes the exchange count by landing a cracking kick to the body. BB really felt that one!
Harper stalks BB and leaps in with a furious combination of punches. Uppercuts and crosses smash into BB's face. BB staggers backwards, shaken.
BB is on the wrong end of a nice combination from Harper.
BB moves out of range of the leg kick from Harper.
A swing and a miss from BB.
Harper misses with an attempted mid kick.
BB throws an uppercut from half a mile away. Harper sees it coming and avoids it easily.
Fantastic stuff here - a very entertaining period of action, which has drawn cheers from the crowd.
Harper lands a high kick!
BB throws a body punch but Harper moves out of range.
Harper finds nothing but air with that leg kick attempt.
BB misses with a shot to the body
and Harper counters with an inside leg kick.
Harper fails to land with the punch combination there - jab, cross, hook, miss, miss, miss.
Harper connects with a body shot.
Harper misses with a two punch combination.
That's one minute gone in the round.
Harper throws a series of punches but BB avoids them all with ease.
BB swings and misses with a hook to the body.
Josh Harper seems to be the more aggressive standup fighter in this bout.
BB misses with a wild body shot.
Harper connects with a looping right hand.
Harper feints with a shoulder and throws a nice leg kick to BB's calf.
BB throws the left hand but Harper avoids the punch easily.
BB swings and misses with a hook to the body.
BB throws a body punch but Harper moves out of range.
BB takes a swing at Harper's ribcage but misses.
Harper displays some good footwork, moving neatly out of range as BB throws out the jab.
Harper scores with a nice looking left hook and follows it up with an uppercut!
Harper throws a head kick but BB moves out of range.
Harper swinging wildly here.
Harper lands with a thumping leg kick.
Harper misses with a jab and misses with a cross straight after too.
BB misses with a body shot.
That's two minutes gone in the round.
BB misses the shot to the body.
BB throws a hook but Harper avoids it easily.
BB misses with a telegraphed body shot
and Harper counters with a two punch combo.
BB throws a combination but comes up with nothing but fresh air.
Both fighters circling a little - Harper finishes the exchange with a kick to the body.
Harper lands with a nice low kick. That'll leave a bruise.
BB blocks a head kick by Harper.
Wooooo! Give it up for these two warriors! They are putting on a show!
BB connects nicely with a jab. Noted by the judges no doubt.
Harper scores with a nice head shot.
Harper tries to land with a swinging hook to the body but BB was well out of range. Poor timing from Harper.
Harper lands a jab, followed by a cross and another cross, as BB backs up against the cage.
A right-left combo lands from Harper.
BB misses the shot to the body.
BB swings for the body but Harper moves out of range.
BB is throwing a lot of body shots here, looking to wear down Harper rather than just go for the knockout.
BB fakes high and swings low for a body shot but Harper manages to avoid it.
Harper slips a jab and a cross from BB.
That's three minutes gone in the round.
Harper lands a nice looking body kick.
Harper walks into a jab.
BB ducks down and throws a hook to the body.
BB is the aggressor but that punch slipped nicely by Harper.
BB rushes forward with a series of wild hooks but Harper moves out of range and avoids them all easily.
Harper ducks low and lands a nice hook to the body of his opponent.
BB takes a body punch that cleary hurt but he's trying not to show any weakness.
Harper misses with a jab and misses with a cross straight after too.
BB dodges the punch combination from Harper.
Harper misses with the combination.
Harper throws the kick towards the body but BB avoids it.
Harper fails to land with a series of punches.
Harper misses with a jab and misses with a cross straight after too.
Harper gets cracked there but stands up to it.
That's four minutes gone in the round.
BB throws a predictable looking body shot
and Harper makes him pay by landing a thudding low kick.
A jab from BB finds it's way through Harper's defenses.
Harper defending well as BB loads up on a big left hand.
Harper ducks under a wild hook from BB.
The crowd are loving this. Great action here.
A shot to the body from BB misses
and Harper counters with a one-two to the body.
Harper moves his head to the side to avoid a jab but walks straight into a cross.

Harper is rocked!
BB throws a monster overhand right that drops Harper! BB follows up with more strikes from mount and the fight is all over!
Ladies and gentlemen, after 4:31 of round 1, we have a winner by way of TKO (Strikes). Beavis BB!
|
|
|
|
|
|
|
|
|
|
|
|
|
|
|
|
|
|
|
|
|
|
|
| S |
C
A |
G |
S |
C
B |
G |
|
S |
C |
G |
|
energy
A | B |
|
hype
A | B |
|
pop
A | B |
|
mgr
A | B |
|
FIGHT
RATING
65% |
|
|
|
|
|
|
|
Undercard bout
|
Coming up we have a bantamweight MMA rules bout between Rocky Bullwinkle (ranked 0 p4p, 0 weight class) and Jamsha Gonzales (ranked 0 p4p, 0 weight class). Over to our ring announcer for the fighter introductions!
 |
|
 |
| 185 cm
25
145 lbs
7 - 7 - 1 |
|
180 cm
26
136 lbs
3 - 13 - 0 |
Good takedowns
Good knees
Granite chin |
|
BJJ Purple Belt
Decent boxing
Solid chin |
|
| |
|
Ladies and gentlemen. This fight is 3 rounds, in the bantamweight division.
Introducing the fighter to my left, fighting out of the red corner.
With a record of
7 - 7 - 1, fighting out of Amsterdam, Rocky Bullwinkle!
And introducing the fighter to my right, fighting out of the blue corner.
With a record of
3 - 13 - 0, fighting out of Amsterdam, Jamsha Gonzales!
The judges for this bout are Saam Ante, Radbod Blank and Albert Achterberg.
The bell rings for round one and we are underway!
Bullwinkle tries to close the distance and clinch up but Gonzales swats him away and circles back towards the center.
Gonzales throws a good cross that connects.
Gonzales lands a straight punch to the body, keeping Bullwinkle at a distance.
Bullwinkle wants to clinch up but Gonzales keeps it at a distance.
Gonzales has a takedown stuffed.
Bullwinkle pushes Gonzales up against the cage in a clinch.

Bullwinkle pushes off and circles away, back to the middle of the mat.
Gonzales throws a combination but it was largely blocked by Bullwinkle.
Bullwinkle clinches with his opponent.
Gonzales trying to land knees to the body.
Bullwinkle gets double underhooks to prevent a takedown attempt from Gonzales.
Gonzales is trying to break free.
Bullwinkle has picked Gonzales up - he's going for a ride! Bullwinkle dumps his opponent to the mat with a thud and settles into half guard.
The fighters are pressed up against the cage, both looking to find a bit of space to work.
Bullwinkle is trying a forearm choke
I don't think that's going to do much at this level of the game.
Bullwinkle really does look like a pencil wearing a pair of gloves. Let's hope he has a gameplan to suit that ridiculous body shape.
Bullwinkle decides to stand up.
That's one minute gone in the round.
Nice takedown defense from Bullwinkle. No joy for Gonzales on that attempt.
Rocky Bullwinkle has stuffed three takedown attempts in the round now. That's going to take a lot out of Jamsha Gonzales.
Gonzales blocks a head kick by Bullwinkle.
Bullwinkle closes the distance and scores a nice trip takedown into half guard. Gonzales did well to prevent Bullwinkle getting side control.
Bullwinkle landing with strikes to the body and head, softening up his opponent.
Bullwinkle throwing shots but they're hitting the canvas more than the man.
Bullwinkle wants to free his trapped foot but Gonzales is holding on for dear life with his legs.
Bullwinkle wants to work for an arm triangle but Gonzales is really keeping half guard well and defending the submission attempt.
That's two minutes gone in the round.
Gonzales looking for submissions from an awkward position here.
Gonzales keeping his head moving to avoid the ground and pound.
Bullwinkle throwing shots but they're hitting the canvas more than the man.
Bullwinkle has been looking to land a fair amount of strikes on the ground. He might be looking to soften his opponent up in order to work for a submission.
Bullwinkle thumps the canvas. Not on purpose obviously - he just missed Gonzales's head.
Bullwinkle is trying for a kimura here. Gonzales looks like he's in a lot of pain... and he's tapping out! Bullwinkle wins by kimura!
Ladies and gentlemen, after 2:59 of round 1, we have a winner by way of Submission (Kimura). Rocky Bullwinkle!
|
|
|
|
|
|
|
|
|
|
|
|
|
|
|
|
|
|
|
|
|
|
|
| S |
C
A |
G |
S |
C
B |
G |
|
S |
C |
G |
|
energy
A | B |
|
hype
A | B |
|
pop
A | B |
|
mgr
A | B |
|
FIGHT
RATING
42% |
|
|
|
|
|
|
|
Undercard bout
|
Coming up we have a lightweight MMA rules bout between Steve Limmen (ranked 0 p4p, 0 weight class) and Jordan Swift (ranked 0 p4p, 0 weight class). Steve Limmen could well score a knockout today. He has the power to get to Jordan Swift's chin.
 |
|
 |
| 175 cm
29
165 lbs
11 - 8 - 2 |
|
170 cm
25
167 lbs
7 - 12 - 0 |
BJJ White Belt
Excellent boxer
Very quick |
|
BJJ White Belt
World class boxer
Good gas tank |
|
| |
|
Ladies and gentlemen. This fight is 3 rounds, in the lightweight division.
Introducing the fighter to my left, fighting out of the red corner.
With a record of
11 - 8 - 2, fighting out of Amsterdam, Steve Limmen!
And introducing the fighter to my right, fighting out of the blue corner.
With a record of
7 - 12 - 0, fighting out of Amsterdam, Jordan Swift!
The judges for this bout are Nard Betker, Wagner Zegers and Daniel Blasius.
The bell rings for round one and we are underway!
Swift throws a lazy right hand but Limmen sees it coming a mile off and sidesteps it easily.
Swift throws a body punch but Limmen moves out of range.
Swift looks shocked there as he takes a right hand to the temple.
Swift throws an ugly left hook that misses
and Limmen counters with a nice uppercut.
Swift lands with a cross to side of his opponent's head.
Limmen tries to bum rush Swift with a series of wild strikes but Swift uses good footwork to avoid the assault.
Limmen misses with a double jab.
Swift sizes up Limmen with a pawing jab and scores with a straight right down the middle.
A jab lands there for Limmen.
Limmen scores with a body shot.
Limmen scores with a nice strike.
This has been an exciting period of action!
Limmen waving his hands out in front of him, looking to distract Swift.
Swift misses with the combination.
Limmen stooping low to avoid any incoming strikes and then lunges in with an uppercut come cross that lands flush.
Swift is rocked!
Swift throws an ugly left hook that misses
and Limmen counters with a big left hand that crumples Swift! He was out before he hit the floor! Brutal knockout!
Ladies and gentlemen, after 0:53 of round 1, we have a winner by way of KO (Punch). Steve Limmen!
Steve Limmen decided to hype himself up post fight. It was going well but he went on about it a bit too long and the crowd turned on him a little.
|
|
|
|
|
|
|
|
|
|
|
|
|
|
|
|
|
|
|
|
|
|
|
| S |
C
A |
G |
S |
C
B |
G |
|
S |
C |
G |
|
energy
A | B |
|
hype
A | B |
|
pop
A | B |
|
mgr
A | B |
|
FIGHT
RATING
89% |
|
|
|
|
|
|
|
Undercard bout
|
Coming up we have a lightweight MMA rules bout between Adams Kovalsky (ranked 0 p4p, 0 weight class) and Stan Bickens (ranked 0 p4p, 0 weight class). The key to victory for Adams Kovalsky has got to be keeping the fight on the feet.
 |
|
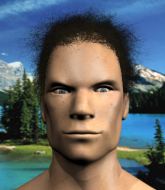 |
| 170 cm
19
155 lbs
1 - 0 - 0 |
|
175 cm
25
163 lbs
0 - 0 - 0 |
BJJ Blue Belt
Brawler
Good chin |
|
Good takedowns
Counter striker
Solid chin |
|
| |
|
Ladies and gentlemen. This fight is 3 rounds, in the lightweight division.
Introducing the fighter to my left, fighting out of the red corner.
With a record of
1 - 0 - 0, fighting out of Amsterdam, Adams Kovalsky!
And introducing the fighter to my right, fighting out of the blue corner.
With a record of
0 - 0 - 0, fighting out of Amsterdam, Stan Bickens!
The judges for this bout are Wagner Zegers, Radbod Blank and Aafke Stam.
The bell rings for round one and we are underway!
Kovalsky closes the distance and gets a trip takedown into side control. Bickens quickly recovers to half guard.
Kovalsky is looking for a kimura but he's never going to get it from there.
Bickens gets back to full guard.
Bickens wants to sweep but no luck.
Kovalsky stands up and looks to throw the legs aside to pass to side control. Bickens swivels though and keeps the full guard.
Kovalsky has to be careful here, sitting in the guard of a superior BJJ player.
Kovalsky is posturing up here but Bickens has hold of an arm and he's gone for an armbar! Kovalsky tries to roll out but it's too tight and Kovalsky has to tap! Slick submission there by Bickens!
Ladies and gentlemen, after 0:59 of round 1, we have a winner by way of Submission (Armbar). Stan Bickens!
|
|
|
|
|
|
|
|
|
|
|
|
|
|
|
|
|
|
|
|
|
|
|
| S |
C
A |
G |
S |
C
B |
G |
|
S |
C |
G |
|
energy
A | B |
|
hype
A | B |
|
pop
A | B |
|
mgr
A | B |
|
FIGHT
RATING
36% |
|
|
|
|
|
|
|
Undercard bout
|
Coming up we have a lightweight MMA rules bout between Johnny The Rocket (ranked 0 p4p, 0 weight class) and Sid Krakken (ranked 0 p4p, 0 weight class). The Rocket comes to the cage accompanied by Airplanes - B.O.B. and Hayley Williams. Over to our ring announcer for the fighter introductions!
 |
|
 |
| 176 cm
25
160 lbs
0 - 0 - 0 |
|
185 cm
25
162 lbs
1 - 0 - 0 |
BJJ Brown Belt
Counter striker
KO power |
|
BJJ White Belt
Excellent boxer
Heavy handed |
|
| |
|
Ladies and gentlemen. This fight is 3 rounds, in the lightweight division.
Introducing the fighter to my left, fighting out of the red corner.
With a record of
0 - 0 - 0, fighting out of Amsterdam, Johnny The Rocket!
And introducing the fighter to my right, fighting out of the blue corner.
With a record of
1 - 0 - 0, fighting out of Amsterdam, Sid Krakken!
The judges for this bout are Paulsen Ambrosius, Saam Ante and Nard Betker.
The bell rings for round one and we are underway!
Krakken throws out a token jab with nothing on it.
The Rocket doesn't manage to clinch there - Krakken circles away.
The Rocket tries to clinch up
and Krakken counters with a shot to the ribs. That looked like it hurt.
Krakken looks to score with a jab to the body but The Rocket is just out of range.
The Rocket tries to grapple but his opponent circles
and Krakken counters with a shot to the ribs. That looked like it hurt.
Krakken just misses with a punch to the body.
No joy there for Krakken, who threw a few shots but didn't land.
The Rocket wants to clinch.
The Rocket tries to grapple but his opponent circles
and Krakken connects with a straight left hand counter down the middle.
That's one minute gone in the round.
Krakken swings widly with a right hand
and The Rocket counters with a straight right hand.
The Rocket moves to clinch but Krakken breaks away
and Krakken counters with a good right hand that lands right on the jaw.
Krakken misses with a body shot.
Krakken throws out a loose jab but The Rocket uses good head movement to avoid it.
The fighters circling - Krakken throws out the jab but it was never going to land.
Krakken throws an ugly left hook that misses
and The Rocket cracks him with a counter punch right on the button.
Krakken throws a hook to the body but it doesn't connect.
Krakken fakes high and swings low for a body shot but The Rocket manages to avoid it.
The Rocket tries to clinch up
enabling Krakken to counter with a crisp jab.
Sid Krakken seems to be the more aggressive standup fighter in this bout.
Krakken misses with a hook.
That's two minutes gone in the round.
The Rocket closes the distance looking to clinch
and Krakken connects with a straight left hand counter down the middle.
The fans in attendance giving it up for the two fighters, who have really let it all hang out in the last minute or so!
The Rocket is looking to take this fight into the clinch.
The Rocket keeping his hands up high there, blocking the jab from Krakken.
The Rocket keeping a good distance there, avoiding the body shot.
The Rocket moves out of range of the strikes.
Good exchange - Krakken coming out on top.
The Rocket darts in trying to clinch
and Krakken counters with a lovely shot to the body.
The Rocket takes an uppercut right on the button but keeps his composure.
The Rocket takes a punch right to his stomach. That took the wind out of him momentarily.
That's three minutes gone in the round.
Krakken misses the shot to the body.
The Rocket tries to close the distance and clinch up but Krakken swats him away and circles back towards the center.
Krakken missing with a left hand there. The Rocket was out of range so wasted energy throwing that one.
The Rocket lands a slapping body shot.
Krakken pushing out the jab but it's not landing.
The Rocket moves out of range of the strikes.
Krakken misses with a body shot. Nice footwork from The Rocket.
The Rocket tries to clinch but is not successful on this occasion.
Krakken throws a jab to the body, straight down the pipe. Boom. That sent The Rocket stumbling backwards but he manages to regain his composure quickly.
Krakken misses with a body shot.
A telegraphed right hand from Krakken misses the target.
Krakken misses with a telegraphed body shot
and The Rocket makes him pay by landing a nice hook to the body before moving out of range.
That's four minutes gone in the round.
Krakken stooping low to avoid any incoming strikes and then lunges in with an uppercut come cross that lands flush.
The Rocket on the wrong end of a vicious looking body shot.
Krakken misses with a looping left.
Krakken ducks down and throws a hook to the body but The Rocket moves away.
The Rocket tries to clinch but Krakken is having none of it.
The Rocket tries to clinch up against the cage, rushing in the close the distance. Krakken manages to break the clinch and circles back to the middle of the mat.
Krakken misses with an uppercut.
This has been an exciting period of action!
The Rocket walks into a stiff left hand from Krakken.
Krakken throws a monster uppercut resembling something out of street fighter but it doesn't land.
The Rocket tries to clinch up.
As the round comes to an end the crowd are showing their appreciation for a great round of action.
A looping hook to the body misses from Krakken. The Rocket does a little dance to reset his feet.
Krakken goes to the watering hole and comes back with a big thumbs up from the judges as he scores a three punch combo.
The Rocket is rocked!
It looks like Johnny The Rocket has been cut.
The Rocket ducks down and throws a hook to the body but Krakken moves away.
Oh The Rocket is still all over the place! His legs are completely gone! Will he be able to recover?!!
Krakken drops The Rocket with a huge uppercut! The Rocket drops to the floor like a sack of potatoes. Krakken is raining down punches and the ref stops the fight! This one is all over!
Ladies and gentlemen, after 4:55 of round 1, we have a winner by way of TKO (Strikes). Sid Krakken!
|
|
|
|
|
|
|
|
|
|
|
|
|
|
|
|
|
|
|
|
|
|
|
| S |
C
A |
G |
S |
C
B |
G |
|
S |
C |
G |
|
energy
A | B |
|
hype
A | B |
|
pop
A | B |
|
mgr
A | B |
|
FIGHT
RATING
48% |
|
|
|
|
|
|
|
Co-main event
|
Coming up we have a featherweight MMA rules bout between Jack Handy (ranked 0 p4p, 0 weight class) and Chad Holdren (ranked 0 p4p, 0 weight class). The atmosphere really building for this one as we go over to our ring announcer for the fighter introductions!
 |
|
 |
| 175 cm
25
153 lbs
0 - 0 - 0 |
|
170 cm
25
155 lbs
1 - 0 - 0 |
BJJ White Belt
Excellent boxer
Granite chin |
|
BJJ White Belt
Excellent boxer
Determined |
|
| |
|
Ladies and gentlemen. This fight is 3 rounds, in the featherweight division.
Introducing the fighter to my left, fighting out of the red corner.
With a record of
0 - 0 - 0, fighting out of Amsterdam, Jack Handy!
And introducing the fighter to my right, fighting out of the blue corner.
With a record of
1 - 0 - 0, fighting out of Amsterdam, Chad Holdren!
The judges for this bout are Daniel Blasius, Radbod Blank and Aafke Stam.
The bell rings for round one and we are underway!
Handy misses with an uppercut. Holdren saw that one coming.
Handy just misses with a punch to the body.
Handy misses the shot to the body.
Holdren dips down and scores with a jab to the body.
Holdren ducks under an overhand right and circles away with a smile on his face.
Handy fakes a jab and then connects with a hook.
Handy throws a sloppy body shot
and Holdren counters with a stiff right hand.
A looping hook to the body misses from Handy. Holdren does a little dance to reset his feet.
Holdren takes a punch right to his stomach. That took the wind out of him momentarily.
Handy throws a series of punches but Holdren avoids them all with ease.
Holdren slips under a jab from Handy.
Handy just misses with a punch to the body.
Handy misses with a hook.
Handy is looking to wear down Holdren with body shots, infact he's throwing more body shots than head shots at the moment.
Handy feints a straight left to the body, then turns around with a flashy move and hits Holdrens jaw with a dramatic spinning back fist!
Handy swings for the body but Holdren moves out of range.
Holdren throws a jab when Handy was well out of range.
Holdren fakes low and throws an overhand right that catches Handy on the side of the head.
The crowd are loving this. Great action here.
Boom, another hit is landed. "You're gunna get knocked out" taunts Handy, as that shot connected.
Handy throws a hook to the body but it doesn't connect.
That's one minute gone in the round.
Holdren ducks under a wild hook from Handy.
Handy defending well as Holdren loads up on a big left hand.
Holdren missing with a left hand there. Handy was out of range so wasted energy throwing that one.
Handy ducks under an overhand right and circles away with a smile on his face.
Donk. Holdren catches Handy right on the button with a cross.
It looks like Jack Handy has been cut.
Handy swings wildly with a hook that is half blocked by Holdren.
Holdren connects with a body shot that sends Handy's belly button to the back.
Holdren walks straight into a jab right on the nose. That one stung - he's blinking and trying to clear his head.
Handy keeping a good distance there, avoiding the body shot.
Handy takes a hook to the side of the head. I wonder if that's got his ears ringing.
Handy moves into range and throws a combination. A nice jab followed by a hook to the body.
Holdren throws a hook to the body but it doesn't connect.
Wooooo! Give it up for these two warriors! They are putting on a show!
Handy throws a jab when Holdren was well out of range.
Handy darts in and out, connecting with a jab.
Holdren throws a big shot that misses.
Handy scores with a straight right hand, right through his opponent's guard.
A looping hook to the body misses from Holdren. Handy does a little dance to reset his feet.
That's two minutes gone in the round.
Holdren misses with a body shot.
Holdren looks to score with a combo but nothing lands.
Handy throws a jab but it's blocked by Holdren.
Handy connects with a hook to the side of his opponent's head.
Holdren takes a body punch that cleary hurt but he's trying not to show any weakness.
Handy thuds his right hand into Holdren's forehead from close range. That could be painful for both fighters.
A decent looking cross lands there for Holdren.
Handy clobbers Holdren with an overhand right that has the crowd gasping. That made a horrendous noise.
Holdren is rocked!
Holdren ducks under a wild hook from Handy.
Handy sizes up Holdren with a pawing jab and scores with a straight right down the middle.
Holdren is still on wobbly legs! Can Handy finish him?
Handy swinging wildly here.
Holdren seems to have recovered his senses.
Nice body punch from Handy.
Handy avoids a lazy jab quite easily.
Holdren walks into a left hand.
Jack Handy seems to be the more aggressive standup fighter in this bout.
That's three minutes gone in the round.
Holdren works Handy's body with a nice hook.
Holdren gets cracked with a nice right hand there by Handy.
Handy keeps his opponent at a distance with a nice jab.
Handy throws a jab when Holdren was well out of range.
Handy throws an overhand right that lands on Holdren's shoulder, as Holdren tries to avoid the shot.
Handy takes one to the side of the head.
Holdren looks to land a right hand but Handy moved out of range.
Holdren lands a slapping body shot.
Handy scores with a body shot.
Holdren works Handy's body with a nice hook.
Holdren scores with a big left there. The judges will like that one.
Handy looks to score with a jab to the body but Holdren is just out of range.
Holdren misses with a jab to the body
and Handy counters with a crisp hook to the side of the head.
Holdren keeping a good distance there, avoiding the body shot.
This has been an exciting period of action!
Holdren throws a body punch but Handy moves out of range.
Handy scores with a jab to the head.
That's four minutes gone in the round.
Holdren throws out a token jab with nothing on it.
Holdren scores with a punch to the head.
Handy misses with a wild body shot.
Handy avoids a lazy jab quite easily.
Holdren misses with a straight right.
Handy swings for the body but Holdren moves out of range.
Handy fakes high and swings low for a body shot but Holdren manages to avoid it.
Handy digs a good hook to Holdren's body.
Handy cracks Holdren with a right hand to the side of the head.
Handy throws a lazy uppercut
and Holdren cracks him with a counter punch right on the button.
Holdren takes a shot to the nose. Hopefully that hasn't broken it.
Handy is really peppering his opponent's head with punches.
Handy misses with a hook. Holdren ducked under it nicely.
The crowd are going absolutely nuts as the round comes to an end - what a fantastic round of action!
Holdren throws a couple of head shots and lands with the final one - a decent hook, which struck Handy on the side of the head.
Holdren lands a slapping body shot.
Holdren throws a hook to the body but it doesn't connect.
Holdren misses with a lunging right hand
enabling Handy to counter with a crisp jab.
And thats the end of the round the fighters go back to their corners.
Jack Handy dominated that round.
The cut man is working on Jack Handy's cut.
The fighters' corners scream their final instructions, as the referee calls time. Here we go, back to the action!
Holdren slips a jab from Handy.
Handy keeping a good distance there, avoiding the body shot.
Handy fakes a head shot and lands one to the body.
Handy throws a jab when Holdren was well out of range.
Sloppy strikes from Handy. Those never looked like landing.
Handy thows a left - swing and a miss!
Holdren swings for the body but Handy moves out of range.
Holdren closes the distance and takes a jab right on the nose as he does so.
Holdren uses good footwork to avoid the strikes from Handy.
A nice combination there by Holdren.
Handy connects with a good right hand that stumbles Holdren. Holdren circles away out of range and recomposes himself.
Handy throws a hook to the body but it doesn't connect.
Holdren swings and misses with a hook to the body.
Handy keeping a good distance there, avoiding the body shot.
Holdren throws a hook to the side of Handy's head but Handy sees it coming and ducks under it beautifully.
Handy throws a jab when Holdren was well out of range.
Holdren misses with an uppercut.
That's one minute gone in the round.
Handy takes a swing at Holdren's ribcage but misses.
Holdren has a pretty nasty looking mouse under his right eye.
Holdren punishes Handy's body with a nice straight punch.
Handy throws a jab but it's blocked by Holdren.
Holdren lands a jab to Handy's midsection.
Holdren cracks Handy with an open hand slap.
Handy dips down and scores with a jab to the body.
Holdren lands a nice shot to the body.
Sloppy strikes from Handy. Those never looked like landing.
Holdren blocks a jab.
Handy looks to land a right hand but Holdren moved out of range.
Handy swings and misses with a hook to the body.
A big left from Handy misses.
Handy misses with a lunging right hand
and Holdren counters with a three punch combo that has Handy backing up. Handy nods at Holdren to acknowledge the strikes.
Handy walks straight into a jab right on the nose. That one stung - he's blinking and trying to clear his head.
Handy moves out of range of the strikes.
That's two minutes gone in the round.
Donk. Holdren catches Handy right on the button with a cross.
The crowd are loving this. Great action here.
Handy tries to land with a swinging hook to the body but Holdren was well out of range. Poor timing from Handy.
Handy swings and misses with a hook to the body.
Handy ducks right into an uppercut from Holdren.
Handy takes an uppercut right on the jaw but it doesn't phase him.
Holdren keeping a good distance there, avoiding the body shot.
Holdren ducks under a wild hook from Handy.
A big left from Handy misses.
Handy gets his head snapped back by a nice shot there.
Handy scores with a jab. Holdren acknowledges it with a nod of the head.
Holdren throws a hook but Handy blocks it.
Handy takes a solid shot to the body. That one hurt him but he's trying not to show it.
Holdren is moving around nicely and scores here with a single head shot.
Handy looks shocked there as he takes a right hand to the temple.
Holdren misses with a body shot.
That's three minutes gone in the round.
Handy misses the shot to the body.
Holdren lands an overhand right.
Handy throws a body punch but Holdren moves out of range.
Handy takes a shot right to the liver - Bas would have been proud of that punch.
Handy tries to bum rush Holdren with a series of wild strikes but Holdren uses good footwork to avoid the assault.
Holdren tries to bum rush Handy with a series of wild strikes but Handy uses good footwork to avoid the assault.
Handy throws a lazy right hand but Holdren sees it coming a mile off and sidesteps it easily.
Handy connects with a body shot.
Holdren fakes high and swings low for a body shot but Handy manages to avoid it.
Holdren ducks under a wild hook from Handy.
Handy throws a hard body shot but it just misses.
Handy connects with a looping right hand.
Jack Handy is winning the standup battle so far.
Handy connects with a lovely jab that went straight through the gap between Holdren's hands.
Holdren misses with a two punch combination.
Handy scores with a reasonable looking shot to the body. Holdren doesn't seem bothered though.
That's four minutes gone in the round.
Handy moving in and out of range nicely, whilst landing the scoring shot.
Holdren throws a looping overhand right but Handy ducks down to avoid it.
Handy throws a combination but comes up with nothing but fresh air.
Handy misses with a body shot. Nice footwork from Holdren.
Holdren with a nice cross.
We've seen a great period of action over the last minute or so - credit to both fighters for going all out!
Handy looks to land a left hand but Holdren moved out of range nicely.
Holdren misses the shot to the body.
A big right from Handy misses.
Holdren connects with a body shot.
Handy throws a big shot that misses.
Handy ducks low and lands a nice hook to the body of his opponent.
The crowd are going absolutely nuts as the round comes to an end - what a fantastic round of action!
Handy avoids the body shot from Holdren.
Handy fakes a head shot and lands one to the body.
Holdren scores with a jab. Handy acknowledges it with a nod of the head.
A slow jab from Holdren misses its intended target.
And thats the end of the round the fighters go back to their corners.
A close second round but Chad Holdren will probably get the nod - 10:9.
The cut man is working on Jack Handy's cut.
That's the end of the interval. I'm sure that seemed a lot quicker than a minute for our two fighters! Back to the action. This is the final round!
Holdren with a body punch. A glancing blow.
Holdren moves out of range of the strikes.
Handy's hands are dropping dangerously low here and Holdren connects clean with a right hook that sends him down to one knee! Handy scrambles back to his feet.
Holdren throws a combination that misses
and Handy counters with a nice jab to the body that keeps Holdren thinking.
Handy swings wildly with a right hand that was never going to find it's target.
Holdren lands with a nice body punch.
Holdren uses some good footwork to avoid the body shot by Handy.
Handy swings for the body but Holdren moves out of range.
Holdren moves his head to the side to avoid a jab but walks straight into a cross.
Handy throws a sloppy body shot
and Holdren counters with a quick right hand to the jaw.
Handy thows a body shot but no joy.
Handy moves away from the strike by Holdren.
Handy connects with a body shot.
Holdren avoids a lazy jab quite easily.
Handy stuns Holdren with a nice body shot, before stepping back out of range.
Handy looks to score with a jab to the body but Holdren is just out of range.
That's one minute gone in the round.
Holdren keeping a good distance there, avoiding the body shot.
Handy scores with a reasonable looking shot to the body. Holdren doesn't seem bothered though.
Holdren keeping his hands up high there, blocking the jab from Handy.
Holdren takes one on the button.
Handy misses with a wild body shot.
Both fighters are breathing heavily.
Handy slips a straight right by Holdren.
Holdren looks to score with a jab to the body but Handy is just out of range.
Handy throws a nice hook to the body that draws an oooh from the crowd.
Handy keeping a good distance there, avoiding the body shot.
Holdren jabbing away but nothing is landing.
Handy swings and misses with a hook to the body.
A looping hook to the body misses from Holdren. Handy does a little dance to reset his feet.
Handy thows a body shot but no joy.
Handy throws a hard body shot but it just misses.
Handy thows a body shot but no joy.
That's two minutes gone in the round.
Holdren slips a jab from Handy.
Holdren keeping his hands up high there, blocking the jab from Handy.
Handy misses the shot to the body.
A swing and a miss from Holdren.
Holdren moves out of range as Handy strikes.
Holdren takes a shot to the body in his stride.
Holdren throws a body punch but Handy moves out of range.
Handy blocks a jab.
Handy lands a body shot.
The crowd cheering loudly, showing their appreciation for the quality fight we're seeing here.
Holdren lands with a good body shot.
Holdren lands a straight punch to the body, keeping Handy at a distance.
Handy throws a hard body shot but it just misses.
Holdren looks to land a left hand but Handy moved out of range nicely.
Handy keeping a good distance there, avoiding the body shot.
Holdren tries to land with a swinging hook to the body but Handy was well out of range. Poor timing from Holdren.
That's three minutes gone in the round.
Holdren takes an uppercut right on the jaw but it doesn't phase him.
Holdren takes a swing at Handy's ribcage but misses.
Handy misses with a wild body shot.
Holdren throws out a loose jab but Handy uses good head movement to avoid it.
Holdren thows a body shot but no joy.
Handy throws a hook to the body but it doesn't connect.
Holdren misses the body punch
and Handy counters with a right hand to the body.
Handy takes a swing at Holdren's ribcage but misses.
Holdren misses with a looping right.
Handy throws a nice hook to the body that draws an oooh from the crowd.
Handy looks to score with a jab to the body but Holdren is just out of range.
Handy throws a wild combination but nothing lands.
Handy gets cracked with a nice right hand there by Holdren.
Handy avoids the body shot from Holdren.
That's four minutes gone in the round.
Handy throws a jab but it's blocked by Holdren.
Holdren will need to tighten up his combinations if he doesn't want to gas himself out, swinging at thin air.
Handy keeping his hands up high there, blocking the jab from Holdren.
Holdren lands a powerful looking uppercut that connected with his opponent's jaw.
Holdren ducks right into an uppercut from Handy.
Handy bobs and weaves and unloads with a good uppercut.
Wooooo! Give it up for these two warriors! They are putting on a show!
Handy thows a left - swing and a miss!
Holdren throws a shot from downtown. Handy moves away and avoids it.
Holdren throws a hook to the body but it doesn't connect.
Handy's corner calls for a 1-2. Handy obliges with the 1 part as he scores the single shot and moves back out of range.
As the round comes to an end the crowd are showing their appreciation for a great round of action.
Holdren ducks under a wild hook from Handy.
Holdren misses the jab.
Holdren thuds a left hand into Handy's body.
Holdren just misses with a punch to the body.
And that's the end of the fight!
Jack Handy showed his dominance in that final round.
Well Handy has outscored his opponent in every aspect of the fight today. Only a scarily incompetent judge or two will keep him from a well deserved win... Over to the ring announcer for the scorecards.
Ladies and gentlemen, after 3 rounds of action, we go to the scorecards for a decision.
Judge Daniel Blasius scores the fight 29:28
Judge Radbod Blank scores the fight 29:28
Judge Aafke Stam scores the fight 29:28
In favor of your winner, by unanimous decision... Jack Handy!
|
|
|
|
|
|
|
|
|
|
|
|
|
|
|
|
|
|
|
|
|
|
|
| S |
C
A |
G |
S |
C
B |
G |
|
S |
C |
G |
|
energy
A | B |
|
hype
A | B |
|
pop
A | B |
|
mgr
A | B |
|
FIGHT
RATING
100% |
|
|
|
|
|
|
|
Main event
|
Coming up we have a bantamweight MMA rules bout between Mike Brunner (ranked 0 p4p, 0 weight class) and Richardt Bam Bam (ranked 0 p4p, 0 weight class). The atmosphere really building for this one as we go over to our ring announcer for the fighter introductions!
 |
|
 |
| 170 cm
25
130 lbs
8 - 5 - 0 |
|
175 cm
29
140 lbs
6 - 5 - 0 |
Good wrestling
Excellent boxer
Experienced |
|
BJJ White Belt
Excellent MT
Good gas tank |
|
| |
|
Ladies and gentlemen. This fight is 3 rounds, in the bantamweight division.
Introducing the fighter to my left, fighting out of the red corner.
With a record of
8 - 5 - 0, fighting out of Amsterdam, Mike Brunner!
And introducing the fighter to my right, fighting out of the blue corner.
With a record of
6 - 5 - 0, fighting out of Amsterdam, Richardt Bam Bam!
The judges for this bout are Daniel Blasius, Patrick Alders and Paulsen Ambrosius.
The bell rings for round one and we are underway!
Brunner rushes Bam Bam and presses him up against the cage.
Brunner jumps guard and drags Bam Bam to the mat. He's obviously going to be looking for submissions off his back.
The referee wants the fighters to be more active or he's going to reset them on the feet.
There's a bit of a scramble here and now Brunner is on top in guard.
Brunner working some strikes from top position.
Brunner is trying to work a guillotine from the top, or something like that? Don't know how he thinks he's going to get a finish from there.
Brunner is trying to work a guillotine from the top, or something like that? Don't know how he thinks he's going to get a finish from there.
Brunner wants to control from the top but Bam Bam keeps moving.
Bam Bam wants to stand but Brunner is controlling the position.
That's one minute gone in the round.
Brunner is intent on slowing down the pace of the fight, simply looking to control.
Brunner pushes down on Bam Bam's leg and manages to get into half guard.
The fighters are pressed up against the cage, both looking to find a bit of space to work.
Brunner seems to be looking for submissions.
Brunner performing his best blanket impression for a moment.
Bam Bam is trying to stand up here but Brunner is controlling him well.
Brunner is trying to control the action in half guard but Bam Bam is working away on the bottom, looking perhaps to get back to full guard.
Brunner seems to be looking for submissions.
That's two minutes gone in the round.
Brunner is looking for an arm triangle, whilst trying to pass to side control. Bam Bam doesn't seem that keen to cooperate though. No luck this time Brunner.
Bam Bam is looking to improve his position.
Brunner is working for a submission here. He's got hold of the far side arm and he's looking for a kimura. He's cranking on the arm and he's got it! Bam Bam is tapping out! Ouch, that looked like it hurt!
Ladies and gentlemen, after 2:54 of round 1, we have a winner by way of Submission (Kimura). Mike Brunner!
|
|
|
|
|
|
|
|
|
|
|
|
|
|
|
|
|
|
|
|
|
|
|
| S |
C
A |
G |
S |
C
B |
G |
|
S |
C |
G |
|
energy
A | B |
|
hype
A | B |
|
pop
A | B |
|
mgr
A | B |
|
FIGHT
RATING
32% |
|
|
|
|
|
|
|
|
|
|
