 |
CFA 14 PBP Commentary |
Undercard bout
|
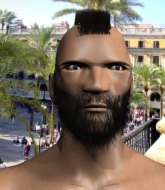
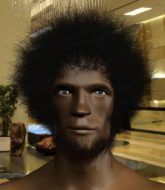
Coming up we have a light heavyweight MMA rules bout between Johann Friden (ranked 0 p4p, 0 weight class) and Mattize Grovinsky (ranked 0 p4p, 0 weight class). Over to our ring announcer for the fighter introductions!
 |
|
 |
| 186 cm
22
203 lbs
1 - 1 - 0 |
|
187 cm
25
205 lbs
1 - 1 - 0 |
BJJ Blue Belt
Counter striker
Good chin |
|
BJJ Blue Belt
Brawler
Determined |
|
| |
|
Ladies and gentlemen. This fight is 3 rounds, in the light heavyweight division.
Introducing the fighter to my left, fighting out of the red corner.
With a record of
1 - 1 - 0, fighting out of Sydney, Johann Friden!
And introducing the fighter to my right, fighting out of the blue corner.
With a record of
1 - 1 - 0, fighting out of Sydney, Mattize Grovinsky!
The judges for this bout are Skip Squint, Hugh Johnson and Damien Edna.

The bell rings for round one and we are underway!
Friden walks straight into a jab right on the nose. That one stung - he's blinking and trying to clear his head.

It looks like Johann Friden has been cut.
Grovinsky scores with a slapping inside leg kick.
Grovinsky misses with a low kick.
Grovinsky throws a hook to the body but it doesn't connect.

Friden drives through with a takedown into guard.
We've had a lack of effective grappling in the last minute or so, which could well see a referee standup.
Friden tries to free his leg and advance position but Grovinsky is retaining full guard.
The ref warns both fighters not to hold the cage as they work up against the meshing.
Fantastic stuff here - a very entertaining period of action, which has drawn cheers from the crowd.

Friden stands up and waves to Grovinsky to follow him.
Friden drives through with a really nice takedown into side control.
Friden trying to control the action but Grovinsky is working from the bottom.
Friden taking a breather here.

That's one minute gone in the round.
Friden wants to control but Grovinsky is keeping him busy.
Grovinsky struggling a bit here.
Friden is maintaining the dominant position - no doubt Grovinsky will start to get frustrated soon if he's not already.
The referee looks like he's ready to step in and stand the fighters back up.
Friden tries to advance to mount but Grovinsky denies him.

That's two minutes gone in the round.
Friden stands up and beckons Grovinsky to his feet.
Friden walks into a left hand.

A jab-cross combination lands for Grovinsky and sends Friden crashing to the mat! Grovinsky follows him down to the mat - Friden regains half guard but he's not out of trouble yet!

Friden is rocked!
The fans in attendance giving it up for the two fighters, who have really let it all hang out in the last minute or so!
Friden wants to control but Grovinsky is keeping busy.
Oh Friden is still in real trouble! Will he be able to recover?!!
The fighters are pressed up against the cage, both looking to find a bit of space to work.
Friden wants to get back to full guard but Grovinsky has passed into side control.
Friden seems to have got his legs back now.
Friden is looking to regain half guard here but Grovinsky keeps moving and retains side control.

That's three minutes gone in the round.
You can see the frustration on Friden's face, being in this tough position on the bottom.
Friden is looking for a sweep.
This fight is sponsored by Chainsaw 7. More blood and guts and stuff like that, in cinemas everywhere now!
Friden is pushing Grovinsky's head away, looking to escape. Grovinsky manages to hold on to the position though.

That's four minutes gone in the round.

Grovinsky stands up.
Grovinsky cracks Friden with a right hand to the side of the head.
Grovinsky throws a head kick that misses.
Grovinsky throws a push kick but Friden slaps the foot to one side.
This has been an exciting period of action!
Friden tries to clinch up.
Friden slips a jab from Grovinsky.
Grovinsky misses with an uppercut. Friden saw that one coming.
The crowd are going absolutely nuts as the round comes to an end - what a fantastic round of action!
Friden shoots in looking for a takedown. Grovinsky tries to sprawl out of it but Friden keeps driving through. The fighters are pinned against the cage. Grovinsky manages to get underhooks and after a bit of a struggle, circles away and we're back to standing.
Grovinsky lunges in with swinging rights and lefts but Friden circles away quickly and effectively.
And thats the end of the round the fighters go back to their corners.
Mattize Grovinsky dominated that round.
The cut man is working on Johann Friden's cut.
The referee calls time. The cornermen exit stage left and we're back to business.

Grovinsky lands a leg kick that knocks Friden off balance momentarily.
Grovinsky lunges in with swinging rights and lefts but Friden circles away quickly and effectively.
Friden tries to score a power double leg takedown but Grovinsky sees that one coming and sprawls well. That will dishearten Friden somewhat.
Friden uses decent footwork to sidestep a right hand from Grovinsky.
Grovinsky looks to score with a combo but nothing lands.
Friden staying out of range there.
Mattize Grovinsky seems to be getting the better of the standup.
Friden doesn't manage to clinch there - Grovinsky circles away.
Friden bobs and weaves well there to avoid the strikes.
Mattize Grovinsky seems to be the more aggressive standup fighter in this bout.

Friden fakes with an overhand right and moves in to clinch with Grovinsky, pushing him back against the cage.
Grovinsky blocks a knee to the body. He'll have a nicely bruised forearm in the morning.

Grovinsky breaks from the clinch.
Grovinsky rushes forward with a series of wild hooks but Friden moves out of range and avoids them all easily.
That's one minute gone in the round.
Horrible takedown by Friden or perhaps it was just good defense by Grovinsky which made him look bad.
Friden closes the distance and clinches up, looking for a takedown. He shifts his weight and gets a nice trip into half guard.
Friden tries to pass the half guard into mount. Grovinsky knows what he's doing though and prevents the attempt.
Grovinsky wants to control but Friden is keeping busy and won't allow it.
Grovinsky kicks off Friden and gets to his feet.
Friden moves into the clinch successfully.
Grovinsky is trying to break free.
Friden is working on a leg, looking for a takedown but Grovinsky is defending well.
That's three failed takedown attempts in the round for Johann Friden. That's going to take a lot out of him.
That's two minutes gone in the round.
Friden is working for a takedown up against the cage. He can't get it on this occasion though.
Friden tries to pull guard but can't drag his opponent to the mat. Grovinsky just stands there and leans against the cage.
Grovinsky breaks the clinch.
Friden feints and as Grovinsky raises his hands in defense, Friden changes levels and drives through with a takedown into guard.
Wooooo! Give it up for these two warriors! They are putting on a show!
Grovinsky manages to sweep nicely, so he's now on top. Friden manages to get himself to full guard.
Grovinsky stopping the sweep attempt from Friden.
Johann Friden overall seems to be getting the better of the ground position in the fight so far.
Grovinsky tries to free his leg and advance position but Friden is retaining full guard.
That's three minutes gone in the round.

Friden looking for submissions off his back, moving his hips, looking for an opening.
Grovinsky pressing down on his opponent's thigh, looking to pass guard. Friden is keeping the position for now.
Friden doesn't do any damage with a couple of strikes from the bottom.
Friden looking for submissions from the bottom but instead Grovinsky passes into half guard.
Grovinsky is trying to control the action in half guard but Friden is working away on the bottom, looking perhaps to get back to full guard.
That's four minutes gone in the round.
Grovinsky tries to pass to full mount but Friden defends it.
Friden is working for an escape here. He's hooked one of Grovinsky's legs and he's managed to sneak out and take Grovinsky's back!
Friden looking for the choke but no joy.
As the round comes to an end the crowd are showing their appreciation for a great round of action.
Friden is working for the rear naked choke. He has one arm under the chin but Grovinsky has hold of the other arm. A bit of a stalemate here.
And thats the end of the round the fighters go back to their corners.
That was a close second round but I would say that Johann Friden will probably get the nod.
The cut man is working on Johann Friden's cut.
That's the end of the interval. I'm sure that seemed a lot quicker than a minute for our two fighters! Back to the action. This is the final round!

Grovinsky lands a really nice looking cross but Friden seems unphased.
Friden walks into a left hand.
Grovinsky lands a nice looking kick to the body. Friden takes a step back to recover.
The crowd are loving this. Great action here.
Friden tries to clinch there but Grovinsky circles away.
Nice body punch from Grovinsky.
Grovinsky steps into range and cracks Friden with a monster punch that buckles his knees! Friden flops backwards and Grovinsky dives into his guard looking to finish!
Grovinsky pressing down on his opponent's thigh, looking to pass guard. Friden is keeping the position for now.
Grovinsky wants to control from the top but Friden keeps moving.
Both fighters are breathing heavily.
That's one minute gone in the round.
Friden looking for a sweep. Not yet Friden, not yet.

OK we're going to have a standup here. Mattize Grovinsky hasn't been effective enough on the ground and the referee wants a restart.
Grovinsky drops Friden with a big left hand and mounts him. Friden is in big trouble!
This is a great period of action - very entertaining stuff!
Friden tries to lock up and control but Grovinsky gives him a forearm to the face and pushes him away.
Friden is going to have to think about doing something other than just controlling because Grovinsky is managing to avoid having the position dictated to him.
Friden is looking to get to half guard.
That's two minutes gone in the round.
Grovinsky landing strikes from the mount.
Grovinsky raining down hammerfists from mount.
Grovinsky prevents Friden from getting the reversal.
Grovinsky lands with some vicious ground and pound - can Friden hang on?
Grovinsky postures up and throws a couple of big shots that have Friden in real trouble here! The ref calls for Friden to improve his position which he doesn't do, so the referee has no choice but to end the fight due to the strikes!
Ladies and gentlemen, after 3:57 of round 3, we have a winner by way of TKO (Strikes). Mattize Grovinsky!
|
|
|
|
|
|
|
|
|
|
|
|
|
|
|
|
|
|
|
|
|
|
|
| S |
C
A |
G |
S |
C
B |
G |
|
S |
C |
G |
|
energy
A | B |
|
hype
A | B |
|
pop
A | B |
|
mgr
A | B |
|
FIGHT
RATING
100% |
|
|
|
|
|
|
|
Undercard bout
|
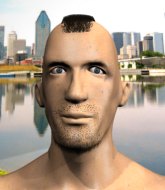
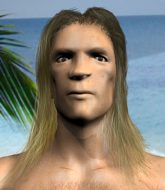
Coming up we have a welterweight MMA rules bout between Dynas Mitias (ranked 0 p4p, 0 weight class) and Leopold Stotch (ranked 0 p4p, 0 weight class). The key to victory for Dynas Mitias has got to be keeping the fight on the feet.
 |
|
 |
| 171 cm
25
168 lbs
1 - 1 - 0 |
|
178 cm
25
181 lbs
1 - 1 - 0 |
BJJ Purple Belt
Brawler
Big heart |
|
BJJ Purple Belt
Counter striker
Determined |
|
| |
|
Ladies and gentlemen. This fight is 3 rounds, in the welterweight division.
Introducing the fighter to my left, fighting out of the red corner.
With a record of
1 - 1 - 0, fighting out of Sydney, Dynas Mitias!
And introducing the fighter to my right, fighting out of the blue corner.
With a record of
1 - 1 - 0, fighting out of Sydney, Leopold Stotch!
The judges for this bout are Summer Carpenter, Hugh Johnson and Bruno Hogan.
The bell rings for round one and we are underway!
Mitias shoots in for a takedown but doesn't get it.
Mitias shoots in for a takedown. "Ole!" shouts Stotch as he jumps to the side.
Mitias gets the takedown into side control.
Mitias tries to get to his feet but he's trapped momentarily.
Stotch struggling a bit here.
Stotch tries to work a leg under to get back to half guard but Mitias wriggles his own leg back out and remains in side control.
The ref warns both fighters not to hold the cage as they work up against the meshing.
Mitias stands up and we're back to a striking position.
Stotch on the receiving end of a decent leg kick there by Mitias. Mitias obviously looking to wear him down.
Mitias leaves Stotch with his face pressed against the mat as he sprawls beautifully, defending against a solid takedown attempt.
Wooooo! Give it up for these two warriors! They are putting on a show!
Stotch shoots for a double leg takedown but Mitias sprawls well. He's pushed Stotch's face into the mat and manages to get back to his feet relatively easily.
Dynas Mitias seems to be the more aggressive standup fighter in this bout.
That's one minute gone in the round.
Stotch avoids the clinch attempt nicely.
Stotch fails with a takedown attempt.
Dynas Mitias has stuffed three takedown attempts in the round now. That's going to take a lot out of Leopold Stotch.
Mitias slips in close and lands a nice hook before moving back out of range.
Mitias looking to shoot here. He's gone for it and he's landed a takedown into mount! Oh, that's bad for Stotch!
Stotch is in all sorts of trouble here.
Mitias is trying to stand up but he's being controlled by his opponent.
Mitias is standing up out of mount! Strange tactic there - he must really want this one on the feet!
The fans in attendance giving it up for the two fighters, who have really let it all hang out in the last minute or so!
Mitias cracks Stotch with a good jab.
Stotch shoots in but no luck this time.
Mitias scores with a jab to the head.
Stotch tries to shoot in for a takedown. He's got hold of a leg but Mitias swivels and escapes.
Stotch looks gassed!
That's two minutes gone in the round.
Stotch tries to shoot in for a takedown. He's got hold of a leg but Mitias swivels and escapes.
Mitias throws a looping left and ducks down for a takedown. He's got his arms around Stotch's waist but Stotch gets an underhook and avoids the takedown by throwing Mitias off to one side.
Mitias digs a good body shot into Stotch's ribs.
Mitias shoots for a double leg takedown but Stotch sprawls well. He's pushed Mitias's face into the mat and manages to get back to his feet relatively easily.
Horrible takedown by Mitias or perhaps it was just good defense by Stotch which made him look bad.
Mitias misses the shot to the body.
Mitias has a takedown stuffed.
Mitias tries for a takedown but Stotch circles away easily

and Stotch counters with a shoot takedown into half guard.

Stotch has hold of the far side arm. He's working for the Kimura, can Mitias defend it? Stotch steps over the head and cranks it - Mitias is tapping out! That was textbook stuff right there - nice submission victory for Stotch!
Ladies and gentlemen, after 2:53 of round 1, we have a winner by way of Submission (Kimura). Leopold Stotch!
|
|
|
|
|
|
|
|
|
|
|
|
|
|
|
|
|
|
|
|
|
|
|
| S |
C
A |
G |
S |
C
B |
G |
|
S |
C |
G |
|
energy
A | B |
|
hype
A | B |
|
pop
A | B |
|
mgr
A | B |
|
FIGHT
RATING
65% |
|
|
|
|
|
|
|
Undercard bout
|
Coming up we have a light heavyweight MMA rules bout between Mike Pantine (ranked 0 p4p, 0 weight class) and Johnny Crackcorn (ranked 0 p4p, 0 weight class). Chooooooooon! I think Pantine might be my favorite fighter, now he's come out to Lay It on the Line. Johnny Crackcorn is staring across the cage at his opponent, tweaking his nipples.
 |
|
 |
| 185 cm
21
205 lbs
2 - 1 - 0 |
|
150 cm
23
205 lbs
2 - 0 - 0 |
BJJ Blue Belt
Brawler
Big heart |
|
BJJ Purple Belt
Brawler
Determined |
|
| |
|
Ladies and gentlemen. This fight is 3 rounds, in the light heavyweight division.
Introducing the fighter to my left, fighting out of the red corner.
With a record of
2 - 1 - 0, fighting out of Sydney, Mike Pantine!
And introducing the fighter to my right, fighting out of the blue corner.
With a record of
2 - 0 - 0, fighting out of Sydney, Johnny Crackcorn!
The judges for this bout are John Mangel, Winston Howard and Hugh Johnson.
The bell rings for round one and we are underway!
Crackcorn stuffs a takedown. It's all about dictating where the fight takes place and Crackcorn wants it to stay on the feet.
Crackcorn tries to shoot in for a takedown. He's got hold of a leg but Pantine swivels and escapes.
Pantine explodes with a nice body kick and back out of range. Nice work.
Crackcorn gets a double leg takedown into Pantine's guard.
The fighters are pressed up against the cage, both looking to find a bit of space to work.
Pantine is trying to control the position from the bottom.
Crackcorn stops Pantine from standing up.
Crackcorn drops back for a leg! It's a sloppy attempt though and Crackcorn jumps back into guard quickly, to retain the dominant position.
Pantine has butterfly guard. He's looking to stand up here. He pushes Crackcorn off him and springs to his feet nicely. The crowd applauds.
Ouch! a nice leg kick from Pantine, right into the meat.
Johnny Crackcorn seems to be the more aggressive standup fighter in this bout.
This is a great period of action - very entertaining stuff!
Pantine doesn't manage to clinch there - Crackcorn circles away.
Crackcorn is trying hard to land a takedown here. Pantine sprawls well and keeps this one on the feet.
A momentary lapse in concentration from Pantine enables Crackcorn to shoot in and score with a neat double leg. Pantine manages to secure a closed guard as the fighters hit the mat.
Pantine wants to sweep here but Crackcorn controlling him for the moment.
Pantine knows he needs to get back to his feet asap. He's simply no match for Crackcorn on the ground.
Pantine is trying to control the position from the bottom.
Crackcorn is trying to work a guillotine from the top, or something like that? Don't know how he thinks he's going to get a finish from there.
That's one minute gone in the round.
Crackcorn is trying to work a guillotine from the top, or something like that? Don't know how he thinks he's going to get a finish from there.
Crackcorn is trying to work a guillotine from the top, or something like that? Don't know how he thinks he's going to get a finish from there.
Pantine is working an open guard here, looking to improve his position. No doubt that will leave him open to counters but at least he's being more offensive.
Crackcorn drops back for a leg! It's a sloppy attempt though and Crackcorn jumps back into guard quickly, to retain the dominant position.
Crackcorn drops back looking for a leg! Pantine is in trouble here! The fighters roll with the hold and Pantine manages to kick Crackcorn off! Crackcorn jumps back into Pantine's guard.
Crackcorn works a leg free and moves into half guard.
That's two minutes gone in the round.
Crackcorn is looking for a kimura. It's going to be difficult to finish that from half guard though and Pantine defends it well.
Crackcorn is thinking about going for an arm triangle but he can't free his leg.
Pantine is looking to regain full guard. Not this time though.
Crackcorn is working for a submission of some sort.
Pantine is defending against the submission attempts here by Crackcorn.
That's three minutes gone in the round.
Pantine is in trouble now - Crackcorn has advanced to mount!
Crackcorn looking to secure an arm triangle but Pantine defends it well.
Crackcorn looking to secure an arm triangle but Pantine defends it well.
Crackcorn is working close to his opponent, looking to work a submission by the looks of things. Oh, he's managed to get a guillotine from mount as his opponent reached up! That looks tiiiiight! Will he tap? YES, he's tapped! Impressive submission by Crackcorn!
Ladies and gentlemen, after 3:56 of round 1, we have a winner by way of Submission (Guillotine). Johnny Crackcorn!
|
|
|
|
|
|
|
|
|
|
|
|
|
|
|
|
|
|
|
|
|
|
|
| S |
C
A |
G |
S |
C
B |
G |
|
S |
C |
G |
|
energy
A | B |
|
hype
A | B |
|
pop
A | B |
|
mgr
A | B |
|
FIGHT
RATING
53% |
|
|
|
|
|
|
|
Undercard bout
|
Coming up we have a light heavyweight MMA rules bout between Raphael Bowie (ranked 0 p4p, 0 weight class) and Levi Jeans (ranked 0 p4p, 0 weight class). I can't wait for this one - let's get the fighter introductions out of the way and get this one started!
 |
|
 |
| 195 cm
22
210 lbs
4 - 0 - 0 |
|
185 cm
20
212 lbs
5 - 4 - 0 |
BJJ Brown Belt
Basic striking
Very quick |
|
Good wrestler
Brawler
Solid chin |
|
| |
|
Ladies and gentlemen. This fight is 3 rounds, in the light heavyweight division.
Introducing the fighter to my left, fighting out of the red corner.
With a record of
4 - 0 - 0, fighting out of Sydney, Raphael Bowie!
And introducing the fighter to my right, fighting out of the blue corner.
With a record of
5 - 4 - 0, fighting out of Sydney, Levi Jeans!
The judges for this bout are Skip Squint, Hugh Johnson and Bruno Hogan.
The bell rings for round one and we are underway!
Bowie uses good footwork to avoid the strikes from Jeans.
Bowie blocks a jab.
Jeans tries to clinch but Bowie is having none of it.
Bowie is moving around nicely and scores here with a single head shot.
Bowie has Jeans up against the cage in a clinch.
Bowie gets double underhooks and manages to take the fight to the ground.
Bowie postures up to throw the ground and pound strikes but they don't connect.
Bowie thinks about going for a leg but decides against it, in order to maintain the position.
The fighters are pressed up against the cage, both looking to find a bit of space to work.
Bowie wants to control from the top but Jeans keeps moving.
A big thud reverberates around the arena there as Bowie accidentally thumps the mat. Hopefully he's not broken his hand.
Bowie has been looking to land a fair amount of strikes on the ground. He might be looking to soften his opponent up in order to work for a submission.
Bowie postures up to throw the ground and pound strikes but they don't connect.
Bowie works a leg free and moves into half guard.
We get told so often about how wrestlers don't like to be on their backs. Let's see if Jeans can do anything to dispel that myth.
Bowie is scoring with some nice ground and pound from the dominant position.
This is a great period of action - very entertaining stuff!
Bowie prevents Jeans from improving his position.
That's one minute gone in the round.
Jeans is looking to regain full guard. He's left an arm up in the air though and Bowie has latched onto it... Big trouble! Bowie pivots for an armbar - it's in tight and it Jeans is tapping in no time flat! Great counter grappling there from Bowie!
Ladies and gentlemen, after 1:27 of round 1, we have a winner by way of Submission (Armbar). Raphael Bowie!
During a confident post fight interview, Raphael Bowie thanked all his fans. He seemed very genuine when describing how motivated his fans keep him.
|
|
|
|
|
|
|
|
|
|
|
|
|
|
|
|
|
|
|
|
|
|
|
| S |
C
A |
G |
S |
C
B |
G |
|
S |
C |
G |
|
energy
A | B |
|
hype
A | B |
|
pop
A | B |
|
mgr
A | B |
|
FIGHT
RATING
51% |
|
|
|
|
|
|
|
Undercard bout
|
Coming up we have a welterweight MMA rules bout between Geese Howard (ranked 0 p4p, 0 weight class) and Andrew Immanuel (ranked 0 p4p, 0 weight class). Immanuel has chosen Dragging Dead Bodies in Blue Bags Up Really Long Hills as his entrance music. Geese Howard has the edge in experience - let's see if he can make that count tonight.
 |
|
 |
| 183 cm
21
181 lbs
8 - 7 - 0 |
|
170 cm
21
176 lbs
3 - 1 - 0 |
BJJ Purple Belt
Brawler
Granite chin |
|
Decent wrestler
Basic striking
Powerful |
|
| |
|
Ladies and gentlemen. This fight is 3 rounds, in the welterweight division.
Introducing the fighter to my left, fighting out of the red corner.
With a record of
8 - 7 - 0, fighting out of Sydney, Geese Howard!
And introducing the fighter to my right, fighting out of the blue corner.
With a record of
3 - 1 - 0, fighting out of Sydney, Andrew Immanuel!
The judges for this bout are Damien Edna, Hugh Johnson and John Mangel.
The bell rings for round one and we are underway!
Howard gets taken down but at least he's managed to land in guard.
Howard is trying to control the position but Immanuel postures up.
Howard has his foot on Immanuel's thigh. He's trying to push off and get in position for a triangle, I think. Immanuel works his way back into a safe position though.
Immanuel lands a couple of decent looking shots.
Immanuel throws a big elbow that misses.
Immanuel postures up in Howard's guard and throws a big left but Howard blocks it.
Howard avoiding any damage from the ground and pound.
Howard working for a triangle but Immanuel defends it easily.
Immanuel trying to land body shots but he keeps hitting the mat.
The crowd are loving this. Great action here.
A big thud reverberates around the arena there as Immanuel accidentally thumps the mat. Hopefully he's not broken his hand.
Immanuel stands and throws Howard's legs to the side, diving into side control.
Howard wants to control but Immanuel postures up.
Immanuel really doesn't want to stay on the ground with Howard. If he can't get it back to his feet, it's only a matter of time before he'll be tapping out.
Howard takes a big shot right to the temple there but he's taken it well.
Both fighters really going for it on the ground here!
Howard is looking to regain half guard here but Immanuel keeps moving and retains side control.
Immanuel lands a decent elbow from side control.
That's one minute gone in the round.
Howard regains half guard.
Howard actively working from the bottom here.
The referee walks around the fighters to get a better view of the action. Immanuel lands a nice short elbow.
Howard taking some punishment here, with Immanuel in his half guard.
Immanuel lands strikes from half guard.
Howard is pressing down on Immanuel's left leg trying to get back to full guard. He's managed it.
Immanuel landing with the ground and pound.
Immanuel is posturing up here but Howard has hold of an arm and he's gone for an armbar! Immanuel tries to roll out but it's too tight and Immanuel has to tap! Slick submission there by Howard!
Ladies and gentlemen, after 1:44 of round 1, we have a winner by way of Submission (Armbar). Geese Howard!
Geese Howard very nearly forgot to thank HeavyWeight Designs amongst all the excitement of his win but just as the interview came to a close, he screamed their name. Hopefully he'll get a few nice freebies in the mail as a thank you.
|
|
|
|
|
|
|
|
|
|
|
|
|
|
|
|
|
|
|
|
|
|
|
| S |
C
A |
G |
S |
C
B |
G |
|
S |
C |
G |
|
energy
A | B |
|
hype
A | B |
|
pop
A | B |
|
mgr
A | B |
|
FIGHT
RATING
83% |
|
|
|
|
|
|
|
Co-main event
|
Coming up we have a welterweight MMA rules bout between Buster Cherry (ranked 0 p4p, 0 weight class) and Richard Meyer (ranked 0 p4p, 0 weight class). Cherry comes to the cage accompanied by We're Both In Love With a Sexy Lady. Richard Meyer acknowledges the crowd's support as he enters the cage.
 |
|
 |
| 180 cm
21
180 lbs
5 - 1 - 0 |
|
185 cm
20
174 lbs
6 - 4 - 0 |
Good wrestling
Brawler
KO power |
|
ADCC Champion
Counter striker
Solid chin |
|
| |
|
Ladies and gentlemen. This fight is 3 rounds, in the welterweight division.
Introducing the fighter to my left, fighting out of the red corner.
With a record of
5 - 1 - 0, fighting out of Sydney, Buster Cherry!
And introducing the fighter to my right, fighting out of the blue corner.
With a record of
6 - 4 - 0, fighting out of Sydney, Richard Meyer!
The judges for this bout are Steve Erwin, Bruno Hogan and Skip Squint.
The bell rings for round one and we are underway!
Meyer is pinned up against the cage taking some big shots here. The referee is looking closely deciding whether he should stop the fight.
Cherry loads up on a big right hand but Meyer slips the punch.
Boom, another hit is landed. "You're gunna get knocked out" taunts Cherry, as that shot connected.
Meyer throws a head kick that misses and slips in the process. He scrambles back to his feet and the fighters circle.
Cherry lunges in with an uppercut that skims his opponent's chin.
Nice takedown defense from Cherry. No joy for Meyer on that attempt.
Cherry looks to land a left hand but Meyer moved out of range nicely.
Fantastic stuff here - a very entertaining period of action, which has drawn cheers from the crowd.
Cherry tests Meyer's chin there with a solid looking shot.
Meyer fails with a takedown attempt.
Meyer shoots in for a takedown but Cherry shows good takedown defense there and keeps this one on the feet.
Buster Cherry has stuffed three takedown attempts in the round now. That's going to take a lot out of Richard Meyer.
Meyer tries to score a power double leg takedown but Cherry sees that one coming and sprawls well. That will dishearten Meyer somewhat.
That's one minute gone in the round.
Cherry's corner calls for a 1-2. Cherry obliges with the 1 part as he scores the single shot and moves back out of range.
Cherry ducks low and lands a nice hook to the body of his opponent.
Good standup being displayed there by Cherry as he connects with a hook.
Cherry avoids the clinch attempt nicely.
Cherry scores with a punch to the head.
Meyer tries to close the distance and clinch up but Cherry swats him away and circles back towards the center.
Cherry throws a looping overhand right but Meyer ducks down to avoid it.
Cherry paws at his opponent with the jab and then lunges in with a straight, right on the button.
This has been an exciting period of action!
Nice shot by Cherry.
Cherry connects with a jab.
That's two minutes gone in the round.
Cherry ducks low and lands a nice hook to the body of his opponent.
Cherry scores with a sloppy punch to the body. Not much technique there but it did the business.
Nice uppercut lands for Cherry. That snapped Meyer's head back.
Meyer is trying desperately to land a takedown but Cherry is having absolutely none of it. This is turning into a bit of a nightmare for Meyer.
Cherry lands a nice shot that snaps Meyer's head back.
Cherry bobs and weaves and throws out a fast jab that snaps Meyer's head backwards.

Meyer is rocked!
Cherry lands with a good body shot.
Cherry connects with a single shot there.
Meyer is still on wobbly legs! Can Cherry finish him?
Cherry lands a jab followed by a nice looking cross.
Meyer defending well as Cherry loads up on a big left hand.
Cherry's jab looks to have found its range, popping Meyer under the eye.
Meyer looks up at the clock. Bad move! Cherry lands a right hand from hell, dropping Meyer. Cherry pounces and finishes the fight with a flurry of punches and elbows.
Ladies and gentlemen, after 3:57 of round 1, we have a winner by way of TKO (Strikes). Buster Cherry!
Buster Cherry decided to hype himself up post fight. It was going well but he went on about it a bit too long and the crowd turned on him a little.
|
|
|
|
|
|
|
|
|
|
|
|
|
|
|
|
|
|
|
|
|
|
|
| S |
C
A |
G |
S |
C
B |
G |
|
S |
C |
G |
|
energy
A | B |
|
hype
A | B |
|
pop
A | B |
|
mgr
A | B |
|
FIGHT
RATING
56% |
|
|
|
|
|
|
|
Main event
|
Coming up we have a light heavyweight MMA rules bout between Hugh Jontop (ranked 0 p4p, 0 weight class) and Chuck Reznor (ranked 0 p4p, 0 weight class). Chuck Reznor told me before the fight that he's been watching a lot of DVDs so let's see if that helps him in this one! I can't wait to find out!
 |
|
 |
| 188 cm
22
205 lbs
5 - 2 - 0 |
|
188 cm
27
205 lbs
4 - 2 - 0 |
BJJ Purple Belt
Excellent boxer
Granite chin |
|
BJJ Purple Belt
Excellent boxer
Heavy handed |
|
| |
|
Ladies and gentlemen. This fight is 3 rounds, for the light heavyweight championship of the world!
Introducing the champion to my left, fighting out of the red corner.
With a record of
5 - 2 - 0, fighting out of Sydney, Hugh Jontop!
And introducing the challenger to my right, fighting out of the blue corner.
With a record of
4 - 2 - 0, fighting out of Sydney, Chuck Reznor!
The judges for this bout are Skip Squint, Donatello Bradman and Steve Erwin.
The bell rings for round one and we are underway!
Jontop closes the distance and clinches up with Reznor, looking for a takedown. Jontop pushes Reznor against the cage but Reznor circles to the side and manages to break the clinch.
No luck with that takedown attempt from Jontop.
Reznor looks to score with a jab to the body but Jontop is just out of range.
Reznor swinging wildly here.
Reznor will need to tighten up his combinations if he doesn't want to gas himself out, swinging at thin air.
Jontop moves into the clinch.

Jontop breaks the clinch and we return to the middle of the mat.
Reznor scores with a one two! Jontop had his feet all tangled up there and couldn't avoid the strikes.
It looks like Hugh Jontop has been cut.
Reznor misses with a double jab.
Reznor looks gassed!
Sloppy strikes from Jontop. Those never looked like landing.
Reznor leaves Jontop with his face pressed against the mat as he sprawls beautifully, defending against a solid takedown attempt.
That's three failed takedown attempts in the round for Hugh Jontop. That's going to take a lot out of him.
A jab from Reznor misses.
Jontop instigates a clinch.
Jontop's corner calls for him to break the clinch, which he does.
A combination from Jontop does no damage.
Jontop shoots in for a takedown but Reznor shows good takedown defense.
That's one minute gone in the round.
Jontop shoots in looking for a takedown. Reznor tries to sprawl out of it but Jontop keeps driving through. The fighters are pinned against the cage. Reznor manages to get underhooks and after a bit of a struggle, circles away and we're back to standing.
Jontop closes the distance and pushes Reznor back into the cage.
Jontop is working on a leg, looking for a takedown but Reznor is defending well.
Jontop prevents Reznor from breaking the clinch.
Jontop displaying some good clinch control by pressing Reznor up against the cage.
Jontop scores with a hook to the body.
Jontop pulls guard successfully.
We've had a lack of effective grappling in the last minute or so, which could well see a referee standup.
Reznor postures up in Jontop's guard and throws a big left but Jontop blocks it.
Jontop looking to control the pace of the fight rather than finish it.
Jontop scrambles and gets back to his feet.
That's two minutes gone in the round.
Jontop fails to land the takedown.
Jontop gets a clinch.
Jontop goes for a takedown attempt but Reznor pushes him away and we're back to fighting at a distance.
We've seen a great period of action over the last minute or so - credit to both fighters for going all out!
Reznor rushes forward with a series of wild hooks but Jontop moves out of range and avoids them all easily.
Jontop moves into the clinch.
Reznor is trying to work out of this bad position, with his back against the cage.
Jontop keeps the fight in the clinch, despite Reznor's efforts to push away.
Jontop keeps the fight in the clinch, despite Reznor's efforts to push away.
Jontop has managed to pull guard. Let's see whether he can work an aggressive guard. It will also be interesting to see what tactics Reznor uses from the top position.
That's three minutes gone in the round.
Reznor tries to free his leg and advance position but Jontop is retaining full guard.
Reznor with a flurry of punches that miss.
Jontop is avoiding any damage by keeping wrist control.
The fighters are pressed up against the cage, both looking to find a bit of space to work.
Jontop looking for a guillotine here but Reznor defends easily.
Jontop is trying to keep Reznor in close.
Jontop is working the butterfly guard. He manages to land a nice scissor sweep and is now in half guard on the top. Nice move.
Jontop missing with some ground and pound from the half guard.
That's four minutes gone in the round.
Jontop not doing much here.
Jontop's ground tactics aren't going to win him many fans. Let's hope he's got fireworks for us if he gets back to his feet because he's not doing much on the ground.
We must be close to a standup if these guys don't pick up the pace.
Reznor avoiding damage under a succession of punches from Jontop.
As the round comes to an end the crowd are showing their appreciation for a great round of action.
Jontop not throwing his punches with enough precision this time.
And thats the end of the round the fighters go back to their corners.
Hugh Jontop dominated that round.
The cut man is working on Hugh Jontop's cut.
The minute break is over - no more time for sponges and pep talks - back to the action!
Reznor throws a lazy uppercut
and Jontop counters with a nice body kick.
Reznor leaves Jontop with his face pressed against the mat as he sprawls beautifully, defending against a solid takedown attempt.
Jontop closes the distance and clinches up with Reznor, looking for a takedown. Jontop pushes Reznor against the cage but Reznor circles to the side and manages to break the clinch.
Jontop moves into the clinch.
Jontop tries to score a body lock takedown but Reznor shows good agility there to stay on his feet.
That's three failed takedown attempts in the round for Hugh Jontop. That's going to take a lot out of him.
Jontop breaks from the clinch.
A telegraphed takedown attempt from Jontop is defended easily by Reznor.
Reznor swings and misses with a hook to the body.
Jontop has closed the distance and engaged Reznor in a clinch.
Jontop pushes off and circles away, back to the middle of the mat.
No joy there for Reznor, who threw a few shots but didn't land.
A nice inside leg kick there by Jontop. That's going to slow Reznor down.
Jontop is trying hard to land a takedown here. Reznor sprawls well and keeps this one on the feet.
Reznor is breathing heavily.
Wooooo! Give it up for these two warriors! They are putting on a show!
Reznor throws a lazy right hand but Jontop sees it coming a mile off and sidesteps it easily.
A telegraphed takedown attempt from Jontop is defended easily by Reznor.
That's one minute gone in the round.
Nice body kick there by Jontop.
Jontop lands with a two punch combination before moving back out of range.
Jontop feints and then dives in with a takedown. That was a long way out but the feint bought him enough time to close the distance and complete the takedown. Now we'll play guard for a bit and see who can get the better of that position.
Jontop throwing strikes but missing.
Jontop is working the ground and pound from guard. He might want to try advancing position though to get more of an impact.
The fans in attendance giving it up for the two fighters, who have really let it all hang out in the last minute or so!
Jontop is trying to work a guillotine from the top, or something like that? Don't know how he thinks he's going to get a finish from there.
Jontop is looking to work some ground and pound but Reznor has wrist control.
That's two minutes gone in the round.
Jontop throwing shots from guard but he's hitting more mat than opponent.
Jontop with a flurry of punches that miss.
Jontop is looking to work some ground and pound but Reznor has wrist control.
Reznor looking to sweep here. No luck so far.
Jontop with a flurry of punches that miss.
Jontop pushing down on Reznor's thigh, trying to pass to half guard. He's managed it... Nice work.
Jontop winds up and cracks Reznor with a swinging punch to the side of the head.
Jontop throwing shots but Reznor is blocking nicely.
Jontop missing with some ground and pound from the half guard.
That's three minutes gone in the round.
Jontop thumps the canvas. Not on purpose obviously - he just missed Reznor's head.
Jontop works his way into full mount!
Reznor wriggling around on the bottom manages to avoid the strikes thrown by Jontop.
Reznor holding onto his opponent's waist for dear life, as Jontop tries to land some strikes to get him to release his grip.
Jontop has been looking to land a fair amount of strikes on the ground. He might be looking to soften his opponent up in order to work for a submission.
Jontop lands a heavy elbow.
Jontop controlling from the full mount.
That's four minutes gone in the round.
Reznor taking shots to the head.
Reznor is rocked!
We've seen a great period of action over the last minute or so - credit to both fighters for going all out!
Jontop scores with a couple of good head shots there.
Reznor is still in real trouble! Can Jontop finish him?
Jontop postures up and lands a whopping elbow - oh that's hurt Reznor bigstyle! Two more strikes land for Jontop and the fight is over!
Ladies and gentlemen, after 4:42 of round 2, we have a winner by way of TKO (Strikes). Hugh Jontop!
Hugh Jontop retains his light heavyweight title!
Jumping up and down and very excited, Hugh Jontop waved his t-shirt featuring [CBK] LEGAL HIGHS - AJFC ↑ DOUBLE 160Q *'s logo in front of the cameras.
|
|
|
|
|
|
|
|
|
|
|
|
|
|
|
|
|
|
|
|
|
|
|
| S |
C
A |
G |
S |
C
B |
G |
|
S |
C |
G |
|
energy
A | B |
|
hype
A | B |
|
pop
A | B |
|
mgr
A | B |
|
FIGHT
RATING
35% |
|
|
|
|
|
|
|
|
|
|
