 |
Bellum 60: Lazerus Vs Howard PBP Commentary |
Undercard bout
|
|
|
|
Undercard bout
|
|
|
|
Undercard bout
|
|
|
|
Undercard bout
|
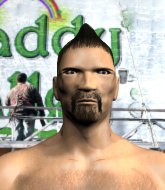
Coming up we have a lightweight MMA rules bout between Ashida Kim (ranked 0 p4p, 0 weight class) and Frenzo Tello (ranked 0 p4p, 0 weight class). Ashida Kim has the edge in experience - let's see if he can make that count tonight.
 |
|
 |
| 177 cm
19
155 lbs
2 - 1 - 0 |
|
199 cm
18
155 lbs
0 - 1 - 0 |
BJJ Blue Belt
Brawler
Good chin |
|
BJJ Blue Belt
Brawler
Very confident |
|
| |
|
Ladies and gentlemen. This fight is 3 rounds, in the lightweight division.
Introducing the fighter to my left, fighting out of the red corner.
With a record of
2 - 1 - 0, fighting out of Los Angeles, Ashida Kim!
And introducing the fighter to my right, fighting out of the blue corner.
With a record of
0 - 1 - 0, fighting out of Los Angeles, Frenzo Tello!
The judges for this bout are Frank Antenori, Timothy Bukovac and Jack Bonds.

The bell rings for round one and we are underway!
Tello tries to score a power double leg takedown but Kim sees that one coming and sprawls well. That will dishearten Tello somewhat.
Kim shoots in and drives through. Tello sprawls well.
Tello misses with a takedown attempt - Kim sprawls well and throws a nice strike on the way out which just misses.
Tello shoots in for a takedown but Kim shows good takedown defense there and keeps this one on the feet.
Ashida Kim has stuffed three takedown attempts in the round now. That's going to take a lot out of Frenzo Tello.
Tello stuffs the takedown attempt from Kim. Kim gets slowly back to his feet.
Kim shoots in with a takedown attempt and he has Tello pinned against the cage. Tello gets the underhooks and manages to circle away.

Tello instigates a clinch.
Tello is a painfully thin specimen of a man. You do wonder whether a good body kick would snap him clean in two.
Tello lands on the inside with an uppercut.
Kim wants a takedown.
Kim is breathing heavily.

That's one minute gone in the round.
Kim has a body lock and is looking for a takedown. Tello is bouncing around trying to prevent the takedown and somehow he has indeed managed to stay on his feet.
Kim taking a breather.
Tello wants a takedown but no success here.

Tello successfully pulls guard.
If this pace continues, the referee will definitely step in and force a standup.
Kim postures up to throw the ground and pound strikes but they don't connect.
Kim might be looking to lock onto one of his opponent's long limbs for a submission, whilst we're on the ground.
Kim postures up.
Kim with a flurry of punches that miss.
Tello looking to hit a scissor sweep but Kim is one step ahead there.
Kim has been looking to land a fair amount of strikes on the ground. He might be looking to soften his opponent up in order to work for a submission.

Tello is active off his back here, looking for submissions.
The fighters are pressed up against the cage, both looking to find a bit of space to work.
Tello is looking for a triangle but Kim pushes his legs off easily.

That's two minutes gone in the round.
Kim prevents Tello from getting back to his feet.
Tello looking to sweep here. No luck so far.
Kim postures up in Tello's guard and throws a big left but Tello blocks it.
Tello trying to keep a closed guard but Kim is proving a slippery customer.
Kim working in close now, lands a nice elbow to the side of Tello's head.
Kim in full guard, throwing the ground and pound. No damage this time.

Kim drops back for a leg! It's a sloppy attempt though and Kim jumps back into guard quickly, to retain the dominant position.
Tello not looking particularly offensive just at the moment.
The crowd are loving this. Great action here.
Tello is looking for a guillotine. You can't force these things though and Kim defends well.
Tello trying to control the position here.

That's three minutes gone in the round.
Tello utilising some decent striking defenses from the guard, preventing the ground and pound.
Kim throwing shots from guard but he's hitting more mat than opponent.
Kim loading up with the ground and pound but he's missing more than he's landing in this flurry.
Tello trying to control the position.
Tello looking for submissions from the bottom here. Moving his hips around, possibly looking for an armbar.
Kim works over Tello with some ground and pound from guard.
Kim makes a bit of distance and scores with some ground and pound, still in guard.
Tello working the defensive guard well to avoid strikes from Kim.
Kim postures up as if he's going to throw some strikes but drops back for an ankle! Tello is in big trouble! He looks ready to tap! But no, he's escaped and dives on top of Kim, into his guard.

That's four minutes gone in the round.
Tello preventing the sweep.
Kim looking for a guillotine here but Tello defends easily.
Tello won't allow Kim to sweep him here.
The crowd applaud the fighters efforts here as the round comes to an end.
Kim keeping full guard, as Tello tries to pass.
And thats the end of the round the fighters go back to their corners.
A close round but Frenzo Tello will probably get the nod.
That's time! Kim's corner gives him a slap on the ass as he gets ready to fight.

Tello gets to the clinch - let's see what his plan is here.
Tello is trying to pull guard but being pressed up against the cage enables Kim to keep the fight standing.
Kim tries to pull guard but Tello holds him up against the cage and eventually Kim drops back down to his feet.

Tello breaks from the clinch.
Kim slaps away a takedown attempt from Tello, before circling back to the center of the mat.
Tello shoots in looking for a double leg takedown. Kim defends it nicely.
Ashida Kim has stuffed three takedown attempts in the round now. That's going to take a lot out of Frenzo Tello.
Kim fails with a takedown attempt.
That's one minute gone in the round.

Tello gets taken down but at least he's managed to land in guard.
Both fighters are absolutely exhausted here.
Tello looking for a sweep. Not yet Tello, not yet.
Kim postures up in Tello's guard and throws a big left but Tello blocks it.
Tello is looking to get back to his feet but can't, whilst Kim is controlling him.
Tello not looking particularly offensive just at the moment.
Kim drops back, looking for a kneebar! Tello looks panicked! The fighters roll across the mat, one looking to finish, one looking to escape. Tello looks to have wriggled free... Yes, he's got his leg free and he's dived into side control! Good work there from Tello!
Kim tries to improve position but can't.
That's two minutes gone in the round.
Tello content to control the pace. The referee will try and keep them active though.

Tello decides to stand back up.
Tello lands a front kick.
Tello tries for a takedown but Kim sees it coming a mile off and avoids it easily.
This is a great period of action - very entertaining stuff!
Tello tries to close the distance and clinch but Kim swats him to one side with an open hand palm strike and circles away.
Tello fails with a takedown attempt from distance.
Tello stuffs a takedown. It's all about dictating where the fight takes place and Tello wants it to stay on the feet.
Tello scores with a nice body kick.
That's three minutes gone in the round.
Kim fails miserably with a takedown attempt.
Nice sprawl there from Kim as Tello shoots in.
Kim is trying hard to land a takedown here. Tello sprawls well and keeps this one on the feet.
Tello moves in looking to clinch but Kim pushes him off.
Tello has a takedown stuffed.
Tello leaves Kim with his face pressed against the mat as he sprawls beautifully, defending against a solid takedown attempt.
Tello slaps away a takedown attempt from Kim, before circling back to the center of the mat.
That's four minutes gone in the round.
Kim has his head slapped from side to side by a 3 punch combination. That must have hurt him.
A head kick from Tello lands but Kim takes it in his stride.
Nice takedown defense from Tello. No joy for Kim on that attempt.
Tello shoots in for a takedown but Kim shows good takedown defense.
Kim scores a trip takedown into side control. Nice.
You can see the frustration on Tello's face, being in this tough position on the bottom.
Kim lands an elbow.
The crowd are loving this. Great action here.
As the round comes to an end the crowd are showing their appreciation for a great round of action.
Tello struggling a bit here.
Kim lands a decent elbow from side control.
And thats the end of the round the fighters go back to their corners.
A close second round but Frenzo Tello will probably get the nod - 10:9.
That's time! Back to the action! And we move into the final round!

Tello looks for a takedown here. Will he get it? Kim is fending him off so far but Tello persists. Nope, Kim circles away and we're back to standing.
Tello shoots in but Kim avoids the takedown attempt easily.
Kim fails miserably with a takedown attempt.
Tello shoots in looking for a double leg takedown. Kim defends it nicely.
Ashida Kim has stuffed three takedown attempts in the round now. That's going to take a lot out of Frenzo Tello.
Tello closes the distance and pushes Kim back into the cage.
Both fighters are breathing heavily.
Tello taking a breather.
Tello prevents the takedown attempt.
That's one minute gone in the round.
Tello manages to break the clinch.
Tello shoots in for a takedown - he's clinched up with Kim but Kim pushes him off and we're back to square one.
Kim stuffs the takedown attempt from Tello. Tello gets slowly back to his feet.
Tello displays good takedown defense there as he swats away a double leg from Kim.
Tello fails with a takedown attempt.
Tello tries to close the distance and clinch up but Kim swats him away and circles back towards the center.
That's two minutes gone in the round.
Kim tries to score a power double leg takedown but Tello sees that one coming and sprawls well. That will dishearten Kim somewhat.
Ashida Kim is looking to throw some combinations by the looks of things.
A telegraphed takedown attempt from Tello is defended easily by Kim.
Kim fails with a rather predictable takedown attempt.
Kim blocks a head kick by Tello.
Tello fails with a takedown attempt from distance.
Kim shoots in looking for a single leg takedown. Tello is trying to defend but Kim finishes it well and ends up in half guard. Let's see if he can advance position further.
That's three minutes gone in the round.
Kim is trying for a guillotine from the top but the pressure isn't in the right place so Tello is just riding it out for now. Kim eventually gives up the hold.
Tello wants to get back to full guard.
Tello is trying to control but can't.
Kim working over Tello with some ground and pound. Tello looks like he wants out of this position, which is understandable.
Kim missing with the ground and pound from half guard.
Tello pushes Kim off looking to stand but Kim dives back in and keeps control.
Kim throwing shots but they're hitting the canvas more than the man.
That's four minutes gone in the round.
Tello trying to control but Kim postures up.
Tello is looking to escape.
Kim is thinking about going for an arm triangle but he can't free his leg.
Tello is trying to control but can't.
Kim sitting in half guard, looking to land shots. Tello defending well though.
Tello gets full guard.
Tello pulls Kim in close to prevent any damage.
The crowd applaud the fighters efforts here as the round comes to an end.
Kim landing with the ground and pound.
And that's the end of the fight!
That was a close round. You could make an argument for either fighter but I would give it to Ashida Kim.
I think Tello has won this one but let's see whether the judges agree with me. Over to the ring announcer for the scorecards.
Ladies and gentlemen, after 3 rounds of action, we go to the scorecards for a decision.
Judge Frank Antenori scores the fight 27:30
Judge Timothy Bukovac scores the fight 28:30
Judge Jack Bonds scores the fight 27:30
In favor of your winner, by unanimous decision... Frenzo Tello!
|
|
|
|
|
|
|
|
|
|
|
|
|
|
|
|
|
|
|
|
|
|
|
| S |
C
A |
G |
S |
C
B |
G |
|
S |
C |
G |
|
energy
A | B |
|
hype
A | B |
|
pop
A | B |
|
mgr
A | B |
|
FIGHT
RATING
54% |
|
|
|
|
|
|
|
Undercard bout
|
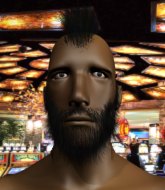
Coming up we have a heavyweight MMA rules bout between Mike Anderson (ranked 0 p4p, 0 weight class) and Keith James (ranked 0 p4p, 0 weight class). Keith James is the more experienced fighter, so let's see if that makes a difference tonight.
 |
|
 |
| 190 cm
21
275 lbs
0 - 1 - 0 |
|
187 cm
30
265 lbs
2 - 5 - 0 |
BJJ Blue Belt
Brawler
Self confident |
|
BJJ White Belt
Decent boxing
Powerful |
|
| |
|
Ladies and gentlemen. This fight is 3 rounds, in the heavyweight division.
Introducing the fighter to my left, fighting out of the red corner.
With a record of
0 - 1 - 0, fighting out of Los Angeles, Mike Anderson!
And introducing the fighter to my right, fighting out of the blue corner.
With a record of
2 - 5 - 0, fighting out of Los Angeles, Keith James!
The judges for this bout are Timothy Bukovac, Jack Bonds and Don Winkell.
The bell rings for round one and we are underway!
James shoots in for a takedown. "I don't think so" says Anderson as he avoids it easily.
Anderson changes levels and looks for a double leg takedown. James tries to avoid it but Anderson manages to keep hold of a leg and drag James to the ground. James escapes though and pops straight back up to his feet.
Anderson throws a series of punches but James avoids them all with ease.
James fakes high and shoots in for a takedown but Anderson avoids it really well and circles away.
A combination from Anderson does no damage.
Anderson tries to land with a swinging hook to the body but James was well out of range. Poor timing from Anderson.
No joy there for Anderson, who threw a few shots but didn't land.
James shoots in looking for a takedown. Anderson tries to sprawl out of it but James keeps driving through. The fighters are pinned against the cage. Anderson manages to get underhooks and after a bit of a struggle, circles away and we're back to standing.
Mike Anderson has stuffed three takedown attempts in the round now. That's going to take a lot out of Keith James.
James fails in his attempt to clinch.
Anderson fails to land with the punch combination there - jab, cross, hook, miss, miss, miss.
Anderson fails to land the takedown.
Anderson swings wildly with a couple of big hooks
and James counters with a nice uppercut.
Anderson looks to score with a combo but nothing lands.
That's one minute gone in the round.
James blocks a head kick by Anderson.
Anderson throws a series of punches but James moves out of range.
Anderson throws a nice looking combination but James bobs and weaves to avoid any damage.
James looking to throw a kick but he's pulled out of it.
Anderson tries a switch kick but it misses it's target.
James pulls out of a head kick attempt.
James lands a jab-cross combination.
James blocks the body kick.
James closes the distance and gets a double leg, slamming Anderson to the mat! Anderson manages to get full guard.
James stands up and looks to throw the legs aside to pass to side control. Anderson swivels though and keeps the full guard.
Anderson is looking to stand up but James isn't so interested in that idea.
This is a great period of action - very entertaining stuff!

Anderson kicks James off and gets to his feet.
That's two minutes gone in the round.
James forces Anderson back against the cage and clinches.
James wants to break free but Anderson has control.

Anderson manages to break the clinch.
Anderson throws a combination that misses
and James counters with a nice jab to the body that keeps Anderson thinking.
Anderson is breathing heavily.
James tries a head kick but it misses.
Anderson misses with a double jab
and James counters with a straight punch to the midsection.
Anderson slaps away a takedown attempt from James, before circling back to the center of the mat.
Mike Anderson seems to be the more aggressive standup fighter in this bout.
Anderson misses with a combination
and James counters by moving into the clinch.
Anderson is trying to force a seperation but James has the dominant position.
Anderson tries for a takedown. No joy.
Anderson is trying to break the clinch but James has him pressed against the cage.
That's three minutes gone in the round.
James stalling here - the referee won't stand for too much of that.
Anderson wants to strike at distance but he can't break free of the clinch.
Anderson breaks the clinch and we return to the middle of the mat.
Anderson avoids the head kick by James.
No luck with that takedown attempt from Anderson.
Anderson looks to score with a combo but nothing lands.
Anderson throws a left and a right that both miss
and James moves into the clinch.
James jumps guard but his hands slip and he falls flat on his back. Well, he's made himself look a right mug there, as Anderson walks away with a smile on his face. James gets slowly back to his feet and shakes his head.
Anderson throws a left and a right that both miss
enabling James to counter with a crisp jab.
Anderson swings wildly with a couple of big hooks
and James counters with a series of strikes. Anderson will be more careful next time no doubt.
Wooooo! Give it up for these two warriors! They are putting on a show!
Anderson stuffs the takedown.
James moves into the clinch.
That's four minutes gone in the round.
James is trying to break free.
Anderson is trying to break the clinch but James has him pressed against the cage.
James tries to pull guard but Anderson won't allow it.
James tries to circle away but Anderson has him pinned against the cage.
Anderson gets underhooks to prevent James's takedown attempt.
Anderson tries a knee to the head but James blocks it.
A frustrated look appears on James's face as he tries to break the clinch.
Anderson tries a shoulder strike but it doesn't do any damage.
James leaning against his opponent.
James is working on a leg, looking for a takedown but Anderson is defending well.
The crowd are going absolutely nuts as the round comes to an end - what a fantastic round of action!
Anderson manages to break the clinch.
Anderson swings for the body but James moves out of range.
James shoots in for a takedown. "I don't think so" says Anderson as he avoids it easily.
And thats the end of the round the fighters go back to their corners.
Keith James dominated that round.
That's time! Back to the action!
James showing good head movement there, avoiding the strikes from Anderson.
Anderson misses with a wild combination.
James blocks a low kick nicely.
Anderson misses with a jab, cross combination.
Some wild striking there from Anderson.
James throws a head kick that misses and slips in the process. He scrambles back to his feet and the fighters circle.
Anderson throws a hook to the body but it doesn't connect.
Anderson throws a sloppy head kick and James moves out of range easily.
No joy there for Anderson, who threw a few shots but didn't land.
James has closed the distance and engaged Anderson in a clinch.
Anderson is working for takedown but James is calmly controlling the position for now.
James wants to break free but Anderson has control.
That's one minute gone in the round.
James keeps control of Anderson as he tries to wriggle out of the double underhooks.
Anderson's corner calls for him to break the clinch, which he does.
Anderson rushes forward with a series of wild hooks but James moves out of range and avoids them all easily.
James fails with the takedown.
Anderson moves out of range of the body kick from James.
Anderson stuffs a takedown. It's all about dictating where the fight takes place and Anderson wants it to stay on the feet.
Keith James seems to be getting the better of the standup.
James throws a looping left and ducks down for a takedown. He's got his arms around Anderson's waist but Anderson gets an underhook and avoids the takedown by throwing James off to one side.
Mike Anderson has stuffed three takedown attempts in the round now. That's going to take a lot out of Keith James.
Anderson misses with a jab to the body
and James counters by moving into the clinch. Good anticipation by James.
James's corner calls for him to break the clinch, which he does.
James shoots in for a takedown - he's clinched up with Anderson but Anderson pushes him off and we're back to square one.
Nice defenses there by James.
Anderson takes a shot right to the bread basket.
That's two minutes gone in the round.
Anderson misses with a body shot. Nice footwork from James.
Anderson misses with a double jab.
Anderson falls off balance throwing a combination
and James counters with a series of strikes. Anderson will be more careful next time no doubt.
Both fighters are absolutely exhausted here.
Fantastic stuff here - a very entertaining period of action, which has drawn cheers from the crowd.
Anderson throws a left and a right that both miss
and James counters with a shot to the ribs. That looked like it hurt.
James wants to slow Anderson down by chopping away at his legs.
Anderson swings wildly with a couple of big hooks

and James counters with a crisp one two that drops Anderson! James thinks about following him to the mat for a moment but instead steps back and waves Anderson to his feet! Anderson is in big trouble!

Anderson is rocked!
James shoots in with a takedown attempt and he has Anderson pinned against the cage. Anderson gets the underhooks and manages to circle away.
James shoots in looking for a takedown but Anderson manages to keep the fight standing, pushing James's face into the canvas for good measure before circling away.
Anderson throws a body kick that misses.
Anderson misses with a few strikes there.
That's three minutes gone in the round.
James is trying hard to land a takedown here. Anderson sprawls well and keeps this one on the feet.
James fails with a takedown attempt.
Anderson throws a right hand that James ducks under and follows up with a left that James also avoids with ease.
James throws a looping left and ducks down for a takedown. He's got his arms around Anderson's waist but Anderson gets an underhook and avoids the takedown by throwing James off to one side.
James tries to close the distance and clinch up but Anderson swats him away and circles back towards the center.
James shoots for a double leg takedown but Anderson sprawls well. He's pushed James's face into the mat and manages to get back to his feet relatively easily.
Anderson swings wildly with a couple of big hooks
and James makes him pay by landing a nice hook to the body before moving out of range.
James tries to clinch but Anderson is having none of it.
Anderson throws a combination that misses
and James counters nicely by changing levels and landing a hook to the body.
Anderson throws a combination that misses
and James cracks him with a counter punch right on the button.
Oooooooooooh, not good. A low kick from James lands where it shouldn't have, right in the... well, you know what he did? He kicked him in the penis. He's injured, injured bad. The referee sends both fighters to their corners and Anderson has 5 minutes to recover. He's OK now though... a thumbs up from Anderson and we're back underway with a touch of gloves.
That's four minutes gone in the round.
James rushes Anderson and presses him up against the cage.
A short uppercut from James.
Fantastic stuff here - a very entertaining period of action, which has drawn cheers from the crowd.
Anderson breaks the clinch and we return to the middle of the mat.
Anderson falls off balance throwing a combination
and James counters with a good right hand that lands right on the jaw.
James pushes Anderson up against the cage in a clinch.
Anderson prevents a takedown attempt there.
Stalling in the clinch from James.
James continues to stall. The referee tells him to work or he's going to break them up.
The crowd are going absolutely nuts as the round comes to an end - what a fantastic round of action!
Anderson tries to land a knee to the body but he is off balance and James avoids it.
And thats the end of the round the fighters go back to their corners.
Keith James showed his class in that round. I'd imagine he'll take it on all the scorecards.
That's time! Anderson's corner gives him a slap on the ass as he gets ready to fight. This is the final round!
Anderson slaps away a takedown attempt from James, before circling back to the center of the mat.
Anderson swats away the attempt to clinch by James.
Anderson takes a punch to the jaw and another one to the bread basket.
James closes the distance and clinches up with Anderson, looking for a takedown. James pushes Anderson against the cage but Anderson circles to the side and manages to break the clinch.
James slips a jab and a cross from Anderson.
Anderson misses with a jab, cross combination.
Anderson falls off balance throwing a combination
and James counters with a three punch combination, finished off with a leg kick. Nice work.
Anderson looks to score with a combo but nothing lands.
Anderson swings away but doesn't land with a series of punches.
A head kick misses from Anderson.
Anderson throws a head kick that misses.
Both fighters are breathing heavily.
That's one minute gone in the round.
James fails in his attempt to clinch.
James looks for a takedown here. Will he get it? Anderson is fending him off so far but James persists. Nope, Anderson circles away and we're back to standing.
Mike Anderson has stuffed three takedown attempts in the round now. That's going to take a lot out of Keith James.
James fails with an attempt to clinch.
Anderson misses with a double jab
and James counters with a nice uppercut.
Anderson throws a wild combination but nothing lands.
Anderson avoids the head kick by James.
Anderson throws a jab, cross combination which is slipped
and James counters with a stiff right hand.
Anderson pivots as if he's going to throw a leg kick but stops half way.
The fight stays on the outside here - James looks like he's thinking about clinching though.
Anderson blocks a head kick by James.
Some wild striking there from Anderson.
That's two minutes gone in the round.
James will have to do better than that with his takedown attempts.
Anderson misses with a combination
and James makes him pay by landing a nice hook to the body before moving out of range.
Fantastic stuff here - a very entertaining period of action, which has drawn cheers from the crowd.
James lands a nice hook to Anderson's body. Anderson takes it in his stride and looks to land his own strikes.
James wants to land a leg kick but Anderson is out of range.
James connects with a jab and follows up with a big overhand right! Oh that's hurt Anderson! He's out on his feet! James rushes in and drops Anderson with another big right hand, forcing the referee to stop the fight!
Ladies and gentlemen, after 2:34 of round 3, we have a winner by way of TKO (Punches). Keith James!
|
|
|
|
|
|
|
|
|
|
|
|
|
|
|
|
|
|
|
|
|
|
|
| S |
C
A |
G |
S |
C
B |
G |
|
S |
C |
G |
|
energy
A | B |
|
hype
A | B |
|
pop
A | B |
|
mgr
A | B |
|
FIGHT
RATING
100% |
|
|
|
|
|
|
|
Undercard bout
|
|
|
|
Undercard bout
|
|
|
|
Undercard bout
|
Coming up we have a featherweight MMA rules bout between Sydney Fife (ranked 0 p4p, 0 weight class) and Ricardo Nova Terra (ranked 0 p4p, 0 weight class). Fife's entrance music is The Offspring - Why Don't You Get A Job. A fine choice. Nova Terra has chosen Super Duper Love as his entrance music. Man, I cannot wait for this one!
 |
|
 |
| 178 cm
20
155 lbs
3 - 1 - 0 |
|
176 cm
20
145 lbs
1 - 2 - 1 |
BJJ White Belt
Solid boxing
KO power |
|
BJJ Blue Belt
Counter striker
Intelligent |
|
| |
|
Ladies and gentlemen. This fight is 3 rounds, in the featherweight division.
Introducing the fighter to my left, fighting out of the red corner.
With a record of
3 - 1 - 0, fighting out of Los Angeles, Sydney Fife!
And introducing the fighter to my right, fighting out of the blue corner.
With a record of
1 - 2 - 1, fighting out of Los Angeles, Ricardo Nova Terra!
The judges for this bout are Timothy Bukovac, Jack Bonds and Don Winkell.
The bell rings for round one and we are underway!
Fife misses with a double jab
and Nova Terra counters with a nice jab to the body that keeps Fife thinking.
Fife pulls out of a head kick attempt.
Fife uses some good footwork to avoid the body shot by Nova Terra.
Nova Terra misses with a hook to the body
and Fife counters with a quick right hand to the jaw.
Nova Terra misses with a hook to the body
and Fife counters with a solid body kick.
Fife displaying good standup as he scores with a three punch combination.

Nova Terra is rocked!
Fife fakes a head punch and goes low to the body. Nicely done.
Nova Terra is still on wobbly legs! Can Fife finish him?
Fantastic stuff here - a very entertaining period of action, which has drawn cheers from the crowd.
Fife throws a combination but it was largely blocked by Nova Terra.
Nova Terra seems to have recovered his senses.
Nova Terra thows a body shot but no joy.
Fife cracks Nova Terra with a nice right hand that draws applause from the crowd.
That's one minute gone in the round.
Nova Terra throws a lazy uppercut
and Fife counters with a crisp right that sends Nova Terra to the canvas! Fife follows up with punches from the mount and this one is all over!
Ladies and gentlemen, after 1:11 of round 1, we have a winner by way of TKO (Strikes). Sydney Fife!
An out of breath Sydney Fife thanked his loyal fans in his post fight interview, giving them credit for his success over the course of his career.
|
|
|
|
|
|
|
|
|
|
|
|
|
|
|
|
|
|
|
|
|
|
|
| S |
C
A |
G |
S |
C
B |
G |
|
S |
C |
G |
|
energy
A | B |
|
hype
A | B |
|
pop
A | B |
|
mgr
A | B |
|
FIGHT
RATING
44% |
|
|
|
|
|
|
|
Co-main event
|
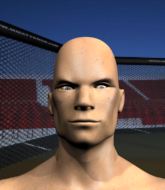
Coming up we have a light heavyweight MMA rules bout between Scott Broyles (ranked 0 p4p, 0 weight class) and Edwin Atkins (ranked 0 p4p, 0 weight class). Atkins has chosen Battle Without Honour Or Humanity as his entrance music. Both fighters look fresh as a daisy as they make their way towards the cage.
 |
|
|
| 185 cm
21
210 lbs
5 - 4 - 0 |
|
188 cm
22
218 lbs
2 - 0 - 0 |
Good takedowns
Solid boxing
Cardio machine |
|
BJJ Blue Belt
Counter striker
Solid chin |
|
| |
|
Ladies and gentlemen. This fight is 3 rounds, in the light heavyweight division.
Introducing the fighter to my left, fighting out of the red corner.
With a record of
5 - 4 - 0, fighting out of Los Angeles, Scott Broyles!
And introducing the fighter to my right, fighting out of the blue corner.
With a record of
2 - 0 - 0, fighting out of Los Angeles, Edwin Atkins!
The judges for this bout are Timothy Bukovac, Don Winkell and Frank Antenori.
The bell rings for round one and we are underway!
Broyles shoots in for a takedown - he's clinched up with Atkins but Atkins pushes him off and we're back to square one.
Atkins changes levels and drives through with a really nice takedown into side control. Broyles looks really pissed at himself for not defending that better.
Broyles on his back here. We all know that wrestlers don't like being on their back so let's see if Broyles tries to get out of the position.
The referee must be thinking about standing these guys back up.
Broyles is looking to reverse the position.
Atkins wants to control but Broyles is keeping him busy.
Broyles is looking to regain half guard here but Atkins keeps moving and retains side control.
Atkins wants to lay and pray for a moment but Broyles keeps working.
Atkins tries to land with some ground and pound but misses.
Atkins scores with punches from side control.
Atkins throws a strike aimed at the side of Broyles's head but Broyles avoids it well.
Broyles regains half guard.
Broyles punching from the bottom.
Broyles is looking to regain full guard. Not this time though.
Broyles lands one or two decent shots to the body here. Although from his own half guard, he's not going to be causing too much damage.
Broyles has been looking to land a fair amount of strikes on the ground. He might be looking to soften his opponent up in order to work for a submission.
Wooooo! Give it up for these two warriors! They are putting on a show!
Broyles lands with a few short shots to the body.
Broyles is working for an escape here. He's hooked one of Atkins's legs and he's managed to sneak out and take Atkins's back!
That's one minute gone in the round.
Atkins just trying to survive but Broyles is wriggling into a better position, looking to finish.
Broyles throwing lazy shots from the back mount that aren't doing any damage.
Broyles missing with strikes.
Atkins avoids the strikes from Broyles.
Atkins won't enjoy being in this position. Broyles looking for the choke. Oh... he's slipped the arm under the neck - Atkins is tapping - it's over boys! Broyles picks up the submission victory!
Ladies and gentlemen, after 1:33 of round 1, we have a winner by way of Submission (RNC). Scott Broyles!
Scott Broyles decided to go for the less than humble approach in his post fight interview, telling everyone how he is going to conquer the world. The crowd seemed to like it when really that sort of approach could have gone either way.
|
|
|
|
|
|
|
|
|
|
|
|
|
|
|
|
|
|
|
|
|
|
|
| S |
C
A |
G |
S |
C
B |
G |
|
S |
C |
G |
|
energy
A | B |
|
hype
A | B |
|
pop
A | B |
|
mgr
A | B |
|
FIGHT
RATING
59% |
|
|
|
|
|
|
|
Main event
|
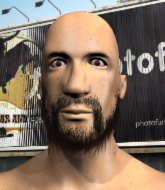
Coming up we have a super heavyweight MMA rules bout between Dwight Howard (ranked 0 p4p, 0 weight class) and Lazerus Limbtwister (ranked 0 p4p, 0 weight class). Howard comes to the cage accompanied by superman theme. Limbtwister has chosen Wait and bleed by Slipknot as his entrance music. The key to victory for Dwight Howard has got to be keeping the fight on the feet.
 |
|
 |
| 210 cm
26
270 lbs
3 - 0 - 0 |
|
195 cm
26
287 lbs
3 - 0 - 0 |
BJJ Blue Belt
Brawler
Cuts easily |
|
Powerful takedowns
Counter striker
Powerful |
|
| |
|
Ladies and gentlemen. This fight is 5 rounds, for the super heavyweight championship of the world!
Introducing the champion to my left, fighting out of the red corner.
With a record of
3 - 0 - 0, fighting out of Los Angeles, Dwight Howard!
And introducing the challenger to my right, fighting out of the blue corner.
With a record of
3 - 0 - 0, fighting out of Hilo, Lazerus Limbtwister!
The judges for this bout are Frank Antenori, and Don Winkell.
The bell rings for round one and we are underway!
Howard misses with a body shot. Nice footwork from Limbtwister.
Limbtwister shoots in but no luck this time.
Howard shuffles to his left behind two crisp jabs. Limbtwister eats them both and turns towards Howard to reposition himself and eats a stinging right hand-left hook combo.

It looks like Lazerus Limbtwister has been cut.
Limbtwister looks for a takedown here. Will he get it? Howard is fending him off so far but Limbtwister persists. Nope, Howard circles away and we're back to standing.
Limbtwister misses with a takedown attempt. He shot from a bit too far out.
Dwight Howard has stuffed three takedown attempts in the round now. That's going to take a lot out of Lazerus Limbtwister.
Howard throws a right and a left that both miss.

Howard drops Limbtwister with a left and a right! Oh, Limbtwister is hurt - Howard dives into side control looking to finish!
This has been an exciting period of action!
You can see the frustration on Limbtwister's face, being in this tough position on the bottom.
Limbtwister is holding Howard down, trying to stall.
Limbtwister manages to work his way to half guard, despite Howard's best efforts.
That's one minute gone in the round.
Limbtwister is looking to sinch up a guillotine here but Howard pulls his head out easily.
Limbtwister avoiding damage under a succession of punches from Howard.
Limbtwister actively working from the bottom here.
Howard is trying to control the action in half guard but Limbtwister is working away on the bottom, looking perhaps to get back to full guard.
Howard will need to keep those long limbs tucked in whilst he's on the ground, to prevent any submissions.
Howard is thwarting Limbtwister's attempts to control the position.
Limbtwister is doing well to control the position and prevent Howard from advancing to side control.
Limbtwister looking for submissions from an awkward position here.
Limbtwister is doing well to avoid being mounted. He's controlling the position at the moment.
Limbtwister gets back to full guard.
That's two minutes gone in the round.
Limbtwister is throwing his legs up, looking for submissions. Howard is aware though and is defending well.
Howard has to be careful here, sitting in the guard of a superior BJJ player.
Howard pressing down on his opponent's thigh, looking to pass guard. Limbtwister is keeping the position for now.
Limbtwister has a loose triangle. He'll be looking to tighten that up but Howard can see exactly what he's planning and manages to posture up and free himself.
The ref warns both fighters not to hold the cage as they work up against the meshing.
The fans in attendance giving it up for the two fighters, who have really let it all hang out in the last minute or so!
Limbtwister tries to land a sweep but no joy.
Howard throwing shots from guard but he's hitting more mat than opponent.
There's a bit of a scramble here and now Limbtwister is on top in guard.
Limbtwister is intent on slowing down the pace of the fight, simply looking to control.
Limbtwister throwing shots from guard but he's hitting more mat than opponent.
That's three minutes gone in the round.
Howard can't keep his opponent in guard - Limbtwister advances to half guard, no doubt looking to mount.
The fighters are pressed up against the cage, both looking to find a bit of space to work.
Limbtwister is looking for a kimura here.
The fighters are starting to get a bit slippery now, which will make submissions a bit more difficult.
Limbtwister is looking for a kimura here.
Limbtwister is trying for a guillotine from the top but the pressure isn't in the right place so Howard is just riding it out for now. Limbtwister eventually gives up the hold.
Howard knows he needs to get back to his feet asap. He's simply no match for Limbtwister on the ground.
That's four minutes gone in the round.
Howard tries to get to full guard but Limbtwister has control of the leg.
Limbtwister trying to control from Howard's half guard. Howard has other ideas though and has regained full guard.
The crowd are going absolutely nuts as the round comes to an end - what a fantastic round of action!
Limbtwister drops back for a leg but he's not going to get it - he lets go and Howard dives on top into guard.
Limbtwister has managed to work for a loose triangle. I think Howard should be able to defend this one pretty easily though. Oh, Limbtwister has tightened it up now! Howard should have reacted faster there - he's in big trouble and yes, he's tapped out! This one is all over!
Ladies and gentlemen, after 4:57 of round 1, we have a winner by way of Submission (Triangle). Lazerus Limbtwister! Lazerus Limbtwister retains his super heavyweight title!
As Lazerus Limbtwister got his breath back, he grabbed the microphone and managed to blurt out the following: I am the Bellum SHW champ and Im here to stay!!'.
|
|
|
|
|
|
|
|
|
|
|
|
|
|
|
|
|
|
|
|
|
|
|
| S |
C
A |
G |
S |
C
B |
G |
|
S |
C |
G |
|
energy
A | B |
|
hype
A | B |
|
pop
A | B |
|
mgr
A | B |
|
FIGHT
RATING
46% |
|
|
|
|
|
|
|
|
|
|

