 |
ROF 2 PBP Commentary |
Undercard bout
|
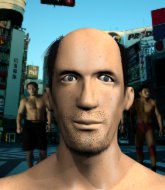
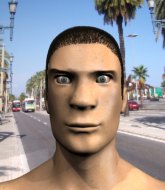
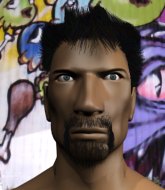
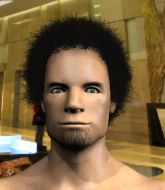
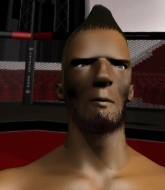
Coming up we have a heavyweight MMA rules bout between Rashed Evans (ranked 0 p4p, 0 weight class) and Jumbo Tyson (ranked 0 p4p, 0 weight class). Tyson has a niggling injury. He would have liked to come in 100% fit but that's not always possible. These two fighters really are very evenly matched on the feet - it will be fascinating to see who can assert themselves in that aspect of the fight.
 |
|
 |
| 180 cm
19
250 lbs
0 - 2 - 0 |
|
187 cm
25
245 lbs
0 - 2 - 0 |
BJJ White Belt
Great elbows
Granite chin |
|
BJJ Blue Belt
Good kicks
Solid chin |
|
| |
|
Ladies and gentlemen. This fight is 3 rounds, in the heavyweight division.
Introducing the fighter to my left, fighting out of the red corner.
With a record of
0 - 2 - 0, fighting out of Hilo, Rashed Evans!
And introducing the fighter to my right, fighting out of the blue corner.
With a record of
0 - 2 - 0, fighting out of Hilo, Jumbo Tyson!
The judges for this bout are Roger Salmon, Paul Gruel and Colin Fray.

The bell rings for round one and we are underway!
A looping hook to the body misses from Evans. Tyson does a little dance to reset his feet.
Tyson shoots in for a takedown. "I don't think so" says Evans as he avoids it easily.
Tyson looks gassed!
A telegraphed takedown attempt from Tyson is defended easily by Evans.

Evans gets in close and instigates a clinch.
Evans tries to stall but Tyson uses the opportunity to gain a better position.
Tyson taking a breather.
Tyson wants to break free. God knows he wants to breaaaak freeee.
Tyson has Evans pressed against the ropes, preventing Evans from circling away and getting back to striking at range.
Evans jumps guard but Tyson turns him against the ropes and keeps the fight standing.
Evans tries to take the fight to the ground by pulling guard but can't manage it.
Evans tries for a takedown but Tyson manages to get underhooks.
That's three failed takedown attempts in the round for Rashed Evans. That's going to take a lot out of him.
Evans has had enough of the clinch but Tyson keeps him there for the moment.
Evans wants to break free but Tyson has control.
Evans tries to circle away but Tyson has him pinned against the ropes.
Evans fails to pull the fight into his guard.
Tyson jumps guard but Evans turns him against the ropes and keeps the fight standing.

That's one minute gone in the round.
Tyson swings wildly with an uppercut but Evans uses good head movement to avoid it.
Evans is working for takedown but Tyson is calmly controlling the position for now.
Evans is trying to force a seperation but Tyson has the dominant position.
Evans is trying to pull guard but being pressed up against the ropes enables Tyson to keep the fight standing.
Tyson is trying to push Evans away but Evans has him pressed against the ropes, so he's going nowhere.

Evans breaks from the clinch.
Evans fails with a rather predictable takedown attempt.

Tyson scores a trip takedown into side control. Nice.
Evans struggling a bit here.
Evans is trying to get back to half guard.

That's two minutes gone in the round.
Tyson throwing strikes but Evans manages to buck up and roll into a nice reversal - now he's on top in side control!
Evans tries to stand but Tyson is controlling his head.
An elbow from Evans crashes against the mat.
Evans sitting in side control, looking to soften his opponent up with elbows and hammerfists but Tyson is avoiding damage well and looking to escape the position.
The fans in attendance giving it up for the two fighters, who have really let it all hang out in the last minute or so!

Evans is trying to get an arm triangle but Tyson is defending well.

That's three minutes gone in the round.
Evans tries for an arm triangle. That looks pretty tight to me. Is this one over!?! Possibly, maybe, no Evans has let go of the choke. Obviously it wasn't as tight as we thought!
Tyson manages to work his way to half guard, despite Evans's best efforts.
The fighters are tangled up in the ropes here. We might need a restart if the fighters can't break free themselves.
Tyson is working for an escape here. He's hooked one of Evans's legs and he's managed to sneak out and take Evans's back!

That's four minutes gone in the round.
A bit of a pause in the action here. Tyson controlling the positon.
Evans rolls, trying to escape but Tyson keeps control of the position.

Tyson is working for a rear naked choke. Evans is not defending it well and Tyson has tightened it up quickly! This could be all over! Evans refuses to tap and goes to sleep, forcing the referee to intervene. A little trickle of blood came out of Evans's nose as his head slumped to the floor. That is naaaasty!
Ladies and gentlemen, after 4:45 of round 1, we have a winner by way of Submission (RNC). Jumbo Tyson!
|
|
|
|
|
|
|
|
|
|
|
|
|
|
|
|
|
|
|
|
|
|
|
| S |
C
A |
G |
S |
C
B |
G |
|
S |
C |
G |
|
energy
A | B |
|
hype
A | B |
|
pop
A | B |
|
mgr
A | B |
|
FIGHT
RATING
36% |
|
|
|
|
|
|
|
Undercard bout
|
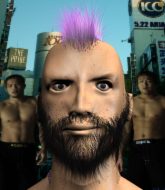
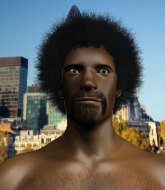
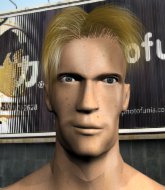
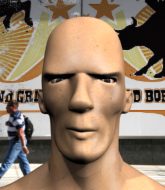
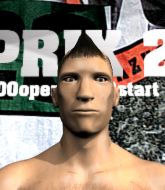
Coming up we have a light heavyweight MMA rules bout between Chuck Bouncer (ranked 0 p4p, 0 weight class) and Jimmy Yackey (ranked 0 p4p, 0 weight class). We have two fighters making their debuts here, so let's see who comes out of this one with their first professional victory.
 |
|
 |
| 195 cm
18
220 lbs
0 - 0 - 0 |
|
188 cm
19
205 lbs
0 - 0 - 0 |
BJJ White Belt
Excellent boxer
Granite chin |
|
Good wrestler
Good kicks
Granite chin |
|
| |
|
Ladies and gentlemen. This fight is 3 rounds, in the light heavyweight division.
Introducing the fighter to my left, fighting out of the red corner.
With a record of
0 - 0 - 0, fighting out of Hilo, Chuck Bouncer!
And introducing the fighter to my right, fighting out of the blue corner.
With a record of
0 - 0 - 0, fighting out of Hilo, Jimmy Yackey!
The judges for this bout are Paul Gruel, Josh West and Colin Fray.
The bell rings for round one and we are underway!
Yackey shoots in for a takedown and gets it.
Yackey has hold of the far side arm. He's working for the Kimura, can Bouncer defend it? Yackey steps over the head and cranks it - Bouncer is tapping out! That was textbook stuff right there - nice submission victory for Yackey!
Ladies and gentlemen, after 0:05 of round 1, we have a winner by way of Submission (Kimura). Jimmy Yackey!
|
|
|
|
|
|
|
|
|
|
|
|
|
|
|
|
|
|
|
|
|
|
|
| S |
C
A |
G |
S |
C
B |
G |
|
S |
C |
G |
|
energy
A | B |
|
hype
A | B |
|
pop
A | B |
|
mgr
A | B |
|
FIGHT
RATING
68% |
|
|
|
|
|
|
|
Undercard bout
|
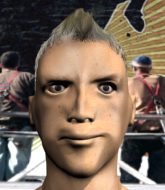
Coming up we have a bantamweight MMA rules bout between Marshall Jones (ranked 0 p4p, 0 weight class) and Gunner King (ranked 0 p4p, 0 weight class). Over to our ring announcer for the fighter introductions!
 |
|
 |
| 178 cm
22
140 lbs
0 - 1 - 0 |
|
170 cm
18
145 lbs
0 - 0 - 0 |
BJJ Blue Belt
Excellent boxer
Inexperienced |
|
Good wrestler
Basic striking
Experienced |
|
| |
|
Ladies and gentlemen. This fight is 3 rounds, in the bantamweight division.
Introducing the fighter to my left, fighting out of the red corner.
With a record of
0 - 1 - 0, fighting out of Hilo, Marshall Jones!
And introducing the fighter to my right, fighting out of the blue corner.
With a record of
0 - 0 - 0, fighting out of Hilo, Gunner King!
The judges for this bout are Ryoma Takatsuka, Chris Saunders and Micheangelo Fripello.
The bell rings for round one and we are underway!
King misses with a hook.

The fight moves into the clinch position.
King's corner are urging him to control the action in the clinch for a moment, rather than mount any serious offense. I'm sure the crowd appreciate those instructions... not.
King has clasped his hands together around Jones's back... aaand, he's got a takedown into side control. Nicely done.
The referee looks like he's ready to step in and stand the fighters back up.
Jones can't do much from the bottom here.
Jones takes a nasty elbow to the side of the head.
King lands some shots froms side control.
King landing strikes.
Wooooo! Give it up for these two warriors! They are putting on a show!
Jones wants to escape from the position here - easier said than done!
King in side control lands a decent elbow.

Jones is rocked!
You can see the frustration on Jones's face as King controls the position.
Jones can't do much from the bottom here.
That's one minute gone in the round.
King working the head with strikes.
King landing strikes.
Oh Jones is still in real trouble! Will he be able to recover?!!
Jones wants to control but King postures up.
Jones takes a couple of big shots there - the referee warns him that he has to defend himself better.
Jones really does look like a pencil wearing a pair of gloves. Let's hope he has a gameplan to suit that ridiculous body shape.
King landing strikes.
The fighters are trapped in the ropes so we're going to have a reposition here. The ref calls for a break and repositions the fighters in the center of the ring.
King is looking to take a break and control but Jones is keeping him honest, looking to work from the bottom.
Jones is positioning himself to get back to half guard.
Jones trying to control but King flips him over like a cheap hooker and has his back!
King is punishing Jones with strikes - can he finish him?!
King is raining down hard shots and and Jones has had enough - he's tapped out due to the strikes!
Ladies and gentlemen, after 2:59 of round 1, we have a winner by way of Submission (Strikes). Gunner King!
|
|
|
|
|
|
|
|
|
|
|
|
|
|
|
|
|
|
|
|
|
|
|
| S |
C
A |
G |
S |
C
B |
G |
|
S |
C |
G |
|
energy
A | B |
|
hype
A | B |
|
pop
A | B |
|
mgr
A | B |
|
FIGHT
RATING
71% |
|
|
|
|
|
|
|
Undercard bout
|
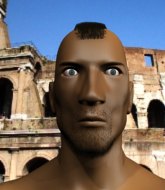
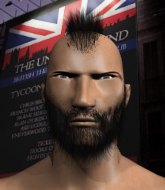
Coming up we have a light heavyweight MMA rules bout between Jared Hart (ranked 0 p4p, 0 weight class) and Hanzo Hasashi (ranked 0 p4p, 0 weight class). Both fighter's entrance songs getting the crowd jumping here.
 |
|
 |
| 225 cm
26
210 lbs
1 - 2 - 0 |
|
192 cm
22
205 lbs
1 - 2 - 0 |
BJJ White Belt
Excellent boxer
Very quick |
|
BJJ Blue Belt
Good kicks
Very confident |
|
| |
|
Ladies and gentlemen. This fight is 3 rounds, in the light heavyweight division.
Introducing the fighter to my left, fighting out of the red corner.
With a record of
1 - 2 - 0, fighting out of Hilo, Jared Hart!
And introducing the fighter to my right, fighting out of the blue corner.
With a record of
1 - 2 - 0, fighting out of Hilo, Hanzo Hasashi!
The judges for this bout are Ryoma Takatsuka, Jeff Smith and Paul Gruel.
The bell rings for round one and we are underway!
Hart keeps the fight standing with a nice sprawl.
Hasashi shoots in for a takedown but Hart shows good takedown defense there and keeps this one on the feet.
Nice sprawl there from Hart as Hasashi shoots in.
Jared Hart has stuffed three takedown attempts in the round now. That's going to take a lot out of Hanzo Hasashi.
Hasashi shoots in for a takedown but Hart shows good takedown defense there and keeps this one on the feet.
Hasashi shoots in for a takedown - he's clinched up with Hart but Hart pushes him off and we're back to square one.
Hanzo Hasashi seems to be the more aggressive standup fighter in this bout.
Hasashi fails with a rather predictable takedown attempt.
Hasashi slips a jab and a cross from Hart.
That's one minute gone in the round.
Hasashi shoots in with a takedown attempt and he has Hart pinned against the ropes. Hart gets the underhooks and manages to circle away.
Hart fails to land with the punch combination there - jab, cross, hook, miss, miss, miss.
Hasashi fakes high and shoots in for a takedown but Hart avoids it really well and circles away.
Hasashi shoots in but no luck this time.
That's two minutes gone in the round.
Hart stuffs the takedown attempt from Hasashi. Hasashi gets slowly back to his feet.
Hart throws a combination but it was largely blocked by Hasashi.
Hart leaves Hasashi with his face pressed against the mat as he sprawls beautifully, defending against a solid takedown attempt.
Hart throws a series of punches but Hasashi moves out of range.
Hart throws a combination but it was largely blocked by Hasashi.
That's three minutes gone in the round.
Hasashi shoots in for a takedown but Hart shows good takedown defense.
Hasashi looks for a takedown. He's got it. We're now in half guard.
Hasashi looks gassed!
Hasashi is thinking about going for an arm triangle but he can't free his leg.
Hasashi trying to control from half guard but Hart is working away.
That's four minutes gone in the round.
Hasashi is trying to work for a kimura but Hart is defending well.
Hasashi is looking for an arm triangle, whilst trying to pass to side control. Hart doesn't seem that keen to cooperate though. No luck this time Hasashi.
Hart is not content to let Hasashi control the position.
And thats the end of the round the fighters go back to their corners.
Hanzo Hasashi dominated that round.
That's the end of the interval. I'm sure that seemed a lot quicker than a minute for our two fighters! Back to the action.

Hasashi dives in and grabs Hart's left leg, looking for a takedown. Hart pushes down on Hasashi's head and hops out.
No luck with that takedown attempt from Hasashi.
Hart swings away but doesn't land with a series of punches.
Hasashi shoots in for a takedown but Hart shows good takedown defense there and keeps this one on the feet.
Jared Hart has stuffed three takedown attempts in the round now. That's going to take a lot out of Hanzo Hasashi.
A punch combination from Hart misses.
Hasashi shoots in for a takedown but Hart shows good takedown defense there and keeps this one on the feet.
That's one minute gone in the round.
Hasashi shoots in but Hart avoids the takedown attempt easily.
Hasashi shoots for a takedown but Hart saw that one coming a mile off and avoided it easily.
Hart defends well against a solid takedown attempt from Hasashi.
Hasashi is breathing heavily.
Hart misses with a jab and misses with a cross straight after too.
Hart defends well against a solid takedown attempt from Hasashi.
Hasashi tries to shoot in for a takedown. He's got hold of a leg but Hart swivels and escapes.
That's two minutes gone in the round.
Hart will need to tighten up his combinations if he doesn't want to gas himself out, swinging at thin air.
Hart really does look like a pencil wearing a pair of gloves. Let's hope he has a gameplan to suit that ridiculous body shape.
Hart throws a series of punches but Hasashi moves out of range.
Hasashi shoots in for a takedown - he's clinched up with Hart but Hart pushes him off and we're back to square one.
Hasashi fails with a takedown attempt.
Hart throws a combination but it was largely blocked by Hasashi.
That's three minutes gone in the round.
Hasashi looks for a takedown here. Will he get it? Hart is fending him off so far but Hasashi persists. Nope, Hart circles away and we're back to standing.
Hasashi shoots in looking for a double leg takedown. Hart defends it nicely.
Jared Hart is looking to throw some combinations by the looks of things.
Hart fails to land with the punch combination there - jab, cross, hook, miss, miss, miss.
Hasashi shoots in for a takedown but Hart shows good takedown defense there and keeps this one on the feet.
Hasashi will have to do better than that with his takedown attempts.
That's four minutes gone in the round.
Hart misses with a wild combination.
Hasashi avoids a punch combination nicely.
Hasashi slips a jab and a cross from Hart.
Hasashi gets a double leg takedown into Hart's guard.
And thats the end of the round the fighters go back to their corners.
A close second round but Hanzo Hasashi will probably get the nod - 10:9.
The fighters get back to their feet, the hooter sounds and we're back to the action! And we move into the final round!

Hart misses with a two punch combination.
A telegraphed takedown attempt from Hasashi is defended easily by Hart.
Hart throws a wild combination but nothing lands.
We've had a slow start to the round here - hopefully the action picks up.
Hart stuffs a takedown. It's all about dictating where the fight takes place and Hart wants it to stay on the feet.
Hasashi fakes high and shoots in for a takedown but Hart avoids it really well and circles away.
Jared Hart has stuffed three takedown attempts in the round now. That's going to take a lot out of Hanzo Hasashi.
Hasashi takes a big intake of breath there - he's definitely tired.
That's one minute gone in the round.
Hasashi feints and as Hart raises his hands in defense, Hasashi changes levels and drives through with a takedown into guard.
Hasashi drops back for a leg! It's a sloppy attempt though and Hasashi jumps back into guard quickly, to retain the dominant position.
The fighters are tangled up in the ropes here. We might need a restart if the fighters can't break free themselves.
Hasashi looking to control the position here, rather than advance.
Hasashi wants to control from the top but Hart keeps moving.
Jared Hart has stepped it up - he knows he needs a finish here!
That's two minutes gone in the round.
The referee is asking the fighters to pick up the pace.

The ref stands the fighters back up, due to lack of action by Hanzo Hasashi.
Hart fails to land with the punch combination there - jab, cross, hook, miss, miss, miss.
Hart leaves Hasashi with his face pressed against the mat as he sprawls beautifully, defending against a solid takedown attempt.
Jared Hart is looking to keep the fight on the feet at all costs.
That's three minutes gone in the round.
Hasashi fails to land the takedown.
Hart slaps away a takedown attempt from Hasashi, before circling back to the center of the mat.
Hart fails to land with a series of punches.
Hart misses with a double jab
and Hasashi counters with a single leg into guard. Hart didn't expect that.
Hart knows he needs to get back to his feet asap. He's simply no match for Hasashi on the ground.
That's four minutes gone in the round.
Hasashi wants to control from the top but Hart keeps moving.
Hasashi drops back for a leg! It's a sloppy attempt though and Hasashi jumps back into guard quickly, to retain the dominant position.
Hasashi trying to control the position from guard on top but Hart is wriggling around, looking for whatever he can.
And that's the end of the fight!
Hanzo Hasashi comfortably won the final round on my scorecard.
I've got Hasashi winning every round here. Surely the decision will go his way and he'll pick up a well deserved decision victory. Over to the ring announcer for the scorecards.
Ladies and gentlemen, after 3 rounds of action, we go to the scorecards for a decision.
Judge Ryoma Takatsuka scores the fight 28:30
Judge Jeff Smith scores the fight 27:30
Judge Paul Gruel scores the fight 27:30
In favor of your winner, by unanimous decision... Hanzo Hasashi!
|
|
|
|
|
|
|
|
|
|
|
|
|
|
|
|
|
|
|
|
|
|
|
| S |
C
A |
G |
S |
C
B |
G |
|
S |
C |
G |
|
energy
A | B |
|
hype
A | B |
|
pop
A | B |
|
mgr
A | B |
|
FIGHT
RATING
23% |
|
|
|
|
|
|
|
Undercard bout
|
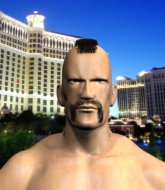
Coming up we have a super heavyweight MMA rules bout between Damian Brookins (ranked 0 p4p, 0 weight class) and Roberto Bex (ranked 0 p4p, 0 weight class). Roberto Bex has the better chin. Will he look to stand and bang today?
 |
|
 |
| 150 cm
26
300 lbs
3 - 0 - 0 |
|
200 cm
18
300 lbs
0 - 0 - 0 |
Good takedowns
Basic striking
Big heart |
|
BJJ White Belt
Dangerous knees
Determined |
|
| |
|
Ladies and gentlemen. This fight is 3 rounds, in the super heavyweight division.
Introducing the fighter to my left, fighting out of the red corner.
With a record of
3 - 0 - 0, fighting out of Hilo, Damian Brookins!
And introducing the fighter to my right, fighting out of the blue corner.
With a record of
0 - 0 - 0, fighting out of Hilo, Roberto Bex!
The judges for this bout are Ryoma Takatsuka, Micheangelo Fripello and Colin Fray.
The bell rings for round one and we are underway!

A momentary lapse in concentration from Bex enables Brookins to shoot in and score with a neat double leg. Bex manages to secure a closed guard as the fighters hit the mat.
The referee must be thinking about standing these guys back up.
Brookins not doing a lot at the moment. He'll have to show some more aggression or the fight will get stood up.
Bex really doesn't want to stay on the ground with Brookins. If he can't get it back to his feet, it's only a matter of time before he'll be tapping out.
Brookins slips effortlessly into side control - very nice.
Brookins lands a nice forearm strike.

It looks like Roberto Bex has been cut.
The crowd are loving this. Great action here.
Brookins lands a decent elbow from side control.
That has opened up Roberto Bex's cut even more.
Brookins works a knee to the body and follows up with a nice elbow to the head.

Bex is rocked!
The cut above Roberto Bex's eye is starting to cause him problems now.
The referee calls the doctor in to look at Roberto Bex's cut. Oh no, the doctor has called an end to the bout!
Ladies and gentlemen, after 0:58 of round 1, we have a winner by way of TKO (Cut). Damian Brookins!
Damian Brookins gave a mention to Ironhand Fightwear (Everything $9.00 or less!) in his post fight interview. That will please them (and hopefully generate some sales).
|
|
|
|
|
|
|
|
|
|
|
|
|
|
|
|
|
|
|
|
|
|
|
| S |
C
A |
G |
S |
C
B |
G |
|
S |
C |
G |
|
energy
A | B |
|
hype
A | B |
|
pop
A | B |
|
mgr
A | B |
|
FIGHT
RATING
85% |
|
|
|
|
|
|
|
Undercard bout
|
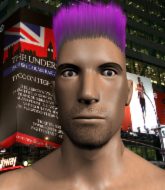
Coming up we have a heavyweight MMA rules bout between Billy Coleman (ranked 0 p4p, 0 weight class) and Alistair Overeem (ranked 0 p4p, 0 weight class). Chooooooooon! I think Coleman might be my favorite fighter, now he's come out to Start from Scratch. Overeem has chosen Roy Jones - Can't be touched as his entrance music, which hasn't gone down very well with the crowd. Overeem has a niggling injury. He would have liked to come in 100% fit but that's not always possible. Billy Coleman has the better chin. Will he look to stand and bang today?
 |
|
 |
| 198 cm
24
243 lbs
1 - 0 - 0 |
|
195 cm
23
263 lbs
3 - 7 - 0 |
BJJ Purple Belt
Counter striker
Cuts easily |
|
BJJ White Belt
Solid Muay Thai
Knockout power |
|
| |
|
Ladies and gentlemen. This fight is 3 rounds, in the heavyweight division.
Introducing the fighter to my left, fighting out of the red corner.
With a record of
1 - 0 - 0, fighting out of Hilo, Billy Coleman!
And introducing the fighter to my right, fighting out of the blue corner.
With a record of
3 - 7 - 0, fighting out of Hilo, Alistair Overeem!
The judges for this bout are Colin Fray, Paul Gruel and Josh West.
The bell rings for round one and we are underway!
Overeem closes the distance but Coleman moves to the side
and Coleman counters with a driving takedown into guard. Nice work there by Coleman.
We've had a lack of effective grappling in the last minute or so, which could well see a referee standup.
Coleman is pushing down on Overeem's leg trying to pass to half guard. Overeem is fighting to maintain full guard but Coleman has managed to sneak the leg through.
Coleman seems to be looking for submissions.
Coleman wants to take a breather but Overeem is having none of it.
Coleman is trying for a kimura here. Overeem looks like he's in a lot of pain... and he's tapping out! Coleman wins by kimura!
Ladies and gentlemen, after 0:36 of round 1, we have a winner by way of Submission (Kimura). Billy Coleman!
Billy Coleman decided to hype himself up post fight. It was going well but he went on about it a bit too long and the crowd turned on him a little.
|
|
|
|
|
|
|
|
|
|
|
|
|
|
|
|
|
|
|
|
|
|
|
| S |
C
A |
G |
S |
C
B |
G |
|
S |
C |
G |
|
energy
A | B |
|
hype
A | B |
|
pop
A | B |
|
mgr
A | B |
|
FIGHT
RATING
70% |
|
|
|
|
|
|
|
Undercard bout
|
Coming up we have a featherweight MMA rules bout between Christian De Ertu (ranked 0 p4p, 0 weight class) and John Goldman (ranked 0 p4p, 0 weight class). Both fighters look fresh as a daisy as they make their way towards the ring.
 |
|
 |
| 185 cm
22
155 lbs
3 - 2 - 0 |
|
179 cm
18
145 lbs
1 - 1 - 0 |
BJJ Purple Belt
Counter striker
Big heart |
|
BJJ Purple Belt
Basic striking
Enjoys gardening |
|
| |
|
Ladies and gentlemen. This fight is 3 rounds, in the featherweight division.
Introducing the fighter to my left, fighting out of the red corner.
With a record of
3 - 2 - 0, fighting out of Hilo, Christian De Ertu!
And introducing the fighter to my right, fighting out of the blue corner.
With a record of
1 - 1 - 0, fighting out of Hilo, John Goldman!
The judges for this bout are Roger Salmon, Jeff Smith and Chris Saunders.
The bell rings for round one and we are underway!
Goldman throws a looping left and ducks down for a takedown. He's got his arms around De Ertu's waist but De Ertu gets an underhook and avoids the takedown by throwing Goldman off to one side.
Goldman tries to close the distance and clinch but De Ertu swats him to one side with an open hand palm strike and circles away.
De Ertu shoots in for a takedown and gets it. Oh and he's advanced to full mount straight away.
We must be close to a standup if these guys don't pick up the pace.
Goldman is desperately trying to get back to half guard.
De Ertu raining down shots from the mount!
De Ertu is going oldschool here, as he tries to force Goldman to tap using a forearm choke. This isn't 1993 though, so Goldman shrugs it off.
Goldman slips a leg in and gets back to half guard.
De Ertu has been looking to land a fair amount of strikes on the ground. He might be looking to soften his opponent up in order to work for a submission.
It looks like De Ertu is going to stand back up.
Goldman tries to roll over but De Ertu keeps him under control.
Goldman slips a foot under and gets full guard. Nice work.
The fans in attendance giving it up for the two fighters, who have really let it all hang out in the last minute or so!
De Ertu loading up with the ground and pound but he's missing more than he's landing in this flurry.
Goldman keeping moving, preventing De Ertu from controlling successfully.
That's one minute gone in the round.
De Ertu wants to get up but he can't break Goldman's closed guard. He needs to be careful trying to break the legs open, as he's open to submissions here.
The fighters are tangled up in the ropes here. We might need a restart if the fighters can't break free themselves.
Goldman looking to hit a scissor sweep but De Ertu is one step ahead there.
Goldman trying to control the position.
Goldman wants to get back to his feet but De Ertu is in a dominant position and won't allow it.

Goldman kicks De Ertu off and gets to his feet.
De Ertu displays good takedown defense there as he swats away a double leg from Goldman.
Goldman tries to score with an inside leg kick but telegraphs it and De Ertu is able to avoid easily.
De Ertu shoots in for a double leg but Goldman sprawls well. That's going to sap some energy.
That's two minutes gone in the round.
De Ertu scores with a takedown into Goldman's guard.
De Ertu really does look like a pencil wearing a pair of gloves. Let's hope he has a gameplan to suit that ridiculous body shape.
Goldman looks gassed!
Goldman keeping full guard, as De Ertu tries to pass.
Goldman wants to sweep here but De Ertu controlling him for the moment.
De Ertu trying to control the position from guard on top but Goldman is wriggling around, looking for whatever he can.
De Ertu advances position into side control!
Wooooo! Give it up for these two warriors! They are putting on a show!
De Ertu is working to tighten is grip on Goldman's neck. He's isolated an arm and is working for an arm triangle. Goldman has recognised the danger and is trying to turn with the submission but De Ertu is really squeezing tight and eventually Goldman passes out! De Ertu breaks the hold and jumps onto the ropes to celebrate! Submission of the night, I'd say!
Ladies and gentlemen, after 2:58 of round 1, we have a winner by way of Submission (Arm Triangle). Christian De Ertu!
Christian De Ertu thanked the fans post fight for their support.
|
|
|
|
|
|
|
|
|
|
|
|
|
|
|
|
|
|
|
|
|
|
|
| S |
C
A |
G |
S |
C
B |
G |
|
S |
C |
G |
|
energy
A | B |
|
hype
A | B |
|
pop
A | B |
|
mgr
A | B |
|
FIGHT
RATING
47% |
|
|
|
|
|
|
|
Undercard bout
|
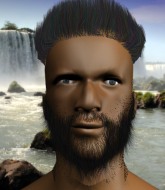
Coming up we have a lightweight MMA rules bout between Kota Punga (ranked 0 p4p, 0 weight class) and Ty Ponowog (ranked 0 p4p, 0 weight class). Punga comes to the ring accompanied by who let the dogs out. Ponowog has chosen Panini Pua Kea as his entrance music. Kota Punga could well score a knockout today. He has the power to get to Ty Ponowog's chin.
 |
|
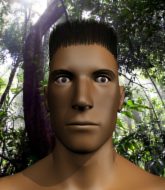 |
| 169 cm
25
161 lbs
5 - 6 - 0 |
|
176 cm
22
156 lbs
1 - 1 - 0 |
BJJ Purple Belt
Solid boxing
Experienced |
|
BJJ Blue Belt
Counter striker
Very confident |
|
| |
|
Ladies and gentlemen. This fight is 3 rounds, in the lightweight division.
Introducing the fighter to my left, fighting out of the red corner.
With a record of
5 - 6 - 0, fighting out of Hilo, Kota Punga!
And introducing the fighter to my right, fighting out of the blue corner.
With a record of
1 - 1 - 0, fighting out of Hilo, Ty Ponowog!
The judges for this bout are Ryoma Takatsuka, Chris Saunders and Colin Fray.
The bell rings for round one and we are underway!
Ponowog wants to clinch up but Punga keeps it at a distance.
Ponowog misses with a jab and misses with a cross straight after too.
Punga shoots in for a takedown but Ponowog shows good takedown defense.
A telegraphed right hand from Punga misses the target.
Punga throws a loose over hand right and dives in with a double leg takedown. Ponowog tries to sprawl but it's too late and the fighters hit the mat. Punga is in Ponowog's guard.
The referee is pacing around the two fighters - he looks like he's thinking about a standup.
Ponowog wants to sweep here but Punga controlling him for the moment.
Ponowog working a defensive guard here.
Punga is trying to work a guillotine from the top, or something like that? Don't know how he thinks he's going to get a finish from there.
Punga is just sitting in guard, looking to avoid any submissions.
That's one minute gone in the round.
Ponowog trying to control the position.
Ponowog is trying to stand up but he's not managed so far.
Punga throwing strikes from guard but Ponowog blocks nicely.
Ponowog keeping moving, preventing Punga from controlling successfully.
Ponowog is looking to stand up but Punga isn't so interested in that idea.
Ponowog really doesn't want to stay on the ground with Punga. If he can't get it back to his feet, it's only a matter of time before he'll be tapping out.

The referee decides to stand the fighters back up.
A right-left combo lands from Punga.
That's two minutes gone in the round.
Punga misses with a double jab
and Ponowog counters with a lovely straight right hand!
Horrible takedown by Punga or perhaps it was just good defense by Ponowog which made him look bad.
Ponowog throws a nice outside leg kick.
Ponowog throws a hard body shot but it just misses.
Punga is trying hard to land a takedown here. Ponowog sprawls well and keeps this one on the feet.
That's three failed takedown attempts in the round for Kota Punga. That's going to take a lot out of him.
Punga misses with a takedown attempt - Ponowog sprawls well and throws a nice strike on the way out which just misses.
Ponowog scores with a spinning back kick!
We've seen a great period of action over the last minute or so - credit to both fighters for going all out!
Punga misses with the combination.
Punga blocks a jab.
That's three minutes gone in the round.
Punga looks for a takedown here. Will he get it? Ponowog is fending him off so far but Punga persists. Nope, Ponowog circles away and we're back to standing.
Punga shoots for a takedown but Ponowog saw that one coming a mile off and avoided it easily.
Punga is breathing heavily.
Punga shoots in looking for a takedown. Ponowog tries to sprawl out of it but Punga keeps driving through. The fighters are pinned against the ropes. Ponowog manages to get underhooks and after a bit of a struggle, circles away and we're back to standing.
Ponowog tries to close the distance and clinch but Punga swats him to one side with an open hand palm strike and circles away.
Punga misses with a jab, cross combination.
Ponowog moves into range and lands a nice leg kick.
Punga tries to move into range but Ponowog moves to the side and lands with a nice right hand.
A looping hook to the body misses from Punga. Ponowog does a little dance to reset his feet.
Punga dives in and grabs Ponowog's left leg, looking for a takedown. Ponowog pushes down on Punga's head and hops out.
Ponowog is looking to clinch but Punga is avoiding it.
That's four minutes gone in the round.
Ponowog fakes high and swings low for a body shot but Punga manages to avoid it.
Punga throws a combination but comes up with nothing but fresh air.
Ponowog connects with a good right hand that stumbles Punga. Punga circles away out of range and recomposes himself.
Punga tries for a takedown but Ponowog sees it coming a mile off and avoids it easily.
Ponowog leaves Punga with his face pressed against the mat as he sprawls beautifully, defending against a solid takedown attempt.
Punga staying out of range there.
Ponowog pushes Punga up against the ropes in a clinch.
Punga takes a knee right on the jaw!
Ponowog misses the knee to the body. Nice hip positioning from Punga.
Wooooo! Give it up for these two warriors! They are putting on a show!
As the round comes to an end the crowd are showing their appreciation for a great round of action.
Ponowog is looking to score with knees to the body. Maybe he'll change it up and go body then head. Punga is defending well for now.
Ponowog pushes Punga back against the ropes and lands a hook to the side of the head.
Ponowog misses with a knee strike.
Ponowog throws a knee to the head but misses.
And thats the end of the round the fighters go back to their corners.
A close round but Ty Ponowog will probably get the nod.
The corners get their ten second warning. Both fighters stand from their stools and stare eachother down, ready to get back to the action.
Ponowog instigates a clinch.
Punga avoiding damage as Ponowog throws knees to the body.
Ponowog tries to land knees in the clinch but Punga avoids the damage to the body.
Come on Ponowog - let's have some action - none of this stalling nonsense.
Ponowog tries to land a knee to the head but Punga blocks with his arms.
Ponowog tries to stall but Punga uses the opportunity to gain a better position.
Ponowog lands with a quick shot inside that doesn't really do much damage.
Ponowog is clearly stalling here... Pick up the pace son.
A real battle for position is taking place between these two warriors.
Punga tries to score a body lock takedown but Ponowog shows good agility there to stay on his feet.
Good body shot from Ponowog.
Ponowog lands a right hand.
Punga has hold of a leg and is looking for a trip takedown. Ponowog avoids it nicely though and we remain in the clinch.
Ponowog lands on the inside with an uppercut.
That's one minute gone in the round.
Ponowog presses Punga against the ropes and delivers a mid-strength body shot.
Punga gets a nice trip takedown into half guard.
Ponowog is looking to control Punga's leg but it's slowly edging free. Can Ponowog avoid being mounted?
Punga is thinking about going for an arm triangle but he can't free his leg.
Ponowog looks like he's trying to stand up.
Ponowog is using up a lot of energy trying to get back to his feet. Perhaps he should improve his position first.
That's two minutes gone in the round.
Ponowog is looking for a sweep. Punga is wise to his cunning plan and keeps the top position.
Ponowog is refusing to be controlled, as Punga sits in half guard.
The fighters are tangled up in the ropes here. We might need a restart if the fighters can't break free themselves.
Punga is looking to advance position but Ponowog won't allow it.
Ponowog trying to control but Punga postures up.
The referee is asking the fighters to pick up the pace.
Punga working Ponowog over with strikes.
This has been an exciting period of action!
Punga is thinking about going for an arm triangle but he can't free his leg.
Punga wants to pass the guard but Ponowog is defending well.
That's three minutes gone in the round.
Ponowog is looking for a sweep. Punga is wise to his cunning plan and keeps the top position.
Ponowog is trying to stand.
Punga works his way into side control.
Punga is trying to land an Americana. He has the arm isolated but Ponowog is keeping cool and he's avoided the danger for now.
That's four minutes gone in the round.
Ponowog dodges the ground and pound from Punga.
Ponowog tries to improve position but can't.
Punga is trying to land an Americana. He has the arm isolated but Ponowog is keeping cool and he's avoided the danger for now.
Ponowog is trying to get back to his feet.
The crowd applaud the fighters efforts here as the round comes to an end.
Punga in side control, working for a kimura. He's got hold of an arm and he's torquing it... Ponowog is tapping! That's the end of the fight!
Ladies and gentlemen, after 4:59 of round 2, we have a winner by way of Submission (Kimura). Kota Punga!
After winning the bout, Kota Punga thanked all his fans and promised he'd do even better in his next fight. The crowd seemed to love his humility.
|
|
|
|
|
|
|
|
|
|
|
|
|
|
|
|
|
|
|
|
|
|
|
| S |
C
A |
G |
S |
C
B |
G |
|
S |
C |
G |
|
energy
A | B |
|
hype
A | B |
|
pop
A | B |
|
mgr
A | B |
|
FIGHT
RATING
29% |
|
|
|
|
|
|
|
Co-main event
|
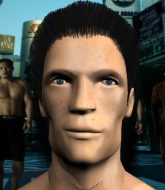
Coming up we have a welterweight MMA rules bout between Anthony Miller (ranked 0 p4p, 0 weight class) and Allan Durham (ranked 0 p4p, 0 weight class). Durham has chosen Headstrong as his entrance music, which hasn't gone down very well with the crowd. Durham has a niggling injury. He would have liked to come in 100% fit but that's not always possible. Allan Durham struggled to make weight for this fight. He only made it down to 172.8lbs at the first attempt and had to take the additional two hours to make the official bout weight. Let's see how much it's taken out of him. I don't know about you partner, but I'm pumped for this one!
 |
|
 |
| 184 cm
21
175 lbs
2 - 0 - 0 |
|
178 cm
23
180 lbs
3 - 3 - 0 |
BJJ Blue Belt
Solid boxing
Good chin |
|
BJJ Blue Belt
Decent boxing
Knockout power |
|
| |
|
Ladies and gentlemen. This fight is 3 rounds, in the welterweight division.
Introducing the fighter to my left, fighting out of the red corner.
With a record of
2 - 0 - 0, fighting out of Hilo, Anthony Miller!
And introducing the fighter to my right, fighting out of the blue corner.
With a record of
3 - 3 - 0, fighting out of Hilo, Allan Durham!
The judges for this bout are Chris Saunders, Paul Gruel and Roger Salmon.
The bell rings for round one and we are underway!
Miller throws a head kick that Durham semi-blocks.
Durham looks gassed!
Miller closes the distance and clinches.
Miller misses with a hook to the ribs.
Miller controlling the action here for a moment.
Durham blocks a body shot from Miller.
Durham jumps guard but Miller stands there with Durham around his waist. Durham gives up and drops back to his feet. We remain in the clinch.
Miller keeps the fight in the clinch, despite Durham's efforts to push away.
Miller manages to break the clinch.
Durham doesn't react quick enough there as he takes a shot to the body.
Durham has his head slapped from side to side by a 3 punch combination. That must have hurt him.
Miller scores with a nice looking left hook and follows it up with an uppercut!
Durham takes a body punch but keeps moving.
Allan Durham seems to be the more aggressive standup fighter in this bout.
That's one minute gone in the round.
Miller digs a good hook to Durham's body.
Miller ducks low and lands a nice hook to the body of his opponent.
Miller lunges in with swinging rights and lefts but Durham circles away quickly and effectively.
Miller throws a right and a left that Durham avoids nicely.
Miller scores to the head and body with a nice combination!
A combination from Miller does no damage.
Miller connects with a leg kick. Durham looked like he was expecting something else and didn't defend it.
Miller feints a jab promting Durham to slip. Miller then demonstrates his capabilities by jabbing again. Durham slips again and ducks right into an uppercut.
Durham on the wrong end of a nice hook.
Miller takes the fight into the clinch.
Miller breaks the clinch.
Miller punishes Durham's body with a nice straight punch.
Durham takes a nice looking leg kick right on the meat of his thigh there.
That's two minutes gone in the round.
Miller lands a jab followed by a nice looking cross.
Miller has closed the distance and engaged Durham in a clinch.
This is a great period of action - very entertaining stuff!
Miller stalling.
Miller gets a warning from the ref for wasting time.
Miller manages to break the clinch.
Miller throws a combination. Durham tries to block but a couple of punches get through.
Miller lands a jab. Then a cross. Then finally a nice hook to the body. Good work there by Miller.
Durham tries to keep at a distance but Miller has taken the fight into the clinch.
Miller lands a body punch - he's looking to wear down Durham.
Durham fails to pull guard.
That's three minutes gone in the round.
Miller dictating the pace here, as the fighters clinch against the ropes.
Miller breaks the clinch.
Miller looks to land a combination. Durham sees it coming but can only parry a couple of the shots.
Miller scores with a nice looking left hook and follows it up with an uppercut!
Miller pushes Durham away with a front kick.
Miller moves into range and throws a combination. A nice jab followed by a hook to the body.
Miller lets the fists fly and connects with a left straight followed by a right hook.
Miller goes to the watering hole and comes back with a big thumbs up from the judges as he scores a three punch combo.
Durham throws a low kick but his opponent is out of range.
Miller throws out a powerful jab.
Miller feints a jab promting Durham to slip. Miller then demonstrates his capabilities by jabbing again. Durham slips again and ducks right into an uppercut.
Miller tries to clinch but Durham is having none of it.
That's four minutes gone in the round.
Durham tries to clinch up against the ropes, rushing in the close the distance. Miller manages to break the clinch and circles back to the middle of the mat.
Like a baseball bat into the meat of his leg there - nice leg kick by Miller.
Miller jabs at Durham's body.
The fight moves into the clinch position.
Miller's corner calls for him to break the clinch, which he does.
Miller fakes a jab and then connects with a hook.
Miller scores with a straight right hand, right through his opponent's guard.
Miller throws a series of punches but Durham moves out of range.
This has been an exciting period of action!
Miller misses with a double jab.
As the round comes to an end the crowd are showing their appreciation for a great round of action.
Durham throws a right and a left that both miss.
Miller connects nicely with a jab. Noted by the judges no doubt.
Nice body punch from Miller.
And thats the end of the round the fighters go back to their corners.
Anthony Miller dominated that round.
That's time! Back to the action!
Miller throws a right and a left that both miss.
Miller digs a good body shot into Durham's ribs.
A head kick by Durham misses
and Miller counters with a two punch combo.
Durham misses with a jab and misses with a cross straight after too.
Miller is working the combinations to good effect here.
Miller throws a series of punches but Durham avoids them all with ease.
Miller scores with a nice head shot.
Miller listening to his corner there, landing a nice uppercut.
Miller lands a nice shot that snaps Durham's head back.
Miller changes levels and scores with a jab to the body.
Miller has Durham up against the ropes in a clinch.
The pace really dropping off here, momentarily.
Durham wants to strike at distance but he can't break free of the clinch.
Both fighters are absolutely exhausted here.
That's one minute gone in the round.
Miller pushes off and circles away, back to the middle of the mat.
Miller connects with an inside leg kick.
Jab, cross, leg kick. Nice combination by Miller!
Some wild striking there from Miller.
Miller with a nice cross.
Miller bobs and weaves and unloads with a good uppercut.
Miller tries to close the distance and clinch up against the ropes but Durham paws at him with a jab and circles away.
Anthony Miller is looking to keep the fight on the feet at all costs.
Miller dips down and scores with a jab to the body.
Miller lands a nice leg kick that just misses Durham's sensitive parts.
Miller goes to the watering hole and comes back with a big thumbs up from the judges as he scores a three punch combo.
Anthony Miller is looking to throw some combinations by the looks of things.
Miller scores with a nice one two combo and darts back out of range to avoid anything coming in the opposite direction.
Durham misses with a double jab.
That's two minutes gone in the round.
A head kick by Durham misses
and Miller counters with a nice body shot.
Durham on the wrong end of an overhand right that came out of nowhere.
Miller scores to the head and body with a nice combination!
Nice takedown defense from Miller. No joy for Durham on that attempt.
Anthony Miller is winning the standup battle so far.
Durham takes a shot right to the bread basket.
Miller is looking to take this fight into the clinch.
Durham clinches with his opponent.
Durham is trying to push Miller away but Miller has him pressed against the ropes, so he's going nowhere.
The crowd cheering loudly, showing their appreciation for the quality fight we're seeing here.
Some stalling of biblical proportions here from Miller.
Miller pushes off and circles away, back to the middle of the mat.
Durham takes a solid shot to the body. That one hurt him but he's trying not to show it.
Miller is using his height advantage well here, landing a good percentage of his punches.
Miller scores with a three punch combo!
A head kick misses from Miller.
That's three minutes gone in the round.
Durham throws a hard body shot but it just misses.
Miller throws a wild combination but nothing lands.
Durham loads up on a big right hand but Miller slips the punch.
Durham has a pretty nasty looking mouse under his right eye.
Miller feints a jab promting Durham to slip. Miller then demonstrates his capabilities by jabbing again. Durham slips again and ducks right into an uppercut.
Miller moves into the clinch.
Durham wants to break free but Miller has control.
Durham tries to break the clinch but Miller is controlling the position.
Miller breaks the clinch.
Miller ducks down and throws a hook to the body.
Miller clinches.
Durham looks like he'd prefer to be striking at range right now.
Miller goes for a body shot but it's blocked.
That's four minutes gone in the round.
Miller is working Durham over against the ropes.
Miller trying to stall but Durham improves his position.
Durham has had enough of the clinch but Miller keeps him there for the moment.
Durham goes for a body shot but it's blocked.
Miller breaks the clinch and we're back to striking at distance.
Miller swinging wildly here.
Miller lands three nice shots there - that looked like it hurt!
As the round comes to an end the crowd are showing their appreciation for a great round of action.
Durham connects with a body shot that sends Miller's belly button to the back.
Miller digs a good body shot into Durham's ribs.
Durham takes a nice looking leg kick right on the meat of his thigh there.
The crowd cheering loudly, showing their appreciation for the quality fight we're seeing here.
Durham misses with an uppercut
and Miller counters with a three punch combo that has Durham backing up. Durham nods at Miller to acknowledge the strikes.
And thats the end of the round the fighters go back to their corners.
Anthony Miller dominated that second round.
The corners get their ten second warning. Both fighters stand from their stools and stare eachother down, ready to get back to the action. This is the final round!
No joy there for Miller, who threw a few shots but didn't land.
Miller swinging wildly here.
Miller scores with a crisp jab that stopped Durham in his tracks.
Durham misses with a series of wild punches.
Durham moves to clinch but Miller breaks away
and Miller counters with a nice leg kick.
Some wild striking there from Durham.
Miller is really dominating this fight. Is there anything that Durham can do to turn this around?
Miller cracks a nice hook into Durham's ribs.
Durham looks to throw the jab but Miller is out of range.
Both fighters are breathing heavily.
Miller lands a two punch combo.
Miller scores with a nice one two combo and darts back out of range to avoid anything coming in the opposite direction.
A nice combination there by Miller.
Miller turns his hip over beautifully as he lands a nice leg kick.
That's one minute gone in the round.
Durham wants to clinch up but Miller keeps it at a distance.
Miller will need to tighten up his combinations if he doesn't want to gas himself out, swinging at thin air.
Miller throws a series of strikes that have Durham backpedaling.
Miller ducks under a wild hook from Durham.
Miller lands a jab followed by a nice looking cross.
Durham tries to clinch but Miller is having none of it.
Durham misses with a jab and misses with a cross straight after too.
Miller looks to land a combination. Durham sees it coming but can only parry a couple of the shots.
Durham tries to close the distance and clinch up but Miller swats him away and circles back towards the center.
Miller dips to his left and cracks Durham with an uppercut!
Miller circles away from the clinch attempt.
A right-left combo lands from Miller.
The fight stays on the outside here - Durham looks like he's thinking about clinching though.
That's two minutes gone in the round.
Miller gets a clinch.
A frustrated look appears on Durham's face as he tries to break the clinch.
Miller breaks from the clinch.
No joy there for Miller, who threw a few shots but didn't land.
Miller throws a series of punches but Durham avoids them all with ease.
Durham avoids a punch combination nicely.
Durham takes one on the chin but keeps coming.
That kick from Miller tenderised Durham's leg. Durham is trying to keep his angry face on.
Miller throws a mid kick that lands with a slap.
Durham misses with a left hand
and Miller counters with a lovely straight right hand!
Durham misses with a jab, cross combination.
The crowd are loving this. Great action here.
Miller feints a straight left to the body, then turns around with a flashy move and hits Durhams jaw with a dramatic spinning back fist!
That's three minutes gone in the round.
A shot to the liver by Miller. Beautiful body shot.
Durham wants to clinch.
Durham throws a body punch but Miller moves out of range.
Miller thuds a mid kick into his opponent's body. That will wear on Durham if he has to take too many more of those.
Miller throws a leg kick which misses Durham's front leg but catches the back leg as Durham tries to avoid it.
Miller misses with a double jab.
Durham fails miserably with a takedown attempt.
Durham throws a combination but it was largely blocked by Miller.
Miller looks to land a combination. Durham sees it coming but can only parry a couple of the shots.
Miller slips a straight right by Durham.
Durham misses with a series of wild punches.
That's four minutes gone in the round.
Miller lands a nice hook to Durham's body. Durham takes it in his stride and looks to land his own strikes.
Durham dodges the punch combination from Miller.
A punch combination from Miller misses.
Miller throws a combination. Durham tries to block but a couple of punches get through.
Durham ducks down and throws a hook to the body but Miller moves away.
Miller pushes forward with a 1-2 combination that forces Durham back to the ropes. Miller follows up with a solid lead hook to the liver.
Durham looks to score with a jab to the body but Miller is just out of range.
Miller stalks Durham and leaps in with a furious combination of punches. Uppercuts and crosses smash into Durham's face. Durham staggers backwards, shaken.
Durham wants to clinch up but Miller keeps it at a distance.
The crowd applaud the fighters efforts here as the round comes to an end.
Miller uses good footwork to get in and out, landing a nice hook.
Miller lands a slapping body shot.
Miller misses with a double jab.
Allan Durham has stepped it up - he knows he needs a finish here!
Anthony Miller is fighting for a decision here - he's started to take the cautious approach.
Durham has his front leg slapped to the side - a nice low kick landing there from Miller.
And that's the end of the fight!
Anthony Miller showed his dominance in that final round.
Well Miller has outscored his opponent in every aspect of the fight today. Only a scarily incompetent judge or two will keep him from a well deserved win... Over to the ring announcer for the scorecards.
Ladies and gentlemen, after 3 rounds of action, we go to the scorecards for a decision.
Judge Chris Saunders scores the fight 30:27
Judge Paul Gruel scores the fight 30:26
Judge Roger Salmon scores the fight 30:26
In favor of your winner, by unanimous decision... Anthony Miller!
Anthony Miller decided to thank the fans in attendance for making a great atmosphere. It seemed to go down pretty well.
|
|
|
|
|
|
|
|
|
|
|
|
|
|
|
|
|
|
|
|
|
|
|
| S |
C
A |
G |
S |
C
B |
G |
|
S |
C |
G |
|
energy
A | B |
|
hype
A | B |
|
pop
A | B |
|
mgr
A | B |
|
FIGHT
RATING
60% |
|
|
|
|
|
|
|
Main event
|
Coming up we have a heavyweight MMA rules bout between Kenny Horn (ranked 0 p4p, 0 weight class) and Leo Ninja Turtle (ranked 0 p4p, 0 weight class). Ninja Turtle comes into a darkened arena with his song building. Ninja turtles theme song!!! kicks in, the lights come on and the crowd goes wild! What a showman! Well, the cameraman is lingering on a pretty young lady for a bit too long there. Keep your eyes on the fighters buddy or you'll miss the fighter intros!
 |
|
 |
| 195 cm
21
272 lbs
6 - 0 - 0 |
|
190 cm
26
265 lbs
2 - 0 - 0 |
Decent wrestler
World class MT
KO power |
|
Good wrestler
Counter striker
Powerful |
|
| |
|
Ladies and gentlemen. This fight is 3 rounds, in the heavyweight division.
Introducing the fighter to my left, fighting out of the red corner.
With a record of
6 - 0 - 0, fighting out of Hilo, Kenny Horn!
And introducing the fighter to my right, fighting out of the blue corner.
With a record of
2 - 0 - 0, fighting out of Hilo, Leo Ninja Turtle!
The judges for this bout are Colin Fray, Micheangelo Fripello and Jeff Smith.
The bell rings for round one and we are underway!
A chopping leg kick lands by Horn.
Ninja Turtle walks into a jab.
Horn wants to clinch.
Horn lands a leg kick and bounces back out of range.
Horn throws a body kick that digs right into the meat.
Fantastic stuff here - a very entertaining period of action, which has drawn cheers from the crowd.
Horn defends well against a solid takedown attempt from Ninja Turtle.

Horn lands a big head kick that sends Ninja Turtle tumbling to the mat! Horn takes a step backwards and waves Ninja Turtle back to his feet - he wants the finish!
It looks like Leo Ninja Turtle has been cut.
and Horn counters with a massive uppercut that badly hurts Ninja Turtle! He's just covering up as Horn starts to tee off till the referee steps in and stops the fight!
Ladies and gentlemen, after 0:40 of round 1, we have a winner by way of TKO (Strikes). Kenny Horn!
Post fight, Kenny Horn took to the microphone: 'I told ya all!?! *smiles*'.
|
|
|
|
|
|
|
|
|
|
|
|
|
|
|
|
|
|
|
|
|
|
|
| S |
C
A |
G |
S |
C
B |
G |
|
S |
C |
G |
|
energy
A | B |
|
hype
A | B |
|
pop
A | B |
|
mgr
A | B |
|
FIGHT
RATING
100% |
|
|
|
|
|
|
|
|
|
|
