 |
FED 18 PBP Commentary |
Undercard bout
|
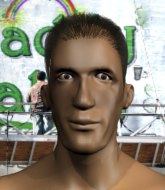
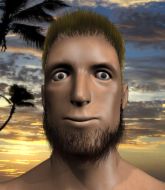
Coming up we have a light heavyweight MMA rules bout between Henderson Cormier (ranked 0 p4p, 0 weight class) and Chris Bates (ranked 0 p4p, 0 weight class). Both fighters look fresh as a daisy as they make their way towards the cage.
 |
|
 |
| 180 cm
19
224 lbs
1 - 0 - 0 |
|
188 cm
20
221 lbs
2 - 0 - 0 |
Good wrestling
Brawler
Granite chin |
|
BJJ Blue Belt
Counter striker
Determined |
|
| |
|
Ladies and gentlemen. This fight is 3 rounds, in the light heavyweight division.
Introducing the fighter to my left, fighting out of the red corner.
With a record of
1 - 0 - 0, fighting out of London, Henderson Cormier!
And introducing the fighter to my right, fighting out of the blue corner.
With a record of
2 - 0 - 0, fighting out of London, Chris Bates!
The judges for this bout are Andrew Berry, Colin Fotheringham and Daniel Bishop.

The bell rings for round one and we are underway!
Cormier shoots in looking for a takedown but Bates manages to keep the fight standing, pushing Cormier's face into the canvas for good measure before circling away.
Bates misses with a jab, cross combination.
A combination from Bates does no damage.
Cormier shoots for a takedown but Bates saw that one coming a mile off and avoided it easily.
A swing and a miss from Cormier.
Cormier shoots in with a takedown attempt and he has Bates pinned against the cage. Bates gets the underhooks and manages to circle away.
That's three failed takedown attempts in the round for Henderson Cormier. That's going to take a lot out of him.
A combination from Bates does no damage.
Bates lands a nice looking body shot.
Bates looks to score with a jab to the body but Cormier is just out of range.
Bates scores with a nice looking left hook and follows it up with an uppercut!
Bates misses with a jab and misses with a cross straight after too.

Cormier fakes an overhand right and shoots for a takedown. Bates sprawls well initially but Cormier persists and gets the takedown into half guard.
The ref warns both fighters not to hold the cage as they work up against the meshing.
This has been an exciting period of action!
The referee must be thinking about standing these guys back up.
Bates has no desire to be mounted, so is trying to control. Cormier is working away from the top position though.
Cormier trying to pass the guard but Bates defending well.

That's one minute gone in the round.
Cormier thows a wild elbow that connects with the canvas.
Bates gets back to full guard.
Bates looking to control.
Cormier has been looking to land a fair amount of strikes on the ground. He might be looking to soften his opponent up in order to work for a submission.
Cormier with a flurry of punches that miss.
Cormier with a flurry of punches that miss.
Cormier in full guard, throwing the ground and pound. No damage this time.
Bates working the defensive guard well to avoid strikes from Cormier.
Cormier working from the guard for now, landing some ground and pound.
Bates wants to sweep here but Cormier controlling him for the moment.

That's two minutes gone in the round.
Bates not looking particularly offensive just at the moment.
Cormier trying to control the position from guard on top but Bates is wriggling around, looking for whatever he can.
Cormier tries to free his leg and advance position but Bates is retaining full guard.
Bates wants to get back to his feet but Cormier is in a dominant position and won't allow it.
Cormier working some ground and pound from guard but it's not doing any damage.
Bates wants to get back to his feet but Cormier passes into half guard.
Bates regains full guard, whilst avoiding punches from Cormier.
Bates has Cormier pulled in close to control his posture.

That's three minutes gone in the round.
Cormier wants to control from the top but Bates keeps moving.
Bates not looking particularly offensive just at the moment.
Bates working the defensive guard well to avoid strikes from Cormier.
Cormier preventing the sweep.
A big thud reverberates around the arena there as Cormier accidentally thumps the mat. Hopefully he's not broken his hand.
Cormier missing there with some ground and pound from the guard.
Cormier looking to pass the guard.

That's four minutes gone in the round.
Bates pulls Cormier in close to prevent any damage.
Cormier postures up to throw the ground and pound strikes but they don't connect.
Bates wants to stand and escape but Cormier is having none of it.
Cormier trying to land body shots but he keeps hitting the mat.
Cormier throws an elbow that misses. Bates uses the momentum to reverse the position. He's now in Cormier's guard. Nice move by Bates!
Cormier is working from a closed guard but he's struggling to control his opponent.
As the round comes to an end the crowd are showing their appreciation for a great round of action.
Cormier controlling the position.
And thats the end of the round the fighters go back to their corners.
That was a close round but I would say that Henderson Cormier will probably get the nod.
OK. That's time! The bell goes and we're back to the action.

Cormier uses good footwork to avoid the strikes from Bates.
Cormier shoots in with a takedown attempt and he has Bates pinned against the cage. Bates gets the underhooks and manages to circle away.
Bates slaps away a takedown attempt from Cormier, before circling back to the center of the mat.
Cormier darts in and lands a nice takedown into half guard.
Bates tries to kick Cormier off but Cormier keeps his base steady and stays in half guard.
Cormier landing with strikes to the body and head, softening up his opponent.
Bates works his way to full guard. Good work.
A big thud reverberates around the arena there as Cormier accidentally thumps the mat. Hopefully he's not broken his hand.
Cormier throws a big right hand that misses.
That's one minute gone in the round.
Cormier is looking to work some ground and pound but Bates has wrist control.
Cormier working some ground and pound from guard but it's not doing any damage.
Bates working a defensive guard here.
Cormier slows down the pace of the fight for a moment. He'll need to remain active if he doesn't want to see the fight stood back up.
Cormier landing some decent shots from guard.
Cormier in full guard, throwing the ground and pound. No damage this time.
Cormier throwing shots from guard but he's hitting more mat than opponent.
Bates looking for a sweep. Not yet Bates, not yet.
That's two minutes gone in the round.
Cormier is sitting in guard, working some ground and pound.
Cormier throws a big right hand that misses.
Cormier looking to sit in guard and control but Bates gets the butterfly guard and sweeps. He's now in the guard on the top.
Bates slows down the pace of the fight, as he sits in guard.
Cormier looking to control but Bates passes into half guard.
Wooooo! Give it up for these two warriors! They are putting on a show!
Cormier slips a foot under and gets full guard. Nice work.
Henderson Cormier overall seems to be getting the better of the ground position in the fight so far.
That's three minutes gone in the round.
Bates stopping the sweep attempt from Cormier.

Bates gets to his feet. Cormier looking to butt scoot but the ref puts an end to that. On your feet son!
Cormier throws a looping left and ducks down for a takedown. He's got his arms around Bates's waist but Bates gets an underhook and avoids the takedown by throwing Cormier off to one side.
That's three failed takedown attempts in the round for Henderson Cormier. That's going to take a lot out of him.
Bates lands a two punch combo.
Cormier fails miserably with a takedown attempt.
Cormier throws a leg kick but Bates sees it coming and moves out of range.
That's four minutes gone in the round.
Bates misses with a series of wild punches.
Cormier tries to check the leg kick but that clearly hurt him.
Cormier avoids the body shot from Bates.
Cormier is looking to take this fight into the clinch.
Cormier is trying hard to land a takedown here. Bates sprawls well and keeps this one on the feet.
Chris Bates is looking to keep the fight on the feet at all costs.
The fighters circling - Bates throws out the jab but it was never going to land.
Wooooo! Give it up for these two warriors! They are putting on a show!
Cormier closes the distance and scores a nice trip takedown into half guard. Bates did well to prevent Cormier getting side control.
Bates is not content to let Cormier control the position.
As the round comes to an end the crowd are showing their appreciation for a great round of action.
Cormier looks towards his corner to check for any instructions. The corner give him nothing to work with, so he cracks Bates with a short hammerfist. I guess that's as good as any advice he could get in this position.
And thats the end of the round the fighters go back to their corners.
Henderson Cormier dominated that second round.
That's the end of the interval. I'm sure that seemed a lot quicker than a minute for our two fighters! Back to the action. So, we enter the final round. Let's see if either fighter can bring us a finish, or whether we're going to the judges scorecards.

Nice takedown defense from Bates. No joy for Cormier on that attempt.
Cormier changes levels and looks for a double leg takedown. Bates tries to avoid it but Cormier manages to keep hold of a leg and drag Bates to the ground. Bates escapes though and pops straight back up to his feet.
Cormier shoots in but doesn't get the takedown
and Bates counters with a lovely shot to the body.
That's three failed takedown attempts in the round for Henderson Cormier. That's going to take a lot out of him.
Bates leaves Cormier with his face pressed against the mat as he sprawls beautifully, defending against a solid takedown attempt.
Chris Bates seems to be getting the better of the standup.
Cormier closes the distance and clinches up with Bates, looking for a takedown. Cormier pushes Bates against the cage but Bates circles to the side and manages to break the clinch.
Cormier darts in and lands a nice takedown into half guard.
Cormier wants to pass to mount but Bates is defending the position.
Cormier throwing punches and elbows but they're not doing any damage.
Both fighters are breathing heavily.
Bates is trying to stand up here but Cormier is controlling him well.
That's one minute gone in the round.
Cormier thows a wild elbow that connects with the canvas.
Bates is looking for a sweep. Cormier is wise to his cunning plan and keeps the top position.
Bates is trying to maintain the position but Cormier is very close to passing his half guard.
Bates pushes Cormier off looking to stand but Cormier dives back in and keeps control.
Cormier throwing shots but they're hitting the canvas more than the man.
Cormier throwing shots but Bates is blocking nicely.
Bates wants to get back to full guard.
Cormier with the ground and pound but Bates uses the opportunity to regain guard.
That's two minutes gone in the round.
Cormier is working Bates over from the guard. He should look to pass the guard and do a little more damage with these strikes.
Cormier loading up with the ground and pound but he's missing more than he's landing in this flurry.
Bates keeping moving, preventing Cormier from controlling successfully.
Bates trying to control the position here.
Bates is trying to control the position from the bottom.
Cormier trying to control the position from guard on top but Bates is wriggling around, looking for whatever he can.
That's three minutes gone in the round.
Cormier stopping the sweep attempt from Bates.

The referee has ruled that neither fighter is active enough on the ground and has stood them back up.
Bates displays good takedown defense there as he swats away a double leg from Cormier.
Bates lunges at Cormier with a hook that half lands and is half blocked by Cormier's hand.
Cormier shoots in for a takedown. "I don't think so" says Bates as he avoids it easily.
Cormier has his takedown stuffed
and Bates cracks him with a counter punch right on the button.
Henderson Cormier seems to be the more aggressive standup fighter in this bout.
Bates throws out a leg kick but Cormier moves out of range and Bates only half commits.
A telegraphed right hand from Bates misses the target.
Cormier dodges the punch combination from Bates.
That's four minutes gone in the round.
Bates throws a combination but it was largely blocked by Cormier.

Bates instigates a clinch.
Cormier tries to take the fight to the ground by pulling guard but can't manage it.
The crowd are loving this. Great action here.
Bates is leaning against Cormier and scores with a nice uppercut to the body.
Cormier tries to pull guard but can't drag his opponent to the mat. Bates just stands there and leans against the cage.
Good body shot from Bates.

Bates breaks the clinch and we return to the middle of the mat.
Bates swings wildly with a couple of big hooks
and Cormier counters with a straight punch to the midsection.
As the round comes to an end the crowd are showing their appreciation for a great round of action.
Bates cracks Cormier with a good shot that sees him stumbling back into the cage.
Bates scores with a one two! Cormier had his feet all tangled up there and couldn't avoid the strikes.

It looks like Henderson Cormier has been cut.
Bates fakes with the hands and throws a leg kick but Cormier is out of range.
Bates fakes a head punch and goes low to the body. Nicely done.
And that's the end of the fight!
Chris Bates comfortably won the final round on my scorecard.
I think Cormier has won this one but let's see what the judges have to say. Over to the ring announcer for the scorecards.
Ladies and gentlemen, after 3 rounds of action, we go to the scorecards for a decision.
Judge Andrew Berry scores the fight for Chris Bates!
Judge Colin Fotheringham scores the fight for Chris Bates!
Judge Daniel Bishop scores the fight for Chris Bates!
Chris Bates wins by unanimous decision!
Chris Bates decided to go for the less than humble approach in his post fight interview, telling everyone how he is going to conquer the world. The crowd seemed to like it when really that sort of approach could have gone either way.
|
|
|
|
|
|
|
|
|
|
|
|
|
|
|
|
|
|
|
|
|
|
|
| S |
C
A |
G |
S |
C
B |
G |
|
S |
C |
G |
|
energy
A | B |
|
hype
A | B |
|
pop
A | B |
|
mgr
A | B |
|
FIGHT
RATING
69% |
|
|
|
|
|
|
|
Co-main event
|
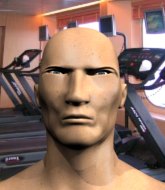
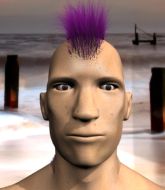
Coming up we have a middleweight MMA rules bout between Naruto Uzamaki (ranked 0 p4p, 0 weight class) and Brutal Delux (ranked 0 p4p, 0 weight class). These two fighters really are very evenly matched on the feet - it will be fascinating to see who can assert themselves in that aspect of the fight.
 |
|
 |
| 184 cm
28
182 lbs
13 - 10 - 0 |
|
182 cm
27
190 lbs
13 - 10 - 0 |
Good wrestling
Excellent boxer
Cardio machine |
|
Good wrestler
Excellent boxer
Good gas tank |
|
| |
|
Ladies and gentlemen. This fight is 3 rounds, in the middleweight division.
Introducing the fighter to my left, fighting out of the red corner.
With a record of
13 - 10 - 0, fighting out of London, Naruto Uzamaki!
And introducing the fighter to my right, fighting out of the blue corner.
With a record of
13 - 10 - 0, fighting out of London, Brutal Delux!
The judges for this bout are Sam Margolis, James Atkins and Chris Edwards.
The bell rings for round one and we are underway!
Uzamaki tries to clinch up.

Uzamaki drives through and clinches with Delux against the cage.
Delux goes for a takedown in the clinch but Uzamaki prevents it.
Uzamaki lands a nice uppercut.
Delux looking for a takedown.
Uzamaki will no doubt start fighting again in a minute but for now he's just having a little rest, leaning Delux up against the cage.
Uzamaki is leaning against Delux and scores with a nice uppercut to the body.
Uzamaki misses with a body punch.
Delux tries for a takedown but Uzamaki manages to get underhooks.
Naruto Uzamaki has stuffed three takedown attempts in the round now. That's going to take a lot out of Brutal Delux.
Delux managing to block the knees to the body from Uzamaki.
That's one minute gone in the round.
Uzamaki is looking for a takedown up against the cage. Delux gets underhooks though and prevents the takedown attempt.
Uzamaki struggles to land a body shot inside as Delux controls his hands.
Delux tries to pull guard but Uzamaki won't allow it.
Uzamaki tried to land a shot to the body but connects with Delux's elbow.
Uzamaki jumps guard and drags Delux to the mat. He's obviously going to be looking for submissions off his back.
Delux throwing strikes but missing.
Delux wants to control from the top but Uzamaki keeps moving.
Delux wants to stand but Uzamaki is controlling his posture from full guard.
Delux postures up.
That's two minutes gone in the round.

Uzamaki looking for submissions off his back, moving his hips, looking for an opening.
Delux postures up to throw the ground and pound strikes but they don't connect.
Delux trying to control but Uzamaki is working from the bottom.
Delux wants to stand but Uzamaki has a closed guard, so he can't escape.
Uzamaki wants to sweep but no luck.
That's three minutes gone in the round.
Uzamaki is looking for a guillotine. You can't force these things though and Delux defends well.
Uzamaki wants to sweep here but Delux controlling him for the moment.
Delux wants to control from the top but Uzamaki keeps moving.
Delux postures up and lands some nice ground and pound.
Uzamaki will have to put a bit more behind his punches if he's going to do any damage from this position.
Uzamaki lands a beautiful switch and he's in full mount! That could spell trouble for Delux!
That's four minutes gone in the round.
Uzamaki content just to control the position here.
Delux tries to hold on but Uzamaki pushes him away.
Delux wants to try and get back to his feet.
Uzamaki controlling the position easily from mount.
Delux keeping his composure momentarily, calmly looking to get back to half guard.
The crowd applaud the fighters efforts here as the round comes to an end.
Uzamaki jumps to the side looking to secure the arm triangle
. Ooooh, that looks tight
Delux is gargling but he's managed to escape! Nice work there by Delux and Uzamaki has given up the dominant position trying to land that submission.
And thats the end of the round the fighters go back to their corners.
Naruto Uzamaki dominated that round.
Well, the break between rounds is over. Let's get back to the scrappin!
Uzamaki shoots in with a takedown attempt and he has Delux pinned against the cage. Delux gets the underhooks and manages to circle away.
Uzamaki shoots in from a long way out. He's driving through with the takedown attempt and he eventually gets it, landing in Delux's guard.
Delux seems keen to control Uzamaki's posture.
Uzamaki is trying to work a guillotine from the top, or something like that? Don't know how he thinks he's going to get a finish from there.
Delux wants to control but instead he gets his guard passed and Uzamaki is now in half guard.
Delux tries to get to full guard but Uzamaki has control of the leg.
That's one minute gone in the round.
Delux is refusing to be controlled, as Uzamaki sits in half guard.
Delux is in trouble now - Uzamaki has advanced to mount!

Uzamaki stands up from mount. Strange move.
Delux misses with an uppercut
letting Uzamaki counter with a right hand.
Uzamaki moves his head to the side to avoid a jab but walks straight into a cross.
Uzamaki misses with an uppercut. Delux saw that one coming.
Nice shot by Delux.
That's two minutes gone in the round.
Uzamaki moves in looking to clinch but Delux pushes him off.
Delux lets the fists fly and connects with a left straight followed by a right hook.
The crowd cheering loudly, showing their appreciation for the quality fight we're seeing here.
Uzamaki gets a clinch.
Delux is trying to pull guard but Uzamaki has him pressed against the cage.
Uzamaki throws an elbow but it's blocked.
Delux jumps guard but his hands slip and he falls flat on his back. Well, he's made himself look a right mug there, as Uzamaki walks away with a smile on his face. Delux gets slowly back to his feet and shakes his head.
Delux lunges in with an uppercut that skims his opponent's chin.
Delux throws a lazy right hand but Uzamaki sees it coming a mile off and sidesteps it easily.
Delux throws a poor cross that misses
and Uzamaki counters with a nice uppercut.
Delux misses with a takedown attempt. He shot from a bit too far out.
Naruto Uzamaki has stuffed three takedown attempts in the round now. That's going to take a lot out of Brutal Delux.
Delux bobs and weaves and unloads with a good uppercut.
That's three minutes gone in the round.
Uzamaki blocks a jab.
Delux sizes up Uzamaki with a pawing jab and scores with a straight right down the middle.
Delux throws a hook but Uzamaki blocks it.
Uzamaki moves forwards but Delux connects with a nice, crisp jab.
Delux looks for a takedown but Uzamaki sprawls well.
The fighters circling - Delux throws out the jab but it was never going to land.
Delux misses with a takedown attempt. He shot from a bit too far out.
Delux shoots in but no luck this time.
Uzamaki looks for a takedown here. Will he get it? Delux is fending him off so far but Uzamaki persists. Nope, Delux circles away and we're back to standing.
That's four minutes gone in the round.
Uzamaki ducks under an overhand right and circles away with a smile on his face.
Uzamaki fails with an attempt to clinch.
A low kick from Delux is predictable there
and Uzamaki counters with a body kick that stops Delux in his tracks momentarily.
Uzamaki moves in looking to clinch but Delux pushes him off.
Uzamaki avoids a punch combination nicely.
Delux missing with a left hand there. Uzamaki was out of range so wasted energy throwing that one.
Delux takes an uppercut right on the button but keeps his composure.
This is a great period of action - very entertaining stuff!
As the round comes to an end the crowd are showing their appreciation for a great round of action.
Nice uppercut there from Delux.
Uzamaki takes a nasty kick to the mid section... That should keep him thinking. Does he try and block and risk a head kick landing?
Uzamaki ducks under a wild hook from Delux.
And thats the end of the round the fighters go back to their corners.
Brutal Delux showed his class in that round. I'd imagine he'll take it on all the scorecards.
The fighters get back to their feet, the hooter sounds and we're back to the action! This is the final round!
Uzamaki is looking to land body kicks.
Uzamaki's hands are dropping dangerously low here and Delux connects clean with a right hook that sends him down to one knee! Uzamaki scrambles back to his feet.
Delux lands with a hook. Uzamaki tried to avoid it but it clipped the top of his head.
Brutal Delux seems to be the more aggressive standup fighter in this bout.
Delux circles away from the clinch attempt.
Delux misses with a straight right.
Uzamaki avoids a lazy jab quite easily.
Delux lands three nice shots there - that looked like it hurt!
Uzamaki fakes low and throws an overhand right that catches Delux on the side of the head.
Delux shoots in for a takedown but doesn't get it.
Uzamaki lands with a two punch combination before moving back out of range.
The fans in attendance giving it up for the two fighters, who have really let it all hang out in the last minute or so!
Uzamaki throws a hook to the body but it doesn't connect.
Uzamaki keeping a good distance there, avoiding the body shot.
That's one minute gone in the round.
A slow jab from Uzamaki misses its intended target.
Delux misses with a body shot. Nice footwork from Uzamaki.
Uzamaki moves in looking to clinch but Delux pushes him off.
Uzamaki tests Delux's chin there with a solid looking shot.
Uzamaki fails with an attempt to clinch.
Uzamaki clinches up against the cage.
Delux tries to pull guard but Uzamaki holds him up against the cage and eventually Delux drops back down to his feet.
Delux tries to pull guard but Uzamaki forces him back to his feet, against the cage.
Naruto Uzamaki has stuffed three takedown attempts in the round now. That's going to take a lot out of Brutal Delux.
That's two minutes gone in the round.
Delux is trying to pull guard but Uzamaki has him pressed against the cage.
Uzamaki misses with a knee to the head.
Delux blocks an elbow strike.
Uzamaki manages to pull guard.
Uzamaki working for a triangle but Delux defends it easily.
Delux trying to control but Uzamaki is working from the bottom.
Naruto Uzamaki overall seems to be getting the better of the ground position in the fight so far.
Delux tries to free his leg and advance position but Uzamaki is retaining full guard.
That's three minutes gone in the round.
Uzamaki looking for submissions from the bottom here. Moving his hips around, possibly looking for an armbar.
Uzamaki is actively looking for submissions from his back. He's worked himself a little space on the bottom and seems to be going for a triangle. No, he's switched into an armbar! That was slick! Delux rolls with it to try and escape but Uzamaki cranks on the arm and Delux is forced to tap out! This one is aaaaaaaaall over!
Ladies and gentlemen, after 3:32 of round 3, we have a winner by way of Submission (Armbar). Naruto Uzamaki!
An out of breath and clearly excited Naruto Uzamaki thanked Bloodsport Nutrition (100% Genuine)SALE 159Q $30 for their help and support (and free stuff they sent him).
|
|
|
|
|
|
|
|
|
|
|
|
|
|
|
|
|
|
|
|
|
|
|
| S |
C
A |
G |
S |
C
B |
G |
|
S |
C |
G |
|
energy
A | B |
|
hype
A | B |
|
pop
A | B |
|
mgr
A | B |
|
FIGHT
RATING
65% |
|
|
|
|
|
|
|
Main event
|
Coming up we have a welterweight MMA rules bout between Merik Hunt (ranked 0 p4p, 0 weight class) and Jim Yankee (ranked 0 p4p, 0 weight class). Chooooooooon! I think Hunt might be my favorite fighter, now he's come out to Comfortably Numb. Both fighters look fresh as a daisy as they make their way towards the cage.
 |
|
 |
| 175 cm
25
170 lbs
13 - 8 - 0 |
|
180 cm
33
178 lbs
20 - 15 - 0 |
Abu Dhabi Champ
Lethal high kicks
Insanely flexible |
|
Good wrestler
Excellent MT
Powerful |
|
| |
|
Ladies and gentlemen. This fight is 5 rounds, for the welterweight championship of the world!
Introducing the champion to my left, fighting out of the red corner.
With a record of
13 - 8 - 0, fighting out of London, Merik Hunt!
And introducing the challenger to my right, fighting out of the blue corner.
With a record of
20 - 15 - 0, fighting out of London, Jim Yankee!
The judges for this bout are Richard Clark, Donald Grub and Sam Margolis.
The bell rings for round one and we are underway!
Yankee is the aggressor but that punch slipped nicely by Hunt.
Hunt throws a low kick but Yankee moves out of range easily.
Yankee scores with the left hand. Hunt knows he should have avoided that one.
Merik Hunt seems to be the more aggressive standup fighter in this bout.
A head kick misses from Yankee.
Hunt showing good head movement there, avoiding the strikes from Yankee.
Yankee connects with a nice looking jab.
Yankee throws a head kick but Hunt moves out of range.
Yankee misses with a looping right.
Hunt closes this distance looking for a takedown but Yankee circles away.
Yankee slips a jab from Hunt.
Hunt misses with a takedown attempt. He shot from a bit too far out.
Yankee tries to clinch there but Hunt circles away.
That's one minute gone in the round.
Donk. Yankee catches Hunt right on the button with a cross.
Hunt dodges the punch combination from Yankee.
Hunt has a takedown stuffed.
That's three failed takedown attempts in the round for Merik Hunt. That's going to take a lot out of him.
Yankee bobbing and weaving, closes the distance and lands a hook to the side of Hunt's head.
Yankee checks a low kick from Hunt.
Yankee misses with a looping right.
Hunt throws the left hand but Yankee avoids the punch easily.
Nice shot by Hunt.
Hunt fails with a takedown attempt.
That's two minutes gone in the round.
Hunt throws a leg kick but Yankee moved away.
Hunt bobs and weaves well there to avoid the strikes.
Hunt darts in and clinches Yankee up against the cage.
A quick uppercut on the inside from Yankee.
Yankee's corner calls for him to break the clinch, which he does.
Yankee tries to bum rush Hunt with a series of wild strikes but Hunt uses good footwork to avoid the assault.
Yankee ducks under a wild hook from Hunt.
Yankee fails in his attempt to clinch.
Hunt feints and as Yankee raises his hands in defense, Hunt changes levels and drives through with a takedown into guard.
Fantastic stuff here - a very entertaining period of action, which has drawn cheers from the crowd.
The referee must be thinking about standing these guys back up.
Yankee looking to sweep here. No luck so far.
Hunt in full guard, throwing the ground and pound. No damage this time.
That's three minutes gone in the round.
Hunt trying to pass the guard but can't manage it just yet.
Hunt seems content to control from guard here. He's going to have to remain active though if he doesn't want to get stood back up.
Hunt trying to control but Yankee is working from the bottom.
Yankee is trying to keep Hunt in close.
The referee has ruled that neither fighter is active enough on the ground and has stood them back up.
Hunt takes a head kick and keeps coming.
Hunt wants to land a leg kick but Yankee is out of range.
Yankee keeps the fight standing with a nice sprawl.
Hunt throws a leg kick but Yankee sees it coming and checks it nicely.
That's four minutes gone in the round.
The fight stays on the outside here - Yankee looks like he's thinking about clinching though.
Yankee misses with a half-hearted attempt at a head kick.
Yankee is looking to clinch but Hunt is avoiding it.
Hunt throws a low kick but Yankee avoids it.
Hunt takes a swing at Yankee's ribcage but misses.
Hunt listening to his corner there, landing a nice uppercut.
Yankee stuffs the takedown attempt from Hunt. Hunt gets slowly back to his feet.
Yankee misses with a straight left.
The crowd applaud the fighters efforts here as the round comes to an end.
Yankee throws a lazy right hand but Hunt sees it coming a mile off and sidesteps it easily.
Hunt fails to land the takedown.
And thats the end of the round the fighters go back to their corners.
A close round but Jim Yankee will probably get the nod.
The minute break is over - no more time for sponges and pep talks - back to the action!
Hunt's hands are dropping dangerously low here and Yankee connects clean with a right hook that sends him down to one knee! Hunt scrambles back to his feet.
Hunt shoots in for a takedown. "I don't think so" says Yankee as he avoids it easily.
Yankee lands a jab.
Yankee on the wrong end of a nice jab.
Yankee is looking to take this fight into the clinch.
Jim Yankee seems to be getting the better of the standup.
Hunt takes a jab on the nose there. A little bit of blood seems to be coming out. Hopefully that won't affect his breathing.
Yankee tries to clinch there but Hunt circles away.
Hunt moves into range and lands a nice body kick.
Yankee uses good head movement to avoid the hook from Hunt.
That's one minute gone in the round.
Hunt blocks a jab.
Yankee takes a push kick to the midsection and stumbles backwards.
Hunt throws a hard body shot but it just misses.
Hunt throws a leg kick
and Yankee counters with an inside leg kick.
Hunt cracks Yankee with a hook to the jaw. Both fighters smile at eachother and high-five before getting back down to business.
Nice sprawl there from Yankee as Hunt shoots in.
Jim Yankee is looking to throw some combinations by the looks of things.
A low kick from Hunt is predictable there
and Hunt takes a counter punch right on the button for his troubles.
Yankee might want to mix his strikes up a bit more. He's just going for head shots at the moment and that can become a bit predictable.
Hunt dodges the punch combination from Yankee.
Hunt punishes Yankee's body with a nice straight punch.
Hunt takes a shot to the nose. Hopefully that hasn't broken it.
That's two minutes gone in the round.
Yankee ducks low and lands a nice hook to the body of his opponent.
Yankee slips a jab from Hunt.
Yankee throws a combination but comes up with nothing but fresh air.
Hunt throws a series of punches but Yankee moves out of range.
Hunt loads up on a big right hand but Yankee slips the punch.
Yankee connects with a slap. Keep your fist closed son.
Wooooo! Give it up for these two warriors! They are putting on a show!
Yankee throws a monster uppercut resembling something out of street fighter but it doesn't land.
Hunt looking to shoot here. He's gone for it and he's landed a takedown into mount! Oh, that's bad for Yankee!
Yankee tries to get back to half guard but can't.
Hunt tries to control but Yankee wriggling away.
Yankee is writhing around trying to get back to his feet.
That's three minutes gone in the round.
Yankee is looking to get back to his feet - it's going to be hard from this position.
Yankee tries to hold on but Hunt pushes him away.
Yankee sneaks a leg back under and regains half guard and is working straight away to try and get back to guard. He hasn't managed just yet though.
Hunt looks towards his corner to check for any instructions. The corner give him nothing to work with, so he cracks Yankee with a short hammerfist. I guess that's as good as any advice he could get in this position.
Hunt is scoring with some nice ground and pound from the dominant position.
Yankee looks like he's trying to stand up.
The fighters are starting to perspire pretty heavily.
Hunt looking to pass the half guard. Not this time.
Yankee gets full guard.
Hunt missing there with some ground and pound from the guard.
That's four minutes gone in the round.
Hunt with a nice head shot there.
This has been an exciting period of action!
Hunt looking to pass the guard.
Hunt trying to control but Yankee is working from the bottom.
The fighters are pressed up against the cage, both looking to find a bit of space to work.
Hunt prevents Yankee from getting back to his feet.
Hunt postures up and lands some nice ground and pound.
Hunt is working Yankee over from the guard. He should look to pass the guard and do a little more damage with these strikes.
Hunt loading up with the ground and pound but he's missing more than he's landing in this flurry.
Hunt loading up with the ground and pound but he's missing more than he's landing in this flurry.
As the round comes to an end the crowd are showing their appreciation for a great round of action.
Hunt trying to control but Yankee is working from the bottom.
And thats the end of the round the fighters go back to their corners.
Merik Hunt dominated that second round.
That's time! Hunt's corner gives him a slap on the ass as he gets ready to fight.
Yankee slaps away a takedown attempt from Hunt, before circling back to the center of the mat.
Yankee goes to the watering hole and comes back with a big thumbs up from the judges as he scores a three punch combo.
Hunt shoots in for a takedown but Yankee shows good takedown defense there and keeps this one on the feet.
Hunt shoots in and scores a nice double leg takedown into half guard.
Hunt is trying to work for a kimura. This could be trouble! No, Yankee has managed to free his arm - good work.
Yankee is not content to let Hunt control the position.
Yankee kicks Hunt off and gets back to his feet.
That's one minute gone in the round.
A looping hook to the body misses from Hunt. Yankee does a little dance to reset his feet.
Yankee jabs Hunt right on the nose. Hunt blinks but takes it well.
Hunt keeping his hands up high there, blocking the jab from Yankee.
Yankee throws a couple of head shots and lands with the final one - a decent hook, which struck Hunt on the side of the head.
Yankee throws a body kick that misses.
Hunt throws an off balance right hand
and Yankee counters with a lovely shot to the body.
Yankee looks to score with a jab to the body but Hunt is just out of range.
Yankee walks into a jab.
Hunt connects with a looping right hand.
Yankee scores with a decent looking hook.
That's two minutes gone in the round.
Hunt shoots in but Yankee avoids the takedown attempt easily.
That's three failed takedown attempts in the round for Merik Hunt. That's going to take a lot out of him.
Yankee is the aggressor but that punch slipped nicely by Hunt.
A low kick from Hunt misses
and Yankee counters with a three punch combo that has Hunt backing up. Hunt nods at Yankee to acknowledge the strikes.
Yankee looks to score with a jab to the body but Hunt is just out of range.
Yankee uses decent footwork to sidestep a right hand from Hunt.
Nice uppercut lands for Yankee. That snapped Hunt's head back.
This has been an exciting period of action!
Yankee tries to clinch up against the cage, rushing in the close the distance. Hunt manages to break the clinch and circles back to the middle of the mat.
Hunt looking to throw a kick but he's pulled out of it.
Hunt misses with a series of wild punches.
No luck for Hunt with that takedown attempt.
That's three minutes gone in the round.
Yankee with a nice cross.
Hunt throws a looping overhand right but Yankee ducks down to avoid it.
Hunt misses with a hook. Yankee ducked under it nicely.
Yankee misses with a straight right.
Yankee will need to tighten up his combinations if he doesn't want to gas himself out, swinging at thin air.
Hunt is looking to land body kicks.
Hunt tries to score with an inside leg kick but telegraphs it and Yankee is able to avoid easily.
Yankee scores with a punch to the head.
That's four minutes gone in the round.
Yankee stuffs the takedown.
Hunt misses with a leg kick
and Yankee counters with a stiff right hand.
Hunt misses with a leg kick
and Yankee counters with a crisp hook to the side of the head.
Yankee slips a jab from Hunt.
Hunt shoots in looking for a takedown. Yankee tries to sprawl out of it but Hunt keeps driving through. The fighters are pinned against the cage. Yankee manages to get underhooks and after a bit of a struggle, circles away and we're back to standing.
Yankee takes a swing at Hunt's ribcage but misses.
As the round comes to an end the crowd are showing their appreciation for a great round of action.
Yankee scores with a nice strike.
Hunt showing good head movement there, avoiding the strikes from Yankee.
And thats the end of the round the fighters go back to their corners.
Jim Yankee really dominated that round.
That's time! Back to the action!

Hunt looks to score with a combo but nothing lands.
Hunt misses with a low kick.
Yankee tries to close the distance and clinch up against the cage but Hunt paws at him with a jab and circles away.
Hunt fakes an overhand right and shoots for a takedown. Yankee sprawls well initially but Hunt persists and gets the takedown into half guard.
Hunt wants to lay and pray for a moment but Yankee keeps working.
Hunt not landing any meaningful shots this time.
Hunt working the head and body with strikes.
Yankee is looking to get back to is feet but Hunt passes into side control.
Hunt is looking to take a break and control but Yankee is keeping him honest, looking to work from the bottom.
Hunt tries to land with some ground and pound but misses.
That's one minute gone in the round.
Yankee tries to work a leg under to get back to half guard but Hunt wriggles his own leg back out and remains in side control.
Yankee manages to work his way to half guard, despite Hunt's best efforts.
Hunt is looking for a kimura here.
Hunt is controlling the pace.
Yankee tries to roll over but Hunt keeps him under control.
Yankee trying to hold on to Hunt's head to control him but Hunt postures up.
Hunt throwing shots but they're hitting the canvas more than the man.
That's two minutes gone in the round.
Hunt wants to take a breather but Yankee is having none of it.
Hunt tries to pass to full mount but Yankee defends it.
Hunt works his way into full mount!
Yankee is trying to stand.
Yankee wants to hold on but Hunt pushes him away.
Yankee is in a horrible position here. Hunt smacks him with another shot as he tries to escape the position.
The fans in attendance giving it up for the two fighters, who have really let it all hang out in the last minute or so!
Yankee wants to hold on but Hunt pushes him away.
Hunt scores with a couple of good head shots there.
Hunt landing strikes, looking to finish!

Yankee is rocked!
Hunt is still in mount, landing shots to his trapped opponent. Yankee can't stay in a position like this for much longer.
Yankee is still in real trouble! Can Hunt finish him?
That's three minutes gone in the round.
Yankee is working to get back to half guard.
Hunt is in full mount looking to finish with strikes. He lands a big shot, followed by another and Yankee goes limp! The ref jumps in to end the fight - a big win for Hunt!
Ladies and gentlemen, after 3:21 of round 4, we have a winner by way of KO (Strikes). Merik Hunt!
Merik Hunt retains his welterweight title!
A victorious Merik Hunt thanked his army of followers in his post fight interview, telling people to make sure they follow him on Twitter.
|
|
|
|
|
|
|
|
|
|
|
|
|
|
|
|
|
|
|
|
|
|
|
| S |
C
A |
G |
S |
C
B |
G |
|
S |
C |
G |
|
energy
A | B |
|
hype
A | B |
|
pop
A | B |
|
mgr
A | B |
|
FIGHT
RATING
100% |
|
|
|
|
|
|
|
|
|
|
