 |
C W C 66 PBP Commentary |
Undercard bout
|
|
|
|
Undercard bout
|
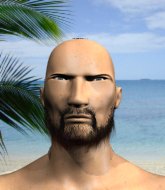
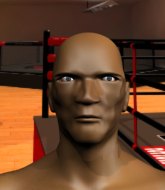
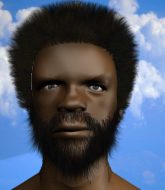
Coming up we have a middleweight MMA rules bout between Fabio Fagundes (ranked 0 p4p, 0 weight class) and David Scott (ranked 0 p4p, 0 weight class). Scott comes into a darkened arena with his song building. "Sad But True" by Metallica kicks in, the lights come on and the crowd goes wild! What a showman! This should be fireworks!
 |
|
 |
| 182 cm
25
195 lbs
5 - 5 - 0 |
|
185 cm
25
185 lbs
1 - 0 - 0 |
Decent wrestler
Excellent boxer
Granite chin |
|
BJJ Brown Belt
Brawler
Solid chin |
|
| |
|
Ladies and gentlemen. This fight is 3 rounds, in the middleweight division.
Introducing the fighter to my left, fighting out of the red corner.
With a record of
5 - 5 - 0, fighting out of Hilo, Fabio Fagundes!
And introducing the fighter to my right, fighting out of the blue corner.
With a record of
1 - 0 - 0, fighting out of Hilo, David Scott!
The judges for this bout are Roger Salmon, Jeff Smith and Josh West.

The bell rings for round one and we are underway!
Scott misses with an uppercut.
Scott is looking to take this fight into the clinch.
Fagundes wings a very wild body shot but it does the job and lands to the midsection.
A really sloppy takedown attempt there from Scott.
Scott has his head snapped back a nice jab. A little nod from Scott there as he acknowledges the shot.
Fagundes circles away from the clinch attempt.
Fagundes scores with a sloppy punch to the body. Not much technique there but it did the business.
Fagundes scores with a jab.

It looks like David Scott has been cut.
The crowd cheering loudly, showing their appreciation for the quality fight we're seeing here.
Scott with a lazy takedown attempt

and Fagundes counters with a nice right hand that sends Scott toppling to the canvas! Scott scrambles and gets back to his feet - can Fagundes finish him?!

Scott is rocked!
Fagundes feints and then winds up with a huge right hand that connects perfectly and sends Scott sprawling to the canvas! Scott rolls over backwards and springs off the cage and manages to regain his footing - how acrobatic! Oh, he's still wobbly - can Fagundes finish him?!
Scott is still on wobbly legs! Can Fagundes finish him?
Scott has his takedown stuffed
and Fagundes counters with a crisp right that sends Scott to the canvas! Fagundes follows up with punches from the mount and this one is all over!
Ladies and gentlemen, after 0:38 of round 1, we have a winner by way of TKO (Strikes). Fabio Fagundes!
Fabio Fagundes made sure to mention his sponsor, Steel Penn's Laundry 93% in his post fight interview.
|
|
|
|
|
|
|
|
|
|
|
|
|
|
|
|
|
|
|
|
|
|
|
| S |
C
A |
G |
S |
C
B |
G |
|
S |
C |
G |
|
energy
A | B |
|
hype
A | B |
|
pop
A | B |
|
mgr
A | B |
|
FIGHT
RATING
100% |
|
|
|
|
|
|
|
Undercard bout
|
|
|
|
Undercard bout
|
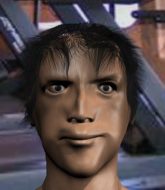
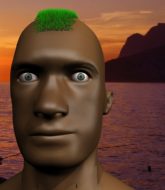
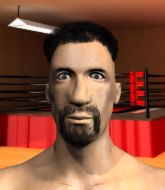
Coming up we have a welterweight MMA rules bout between Steve Buscemi (ranked 0 p4p, 0 weight class) and Jackie Moon (ranked 0 p4p, 0 weight class). Jackie Moon has the power to score a knockout today if he connects clean with Steve Buscemi's chin.
 |
|
 |
| 170 cm
25
180 lbs
1 - 4 - 0 |
|
175 cm
23
175 lbs
0 - 1 - 0 |
BJJ Blue Belt
Solid Muay Thai
Experienced |
|
BJJ Blue Belt
Basic striking
Granite chin |
|
| |
|
Ladies and gentlemen. This fight is 3 rounds, in the welterweight division.
Introducing the fighter to my left, fighting out of the red corner.
With a record of
1 - 4 - 0, fighting out of Hilo, Steve Buscemi!
And introducing the fighter to my right, fighting out of the blue corner.
With a record of
0 - 1 - 0, fighting out of Hilo, Jackie Moon!
The judges for this bout are Ryoma Takatsuka, Micheangelo Fripello and Paul Gruel.
The bell rings for round one and we are underway!
Moon throws a right hand that Buscemi ducks under and follows up with a left that Buscemi also avoids with ease.
Buscemi is trying hard to land a takedown here. Moon sprawls well and keeps this one on the feet.

Buscemi closes the distance and clinches.
Buscemi is trying to pull guard but Moon turns him against the cage and we stay in the clinch.
Moon misses with some punches.
Moon working hard to break the clinch.
Moon working hard to break the clinch.
Moon has hold of a leg and is looking for a trip takedown. Buscemi avoids it nicely though and we remain in the clinch.
Buscemi connects with a nasty looking knee right to Moon's face.
Buscemi prevents Moon from breaking the clinch.

Moon escapes the clinch and we're back to striking.
Buscemi misses with a series of wild punches.

Moon closes the distance and presses his opponent up against the cage.
Buscemi is trying to wear down his opponent with knees to the body.

Buscemi drags the fight down to the ground.
Buscemi wants to sweep here but Moon controlling him for the moment.

That's one minute gone in the round.
Buscemi looking to control.
Moon wants to stand but Buscemi is controlling his posture from full guard.
Moon is intent on slowing down the pace of the fight, simply looking to control.
Moon working from the guard for now, landing some ground and pound.
Buscemi wants to get back to his feet but Moon is in a dominant position and won't allow it.
Buscemi has a closed guard, preventing Moon from standing up.
Buscemi manages to land a sweep and now he's in mount on top!
The ref warns both fighters not to hold the cage as they work up against the meshing.

That's two minutes gone in the round.
Moon working to try and regain half guard.
Moon blocking the ground and pound.
Buscemi controlling from mount.
Moon is desperately trying to improve his position but Buscemi has a good base and remains in mount.
Buscemi unloads with some shots from mount but Moon bucks and avoids them well.
Buscemi throwing strikes but Moon uses the opportunity to regain half guard.
Buscemi tries to stand but his hand is stuck under Moon.

That's three minutes gone in the round.
Buscemi missing with some ground and pound from the half guard.
Moon is looking to control Buscemi's leg but it's slowly edging free. Can Moon avoid being mounted?
Moon wants to get back to full guard.

Buscemi decides to stand and escape the position.
Buscemi shoots in for a takedown. "Ole!" shouts Moon as he jumps to the side.
That's three failed takedown attempts in the round for Steve Buscemi. That's going to take a lot out of him.
Buscemi wants to clinch.
Buscemi gets his takedown attempt stuffed easily
and Moon counters with a nice uppercut.

It looks like Steve Buscemi has been cut.
Buscemi is breathing heavily.
Buscemi misses with a hook
and Moon cracks him with a counter punch right on the button.
Buscemi could do with losing a few pounds - he looks very soft around the mid section, to put it politely.
Buscemi tries to clinch but Moon is having none of it.

That's four minutes gone in the round.
Nice sprawl there from Buscemi as Moon shoots in.
Steve Buscemi seems to be the more aggressive standup fighter in this bout.
Buscemi leaves Moon with his face pressed against the mat as he sprawls beautifully, defending against a solid takedown attempt.
Moon shoots in looking for a takedown. Buscemi tries to sprawl out of it but Moon keeps driving through. The fighters are pinned against the cage. Buscemi manages to get underhooks and after a bit of a struggle, circles away and we're back to standing.
The crowd are loving this. Great action here.
Moon is trying hard to land a takedown here. Buscemi sprawls well and keeps this one on the feet.
Buscemi has a takedown stuffed.
Buscemi shoots in but no luck this time.
As the round comes to an end the crowd are showing their appreciation for a great round of action.
Buscemi shoots for a double leg takedown but Moon sprawls well. He's pushed Buscemi's face into the mat and manages to get back to his feet relatively easily.
Buscemi throws a head kick that misses and slips in the process. He scrambles back to his feet and the fighters circle.
Moon shoots in for a takedown. "Ole!" shouts Buscemi as he jumps to the side.
And thats the end of the round the fighters go back to their corners.
That was a close round but I would say that Steve Buscemi will probably get the nod.
The cut man is working on Steve Buscemi's cut.
The corners get their ten second warning. Both fighters stand from their stools and stare eachother down, ready to get back to the action.

Moon clinches up against the cage.
Come on Buscemi - let's have some action - none of this stalling nonsense.
Moon looks like he'd prefer to be striking at range right now.
Buscemi is stalling here. The referee will be looking to step in if he doesn't pick up the pace.
Moon gets double underhooks to prevent a takedown attempt from Buscemi.
Moon tries to land a knee to the body but he is off balance and Buscemi avoids it.
Buscemi pulls guard effortlessly.
Moon is taking a break and basically stalling. The referee will not allow him to do that for long.
Buscemi manages to land a sweep and now he's in mount on top!
That's one minute gone in the round.
Moon sneaks a leg back under and regains half guard and is working straight away to try and get back to guard. He hasn't managed just yet though.
Buscemi has decided to stand back up but his arm is trapped. Whilst he's worrying about his arm, Moon works to full guard.
Buscemi would like to get this fight back to the feet but can't get free from the closed guard.
Both fighters are absolutely exhausted here.
Buscemi gets to his feet - Moon follows without any prompting.
Moon clinches with his opponent.
Buscemi tries to pull guard but can't drag his opponent to the mat. Moon just stands there and leans against the cage.
Moon can't break the clinch.
Moon wants to get back to striking at distance but Buscemi won't allow it.
That's two minutes gone in the round.
Buscemi keeps the fight in the clinch, despite Moon's efforts to push away.
Buscemi manages to pull guard. Let's see whether he can land a sub off his back.
Moon with a couple of shots to the head there. Not particularly brutal.
Moon with a flurry of punches that miss.
Moon wants to control from the top but Buscemi keeps moving.
Moon might have to switch it up a bit here because his efforts to control Buscemi kaven't been going to plan, at least at the current moment in time.
We've seen a great period of action over the last minute or so - credit to both fighters for going all out!

Moon stands and steps away. Buscemi gets to his feet too and we're back to the striking game.
Buscemi changes levels and looks for a double leg takedown. Moon tries to avoid it but Buscemi manages to keep hold of a leg and drag Moon to the ground. Moon escapes though and pops straight back up to his feet.
That's three failed takedown attempts in the round for Steve Buscemi. That's going to take a lot out of him.
Buscemi walks forward, straight into a front kick from Moon.
That's three minutes gone in the round.
Moon throws a chopping leg kick but Buscemi manages to avoid taking any serious damage.
Danga de danga de dang - Moon scores with a four punch combination!
The fight moves into the clinch position.
Moon is trying to push Buscemi away but Buscemi has him pressed against the cage, so he's going nowhere.
Moon has a couple of punches blocked by Buscemi.
Buscemi misses the knee to the body. Nice hip positioning from Moon.
Buscemi can't get the takedown.
Moon wants to push off and get back to the center of the mat but Buscemi has him pressed against the cage.
Buscemi misses the knee to the body. Nice hip positioning from Moon.
Moon creates a bit of distance and throws an elbow that only just misses.
Moon working hard to break the clinch.
Moon has had enough of the clinch but Buscemi keeps him there for the moment.
That's four minutes gone in the round.
Moon tries to circle away but Buscemi has him pinned against the cage.

Moon jumps guard.
Steve Buscemi overall seems to be getting the better of the ground position in the fight so far.
Moon is pulling down on Buscemi's head. It's preventing any offense from Buscemi, at least for the moment.
Moon wriggles free and stands up.
No luck with that takedown attempt from Moon.
Fantastic stuff here - a very entertaining period of action, which has drawn cheers from the crowd.
Buscemi pulls out of a head kick attempt.
As the round comes to an end the crowd are showing their appreciation for a great round of action.
Moon attempts a leg kick but it's missed by a good margin.
Moon throws a low kick but Buscemi moves out of range easily.
Moon shoots in for a takedown - he's clinched up with Buscemi but Buscemi pushes him off and we're back to square one.
And thats the end of the round the fighters go back to their corners.
Jackie Moon showed his class in that round. I'd imagine he'll take it on all the scorecards.
The cut man is working on Steve Buscemi's cut.
The fighters' corners scream their final instructions, as the referee calls time. Here we go, back to the action! This is the final round!

Moon has managed to clinch.

Buscemi breaks the clinch and we return to the middle of the mat.
Moon stuffs a takedown. It's all about dictating where the fight takes place and Moon wants it to stay on the feet.
Buscemi looks to land a combination but Moon avoids it well.
Moon closes the distance and lands a one-two.
Moon shoots in for a takedown. "Ole!" shouts Buscemi as he jumps to the side.
Moon fails with the takedown.
Nice sprawl there from Moon as Buscemi shoots in.
Moon shoots in with a takedown attempt and he has Buscemi pinned against the cage. Buscemi gets the underhooks and manages to circle away.
Steve Buscemi has stuffed three takedown attempts in the round now. That's going to take a lot out of Jackie Moon.
Both fighters are breathing heavily.
Moon takes a hook to the side of the head. I wonder if that's got his ears ringing.
That's one minute gone in the round.
Buscemi stuffs a takedown. It's all about dictating where the fight takes place and Buscemi wants it to stay on the feet.
Buscemi rushes Moon and pushes him back against the cage in a clinch.
Buscemi gets an overhook and lands an elbow to the side of the head.
Buscemi crunches a lovely knee into Moon's ribcage.
Moon takes a knee right on the jaw!
It looks like Jackie Moon has been cut.
Buscemi comes over the top with an elbow. That landed flush.
Buscemi misses with a knee strike.
Buscemi tries a knee to the head but Moon blocks it.
Buscemi decides to pull guard.
Moon decides he's had enough of playing guard and decides to stand. Come on Buscemi, up you get!
Moon misses with a double jab.
Steve Buscemi is looking to throw some combinations by the looks of things.
Buscemi fails miserably with a takedown attempt.
That's two minutes gone in the round.
Moon misses with a wild combination.
Moon stuffs the takedown attempt from Buscemi. Buscemi gets slowly back to his feet.
Buscemi displays good takedown defense there as he swats away a double leg from Moon.
Moon swings and misses with a hook to the body.
Left hook, right uppercut from Buscemi.
We've seen a great period of action over the last minute or so - credit to both fighters for going all out!
Moon tries to shoot in for a takedown. He's got hold of a leg but Buscemi swivels and escapes.
Buscemi connects with a body shot.
Moon has a takedown stuffed.
That's three minutes gone in the round.
No luck for Buscemi with that takedown attempt.
Buscemi moves into the clinch.
Buscemi looking to stall.
Buscemi blocks a body shot from Moon.
Moon working hard to break the clinch.
Steve Buscemi has scored more points in the clinch so far.
Buscemi jumps guard but Moon turns him against the cage and keeps the fight standing.
Buscemi tries to pull guard but can't drag his opponent to the mat. Moon just stands there and leans against the cage.
Moon pulls guard successfully.
Buscemi wants to control from the top but Moon keeps moving.
That's four minutes gone in the round.

Moon throwing his legs up looking for a triangle.
Buscemi stands up and waves to Moon to follow him.
Buscemi jabbing away but nothing is landing.
Moon misses with a jab, cross combination.
As the round comes to an end the crowd are showing their appreciation for a great round of action.
Buscemi bobs and weaves and unloads with a good uppercut.
Jackie Moon seems to be getting the better of the standup.
Moon closes the distance and after a bit of a stuggle, scores a takedown into Buscemi's guard.
Fantastic stuff here - a very entertaining period of action, which has drawn cheers from the crowd.
Buscemi keeping moving, preventing Moon from controlling successfully.
And that's the end of the fight!
That was a close round. You could make an argument for either fighter but I would give it to Steve Buscemi.
I think Buscemi has won this one but let's see what the judges have to say. Over to the ring announcer for the scorecards.
Ladies and gentlemen, after 3 rounds of action, we go to the scorecards for a decision.
Judge Ryoma Takatsuka scores the fight 29:28
Judge Micheangelo Fripello scores the fight 29:29
Judge Paul Gruel scores the fight 29:29
The fight is ruled a majority draw!
|
|
|
|
|
|
|
|
|
|
|
|
|
|
|
|
|
|
|
|
|
|
|
| S |
C
A |
G |
S |
C
B |
G |
|
S |
C |
G |
|
energy
A | B |
|
hype
A | B |
|
pop
A | B |
|
mgr
A | B |
|
FIGHT
RATING
72% |
|
|
|
|
|
|
|
Undercard bout
|
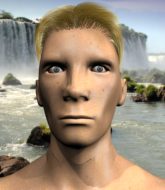
Coming up we have a welterweight MMA rules bout between Floyd Mondello (ranked 0 p4p, 0 weight class) and Clark Kent (ranked 0 p4p, 0 weight class). Kent has chosen Superman - Five For Fighting as his entrance music. Both fighters look pumped up here. Let's hope this is a good fight!
 |
|
 |
| 178 cm
19
178 lbs
4 - 0 - 0 |
|
185 cm
20
175 lbs
1 - 0 - 0 |
BJJ Blue Belt
Excellent boxer
Cardio machine |
|
BJJ Blue Belt
Basic striking
Tends to cut |
|
| |
|
Ladies and gentlemen. This fight is 3 rounds, in the welterweight division.
Introducing the fighter to my left, fighting out of the red corner.
With a record of
4 - 0 - 0, fighting out of Hilo, Floyd Mondello!
And introducing the fighter to my right, fighting out of the blue corner.
With a record of
1 - 0 - 0, fighting out of Hilo, Clark Kent!
The judges for this bout are Jeff Smith, Paul Gruel and Ryoma Takatsuka.
The bell rings for round one and we are underway!
Kent gets his takedown attempt stuffed easily
and Mondello cracks him with a counter punch right on the button.
It looks like Clark Kent has been cut.
Kent shoots in for a takedown. He's persisting with it as Mondello sprawls well. Mondello wins this battle and keeps the fight standing. Kent gets slowly back to his feet.
Mondello misses with a double jab.
Kent fails to land the takedown.
Floyd Mondello has stuffed three takedown attempts in the round now. That's going to take a lot out of Clark Kent.
Mondello throws a wild body kick that Kent sees coming a mile off.
Some wild striking there from Mondello.
Mondello fails in his attempt to clinch.
Kent loses concentration momentarily and Mondello pounces with a three punch combo! Right, left, right! Kent crashes face first to the mat, out cold! Mondello finishes this one with a fantastically precise combo! Great stuff.
Ladies and gentlemen, after 0:39 of round 1, we have a winner by way of KO (Punches). Floyd Mondello!
|
|
|
|
|
|
|
|
|
|
|
|
|
|
|
|
|
|
|
|
|
|
|
| S |
C
A |
G |
S |
C
B |
G |
|
S |
C |
G |
|
energy
A | B |
|
hype
A | B |
|
pop
A | B |
|
mgr
A | B |
|
FIGHT
RATING
62% |
|
|
|
|
|
|
|
Co-main event
|
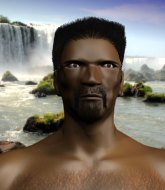
Coming up we have a heavyweight MMA rules bout between Robert Dominator (ranked 0 p4p, 0 weight class) and Japa Kaka (ranked 0 p4p, 0 weight class). Dominator comes to the cage accompanied by Condemned 84 - Face the Aggression. Robert Dominator could well score a knockout today. He has the power to get to Japa Kaka's chin.
 |
|
 |
| 200 cm
29
268 lbs
10 - 9 - 0 |
|
190 cm
31
275 lbs
15 - 8 - 0 |
Decent wrestler
Excellent boxer
KO power |
|
BJJ Blue Belt
Excellent boxer
Good gas tank |
|
| |
|
Ladies and gentlemen. This fight is 3 rounds, in the heavyweight division.
Introducing the fighter to my left, fighting out of the red corner.
With a record of
10 - 9 - 0, fighting out of Hilo, Robert Dominator!
And introducing the fighter to my right, fighting out of the blue corner.
With a record of
15 - 8 - 0, fighting out of Hilo, Japa Kaka!
The judges for this bout are Micheangelo Fripello, Josh West and Ryoma Takatsuka.
The bell rings for round one and we are underway!
Kaka misses with a straight left.
Kaka looks to throw the jab but Dominator is out of range.
Dominator pushes forward with a 1-2 combination that forces Kaka back to the cage. Dominator follows up with a solid lead hook to the liver.
Kaka moves out of range of the body kick from Dominator.
A combination from Kaka does no damage.
Dominator throws a hook but Kaka blocks it.
Dominator fails in his attempt to clinch.
Sloppy strikes from Dominator. Those never looked like landing.
A swing and a miss from Kaka.
Dominator needs to keep his hands up - Kaka had a free shot at his head there.
Kaka lands a nice looking body shot.
Dominator fails with an attempt to clinch.
Dominator keeping his hands up high there, blocking the jab from Kaka.
Nice straight punches there by Kaka. You know Roy Jones Jr respects the hands of Kaka.
Wooooo! Give it up for these two warriors! They are putting on a show!
Dominator looking to land some kicks to the body here.
Kaka rushes forward with a series of wild hooks but Dominator moves out of range and avoids them all easily.
Kaka lands a jab-cross combination.
Kaka scores with the left hand. Dominator knows he should have avoided that one.
Dominator slips a jab and a cross from Kaka.
Kaka throws a wild combination but nothing lands.
That's one minute gone in the round.
Dominator tries to clinch but is not successful on this occasion.
Dominator tries to clinch but is not successful on this occasion.
Kaka just misses with a punch to the body.
Dominator avoids the body shot from Kaka.
Kaka swinging wildly here.
The fight moves into the clinch position.
A frustrated look appears on Kaka's face as he tries to break the clinch.
Kaka tries to throw a body punch but Dominator avoids it by throwing Kaka back against the cage.
Kaka breaks the clinch.
Dominator tries to clinch but Kaka moves away
and Kaka counters with a three punch combo that has Dominator backing up. Dominator nods at Kaka to acknowledge the strikes.
Dominator uses good head movement to avoid the hook from Kaka.
Kaka circles away from the clinch attempt.
Dominator ducks down and throws a hook to the body but Kaka moves away.
Dominator fakes with an overhand right and moves in to clinch with Kaka, pushing him back against the cage.
Kaka manages to break the clinch.
Dominator is looking to take this fight into the clinch.
That's two minutes gone in the round.
Dominator tries to clinch there but Kaka circles away.
Dominator tries to grapple but his opponent circles
enabling Kaka to counter with a crisp jab.
We've seen a great period of action over the last minute or so - credit to both fighters for going all out!
Dominator gets cracked with a nice right hand there by Kaka.
Kaka swings away but doesn't land with a series of punches.
Dominator takes a jab right on the kisser.
Dominator moves to clinch but Kaka breaks away
and Kaka counters with a nice uppercut.
Dominator tries to clinch up against the cage, rushing in the close the distance. Kaka manages to break the clinch and circles back to the middle of the mat.
Kaka scores with a hook.
Dominator misses with a body kick.
Dominator wants to clinch.
Dominator lands a nice shot that snaps Kaka's head back.
Kaka lands a jab to Dominator's midsection.
That's three minutes gone in the round.
Kaka throws a combination but it was largely blocked by Dominator.
Dominator fails in his attempt to clinch.
Kaka misses with a straight right.
Dominator doesn't manage to clinch there - Kaka circles away.
Dominator has his hands up protecting his head but a hook from Kaka finds it's way round the side to connect with Dominator's head.
Kaka scores with the left hand. Dominator knows he should have avoided that one.
Kaka scores with a jab.
Dominator scores with a jab.
Sloppy strikes from Dominator. Those never looked like landing.
Dominator looks to clinch
and Kaka counters with a three punch combo that has Dominator backing up. Dominator nods at Kaka to acknowledge the strikes.
The crowd cheering loudly, showing their appreciation for the quality fight we're seeing here.
The sound of bone on bone echoes around the arena as Kaka checks a leg kick.
Dominator drops his hands momentarily and Kaka takes advantage with a crisp shot to the head.
Robert Dominator seems to be the more aggressive standup fighter in this bout.
Kaka throws a jab to the body, straight down the pipe. Boom. That sent Dominator stumbling backwards but he manages to regain his composure quickly.
Kaka takes a really solid shot there but just smiles back and shrugs his shoulders.
Dominator uses some good footwork to avoid the body shot by Kaka.
Dominator fails in his attempt to clinch.
Dominator wants to clinch.
Kaka throws out a token jab with nothing on it.
That's four minutes gone in the round.
Kaka digs a good body shot into Dominator's ribs.
Dominator misses with a few strikes there.
Dominator tries to move into range but Kaka moves to the side and lands with a nice right hand.
Dominator throws a combination but comes up with nothing but fresh air.
A left lands for Kaka.
Kaka misses with a jab and misses with a cross straight after too.
Kaka thows a body shot but no joy.
Dominator throws a hard body shot but it just misses.
Dominator closes the distance and takes a jab right on the nose as he does so.
Dominator is looking to clinch.
Dominator wants to clinch.
Kaka is landing a lot of head punches in this opening round! Dominator had better start moving his head a bit unless he wants his face to turn into pâté.
The crowd are going absolutely nuts as the round comes to an end - what a fantastic round of action!
A slow jab from Kaka misses its intended target.
Kaka cracks Dominator with a right hand to the side of the head.
And thats the end of the round the fighters go back to their corners.
Japa Kaka dominated that round.
The minute break is over - no more time for sponges and pep talks - back to the action!
Dominator takes a shot to the eye socket. That's gotta hurt.
Dominator looks to score with a combo but nothing lands.
Kaka scores with a decent looking hook.
Kaka throws a right hand that Dominator ducks under and follows up with a left that Dominator also avoids with ease.
Robert Dominator is looking to throw some combinations by the looks of things.
Kaka shakes his hands off, looking to compose himself, but takes a jab to the jaw whilst he does it.
Dominator misses with a half-hearted attempt at a head kick.
Dominator tries to clinch there but Kaka circles away.
Dominator looks to clinch
and Kaka counters with a straight right hand.
Dominator doesn't manage to clinch there - Kaka circles away.
Dominator throws a head kick that misses.
Dominator tries to close the distance and clinch up but Kaka swats him away and circles back towards the center.
Dominator wants to clinch.
Dominator takes a solid shot to the body. That one hurt him but he's trying not to show it.
The fans in attendance giving it up for the two fighters, who have really let it all hang out in the last minute or so!
Dominator wants to clinch.
Kaka thuds a left hand into Dominator's body.
That's one minute gone in the round.
Nice jab there from Kaka.
Dominator tries to clinch but Kaka moves out of range.
Dominator takes one on the chin but keeps coming.
Dominator tries to clinch up but Kaka circles away and keeps his distance.
Dominator tries to clinch up.
Kaka digs a good body shot into Dominator's ribs.
Kaka circles away from the clinch attempt
and Kaka counters with a nice jab to the body that keeps Dominator thinking.
Kaka throws a nice hook to the body that draws an oooh from the crowd.
Japa Kaka seems to be getting the better of the standup.
A punch combination from Kaka misses.
Kaka throws a combination but it was largely blocked by Dominator.
Dominator slips under a jab from Kaka.
Kaka scores with a reasonable looking shot to the body. Dominator doesn't seem bothered though.
Both fighters are absolutely exhausted here.
The crowd are loving this. Great action here.
A decent looking cross lands there for Kaka.
Kaka dips down and scores with a jab to the body.
Kaka tests Dominator's chin there with a solid looking shot.
That's two minutes gone in the round.
Kaka lands a right hook to the body.
Dominator is looking to take this fight into the clinch.
Donk. Kaka catches Dominator right on the button with a cross.
Kaka works over Dominator's head and body with a nice combination.
Dominator moves to clinch but Kaka breaks away
and Dominator takes a counter punch right on the button for his troubles.
Kaka showing good head movement there, avoiding the strikes from Dominator.
The fighters are starting to get sweaty, which will make takedowns a bit more tricky.
Nice shot by Kaka.
Kaka ducks under a wild hook from Dominator.
Kaka scores with a decent looking hook.
Kaka scores with a jab to the body.
Kaka throws a hook to the side of Dominator's head but Dominator sees it coming and ducks under it beautifully.
Kaka swats away the attempt to clinch by Dominator.
That's three minutes gone in the round.
Dominator tries to clinch but Kaka moves out of range.
Kaka fakes a head punch and goes low to the body. Nicely done.
Dominator on the wrong end of a decent looking cross there.
Kaka has been the more effective fighter overall so far.
Kaka missing with a left hand there. Dominator was out of range so wasted energy throwing that one.
Kaka digs a good hook to Dominator's body.
Dominator gets his head snapped back by a nice shot there.
Kaka bobs and weaves and unloads with a good uppercut.
This is a great period of action - very entertaining stuff!
Kaka throws a good cross that connects.

Dominator is rocked!
Kaka fakes a jab and then connects with a hook.
Oh Dominator is still all over the place! His legs are completely gone! Will he be able to recover?!!
Dominator tries to close the distance and clinch up but Kaka swats him away and circles back towards the center.

Kaka steps into range and cracks Dominator with a monster punch that buckles his knees! Dominator flops backwards and Kaka dives into his guard looking to finish!
We've had a lack of effective grappling in the last minute or so, which could well see a referee standup.
Dominator is working an open guard so Kaka takes the opportunity to get back to his feet.
Are you kidding me?! Kaka ducked down and unloaded an uppercut from hell that sent Dominator clean off his feet! Someone make me a GIF - that's knockout of the night for sure!
Ladies and gentlemen, after 3:57 of round 2, we have a winner by way of KO (Punch). Japa Kaka!
A very excited looking Japa Kaka made sure he remembered to thank all the fans both in the arena and on the internet. He said all the coolest people spend all day on MMA websites, which got a big reaction.
|
|
|
|
|
|
|
|
|
|
|
|
|
|
|
|
|
|
|
|
|
|
|
| S |
C
A |
G |
S |
C
B |
G |
|
S |
C |
G |
|
energy
A | B |
|
hype
A | B |
|
pop
A | B |
|
mgr
A | B |
|
FIGHT
RATING
96% |
|
|
|
|
|
|
|
Main event
|
Coming up we have a heavyweight MMA rules bout between Rasta Madafaka (ranked 0 p4p, 0 weight class) and Pedro Flikflak (ranked 0 p4p, 0 weight class). Both fighters look fresh as a daisy as they make their way towards the cage.
 |
|
 |
| 192 cm
31
275 lbs
10 - 8 - 0 |
|
200 cm
30
265 lbs
17 - 4 - 1 |
BJJ White Belt
World class boxer
Cardio machine |
|
Good wrestler
Excellent boxer
Good gas tank |
|
| |
|
Ladies and gentlemen. This fight is 3 rounds, in the heavyweight division.
Introducing the fighter to my left, fighting out of the red corner.
With a record of
10 - 8 - 0, fighting out of Hilo, Rasta Madafaka!
And introducing the fighter to my right, fighting out of the blue corner.
With a record of
17 - 4 - 1, fighting out of Hilo, Pedro Flikflak!
The judges for this bout are Micheangelo Fripello, Colin Fray and Paul Gruel.
The bell rings for round one and we are underway!
Flikflak lands a body shot.
Donk. Madafaka catches Flikflak right on the button with a cross.
Flikflak misses the shot to the body.
Madafaka throws a nice hook to the body that draws an oooh from the crowd.
Flikflak misses with a right hand
and Madafaka counters nicely by changing levels and landing a hook to the body.
Madafaka throws a combination but comes up with nothing but fresh air.
Flikflak misses with a hook
and Madafaka counters with a quick right hand to the jaw.
Flikflak displays some good footwork, moving neatly out of range as Madafaka throws out the jab.
Madafaka takes a big uppercut there. He seems a bit wobbly but no, he's OK.
Flikflak swings for the body but Madafaka moves out of range.
Flikflak fakes a jab and then connects with a hook.
Wooooo! Give it up for these two warriors! They are putting on a show!
Madafaka drops his hands momentarily and Flikflak takes advantage with a crisp shot to the head.
Flikflak misses with a straight right.
Madafaka looks to score with a jab to the body but Flikflak is just out of range.
Madafaka throws a hook but Flikflak blocks it.
Flikflak ducks under a wild hook from Madafaka.
A big left from Madafaka misses.
Madafaka cracks Flikflak with a nice right hand that draws applause from the crowd.
That's one minute gone in the round.
Madafaka keeping his hands up high there, blocking the jab from Flikflak.
Flikflak fails with a takedown attempt.
Madafaka throws the left hand but Flikflak avoids the punch easily.
Madafaka displays some good footwork, moving neatly out of range as Flikflak throws out the jab.
Flikflak throws an overhand right that lands on Madafaka's shoulder, as Madafaka tries to avoid the shot.
Madafaka moves into range and throws a combination. A nice jab followed by a hook to the body.
A left lands for Madafaka.
Madafaka staying out of range there.
A swing and a miss from Madafaka.
Flikflak ducks under a wild hook from Madafaka.
Flikflak cracks Madafaka with a right hand to the side of the head.
Madafaka misses with a double jab.
Madafaka swings for the body but Flikflak moves out of range.
Madafaka keeping a good distance there, avoiding the body shot.
That's two minutes gone in the round.
Flikflak closes the distance and pushes Madafaka back into the cage.
The fans in attendance giving it up for the two fighters, who have really let it all hang out in the last minute or so!
Flikflak lands with a left to the head.
With the fighters clinched against the cage, Madafaka creates a bit of distance for himself and scores with a nice uppercut.
Madafaka is trying to break free.
Flikflak lands a hook to the side of the head.
Madafaka struggles to land a body shot inside as Flikflak controls his hands.
Madafaka misses with a shot to the kidneys.
Flikflak has Madafaka pushed against the cage.
Madafaka tries to break the clinch but Flikflak is controlling the position.
Madafaka presses Flikflak against the cage and delivers a mid-strength body shot.
Madafaka working hard to break the clinch.
Flikflak scores with an uppercut up the middle.
Madafaka pushes off and circles away, back to the middle of the mat.
Flikflak fakes high and swings low for a body shot but Madafaka manages to avoid it.
Flikflak ducks under an overhand right and circles away with a smile on his face.
Madafaka throws an uppercut from half a mile away. Flikflak sees it coming and avoids it easily.
That's three minutes gone in the round.
Flikflak misses with a straight left.
Flikflak ducks under a wild hook from Madafaka.
Madafaka connects with a good right hand that stumbles Flikflak. Flikflak circles away out of range and recomposes himself.
Madafaka just misses with a punch to the body.
Madafaka lets the fists fly and connects with a left straight followed by a right hook.
Madafaka connects with a right hand. Flikflak shakes it off.
Madafaka looks to throw the jab but Flikflak is out of range.
Madafaka misses with an uppercut.
Madafaka slips under a jab.
Madafaka throws a jab when Flikflak was well out of range.
Flikflak is looking to take this fight into the clinch.
Madafaka throws a series of punches but Flikflak moves out of range.
Madafaka moves away from the strike by Flikflak.
Madafaka works over Flikflak's head and body with a nice combination.
That's four minutes gone in the round.
Madafaka keeping a good distance there, avoiding the body shot.
Flikflak closes the distance and pushes Madafaka back into the cage.
The fans in attendance giving it up for the two fighters, who have really let it all hang out in the last minute or so!
Madafaka can't break the clinch.
Madafaka takes a shot to the head.
Madafaka breaks the clinch.
Rasta Madafaka is looking to keep the fight on the feet at all costs.
Flikflak swings and misses with a hook to the body.
Madafaka misses with a body shot. Nice footwork from Flikflak.
Flikflak misses with a hook.
Madafaka avoids a kick to the body.
Madafaka lunges in with swinging rights and lefts but Flikflak circles away quickly and effectively.
Madafaka uses good head movement to avoid the hook from Flikflak.
Flikflak takes a body punch but keeps moving.
The crowd are going absolutely nuts as the round comes to an end - what a fantastic round of action!
Madafaka throws a two punch combo that lands nicely.
Madafaka misses with an uppercut.
Flikflak staying out of range there.
Madafaka uses decent footwork to sidestep a right hand from Flikflak.
And thats the end of the round the fighters go back to their corners.
Rasta Madafaka dominated that round.
The referee calls time. The cornermen exit stage left and we're back to business.
Flikflak throws an overhand right that lands on Madafaka's shoulder, as Madafaka tries to avoid the shot.
Madafaka closes the distance and lands a one-two.
Madafaka throws an overhand right that lands on Flikflak's shoulder, as Flikflak tries to avoid the shot.
Madafaka uses good footwork to get in and out, landing a nice hook.
Flikflak fails miserably with a takedown attempt.
The fighters circling - Flikflak throws out the jab but it was never going to land.
Madafaka moves into range and throws a lovely three punch combination.
Madafaka throws a big shot that misses.
A slow jab from Madafaka misses its intended target.
Madafaka stuffs the takedown attempt from Flikflak. Flikflak gets slowly back to his feet.
Flikflak tries to clinch there but Madafaka circles away.
Madafaka bobs and weaves and unloads with a good uppercut.
This is a great period of action - very entertaining stuff!
Madafaka ducks down and throws a hook to the body but Flikflak moves away.
That's one minute gone in the round.
Flikflak fakes with an overhand right and moves in to clinch with Madafaka, pushing him back against the cage.
Both guys are working to get underhooks.
A nice left hand lands by Madafaka.
Flikflak taking a break, stalling in the clinch.
Madafaka tries to circle away but Flikflak has him pinned against the cage.
Madafaka wants to get back to striking at distance but Flikflak won't allow it.
Madafaka breaks from the clinch.
Flikflak looks to land a right hand but Madafaka moved out of range.
Flikflak takes a really solid shot there but just smiles back and shrugs his shoulders.
Madafaka throws a combination but comes up with nothing but fresh air.
Some wild striking there from Madafaka.
A jab from Madafaka does it's job there.
Flikflak swings for the body but Madafaka moves out of range.
Madafaka loads up on a big right hand but Flikflak slips the punch.
A jab from Flikflak finds it's way through Madafaka's defenses.
That's two minutes gone in the round.
The fans in attendance giving it up for the two fighters, who have really let it all hang out in the last minute or so!
Flikflak avoids the body shot from Madafaka.
Madafaka keeping a good distance there, avoiding the body shot.
Flikflak swings and misses with a hook to the body.
Flikflak getting the better of the striking in that exchange.
A looping hook to the body misses from Madafaka. Flikflak does a little dance to reset his feet.
Flikflak just misses with a punch to the body.
Rasta Madafaka is winning the standup battle so far.
Madafaka stuffs the takedown.
Rasta Madafaka has stuffed three takedown attempts in the round now. That's going to take a lot out of Pedro Flikflak.
Madafaka connects with a hook to the side of his opponent's head.
Flikflak looks to land a left hand but Madafaka moved out of range nicely.
Madafaka bobbing and weaving, closes the distance and lands a hook to the side of Flikflak's head.
Madafaka stalks Flikflak and leaps in with a furious combination of punches. Uppercuts and crosses smash into Flikflak's face. Flikflak staggers backwards, shaken.
Flikflak misses with an uppercut. Madafaka saw that one coming.
Flikflak throws a body punch but Madafaka moves out of range.
Boom, another hit is landed. "You're gunna get knocked out" taunts Madafaka, as that shot connected.
Flikflak takes one on the chin but seems OK.
That's three minutes gone in the round.
Flikflak connects with a right hand. Madafaka shakes it off.
Nice shot by Madafaka.
A swing and a miss from Madafaka.
Flikflak misses the shot to the body.
A looping hook to the body misses from Flikflak. Madafaka does a little dance to reset his feet.
Flikflak staying out of range there.
Flikflak looks to score with a jab to the body but Madafaka is just out of range.
Madafaka lands a nice shot that snaps Flikflak's head back.
Madafaka takes one on the chin but seems OK.
Madafaka connects with a good right hand that stumbles Flikflak. Flikflak circles away out of range and recomposes himself.
Madafaka lands a nice looking body shot.
Flikflak digs a good hook to Madafaka's body.
Flikflak waving his hands out in front of him, looking to distract Madafaka.
Flikflak throws a monster uppercut resembling something out of street fighter but it doesn't land.
That's four minutes gone in the round.
Madafaka displays some good footwork, moving neatly out of range as Flikflak throws out the jab.
Flikflak misses with a body shot.
Flikflak has a pretty nasty looking mouse under his right eye.
Madafaka falls off balance throwing a combination
and Flikflak counters with a left to the body.
This has been an exciting period of action!
Madafaka lands with a right hand.
Madafaka moves away from the strike by Flikflak.
Madafaka avoids the body shot from Flikflak.
Madafaka connects with a body shot that sends Flikflak's belly button to the back.
Flikflak lands a nice shot to the body.
Madafaka scores with a sloppy right hand. Flikflak should have avoided that one.
Flikflak takes a jab on the nose. He smiles like he loves it and keeps coming.
The crowd are going absolutely nuts as the round comes to an end - what a fantastic round of action!
A looping hook to the body misses from Flikflak. Madafaka does a little dance to reset his feet.
Flikflak steps to the side to avoid the strikes from Madafaka.
Madafaka waving his hands out in front of him, looking to distract Flikflak.
Flikflak fakes a jab and then connects with a hook.
And thats the end of the round the fighters go back to their corners.
Rasta Madafaka dominated that second round.
The fighters get back to their feet, the hooter sounds and we're back to the action! This is the final round!
Madafaka jabbing away but nothing is landing.
Madafaka misses the jab.
A big left from Madafaka misses.
Madafaka connects with a jab.
A looping hook to the body misses from Flikflak. Madafaka does a little dance to reset his feet.
Madafaka with a jab.
Flikflak digs a good body shot into Madafaka's ribs.
Nice defenses there by Madafaka.
Madafaka takes an uppercut right on the jaw but it doesn't phase him.
Madafaka ducks under an overhand right and circles away with a smile on his face.
Madafaka takes a swing at Flikflak's ribcage but misses.
Flikflak moves away from the strike by Madafaka.
Flikflak throws a hard body shot but it just misses.
Madafaka scores with a hook.
Madafaka lands a really nice looking cross but Flikflak seems unphased.
That's one minute gone in the round.
Madafaka loads up on a big right hand but Flikflak slips the punch.
Flikflak misses the jab.
A really sloppy takedown attempt there from Flikflak.
A slow jab from Flikflak misses its intended target.
Flikflak takes a shot to the body in his stride.
Flikflak displays some good footwork, moving neatly out of range as Madafaka throws out the jab.
Madafaka rushes forward with a series of wild hooks but Flikflak moves out of range and avoids them all easily.
A left and a right from Madafaka both land. Nice combination.
Madafaka ducks under a wild hook from Flikflak.
Flikflak on the wrong end of a nice jab.
Madafaka tries to land with a swinging hook to the body but Flikflak was well out of range. Poor timing from Madafaka.
Madafaka throws a combination that misses
and Flikflak connects with a straight left hand counter down the middle.
This has been an exciting period of action!
Madafaka uses some good footwork to avoid the body shot by Flikflak.
That's two minutes gone in the round.
Madafaka throws a hard body shot but it just misses.
Madafaka misses the body punch
and Flikflak counters with a stiff right hand.
Flikflak keeping his hands up high there, blocking the jab from Madafaka.
Flikflak shoots in for a takedown - he's clinched up with Madafaka but Madafaka pushes him off and we're back to square one.
Flikflak misses with a straight left.
Flikflak fails with a takedown attempt.
Rasta Madafaka has stuffed three takedown attempts in the round now. That's going to take a lot out of Pedro Flikflak.
Jab by Madafaka.
Madafaka steps to the side to avoid the strikes from Flikflak.
Madafaka misses with a double jab.
Flikflak ducks down and throws a hook to the body but Madafaka moves away.
Madafaka connects with a looping right hand.
Flikflak avoids a lazy jab quite easily.
That's three minutes gone in the round.
Madafaka fails to land with a series of punches.
A big left from Flikflak misses.
Flikflak uses some good footwork to avoid the body shot by Madafaka.
Flikflak misses with a kick to the body.
Nice takedown defense from Madafaka. No joy for Flikflak on that attempt.
Madafaka throws a right hand that misses
and Madafaka takes a counter punch right on the button for his troubles.
No luck with that takedown attempt from Flikflak.
Flikflak takes a big intake of breath there - he's definitely tired.
A lazy left from Madafaka finds it's target.
No luck for Flikflak with that takedown attempt.
Nice shot by Flikflak.
Madafaka throws a series of punches but Flikflak avoids them all with ease.
Madafaka slips under a jab from Flikflak.
That's four minutes gone in the round.
Madafaka misses with a straight right.
Flikflak stuns Madafaka with a nice body shot, before stepping back out of range.
Madafaka uses good footwork to avoid the strikes from Flikflak.
Madafaka throws the left hand but Flikflak avoids the punch easily.
Flikflak staying out of range there.
Madafaka moves out of range as Flikflak strikes.
Madafaka fakes low and throws an overhand right that catches Flikflak on the side of the head.
The crowd are loving this. Great action here.
This fight brought to you by 5M nutrition - it's mmmmm tasty. Nice jab by Madafaka.
Madafaka misses with the combination.
A right-left combo lands from Madafaka.
Rasta Madafaka is fighting for a decision here - he's started to take the cautious approach.
The crowd are going absolutely nuts as the round comes to an end - what a fantastic round of action!
Flikflak connects with a jab.
Madafaka thows a left - swing and a miss!
Pedro Flikflak has stepped it up - he knows he needs a finish here!
Madafaka moves out of range of the strikes.
And that's the end of the fight!
Rasta Madafaka showed his dominance in that final round.
Well Madafaka has outscored his opponent in every aspect of the fight today. Only a scarily incompetent judge or two will keep him from a well deserved win... Over to the ring announcer for the scorecards.
Ladies and gentlemen, after 3 rounds of action, we go to the scorecards for a decision.
Judge Micheangelo Fripello scores the fight 30:27
Judge Colin Fray scores the fight 30:27
Judge Paul Gruel scores the fight 30:27
In favor of your winner, by unanimous decision... Rasta Madafaka!
After winning the bout, Rasta Madafaka thanked all his fans and promised he'd do even better in his next fight. The crowd seemed to love his humility.
|
|
|
|
|
|
|
|
|
|
|
|
|
|
|
|
|
|
|
|
|
|
|
| S |
C
A |
G |
S |
C
B |
G |
|
S |
C |
G |
|
energy
A | B |
|
hype
A | B |
|
pop
A | B |
|
mgr
A | B |
|
FIGHT
RATING
100% |
|
|
|
|
|
|
|
|
|
|

