 |
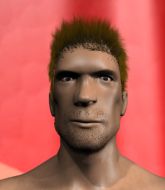
WCF 24: Watson vs. Voda PBP Commentary |
Undercard bout
|
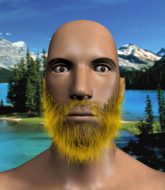
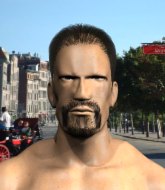
Coming up we have a heavyweight MMA rules bout between Jimmy Trent (ranked 0 p4p, 0 weight class) and Merce Poindexter (ranked 0 p4p, 0 weight class). Trent kept the crowd waiting but all that was forgotten when his ring entrance music started. The incomparable musical genius that is Panama. Merce Poindexter is staring across the cage at his opponent, tweaking his nipples.
 |
|
 |
| 190 cm
22
250 lbs
1 - 1 - 0 |
|
200 cm
20
265 lbs
1 - 2 - 0 |
BJJ Blue Belt
Brawler
Good in bed |
|
BJJ White Belt
Decent boxing
Enjoys gardening |
|
| |
|
Ladies and gentlemen. This fight is 3 rounds, in the heavyweight division.
Introducing the fighter to my left, fighting out of the red corner.
With a record of
1 - 1 - 0, fighting out of Montreal, Jimmy Trent!
And introducing the fighter to my right, fighting out of the blue corner.
With a record of
1 - 2 - 0, fighting out of Montreal, Merce Poindexter!
The judges for this bout are Steve Smith, Robert Douchet and Gregory Folan.

The bell rings for round one and we are underway!
Poindexter fails with a rather predictable takedown attempt.
Trent misses with a jab and misses with a cross straight after too.
Poindexter avoids a kick to the body.
Poindexter throws a series of punches but Trent avoids them all with ease.

Trent has closed the distance and engaged Poindexter in a clinch.

Poindexter manages to break the clinch.
Poindexter looks for a takedown but Trent sprawls well.
Trent leaves Poindexter with his face pressed against the mat as he sprawls beautifully, defending against a solid takedown attempt.
Jimmy Trent has stuffed three takedown attempts in the round now. That's going to take a lot out of Merce Poindexter.
Trent misses with a series of wild punches.
Poindexter is trying hard to land a takedown here. Trent sprawls well and keeps this one on the feet.

Poindexter darts in and clinches Trent up against the cage.
Poindexter tries to jump guard but he falls flat on his backside. Trent smiles and moves away.
Poindexter closes the distance and clinches.

That's one minute gone in the round.
Poindexter swings wildly with an uppercut but Trent uses good head movement to avoid it.
Trent lands with a good tight uppercut to the head.
Poindexter is trying to break the clinch but Trent is controlling him.
Trent comes over the top with an elbow. That landed flush.

It looks like Merce Poindexter has been cut.
Poindexter goes for a body shot but it's blocked.
Trent landing some nice looking knees to the body.
Poindexter looks gassed!
Poindexter takes an elbow to the forehead.
Poindexter prevents the takedown attempt.
Trent looks to throw an elbow but misses.
Poindexter is looking for a takedown.
Trent landing some nice looking knees to the body.
Trent lands with a left to the head.
Wooooo! Give it up for these two warriors! They are putting on a show!
Trent stalls.
A short right hand to the side of the head by Trent.

That's two minutes gone in the round.
Poindexter tries to stall but Trent uses the opportunity to gain a better position.
The two fighters are working to gain dominance in the clinch.
A nice glancing elbow lands by Trent.
Trent gets through Poindexter's defenses to land a nice punch to the side of the head.
Poindexter tries to pull guard but Trent won't allow it.
Trent lands punches inside but they're not really causing much damage.

Trent breaks the clinch.
Trent does a little shimmy and throws a leg kick. The leg kick missed by a considerable margin though, making him look a little bit silly for doing the shimmy.

Trent manages to get an easy takedown there - catching Poindexter on his heels. He'll look to pass Poindexter's guard now, I'm sure.
The referee wants the fighters to be more active or he's going to reset them on the feet.
Trent slows down the pace of the fight, as he sits in guard.
Trent wants to control from the top but Poindexter keeps moving.
Poindexter really doesn't want to stay on the ground with Trent. If he can't get it back to his feet, it's only a matter of time before he'll be tapping out.

That's three minutes gone in the round.
Trent lands a couple of elbows.
Trent stands and throws Poindexter's legs to the side, diving into side control.

Trent has had enough of the ground for now and decides to stand.

Trent lands a left and a right that send Poindexter crashing to the mat, dazed. Trent thinks about following him to the mat but decides to wave him back up to his feet!
We've seen a great period of action over the last minute or so - credit to both fighters for going all out!
Some wild striking there from Trent.
Poindexter misses with a takedown attempt. He shot from a bit too far out.
Trent throws a hook to the side of Poindexter's head but Poindexter sees it coming and ducks under it beautifully.
A head kick misses from Trent.
Trent lands a big head kick that sends Poindexter tumbling to the mat! Trent takes a step backwards and waves Poindexter back to his feet - he wants the finish!

Poindexter is rocked!

That's four minutes gone in the round.
Poindexter leaves his chin hanging out and Trent seizes the opportunity with an uppercut! Poindexter crumbles to the floor in a heap! The referee steps in and tends to the downed fighter! What a knockout!
Ladies and gentlemen, after 4:07 of round 1, we have a winner by way of KO (Punch). Jimmy Trent!
Jimmy Trent decided to go for the less than humble approach in his post fight interview, telling everyone how he is going to conquer the world. The crowd seemed to like it when really that sort of approach could have gone either way.
|
|
|
|
|
|
|
|
|
|
|
|
|
|
|
|
|
|
|
|
|
|
|
| S |
C
A |
G |
S |
C
B |
G |
|
S |
C |
G |
|
energy
A | B |
|
hype
A | B |
|
pop
A | B |
|
mgr
A | B |
|
FIGHT
RATING
68% |
|
|
|
|
|
|
|
Undercard bout
|
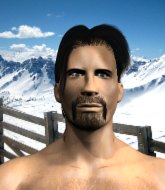
Coming up we have a heavyweight MMA rules bout between Coheed Cambria (ranked 0 p4p, 0 weight class) and Chubba Bubba (ranked 0 p4p, 0 weight class). Bubba has chosen Sick of you as his entrance music. Chubba Bubba has the power to score a knockout today if he connects clean with Coheed Cambria's chin.
 |
|
 |
| 200 cm
21
265 lbs
0 - 1 - 0 |
|
183 cm
18
270 lbs
0 - 1 - 0 |
BJJ Blue Belt
Brawler
Self confident |
|
BJJ Blue Belt
Excellent boxer
Heavy handed |
|
| |
|
Ladies and gentlemen. This fight is 3 rounds, in the heavyweight division.
Introducing the fighter to my left, fighting out of the red corner.
With a record of
0 - 1 - 0, fighting out of Montreal, Coheed Cambria!
And introducing the fighter to my right, fighting out of the blue corner.
With a record of
0 - 1 - 0, fighting out of Montreal, Chubba Bubba!
The judges for this bout are Yves DeLean, Elvis Blanc and Steve Smith.
The bell rings for round one and we are underway!
Cambria delivers a nice body kick.
Bubba with a jab.
Cambria forces Bubba back against the cage and clinches.
Bubba wants to push off and get back to the center of the mat but Cambria has him pressed against the cage.
Cambria gets the body lock takedown. After a quick scramble, Bubba regains guard.

Bubba looking for submissions off his back, moving his hips, looking for an opening.
The fans in attendance giving it up for the two fighters, who have really let it all hang out in the last minute or so!
Bubba preventing the ground and pound from doing any damage.
Cambria throwing strikes from guard but Bubba blocks nicely.
Cambria will need to keep those long limbs tucked in whilst he's on the ground, to prevent any submissions.
Cambria is looking to work some ground and pound but Bubba has wrist control.
Bubba working for a triangle but Cambria defends it easily.
Cambria decides to stand up and beckons his opponent to follow.
Cambria tries to clinch up.
Bubba misses with a hook. Cambria ducked under it nicely.
Cambria has closed the distance and engaged Bubba in a clinch.
That's one minute gone in the round.
Cambria wants the takedown. Bubba is fighting it off but Cambria persists and manages to bring the fight to the ground, ending up in Bubba's guard against the cage.
Cambria postures up and lands some nice ground and pound.
Bubba is trying to control the position but Cambria postures up.
Bubba avoiding any damage from the ground and pound.
Cambria in full guard, throwing the ground and pound. No damage this time.
The ref warns both fighters not to hold the cage as they work up against the meshing.
Cambria cracks Bubba with a solid left hand.
Cambria scores with a decent looking elbow strike.
Cambria throws a big right hand that misses.
Cambria has been looking to land a fair amount of strikes on the ground. He might be looking to soften his opponent up in order to work for a submission.
Cambria is working the ground and pound from guard. He might want to try advancing position though to get more of an impact.
We've seen a great period of action over the last minute or so - credit to both fighters for going all out!
Cambria scoring with some ground and pound.
Cambria postures up to throw the ground and pound strikes but they don't connect.
Cambria advances to half guard.
Bubba looking to work for a kimura from the bottom.
Both fighters really going for it on the ground here!
Bubba is looking to sinch up a guillotine here but Cambria pulls his head out easily.
Bubba looks gassed!
That's two minutes gone in the round.
Cambria thows a huge punch but Bubba dodges it nicely.
Cambria passes to side control.
The fighters are going at a pretty good pace and they're both starting to sweat now.
Cambria stands up.
Cambria moves away from the strike by Bubba.
Cambria is looking to clinch.
Bubba pushes forward with a 1-2 combination that forces Cambria back to the cage. Bubba follows up with a solid lead hook to the liver.
Cambria takes one on the chin but seems OK.
Cambria closes the distance and gets a trip takedown into side control. Bubba quickly recovers to half guard.
Bubba is looking to sinch up a guillotine here but Cambria pulls his head out easily.
Cambria takes advantage of the dominant position to land a couple of big hammer fists.
That's three minutes gone in the round.
Bubba has hold of Cambria's hands but Cambria slips his arm to the side and lands an elbow.
Bubba has hold of Cambria's hands but Cambria slips his arm to the side and lands an elbow.
Cambria lands with a punch from half guard.
Ground and pound from Cambria.
Cambria thows a huge punch but Bubba dodges it nicely.
Cambria throwing shots but Bubba is blocking nicely.
Cambria looks to score some points with some ground and pound.
Cambria missing with some ground and pound from the half guard.
Bubba on the receiving end of some nice ground and pound.
Bubba has no desire to be mounted, so is trying to control. Cambria is working away from the top position though.
Cambria slips a nice elbow through Bubba's hands, connecting with Bubba's forehead.
Bubba has no desire to be mounted, so is trying to control. Cambria is working away from the top position though.
The referee walks around the fighters to get a better view of the action. Cambria lands a nice short elbow.
That's four minutes gone in the round.
Bubba is looking to control Cambria's leg but it's slowly edging free. Can Bubba avoid being mounted?
Cambria is nestled in close to Bubba, controlling him well. He's worked in a nice elbow to the side of the head as well, for good measure.
Fantastic stuff here - a very entertaining period of action, which has drawn cheers from the crowd.
Cambria winds up and cracks Bubba with a swinging punch to the side of the head.
Cambria gets to his feet - back to striking we go!
Bubba throws a series of strikes that have Cambria backpedaling.
Bubba lands a lovely overhand right.
Cambria closes the distance and gets a double leg, slamming Bubba to the mat! Bubba manages to get full guard.
Bubba has an active guard here but Cambria has managed to pass into half guard.
Cambria has freed up his trapped foot and advances to mount.
The crowd are going absolutely nuts as the round comes to an end - what a fantastic round of action!
Cambria has his opponent pinned against the cage, landing some nasty ground and pound that is really making a bit of a mess out of Bubba's face.
And thats the end of the round the fighters go back to their corners.
Coheed Cambria dominated that round.
That's time! Cambria's corner gives him a slap on the ass as he gets ready to fight.

Cambria forces Bubba back against the cage and clinches.
Bubba wants to push off and get back to the center of the mat but Cambria has him pressed against the cage.
Cambria turns his back and goes for a hip toss. It's a bit messy but it gets the job done and Cambria manages to end up in side control.
Bubba tries to get back to half guard but can't.
Cambria cracks Bubba with a big elbow.
Bubba is sneaking out the side here. He's bucked Cambria off and has taken his back!
Bubba looking for the choke but no joy.
Cambria trying to control the hands but Bubba won't let him.
The fans in attendance giving it up for the two fighters, who have really let it all hang out in the last minute or so!
Cambria is going to have to think about doing something other than just controlling because Bubba is managing to avoid having the position dictated to him.
Coheed Cambria overall seems to be getting the better of the ground position in the fight so far.
That's one minute gone in the round.
Bubba is working really hard to secure the rear naked choke. Cambria defends successfully for a significant amount of time. Both fighters are looking very determined.
Cambria trying to control the action but Bubba just sinks the hooks in.
Bubba working for the choke.
That's two minutes gone in the round.
Will Bubba go for the finish here or will he try and keep control of the position?
Bubba is breathing heavily.
Cambria is in bad spot here.
Bubba looking for the choke but no joy.
Cambria holding both Bubba 's hands and preventing any damage.
Bubba doesn't have the hooks in and Cambria manages to turn into his guard.
That's three minutes gone in the round.
Cambria is working the ground and pound from guard. He might want to try advancing position though to get more of an impact.
Cambria with a flurry of punches that miss.
Bubba working for a triangle but Cambria defends it easily.
Cambria stopping the sweep attempt from Bubba.
Bubba had isolated an arm as going for a kimura. Cambria defends it easily.
Cambria chips away with some ground and pound.
The fighters are pressed up against the cage, both looking to find a bit of space to work.
That's four minutes gone in the round.
Cambria throwing strikes from guard but Bubba blocks nicely.
Cambria is sitting in guard, working some ground and pound.
Cambria is in close to Bubba's body, working some short punches and elbows.
Bubba working for a triangle but Cambria defends it easily.
The crowd cheering loudly, showing their appreciation for the quality fight we're seeing here.
Cambria cracks Bubba with a solid left hand.
Cambria landing some decent shots from guard.
Cambria scores with a decent looking elbow strike.
As the round comes to an end the crowd are showing their appreciation for a great round of action.
Cambria lands a couple of digs.
Cambria working in close now, lands a nice elbow to the side of Bubba's head.
Hammerfist, elbow! yells Cambria's corner. There ya go! There ya go!
Cambria connects with a couple of short punches.
And thats the end of the round the fighters go back to their corners.
Coheed Cambria dominated that second round.
The fighters' corners scream their final instructions, as the referee calls time. Here we go, back to the action! And we move into the final round!

Bubba gets caught on his heels momentarily as he allows Cambria to score an easy takedown into full guard.
Bubba is looking for a guillotine. You can't force these things though and Cambria defends well.
Cambria is in close to Bubba's body, working some short punches and elbows.
Cambria cracks Bubba with a solid left hand.
Cambria lands a nice shot whilst sitting in his opponent's guard.
Cambria scores with a decent looking elbow strike.
Bubba throwing his legs up looking for a triangle.
This has been an exciting period of action!
Bubba looking to hit a scissor sweep but Cambria is one step ahead there.
Bubba takes a big intake of breath there - he's definitely tired.
Cambria lands a couple of decent looking shots.
That's one minute gone in the round.
Cambria working in close now, lands a nice elbow to the side of Bubba's head.
Bubba is throwing his legs up, looking for submissions. Cambria is aware though and is defending well.
Bubba is active off his back here, looking for submissions.
Cambria chips away with some ground and pound.
Cambria with a nice head shot there.
Cambria postures up and lands a big shot to Bubba's brow.
Cambria with a nice head shot there.
Cambria with a couple of shots to the head there. Not particularly brutal.
Cambria working some strikes from top position.
Cambria connects with a couple of short punches.
The crowd cheering loudly, showing their appreciation for the quality fight we're seeing here.
Bubba is throwing his legs up, looking for submissions. Cambria is aware though and is defending well.
Cambria scoring with punches to the head and body.
Cambria postures up and lands a big shot to Bubba's brow.
Cambria content to strike from guard, landing some decent shots.
That's two minutes gone in the round.
Cambria is working Bubba over from the guard. He should look to pass the guard and do a little more damage with these strikes.
Hammerfist, elbow! yells Cambria's corner. There ya go! There ya go!
Cambria postures up and lands some nice ground and pound.
Cambria with a nice head shot there.
Cambria stands up from Bubba's guard - Cambria perhaps looking for a knockout.
Bubba tries to sprawl but Cambria drives through with a takedown into half guard.
Cambria looks to land a strike but Bubba avoids it nicely and regains full guard.
Cambria working from the guard for now, landing some ground and pound.
Bubba is active off his back here, looking for submissions.
Cambria cracks Bubba with a solid left hand.
Cambria is working the ground and pound from guard. He might want to try advancing position though to get more of an impact.
That's three minutes gone in the round.
Cambria lands a couple of decent looking shots.
Cambria throwing strikes but missing.
Bubba is looking for a guillotine. You can't force these things though and Cambria defends well.
Cambria lands a nice shot whilst sitting in his opponent's guard.
Cambria wants to pass the guard but Bubba is keeping the position.
Cambria tries to stand but Bubba is controlling from the bottom.
Cambria postures up in Bubba's guard and throws a big left but Bubba blocks it.
Bubba trying to control the position.
Cambria stands up over Bubba, holding his feet. He dives back in and lands a decent shot to the head.
That's four minutes gone in the round.
Bubba had isolated an arm as going for a kimura. Cambria defends it easily.
The crowd cheering loudly, showing their appreciation for the quality fight we're seeing here.
Cambria working from the guard for now, landing some ground and pound.
Cambria is working Bubba over from the guard. He should look to pass the guard and do a little more damage with these strikes.
Bubba looking for submissions off his back, moving his hips, looking for an opening.
Cambria working in close now, lands a nice elbow to the side of Bubba's head.
Chubba Bubba has stepped it up - he knows he needs a finish here!
Bubba has a loose triangle. He'll be looking to tighten that up but Cambria can see exactly what he's planning and manages to posture up and free himself.
Cambria postures up and lands some nice ground and pound.
Coheed Cambria is fighting for a decision here - he's started to take the cautious approach.
The crowd are going absolutely nuts as the round comes to an end - what a fantastic round of action!
Cambria not doing a lot at the moment. He'll have to show some more aggression or the fight will get stood up.
And that's the end of the fight!
Coheed Cambria showed his dominance in that final round.
Well I reckon that's a shut out for Cambria, winning every round. Will the judges agree? They are the ones who matter, even if they are often depressingly incompetent. Over to the ring announcer for the scorecards.
Ladies and gentlemen, after 3 rounds of action, we go to the scorecards for a decision.
Judge Yves DeLean scores the fight 30:27
Judge Elvis Blanc scores the fight 30:27
Judge Steve Smith scores the fight 30:27
In favor of your winner, by unanimous decision... Coheed Cambria!
|
|
|
|
|
|
|
|
|
|
|
|
|
|
|
|
|
|
|
|
|
|
|
| S |
C
A |
G |
S |
C
B |
G |
|
S |
C |
G |
|
energy
A | B |
|
hype
A | B |
|
pop
A | B |
|
mgr
A | B |
|
FIGHT
RATING
100% |
|
|
|
|
|
|
|
Undercard bout
|
|
|
|
Undercard bout
|
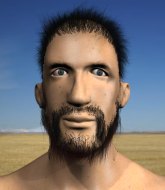
Coming up we have a heavyweight MMA rules bout between Nathan Drake (ranked 0 p4p, 0 weight class) and Krzysztof Kothciushco (ranked 0 p4p, 0 weight class). Both fighters will be looking to make this an exciting fight for the fans, I'm sure!
 |
|
 |
| 190 cm
22
255 lbs
1 - 0 - 0 |
|
200 cm
19
250 lbs
1 - 1 - 0 |
BJJ White Belt
Excellent boxer
Good chin |
|
BJJ Blue Belt
Brawler
Enjoys gardening |
|
| |
|
Ladies and gentlemen. This fight is 3 rounds, in the heavyweight division.
Introducing the fighter to my left, fighting out of the red corner.
With a record of
1 - 0 - 0, fighting out of Montreal, Nathan Drake!
And introducing the fighter to my right, fighting out of the blue corner.
With a record of
1 - 1 - 0, fighting out of Montreal, Krzysztof Kothciushco!
The judges for this bout are Gregory Folan, Yves DeLean and Steve Smith.
The bell rings for round one and we are underway!
Drake throws a right and a left that Kothciushco avoids nicely.
Drake lets the fists fly and connects with a left straight followed by a right hook.
Drake closes the distance and lands a one-two.
The crowd are loving this. Great action here.
Drake ducks under a wild hook from Kothciushco.
No luck for Kothciushco with that takedown attempt.
Drake throws a right and a left that Kothciushco avoids nicely.
Drake looks frustrated there after his takedown attempt is stuffed easily.
Kothciushco fakes high and swings low for a body shot but Drake manages to avoid it.
Drake throws a series of punches but Kothciushco avoids them all with ease.
Kothciushco fakes a jab and then connects with a hook.
Kothciushco lands with a kick to the temple. Drake shrugs as if to say "is that all you've got?"

It looks like Nathan Drake has been cut.
Krzysztof Kothciushco seems to be the more aggressive standup fighter in this bout.
Kothciushco moves into range and lands a nice body kick.
Drake is breathing heavily.

Kothciushco connects with a vicious head kick that knocks Drake to the floor! Kothciushco dives in looking for the finish!
Kothciushco missing with some ground and pound from the half guard.
Kothciushco is working for a submission here. He's got hold of the far side arm and he's looking for a kimura. He's cranking on the arm and he's got it! Drake is tapping out! Ouch, that looked like it hurt!
Ladies and gentlemen, after 1:55 of round 1, we have a winner by way of Submission (Kimura). Krzysztof Kothciushco!
|
|
|
|
|
|
|
|
|
|
|
|
|
|
|
|
|
|
|
|
|
|
|
| S |
C
A |
G |
S |
C
B |
G |
|
S |
C |
G |
|
energy
A | B |
|
hype
A | B |
|
pop
A | B |
|
mgr
A | B |
|
FIGHT
RATING
100% |
|
|
|
|
|
|
|
Undercard bout
|
Coming up we have a middleweight MMA rules bout between Eysteinn H Sigur (ranked 0 p4p, 0 weight class) and Eli Samuel (ranked 0 p4p, 0 weight class). Samuel has chosen Stuck in the Moment as his entrance music. The key to victory for Eysteinn H Sigur has got to be keeping the fight on the feet.
 |
|
 |
| 185 cm
23
191 lbs
4 - 3 - 0 |
|
185 cm
24
190 lbs
6 - 5 - 0 |
BJJ Purple Belt
Solid boxing
Experienced |
|
BJJ Purple Belt
Counter striker
Granite chin |
|
| |
|
Ladies and gentlemen. This fight is 3 rounds, in the middleweight division.
Introducing the fighter to my left, fighting out of the red corner.
With a record of
4 - 3 - 0, fighting out of Montreal, Eysteinn H Sigur!
And introducing the fighter to my right, fighting out of the blue corner.
With a record of
6 - 5 - 0, fighting out of Montreal, Eli Samuel!
The judges for this bout are Dillan Fox, Alec Ball and Robert Douchet.
The bell rings for round one and we are underway!
Samuel is pinned up against the cage taking some big shots here. The referee is looking closely deciding whether he should stop the fight.

Samuel looking for a takedown here - he's got it.
Samuel stopping the sweep attempt from Sigur.
The fighters are pressed up against the cage, both looking to find a bit of space to work.
Sigur trying to keep a closed guard but Samuel is proving a slippery customer.

Sigur looking for submissions off his back, moving his hips, looking for an opening.
Samuel missing there with some ground and pound from the guard.
The ref warns both fighters not to hold the cage as they work up against the meshing.
Sigur keeping full guard, as Samuel tries to pass.
Samuel lands a nice shot whilst sitting in his opponent's guard.
Sigur keeping full guard, as Samuel tries to pass.
Sigur trying to keep a closed guard but Samuel is proving a slippery customer.
That's one minute gone in the round.
Sigur has a loose triangle. He'll be looking to tighten that up but Samuel can see exactly what he's planning and manages to posture up and free himself.
Sigur trying to keep a closed guard but Samuel is proving a slippery customer.
Samuel working from the guard for now, landing some ground and pound.
Sigur is looking for a triangle but Samuel pushes his legs off easily.
Samuel connects with a couple of short punches.
Sigur avoiding any damage from the ground and pound.
Samuel lands a couple of elbows.
Samuel has a momentary lapse of concentration, allowing Sigur to throw up a leg and lock on what appears to be a pretty tight triangle! Samuel is fighting it off but it's all too little too late - Sigur pulls down on the head and he's put Samuel to sleep! This one is all over!
Ladies and gentlemen, after 2:55 of round 1, we have a winner by way of Submission (Triangle). Eysteinn H Sigur!
|
|
|
|
|
|
|
|
|
|
|
|
|
|
|
|
|
|
|
|
|
|
|
| S |
C
A |
G |
S |
C
B |
G |
|
S |
C |
G |
|
energy
A | B |
|
hype
A | B |
|
pop
A | B |
|
mgr
A | B |
|
FIGHT
RATING
48% |
|
|
|
|
|
|
|
Undercard bout
|
Coming up we have a lightweight MMA rules bout between Alexander Hodgins (ranked 0 p4p, 0 weight class) and Gerard Bazinet (ranked 0 p4p, 0 weight class). Gerard Bazinet will no doubt be looking to use his reach advantage to good effect.
 |
|
 |
| 172 cm
20
163 lbs
3 - 3 - 0 |
|
186 cm
20
157 lbs
3 - 2 - 0 |
BJJ Purple Belt
Brawler
Very quick |
|
BJJ Purple Belt
Decent boxing
Solid chin |
|
| |
|
Ladies and gentlemen. This fight is 3 rounds, in the lightweight division.
Introducing the fighter to my left, fighting out of the red corner.
With a record of
3 - 3 - 0, fighting out of Montreal, Alexander Hodgins!
And introducing the fighter to my right, fighting out of the blue corner.
With a record of
3 - 2 - 0, fighting out of Montreal, Gerard Bazinet!
The judges for this bout are Gregory Folan, Elvis Blanc and William Peck.
The bell rings for round one and we are underway!
Bazinet misses with a series of wild punches.
Bazinet misses with a few strikes there.
Hodgins shoots in looking for a single leg takedown. Bazinet is trying to defend but Hodgins finishes it well and ends up in half guard. Let's see if he can advance position further.
Bazinet is a painfully thin specimen of a man. You do wonder whether a good body kick would snap him clean in two.
Ground and pound from Hodgins.
Bazinet is trying to control but can't.
Hodgins landing with strikes to the body and head, softening up his opponent.
Bazinet on the receiving end of some nice ground and pound.
Hodgins working over Bazinet with some ground and pound. Bazinet looks like he wants out of this position, which is understandable.
Fantastic stuff here - a very entertaining period of action, which has drawn cheers from the crowd.
Bazinet gets back to full guard.
Hodgins might be looking to lock onto one of his opponent's long limbs for a submission, whilst we're on the ground.
Hodgins postures up and lands some nice ground and pound.
Hammerfist, elbow! yells Hodgins's corner. There ya go! There ya go!
Hodgins with a flurry of punches that miss.
Hodgins cracks Bazinet with a solid left hand.
That's one minute gone in the round.
Hodgins lands a couple of digs.
Hodgins postures up.
Hodgins connects with a couple of short punches.
Bazinet is trying to control the position but Hodgins postures up.
Hodgins trying to control the position from guard on top but Bazinet is wriggling around, looking for whatever he can.
Bazinet is looking for a triangle but Hodgins pushes his legs off easily.
Bazinet throwing his legs up looking for a triangle.
Bazinet has momentary wrist control but Hodgins slips an elbow through the middle.
Hodgins wants to pass the guard but Bazinet is keeping the position.
Hodgins scores with a decent looking elbow strike.
That's two minutes gone in the round.
Hammerfist, elbow! yells Hodgins's corner. There ya go! There ya go!
Bazinet manages to sweep nicely, so he's now on top. Hodgins manages to get himself to full guard.
Fantastic stuff here - a very entertaining period of action, which has drawn cheers from the crowd.
Bazinetis looking to pass into half guard but Hodgins pushes him away with his feet and jumps on top - now Hodgins is in guard.
Hodgins wants to pass the guard but Bazinet is keeping the position.
Hodgins wants to control from the top but Bazinet keeps moving.
Hodgins is in close to Bazinet's body, working some short punches and elbows.
Hodgins wants to pass the guard but Bazinet is keeping the position.
Hodgins is sitting in guard, working some ground and pound.
Hodgins has been looking to land a fair amount of strikes on the ground. He might be looking to soften his opponent up in order to work for a submission.
Hodgins stays in close to Bazinet's body and controls the position.
Hodgins throwing shots from guard but he's hitting more mat than opponent.
That's three minutes gone in the round.
Hodgins working some ground and pound from guard but it's not doing any damage.
Bazinet throws a couple of shots from the bottom but they don't land.
Hodgins slips nicely into half guard.
Hodgins thows a huge punch but Bazinet dodges it nicely.
Bazinet has no desire to be mounted, so is trying to control. Hodgins is working away from the top position though.
Bazinet is refusing to be controlled, as Hodgins sits in half guard.
Bazinet is trying to control but can't.
Hodgins works his way into full mount!
Bazinet wants to hold on but Hodgins pushes him away.
The ref warns both fighters not to hold the cage as they work up against the meshing.
That's four minutes gone in the round.
Hodgins lands a big shot there that rocks Bazinet but he's holding on and managing to survive for now.
Hodgins dominating with strikes here.
It looks like Gerard Bazinet has been cut.
Fantastic stuff here - a very entertaining period of action, which has drawn cheers from the crowd.
Hodgins prevents Bazinet from getting the reversal.
Bazinet tries to lock up and control but Hodgins gives him a forearm to the face and pushes him away.
Bazinet is bucking up trying to escape but Hodgins cracks him with another couple of good strikes.
Hodgins lands an elbow that was bordering on illegal but the referee lets it go with a warning.
Bazinet is looking to get to half guard.
BOOM! Hodgins connects with a massive shot to the dome!
Hodgins with the ground and pound from mount.
The crowd are going absolutely nuts as the round comes to an end - what a fantastic round of action!
Hodgins is landing with some decent strikes but Bazinet is trying to advance his position so the referee is letting the fight continue.
Bazinet is rocked!
Bazinet keeping his composure momentarily, calmly looking to get back to half guard.
Hodgins lands with some strikes.
And thats the end of the round the fighters go back to their corners.
Alexander Hodgins dominated that round.
The cut man is working on Gerard Bazinet's cut.
The corners get their ten second warning. Both fighters stand from their stools and stare eachother down, ready to get back to the action.
Bazinet bobs and weaves and unloads with a good uppercut.
Bazinet looks to land a combination but Hodgins avoids it well.
Hodgins shoots in for a takedown and gets it.
Bazinet desperately trying to maintain half guard.
Hodgins is scoring with some nice ground and pound from the dominant position.
Hodgins seems content to maintain position for now, rather than mounting any offense.
Hodgins thows a huge punch but Bazinet dodges it nicely.
Hodgins with the ground and pound but Bazinet uses the opportunity to regain guard.
That's one minute gone in the round.
Bazinet is working an open guard here, looking to improve his position. No doubt that will leave him open to counters but at least he's being more offensive.
Bazinet is persisting with the attempt to improve his position.
Bazinet keeping full guard, as Hodgins tries to pass.
Hodgins content to strike from guard, landing some decent shots.
The fighters are pressed up against the cage, both looking to find a bit of space to work.
Hodgins is sitting in guard, working some ground and pound.
Hodgins won't allow Bazinet to sweep him here.
Hodgins trying to control but Bazinet is working from the bottom.
Bazinet not looking particularly offensive just at the moment.
Hodgins thinks about going for a leg but decides against it, in order to maintain the position.
Hodgins lands a couple of elbows.
That's two minutes gone in the round.
Hodgins throwing strikes from guard but Bazinet blocks nicely.
Hodgins passes Bazinet's left leg - he's now in half guard.
Bazinet trying to control but Hodgins postures up.
Hodgins passes to side control.
Wooooo! Give it up for these two warriors! They are putting on a show!
Bazinet is trying to control Hodgins's posture but Hodgins avoids it.
Hodgins scoring with punches and elbows.
That's three minutes gone in the round.
Bazinet is trying to get back to half guard. He's pushing on Hodgins's leg. He's managed it. Nice work.
Hodgins is nestled in close to Bazinet, controlling him well. He's worked in a nice elbow to the side of the head as well, for good measure.
Hodgins thumps the canvas. Not on purpose obviously - he just missed Bazinet's head.
Bazinet on the receiving end of some nice ground and pound.
Alexander Hodgins overall seems to be getting the better of the ground position in the fight so far.
Hodgins keeping composed on the top, looking to control the action.
Hodgins is keeping good posture, landing some ground and pound.
Hodgins not landing any meaningful shots this time.
Bazinet is striking from the bottom but he's now found himself mounted! Oh dear - not enough focus on defense there.
Hodgins looking for a guillotine from mount but Bazinet is having none of it.
Hodgins is looking to secure an arm. He's managed it! He's pivoting for an armbar - that looks tight! But Bazinet has managed to get out of it and now he's in a dominant position. Nice work from Bazinet!
That's four minutes gone in the round.
Bazinet trying to control the position from guard on top but Hodgins is wriggling around, looking for whatever he can.
The crowd cheering loudly, showing their appreciation for the quality fight we're seeing here.
Hodgins is looking for a triangle but Bazinet pushes his legs off easily.
A real slowdown in the pace of the fight for a moment, as Hodgins holds on and takes a little breather.
Hodgins keeping moving, preventing Bazinet from controlling successfully.
As the round comes to an end the crowd are showing their appreciation for a great round of action.
Hodgins looking to sweep here. No luck so far.
Bazinet works a leg free and moves into half guard.
And thats the end of the round the fighters go back to their corners.
Alexander Hodgins dominated that second round.
The cut man is working on Gerard Bazinet's cut.
OK. That's time! The bell goes and we're back to the action. This is the final round!
Bazinet fails to land with the punch combination there - jab, cross, hook, miss, miss, miss.
Hodgins dives in and scores a takedown into Bazinet's guard.
Hodgins works a leg free and moves into half guard.
Hodgins passes to side control.
Hodgins lands an elbow.
Hodgins is really dominating this fight. Is there anything that Bazinet can do to turn this around?
Hodgins trying to control the action but Bazinet is working from the bottom.
Hodgins is trying to get an arm triangle but Bazinet is defending well.
Bazinet tries to buck Hodgins off but Hodgins is having none of it.
Hodgins advances nicely into full mount.
That's one minute gone in the round.
Hodgins looking to finish Bazinet with some ground and pound. This is bad for Bazinet!
That has opened up Gerard Bazinet's cut even more.
Hodgins lands with some strikes.
Bazinet is still in real trouble! Can Hodgins finish him?
Gerard Bazinet's cut is absolute horrible now. This looks like something out of a horror film with blood covering both fighters.
The referee calls the doctor in to look at Gerard Bazinet's cut. Oh no, the doctor has called an end to the bout!
Ladies and gentlemen, after 1:29 of round 3, we have a winner by way of TKO (Cut). Alexander Hodgins!
An out of breath Alexander Hodgins thanked his loyal fans in his post fight interview, giving them credit for his success over the course of his career.
|
|
|
|
|
|
|
|
|
|
|
|
|
|
|
|
|
|
|
|
|
|
|
| S |
C
A |
G |
S |
C
B |
G |
|
S |
C |
G |
|
energy
A | B |
|
hype
A | B |
|
pop
A | B |
|
mgr
A | B |
|
FIGHT
RATING
100% |
|
|
|
|
|
|
|
Undercard bout
|
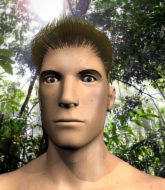
Coming up we have a lightweight MMA rules bout between Doug Camcho (ranked 0 p4p, 0 weight class) and Tomoyasu Matsunaga (ranked 0 p4p, 0 weight class). Camcho kept the crowd waiting but all that was forgotten when his ring entrance music started. The incomparable musical genius that is Kick in the Door- Biggie Smalls. Tomoyasu Matsunaga will no doubt be trying to keep this one on the feet, where he has a distinct advantage.
 |
|
 |
| 170 cm
20
165 lbs
4 - 0 - 0 |
|
165 cm
27
163 lbs
5 - 2 - 0 |
Decent wrestler
Solid Muay Thai
Cardio machine |
|
BJJ Brown Belt
Decent boxing
Granite chin |
|
| |
|
Ladies and gentlemen. This fight is 3 rounds, in the lightweight division.
Introducing the fighter to my left, fighting out of the red corner.
With a record of
4 - 0 - 0, fighting out of London, Doug Camcho!
And introducing the fighter to my right, fighting out of the blue corner.
With a record of
5 - 2 - 0, fighting out of Montreal, Tomoyasu Matsunaga!
The judges for this bout are Yves DeLean, Alec Ball and Trevor Gratis.
The bell rings for round one and we are underway!
Camcho lands a nice hook to Matsunaga's body. Matsunaga takes it in his stride and looks to land his own strikes.
Matsunaga misses with a takedown attempt - Camcho sprawls well and throws a nice strike on the way out which just misses.
Matsunaga fakes high and swings low for a body shot but Camcho manages to avoid it.
Camcho cracks the inside of Matsunaga's front leg.
Camcho lands a nice leg kick that just misses Matsunaga's sensitive parts.
Matsunaga lands a nice looking body shot.
Camcho lands a nice leg kick that just misses Matsunaga's sensitive parts.
Matsunaga throws a leg kick
and Camcho cracks him with a counter punch right on the button.
This has been an exciting period of action!
Camcho instigates a clinch.
A hook to the body from Camcho.
Camcho presses Matsunaga against the cage and delivers a mid-strength body shot.
Camcho lands a hook to the side of the head.
Camcho breaks the clinch.
Camcho lands a leg kick that knocks Matsunaga off balance momentarily.
Matsunaga takes one on the chin but seems OK.
Camcho goes for a high kick. It partially lands.
Matsunaga keeping a good distance there, avoiding the body shot.
That's one minute gone in the round.
Camcho fakes a head shot and lands one to the body.
Matsunaga on the wrong end of a nice low kick. He's acting like it's no big deal but he doesn't want to take many more of those.
That kick from Camcho tenderised Matsunaga's leg. Matsunaga is trying to keep his angry face on.
Matsunaga misses with a few strikes there.
Matsunaga looks gassed!
Camcho lands a nice hook to Matsunaga's body. Matsunaga takes it in his stride and looks to land his own strikes.
Camcho chopping away at his opponent's legs.
Matsunaga misses with a double jab
letting Camcho counter with a right hand.
Camcho scores with a sloppy punch to the body. Not much technique there but it did the business.
The crowd are loving this. Great action here.
Camcho fakes a jab and scores with a low kick.
Camcho throws a mid kick that lands with a slap.
Camcho ducks low and lands a nice hook to the body of his opponent.
Camcho lands with a kick to the ribs.
Camcho gets to the clinch - let's see what his plan is here.
That's two minutes gone in the round.
Camcho breaks the clinch and we're back to striking at distance.
Matsunaga on the wrong end of a kick to the body.
Camcho scores with a leg kick.
Camcho throws a nice inside leg kick.
Camcho clinches up with Matsunaga and pushes him back against the cage.
A quick uppercut on the inside from Camcho.
Camcho lands a short shot on the inside that snaps the head of Matsunaga backwards.
Camcho's corner calls for him to break the clinch, which he does.
Matsunaga gets his head snapped back by a nice shot there.
A nice inside leg kick there by Camcho. That's going to slow Matsunaga down.
Camcho connects with a high kick.
Matsunaga is rocked!
Camcho throws a powerful right kick. Matsunaga tried to block low but the kick was high! Matsunaga was taken right off of his feet! Camcho jumps in to finish the job and the ref tackles him! The fight is over!
Ladies and gentlemen, after 2:54 of round 1, we have a winner by way of KO (Head Kick). Doug Camcho!
Doug Camcho was full of energy after the big win and talked about how he thinks he can do big things in this sport. The crowd were appreciative of his determination to succeed.
|
|
|
|
|
|
|
|
|
|
|
|
|
|
|
|
|
|
|
|
|
|
|
| S |
C
A |
G |
S |
C
B |
G |
|
S |
C |
G |
|
energy
A | B |
|
hype
A | B |
|
pop
A | B |
|
mgr
A | B |
|
FIGHT
RATING
87% |
|
|
|
|
|
|
|
Undercard bout
|
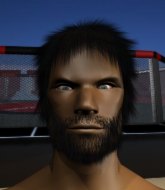
Coming up we have a heavyweight MMA rules bout between Phan Nam (ranked 0 p4p, 0 weight class) and Sam Peterson (ranked 0 p4p, 0 weight class). Phan Nam had a look across the cage there at his opponent. He definitely means business
 |
|
 |
| 180 cm
25
275 lbs
3 - 0 - 0 |
|
194 cm
26
263 lbs
5 - 3 - 0 |
Good takedowns
Counter striker
Good chin |
|
Good takedowns
Basic striking
Determined |
|
| |
|
Ladies and gentlemen. This fight is 3 rounds, in the heavyweight division.
Introducing the fighter to my left, fighting out of the red corner.
With a record of
3 - 0 - 0, fighting out of Montreal, Phan Nam!
And introducing the fighter to my right, fighting out of the blue corner.
With a record of
5 - 3 - 0, fighting out of Montreal, Sam Peterson!
The judges for this bout are Robert Douchet, Alec Ball and Yves DeLean.
The bell rings for round one and we are underway!
Peterson jabs Nam right on the nose. Nam blinks but takes it well.
It looks like Phan Nam has been cut.
Peterson keeps the fight on the outside.
Nam swats away the attempt to clinch by Peterson.
Peterson tries to clinch but Nam is having none of it.
Nam tries to keep at a distance but Peterson has taken the fight into the clinch.
Peterson escapes the clinch and we're back to striking.
Peterson is looking to clinch.
Peterson gets a takedown into half guard.
Peterson is keen to just control but Nam is a slippery customer.
Peterson is looking for an arm triangle, whilst trying to pass to side control. Nam doesn't seem that keen to cooperate though. No luck this time Peterson.
We've seen a great period of action over the last minute or so - credit to both fighters for going all out!
Nam has his hands clasped together around Peterson's back. He's all about the action.
That's one minute gone in the round.
Nam is trying to get back to full guard.
Peterson has freed up his trapped foot and advances to mount.
The fighters are pressed up against the cage, both looking to find a bit of space to work.
Peterson looking to control and managing it successfully.
Nam prevents Peterson from taking his back.
That's two minutes gone in the round.
Nam keeping his composure momentarily, calmly looking to get back to half guard.
Peterson cracks Nam with a nasty head shot there - the crowd let out an audible gasp there, as the noise reverberated around the arena.
Peterson sitting in mount, just looking to control for the moment.
Peterson lands an elbow that was bordering on illegal but the referee lets it go with a warning.
That's three minutes gone in the round.
Nam tries to control the position but Peterson now has his back.
Nam tries to escape the position.
Peterson tries to get the hooks in deep but Nam pushed the leg off.
The ref warns both fighters not to hold the cage as they work up against the meshing.
Nam trying to control the hands but Peterson won't let him.
Nam is very frustrated here, being controlled quite effectively by Peterson.
Peterson is working really hard to secure the rear naked choke. Nam defends successfully for a significant amount of time. Both fighters are looking very determined.
Peterson is riding his opponent, not letting Nam buck him off.
That's four minutes gone in the round.
Peterson has the hooks in. Nam is trying to push off one leg but he has to do so cautiously to avoid being submitted.
Nam could do with losing a few pounds - he looks very soft around the mid section, to put it politely.
Peterson working for the choke.
Nam defending nicely against the rear naked choke attempt.
This is a great period of action - very entertaining stuff!
Peterson not allowing Nam to control his hands.
As the round comes to an end the crowd are showing their appreciation for a great round of action.
Nam is staying cool under pressure, defending well against the rear naked choke attempt from his opponent.
And thats the end of the round the fighters go back to their corners.
Sam Peterson dominated that round.
The cut man is working on Phan Nam's cut.
The fighters' corners scream their final instructions, as the referee calls time. Here we go, back to the action!
Nam rushes in with a sloppy looking punch
and Peterson counters with a good right hand that lands right on the jaw.
Phan Nam's cut is getting worse.
Peterson looks to land a left hand but Nam moved out of range nicely.
Peterson wants to clinch.
Peterson with a hook.
Peterson connects with a crisp jab.
Peterson is using his reach advantage to land shots from outside his opponent's range.
Peterson sizes up Nam with a pawing jab and scores with a straight right down the middle.
Phan Nam's cut is bleeding quite badly. He's got to try and protect it.
Peterson closes the distance and gets a trip takedown into side control. Nam quickly recovers to half guard.
Wooooo! Give it up for these two warriors! They are putting on a show!
Nam has no desire to be mounted, so is trying to control. Peterson is working away from the top position though.
Nam is looking to regain full guard. Not this time though.
Nam is refusing to be controlled, as Peterson sits in half guard.
That's one minute gone in the round.
Peterson passes into side control, despite Nam's attempt to control the position.
Nam tries to improve position but can't.
Nam manages to get back to half guard.
Peterson missing with some ground and pound from the half guard.
Peterson lands strikes from half guard.
Peterson working over Nam with some ground and pound. Nam looks like he wants out of this position, which is understandable.
Nam is trying to get back to full guard.
Both fighters are absolutely exhausted here.
Peterson is working for a submission of some sort.
That's two minutes gone in the round.
Peterson works his way into side control.
Peterson tries for a kimura. Not really close to a finish though.
Nam struggling a bit here.
Peterson is looking to take a break and control but Nam is keeping him honest, looking to work from the bottom.
That's three minutes gone in the round.
Peterson controls the position.
Nam is trying to get back to half guard.
A lull in the action here as Peterson stalls from top position.
Nam tries to bench press Peterson off him but Peterson keeps the position.
Peterson in side control, just content to control the action for now.
The referee is asking the fighters to pick up the pace.
Nam tries to work a leg under to get back to half guard but Peterson wriggles his own leg back out and remains in side control.
That's four minutes gone in the round.
You can see the frustration on Nam's face, being in this tough position on the bottom.
Peterson takes a little break here. Nam wants to take advantage but he is being controlled well.

The referee decides to stand the fighters back up.
No luck with that takedown attempt from Nam.
Peterson pushes Nam up against the cage in a clinch.
As the round comes to an end the crowd are showing their appreciation for a great round of action.
Peterson tightens his grip and picks Nam up, before dumping him to the ground. Nam manages to land in guard.
Peterson wants to control from the top but Nam keeps moving.
The crowd cheering loudly, showing their appreciation for the quality fight we're seeing here.
Nam wants to sweep but no luck.
And thats the end of the round the fighters go back to their corners.
Sam Peterson showed his class in that round. I'd imagine he'll take it on all the scorecards.
The cut man is working on Phan Nam's cut.
That's the end of the interval. I'm sure that seemed a lot quicker than a minute for our two fighters! Back to the action. This is the final round!
Peterson drives through and clinches with Nam against the cage.
Nam is working on a leg, looking for a takedown but Peterson is defending well.
Peterson stops a takedown attempt from Nam.
Nam tries to score a body lock takedown but Peterson shows good agility there to stay on his feet.
That's three failed takedown attempts in the round for Phan Nam. That's going to take a lot out of him.
Nam drops down for a takedown but doesn't get it.
Peterson has dropped down and is working for a takedown. Nam is trying to keep an underhook but Peterson manages to get the takedown into half guard.
Peterson sitting and controlling from the half guard.
Peterson wants to free his trapped foot but Nam is holding on for dear life with his legs.
Peterson seems very keen to just sit and control from half guard but Nam does not like that idea so much and is remaining active off his back.
Both fighters are breathing heavily.
That's one minute gone in the round.
Peterson trying to pass the guard but Nam defending well.
The referee is asking the fighters to pick up the pace.
Peterson passes to full mount!
Nam is desperately trying to improve his position but Peterson has a good base and remains in mount.
Peterson controlling his opponent.
Peterson looking to control but Nam is working nicely, looking to advance position himself.
That's two minutes gone in the round.
Nam tries to improve his position but instead Peterson has taken his back!
Nam is very frustrated here, being controlled quite effectively by Peterson.
Peterson throwing sloppy strikes.
Nam trying to control the hands but Peterson won't let him.
Peterson doesn't have the hooks in and Nam manages to turn into his guard.
Nam looking to sit in guard and control but Peterson gets the butterfly guard and sweeps. He's now in the guard on the top.
Sam Peterson has got the better of the ground game so far.
Peterson is stalling in the full guard.
That's three minutes gone in the round.
Peterson trying to control the position from guard on top but Nam is wriggling around, looking for whatever he can.
Peterson is in a good position here but he's just trying to control... And he's not even managing to do that successfully.
Peterson works a leg free and moves into half guard.
Peterson has been the more effective fighter overall so far.
Nam tries to roll over but Peterson keeps him under control.
Peterson slows the pace down in half guard.
That's four minutes gone in the round.
Peterson frees up his trapped foot and advances to mount.
Nam tries to reverse the position but Peterson maintains control.
Peterson wants to control the pace but Nam is squirming around nicely.
Peterson controlling from mount.
Phan Nam has stepped it up - he knows he needs a finish here!
Sam Peterson is fighting for a decision - hopefully he's judged it right and he's actually winning the fight.
The crowd applaud the fighters efforts here as the round comes to an end.
Peterson lands a couple of nice shots there from mount.
And that's the end of the fight!
Sam Peterson comfortably won the final round on my scorecard.
Well Peterson has outworked and out performed his opponent in all aspects of the game today. He was simply too good and the decision should be no more than a formality. Over to the ring announcer for the scorecards.
Ladies and gentlemen, after 3 rounds of action, we go to the scorecards for a decision.
Judge Robert Douchet scores the fight 27:30
Judge Alec Ball scores the fight 27:30
Judge Yves DeLean scores the fight 27:30
In favor of your winner, by unanimous decision... Sam Peterson!
|
|
|
|
|
|
|
|
|
|
|
|
|
|
|
|
|
|
|
|
|
|
|
| S |
C
A |
G |
S |
C
B |
G |
|
S |
C |
G |
|
energy
A | B |
|
hype
A | B |
|
pop
A | B |
|
mgr
A | B |
|
FIGHT
RATING
59% |
|
|
|
|
|
|
|
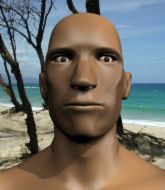
Co-main event
|
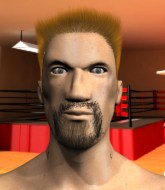
Coming up we have a light heavyweight MMA rules bout between Al Holic (ranked 0 p4p, 0 weight class) and Milan Diprivan (ranked 0 p4p, 0 weight class). Holic comes to the cage accompanied by Alcohol. Both fighter's entrance songs getting the crowd jumping here.
 |
|
 |
| 186 cm
21
202 lbs
6 - 3 - 0 |
|
188 cm
23
207 lbs
9 - 6 - 0 |
BJJ Brown Belt
Excellent boxer
Cardio machine |
|
BJJ Blue Belt
Good kicks
Heavy handed |
|
| |
|
Ladies and gentlemen. This fight is 3 rounds, in the light heavyweight division.
Introducing the fighter to my left, fighting out of the red corner.
With a record of
6 - 3 - 0, fighting out of Montreal, Al Holic!
And introducing the fighter to my right, fighting out of the blue corner.
With a record of
9 - 6 - 0, fighting out of Montreal, Milan Diprivan!
The judges for this bout are Dillan Fox, Yves DeLean and Ian Loll.
The bell rings for round one and we are underway!
Diprivan fails to land with the punch combination there - jab, cross, hook, miss, miss, miss.
Diprivan has his head snapped back a nice jab. A little nod from Diprivan there as he acknowledges the shot.
Holic moves into range and connects with a jab.
It looks like Milan Diprivan has been cut.
Holic throws a right and a left that Diprivan avoids nicely.
Diprivan moves away from the strike by Holic.
Holic throws out a loose jab but Diprivan uses good head movement to avoid it.
Holic will need to tighten up his combinations if he doesn't want to gas himself out, swinging at thin air.
Holic misses with a hook.
The fighters circling - Holic throws out the jab but it was never going to land.
The crowd are loving this. Great action here.
Diprivan misses with a half-hearted attempt at a head kick.
Holic misses the jab.
Diprivan throws a hook but Holic avoids it easily.
Holic looks frustrated there after his takedown attempt is stuffed easily.
Holic fails to land with the punch combination there - jab, cross, hook, miss, miss, miss.
That's one minute gone in the round.
Holic looks to throw the jab but Diprivan is out of range.
Al Holic seems to be the more aggressive standup fighter in this bout.
Diprivan leaves Holic with his face pressed against the mat as he sprawls beautifully, defending against a solid takedown attempt.
Diprivan thuds his right hand into Holic's forehead from close range. That could be painful for both fighters.
Holic shoots in but no luck this time.
That's three failed takedown attempts in the round for Al Holic. That's going to take a lot out of him.
Diprivan feints a jab and as Holic dips his head, Diprivan unleashes a brutal head kick that catches Holic right on the jaw! Timbeeer! Holic falls backwards in slow motion, only propped up by the cage! Diprivan smiles a psychotic smile as he stares down his unconscious opponent. That is a scary man.
Ladies and gentlemen, after 1:29 of round 1, we have a winner by way of KO (Head Kick). Milan Diprivan!
|
|
|
|
|
|
|
|
|
|
|
|
|
|
|
|
|
|
|
|
|
|
|
| S |
C
A |
G |
S |
C
B |
G |
|
S |
C |
G |
|
energy
A | B |
|
hype
A | B |
|
pop
A | B |
|
mgr
A | B |
|
FIGHT
RATING
58% |
|
|
|
|
|
|
|
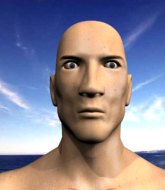
Main event
|
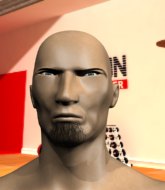
Coming up we have a light heavyweight MMA rules bout between John Watson (ranked 0 p4p, 0 weight class) and Negru Voda (ranked 0 p4p, 0 weight class). Watson comes to the cage accompanied by Till I Collapse- Eminem. Voda comes into a darkened arena with his song building. Parazitii - Din Coltul Blocului kicks in, the lights come on and the crowd goes wild! What a showman! Over to our ring announcer for the fighter introductions!
 |
|
 |
| 182 cm
21
210 lbs
8 - 1 - 0 |
|
191 cm
20
200 lbs
6 - 2 - 0 |
BJJ Purple Belt
Lethal high kicks
Granite chin |
|
BJJ Blue Belt
Excellent boxer
Determined |
|
| |
|
Ladies and gentlemen. This fight is 5 rounds, for the light heavyweight championship of the world!
Introducing the champion to my left, fighting out of the red corner.
With a record of
8 - 1 - 0, fighting out of Montreal, John Watson!
And introducing the challenger to my right, fighting out of the blue corner.
With a record of
6 - 2 - 0, fighting out of Montreal, Negru Voda!
The judges for this bout are Robert Douchet, Dillan Fox and Elvis Blanc.
The bell rings for round one and we are underway!
Watson throws a hard body shot but it just misses.
Voda throws a lazy uppercut
and Watson counters with a nice jab to the body that keeps Voda thinking.
Voda fakes a head punch and goes low to the body. Nicely done.
Voda moves his head to the side to avoid a jab but walks straight into a cross.
Watson buckles his opponent's knee momentarily with a nice leg kick.
Watson lands a lovely overhand right.
Voda pushing out the jab but it's not landing.
Voda has his front leg slapped to the side - a nice low kick landing there from Watson.
We've seen a great period of action over the last minute or so - credit to both fighters for going all out!
Watson gets in close and instigates a clinch.
Still in the clinch, Watson scores with a nice short uppercut.
Watson pushes Voda back against the cage and lands a hook to the side of the head.
Voda wants to strike at distance but he can't break free of the clinch.
Voda breaks the clinch.
Watson turns his hip over beautifully as he lands a nice leg kick.
Voda takes a jab right on the kisser.
It looks like Negru Voda has been cut.
Watson with a nice looking leg kick. You could hear that one land in a back row.
Voda swings widly with a right hand
and Watson counters with a nice body kick.
Voda looks gassed!
That's one minute gone in the round.
A solid leg kick lands there for Watson.
Watson dances in quickly and lands a nice inside leg kick on Voda. That did some damage!
Watson drops Voda with a beautiful combination! Voda stares up at his opponent, who ushers him back to his feet - Watson is looking for the KO!
Voda is rocked!
Fantastic stuff here - a very entertaining period of action, which has drawn cheers from the crowd.
Watson scores with a shot to the body.
Voda is still on wobbly legs! Can Watson finish him?
A nice leg kick lands there from Watson.
A head kick by Watson - that's a beauty! Voda is out but he's somehow still standing... he's going... going... gone. Like a drunk walking down the middle of the road, the inevitable face plant follows and the delayed knockout arrives. Even Watson can't help but laugh at the bizarre end to this one!
Ladies and gentlemen, after 1:28 of round 1, we have a winner by way of KO (Head Kick). John Watson!
John Watson retains his light heavyweight title!
John Watson very nearly forgot to thank Dynamic Nutrition $35 159 Recovery amongst all the excitement of his win but just as the interview came to a close, he screamed their name. Hopefully he'll get a few nice freebies in the mail as a thank you.
|
|
|
|
|
|
|
|
|
|
|
|
|
|
|
|
|
|
|
|
|
|
|
| S |
C
A |
G |
S |
C
B |
G |
|
S |
C |
G |
|
energy
A | B |
|
hype
A | B |
|
pop
A | B |
|
mgr
A | B |
|
FIGHT
RATING
100% |
|
|
|
|
|
|
|
|
|
|

