 |
ONE FC: Fight Night 1 PBP Commentary |
Undercard bout
|
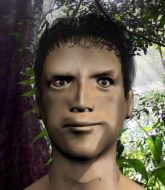
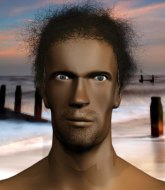
Coming up we have a light heavyweight MMA rules bout between Seishiro Munakata (ranked 0 p4p, 0 weight class) and Kenichi Uzomaki (ranked 0 p4p, 0 weight class). Man, I cannot wait for this one!
 |
|
 |
| 185 cm
22
210 lbs
3 - 1 - 0 |
|
190 cm
30
215 lbs
13 - 13 - 0 |
BJJ Brown Belt
Counter striker
Good in bed |
|
Powerful takedowns
Decent boxing
Granite chin |
|
| |
|
Ladies and gentlemen. This fight is 3 rounds, in the light heavyweight division.
Introducing the fighter to my left, fighting out of the red corner.
With a record of
3 - 1 - 0, fighting out of Tokyo, Seishiro Munakata!
And introducing the fighter to my right, fighting out of the blue corner.
With a record of
13 - 13 - 0, fighting out of Tokyo, Kenichi Uzomaki!
The judges for this bout are Shigeki Fujiwara, Kenichi Hosakawa and Sosuke Kotani.

The bell rings for round one and we are underway!
Uzomaki throws a wild combination but nothing lands.
Uzomaki misses with a wild combination.

Uzomaki closes the distance and pushes Munakata back into the cage.

Uzomaki has Munakata pressed up against the cage. He's trying to work for a single leg takedown. Uzomaki pulls back from the cage and twists to the side, sending Munakata tumbling to the mat - Uzomaki dives into Munakata's guard.
Munakata looking to control the pace of the fight rather than finish it.
Munakata looking for a sweep. Not yet Munakata, not yet.
Munakata not looking particularly offensive just at the moment.
Uzomaki passes Munakata's right leg, so he's now in half guard.

Uzomaki seems to be working for a kimura but Munakata defends the submission attempt.
Uzomaki looking for a kimura but he'll have to free his other leg if he wants to finish that. Perhaps he's just using it as a distraction technique.

That's one minute gone in the round.
Ground and pound from Uzomaki.
Munakata trying to control but Uzomaki postures up.
Uzomaki missing with some ground and pound from the half guard.
Munakata moves his hips nicely and gets into full guard.
Munakata controls Uzomaki momentarily but Uzomaki frees himself.
Munakata trying to strike from the bottom but really, it's not the best position to be doing that from!
Uzomaki drops back for a leg! It's a sloppy attempt though and Uzomaki jumps back into guard quickly, to retain the dominant position.
Uzomaki postures up as if he's going to throw some strikes but drops back for an ankle! Munakata is in big trouble! He looks ready to tap! But no, he's escaped and dives on top of Uzomaki, into his guard.

That's two minutes gone in the round.
The fighters are starting to perspire pretty heavily.
Uzomaki looking for a guillotine here but Munakata defends easily.
Uzomaki had isolated an arm as going for a kimura. Munakata defends it easily.

Munakata stands and steps away. Uzomaki gets to his feet too and we're back to the striking game.
Wooooo! Give it up for these two warriors! They are putting on a show!

Munakata decides to change it up a bit and drives through with a nice takedown into half guard.
Uzomaki wants to control but Munakata is keeping busy.
Uzomaki is trying to get back to full guard.
Uzomaki trying to hold on to Munakata's head to control him but Munakata postures up.

That's three minutes gone in the round.
Uzomaki might have to switch it up a bit here because his efforts to control Munakata kaven't been going to plan, at least at the current moment in time.
Munakata not landing any meaningful shots this time.
If this pace continues, the referee will definitely step in and force a standup.
Uzomaki is looking for a sweep. Munakata is wise to his cunning plan and keeps the top position.

Uzomaki kicks Munakata off and gets back to his feet.
Uzomaki drives through with a takedown into Munakata's guard. Let's see what he can do from the top position.
Munakata is pulling down on Uzomaki's head to control his posture.
Munakata working a defensive guard here.
Uzomaki trying to pass the guard but can't manage it just yet.
Munakata working a defensive guard here.
The referee looks like he's ready to step in and stand the fighters back up.
Uzomaki tries to free his leg and advance position but Munakata is retaining full guard.

Seishiro Munakata has forced the referee to step in and bring the fight back to the feet.
No luck for Munakata with that takedown attempt.

That's four minutes gone in the round.
Uzomaki misses with the combination.
Uzomaki misses with a two punch combination.
Uzomaki misses with the combination.
Uzomaki misses with a wild combination.
The crowd cheering loudly, showing their appreciation for the quality fight we're seeing here.
Uzomaki lands three nice shots there - that looked like it hurt!
Uzomaki fakes a strike and closes the distance, dragging Munakata to the ground. Uzomaki is now in Munakata's guard.
As the round comes to an end the crowd are showing their appreciation for a great round of action.
Munakata is adopting a defensive guard.
Munakata keeping full guard, as Uzomaki tries to pass.
And thats the end of the round the fighters go back to their corners.
Kenichi Uzomaki dominated that round.
That's the end of the round. The referee orders the cornermen out of the cage so we can get back down to business.

Munakata looks frustrated there after his takedown attempt is stuffed easily.
Uzomaki moves into the clinch successfully.
Uzomaki is working on a single leg takedown against the cage. Munakata can't fight it off and eventually Uzomaki manages to take the fight to the floor. Munakata looks annoyed but at least he's managed to land in guard.
Uzomaki has gone for a leg lock! Munakata slips out almost immediately though and dives into Uzomaki's guard.
The fighters are pressed up against the cage, both looking to find a bit of space to work.
Munakata looking to sit in guard and control but Uzomaki gets the butterfly guard and sweeps. He's now in the guard on the top.
Uzomaki throwing elbows and punches but not connecting, as Munakata works some decent striking defense from the bottom.
Uzomaki slips nicely into half guard.
Uzomaki is thinking about going for an arm triangle but he can't free his leg.
That's one minute gone in the round.
Uzomaki is looking for a kimura but he's never going to get it from there.
Uzomaki is working for a submission of some sort.
Munakata is pressing down on Uzomaki's left leg trying to get back to full guard. He's managed it.
Uzomaki wants to pass the guard but Munakata is keeping the position.
Munakata is looking to get back to his feet but can't, whilst Uzomaki is controlling him.
Uzomaki throwing strikes from guard but Munakata blocks nicely.
That's two minutes gone in the round.
Munakata is working the butterfly guard. He manages to land a nice scissor sweep and is now in half guard on the top. Nice move.
Uzomaki is trying to stand up here but Munakata is controlling him well.
Uzomaki is looking to sinch up a guillotine here but Munakata pulls his head out easily.
Uzomaki is trying to stand up here but Munakata is controlling him well.
Uzomaki keeping his head moving to avoid the ground and pound.
Uzomaki pushes Munakata off looking to stand but Munakata dives back in and keeps control.
Uzomaki is breathing heavily.
Munakata thumps the canvas. Not on purpose obviously - he just missed Uzomaki's head.
Munakata is scoring with some nice ground and pound from the dominant position.
The crowd cheering loudly, showing their appreciation for the quality fight we're seeing here.
Uzomaki blocking the ground and pound attempt from Munakata.
Munakata is trying to control the action in half guard but Uzomaki is working away on the bottom, looking perhaps to get back to full guard.

Munakata is working for submissions here but there's nothing on.
That's three minutes gone in the round.
Uzomaki is looking to control Munakata's leg but it's slowly edging free. Can Uzomaki avoid being mounted?
Munakata missing with the ground and pound from half guard.
Uzomaki is looking to escape.
Munakata throwing shots but they're hitting the canvas more than the man.
Uzomaki kicks off Munakata and gets to his feet.
Uzomaki closes the distance and scores a nice trip takedown into half guard. Munakata did well to prevent Uzomaki getting side control.
Munakata is looking to control Uzomaki's leg but it's slowly edging free. Can Munakata avoid being mounted?
Munakata wants to get back to his feet.
Munakata wants to control but Uzomaki is keeping busy.
Uzomaki thows a wild elbow that connects with the canvas.
Uzomaki wants to pass the guard but Munakata is defending well.
That's four minutes gone in the round.
Munakata wants to get back to his feet.
The ref warns both fighters not to hold the cage as they work up against the meshing.
Uzomaki moves into full mount! Munakata won't be happy about that!
The crowd cheering loudly, showing their appreciation for the quality fight we're seeing here.
Uzomaki is looking to secure an arm. He's managed it! He's pivoting for an armbar - that looks tight! But Munakata has managed to get out of it and now he's in a dominant position. Nice work from Munakata!
Uzomaki is looking for a guillotine. You can't force these things though and Munakata defends well.
Uzomaki keeping moving, preventing Munakata from controlling successfully.
Uzomaki is looking to stand back up... there's a bit of a scramble and Munakata dives into side control.
As the round comes to an end the crowd are showing their appreciation for a great round of action.
Uzomaki takes a couple of big shots there - the referee warns him that he has to defend himself better.
Munakata in side control lands a decent elbow.
And thats the end of the round the fighters go back to their corners.
A close second round but Kenichi Uzomaki will probably get the nod - 10:9.
That's the end of the interval. I'm sure that seemed a lot quicker than a minute for our two fighters! Back to the action. This is the final round!

Uzomaki throws a one two combo.
A punch combination from Uzomaki misses.
A punch combination from Uzomaki misses.
Uzomaki has managed to clinch.
Uzomaki gets a nice trip takedown into half guard.
Munakata looking for submissions from an awkward position here.
Munakata looks like he's trying to stand up.
Uzomaki is looking for an arm triangle, whilst trying to pass to side control. Munakata doesn't seem that keen to cooperate though. No luck this time Uzomaki.
Munakata wants to control but Uzomaki is keeping busy.
That's one minute gone in the round.
Uzomaki is looking for a kimura here.
Uzomaki looking for a kimura but he'll have to free his other leg if he wants to finish that. Perhaps he's just using it as a distraction technique.
Kenichi Uzomaki has got the better of the ground game so far.
Uzomaki takes a big intake of breath there - he's definitely tired.
Munakata wants to control but Uzomaki is keeping busy.
Uzomaki is trying to work for a kimura but Munakata is defending well.
Uzomaki is sneakily working for an arm triangle but Munakata sees it coming and defends easily.
That's two minutes gone in the round.
Munakata is trying to control but can't.
Munakata tries to roll over but Uzomaki keeps him under control.
Munakata is looking to control Uzomaki's leg but it's slowly edging free. Can Munakata avoid being mounted?
Uzomaki is thinking about going for an arm triangle but he can't free his leg.
Uzomaki is trying to work for a kimura but Munakata is defending well.
Munakata trying to control from the bottom.
Munakata lands one or two decent shots to the body here. Although from his own half guard, he's not going to be causing too much damage.
That's three minutes gone in the round.
Uzomaki is looking for a kimura here.
Munakata is working for an escape here. He's hooked one of Uzomaki's legs and he's managed to sneak out and take Uzomaki's back!
Munakata tries to get the hooks in deep but Uzomaki pushed the leg off.
Munakata struggling to land strikes to the head as Uzomaki covers up.
Munakata looking for the choke but no joy.
Uzomaki avoids the strikes from Munakata.
Uzomaki is trying to get back to his feet but he's not managed it yet.
Uzomaki covering up well under a barage of strikes.
Uzomaki is trying to stand. He's onto all fours with Munakata on his back. Munakata looks like he's slipping off but he's actually tansitioning to a beautiful armbar! Uzomaki has to tap out to a very impressive submission!
Ladies and gentlemen, after 4:58 of round 3, we have a winner by way of Submission (Armbar). Seishiro Munakata!
During a confident post fight interview, Seishiro Munakata thanked all his fans. He seemed very genuine when describing how motivated his fans keep him.
|
|
|
|
|
|
|
|
|
|
|
|
|
|
|
|
|
|
|
|
|
|
|
| S |
C
A |
G |
S |
C
B |
G |
|
S |
C |
G |
|
energy
A | B |
|
hype
A | B |
|
pop
A | B |
|
mgr
A | B |
|
FIGHT
RATING
85% |
|
|
|
|
|
|
|
Co-main event
|
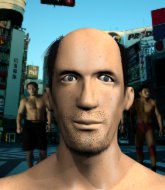
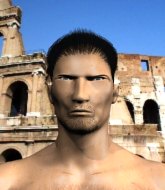
Coming up we have a middleweight MMA rules bout between Chris Booger (ranked 0 p4p, 0 weight class) and jt Wash (ranked 0 p4p, 0 weight class). Booger kept the crowd waiting but all that was forgotten when his ring entrance music started. The incomparable musical genius that is Ang Kulangot. On his way into the cage it seems that Chris Booger has been attacked by a crazed fan! It looks like it might have been the just bleed guy! Luckily Chris Booger seems to be OK! I thought that lunatic was in prison!?
 |
|
 |
| 185 cm
28
185 lbs
10 - 10 - 0 |
|
225 cm
18
185 lbs
3 - 4 - 0 |
Good wrestling
Solid boxing
Cardio machine |
|
BJJ Blue Belt
Brawler
Solid chin |
|
| |
|
Ladies and gentlemen. This fight is 3 rounds, in the middleweight division.
Introducing the fighter to my left, fighting out of the red corner.
With a record of
10 - 10 - 0, fighting out of Tokyo, Chris Booger!
And introducing the fighter to my right, fighting out of the blue corner.
With a record of
3 - 4 - 0, fighting out of St Petersburg, jt Wash!
The judges for this bout are Hirohito Nitta, Yukihiro Yamamoto and Yasuomi Hirokawa.
The bell rings for round one and we are underway!
Booger fakes and then throws a beautiful body shot. Wash looks a bit winded and takes a step backwards to take a breath.
Booger lands with a nice body punch.

Booger lands a big right hand that sends Wash crashing to the mat! Booger stays standing though and waves Wash back to his feet!

Wash is rocked!

It looks like jt Wash has been cut.
Fantastic stuff here - a very entertaining period of action, which has drawn cheers from the crowd.
Booger closes the distance and lands a crisp combination that knocks Wash out cold! Wash corner are devastated, head in hands behind our commentary position. Poor guys.
Ladies and gentlemen, after 0:12 of round 1, we have a winner by way of KO (Punches). Chris Booger!
A loyal slave to those sponsorship dollars, Chris Booger made sure he mentioned [CBK] The Smashwear Corporation, along with how happy he was to win his fight.
|
|
|
|
|
|
|
|
|
|
|
|
|
|
|
|
|
|
|
|
|
|
|
| S |
C
A |
G |
S |
C
B |
G |
|
S |
C |
G |
|
energy
A | B |
|
hype
A | B |
|
pop
A | B |
|
mgr
A | B |
|
FIGHT
RATING
100% |
|
|
|
|
|
|
|
Main event
|
Coming up we have a featherweight MMA rules bout between Kale Perez (ranked 0 p4p, 0 weight class) and Ackmed Giovani (ranked 0 p4p, 0 weight class). Over to our ring announcer for the fighter introductions!
 |
|
 |
| 165 cm
25
150 lbs
2 - 1 - 0 |
|
178 cm
25
135 lbs
3 - 3 - 0 |
Good wrestling
Counter striker
Granite chin |
|
BJJ Blue Belt
Good kicks
Solid chin |
|
| |
|
Ladies and gentlemen. This fight is 3 rounds, in the featherweight division.
Introducing the fighter to my left, fighting out of the red corner.
With a record of
2 - 1 - 0, fighting out of Tokyo, Kale Perez!
And introducing the fighter to my right, fighting out of the blue corner.
With a record of
3 - 3 - 0, fighting out of Amsterdam, Ackmed Giovani!
The judges for this bout are Tatsuya Matsuyama, Yasuomi Hirokawa and Yuuki Gou.
The bell rings for round one and we are underway!
A combination from Giovani does no damage.
Giovani throws a front kick that sends Perez stumbling back into the cage.
Perez shoots in looking for a takedown. Giovani tries to sprawl out of it but Perez keeps driving through. The fighters are pinned against the cage. Giovani manages to get underhooks and after a bit of a struggle, circles away and we're back to standing.
Giovani tries a head kick but it misses.
Giovani throws a head kick that looked like it stung.
Giovani throws a head kick that Perez semi-blocks.
Perez looks for a takedown. He's got it. We're now in half guard.
Giovani has one foot on Perez's thigh - he pushes off and manages to get back to his feet.
Giovani misses with a half-hearted attempt at a head kick.
Giovani blocks a jab.
Giovani throws a combination but comes up with nothing but fresh air.
Perez shoots in for a takedown but doesn't get it.
Giovani keeping his hands up high there, blocking the jab from Perez.
Giovani misses with a double jab.
Giovani swings away but doesn't land with a series of punches.
That's one minute gone in the round.
Giovani throws a combination but comes up with nothing but fresh air.
Giovani looks to score with a combo but nothing lands.
Ackmed Giovani is looking to keep the fight on the feet at all costs.
Perez looks for a takedown here. Will he get it? Giovani is fending him off so far but Perez persists. Nope, Giovani circles away and we're back to standing.
That's three failed takedown attempts in the round for Kale Perez. That's going to take a lot out of him.
Good leg kick by Giovani there. It's the ones that make that thud noise that hurt and that was an almighty thud.
Giovani throws a combination but comes up with nothing but fresh air.
Giovani is looking to land body kicks.
Giovani is a painfully thin specimen of a man. You do wonder whether a good body kick would snap him clean in two.
Giovani throws a right and a left that both miss.
Perez shoots in for a takedown but Giovani shows good takedown defense there and keeps this one on the feet.
A punch combination from Giovani misses.
Giovani tries a head kick but it misses.
Giovani pulls out of a head kick attempt.
Giovani tries a switch kick but it misses it's target.
Giovani throws a head kick that misses.
Perez scores a trip takedown into side control. Nice.
Perez is looking for a kimura. He might have it! No, Giovani has escaped the position, nice work there.
That's two minutes gone in the round.
Fantastic stuff here - a very entertaining period of action, which has drawn cheers from the crowd.
Perez is working to tighten is grip on Giovani's neck. He's isolated an arm and is working for an arm triangle. Giovani has recognised the danger and is trying to turn with the submission but Perez is really squeezing tight and eventually Giovani passes out! Perez breaks the hold and jumps onto the cage to celebrate! Submission of the night, I'd say!
Ladies and gentlemen, after 2:19 of round 1, we have a winner by way of Submission (Arm Triangle). Kale Perez!
A loyal slave to those sponsorship dollars, Kale Perez made sure he mentioned Hopkins Athletics, along with how happy he was to win his fight.
|
|
|
|
|
|
|
|
|
|
|
|
|
|
|
|
|
|
|
|
|
|
|
| S |
C
A |
G |
S |
C
B |
G |
|
S |
C |
G |
|
energy
A | B |
|
hype
A | B |
|
pop
A | B |
|
mgr
A | B |
|
FIGHT
RATING
49% |
|
|
|
|
|
|
|
|
|
|
