 |
SVW: 265 R1 PBP Commentary |
Undercard bout
|
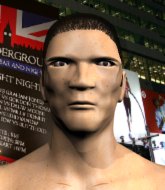
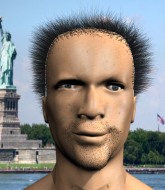
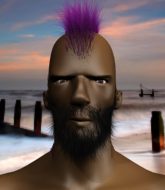
Coming up we have a light heavyweight MMA rules bout between Sammy Spishak (ranked 0 p4p, 0 weight class) and Seijurou Yoshioka (ranked 0 p4p, 0 weight class). Spishak's ring entrance music is that housewives' favourite, Sleeping with Sirens. Buckle up people - heeeeeeeeeere we go!
 |
|
 |
| 185 cm
24
216 lbs
5 - 6 - 0 |
|
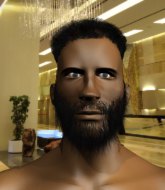
215 cm
23
215 lbs
2 - 0 - 0 |
Abu Dhabi Champ
Excellent boxer
Cardio machine |
|
Good wrestler
Excellent MT
Granite chin |
|
| |
|
Ladies and gentlemen. This fight is 3 rounds, in the light heavyweight division.
Introducing the fighter to my left, fighting out of the red corner.
With a record of
5 - 6 - 0, fighting out of Hilo, Sammy Spishak!
And introducing the fighter to my right, fighting out of the blue corner.
With a record of
2 - 0 - 0, fighting out of St Petersburg, Seijurou Yoshioka!
The judges for this bout are Jeff Smith, Josh West and Roger Salmon.

The bell rings for round one and we are underway!
Spishak tries to clinch but Yoshioka moves out of range.
Spishak takes a kick to the body and keeps moving.
Yoshioka slips under a jab.
Spishak checks the leg kick.
Spishak scoring well with a low kick there.
Spishak swings away but doesn't land with a series of punches.
Spishak lunges in with swinging rights and lefts but Yoshioka circles away quickly and effectively.
Spishak shoots in for a takedown but Yoshioka shows good takedown defense there and keeps this one on the feet.
Yoshioka scores with a jab to the jaw.

It looks like Sammy Spishak has been cut.
Spishak looks for a takedown here. Will he get it? Yoshioka is fending him off so far but Spishak persists. Nope, Yoshioka circles away and we're back to standing.
Yoshioka throws a hook to the body but it doesn't connect.
Oooooooooooh, not good. A low kick from Spishak lands where it shouldn't have, right in the... well, you know what he did? He kicked him in the penis. He's injured, injured bad. The referee sends both fighters to their corners and Yoshioka has 5 minutes to recover. He's OK now though... a thumbs up from Yoshioka and we're back underway with a touch of gloves.
Spishak keeping a good distance there, avoiding the body shot.
Spishak fails in his attempt to clinch.
Sammy Spishak seems to be the more aggressive standup fighter in this bout.
Yoshioka lands with a kick to the temple. Spishak shrugs as if to say "is that all you've got?"
This has been an exciting period of action!
Yoshioka tries to land with a swinging hook to the body but Spishak was well out of range. Poor timing from Yoshioka.

That's one minute gone in the round.

Yoshioka has managed to clinch.
An uppercut to the body lands inside from Yoshioka.
Spishak can't get the takedown.
That's three failed takedown attempts in the round for Sammy Spishak. That's going to take a lot out of him.
Spishak takes a shot to the head.
Spishak wants a takedown.
Spishak tries to pull guard but Yoshioka won't allow it.
Yoshioka throws a blind hook that connects with the side of Spishaks head.
Yoshioka misses with some punches.
Spishak tries to take the fight to the ground by pulling guard but can't manage it.
Yoshioka is a painfully thin specimen of a man. You do wonder whether a good body kick would snap him clean in two.
Yoshioka lands with a short punch from the clinch.
Spishak tries to pull guard but Yoshioka forces him back to his feet, against the cage.
Yoshioka lands a body shot in the clinch.
Spishak misses with a hook from the clinch.
Yoshioka lands an uppercut.
Spishak changes levels and goes for a takedown here. Yoshioka fights it off and pushes away nicely.
A slapping leg kick lands for Yoshioka.
Seijurou Yoshioka is looking to keep the fight on the feet at all costs.

That's two minutes gone in the round.
Fantastic stuff here - a very entertaining period of action, which has drawn cheers from the crowd.
Spishak shoots in looking for a double leg takedown. Yoshioka defends it nicely.
Yoshioka connects with a solid leg kick.
Spishak is breathing heavily.
Spishak tries to check the leg kick but that clearly hurt him.
Yoshioka scores with a kick to the body.
Jab from Yoshioka.
Yoshioka lands a leg kick and bounces back out of range.
Yoshioka works his jab well there, keeping his opponent at a distance.
Spishak on the wrong end of a nice low kick. He's acting like it's no big deal but he doesn't want to take many more of those.

Yoshioka lands a big uppercut and Spishak crumbles to the floor! The ref thinks about stopping the fight but Spishak looks OK. Yoshioka waves Spishak back to his feet!

Spishak is rocked!
Sammy Spishak's cut is getting worse.
Yoshioka pushes Spishak away with a front kick.
Oh Spishak is still all over the place! His legs are completely gone! Will he be able to recover?!!
Are you kidding me?! Yoshioka ducked down and unloaded an uppercut from hell that sent Spishak clean off his feet! Someone make me a GIF - that's knockout of the night for sure!
Ladies and gentlemen, after 2:59 of round 1, we have a winner by way of KO (Punch). Seijurou Yoshioka!
|
|
|
|
|
|
|
|
|
|
|
|
|
|
|
|
|
|
|
|
|
|
|
| S |
C
A |
G |
S |
C
B |
G |
|
S |
C |
G |
|
energy
A | B |
|
hype
A | B |
|
pop
A | B |
|
mgr
A | B |
|
FIGHT
RATING
100% |
|
|
|
|
|
|
|
Undercard bout
|
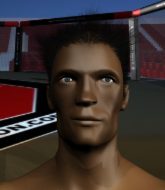
Coming up we have a featherweight MMA rules bout between Ben Bitag (ranked 0 p4p, 0 weight class) and Silent Boxer (ranked 0 p4p, 0 weight class). These two fighters really are very evenly matched on the feet - it will be fascinating to see who can assert themselves in that aspect of the fight.
 |
|
 |
| 182 cm
22
150 lbs
7 - 4 - 0 |
|
165 cm
24
150 lbs
6 - 1 - 0 |
Powerful takedowns
Brawler
Granite chin |
|
Good takedowns
Counter striker
Knockout power |
|
| |
|
Ladies and gentlemen. This fight is 3 rounds, in the featherweight division.
Introducing the fighter to my left, fighting out of the red corner.
With a record of
7 - 4 - 0, fighting out of Hilo, Ben Bitag!
And introducing the fighter to my right, fighting out of the blue corner.
With a record of
6 - 1 - 0, fighting out of Hilo, Silent Boxer!
The judges for this bout are Chris Saunders, Micheangelo Fripello and Paul Gruel.
The bell rings for round one and we are underway!
Bitag misses with a series of wild punches.

Bitag has taken the fight to the clinch.

Bitag decides to pull guard.
Boxer wants to pass the guard but Bitag is keeping the position.
Both fighters really going for it on the ground here!

Boxer thinks about going for a leg but decides against it, in order to maintain the position.
Bitag looking to hit a scissor sweep but Boxer is one step ahead there.
Boxer drops back for a leg but he's not going to get it - he lets go and Bitag dives on top into guard.
The ref warns both fighters not to hold the cage as they work up against the meshing.
Bitag stays in close to Boxer's body and controls the position.
Bitag got a little sloppy there for a moment and Boxer has worked his way into a loose triangle - can he finish it?! No, Bitag has managed to get both his arms back between Boxer's legs - danger averted.
That's one minute gone in the round.
A big thud reverberates around the arena there as Bitag accidentally thumps the mat. Hopefully he's not broken his hand.
Boxer is active off his back here, looking for submissions.
Bitag really does look like a pencil wearing a pair of gloves. Let's hope he has a gameplan to suit that ridiculous body shape.
Boxer has momentary wrist control but Bitag slips an elbow through the middle.
Boxer throwing his legs up looking for a triangle.
Bitag is looking to work some ground and pound but Boxer has wrist control.
Bitag is sitting in guard, working some ground and pound.
Bitag works over Boxer with some ground and pound from guard.
Bitag makes a bit of distance and scores with some ground and pound, still in guard.
Boxer keeping moving, preventing Bitag from controlling successfully.
Boxer preventing the ground and pound from doing any damage.
A big thud reverberates around the arena there as Bitag accidentally thumps the mat. Hopefully he's not broken his hand.
Boxer being controlled here, momentarily.
Bitag will need to keep those long limbs tucked in whilst he's on the ground, to prevent any submissions.
Fantastic stuff here - a very entertaining period of action, which has drawn cheers from the crowd.
Bitag trying to control the position from guard on top but Boxer is wriggling around, looking for whatever he can.
That's two minutes gone in the round.
The fighters are starting to perspire pretty heavily.
Boxer has his foot on Bitag's thigh. He's trying to push off and get in position for a triangle, I think. Bitag works his way back into a safe position though.
Bitag is working the ground and pound from guard. He might want to try advancing position though to get more of an impact.
Bitag slows down the pace of the fight for a moment. He'll need to remain active if he doesn't want to see the fight stood back up.
Bitag has controlled the position for a good 20 seconds, which will no doubt be starting to frustrate his opponent.
Bitag wants to control from the top but Boxer keeps moving.
Bitag working from the guard for now, landing some ground and pound.
Bitag landing some decent shots from guard.
Bitag postures up in Boxer's guard and throws a big left but Boxer blocks it.
Boxer looking for a guillotine here but Bitag defends easily.
Bitag scores with a decent looking elbow strike.
Bitag is in close to Boxer's body, working some short punches and elbows.

That's three minutes gone in the round.
There's a bit of a scramble here and now Boxer is on top in guard.

Bitag looking for submissions off his back, moving his hips, looking for an opening.
Boxer drops back looking for a heel hook - he quickly realises he's not going to get it but Bitag manages to dive on top of him before he can escape and now Boxer has Bitag in his guard.
Bitag connects with a couple of short punches.
Boxer escapes his hips to the side and looks to be working for an armbar. Bitag gives him a little smile and shakes his head. No chance.
Bitag drops back for a leg! It's a sloppy attempt though and Bitag jumps back into guard quickly, to retain the dominant position.
Bitag with a flurry of punches that miss.
Boxer looking for a guillotine here but Bitag defends easily.
Bitag wants to control from the top but Boxer keeps moving.

That's four minutes gone in the round.
Bitag postures up and lands some nice ground and pound.
Boxer keeping moving, preventing Bitag from controlling successfully.
The fans in attendance giving it up for the two fighters, who have really let it all hang out in the last minute or so!
Bitag preventing the sweep.
Boxer working the defensive guard well to avoid strikes from Bitag.
Bitag is stalling in the full guard.
Boxer has a loose triangle. He'll be looking to tighten that up but Bitag can see exactly what he's planning and manages to posture up and free himself.
Bitag is sitting in guard, working some ground and pound.
The crowd are going absolutely nuts as the round comes to an end - what a fantastic round of action!
Bitag connects with a couple of short punches.
Bitag distracts Boxer with his right hand and drops a big elbow with his other arm.
Bitag trying to land body shots but he keeps hitting the mat.
And thats the end of the round the fighters go back to their corners.
Ben Bitag dominated that round.
The corners get their ten second warning. Both fighters stand from their stools and stare eachother down, ready to get back to the action.

Bitag closes the distance and pushes Boxer back into the cage.
Bitag drags the fight down to the ground.
Boxer is holding a leg here, probably looking for an ankle lock - he drops back and goes for it! Bitag is in trouble! Is it all over??? No! Bitag has escaped and now he's on top!
Boxer wants to sweep but no luck.
Boxer is looking for a guillotine. You can't force these things though and Bitag defends well.
Bitag content to strike from guard, landing some decent shots.
Bitag chips away with some ground and pound.
Boxer had isolated an arm as going for a kimura. Bitag defends it easily.
Bitag lands a couple of decent looking shots.
Bitag content to strike from guard, landing some decent shots.
This has been an exciting period of action!
Bitag connects with a couple of short punches.
That's one minute gone in the round.
Bitag wants to control from the top but Boxer keeps moving.
The fighters are pressed up against the cage, both looking to find a bit of space to work.
Bitag cracks Boxer with a solid left hand.
Bitag cracks Boxer with a solid left hand.

Boxer is rocked!
Bitag trying to control but Boxer is working from the bottom.
Boxer is still in real trouble! Can Bitag finish him?
Boxer has a loose triangle. He'll be looking to tighten that up but Bitag can see exactly what he's planning and manages to posture up and free himself.
Boxer is breathing heavily.
Bitag drops back looking for a leg! Boxer is in trouble here! The fighters roll with the hold and Boxer manages to kick Bitag off! Bitag jumps back into Boxer's guard.
Bitag content to strike from guard, landing some decent shots.
Boxer has a loose triangle. He'll be looking to tighten that up but Bitag can see exactly what he's planning and manages to posture up and free himself.
Boxer seems to have recovered his senses.
Bitag trying to control but Boxer is working from the bottom.
Boxer avoiding any damage from the ground and pound.
Bitag throws a big elbow that misses.
That's two minutes gone in the round.
Boxer working the defensive guard well to avoid strikes from Bitag.
Boxer keeping moving, preventing Bitag from controlling successfully.
Ben Bitag overall seems to be getting the better of the ground position in the fight so far.
Bitag is going to have to think about doing something other than just controlling because Boxer is managing to avoid having the position dictated to him.
We've seen a great period of action over the last minute or so - credit to both fighters for going all out!
Boxer avoiding any damage from the ground and pound.
Bitag trying to control the position from guard on top but Boxer is wriggling around, looking for whatever he can.

Ben Bitag has forced the referee to step in and bring the fight back to the feet.
Bitag changes levels and drives through with a really nice takedown into side control. Boxer looks really pissed at himself for not defending that better.
Bitag landing a few strikes.
Boxer manages to get back to half guard.
Boxer is looking to improve his position.
Bitag scores with a couple of good hammerfists.
That's three minutes gone in the round.
Bitag working the head and body with strikes.
Bitag uses his free foot to push down on Boxer's thigh. Eventually he works his other foot free and he's advanced to mount - this is trouble for Boxer.
Bitag looking to finish here with some ground and pound. He lands one big shot that has Boxer covering up... and two more big strikes land, forcing the referee to step in and put and end to proceedings! This fight is all over!
Ladies and gentlemen, after 3:25 of round 2, we have a winner by way of TKO (Strikes). Ben Bitag!
Ben Bitag spent the whole post fight interview bigging himself up. It didn't go down that well with the fans after a while as they thought it was a bit arrogant.
|
|
|
|
|
|
|
|
|
|
|
|
|
|
|
|
|
|
|
|
|
|
|
| S |
C
A |
G |
S |
C
B |
G |
|
S |
C |
G |
|
energy
A | B |
|
hype
A | B |
|
pop
A | B |
|
mgr
A | B |
|
FIGHT
RATING
73% |
|
|
|
|
|
|
|
Undercard bout
|
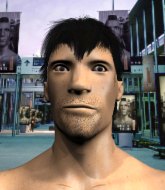
Coming up we have a light heavyweight MMA rules bout between Morgan Jones (ranked 0 p4p, 0 weight class) and Harrison Locke (ranked 0 p4p, 0 weight class). Morgan Jones has the better chin. Will he look to stand and bang today?
 |
|
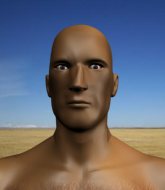 |
| 183 cm
21
213 lbs
4 - 6 - 0 |
|
193 cm
26
211 lbs
3 - 2 - 0 |
BJJ Purple Belt
Brawler
Good chin |
|
BJJ Blue Belt
Excellent MT
Determined |
|
| |
|
Ladies and gentlemen. This fight is 3 rounds, in the light heavyweight division.
Introducing the fighter to my left, fighting out of the red corner.
With a record of
4 - 6 - 0, fighting out of Hilo, Morgan Jones!
And introducing the fighter to my right, fighting out of the blue corner.
With a record of
3 - 2 - 0, fighting out of Hilo, Harrison Locke!
The judges for this bout are Jeff Smith, Colin Fray and Chris Saunders.
The bell rings for round one and we are underway!
Locke bobbing and weaving, closes the distance and lands a hook to the side of Jones's head.
Locke avoids the clinch attempt nicely.
Jones has closed the distance and engaged Locke in a clinch.
Jones fails to pull guard.

Locke breaks the clinch.
Jones tries to clinch but Locke moves out of range.
A really sloppy takedown attempt there from Jones.
Jones tries to check the leg kick but that clearly hurt him.
Jones takes a solid shot to the body. That one hurt him but he's trying not to show it.
This is a great period of action - very entertaining stuff!
Locke stuffs the takedown.
That's three failed takedown attempts in the round for Morgan Jones. That's going to take a lot out of him.
Jones get stunned by a cross and takes another one on the button. Jones stumbles backwards and tries to bounce back off the cage but Locke runs in and jumps on him with a leaping lead hook that puts him out! Wow, that was highlight reel stuff! Awesome finish!
Ladies and gentlemen, after 0:54 of round 1, we have a winner by way of KO (Punch). Harrison Locke!
|
|
|
|
|
|
|
|
|
|
|
|
|
|
|
|
|
|
|
|
|
|
|
| S |
C
A |
G |
S |
C
B |
G |
|
S |
C |
G |
|
energy
A | B |
|
hype
A | B |
|
pop
A | B |
|
mgr
A | B |
|
FIGHT
RATING
53% |
|
|
|
|
|
|
|
Undercard bout
|
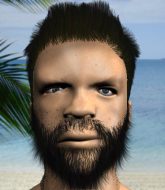
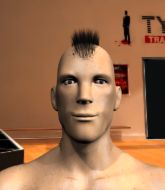
Coming up we have a bantamweight MMA rules bout between Broyeur deRobinet (ranked 0 p4p, 0 weight class) and Hector Barbosa (ranked 0 p4p, 0 weight class). deRobinet's entrance music is God's Gonna Cut You Down. A fine choice. Hector Barbosa told me before the fight that he's been watching a lot of DVDs so let's see if that helps him in this one! I can't wait to find out!
 |
|
 |
| 154 cm
31
132 lbs
15 - 11 - 1 |
|
165 cm
21
144 lbs
3 - 1 - 0 |
Good wrestling
World class MT
Insanely flexible |
|
Good wrestler
Basic striking
Good gas tank |
|
| |
|
Ladies and gentlemen. This fight is 3 rounds, in the bantamweight division.
Introducing the fighter to my left, fighting out of the red corner.
With a record of
15 - 11 - 1, fighting out of Hilo, Broyeur deRobinet!
And introducing the fighter to my right, fighting out of the blue corner.
With a record of
3 - 1 - 0, fighting out of Hilo, Hector Barbosa!
The judges for this bout are Jeff Smith, Roger Salmon and Paul Gruel.
The bell rings for round one and we are underway!
deRobinet throws a right high kick that is partially blocked by Barbosa.
deRobinet lands with a kick to the ribs.
Barbosa tries to work over deRobinet's front leg with a kick but deRobinet checks it.
deRobinet tries to clinch but Barbosa is having none of it.
deRobinet misses with an attempted mid kick.
deRobinet delivers a nice body kick.
deRobinet scores with a head kick. Barbosa tried to block it but didn't get his arm up in time.
The crowd are loving this. Great action here.
deRobinet tries to clinch there but Barbosa circles away.
Whack! deRobinet lands a heavy head kick that drops Barbosa. The ref tackles deRobinet to stop the fight - a great save by the referee because Barbosa was done.
Ladies and gentlemen, after 0:29 of round 1, we have a winner by way of TKO (Head Kick). Broyeur deRobinet!
Broyeur deRobinet decided to thank the fans in attendance for making a great atmosphere. It seemed to go down pretty well.
|
|
|
|
|
|
|
|
|
|
|
|
|
|
|
|
|
|
|
|
|
|
|
| S |
C
A |
G |
S |
C
B |
G |
|
S |
C |
G |
|
energy
A | B |
|
hype
A | B |
|
pop
A | B |
|
mgr
A | B |
|
FIGHT
RATING
100% |
|
|
|
|
|
|
|
Undercard bout
|
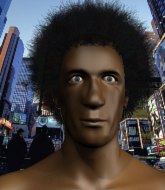
Coming up we have a heavyweight MMA rules bout between Emmanuel Bredenberg (ranked 0 p4p, 0 weight class) and Bam Boon 2 (ranked 0 p4p, 0 weight class). Bredenberg kept the crowd waiting but all that was forgotten when his ring entrance music started. The incomparable musical genius that is Heja Bamse. Boon 2 has chosen Teach me how daugie as his entrance music. The atmosphere really building for this one as we go over to our ring announcer for the fighter introductions!
 |
|
 |
| 202 cm
27
290 lbs
10 - 8 - 0 |
|
208 cm
23
288 lbs
10 - 4 - 1 |
Abu Dhabi Champ
Solid boxing
Granite chin |
|
BJJ Brown Belt
Good low kicks
Granite chin |
|
| |
|
Ladies and gentlemen. This fight is 3 rounds, in the heavyweight division.
Introducing the fighter to my left, fighting out of the red corner.
With a record of
10 - 8 - 0, fighting out of Hilo, Emmanuel Bredenberg!
And introducing the fighter to my right, fighting out of the blue corner.
With a record of
10 - 4 - 1, fighting out of Hilo, Bam Boon 2!
The judges for this bout are Jeff Smith, Micheangelo Fripello and Chris Saunders.
The bell rings for round one and we are underway!
Boon 2 lands with a nice combination. Bredenberg backs away looking to recover.
It looks like Emmanuel Bredenberg has been cut.
Boon 2 tries to close the distance and clinch up against the cage but Bredenberg paws at him with a jab and circles away.
Boon 2 fails to land with a series of punches.
Boon 2 tries to clinch up against the cage, rushing in the close the distance. Bredenberg manages to break the clinch and circles back to the middle of the mat.
Boon 2 is looking to clinch but Bredenberg is avoiding it.
The fight stays on the outside here - Boon 2 looks like he's thinking about clinching though.
Boon 2 is looking to clinch but Bredenberg is avoiding it.
Bredenberg takes one on the chin but keeps coming.
Bam Boon 2 seems to be the more aggressive standup fighter in this bout.
The fans in attendance giving it up for the two fighters, who have really let it all hang out in the last minute or so!
Bredenberg misses with a body kick.
Boon 2 clinches with his opponent.
Bredenberg pulls guard.
Bredenberg can't do much from the bottom at the moment, as Boon 2 controls the pace.
Bredenberg is trying to keep Boon 2 in close.
That's one minute gone in the round.
Boon 2 trying to control but Bredenberg is working from the bottom.
Bredenberg wants to sweep here but Boon 2 controlling him for the moment.
Boon 2 trying to control but Bredenberg is working from the bottom.

OK we're going to have a standup here. Bam Boon 2 hasn't been effective enough on the ground and the referee wants a restart.
Bredenberg closes the distance and scores a nice trip takedown into half guard. Boon 2 did well to prevent Bredenberg getting side control.
Bredenberg wants to control but Boon 2 is keeping him busy.
The referee walks around the fighters to get a better view of the action. Bredenberg lands a nice short elbow.
The fighters are pressed up against the cage, both looking to find a bit of space to work.
That's two minutes gone in the round.
Bredenberg seems content to maintain position for now, rather than mounting any offense.
Bredenberg wants to pass to mount but Boon 2 is defending the position.
Bredenberg is trying to control. Boon 2 wants to improve his position but can't escape this time.
Bredenberg controlling the action here.
Bredenberg is thwarting Boon 2's attempts to control the position.
Bredenberg is looking for an arm triangle, whilst trying to pass to side control. Boon 2 doesn't seem that keen to cooperate though. No luck this time Bredenberg.
That's three minutes gone in the round.
Boon 2 tries to kick Bredenberg off but Bredenberg keeps his base steady and stays in half guard.
Bredenberg keeping composed on the top, looking to control the action.

Well, the referee has seen enough. Neither fighter is active enough on the ground so he's stood them back up.
Boon 2 showing good head movement there, avoiding the strikes from Bredenberg.
Boon 2 gets caught on his heels momentarily as he allows Bredenberg to score an easy takedown into full guard.
Bredenberg avoids a guillotine attempt easily.
That's four minutes gone in the round.
The fighters are starting to perspire pretty heavily.
Bredenberg controlling from the top position.
Bredenberg pressing down on his opponent's thigh, looking to pass guard. Boon 2 is keeping the position for now.
As the round comes to an end the crowd are showing their appreciation for a great round of action.
Bredenberg trying to control but Boon 2 is working from the bottom.
Boon 2 seems keen to control Bredenberg's posture.
And thats the end of the round the fighters go back to their corners.
That was a close round but I would say that Emmanuel Bredenberg will probably get the nod.
The cut man is working on Emmanuel Bredenberg's cut.
The fighters' corners scream their final instructions, as the referee calls time. Here we go, back to the action!
Bredenberg misses with a takedown attempt - Boon 2 sprawls well and throws a nice strike on the way out which just misses.
Bredenberg drives through with a takedown into guard.
Bredenberg showing good wrestling skills to control the position.
Bredenberg won't allow Boon 2 to get back to his feet.
Bredenberg wants to pass the guard but Boon 2 is keeping the position.
Bredenberg works a leg free and moves into half guard.
Bredenberg works his way into side control.
Emmanuel Bredenberg overall seems to be getting the better of the ground position in the fight so far.
Bredenberg is looking to finish here, going for an Americana. Boon 2 knows the correct defense though, so he's OK.
That's one minute gone in the round.
Bredenberg trying to control the position but Boon 2 is working away.
A lull in the action here as Bredenberg stalls from top position.
Boon 2 is not content to let Bredenberg control the position.
Boon 2 manages to get back to half guard.
That's two minutes gone in the round.
Boon 2 has no desire to be mounted, so is trying to control. Bredenberg is working away from the top position though.
Bredenberg has freed up his trapped foot and advances to mount.
Bredenberg controlling the position easily from mount.
Bredenberg looking to control but Boon 2 is working nicely, looking to advance position himself.
That's three minutes gone in the round.
Boon 2 takes a big shot to the head but keeps on trying to improve his position.
Bredenberg wants to control the pace but Boon 2 is squirming around nicely.
Bredenberg working the ground and pound effectively.

Boon 2 somehow manages to escape the mount and get back to his feet!
Boon 2 tries to clinch there but Bredenberg circles away.
Bredenberg swings wildly with a right hand that was never going to find it's target.
Boon 2 fakes a jab and then connects with a hook.
That's four minutes gone in the round.
The crowd are loving this. Great action here.
Boon 2 is looking to take this fight into the clinch.
Boon 2 moves in looking to clinch but Bredenberg pushes him off.
Bredenberg throws a combination but comes up with nothing but fresh air.
Boon 2 is looking to clinch.
Boon 2 moves into the clinch.
Boon 2 is trying to break free.
A frustrated look appears on Boon 2's face as he tries to break the clinch.
Boon 2 is looking to break free of the clinch but Bredenberg has double underhooks.
Bredenberg is trying to pull guard but being pressed up against the cage enables Boon 2 to keep the fight standing.
As the round comes to an end the crowd are showing their appreciation for a great round of action.
Bredenberg keeps the fight in the clinch, despite Boon 2's efforts to push away.
Boon 2 is trying to break the clinch but Bredenberg is controlling him.
And thats the end of the round the fighters go back to their corners.
Emmanuel Bredenberg dominated that second round.
The cut man is working on Emmanuel Bredenberg's cut.
That's time! Back to the action! Let's get this one finished - here comes the final round!

Boon 2 stuffs the takedown.
Boon 2 tries to bum rush Bredenberg with a series of wild strikes but Bredenberg uses good footwork to avoid the assault.
Boon 2 fakes a jab and throws a low kick but Bredenberg checks it well.
Bredenberg scoring well with a low kick there.
Boon 2 tries to bum rush Bredenberg with a series of wild strikes but Bredenberg uses good footwork to avoid the assault.
Bredenberg lands with a right hand.
Boon 2 lands a jab followed by a nice looking cross.
The crowd are loving this. Great action here.
Bredenberg drives through with a really nice takedown into side control.
Bredenberg looking for an arm triangle but it's way too loose to do anything.
Bredenberg wants to control but Boon 2 is keeping him busy.
That's one minute gone in the round.
Boon 2 struggling a bit here.
The ref warns both fighters not to hold the cage as they work up against the meshing.
Boon 2 tries to improve position but can't.
Boon 2 avoids any damage from the ground and pound of Bredenberg.
Bredenberg trying to control the position but Boon 2 is working away.
The ground and pound from Bredenberg seems to be hitting the mat more than his opponent.
Boon 2 is trying to stand back up. He's worked his way up against the cage but Bredenberg has just dragged him back down to the mat.
That's two minutes gone in the round.
Bredenberg working the ground and pound.
Bredenberg lands a knee to the body and a forearm to the face.
Bredenberg is looking to take a break and control but Boon 2 is keeping him honest, looking to work from the bottom.
Boon 2 is working hard to escape and get back to his feet. After a battle for position, Bredenberg asserts his dominance and retains side control.
Bredenberg is maintaining the dominant position - no doubt Boon 2 will start to get frustrated soon if he's not already.
Bredenberg is looking to take a break and control but Boon 2 is keeping him honest, looking to work from the bottom.
Bredenberg takes a little break here. Boon 2 wants to take advantage but he is being controlled well.
Bam Boon 2 has stepped it up - he knows he needs a finish here!
Emmanuel Bredenberg is fighting for a decision here - he's started to take the cautious approach.
That's three minutes gone in the round.
The referee looks like he's ready to step in and stand the fighters back up.
We're going to have a standup here because Emmanuel Bredenberg wasn't active enough for the referee's liking.
Boon 2 slips a jab and a cross from Bredenberg.
Emmanuel Bredenberg is looking to throw some combinations by the looks of things.
Bredenberg shoots in for a takedown but Boon 2 shows good takedown defense there and keeps this one on the feet.
Bredenberg keeps the fight on the outside.
Boon 2 jabs Bredenberg right on the nose. Bredenberg blinks but takes it well.
Bam Boon 2 seems to be getting the better of the standup.
Boon 2 tries to clinch up against the cage, rushing in the close the distance. Bredenberg manages to break the clinch and circles back to the middle of the mat.
That's four minutes gone in the round.
Bredenberg avoids the head kick by Boon 2.
Bredenberg uses good head movement to avoid the hook from Boon 2.
Boon 2 moves out of range of the body kick.
Bredenberg moves out of range as Boon 2 strikes.
Ooooh, nice body kick lands from Bredenberg. Boon 2 shrugs it off though.
Boon 2 tries to close the distance and clinch up but Bredenberg swats him away and circles back towards the center.
Bredenberg looking to shoot here. He's gone for it and he's landed a takedown into mount! Oh, that's bad for Boon 2!
Wooooo! Give it up for these two warriors! They are putting on a show!
Boon 2 trying desperately to get to his feet.
As the round comes to an end the crowd are showing their appreciation for a great round of action.
Bredenberg controlling the position easily from mount.
And that's the end of the fight!
That was a close round. You could make an argument for either fighter but I would give it to Emmanuel Bredenberg.
Well I reckon that's a shut out for Bredenberg, winning every round. Will the judges agree? They are the ones who matter, even if they are often depressingly incompetent. Over to the ring announcer for the scorecards.
Ladies and gentlemen, after 3 rounds of action, we go to the scorecards for a decision.
Judge Jeff Smith scores the fight 30:28
Judge Micheangelo Fripello scores the fight 30:27
Judge Chris Saunders scores the fight 29:28
In favor of your winner, by unanimous decision... Emmanuel Bredenberg!
Emmanuel Bredenberg gave a mention to SPARTA FIGHTWARE-GTI in his post fight interview. That will please them (and hopefully generate some sales).
|
|
|
|
|
|
|
|
|
|
|
|
|
|
|
|
|
|
|
|
|
|
|
| S |
C
A |
G |
S |
C
B |
G |
|
S |
C |
G |
|
energy
A | B |
|
hype
A | B |
|
pop
A | B |
|
mgr
A | B |
|
FIGHT
RATING
58% |
|
|
|
|
|
|
|
Co-main event
|
Coming up we have a heavyweight MMA rules bout between Taisto Sinisalo (ranked 0 p4p, 0 weight class) and William Shimazu (ranked 0 p4p, 0 weight class). Sinisalo's ring entrance music is that housewives' favourite, Jos rakastat. Taisto Sinisalo has a significant reach advantage - let's see if he can make it count.
 |
|
 |
| 210 cm
26
288 lbs
13 - 7 - 0 |
|
180 cm
25
230 lbs
9 - 7 - 1 |
Good wrestling
World class MT
Cardio machine |
|
BJJ Brown Belt
Lethal high kicks
Good gas tank |
|
| |
|
Ladies and gentlemen. This fight is 3 rounds, in the heavyweight division.
Introducing the fighter to my left, fighting out of the red corner.
With a record of
13 - 7 - 0, fighting out of Hilo, Taisto Sinisalo!
And introducing the fighter to my right, fighting out of the blue corner.
With a record of
9 - 7 - 1, fighting out of Hilo, William Shimazu!
The judges for this bout are Colin Fray, Paul Gruel and Micheangelo Fripello.
The bell rings for round one and we are underway!
Sinisalo misses with a hook.
Sinisalo works the jab nicely.
Shimazu looks for a takedown here. Will he get it? Sinisalo is fending him off so far but Shimazu persists. Nope, Sinisalo circles away and we're back to standing.
Sinisalo misses with a leg kick
and Shimazu counters with a body kick that brings a smile to the face of both fighters.
Shimazu misses with a hook to the body
enabling Sinisalo to counter with a crisp jab.
Shimazu throws a hard body shot but it just misses.
Sinisalo tries to clinch but fails miserably
and Shimazu counters with a good right hand that lands right on the jaw.
This is a great period of action - very entertaining stuff!
Sinisalo takes a step back and watches a body kick go sailing past his mid section.
Sinisalo tries to clinch there but Shimazu circles away.
Sinisalo fails to land with a series of punches.
Shimazu tries to land with a swinging hook to the body but Sinisalo was well out of range. Poor timing from Shimazu.
Sinisalo lands a high kick!
Sinisalo moves out of range of the body kick.
Shimazu misses with a hook
and Sinisalo counters with a one-two to the body.
That's one minute gone in the round.
Sinisalo tries to clinch up.
A lazy body kick from Shimazu
and Sinisalo counters with a lovely shot to the body.
Taisto Sinisalo is looking to keep the fight on the feet at all costs.
Sinisalo avoids the body shot from Shimazu.
Sinisalo misses with a head kick.
Sinisalo throws the left hand but Shimazu avoids the punch easily.
Shimazu throws a half hearted mid kick.
Sinisalo is looking to chop away at Shimazu's legs.
A leg kick checked by Sinisalo.
Sinisalo misses with a low kick as Shimazu jumps back.
Shimazu takes a nice looking leg kick right on the meat of his thigh there.
Shimazu on the receiving end of a decent leg kick there by Sinisalo. Sinisalo obviously looking to wear him down.
Sinisalo avoids a kick to the body.
A solid body kick from Shimazu.
That's two minutes gone in the round.
A head kick misses from Sinisalo.
This has been an exciting period of action!
Shimazu will need to close the distance a bit before he attacks - that leg kick was thrown from too far away.
Sinisalo throws a sloppy head kick
and Shimazu counters with a straight punch to the midsection.
Sinisalo moves away from the strike by Shimazu.
Shimazu takes a body punch that cleary hurt but he's trying not to show any weakness.
Shimazu throws an overhand right that lands on Sinisalo's shoulder, as Sinisalo tries to avoid the shot.
A low kick from Sinisalo is predictable there
and Shimazu counters nicely by changing levels and landing a hook to the body.
Shimazu is throwing a lot of body shots here, looking to wear down Sinisalo rather than just go for the knockout.
Sinisalo throws a predictable looking body shot
and Shimazu finishes the little exchange by landing a big kick to the body.
Sinisalo is breathing heavily.
Shimazu throws a hook to the body but it doesn't connect.
Shimazu looks to land a body kick but Sinisalo moved away.
Sinisalo displays good takedown defense there as he swats away a double leg from Shimazu.
Shimazu moves into range and lands a nice leg kick.
That's three minutes gone in the round.
Sinisalo fails in his attempt to clinch.
Shimazu thumps Sinisalo with a low kick.
Shimazu is looking to land body kicks.
Sinisalo lands a high kick!
Shimazu tries for a takedown but Sinisalo circles away easily
and Sinisalo counters with a nice low kick that buckles Shimazu's knee momentarily.
Taisto Sinisalo has stuffed three takedown attempts in the round now. That's going to take a lot out of William Shimazu.
Sinisalo wants to clinch.
Nice uppercut there from Shimazu.
Sinisalo just misses with a punch to the body.
That's four minutes gone in the round.
Shimazu throws a leg kick that is checked
and Sinisalo counters with an inside leg kick.
Wooooo! Give it up for these two warriors! They are putting on a show!
Sinisalo thows a body shot but no joy.
Shimazu takes a jab right on the nose. That must have hurt but he shrugs his shoulders and looks to return the favor.
Sinisalo tries to land a front kick but Shimazu steps back. That was a bit too telegraphed.
Shimazu misses with the body kick
and Sinisalo counters with a leg kick that reverborates around the arena.
Sinisalo cracks Shimazu with a hook to the jaw. Both fighters smile at eachother and high-five before getting back down to business.
Shimazu shoots in looking for a double leg takedown. Sinisalo defends it nicely.
Sinisalo is using his height advantage well here, landing a good percentage of his punches.
A nice leg kick lands there from Shimazu.
The crowd are going absolutely nuts as the round comes to an end - what a fantastic round of action!
Shimazu looking to take his opponent's legs away with the low kicks.
And thats the end of the round the fighters go back to their corners.
Taisto Sinisalo dominated that round.
The referee calls time. The cornermen exit stage left and we're back to business.
Sinisalo fails in his attempt to clinch.
Sinisalo has his front leg slapped to the side - a nice low kick landing there from Shimazu.
Shimazu ducks right into an uppercut from Sinisalo.
A clash of legs there as Shimazu blocks the low kick.
A big right from Shimazu misses.
Some wild striking there from Sinisalo.
William Shimazu seems to be the more aggressive standup fighter in this bout.
Sinisalo is looking to take this fight into the clinch.
Sinisalo blocks the body kick.
Sloppy strikes from Sinisalo. Those never looked like landing.
Sinisalo waving his hands out in front of him, looking to distract Shimazu.
Sinisalo is using his reach advantage well here, landing the more effective single shots from range.
Sinisalo thows a leg kick but Shimazu checks it
and Shimazu counters with a body kick that stops Sinisalo in his tracks momentarily.
That's one minute gone in the round.
Sinisalo bobs and weaves and unloads with a good uppercut.
Shimazu connects with an inside leg kick.
Shimazu throws a body punch but Sinisalo moves out of range.
Shimazu ducks down and throws a hook to the body but Sinisalo moves away.
A bone on bone clash there as Shimazu blocks the leg kick.
Shimazu closes the distance and clinches up with Sinisalo, looking for a takedown. Shimazu pushes Sinisalo against the cage but Sinisalo circles to the side and manages to break the clinch.
Shimazu fakes and then throws a beautiful body shot. Sinisalo looks a bit winded and takes a step backwards to take a breath.
Shimazu avoids a kick to the body.
Shimazu just misses with a punch to the body.
Shimazu shoots in but no luck this time.
Sinisalo tries to land with a swinging hook to the body but Shimazu was well out of range. Poor timing from Sinisalo.
Shimazu throws an off balance right hand
and Sinisalo counters with a quick right hand to the jaw.
That's two minutes gone in the round.
A left lands for Sinisalo.
This is a great period of action - very entertaining stuff!
Both fighters circling a little - Shimazu finishes the exchange with a kick to the body.
Shimazu pivots as if he's going to throw a leg kick but stops half way.
Sinisalo scores with a jab to the body.
Sinisalo looks to throw the jab but Shimazu is out of range.
Sinisalo connects nicely with a jab. Noted by the judges no doubt.
Shimazu lands a leg kick and bounces back out of range.
Sinisalo gets to the clinch - let's see what his plan is here.
Shimazu jumps guard but Sinisalo stands there with Shimazu around his waist. Shimazu gives up and drops back to his feet. We remain in the clinch.
Taisto Sinisalo has stuffed three takedown attempts in the round now. That's going to take a lot out of William Shimazu.
A knee to the head by Sinisalo.
Shimazu looking to stall.
That's three minutes gone in the round.
Sinisalo landing knees to the head.
Shimazu is rocked!
Sinisalo working the clinch nicely. Shimazu is working for position but Sinisalo cracks him with a big knee to the head! Shimazu crumples up against the cage and Sinisalo lands two more shots before the ref can save Shimazu! This one is all over!
Ladies and gentlemen, after 3:18 of round 2, we have a winner by way of TKO (Knee & Punches). Taisto Sinisalo!
Taisto Sinisalo really struggled to get his t-shirt on before his hand was raised. Making sure that xXx - Voodoo Labs - MONEY LAUNDER logo gets some air time is pretty tricky when you're all sweaty.
|
|
|
|
|
|
|
|
|
|
|
|
|
|
|
|
|
|
|
|
|
|
|
| S |
C
A |
G |
S |
C
B |
G |
|
S |
C |
G |
|
energy
A | B |
|
hype
A | B |
|
pop
A | B |
|
mgr
A | B |
|
FIGHT
RATING
70% |
|
|
|
|
|
|
|
Main event
|
Coming up we have a heavyweight MMA rules bout between Shane Luger (ranked 0 p4p, 0 weight class) and Leung Ting (ranked 0 p4p, 0 weight class). Luger comes to the cage accompanied by Right Here, Right Now - Fatboy Slim. Ting has chosen Carl Douglas - Kung-fu fighting as his entrance music. Leung Ting is staring across the cage at his opponent, tweaking his nipples.
 |
|
 |
| 196 cm
25
248 lbs
13 - 3 - 0 |
|
201 cm
23
275 lbs
11 - 5 - 0 |
Good wrestling
World class boxer
Insanely flexible |
|
Good wrestler
Excellent boxer
Granite chin |
|
| |
|
Ladies and gentlemen. This fight is 3 rounds, in the heavyweight division.
Introducing the fighter to my left, fighting out of the red corner.
With a record of
13 - 3 - 0, fighting out of Hilo, Shane Luger!
And introducing the fighter to my right, fighting out of the blue corner.
With a record of
11 - 5 - 0, fighting out of Hilo, Leung Ting!
The judges for this bout are Josh West, Jeff Smith and Ryoma Takatsuka.
The bell rings for round one and we are underway!
Luger takes one to the chin there.
It looks like Shane Luger has been cut.
Ting uses some good footwork to avoid the body shot by Luger.
Luger throws a body punch but Ting moves out of range.
Ting misses with a looping left.
Luger throws a good cross that connects.

It looks like Leung Ting has been cut.
A chopping leg kick lands by Luger.
Decent striking displayed by Luger there.
The fans in attendance giving it up for the two fighters, who have really let it all hang out in the last minute or so!
Ting takes a shot to the body in his stride.
Ting takes a thudding leg kick, right into the meat of the thigh.
Luger lands with a thumping leg kick.
Ting fakes low and throws an overhand right that catches Luger on the side of the head.
Luger lands a powerful looking uppercut that connected with his opponent's jaw.
Luger throws the left hand but Ting avoids the punch easily.
Ting takes a step back and watches a body kick go sailing past his mid section.
That's one minute gone in the round.
Luger connects with a lovely right hand, straight down the pipe.
Luger turns his hip over beautifully as he lands a nice leg kick.
Luger lands with a shot to the body.
Luger moves out of range of the strikes.
Nice shot by Ting.
No joy there for Ting, who threw a few shots but didn't land.
Shane Luger seems to be the more aggressive standup fighter in this bout.
Luger misses with a straight left.
Luger looking to throw a kick but he's pulled out of it.
Luger slips a jab from Ting.
Luger misses with a body shot.
Luger swings and misses with a hook to the body.
That's two minutes gone in the round.
We've seen a great period of action over the last minute or so - credit to both fighters for going all out!
Ting misses with a body shot
and Luger counters with a nice jab to the body that keeps Ting thinking.
That's a knee to de groin and it's over and out! Ting crumples to the ground after an illegal strike from Luger - the referee stops the clock and Ting gets 5 minutes to recover from that one. "I'm sorry" says Luger. Ting manages to get back to his feet and the fight resumes.
Luger connects with a looping right hand.
Luger catches Ting with a nice straight right. He seems pissed - ooooh, it's on now! On like donkey kong!
Ting misses with a looping left.
Ting tries to check the leg kick but that clearly hurt him.
Ting throws an off balance right hand
and Luger counters with a nice leg kick.
Luger misses with a head kick.
Luger fakes a couple of low kicks, before throwing one on the third attempt. It connects and Ting has to reset his feet before getting ready to engage.
Ting feints a straight left to the body, then turns around with a flashy move and hits Lugers jaw with a dramatic spinning back fist!
Ting misses with an uppercut.
That's three minutes gone in the round.
Luger cracks Ting with a right hand to the side of the head.
Ting misses with a double jab
and Luger counters with a stiff right hand.
Luger wings a very wild body shot but it does the job and lands to the midsection.
Luger swings wildly with a right hand that was never going to find it's target.
Ting throws a hook but Luger avoids it easily.
Luger connects nicely with a jab. Noted by the judges no doubt.
That has opened up Leung Ting's cut even more.
Ting uses some good footwork to avoid the body shot by Luger.
This is a great period of action - very entertaining stuff!
Luger connects with a leg kick. Ting looked like he was expecting something else and didn't defend it.
Ting takes a thudding leg kick, right into the meat of the thigh.
Ting looks gassed!
A decent looking cross lands there for Luger.
Luger scores with a slapping inside leg kick.
That's four minutes gone in the round.
Luger connects with a leg kick. Ting looked like he was expecting something else and didn't defend it.
Luger tries to clinch up
and Ting counters nicely by changing levels and landing a hook to the body.
Ting on the receiving end of a decent leg kick there by Luger. Luger obviously looking to wear him down.
Ting's leg has a nasty welt from taking a succession of leg kicks. That must be slowing him down.
Ting takes a nasty kick to the mid section... That should keep him thinking. Does he try and block and risk a head kick landing?
Ouch! a nice leg kick from Luger, right into the meat.
Crunch! Luger slams his shin into Ting's torso.
The crowd are going absolutely nuts as the round comes to an end - what a fantastic round of action!
Luger catches Ting with a nice straight right. He seems pissed - ooooh, it's on now! On like donkey kong!
Luger lands an overhand right.
Ting loads up on a big right hand but Luger slips the punch.
And thats the end of the round the fighters go back to their corners.
Shane Luger dominated that round.
Both fighters have cut men working on them during the interval.
The fighters' corners scream their final instructions, as the referee calls time. Here we go, back to the action!
Luger scoring well with a low kick there.
Luger connects with a looping right hand.
Luger lands with a hook. Ting tried to avoid it but it clipped the top of his head.
The cut above Leung Ting's eye is starting to cause him problems now.
Luger displays some good footwork, moving neatly out of range as Ting throws out the jab.
Luger stooping low to avoid any incoming strikes and then lunges in with an uppercut come cross that lands flush.
Ting might want to mix his strikes up a bit more. He's just going for head shots at the moment and that can become a bit predictable.
Ting scores with a sloppy right hand. Luger should have avoided that one.
The fans in attendance giving it up for the two fighters, who have really let it all hang out in the last minute or so!
Luger scores with a hook to the body. Ting takes a step back and tries to catch his breath.
Good leg kick by Luger there. It's the ones that make that thud noise that hurt and that was an almighty thud.
Luger connects with a right hand. Ting shakes it off.
Ting misses with a lunging right hand
and Luger counters by moving into the clinch.
Ting tries to break free but Luger pushes him back against the cage.
Ting is trying to slow down the pace in the clinch, to catch his breath.
That's one minute gone in the round.
Ting goes for a body shot but it's blocked.
Ting blocks a body shot from Luger.
A body shot lands from Luger.
A head punch blocked on the inside by Ting.
Luger tries to work over Ting's body with a swooping hook but it only glances the target.
Luger lands a shoulder strike that jolts his opponent's head backwards.
Ting tries to break the clinch but Luger is controlling the position.
Luger lands a hook that snaps the head of Ting backwards.
Ting presses Luger against the cage and delivers a mid-strength body shot.
Ting slows down the pace here.
Luger lands a shoulder strike.
Luger scores with a nice hook to the head.
That's two minutes gone in the round.
Ting misses with a punch on the inside.
A nice left hand lands by Ting.
Luger is really dominating this fight. Is there anything that Ting can do to turn this around?
Ting is stalling here.
Luger lands a right hand.
The crowd cheering loudly, showing their appreciation for the quality fight we're seeing here.
A battle for position here, against the cage.
Luger tries to throw a body punch but Ting avoids it by throwing Luger back against the cage.
Luger lands with a good tight uppercut to the head.
Luger throws a head punch that misses.
Ting tries a shoulder strike but it doesn't do any damage.
Luger lands with a short punch from the clinch.
Ting lands with a good tight uppercut to the head.
Ting throws a punch but it's blocked by Luger.
Luger lands an uppercut.
Leung Ting's cut is absolute horrible now. This looks like something out of a horror film with blood covering both fighters.
That's three minutes gone in the round.
Ting swings away with an uppercut that misses.
Luger lands a shoulder strike that jolts his opponent's head backwards.
The two fighters are working to gain dominance in the clinch.
Ting trying to control the position but instead, Luger has worked for underhooks and has pushed Ting into the cage.
Luger misses with a body punch.
Luger tries a body shot but Ting blocks it.
Luger takes a shot to the head.
Luger misses with a hook from the clinch.
Luger tries to work over Ting's body with a swooping hook but it only glances the target.
Luger lands a right hand.
With the fighters clinched against the cage, Luger creates a bit of distance for himself and scores with a nice uppercut.
Luger blocks a punch to the side of the head.
Ting is trying to stall.
That's four minutes gone in the round.
The crowd are loving this. Great action here.
A hook to the body from Ting.
Ting is stalling here.
Ting is working hard here but doesn't seem to be able to control effectively, up against the cage.
Luger tries to land a shot to the body but it's blocked.
Luger lands with a quick shot inside that doesn't really do much damage.
The referee calls the doctor in to look at Leung Ting's cut. Oh no, the doctor has called an end to the bout!
Ladies and gentlemen, after 4:44 of round 2, we have a winner by way of TKO (Cut). Shane Luger!
Shane Luger decided to thank the fans in attendance for making a great atmosphere. It seemed to go down pretty well.
|
|
|
|
|
|
|
|
|
|
|
|
|
|
|
|
|
|
|
|
|
|
|
| S |
C
A |
G |
S |
C
B |
G |
|
S |
C |
G |
|
energy
A | B |
|
hype
A | B |
|
pop
A | B |
|
mgr
A | B |
|
FIGHT
RATING
59% |
|
|
|
|
|
|
|
|
|
|

