 |
Ryze 11 PBP Commentary |
Undercard bout
|
|
|
|
Undercard bout
|
|
|
|
Undercard bout
|
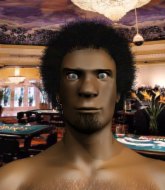
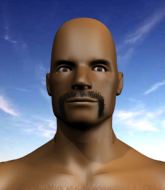
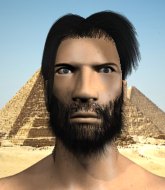
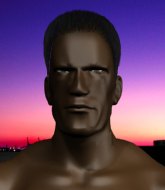
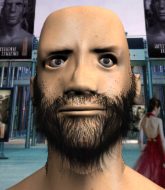
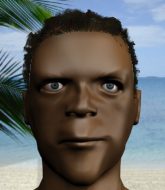
Coming up we have a welterweight MMA rules bout between Jonny Okereke (ranked 0 p4p, 0 weight class) and Happy Sack (ranked 0 p4p, 0 weight class). Jonny Okereke has the better chin. Will he look to stand and bang today?
 |
|
 |
| 180 cm
23
178 lbs
1 - 3 - 0 |
|
180 cm
18
181 lbs
0 - 0 - 0 |
BJJ Blue Belt
Basic striking
Granite chin |
|
BJJ White Belt
Good kicks
Determined |
|
| |
|
Ladies and gentlemen. This fight is 3 rounds, in the welterweight division.
Introducing the fighter to my left, fighting out of the red corner.
With a record of
1 - 3 - 0, fighting out of New York, Jonny Okereke!
And introducing the fighter to my right, fighting out of the blue corner.
With a record of
0 - 0 - 0, fighting out of New York, Happy Sack!
The judges for this bout are Bruno Lombardi, Columbo Gatti and Russell Pearce.

The bell rings for round one and we are underway!
Sack misses with a half-hearted attempt at a head kick.
Okereke doesn't manage to clinch there - Sack circles away.
Okereke lands with a nice combination. Sack backs away looking to recover.

It looks like Happy Sack has been cut.
Okereke dives in and grabs Sack's left leg, looking for a takedown. Sack pushes down on Okereke's head and hops out.
Sack avoids a low kick by using good footwork.
Sack throws a nice head kick!

It looks like Jonny Okereke has been cut.
Wooooo! Give it up for these two warriors! They are putting on a show!

Okereke moves into range and clinches up with Sack.
Sack lands a nice elbow.
Okereke is breathing heavily.
Okereke goes for a takedown in the clinch but Sack prevents it.
Okereke is looking to score with knees to the body. Maybe he'll change it up and go body then head. Sack is defending well for now.
Sack scores with a knee to the head.
Sack has Okereke pressed against the cage, preventing Okereke from circling away and getting back to striking at range.
Okereke blocks an elbow strike from Sack.
Sack with a knee to the head.
Sack misses with an elbow over the top.
Okereke takes an elbow to the forehead.
Sack comes over the top with an elbow. That landed flush.

That's one minute gone in the round.
Okereke misses the knee to the body. Nice hip positioning from Sack.
Sack misses with a knee strike.
Sack connects with a nasty looking knee right to Okereke's face.
Jonny Okereke's cut is getting worse.
Sack landing knees to the head.
Sack creates a bit of space for himself and sneaks an elbow through Okereke's defenses.
Okereke is looking for a takedown up against the cage. Sack gets underhooks though and prevents the takedown attempt.
That's three failed takedown attempts in the round for Jonny Okereke. That's going to take a lot out of him.
Sack misses with an elbow strike.
Nice elbow from Sack.

Sack's corner calls for him to break the clinch, which he does.
Sack misses with a half-hearted attempt at a head kick.
Happy Sack is looking to keep the fight on the feet at all costs.
Sack swats away the attempt to clinch by Okereke.
Sack throws a head kick but Okereke moves out of range.
Okereke is looking to clinch.
Okereke tries to clinch up.

That's two minutes gone in the round.
Sack moves in looking to clinch but Okereke pushes him off.

Sack lands a big head kick that sends Okereke tumbling to the mat! Sack takes a step backwards and waves Okereke back to his feet - he wants the finish!
The fans in attendance giving it up for the two fighters, who have really let it all hang out in the last minute or so!
Okereke misses with a low kick.
Sack has his front leg slapped to the side - a nice low kick landing there from Okereke.
Sack lands a big head kick that sends Okereke to the canvas! Sack follows up with strikes from the mount that forces the ref to step in and stop the fight!
Ladies and gentlemen, after 2:32 of round 1, we have a winner by way of TKO (Strikes). Happy Sack!
|
|
|
|
|
|
|
|
|
|
|
|
|
|
|
|
|
|
|
|
|
|
|
| S |
C
A |
G |
S |
C
B |
G |
|
S |
C |
G |
|
energy
A | B |
|
hype
A | B |
|
pop
A | B |
|
mgr
A | B |
|
FIGHT
RATING
68% |
|
|
|
|
|
|
|
Undercard bout
|
|
|
|
Undercard bout
|
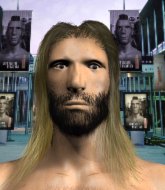
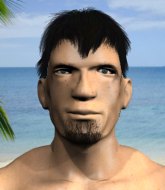
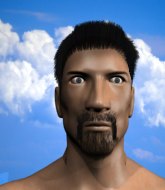
Coming up we have a welterweight MMA rules bout between Daisy Girl (ranked 0 p4p, 0 weight class) and Jason Arona (ranked 0 p4p, 0 weight class). These two fighters really are very evenly matched on the feet - it will be fascinating to see who can assert themselves in that aspect of the fight.
 |
|
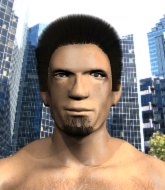 |
| 168 cm
24
174 lbs
2 - 1 - 0 |
|
179 cm
18
170 lbs
1 - 0 - 0 |
BJJ Blue Belt
Brawler
KO power |
|
BJJ White Belt
Basic striking
Determined |
|
| |
|
Ladies and gentlemen. This fight is 3 rounds, in the welterweight division.
Introducing the fighter to my left, fighting out of the red corner.
With a record of
2 - 1 - 0, fighting out of New York, Daisy Girl!
And introducing the fighter to my right, fighting out of the blue corner.
With a record of
1 - 0 - 0, fighting out of New York, Jason Arona!
The judges for this bout are Dean Styles, Alyssa Summers and David Schapiro.
The bell rings for round one and we are underway!

Arona closes the distance, clinches up and gets a nice trip takedown into side control. Very smooth.
The referee must be thinking about standing these guys back up.
Girl regains half guard.
Girl trying to control but Arona postures up.
Arona wants to control but Girl is keeping him busy.

Girl looking to work for a kimura from the bottom.
Girl avoiding damage under a succession of punches from Arona.
Arona is looking to stall here but Girl recovers full guard.
Arona looking to pass the guard.
Arona trying to control the position from guard on top but Girl is wriggling around, looking for whatever he can.
That's one minute gone in the round.
Girl is working actively from the bottom, looking for submissions. He's escaped his hips to the side and he's going for an armbar! Arona has his hands clasped together but Girl extends an breaks Arona's desperate grasp, forcing a tap out due to armbar! Nice BJJ displayed there by Girl.
Ladies and gentlemen, after 1:19 of round 1, we have a winner by way of Submission (Armbar). Daisy Girl!
Daisy Girl looked relieved post fight as he said the following; 'love to fight! when i decided to retire from the porn industry and instead try mma i only did it to get more fans and money!'.
|
|
|
|
|
|
|
|
|
|
|
|
|
|
|
|
|
|
|
|
|
|
|
| S |
C
A |
G |
S |
C
B |
G |
|
S |
C |
G |
|
energy
A | B |
|
hype
A | B |
|
pop
A | B |
|
mgr
A | B |
|
FIGHT
RATING
40% |
|
|
|
|
|
|
|
Undercard bout
|
Coming up we have a welterweight MMA rules bout between Styr Thenn (ranked 0 p4p, 0 weight class) and Tix Arian (ranked 0 p4p, 0 weight class). Tix Arian is the more experienced fighter, so let's see if that makes a difference tonight.
 |
|
 |
| 179 cm
21
178 lbs
1 - 1 - 0 |
|
181 cm
25
181 lbs
5 - 3 - 0 |
Good wrestling
Brawler
Very strong |
|
Good takedowns
Counter striker
Granite chin |
|
| |
|
Ladies and gentlemen. This fight is 3 rounds, in the welterweight division.
Introducing the fighter to my left, fighting out of the red corner.
With a record of
1 - 1 - 0, fighting out of New York, Styr Thenn!
And introducing the fighter to my right, fighting out of the blue corner.
With a record of
5 - 3 - 0, fighting out of New York, Tix Arian!
The judges for this bout are David Schapiro, Steve Montenegro and Jonathan Paton.
The bell rings for round one and we are underway!

Thenn gets a takedown into half guard.
The referee is pacing around the two fighters - he looks like he's thinking about a standup.
Thenn drops an elbow to the side of Arian's head.
Thenn lands a big shot. The thud that echoes around the arena is like music to the fans' ears.
Thenn thows a wild elbow that connects with the canvas.
Arian wants to control but Thenn is keeping busy and won't allow it.
Nice strikes from Thenn there.
Arian regains full guard, whilst avoiding punches from Thenn.
Arian manages to land a sweep and now he's in mount on top!

Arian looks like he's working for a submission but he's not found anything just yet.
Fantastic stuff here - a very entertaining period of action, which has drawn cheers from the crowd.
Thenn tries to hold on but Arian pushes him away.
Arian jumps to the side looking to secure the arm triangle
. Ooooh, that looks tight
Thenn is gargling but he's managed to escape! Nice work there by Thenn and Arian has given up the dominant position trying to land that submission.
Thenn is trying to improve his position.
That's one minute gone in the round.
Arian wants to work for a kimura but he's foiled early by Thenn, who protects the arm well.
Thenn tries to bench press Arian off him but Arian keeps the position.
Arian working away.
Thenn is looking for a sweep.
Thenn struggling a bit here.
Arian is trying to land an Americana. He has the arm isolated but Thenn is keeping cool and he's avoided the danger for now.
You can see the frustration on Thenn's face, being in this tough position on the bottom.
Both fighters really going for it on the ground here!
Thenn is trying to get back to half guard. He's pushing on Arian's leg. He's managed it. Nice work.
Arian is trying to work for a kimura but Thenn is defending well.
That's two minutes gone in the round.
The fighters are going at a pretty good pace and they're both starting to sweat now.
Arian prevents Thenn from improving his position.
Thenn pushes Arian off looking to stand but Arian dives back in and keeps control.
Arian wants to pass to mount but Thenn is defending the position.
Thenn is concentrating on defense, preventing Arian from advancing position.
Arian is working for a submission of some sort.
We've seen a great period of action over the last minute or so - credit to both fighters for going all out!
Thenn is looking for a sweep. Arian is wise to his cunning plan and keeps the top position.
Thenn is pressing down on Arian's left leg trying to get back to full guard. He's managed it.
Arian thinks about going for a leg but decides against it, in order to maintain the position.

That's three minutes gone in the round.
Thenn manages to land a sweep and now he's in mount on top!
Arian taking shots to the head.
Thenn raining down shots from the mount!
Arian really trying hard to get back to half guard here.
Thenn fakes a shot to the body and cracks his opponent in the head. Nice ground and pound there!
Arian can't escape the position.
Thenn working the ground and pound effectively.
This has been an exciting period of action!
Thenn is in the full mount, landing strikes.
Thenn unloading with bombs!

That's four minutes gone in the round.
Thenn lands a shot to the body, followed up by a shot to the exposed head of his trapped opponent.
Arian manages to regain half guard. Good work.
Arian is trying to get back to full guard.
Thenn looking to pass the half guard. Not this time.
Thenn missing with some ground and pound from the half guard.
Arian is refusing to be controlled, as Thenn sits in half guard.
Arian is looking to regain full guard. Not this time though.
Arian wants to control but Thenn is keeping busy and won't allow it.
Arian actively working from the bottom here.
The crowd are going absolutely nuts as the round comes to an end - what a fantastic round of action!
Thenn controlling the pace.
Thenn working over Arian with some ground and pound. Arian looks like he wants out of this position, which is understandable.
And thats the end of the round the fighters go back to their corners.
Styr Thenn dominated that round.
OK. That's time! The bell goes and we're back to the action.

Thenn closes the distance and gets a trip takedown into side control. Arian quickly recovers to half guard.
Arian taking some punishment here, with Thenn in his half guard.
Arian trying to control from the bottom.
Thenn misses with a head shot. Arian uses the momentum to regain guard.
Thenn stopping the sweep attempt from Arian.
Arian lands a beautiful switch and he's in full mount! That could spell trouble for Thenn!
Thenn tries to hold on but Arian postures up.
Arian working for a guillotine from mount but Thenn is in no mood to give up.
Thenn working to try and regain half guard.
That's one minute gone in the round.
Thenn wants to hold on but Arian pushes him away.
Thenn is in all sorts of trouble here.
Arian has hold of Thenn's left arm, perhaps looking for a submission. The two fighters tussle over control of the isolated limb and Thenn manages to get his arm back to his side and away from danger.
Thenn is looking to get to half guard.
Arian is going oldschool here, as he tries to force Thenn to tap using a forearm choke. This isn't 1993 though, so Thenn shrugs it off.
Thenn tries to hold on but Arian postures up.
Arian is going oldschool here, as he tries to force Thenn to tap using a forearm choke. This isn't 1993 though, so Thenn shrugs it off.
Thenn is desperately trying to get back to half guard.
That's two minutes gone in the round.
Thenn tries to lock up and control but Arian gives him a forearm to the face and pushes him away.
Styr Thenn overall seems to be getting the better of the ground position in the fight so far.
Thenn is looking to get to half guard.
The ref warns both fighters not to hold the cage as they work up against the meshing.
Thenn tries to hold on but Arian postures up.
Arian is working for a guillotine from mount but Thenn frees his head quite easily.
The fans in attendance giving it up for the two fighters, who have really let it all hang out in the last minute or so!
Arian looking to secure an arm triangle but Thenn defends it well.
Thenn working to try and regain half guard.
That's three minutes gone in the round.
Arian is thinking about an arm triangle here, looking to tighten it up before moving to side control. Thenn can see it coming though and defends well with a couple of strikes to the head and some good arm positioning.
Thenn tries to hold on but Arian pushes him away.
Thenn really trying hard to get back to half guard here.
Arian working for a submission here. He's tucked his head under his opponent's arm, looking for an arm triangle. He's hopped off into side control, looking to tighten the submission... is it going to work? He's given up a good position looking for it. Thenn looks OK. Oh, I spoke too soon, he's out! That must have been tighter than I thought! Excellent work there by Arian! Submission of the night perhaps?
Ladies and gentlemen, after 3:47 of round 2, we have a winner by way of Submission (Arm Triangle). Tix Arian!
A very excited looking Tix Arian made sure he remembered to thank all the fans both in the arena and on the internet. He said all the coolest people spend all day on MMA websites, which got a big reaction.
|
|
|
|
|
|
|
|
|
|
|
|
|
|
|
|
|
|
|
|
|
|
|
| S |
C
A |
G |
S |
C
B |
G |
|
S |
C |
G |
|
energy
A | B |
|
hype
A | B |
|
pop
A | B |
|
mgr
A | B |
|
FIGHT
RATING
62% |
|
|
|
|
|
|
|
Undercard bout
|
Coming up we have a light heavyweight MMA rules bout between Warren Wilson (ranked 0 p4p, 0 weight class) and Bob Swarner (ranked 0 p4p, 0 weight class). Warren Wilson has the better chin. Will he look to stand and bang today?
 |
|
 |
| 180 cm
25
203 lbs
1 - 0 - 0 |
|
190 cm
25
215 lbs
2 - 0 - 0 |
BJJ Blue Belt
Counter striker
KO power |
|
BJJ White Belt
Great elbows
Determined |
|
| |
|
Ladies and gentlemen. This fight is 3 rounds, in the light heavyweight division.
Introducing the fighter to my left, fighting out of the red corner.
With a record of
1 - 0 - 0, fighting out of New York, Warren Wilson!
And introducing the fighter to my right, fighting out of the blue corner.
With a record of
2 - 0 - 0, fighting out of New York, Bob Swarner!
The judges for this bout are Columbo Gatti, David Schapiro and Joseph Jones.
The bell rings for round one and we are underway!
Swarner stuffs the takedown attempt from Wilson. Wilson gets slowly back to his feet.
Wilson takes one on the chin but keeps coming.
Swarner feints and then cracks Wilson's leading leg with a nice low kick. He's obviously looking to slow Wilson down.
Swarner throws a nice inside leg kick.
Wilson is breathing heavily.
Swarner stooping low to avoid any incoming strikes and then lunges in with an uppercut come cross that lands flush.
Swarner chopping away at his opponent's legs.
Swarner keeps the fight standing with a nice sprawl.
Swarner throws a front kick that sends Wilson stumbling back into the cage.
That's one minute gone in the round.
Wilson takes a nice looking leg kick right on the meat of his thigh there.
Wilson with poor footwork there. He got himself in a bit of a tangle, enabling Swarner to score with a decent uppercut.
Swarner scores with a jab to the body.
Ouch! a nice leg kick from Swarner, right into the meat.
Wilson takes a head kick and shrugs it off.
Wilson on the wrong end of an overhand right that came out of nowhere.
This is a great period of action - very entertaining stuff!
Swarner is looking to clinch.
Swarner tries to close the distance and clinch up against the cage but Wilson paws at him with a jab and circles away.
That's two minutes gone in the round.
Swarner lands a left and a right that send Wilson crashing to the mat, dazed. Swarner thinks about following him to the mat but decides to wave him back up to his feet!

Wilson is rocked!
Swarner throws a sloppy head kick and Wilson moves out of range easily.
Oh Wilson is still all over the place! His legs are completely gone! Will he be able to recover?!!
Swarner slips in close and lands a nice hook before moving back out of range.
Swarner feints and then cracks Wilson's leading leg with a nice low kick. He's obviously looking to slow Wilson down.
Wilson seems to have got his legs back now.
Swarner lands a big head kick that sends Wilson tumbling to the mat! Swarner takes a step backwards and waves Wilson back to his feet - he wants the finish!
Swarner lands with a jab that stuns his opponent. Wilson is looking to close the distance but Swarner sees it coming and throws a beautiful knee! Wilson crumbles to the mat and that's all she wrote! Let's hope Wilson is OK because that was naaaaaasty!
Ladies and gentlemen, after 2:53 of round 1, we have a winner by way of KO (Knee). Bob Swarner!
|
|
|
|
|
|
|
|
|
|
|
|
|
|
|
|
|
|
|
|
|
|
|
| S |
C
A |
G |
S |
C
B |
G |
|
S |
C |
G |
|
energy
A | B |
|
hype
A | B |
|
pop
A | B |
|
mgr
A | B |
|
FIGHT
RATING
57% |
|
|
|
|
|
|
|
Undercard bout
|
Coming up we have a light heavyweight MMA rules bout between Arry Baratheon (ranked 0 p4p, 0 weight class) and Rashad Jenson (ranked 0 p4p, 0 weight class). Buckle up people - heeeeeeeeeere we go!
 |
|
 |
| 197 cm
26
212 lbs
3 - 2 - 0 |
|
179 cm
19
213 lbs
2 - 0 - 0 |
Good wrestling
Counter striker
Big heart |
|
Good wrestler
Counter striker
Powerful |
|
| |
|
Ladies and gentlemen. This fight is 3 rounds, in the light heavyweight division.
Introducing the fighter to my left, fighting out of the red corner.
With a record of
3 - 2 - 0, fighting out of New York, Arry Baratheon!
And introducing the fighter to my right, fighting out of the blue corner.
With a record of
2 - 0 - 0, fighting out of New York, Rashad Jenson!
The judges for this bout are Joseph Jones, John Roberts and Columbo Gatti.
The bell rings for round one and we are underway!
Baratheon misses with a takedown attempt. He shot from a bit too far out.
Baratheon shoots in but doesn't get the takedown
so Jenson counters with a double leg into guard. Good agility.
Baratheon wants to sweep here but Jenson controlling him for the moment.
Baratheon has a closed guard, preventing anything of note from happening. Perhaps he's looking to stall.
The fighters are pressed up against the cage, both looking to find a bit of space to work.
Jenson pressing down on his opponent's thigh, looking to pass guard. Baratheon is keeping the position for now.
Baratheon is working from a closed guard but he's struggling to control his opponent.
Jenson tries to free his leg and advance position but Baratheon is retaining full guard.
Jenson looking to sit in guard and control but Baratheon gets the butterfly guard and sweeps. He's now in the guard on the top.
The ref warns both fighters not to hold the cage as they work up against the meshing.
That's one minute gone in the round.
Baratheon trying to control but Jenson is working from the bottom.
Baratheon stopping the sweep attempt from Jenson.
Baratheon throwing strikes from guard but Jenson blocks nicely.
Baratheon preventing the sweep.
Baratheon throwing elbows and punches but not connecting, as Jenson works some decent striking defense from the bottom.
We get told so often about how wrestlers don't like to be on their backs. Let's see if Jenson can do anything to dispel that myth.
Baratheon with a flurry of punches that miss.
Baratheon passes Jenson's right leg, so he's now in half guard.
Baratheon prevents Jenson from standing back up.
The referee walks around the fighters to get a better view of the action. Baratheon lands a nice short elbow.
That's two minutes gone in the round.
Baratheon wants to take a breather but Jenson is having none of it.
Baratheon not throwing his punches with enough precision this time.
Baratheon missing with the ground and pound from half guard.
Baratheon seems very keen to just sit and control from half guard but Jenson does not like that idea so much and is remaining active off his back.
Jenson really doesn't want to stay on the ground with Baratheon. If he can't get it back to his feet, it's only a matter of time before he'll be tapping out.
The two fighters exchange a few words. I couldn't hear what they were saying but maybe it's more fun if you make it up yourself. Baratheon connects with a nice short shot to Jenson's temple.
The referee walks around the fighters to get a better view of the action. Baratheon lands a nice short elbow.
The crowd are loving this. Great action here.
Baratheon looking for a submission but Jenson manages to get full guard, putting an end to that submission attempt.
Baratheon forces his way into half guard.
Jenson trying to hold on to Baratheon's head to control him but Baratheon postures up.
Baratheon sitting in half guard, looking to land shots. Jenson defending well though.
That's three minutes gone in the round.
Baratheon is trying to control the action in half guard but Jenson is working away on the bottom, looking perhaps to get back to full guard.
Jenson trying to hold on to Baratheon's head to control him but Baratheon postures up.
Baratheon thows a huge punch but Jenson dodges it nicely.
Baratheon looks towards his corner to check for any instructions. The corner give him nothing to work with, so he cracks Jenson with a short hammerfist. I guess that's as good as any advice he could get in this position.
Baratheon slips a nice elbow through Jenson's hands, connecting with Jenson's forehead.
Baratheon winds up and cracks Jenson with a swinging punch to the side of the head.
Jenson makes his way to full guard. A much better position for Jenson.
Baratheon throws a big elbow that misses.
Jenson has a closed guard, preventing anything of note from happening. Perhaps he's looking to stall.
Baratheon wants to control from the top but Jenson keeps moving.
That's four minutes gone in the round.
A big thud reverberates around the arena there as Baratheon accidentally thumps the mat. Hopefully he's not broken his hand.
Jenson is trying to control the position but Baratheon postures up.
Baratheon throwing strikes but missing.
Baratheon throws a big elbow that misses.
Jenson utilising some decent striking defenses from the guard, preventing the ground and pound.
Baratheon throwing strikes from guard but Jenson blocks nicely.
This has been an exciting period of action!
Baratheon prevents Jenson from getting back to his feet.
As the round comes to an end the crowd are showing their appreciation for a great round of action.
Jenson looking to sweep here. No luck so far.
Jenson avoiding any damage from the ground and pound.
And thats the end of the round the fighters go back to their corners.
Arry Baratheon dominated that round.
OK. That's time! The bell goes and we're back to the action.
Baratheon fails with a takedown attempt.
Jenson closes the distance and gets a trip takedown into side control. Baratheon quickly recovers to half guard.
Baratheon tries to kick Jenson off but Jenson keeps his base steady and stays in half guard.
Jenson trying to control from half guard but Baratheon is working away.
Baratheon moves into full guard.
Baratheon will need to keep those long limbs tucked in whilst he's on the ground, to prevent any submissions.
Baratheon working a defensive guard here.
That's one minute gone in the round.
Baratheon is really struggling to control Jenson but he's trying to hold on to the position.
Arry Baratheon overall seems to be getting the better of the ground position in the fight so far.
Jenson stopping the sweep attempt from Baratheon.
Jenson with a couple of shots to the head there. Not particularly brutal.
Baratheon wants to stand and escape but Jenson is having none of it.
The referee looks like he's ready to step in and stand the fighters back up.
Baratheon keeping moving, preventing Jenson from controlling successfully.
Baratheon keeping full guard, as Jenson tries to pass.
Baratheon manages to land a sweep and now he's in mount on top!
That's two minutes gone in the round.
Jenson is desperately trying to improve his position but Baratheon has a good base and remains in mount.
Jenson is trying to stand.
Baratheon scores with a couple of good head shots there.
BOOM! Baratheon connects with a massive shot to the dome!
This is a great period of action - very entertaining stuff!
Jenson wants to control but Baratheon is having none of it.
Baratheon lands an elbow that was bordering on illegal but the referee lets it go with a warning.
Baratheon scores with a couple of good head shots there.
Baratheon working away from the top, dropping strikes.
Baratheon breaks from Jenson's wrist control and lands an elbow.
That's three minutes gone in the round.
Baratheon lands a heavy elbow.
Baratheon with some aggressive grappling here. He's looking for submissions here, rather than waiting for the opportunity to counter.
Jenson is working to get back to half guard.
Baratheon throws some wild stikes that Jenson manages to avoid easily.
Jenson tries to hold on but Baratheon postures up.
You get the feeling that Jenson really doesn't like being in this position too much.
Jenson reaches up and holds on to Baratheon to control the position.
Baratheon raining down hammerfists from mount.
That's four minutes gone in the round.
Baratheon looking to ground and pound his opponent to a finish here.
Baratheon is in the full mount, landing strikes.
This is a great period of action - very entertaining stuff!
Baratheon throws some wild stikes that Jenson manages to avoid easily.
Jenson is desperately trying to improve his position but Baratheon has a good base and remains in mount.
The referee warns Jenson that he has to improve his position here as he takes two more clean shots to the head.

Jenson is rocked!
Jenson is bucking up trying to escape but Baratheon cracks him with another couple of good strikes.
Jenson is still in real trouble! Can Baratheon finish him?
Baratheon drops a big elbow. That's hurt Jenson! More shots from Baratheon and the ref steps in! The fight is over!
Ladies and gentlemen, after 4:51 of round 2, we have a winner by way of TKO (Strikes). Arry Baratheon!
Our winner, Arry Baratheon, made sure he spent some time buttering up the crowd during his post fight interview, which will no doubt bring him a few more fans.
|
|
|
|
|
|
|
|
|
|
|
|
|
|
|
|
|
|
|
|
|
|
|
| S |
C
A |
G |
S |
C
B |
G |
|
S |
C |
G |
|
energy
A | B |
|
hype
A | B |
|
pop
A | B |
|
mgr
A | B |
|
FIGHT
RATING
38% |
|
|
|
|
|
|
|
Co-main event
|
Coming up we have a middleweight MMA rules bout between Romeo Bellanca (ranked 0 p4p, 0 weight class) and Manuel Diablos (ranked 0 p4p, 0 weight class). Bellanca kept the crowd waiting but all that was forgotten when his ring entrance music started. The incomparable musical genius that is Nightmare - Avenged Sevenfold. Romeo Bellanca could well score a knockout today. He has the power to get to Manuel Diablos's chin.
 |
|
 |
| 180 cm
20
195 lbs
2 - 1 - 0 |
|
225 cm
23
194 lbs
3 - 2 - 0 |
BJJ Blue Belt
Counter striker
Intelligent |
|
BJJ Blue Belt
Good kicks
Knockout power |
|
| |
|
Ladies and gentlemen. This fight is 3 rounds, in the middleweight division.
Introducing the fighter to my left, fighting out of the red corner.
With a record of
2 - 1 - 0, fighting out of New York, Romeo Bellanca!
And introducing the fighter to my right, fighting out of the blue corner.
With a record of
3 - 2 - 0, fighting out of Sydney, Manuel Diablos!
The judges for this bout are John Kavanagh, Eddie Farnsworth and Anthony Taglia.
The bell rings for round one and we are underway!
Diablos wants to clinch

and Bellanca counters with a series of strikes that sends Diablos to the canvas! Bellanca follows down into guard, looking to finish the fight!
Diablos is rocked!
Diablos is a painfully thin specimen of a man. You do wonder whether a good body kick would snap him clean in two.
This has been an exciting period of action!
Bellanca stops Diablos from standing up.
Diablos is still in real trouble! Can Bellanca finish him?
Bellanca showing good wrestling skills to control the position.
Bellanca is trying to work a guillotine from the top, or something like that? Don't know how he thinks he's going to get a finish from there.
Diablos seems to have recovered his senses.
Bellanca stops Diablos from standing up.
Bellanca forces his way into half guard.
Still in half guard, Bellanca seems content to control.
That's one minute gone in the round.
Bellanca seems to have a rather negative gameplan on the ground. He seems keen to just score the takedown and hold down Diablos for as long as he can get away with.
Diablos really doesn't want to stay on the ground with Bellanca. If he can't get it back to his feet, it's only a matter of time before he'll be tapping out.

Romeo Bellanca has forced the referee to step in and bring the fight back to the feet.
Bellanca chopped to the floor by a nice leg kick but he springs right back up before Diablos can pounce on him.
Diablos tries to grapple but his opponent circles
and Bellanca counters with a takedown into side control.
That's two minutes gone in the round.
The crowd are loving this. Great action here.
Bellanca in side control, trying to ground and pound but not landing this time.
Bellanca is putting a hurting on Diablos here, landing some big shots from side control.
Bellanca controls the position.
Bellanca wants to control but Diablos is keeping him busy.
Bellanca is staying tight to Diablos's torso, preventing him from escaping.
That's three minutes gone in the round.
Diablos takes a nasty elbow to the side of the head.
Diablos is trying to stand back up. He's worked his way up against the cage but Bellanca has just dragged him back down to the mat.
Bellanca moving around in side mount but really he's just happy to control for now.
Diablos is looking to reverse the position.
Bellanca lands a knee to the body and a forearm to the face.
Bellanca working the ground and pound but he's contacting the mat, not the fighter.
Bellanca taking a breather here.
That's four minutes gone in the round.
The fighters are starting to perspire pretty heavily.
Bellanca moves into full mount!
Bellanca content just to control the position here.
Bellanca lands with some vicious ground and pound - can Diablos hang on?
The crowd are going absolutely nuts as the round comes to an end - what a fantastic round of action!
Bellanca punishing his opponent with strikes.
We've seen a great period of action over the last minute or so - credit to both fighters for going all out!
Bellanca controlling the position easily from mount.
And thats the end of the round the fighters go back to their corners.
Romeo Bellanca dominated that round.
The referee calls time. The cornermen exit stage left and we're back to business.
Bellanca misses with a wild body shot.
Diablos scores with a nice looking left hook and follows it up with an uppercut!
Diablos closes the distance looking to clinch
and Bellanca counters with a straight right hand.
Diablos tries to clinch up against the cage, rushing in the close the distance. Bellanca manages to break the clinch and circles back to the middle of the mat.
Diablos throws a head kick that misses.
Bellanca drives through with a really nice takedown into side control.
We've seen a great period of action over the last minute or so - credit to both fighters for going all out!
Bellanca tries to cartwheel into mount but he doesn't manage it.
That's one minute gone in the round.
Diablos dodges the ground and pound from Bellanca.
Bellanca taking a breather here.
An elbow from Bellanca crashes against the mat.
Diablos trying to remain calm as Bellanca controls from the top position.
Bellanca passes to full mount! That's big trouble for Diablos!
The fighters are pressed up against the cage, both looking to find a bit of space to work.
That's two minutes gone in the round.
Diablos wants to hold on but Bellanca pushes him away.
Bellanca scoring with strikes but Diablos is staying in there.
A nice elbow there by Bellanca.
Bellanca looking to control and managing it successfully.
Bellanca lands a big shot there that rocks Diablos but he's holding on and managing to survive for now.
Diablos is wriggling around trying to escape.
The fans in attendance giving it up for the two fighters, who have really let it all hang out in the last minute or so!
Bellanca has control of Diablos's right arm, working for a kimura. It's a bit of a token attempt though and Diablos regains control of the situation pretty easily.
Bellanca has been looking to land a fair amount of strikes on the ground. He might be looking to soften his opponent up in order to work for a submission.
Diablos sneaks a leg back under and regains half guard and is working straight away to try and get back to guard. He hasn't managed just yet though.
Diablos is breathing heavily.
That's three minutes gone in the round.
Bellanca content to control rather than advance.
Diablos is in trouble now - Bellanca has advanced to mount!
Bellanca controlling his opponent.
Bellanca is landing with some decent strikes but Diablos is trying to advance his position so the referee is letting the fight continue.
That's four minutes gone in the round.
Diablos tries to reverse the position but Bellanca maintains control.
Bellanca with a couple of short strikes.
Diablos tries to hold on but Bellanca pushes him away.
Bellanca controlling the pace for now.
As the round comes to an end the crowd are showing their appreciation for a great round of action.
And thats the end of the round the fighters go back to their corners.
Romeo Bellanca dominated that second round.
That's time! Back to the action! The crowd applaud as we get ready to start the final round!

Bellanca moves into the clinch.
Diablos working hard to break the clinch.
Diablos is trying to maintain a safe position but Bellanca gets an underhook and turns Diablos into the cage.
An uppercut on the inside fails to land for Diablos.
Bellanca is really dominating this fight. Is there anything that Diablos can do to turn this around?
Diablos goes for a takedown attempt but Bellanca pushes him away and we're back to fighting at a distance.
Diablos pulls out of a head kick attempt.
Bellanca fakes a strike and closes the distance, dragging Diablos to the ground. Bellanca is now in Diablos's guard.
Bellanca might be looking to lock onto one of his opponent's long limbs for a submission, whilst we're on the ground.
Bellanca sitting in guard here, content to control.
Diablos takes a big intake of breath there - he's definitely tired.
Bellanca keeps in close for a moment and lands a decent shot to the side of Diablos's head.
That's one minute gone in the round.
Diablos has momentary wrist control but Bellanca slips an elbow through the middle.
The ref warns both fighters not to hold the cage as they work up against the meshing.
Diablos being controlled here, momentarily.
Diablos preventing the ground and pound from doing any damage.
That's two minutes gone in the round.
Bellanca is pushing down on Diablos's leg trying to pass to half guard. Diablos is fighting to maintain full guard but Bellanca has managed to sneak the leg through.
Bellanca not doing much here.
Bellanca wants to free his trapped foot but Diablos is holding on for dear life with his legs.
Bellanca performing his best blanket impression for a moment.
That's three minutes gone in the round.
Bellanca landing with strikes to the body and head, softening up his opponent.
Bellanca landing with strikes to the body and head, softening up his opponent.
Bellanca thows a wild elbow that connects with the canvas.
Bellanca scoring with strikes to the body and head.
Diablos trying to keep hold of his opponent's head but Bellanca manages to pass to mount!
Bellanca is landing with some decent strikes but Diablos is trying to advance his position so the referee is letting the fight continue.
Bellanca with good strikes from the mount here!
Bellanca looking to finish here with some ground and pound. He lands one big shot that has Diablos covering up... and two more big strikes land, forcing the referee to step in and put and end to proceedings! This fight is all over!
Ladies and gentlemen, after 4:59 of round 3, we have a winner by way of TKO (Strikes). Romeo Bellanca!
A victorious Romeo Bellanca thanked his army of followers in his post fight interview, telling people to make sure they follow him on Twitter.
|
|
|
|
|
|
|
|
|
|
|
|
|
|
|
|
|
|
|
|
|
|
|
| S |
C
A |
G |
S |
C
B |
G |
|
S |
C |
G |
|
energy
A | B |
|
hype
A | B |
|
pop
A | B |
|
mgr
A | B |
|
FIGHT
RATING
59% |
|
|
|
|
|
|
|
Main event
|
Coming up we have a middleweight MMA rules bout between Maligni Tudor (ranked 0 p4p, 0 weight class) and Chris Remnant (ranked 0 p4p, 0 weight class). Tudor's ring entrance music is that housewives' favourite, KRANKSVESTER - Rakija. These two fighters really are very evenly matched on the feet - it will be fascinating to see who can assert themselves in that aspect of the fight.
 |
|
 |
| 189 cm
26
194 lbs
3 - 0 - 0 |
|
181 cm
20
188 lbs
2 - 2 - 0 |
Good takedowns
Counter striker
Good chin |
|
Dangerous GnP
Brawler
Powerful |
|
| |
|
Ladies and gentlemen. This fight is 3 rounds, in the middleweight division.
Introducing the fighter to my left, fighting out of the red corner.
With a record of
3 - 0 - 0, fighting out of New York, Maligni Tudor!
And introducing the fighter to my right, fighting out of the blue corner.
With a record of
2 - 2 - 0, fighting out of New York, Chris Remnant!
The judges for this bout are Eddie Farnsworth, Chad Campbell and Dean Styles.
The bell rings for round one and we are underway!
Remnant looks for a takedown. He's got it. We're now in half guard.
Remnant stops Tudor from getting back to his feet.
Remnant seems to be taking a bit of a break to think of his next move. He lands a short punch in the meantime.
Tudor looking for submissions off his back.
Remnant looks to score some points with some ground and pound.
Tudor has hold of Remnant's hands but Remnant slips his arm to the side and lands an elbow.
Tudor wants to improve his position but Remnant is controlling well.
Remnant thows a wild elbow that connects with the canvas.
Remnant trying to control the action but Tudor is working from the bottom.
Tudor is trying to stand up here but Remnant is controlling him well.
Tudor wants to improve his position but Remnant is controlling well.
The fighters are pressed up against the cage, both looking to find a bit of space to work.
We've seen a great period of action over the last minute or so - credit to both fighters for going all out!
Tudor looking to work for a kimura from the bottom.
Remnant prevents Tudor from standing back up.
That's one minute gone in the round.
Remnant slows the pace down in half guard.

Tudor kicks off Remnant and gets to his feet.
Tudor scores a takedown into full mount!
Tudor looking to ground and pound his opponent to a finish here.
Tudor prevents Remnant from getting the reversal.
Tudor goes for an armbar but he's fallen flat on his backside there and now Remnant is on top in guard.
Remnant stands up over Tudor, holding his feet. He dives back in and lands a decent shot to the head.
The fans in attendance giving it up for the two fighters, who have really let it all hang out in the last minute or so!
Tudor uses the cage to get back to his feet.
That's two minutes gone in the round.
Tudor drives through with a really nice takedown into side control.
Both fighters really going for it on the ground here!
Remnant regains half guard.
Tudor sitting and controlling from the half guard.
Remnant trying to control here.
Remnant slips a foot under and gets full guard. Nice work.
Tudor slows down the pace of the fight for a moment. He'll need to remain active if he doesn't want to see the fight stood back up.
That's three minutes gone in the round.
Remnant keeping moving, preventing Tudor from controlling successfully.
The ref stands the fighters back up. Maligni Tudor wasn't doing enough on the ground.
Tudor moves into range and connects with a jab.
Tudor closes the distance, clinches up and gets a nice trip takedown into side control. Very smooth.
Tudor avoids the strikes from the bottom by Remnant.
Tudor is looking to take a break and control but Remnant is keeping him honest, looking to work from the bottom.
Remnant wants to control but Tudor postures up.
That's four minutes gone in the round.
Remnant misses with an elbow from the bottom.
The ref warns both fighters not to hold the cage as they work up against the meshing.
Tudor is trying to get an arm triangle but Remnant is defending well.
Tudor wants to lay and pray for a moment but Remnant keeps working.
Tudor tries to advance to mount but can't.
The crowd cheering loudly, showing their appreciation for the quality fight we're seeing here.
The crowd are going absolutely nuts as the round comes to an end - what a fantastic round of action!
Remnant is looking for a sweep.
And thats the end of the round the fighters go back to their corners.
Maligni Tudor dominated that round.
Well, the break between rounds is over. Let's get back to the scrappin!
Remnant throws out a leg kick but Tudor moves out of range and Remnant only half commits.
Tudor stuffs a takedown. It's all about dictating where the fight takes place and Tudor wants it to stay on the feet.
Tudor slaps away a takedown attempt from Remnant, before circling back to the center of the mat.
Tudor fakes with an overhand right and moves in to clinch with Remnant, pushing him back against the cage.
Remnant fails to land with a short punch on the inside.
Tudor has hold of one of Remnant's legs. Remnant is fighting the takedown attempt but Tudor gets the trip and lands the takedown into guard.
Remnant not looking particularly offensive just at the moment.
Remnant keeping moving, preventing Tudor from controlling successfully.
Remnant throws some sloppy strikes off his back.
Tudor advances to half guard.
That's one minute gone in the round.
Tudor is pressing down on Remnant's thigh, looking to free his foot. Remnant is holding on for now.
Remnant wants to control but Tudor is keeping busy and won't allow it.
Tudor not throwing his punches with enough precision this time.
Remnant is looking to control Tudor's leg but it's slowly edging free. Can Remnant avoid being mounted?
Tudor is stalling here. Remnant is in no mood to hang around though. He's locked up a kimura from the bottom! Tudor seems to be keeping calm but he's forced to roll out of the hold and Remnant has ended up in side control on the top. Nice work.
Remnant tries to advance to mount but Tudor denies him.
Tudor wants to control but Remnant postures up.
Tudor is looking to regain half guard here but Remnant keeps moving and retains side control.
Remnant in side control lands a decent elbow.
That's two minutes gone in the round.
Tudor sneaks out the side door and pushes Remnant away - he's back to his feet. The crowd show their appreciation for the escape.
Tudor gets to the clinch - let's see what his plan is here.
Remnant fails to pull the fight into his guard.
Maligni Tudor has stuffed three takedown attempts in the round now. That's going to take a lot out of Chris Remnant.
Tudor turns his hips and lands a very nice judo throw into side control!
The crowd are loving this. Great action here.
Remnant tries to improve position but can't.
Tudor misses with the ground and pound.
Tudor throws an elbow but Remnant slips to the side and avoids it well.
Tudor throws an elbow but Remnant slips to the side and avoids it well.
You can see the frustration on Remnant's face, being in this tough position on the bottom.
That's three minutes gone in the round.
Tudor is looking to take a break and control but Remnant is keeping him honest, looking to work from the bottom.
Remnant is trying to control Tudor's posture but Tudor avoids it.
Tudor trying to control the action but Remnant is working from the bottom.
Tudor cracks Remnant with a big elbow.
Tudor misses with the ground and pound.
Remnant regains half guard.
Remnant trying to control here.
That's four minutes gone in the round.
Tudor not throwing his punches with enough precision this time.
Remnant tries to roll over but Tudor keeps him under control.
Tudor missing with the ground and pound from half guard.
Remnant trying to control from the bottom.
Tudor wants to control but Remnant is keeping him busy.
As the round comes to an end the crowd are showing their appreciation for a great round of action.
Tudor missing with some ground and pound from the half guard.
Tudor throwing punches and elbows but they're not doing any damage.
Tudor seems very keen to just sit and control from half guard but Remnant does not like that idea so much and is remaining active off his back.
And thats the end of the round the fighters go back to their corners.
Maligni Tudor dominated that second round.
Well, the break between rounds is over. Let's get back to the scrappin! Let's get this one finished - here comes the final round!
Tudor avoids a kick to the body.
Remnant tries to clinch
so Tudor counters with a double leg into guard. Good agility.
Remnant keeping moving, preventing Tudor from controlling successfully.
Tudor postures up as if he's going to throw some strikes but drops back for an ankle! Remnant is in big trouble! He looks ready to tap! But no, he's escaped and dives on top of Tudor, into his guard.
Remnant postures up to throw the ground and pound strikes but they don't connect.
Remnant trying to control the position from guard on top but Tudor is wriggling around, looking for whatever he can.
Tudor has a loose triangle. He'll be looking to tighten that up but Remnant can see exactly what he's planning and manages to posture up and free himself.
That's one minute gone in the round.
Remnant trying to control but Tudor is working from the bottom.
Remnant throws a big elbow that misses.
Tudor is working from a closed guard but he's struggling to control his opponent.
Tudor keeping moving, preventing Remnant from controlling successfully.
Tudor had isolated an arm as going for a kimura. Remnant defends it easily.
Remnant cracks Tudor with a solid left hand.
Remnant trying to control but Tudor is working from the bottom.
Remnant works over Tudor with some ground and pound from guard.
Chris Remnant has stepped it up - he knows he needs a finish here!
That's two minutes gone in the round.
Tudor uses the cage to get back to his feet.
A momentary lapse in concentration from Remnant enables Tudor to shoot in and score with a neat double leg. Remnant manages to secure a closed guard as the fighters hit the mat.
Remnant trying to control the position.
The fans in attendance giving it up for the two fighters, who have really let it all hang out in the last minute or so!
Remnant tries to land a sweep but no joy.
Tudor being controlled here momentarily.
Remnant keeping full guard, as Tudor tries to pass.
Remnant is working from a closed guard but he's struggling to control his opponent.
That's three minutes gone in the round.
It looks like the ref is thinking about a standup.
Tudor stands up and looks to throw the legs aside to pass to side control. Remnant swivels though and keeps the full guard.
Tudor wants to control from the top but Remnant keeps moving.

Well, the referee has seen enough. Neither fighter is active enough on the ground so he's stood them back up.
Remnant looks for a takedown but Tudor sprawls well.
Remnant changes levels and looks for a double leg takedown. Tudor tries to avoid it but Remnant manages to keep hold of a leg and drag Tudor to the ground. Tudor escapes though and pops straight back up to his feet.
Remnant tries to close the distance and clinch up but Tudor swats him away and circles back towards the center.
Remnant shoots in for a takedown. "I don't think so" says Tudor as he avoids it easily.
Maligni Tudor has stuffed three takedown attempts in the round now. That's going to take a lot out of Chris Remnant.
Remnant takes a big intake of breath there - he's definitely tired.
Remnant shoots and misses
enabling Tudor to counter with a crisp jab.
Tudor scores with a body shot.
That's four minutes gone in the round.
Tudor drops down and drives through with a powerful takedown into guard.
Tudor seems content to control from guard here. He's going to have to remain active though if he doesn't want to get stood back up.
This is a great period of action - very entertaining stuff!
Remnant keeping moving, preventing Tudor from controlling successfully.
Maligni Tudor is fighting for a decision here - he's started to take the cautious approach.
The referee must be thinking about standing these guys back up.
Tudor stands up and looks to throw the legs aside to pass to side control. Remnant swivels though and keeps the full guard.
As the round comes to an end the crowd are showing their appreciation for a great round of action.
Tudor content to stall in guard here.
And that's the end of the fight!
Maligni Tudor showed his dominance in that final round.
Well Tudor has outscored his opponent in every aspect of the fight today. Only a scarily incompetent judge or two will keep him from a well deserved win... Over to the ring announcer for the scorecards.
Ladies and gentlemen, after 3 rounds of action, we go to the scorecards for a decision.
Judge Eddie Farnsworth scores the fight 30:27
Judge Chad Campbell scores the fight 30:27
Judge Dean Styles scores the fight 30:27
In favor of your winner, by unanimous decision... Maligni Tudor!
Maligni Tudor was full of energy after the big win and talked about how he thinks he can do big things in this sport. The crowd were appreciative of his determination to succeed.
|
|
|
|
|
|
|
|
|
|
|
|
|
|
|
|
|
|
|
|
|
|
|
| S |
C
A |
G |
S |
C
B |
G |
|
S |
C |
G |
|
energy
A | B |
|
hype
A | B |
|
pop
A | B |
|
mgr
A | B |
|
FIGHT
RATING
69% |
|
|
|
|
|
|
|
|
|
|
