 |
EFFA 3 - Thunderstruck PBP Commentary |
Undercard bout
|
|
|
|
Undercard bout
|
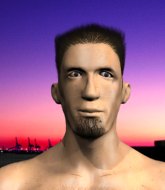
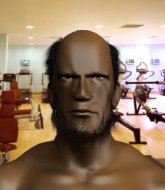
Coming up we have a light heavyweight kickboxing rules bout between Hranghleia Animai (ranked 0 p4p, 0 weight class) and Clay Diggs (ranked 0 p4p, 0 weight class). Hranghleia Animai has the better chin. Will he look to stand and bang today?
 |
|
 |
| 190 cm
25
215 lbs
1 - 3 - 0 |
|
197 cm
26
220 lbs
0 - 1 - 0 |
Great elbows
Good chin
|
|
Decent boxing
Determined
|
|
| |
|
Ladies and gentlemen. This fight is 3 rounds, in the light heavyweight division.
Introducing the fighter to my left, fighting out of the red corner.
With a record of
1 - 3 - 0, fighting out of St Petersburg, Hranghleia Animai!
And introducing the fighter to my right, fighting out of the blue corner.
With a record of
0 - 1 - 0, fighting out of St Petersburg, Clay Diggs!
The judges for this bout are Nard Betker, Paulsen Ambrosius and Saam Ante.

The bell rings for round one and we are underway!
Animai tries to clinch but Diggs moves away
and Diggs counters with a good right hand that lands right on the jaw.

Animai rushes Diggs and presses him up against the ropes.
Animai throws a vicious knee straight up the middle but Diggs blocks it with crossed arms.
Diggs tries to break free but Animai pushes him back against the ropes.
Diggs looking to stall.
Diggs gets through Animai's defenses to land a nice punch to the side of the head.
Animai lands a nice knee to the body.
Animai landing some nice looking knees to the body.
This has been an exciting period of action!
Diggs has had enough of the clinch but Animai keeps him there for the moment.
Animai tries to land knees in the clinch but Diggs avoids the damage to the body.
Animai utilising his Muay Thai to score with a knee to the body.
Diggs looks winded!
Animai landing knees to the head.

It looks like Clay Diggs has been cut.
Animai lands a good knee to the midsection. Diggs won't want to take too many of those.
Animai scores a nice knee to the body.
Animai lands a nice knee to the body.
Animai with a knee to the head.
Knees to the body from Animai.

That's one minute gone in the round.
Diggs takes a knee right on the jaw!
Animai working Diggs over with knees to the body.
Knees to the body from Animai.
Animai scores a nice knee to the body.
Animai tries a knee to the head but he's missed.
Animai lands an elbow inside that Diggs shrugs off.
An uppercut on the inside fails to land for Diggs.
Diggs takes a knee to the side of the body.
Knees in the clinch landing for Animai.
The fans in attendance giving it up for the two fighters, who have really let it all hang out in the last minute or so!
Animai with the Thai clinch, lands a knee to the head.
Animai using the Thai plumb to throw knees but Diggs has his back arched nicely, preventing the strike.
Diggs takes a knee to the side of the body.
Animai lands an elbow just above Diggs 's eye.
Animai lands a nice elbow.
Animai lands a knee to the head.

That's two minutes gone in the round.
Diggs wants to push off and get back to the center of the mat but Animai has him pressed against the ropes.
Animai lands a damaging elbow.
Animai with the Thai clinch, lands a knee to the head.
Diggs working hard to break the clinch.
Animai lands a knee to the body.
Animai lands an elbow inside.
Animai throws a vicious knee straight up the middle but Diggs blocks it with crossed arms.
Animai looking to throw knees to the head but Diggs is blocking nicely.
Diggs avoids a wild elbow strike from Animai.
Animai is looking to score with knees to the body. Maybe he'll change it up and go body then head. Diggs is defending well for now.
Both fighters working to control the clinch.
Diggs wants to break free. God knows he wants to breaaaak freeee.
Diggs manages to get underhooks and slows down the pace for a moment.
Animai with a knee to the head.

That's three minutes gone in the round.
The fighters are pressed against the ropes, as the pace of the fight slows.
Diggs can't break the clinch.
Diggs working hard to break the clinch.
Diggs avoiding damage as Animai throws knees to the body.
Animai looking to throw knees to the head but Diggs is blocking nicely.
Diggs is trying to break free.
Diggs tries to stall but Animai uses the opportunity to gain a better position.
A nice glancing elbow lands by Animai.
Animai is looking to score with knees to the body. Maybe he'll change it up and go body then head. Diggs is defending well for now.
Animai prevents Diggs from breaking the clinch.
Animai tries to land knees in the clinch but Diggs avoids the damage to the body.
Diggs swings wildly with an uppercut but Animai uses good head movement to avoid it.

That's four minutes gone in the round.

Diggs breaks the clinch and we're back to striking at distance.
Diggs lands a straight punch to the body, keeping Animai at a distance.
Diggs fakes high and swings low for a body shot but Animai manages to avoid it.
Animai tries to grapple but his opponent circles
and Diggs counters with a three punch combination, finished off with a leg kick. Nice work.
Animai tries to clinch up
and Diggs makes him pay by landing a nice hook to the body before moving out of range.
Animai doesn't manage to clinch there - Diggs circles away.
The crowd are going absolutely nuts as the round comes to an end - what a fantastic round of action!
Animai is looking to clinch but Diggs is avoiding it.
Hranghleia Animai is looking to keep the fight on the feet at all costs.
Animai tries to clinch up against the ropes, rushing in the close the distance. Diggs manages to break the clinch and circles back to the middle of the mat.
Animai tries to clinch up but Diggs circles away and keeps his distance.
Animai moves out of range as Diggs throws a body kick.
And thats the end of the round the fighters go back to their corners.
Hranghleia Animai dominated that round.
The cut man is working on Clay Diggs's cut.
That's the end of the interval. I'm sure that seemed a lot quicker than a minute for our two fighters! Back to the action.


Diggs has closed the distance and engaged Animai in a clinch.
Come on Diggs - let's have some action - none of this stalling nonsense.
Animai blocks a body shot from Diggs.
Animai with the Thai clinch, lands a knee to the head.
Animai gets an overhook and lands an elbow to the side of the head.
Knees to the body from Animai.
Animai is trying to wear down his opponent with knees to the body.
Animai lands a damaging elbow.
That has opened up Clay Diggs's cut even more.
Wooooo! Give it up for these two warriors! They are putting on a show!
Nice elbow from Animai.
Animai lands a damaging elbow.
Animai connects with a nasty looking knee right to Diggs's face.

Diggs is rocked!
The cut above Clay Diggs's eye is starting to cause him problems now.
Animai scores a nice knee to the body.
Animai lands a glancing elbow in the clinch.
Animai lands a good knee to the midsection. Diggs won't want to take too many of those.
Knees in the clinch landing for Animai.
Both fighters are absolutely exhausted here.
That's one minute gone in the round.
Animai lands a nice elbow.
Animai lands an elbow inside.
Animai scores a nice knee to the body.
Animai lands a good knee to the midsection. Diggs won't want to take too many of those.
Kneeeeees! The crowd are calling for knees to the body. Animai obliges.
Animai lands a good knee to the midsection. Diggs won't want to take too many of those.
Animai using the Thai clinch to land knees to the body.
Animai lands an elbow inside that Diggs shrugs off.
Animai landing some nice looking knees to the body.
Fantastic stuff here - a very entertaining period of action, which has drawn cheers from the crowd.
Animai unloads a knee to the mid-section.
Diggs takes a knee to the side of the body.
Diggs takes an elbow to the forehead.
Diggs is trying to stall.
Animai comes over the top with an elbow. That landed flush.
That's two minutes gone in the round.
Kneeeeees! The crowd are calling for knees to the body. Animai obliges.
A knee to the head by Animai.
Diggs pushes off and circles away, back to the middle of the mat.
Animai tries to clinch but is not successful on this occasion.
Animai tries to close the distance and clinch up but Diggs swats him away and circles back towards the center.
Diggs darts in and clinches Animai up against the ropes.
Diggs working hard to break the clinch.
Animai utilising his Muay Thai to score with a knee to the body.
Animai lands a nice elbow.
Animai is looking to score with knees to the body. Maybe he'll change it up and go body then head. Diggs is defending well for now.
Diggs misses with a shot to the kidneys.
Diggs working hard to break the clinch.
Animai landing knees to the head.
Diggs wants to break free. God knows he wants to breaaaak freeee.
That's three minutes gone in the round.
Diggs wants to push off and get back to the center of the mat but Animai has him pressed against the ropes.
Hranghleia Animai has scored more points in the clinch so far.
Diggs tries to land knees in the clinch but Animai avoids the damage to the body.
Diggs tries to circle away but Animai has him pinned against the ropes.
Animai lands an elbow that stopped Diggs in his tracks for a moment.
Animai tries to land knees in the clinch but Diggs avoids the damage to the body.
Animai avoids a wild elbow strike from Diggs.
Animai tries to land knees in the clinch but Diggs avoids the damage to the body.
Diggs throws a vicious knee straight up the middle but Animai blocks it with crossed arms.
Animai lands a glancing elbow in the clinch.
Diggs looks to throw an elbow but misses.
Animai is really dominating this fight. Is there anything that Diggs can do to turn this around?
Diggs blocks a knee to the body. He'll have a nicely bruised forearm in the morning.
Diggs with the Thai clinch. He's looking to land a big knee but he's not managed it this time.
Diggs is trying to break the clinch but Animai is controlling him.
A nice glancing elbow lands by Animai.
That's four minutes gone in the round.
Diggs wants to break free. God knows he wants to breaaaak freeee.
Animai missing with knees to the body.
Diggs is trying to force a seperation but Animai has the dominant position.
Diggs takes an elbow to the forehead.
Animai lands a glancing elbow in the clinch.
Animai lands an elbow inside.
Animai pushes off an throws an elbow but Diggs leans to the side and avoids it. We're back to clinching against the ropes.
Diggs is trying to slow down the pace in the clinch, to catch his breath.
Animai missing with knees to the body.
Animai misses with a knee to the head.
The crowd are going absolutely nuts as the round comes to an end - what a fantastic round of action!
Diggs avoiding damage as Animai throws knees to the body.
Diggs on the defensive, avoiding the knees to the body.
A short uppercut from Diggs.
Diggs has had enough of the clinch but Animai keeps him there for the moment.
And thats the end of the round the fighters go back to their corners.
Hranghleia Animai dominated that second round.
The cut man is working on Clay Diggs's cut.
The fighters get back to their feet, the hooter sounds and we're back to the action! So, we enter the final round. Let's see if either fighter can bring us a finish, or whether we're going to the judges scorecards.

Diggs clinches up with Animai and pushes him back against the ropes.
Knees in the clinch landing for Animai.
Animai landing knees to the body.
Animai working Diggs over with knees to the body.
Animai with a knee to the head.
The crowd cheering loudly, showing their appreciation for the quality fight we're seeing here.
Animai lands an elbow just above Diggs 's eye.
Animai comes over the top with an elbow. That landed flush.
Animai lands an elbow just above Diggs 's eye.
Animai unloads a knee to the mid-section.
Diggs is trying to break the clinch but Animai is controlling him.
Diggs is trying to break free.
Knees in the clinch landing for Animai.
Animai scores with a knee to the head.
Clay Diggs's cut is absolute horrible now. This looks like something out of a horror film with blood covering both fighters.
Both fighters are breathing heavily.
Animai with an attempt at a knee that misses.
Animai landing knees to the body. They look like they could hurt.
Diggs managing to block the knees to the body from Animai.
That's one minute gone in the round.
Diggs breaks the clinch.
Diggs misses with a half-hearted attempt at a head kick.
Hranghleia Animai seems to be the more aggressive standup fighter in this bout.
Animai tries to close the distance and clinch up but Diggs swats him away and circles back towards the center.
Animai tries to close the distance and clinch but Diggs swats him to one side with an open hand palm strike and circles away.
Hranghleia Animai is looking to throw some combinations by the looks of things.
Animai tries to clinch up but Diggs circles away and keeps his distance.
Animai tries to clinch but is not successful on this occasion.
Animai closes the distance looking to clinch
and Diggs holds on and brings the fighters into a clinch.
Diggs tries to throw a body punch but Animai avoids it by throwing Diggs back against the ropes.
Animai lands an elbow just above Diggs 's eye.
A frustrated look appears on Diggs's face as he tries to break the clinch.
A real battle for position is taking place between these two warriors.
Animai blocks a knee to the body. He'll have a nicely bruised forearm in the morning.
That's two minutes gone in the round.
Diggs wants to push off and get back to the center of the mat but Animai has him pressed against the ropes.
Diggs breaks the clinch and we return to the middle of the mat.
Diggs misses with a jab, cross combination.
Diggs swats away the attempt to clinch by Animai.
Diggs throws an overhand right that lands on Animai's shoulder, as Animai tries to avoid the shot.
Diggs circles away from the clinch attempt
and Diggs counters with a nice body shot.
Animai is looking to take this fight into the clinch.
Diggs moves into range and clinches up with Animai.
Animai unloads a knee to the mid-section.
Fantastic stuff here - a very entertaining period of action, which has drawn cheers from the crowd.
Animai lands an elbow inside.
The referee calls the doctor in to look at Clay Diggs's cut. Oh no, the doctor has called an end to the bout!
Ladies and gentlemen, after 3:57 of round 3, we have a winner by way of TKO (Cut). Hranghleia Animai!
Hranghleia Animai decided to hype himself up post fight. It was going well but he went on about it a bit too long and the crowd turned on him a little.
|
|
|
|
|
|
|
|
|
|
|
|
|
|
|
|
|
|
|
|
|
|
|
| S |
C
A |
G |
S |
C
B |
G |
|
S |
C |
G |
|
energy
A | B |
|
hype
A | B |
|
pop
A | B |
|
mgr
A | B |
|
FIGHT
RATING
100% |
|
|
|
|
|
|
|
Undercard bout
|
|
|
|
Undercard bout
|
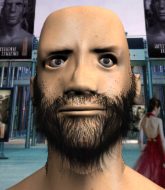
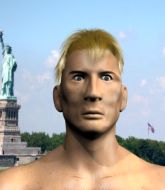
Coming up we have a welterweight kickboxing rules bout between Eddie Santos (ranked 0 p4p, 0 weight class) and Marko Sturridge (ranked 0 p4p, 0 weight class). Both these guys have really solid chins. Will we see a standup war or will they both decide that a knockout is unlikely and try to win the fight elsewhere?
 |
|
 |
| 180 cm
19
176 lbs
0 - 1 - 0 |
|
189 cm
18
179 lbs
0 - 1 - 0 |
Brawler
Good chin
|
|
Brawler
Solid chin
|
|
| |
|
Ladies and gentlemen. This fight is 3 rounds, in the welterweight division.
Introducing the fighter to my left, fighting out of the red corner.
With a record of
0 - 1 - 0, fighting out of Helsinki, Eddie Santos!
And introducing the fighter to my right, fighting out of the blue corner.
With a record of
0 - 1 - 0, fighting out of Amsterdam, Marko Sturridge!
The judges for this bout are Paulsen Ambrosius, Patrick Alders and Nard Betker.
The bell rings for round one and we are underway!
Santos fails to land with the punch combination there - jab, cross, hook, miss, miss, miss.
Left hook, right uppercut from Sturridge.

It looks like Eddie Santos has been cut.
Santos throws a sloppy head kick and Sturridge moves out of range easily.
Sturridge slips a jab and a cross from Santos.
Sturridge tries to bum rush Santos with a series of wild strikes but Santos uses good footwork to avoid the assault.
Santos feints a straight left to the body, then turns around with a flashy move and hits Sturridges jaw with a dramatic spinning back fist!
Nice body kick there by Santos.
Sturridge throws a two punch combo that lands nicely.
Fantastic stuff here - a very entertaining period of action, which has drawn cheers from the crowd.
Sturridge throws a series of punches but Santos avoids them all with ease.
Sturridge misses with a wild combination.
Sturridge swinging wildly here.
Sturridge shuffles to his left behind two crisp jabs. Santos eats them both and turns towards Sturridge to reposition himself and eats a stinging right hand-left hook combo.
No joy there for Santos, who threw a few shots but didn't land.
Santos wants to land a leg kick but Sturridge is out of range.
Sturridge misses with the combination.
Santos throws a right hand that Sturridge ducks under and follows up with a left that Sturridge also avoids with ease.
Sturridge swinging wildly here.
Sturridge looks to land a combination. Santos sees it coming but can only parry a couple of the shots.
Sturridge looks winded!
That's one minute gone in the round.
Santos will need to tighten up his combinations if he doesn't want to gas himself out, swinging at thin air.
Santos fails to land with the punch combination there - jab, cross, hook, miss, miss, miss.
Sturridge throws the kick towards the body but Santos avoids it.
Santos fails to land with a series of punches.
No joy there for Sturridge, who threw a few shots but didn't land.
Eddie Santos is looking to keep the fight on the feet at all costs.
Santos throws a body kick that misses.
Santos scores with a kick to the body.
Sloppy strikes from Santos. Those never looked like landing.
Sturridge throws a series of punches but Santos avoids them all with ease.
A good leg kick by Sturridge.
Sturridge takes one on the chin but seems OK.
Sturridge will need to tighten up his combinations if he doesn't want to gas himself out, swinging at thin air.
Sturridge throws a right hand that Santos ducks under and follows up with a left that Santos also avoids with ease.
Santos scores with a three punch combo!
That's two minutes gone in the round.
The crowd are loving this. Great action here.
Santos dances in quickly and lands a nice inside leg kick on Sturridge. That did some damage!
Santos misses with a two punch combination.
Sturridge falls off balance throwing a combination
and Santos counters with a series of strikes. Sturridge will be more careful next time no doubt.
Santos wings a very wild body shot but it does the job and lands to the midsection.
Santos rushes forward with a series of wild hooks but Sturridge moves out of range and avoids them all easily.
Sturridge misses with a few strikes there.
Sturridge rushes forward with a series of wild hooks but Santos moves out of range and avoids them all easily.
Santos scores with a three punch combo!
Sturridge blocks a head kick by Santos.
A left and a right from Sturridge both land. Nice combination.
Sturridge tries to bum rush Santos with a series of wild strikes but Santos uses good footwork to avoid the assault.
Sturridge misses with a double jab.
Sturridge throws a jab, cross combination which is slipped
and Santos counters with a leg kick.
Sturridge scores to the head and body with a nice combination!
A jab lands there for Santos.
That's three minutes gone in the round.
Santos lands with a kick to the ribs.
Sturridge avoids the head kick by Santos.
Jab, cross, leg kick. Nice combination by Sturridge!
Santos scores with a crisp jab that stopped Sturridge in his tracks.
Some wild striking there from Santos.
Sturridge lands a jab, followed by a cross and another cross, as Santos backs up against the ropes.
Santos scores with a punch to the head.
Santos misses with the combination.
Sturridge lands a jab-cross combination.
Sturridge's corner calls for a 1, 2 combination and Sturridge duly obliges.
Marko Sturridge seems to be the more aggressive standup fighter in this bout.
Santos throws a combination but it was largely blocked by Sturridge.
Santos throws a wild combination but nothing lands.
Sturridge misses with the combination.
No joy there for Santos, who threw a few shots but didn't land.
That's four minutes gone in the round.
Some wild striking there from Santos.
Sturridge misses with a wild combination.
Santos lands a nice looking body kick.
Sturridge scores with a three punch combo!
Santos comes forward and lands a shot to the body, then darts back out of range.
Santos throws a right and a left that Sturridge avoids nicely.
Sturridge misses with a jab and misses with a cross straight after too.
Santos dips to his left and cracks Sturridge with an uppercut!
The fans in attendance giving it up for the two fighters, who have really let it all hang out in the last minute or so!
Sturridge lands with a nice combination. Santos backs away looking to recover.
The crowd are going absolutely nuts as the round comes to an end - what a fantastic round of action!
Santos lands a leg kick and bounces back out of range.
Sturridge will need to tighten up his combinations if he doesn't want to gas himself out, swinging at thin air.
Sturridge fails to land with the punch combination there - jab, cross, hook, miss, miss, miss.
And thats the end of the round the fighters go back to their corners.
That was a close round but I would say that Eddie Santos will probably get the nod.
The cut man is working on Eddie Santos's cut.
The minute break is over - no more time for sponges and pep talks - back to the action!
Santos throws a right hand that Sturridge ducks under and follows up with a left that Sturridge also avoids with ease.
A punch combination from Sturridge misses.
Sturridge walks into a stiff left hand from Santos.
Sturridge goes to the watering hole and comes back with a big thumbs up from the judges as he scores a three punch combo.
Santos dodges the punch combination from Sturridge.
Sturridge blocks a head kick by Santos.
Sturridge scores with a three punch combo!
Sturridge lands with a two punch combination before moving back out of range.
Santos fails to land with a series of punches.
Sturridge is working the combinations to good effect here.
Sturridge works over Santos's head and body with a nice combination.
The fans in attendance giving it up for the two fighters, who have really let it all hang out in the last minute or so!
Sturridge throws a right hand that Santos ducks under and follows up with a left that Santos also avoids with ease.
Santos misses with a two punch combination.
Sturridge misses with a few strikes there.
Santos fakes a jab and scores with a low kick.
Both fighters are absolutely exhausted here.
Sturridge slips a jab and a cross from Santos.
Sturridge throws a combination but it was largely blocked by Santos.
That's one minute gone in the round.
Both fighters circling a little - Santos finishes the exchange with a kick to the body.
Santos throws a right hand that Sturridge ducks under and follows up with a left that Sturridge also avoids with ease.
Sturridge throws a wild combination but nothing lands.
Santos avoids a punch combination nicely.
Santos rushes forward with a series of wild hooks but Sturridge moves out of range and avoids them all easily.
No joy there for Sturridge, who threw a few shots but didn't land.
Santos misses with a few strikes there.
Sturridge will need to tighten up his combinations if he doesn't want to gas himself out, swinging at thin air.
Sturridge misses with a double jab.
Sturridge misses with a series of wild punches.
Santos misses with a head kick.
Sloppy strikes from Sturridge. Those never looked like landing.
A combination from Sturridge does no damage.
That's two minutes gone in the round.
Santos lands a jab followed by a nice looking cross.
Santos throws a hook to the body but it doesn't connect.
Sturridge fails to land with the punch combination there - jab, cross, hook, miss, miss, miss.
Sturridge takes one to the side of the head.
Eddie Santos is winning the standup battle so far.
Santos will need to tighten up his combinations if he doesn't want to gas himself out, swinging at thin air.
Santos takes a punch to the jaw and another one to the bread basket.
Sturridge moves out of range of the body kick.
Santos misses with a jab and misses with a cross straight after too.
Sturridge misses with a jab, cross combination.
Santos throws a nice looking combination but Sturridge bobs and weaves to avoid any damage.
Sturridge looks to land a combination but Santos avoids it well.
Santos feints a jab promting Sturridge to slip. Santos then demonstrates his capabilities by jabbing again. Sturridge slips again and ducks right into an uppercut.
Eddie Santos is looking to throw some combinations by the looks of things.
Santos avoids a punch combination nicely.
Fantastic stuff here - a very entertaining period of action, which has drawn cheers from the crowd.
Sturridge will need to tighten up his combinations if he doesn't want to gas himself out, swinging at thin air.
That's three minutes gone in the round.
Sturridge blocks a head kick by Santos.
Sturridge misses with a jab and misses with a cross straight after too.
Santos fails to land with a series of punches.
Santos throws a head kick but Sturridge moves out of range.
Some wild striking there from Sturridge.
Sturridge lands a leg kick. The shin dug right into the meat of the thigh.
Sturridge throws a right hand that Santos ducks under and follows up with a left that Santos also avoids with ease.
Santos tries to land a front kick but Sturridge steps back. That was a bit too telegraphed.
Sturridge swings away but doesn't land with a series of punches.
Santos throws a right hand that Sturridge ducks under and follows up with a left that Sturridge also avoids with ease.
Santos looks for the body kick but Sturridge saw that one coming.
Sturridge lunges in with swinging rights and lefts but Santos circles away quickly and effectively.
Santos throws a series of punches but Sturridge moves out of range.
That's four minutes gone in the round.
Santos connects with a slap. Keep your fist closed son.
Sturridge misses with the combination.
Santos misses with a two punch combination.
Sturridge showing good head movement there, avoiding the strikes from Santos.
Sturridge throws a right and a left that Santos avoids nicely.
Sturridge looks to score with a combo but nothing lands.
Santos throws a series of punches but Sturridge avoids them all with ease.
Sturridge lands a jab-cross combination.
Santos misses with a jab and misses with a cross straight after too.
No joy there for Sturridge, who threw a few shots but didn't land.
As the round comes to an end the crowd are showing their appreciation for a great round of action.
Sturridge avoids the head kick by Santos.
Sturridge throws a right and a left that both miss.
Santos misses with a jab and misses with a cross straight after too.
Sturridge misses with a two punch combination.
And thats the end of the round the fighters go back to their corners.
A close second round but Marko Sturridge will probably get the nod - 10:9.
The cut man is working on Eddie Santos's cut.
Well, the break between rounds is over. Let's get back to the scrappin! This is the final round!
Sturridge misses with a few strikes there.
Santos fails to land with a series of punches.
Sturridge swings away but doesn't land with a series of punches.
Sturridge swinging wildly here.
Santos misses with a double jab.
A punch combination from Sturridge misses.
Sturridge throws a right and a left that both miss.
Santos lets the fists fly and connects with a left straight followed by a right hook.
Santos throws a series of punches but Sturridge avoids them all with ease.
Sturridge fails to land with the punch combination there - jab, cross, hook, miss, miss, miss.
Sturridge throws a combination but comes up with nothing but fresh air.
Some wild striking there from Santos.
Both fighters are breathing heavily.
Sturridge throws a two punch combo that lands nicely.
Santos looks to land a combination but Sturridge avoids it well.
Sturridge throws a series of punches but Santos moves out of range.
That's one minute gone in the round.
Some wild striking there from Sturridge.
Sturridge dodges the punch combination from Santos.
Sturridge throws a nice looking combination but Santos bobs and weaves to avoid any damage.
No joy there for Sturridge, who threw a few shots but didn't land.
Santos misses with a series of wild punches.
A right-left combo lands from Sturridge.
Santos misses with a head kick.
Sloppy strikes from Sturridge. Those never looked like landing.
Sturridge blocks the body kick.
Santos throws a sloppy head kick and Sturridge moves out of range easily.
Sturridge misses with a jab, cross combination.
Sturridge ducks under a wild hook from Santos.
Santos buckles his opponent's knee momentarily with a nice leg kick.
That's two minutes gone in the round.
Sturridge swings wildly with a couple of big hooks
and Santos counters with a body kick that brings a smile to the face of both fighters.
Sturridge throws a combination but it was largely blocked by Santos.
Sturridge takes a body kick right on the floating rib. Ouchie.
Sturridge misses with a series of wild punches.
Santos misses with a jab, cross combination.
Sturridge misses with the combination.
Sturridge throws a right and a left that both miss.
Sturridge has developed a nice purple lump on his ribcage, as a result of some heavy body kicks from Santos.
Sturridge misses with a jab and misses with a cross straight after too.
Sturridge moves out of range as Santos throws a body kick.
Santos throws a body kick that sends a sickening thudding noise reverberating around the arena.
Santos lands a two punch combo.
Santos fails to land with a series of punches.
Sturridge lands three nice shots there - that looked like it hurt!
That's three minutes gone in the round.
A combination from Sturridge does no damage.
Santos lets loose with a powerful body kick. Sturridge will feel that in the morning.
Sturridge lunges in with swinging rights and lefts but Santos circles away quickly and effectively.
This fight brought to you by 5M nutrition - it's mmmmm tasty. Nice jab by Santos.
Sturridge looks to land a combination but Santos avoids it well.
Santos swings away but doesn't land with a series of punches.
Sloppy strikes from Santos. Those never looked like landing.
Santos misses with a body kick.
Sturridge misses with a jab and misses with a cross straight after too.
Santos swings away but doesn't land with a series of punches.
Sturridge misses with a jab, cross combination.
Sturridge closes the distance and lands a one-two.
Sturridge walks into a left hand.
Sturridge misses with a few strikes there.
Sturridge lands a two punch combo.
Sturridge misses with a two punch combination.
That's four minutes gone in the round.
Santos misses with a wild combination.
Sturridge looks to score with a combo but nothing lands.
Like a baseball bat into the meat of his leg there - nice leg kick by Santos.
Santos throws a wild combination but nothing lands.
Sturridge scores with a one two! Santos had his feet all tangled up there and couldn't avoid the strikes.
Sturridge fails to land with a series of punches.
Santos throws a leg kick which misses Sturridge's front leg but catches the back leg as Sturridge tries to avoid it.
Sturridge throws a wild combination but nothing lands.
Santos showing good head movement there, avoiding the strikes from Sturridge.
Santos misses with a two punch combination.
Fantastic stuff here - a very entertaining period of action, which has drawn cheers from the crowd.
As the round comes to an end the crowd are showing their appreciation for a great round of action.
Santos fails to land with a series of punches.
Danga de danga de dang - Sturridge scores with a four punch combination!
Sturridge pushes forward with a 1-2 combination that forces Santos back to the ropes. Sturridge follows up with a solid lead hook to the liver.
Sturridge closes the distance and lands a one-two.
And that's the end of the fight!
That was a close round. You could make an argument for either fighter but I would give it to Eddie Santos.
Well Santos has outscored his opponent in every aspect of the fight today. Only a scarily incompetent judge or two will keep him from a well deserved win... Over to the ring announcer for the scorecards.
Ladies and gentlemen, after 3 rounds of action, we go to the scorecards for a decision.
Judge Paulsen Ambrosius scores the fight 28:30
Judge Patrick Alders scores the fight 29:28
Judge Nard Betker scores the fight 29:28
In favor of your winner, by split decision... Eddie Santos!
|
|
|
|
|
|
|
|
|
|
|
|
|
|
|
|
|
|
|
|
|
|
|
| S |
C
A |
G |
S |
C
B |
G |
|
S |
C |
G |
|
energy
A | B |
|
hype
A | B |
|
pop
A | B |
|
mgr
A | B |
|
FIGHT
RATING
97% |
|
|
|
|
|
|
|
Undercard bout
|
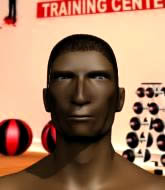
Coming up we have a heavyweight kickboxing rules bout between Dave Edwards (ranked 0 p4p, 0 weight class) and Roman Shebanov (ranked 0 p4p, 0 weight class). Shebanov is bouncing up and down as he enters the arena, backed by Don't worry, be happy. Over to our ring announcer for the fighter introductions!
 |
|
 |
| 209 cm
18
285 lbs
1 - 0 - 0 |
|
186 cm
25
280 lbs
1 - 1 - 0 |
Excellent MT
Prefers standup
|
|
Excellent boxer
Tends to cut
|
|
| |
|
Ladies and gentlemen. This fight is 3 rounds, in the heavyweight division.
Introducing the fighter to my left, fighting out of the red corner.
With a record of
1 - 0 - 0, fighting out of Amsterdam, Dave Edwards!
And introducing the fighter to my right, fighting out of the blue corner.
With a record of
1 - 1 - 0, fighting out of St Petersburg, Roman Shebanov!
The judges for this bout are Daniel Blasius, Aafke Stam and Paulsen Ambrosius.
The bell rings for round one and we are underway!
Edwards ducks under a wild hook from Shebanov.
Edwards throws a body kick but he wasn't in range.
Edwards clinches up against the ropes.
Edwards struggles to land a body shot inside as Shebanov controls his hands.
Shebanov breaks the clinch and we're back to striking at distance.
Shebanov misses with an uppercut.
Shebanov lets the fists fly and connects with a left straight followed by a right hook.
It looks like Dave Edwards has been cut.
The fans in attendance giving it up for the two fighters, who have really let it all hang out in the last minute or so!
Shebanov throws a body punch but Edwards moves out of range.
Edwards takes a swing at Shebanov's ribcage but misses.
Edwards lands a head shot.
Shebanov misses the shot to the body.
Edwards throws a push kick but Shebanov slaps the foot to one side.
Shebanov pushing out the jab but it's not landing.
Shebanov swats away the attempt to clinch by Edwards.
Edwards moves in looking to clinch but Shebanov pushes him off.
Shebanov's hands are dropping dangerously low here and Edwards connects clean with a right hook that sends him down to one knee! Shebanov scrambles back to his feet.
Shebanov throws a right hand that Edwards ducks under and follows up with a left that Edwards also avoids with ease.
That's one minute gone in the round.
Edwards ducks under a wild hook from Shebanov.
A right-left combo lands from Edwards.
Shebanov misses with an uppercut. Edwards saw that one coming.
Edwards throws a body kick but he was well out of range there.
Shebanov scores with a hook to the body. Edwards takes a step back and tries to catch his breath.
Shebanov clobbers Edwards with an overhand right that has the crowd gasping. That made a horrendous noise.
Nice body punch from Shebanov.
Edwards is breathing heavily.
Wooooo! Give it up for these two warriors! They are putting on a show!
A head kick misses from Edwards.
Shebanov avoids the head kick by Edwards.
Edwards fakes high and swings low for a body shot but Shebanov manages to avoid it.
A head kick misses from Edwards.
Edwards avoids a lazy jab quite easily.
Roman Shebanov is looking to keep the fight on the feet at all costs.
Shebanov plants his feet and throws a 3 punch combo. Miss, miss, boom! The third punch, a big right hook, connects right on the temple and drops Edwards to the mat, unconscious! This fight is all over! Edwards just couldn't keep out of the way of the whole flurry of punches!
Ladies and gentlemen, after 1:52 of round 1, we have a winner by way of KO (Punches). Roman Shebanov!
After the big win, Roman Shebanov made sure to do all the important stuff like thanking his sponsors KAISER and telling the interviewer how much he loves him.
|
|
|
|
|
|
|
|
|
|
|
|
|
|
|
|
|
|
|
|
|
|
|
| S |
C
A |
G |
S |
C
B |
G |
|
S |
C |
G |
|
energy
A | B |
|
hype
A | B |
|
pop
A | B |
|
mgr
A | B |
|
FIGHT
RATING
81% |
|
|
|
|
|
|
|
Undercard bout
|
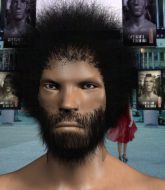
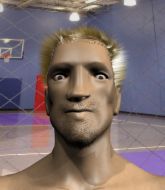
Coming up we have a light heavyweight kickboxing rules bout between Nigel Lembert (ranked 0 p4p, 0 weight class) and Vilkas Johsansonn (ranked 0 p4p, 0 weight class). Johsansonn has chosen Wolf Howl as his entrance music. Vilkas Johsansonn has the better chin. Will he look to stand and bang today?
 |
|
 |
| 205 cm
25
210 lbs
2 - 1 - 0 |
|
200 cm
20
210 lbs
0 - 0 - 0 |
Excellent boxer
Big heart
|
|
Excellent MT
Solid chin
|
|
| |
|
Ladies and gentlemen. This fight is 3 rounds, in the light heavyweight division.
Introducing the fighter to my left, fighting out of the red corner.
With a record of
2 - 1 - 0, fighting out of Amsterdam, Nigel Lembert!
And introducing the fighter to my right, fighting out of the blue corner.
With a record of
0 - 0 - 0, fighting out of London, Vilkas Johsansonn!
The judges for this bout are Nard Betker, Paul Aken and Saam Ante.
The bell rings for round one and we are underway!
Johsansonn tries to clinch but Lembert is having none of it.
The fight stays on the outside here - Johsansonn looks like he's thinking about clinching though.
Johsansonn tries to close the distance and clinch but Lembert swats him to one side with an open hand palm strike and circles away.
Johsansonn keeps Lembert at a distance using the push kick.
Johsansonn keeping a good distance there, avoiding the body shot.
Johsansonn doesn't manage to clinch there - Lembert circles away.
Lembert cracks Johsansonn with a right hand to the side of the head.
Lembert lands a head shot.
Johsansonn tries to clinch up.
Lembert connects with a slap. Keep your fist closed son.
Johsansonn fails in his attempt to clinch.
Lembert misses with a wild combination.
Johsansonn wants to clinch up but Lembert keeps it at a distance.
Johsansonn tries to close the distance and clinch but Lembert swats him to one side with an open hand palm strike and circles away.
Lembert slips a jab and a cross from Johsansonn.
Johsansonn fails with an attempt to clinch.
That's one minute gone in the round.
Johsansonn misses with a wild body shot.
Johsansonn dodges the punch combination from Lembert.
The fight stays on the outside here - Johsansonn looks like he's thinking about clinching though.
Lembert throws a series of punches but Johsansonn avoids them all with ease.
Lembert will need to tighten up his combinations if he doesn't want to gas himself out, swinging at thin air.
Lembert misses with a jab and misses with a cross straight after too.
Nigel Lembert is looking to keep the fight on the feet at all costs.
Johsansonn throws a wild combination but nothing lands.
Johsansonn wants to clinch up but Lembert keeps it at a distance.
Johsansonn misses with a straight right.
Johsansonn takes a hook to the side of the head. I wonder if that's got his ears ringing.
Lembert lunges in with swinging rights and lefts but Johsansonn circles away quickly and effectively.
Nice jab there from Lembert.
Johsansonn dodges the punch combination from Lembert.
That's two minutes gone in the round.
Johsansonn goes to the watering hole and comes back with a big thumbs up from the judges as he scores a three punch combo.
Nigel Lembert seems to be the more aggressive standup fighter in this bout.
Johsansonn slips a jab and a cross from Lembert.
Johsansonn tries to clinch but is not successful on this occasion.
Johsansonn is looking to take this fight into the clinch.
The fans in attendance giving it up for the two fighters, who have really let it all hang out in the last minute or so!
Left hook, right uppercut from Lembert.
Some wild striking there from Lembert.
Lembert steps to his left, right into the path of a big body kick from Johsansonn. That one must have hurt.
Johsansonn throws a right and a left that Lembert avoids nicely.
Lembert throws a right and a left that both miss.
Johsansonn misses with a series of wild punches.
Lembert misses with a wild combination.
That's three minutes gone in the round.
The fight stays on the outside here - Johsansonn looks like he's thinking about clinching though.
Johsansonn fails to land with the punch combination there - jab, cross, hook, miss, miss, miss.
Johsansonn tries to clinch there but Lembert circles away.
Lembert throws a combination that misses
and Johsansonn counters with a big head kick but Lembert shrugs it off.
Johsansonn bobs and weaves well there to avoid the strikes.
Lembert pushes forward with a 1-2 combination that forces Johsansonn back to the ropes. Lembert follows up with a solid lead hook to the liver.
Lembert misses with a wild body shot.
Johsansonn tries to clinch up against the ropes, rushing in the close the distance. Lembert manages to break the clinch and circles back to the middle of the mat.
Lembert misses with a jab and misses with a cross straight after too.
Lembert avoids the clinch attempt nicely.
Johsansonn is looking to take this fight into the clinch.
Lembert throws a hook to the side of Johsansonn's head but Johsansonn sees it coming and ducks under it beautifully.
That's four minutes gone in the round.
No joy there for Lembert, who threw a few shots but didn't land.
Lembert fails to land with the punch combination there - jab, cross, hook, miss, miss, miss.
Lembert really does look like a pencil wearing a pair of gloves. Let's hope he has a gameplan to suit that ridiculous body shape.
Lembert falls off balance throwing a combination
enabling Johsansonn to counter with a crisp jab.
Lembert is breathing heavily.
Johsansonn ducks under an overhand right and circles away with a smile on his face.
Lembert scores with a three punch combo!
The crowd are loving this. Great action here.
Lembert throws out a token jab with nothing on it.
Lembert showing good head movement there, avoiding the strikes from Johsansonn.
Johsansonn goes for a high kick. It partially lands.
As the round comes to an end the crowd are showing their appreciation for a great round of action.
Johsansonn misses with a wild combination.
Lembert takes a head kick and keeps coming.
Johsansonn misses with a two punch combination.
And thats the end of the round the fighters go back to their corners.
A close round but Vilkas Johsansonn will probably get the nod.
The fighters' corners scream their final instructions, as the referee calls time. Here we go, back to the action!
Lembert throws a combination but it was largely blocked by Johsansonn.
Johsansonn misses with a jab, cross combination.
Lembert misses with a wild combination.
Lembert misses with a double jab.
Johsansonn throws a front kick that sends Lembert stumbling back into the ropes.
A punch combination from Lembert misses.
Johsansonn wants to clinch.
Johsansonn is looking to clinch.
Lembert loads up on a big right hand but Johsansonn slips the punch.
Left hook, right uppercut from Lembert.
Johsansonn misses with a half-hearted attempt at a head kick.
Lembert misses with a straight left.
Lembert is really head hunting here, hardly looking to strike to the body at all.
That's one minute gone in the round.
Lembert circles away from the clinch attempt.
Lembert misses with a jab and misses with a cross straight after too.
Johsansonn throws a right hand that Lembert ducks under and follows up with a left that Lembert also avoids with ease.
Johsansonn throws a right and a left that both miss.
Johsansonn moves in looking to clinch but Lembert pushes him off.
A right-left combo lands from Lembert.
Lembert misses with an uppercut. Johsansonn saw that one coming.
Johsansonn showing good head movement there, avoiding the strikes from Lembert.
Lembert thuds a left hand into Johsansonn's body.
Johsansonn throws a one two combo.
Lembert ducks down and throws a hook to the body but Johsansonn moves away.
Lembert misses with a body shot.
Lembert lunges at Johsansonn with a hook that half lands and is half blocked by Johsansonn's hand.
Both fighters are absolutely exhausted here.
That's two minutes gone in the round.
Wooooo! Give it up for these two warriors! They are putting on a show!
Johsansonn needs to keep his hands up - Lembert had a free shot at his head there.
Johsansonn slips a jab and a cross from Lembert.
Lembert misses with a two punch combination.
Lembert throws an uppercut from half a mile away. Johsansonn sees it coming and avoids it easily.
Johsansonn scores with a one two! Lembert had his feet all tangled up there and couldn't avoid the strikes.
Johsansonn keeping his hands up high there, blocking the jab from Lembert.
Nigel Lembert is winning the standup battle so far.
Lembert throws a nice looking combination but Johsansonn bobs and weaves to avoid any damage.
Johsansonn scores with a head kick.
Lembert misses with a double jab.
Johsansonn misses with a two punch combination.
Johsansonn slips a jab and a cross from Lembert.
Lembert misses with a looping right.
Johsansonn tries to close the distance and clinch up against the ropes but Lembert paws at him with a jab and circles away.
Lembert throws a wild combination but nothing lands.
That's three minutes gone in the round.
Johsansonn will need to tighten up his combinations if he doesn't want to gas himself out, swinging at thin air.
Sloppy strikes from Lembert. Those never looked like landing.
Johsansonn misses with a two punch combination.
Thud! ouch! good body kick from Johsansonn - that will leave a mark!
Johsansonn moves in looking to clinch but Lembert pushes him off.
Lembert looks to score with a combo but nothing lands.
Johsansonn dips to his left and cracks Lembert with an uppercut!
Some wild striking there from Lembert.
Lembert is the aggressor but that punch slipped nicely by Johsansonn.
Johsansonn punishes Lembert's body with a nice straight punch.
Lembert lets the fists fly and connects with a left straight followed by a right hook.
That's four minutes gone in the round.
Johsansonn is looking to clinch.
Lembert looks to land a combination but Johsansonn avoids it well.
Lembert misses with a jab and misses with a cross straight after too.
Johsansonn explodes with a nice body kick and back out of range. Nice work.
Johsansonn wants to clinch.
Johsansonn lunges in with swinging rights and lefts but Lembert circles away quickly and effectively.
Lembert avoids the clinch attempt nicely.
Johsansonn tries to clinch but Lembert moves out of range.
Johsansonn throws a series of punches but Lembert avoids them all with ease.
As the round comes to an end the crowd are showing their appreciation for a great round of action.
Lembert smiles there as he lands a nice right hand right on the button.
A punch combination from Lembert misses.
The crowd cheering loudly, showing their appreciation for the quality fight we're seeing here.
Lembert scores with a nice head shot.
And thats the end of the round the fighters go back to their corners.
That was a close second round but I would say that Nigel Lembert will probably get the nod.
The corners get their ten second warning. Both fighters stand from their stools and stare eachother down, ready to get back to the action. This is the final round!
Johsansonn tries to clinch up but Lembert circles away and keeps his distance.
Johsansonn misses with a two punch combination.
Lembert lands a slapping body shot.
Lembert will need to tighten up his combinations if he doesn't want to gas himself out, swinging at thin air.
Johsansonn wants to clinch up but Lembert keeps it at a distance.
Johsansonn dodges the punch combination from Lembert.
Lembert's corner calls for a 1, 2 combination and Lembert duly obliges.
Lembert misses with a series of wild punches.
Lembert with a hook.
Johsansonn moves in looking to clinch but Lembert pushes him off.
Both fighters are breathing heavily.
Lembert lands a two punch combo.
Johsansonn takes a shot to the nose. Hopefully that hasn't broken it.
That's one minute gone in the round.
No joy there for Lembert, who threw a few shots but didn't land.
Lembert circles away from the clinch attempt.
Lembert throws an uppercut from half a mile away. Johsansonn sees it coming and avoids it easily.
Lembert throws a nice looking combination but Johsansonn bobs and weaves to avoid any damage.
Johsansonn moves in looking to clinch but Lembert pushes him off.
Johsansonn rushes Lembert and pushes him back against the ropes in a clinch.
Lembert is trying to break the clinch but Johsansonn has him pressed against the ropes.
Lembert tries to break the clinch but Johsansonn is controlling the position.
Johsansonn misses with a knee to the head.
That's two minutes gone in the round.
Johsansonn fails to land with a short punch on the inside.
Johsansonn keeps control of Lembert as he tries to wriggle out of the double underhooks.
Johsansonn misses the knee to the body. Nice hip positioning from Lembert.
Johsansonn looking to throw knees to the head but Lembert is blocking nicely.
Johsansonn avoiding damage.
Lembert is trying to break the clinch but Johsansonn has him pressed against the ropes.
That's three minutes gone in the round.
Johsansonn misses with a knee to the head.
Johsansonn prevents Lembert from breaking the clinch.
Lembert is trying to break the clinch but Johsansonn has him pressed against the ropes.
Johsansonn has Lembert pressed against the ropes, preventing Lembert from circling away and getting back to striking at range.
A frustrated look appears on Lembert's face as he tries to break the clinch.
That's four minutes gone in the round.
My god... these two guys really need to pick up the pace or everyone will leave to go get a beer.
Lembert working hard to break the clinch.
Lembert wants to get back to striking at distance but Johsansonn won't allow it.
Lembert looks like he'd prefer to be striking at range right now.
Lembert is trying to force a seperation but Johsansonn has the dominant position.
Johsansonn landing knees to the head.
Johsansonn tries a knee to the head but he's missed.
Johsansonn using the Thai plumb to throw knees but Lembert has his back arched nicely, preventing the strike.
And that's the end of the fight!
Nigel Lembert showed his dominance in that final round.
Well Lembert has outscored his opponent in every aspect of the fight today. Only a scarily incompetent judge or two will keep him from a well deserved win... Over to the ring announcer for the scorecards.
Ladies and gentlemen, after 3 rounds of action, we go to the scorecards for a decision.
Judge Nard Betker scores the fight 29:28
Judge Paul Aken scores the fight 29:28
Judge Saam Ante scores the fight 29:28
In favor of your winner, by unanimous decision... Nigel Lembert!
|
|
|
|
|
|
|
|
|
|
|
|
|
|
|
|
|
|
|
|
|
|
|
| S |
C
A |
G |
S |
C
B |
G |
|
S |
C |
G |
|
energy
A | B |
|
hype
A | B |
|
pop
A | B |
|
mgr
A | B |
|
FIGHT
RATING
62% |
|
|
|
|
|
|
|
Undercard bout
|
Coming up we have a lightweight kickboxing rules bout between Mark Henson (ranked 0 p4p, 0 weight class) and Tella Bunteknete (ranked 0 p4p, 0 weight class). Tella Bunteknete will no doubt be trying to keep this one on the feet, where he has a distinct advantage.
 |
|
 |
| 200 cm
22
160 lbs
2 - 3 - 0 |
|
181 cm
20
159 lbs
0 - 0 - 0 |
Solid Muay Thai
Experienced
|
|
Decent boxing
Prefers standup
|
|
| |
|
Ladies and gentlemen. This fight is 3 rounds, in the lightweight division.
Introducing the fighter to my left, fighting out of the red corner.
With a record of
2 - 3 - 0, fighting out of Helsinki, Mark Henson!
And introducing the fighter to my right, fighting out of the blue corner.
With a record of
0 - 0 - 0, fighting out of Amsterdam, Tella Bunteknete!
The judges for this bout are Saam Ante, Nard Betker and Patrick Alders.
The bell rings for round one and we are underway!
Henson moves into the clinch.
Bunteknete is looking to break free of the clinch but Henson has double underhooks.
A knee to the head by Henson.
Bunteknete is trying to break the clinch but Henson has him pressed against the ropes.

Henson breaks the clinch and we're back to striking at distance.
Henson throws a hook but Bunteknete avoids it easily.
Bunteknete with a jab.
Bunteknete lands a jab to the head.
Henson avoids the clinch attempt nicely.
Henson avoids the head kick by Bunteknete.
Henson lunges in with swinging rights and lefts but Bunteknete circles away quickly and effectively.
Bunteknete tries a switch kick but it misses it's target.
Henson rushes Bunteknete and presses him up against the ropes.
Henson really does look like a pencil wearing a pair of gloves. Let's hope he has a gameplan to suit that ridiculous body shape.
Henson manages to break the clinch.
The crowd cheering loudly, showing their appreciation for the quality fight we're seeing here.
A decent looking cross lands there for Bunteknete.
Henson misses with a looping right.
That's one minute gone in the round.
Bunteknete wants to clinch.
Henson gets in close and instigates a clinch.
Bunteknete is trying to break the clinch but Henson has him pressed against the ropes.
Henson has Bunteknete pressed against the ropes, preventing Bunteknete from circling away and getting back to striking at range.
Bunteknete trying to control the position but instead, Henson has worked for underhooks and has pushed Bunteknete into the ropes.
Bunteknete misses with a short punch on the inside.
Henson with an attempt at a knee that misses.
Bunteknete misses with a punch to the body.
That's two minutes gone in the round.
Henson breaks the clinch and we return to the middle of the mat.
Ooooh, nice body kick lands from Henson. Bunteknete shrugs it off though.
Bunteknete has his hands up protecting his head but a hook from Henson finds it's way round the side to connect with Bunteknete's head.
Henson cracks Bunteknete with a right hand to the side of the head.
Henson misses with a two punch combination.
Bunteknete throws a head kick but Henson moves out of range.
A looping hook to the body misses from Henson. Bunteknete does a little dance to reset his feet.
Bunteknete scores with a jab to the jaw.
Henson avoids the clinch attempt nicely.
Henson lands a head kick. Bunteknete smiles back at him and beckons him forward.
Henson looks to throw the jab but Bunteknete is out of range.
Henson throws a head kick that misses and slips in the process. He scrambles back to his feet and the fighters circle.
Bunteknete throws the kick towards the body but Henson avoids it.
This is a great period of action - very entertaining stuff!
Bunteknete lands a leg kick. The shin dug right into the meat of the thigh.
Henson is breathing heavily.
The fight stays on the outside here - Bunteknete looks like he's thinking about clinching though.
That's three minutes gone in the round.
Henson looks to land a left hand but Bunteknete moved out of range nicely.
Bunteknete throws a head kick that misses and slips in the process. He scrambles back to his feet and the fighters circle.
Bunteknete scores with a body shot.
A head kick misses from Henson.
Henson tries to clinch up but Bunteknete circles away and keeps his distance.
Henson swings away but doesn't land with a series of punches.
Bunteknete tries to clinch up but Henson circles away and keeps his distance.
Henson throws a head kick that misses.
Bunteknete pulls out of a head kick attempt.
Henson throws a lazy right hand but Bunteknete sees it coming a mile off and sidesteps it easily.
Henson tries to clinch up against the ropes, rushing in the close the distance. Bunteknete manages to break the clinch and circles back to the middle of the mat.
Henson avoids the clinch attempt nicely.
Henson swats away the attempt to clinch by Bunteknete.
That's four minutes gone in the round.
Henson swings for the body but Bunteknete moves out of range.
Bunteknete moves in looking to clinch but Henson pushes him off.
Bunteknete throws a head kick but Henson moves out of range.
The fight stays on the outside here - Bunteknete looks like he's thinking about clinching though.
Henson takes a kick to the side of the head.
Bunteknete misses with a double jab.
Henson avoids the head kick by Bunteknete.
Bunteknete wants to clinch.
Henson has taken the fight to the clinch.
This has been an exciting period of action!
As the round comes to an end the crowd are showing their appreciation for a great round of action.
Henson breaks the clinch and we're back to striking at distance.
And thats the end of the round the fighters go back to their corners.
Tella Bunteknete dominated that round.
The minute break is over - no more time for sponges and pep talks - back to the action!
Henson throws a sloppy head kick and Bunteknete moves out of range easily.
Henson scores with a punch to the head.
Henson is looking to clinch but Bunteknete is avoiding it.
Henson moves out of range of the body kick from Bunteknete.
Henson moves in looking to clinch but Bunteknete pushes him off.
Tella Bunteknete seems to be getting the better of the standup.
Bunteknete fakes high and swings low for a body shot but Henson manages to avoid it.
Henson dips down and scores with a jab to the body.
Mark Henson is looking to throw some combinations by the looks of things.
Bunteknete goes for a high kick. It partially lands.
Henson misses with a wild body shot.
Henson throws a body punch but Bunteknete moves out of range.
Bunteknete tries to clinch up but Henson circles away and keeps his distance.
The fight stays on the outside here - Bunteknete looks like he's thinking about clinching though.
Henson misses with a head kick.
Both fighters are absolutely exhausted here.
Bunteknete closes the distance looking to clinch
and Henson connects with a straight left hand counter down the middle.
That's one minute gone in the round.
Henson circles away from the clinch attempt.
Henson fails in his attempt to clinch.
Bunteknete tries to close the distance and clinch up against the ropes but Henson paws at him with a jab and circles away.
Henson keeps the fight on the outside.
Henson throws a poor cross that misses
and Bunteknete counters with a nice jab to the body that keeps Henson thinking.
Mark Henson seems to be the more aggressive standup fighter in this bout.
Bunteknete digs a good hook to Henson's body.
Bunteknete clinches up against the ropes.
Bunteknete tries to circle away but Henson has him pinned against the ropes.
Bunteknete goes for a body shot but it's blocked.
Henson keeps the fight in the clinch, despite Bunteknete's efforts to push away.
Henson's corner calls for him to break the clinch, which he does.
That's two minutes gone in the round.
Henson takes a body punch but keeps moving.
Henson tries to clinch but Bunteknete moves away
and Bunteknete counters with a big head kick but Henson shrugs it off.
Bunteknete lands a right hook to the body.
We've seen a great period of action over the last minute or so - credit to both fighters for going all out!
Bunteknete tries to close the distance and clinch up against the ropes but Henson paws at him with a jab and circles away.
Bunteknete is looking to clinch but Henson is avoiding it.
Henson misses with a half-hearted attempt at a head kick.
Bunteknete tries to close the distance and clinch up but Henson swats him away and circles back towards the center.
Bunteknete misses with a half-hearted attempt at a head kick.
A jab from Henson misses.
Henson swats away the attempt to clinch by Bunteknete.
Bunteknete is throwing a lot of body shots here, looking to wear down Henson rather than just go for the knockout.
Bunteknete tries to clinch but Henson is having none of it.
Henson throws a head kick that misses and slips in the process. He scrambles back to his feet and the fighters circle.
That's three minutes gone in the round.
Bunteknete is looking to clinch.
Bunteknete throws a nice inside leg kick.
Bunteknete tries to close the distance and clinch up but Henson swats him away and circles back towards the center.
Henson misses with a wild combination.
Bunteknete throws a shot to the body.
Bunteknete clinches with his opponent.
Bunteknete has had enough of the clinch and is looking to separate.
Bunteknete tries a knee to the head but Henson blocks it.
Henson looks like he'd prefer to be striking at range right now.
The fighters are going at a pretty good pace and they're both starting to sweat now.
Good anti-grappling being displayed by Henson as Bunteknete tries to tie him up.
Bunteknete looks like he'd prefer to be striking at range right now.
That's four minutes gone in the round.
Bunteknete lands a nice looking hook to the body, against the ropes.
Henson is trying to break free.
Bunteknete wants to push off and get back to the center of the mat but Henson has him pressed against the ropes.
Both fighters working to control the clinch.
Henson can't break the clinch.
Henson working hard to break the clinch.
A head punch blocked on the inside by Henson.
As the round comes to an end the crowd are showing their appreciation for a great round of action.
Henson escapes the clinch and we're back to striking.
Bunteknete tries to clinch up against the ropes, rushing in the close the distance. Henson manages to break the clinch and circles back to the middle of the mat.
Henson throws a sloppy head kick and Bunteknete moves out of range easily.
And thats the end of the round the fighters go back to their corners.
Tella Bunteknete showed his class in that round. I'd imagine he'll take it on all the scorecards.
That's the end of the round. The referee orders the cornermen out of the ring so we can get back down to business. This is the final round!
Bunteknete wants to clinch.
Henson tries to close the distance and clinch up against the ropes but Bunteknete paws at him with a jab and circles away.
Henson tries to clinch but Bunteknete moves out of range.
Bunteknete is pinned up against the ropes taking some big shots here. The referee is looking closely deciding whether he should stop the fight.
Bunteknete doesn't manage to clinch there - Henson circles away.
Bunteknete misses with a jab and misses with a cross straight after too.
Henson takes a jab on the nose. He smiles like he loves it and keeps coming.
Bunteknete doesn't manage to clinch there - Henson circles away.
A head kick from Henson lands but Bunteknete takes it in his stride.
Bunteknete dodges the punch combination from Henson.
Bunteknete lands a jab, followed by a cross and another cross, as Henson backs up against the ropes.

Henson is rocked!
Both fighters are breathing heavily.
Bunteknete closes the distance and pushes Henson back into the ropes.
Oh Henson is still all over the place! His legs are completely gone! Will he be able to recover?!!
Fantastic stuff here - a very entertaining period of action, which has drawn cheers from the crowd.
Bunteknete can't break the clinch.
That's one minute gone in the round.
Henson working hard to break the clinch.
Bunteknete trying to control the position but instead, Henson has worked for underhooks and has pushed Bunteknete into the ropes.
Bunteknete trying to land knees to the body.
Bunteknete working hard to break the clinch.
Henson seems to have got his legs back now.
Henson blocks a body shot from Bunteknete.
Henson breaks from the clinch.
Henson fails with an attempt to clinch.
Bunteknete lands a nice looking body shot.
Henson slips a jab and a cross from Bunteknete.
Bunteknete throws a half hearted mid kick.
Bunteknete avoids the body shot from Henson.
Bunteknete moves out of range of the body kick.
Bunteknete tries to clinch but is not successful on this occasion.
That's two minutes gone in the round.
Henson throws a right and a left that both miss.
Bunteknete fakes a head shot and lands one to the body.
Bunteknete lands a jab followed by a nice looking cross.
No joy there for Bunteknete, who threw a few shots but didn't land.
Bunteknete tries to close the distance and clinch but Henson swats him to one side with an open hand palm strike and circles away.
The crowd cheering loudly, showing their appreciation for the quality fight we're seeing here.
Bunteknete has taken the fight to the clinch.
The referee calls for Bunteknete to work.
Bunteknete wants to push off and get back to the center of the mat but Henson has him pressed against the ropes.
Bunteknete trying to control the position but instead, Henson has worked for underhooks and has pushed Bunteknete into the ropes.
Bunteknete is trying to slow the pace down but that's a couple of times in a row that he's tried to get underhooks and Henson has denied him.
That's three minutes gone in the round.
Henson breaks the clinch.
Henson swings and misses with a shot to the body
and Bunteknete counters with a nice jab to the body that keeps Henson thinking.
Bunteknete fails in his attempt to clinch.
Bunteknete fails in his attempt to clinch.
Bunteknete scores with a jab. Henson acknowledges it with a nod of the head.
The fight stays on the outside here - Bunteknete looks like he's thinking about clinching though.
Bunteknete fails with an attempt to clinch.
That's four minutes gone in the round.
Bunteknete throws a combination that misses
and Henson counters with a kick to the head that grazes his opponent. Bunteknete is lucky that one didn't land flush.
A head kick misses from Bunteknete.
Henson lands a right hook to the body.
Bunteknete lands a powerful looking uppercut that connected with his opponent's jaw.
Henson throws a monster uppercut resembling something out of street fighter but it doesn't land.
Henson keeps the fight on the outside.
Bunteknete wants to clinch up but Henson keeps it at a distance.
Henson misses with a wild combination.
Henson looks to land a combination but Bunteknete avoids it well.
Mark Henson has stepped it up - he knows he needs a finish here!
As the round comes to an end the crowd are showing their appreciation for a great round of action.
Bunteknete scores with a sloppy punch to the body. Not much technique there but it did the business.
Bunteknete wants to clinch up but Henson keeps it at a distance.
Bunteknete tries a head kick but it misses.
Tella Bunteknete is fighting for a decision - hopefully he's judged it right and he's actually winning the fight.
Bunteknete tries to clinch but Henson is having none of it.
And that's the end of the fight!
Tella Bunteknete comfortably won the final round on my scorecard.
Well Bunteknete has outworked and out performed his opponent in all aspects of the game today. He was simply too good and the decision should be no more than a formality. Over to the ring announcer for the scorecards.
Ladies and gentlemen, after 3 rounds of action, we go to the scorecards for a decision.
Judge Saam Ante scores the fight 27:30
Judge Nard Betker scores the fight 27:30
Judge Patrick Alders scores the fight 27:30
In favor of your winner, by unanimous decision... Tella Bunteknete!
|
|
|
|
|
|
|
|
|
|
|
|
|
|
|
|
|
|
|
|
|
|
|
| S |
C
A |
G |
S |
C
B |
G |
|
S |
C |
G |
|
energy
A | B |
|
hype
A | B |
|
pop
A | B |
|
mgr
A | B |
|
FIGHT
RATING
76% |
|
|
|
|
|
|
|
Undercard bout
|
Coming up we have a light heavyweight kickboxing rules bout between Ichabod Crane (ranked 0 p4p, 0 weight class) and Jorge Pericic (ranked 0 p4p, 0 weight class). Pericic has chosen T.N.T as his entrance music. Both these guys have solid standup skills and neither is particularly fantastic on the ground, so let's hope for a nice standup war!
 |
|
 |
| 190 cm
25
206 lbs
1 - 0 - 0 |
|
175 cm
19
210 lbs
1 - 0 - 0 |
Excellent MT
Very quick
|
|
Excellent MT
Granite chin
|
|
| |
|
Ladies and gentlemen. This fight is 3 rounds, in the light heavyweight division.
Introducing the fighter to my left, fighting out of the red corner.
With a record of
1 - 0 - 0, fighting out of Amsterdam, Ichabod Crane!
And introducing the fighter to my right, fighting out of the blue corner.
With a record of
1 - 0 - 0, fighting out of Amsterdam, Jorge Pericic!
The judges for this bout are Daniel Blasius, Saam Ante and Radbod Blank.
The bell rings for round one and we are underway!
Pericic throws a wild body kick that Crane sees coming a mile off.
Crane keeping his hands up high there, blocking the jab from Pericic.
Well, he's not going to score with shots like that. A lazy body kick attempt from Crane.
Pericic cracks Crane with a good jab.
Pericic wants to clinch up but Crane keeps it at a distance.
Pericic misses with a half-hearted attempt at a head kick.
Ichabod Crane seems to be the more aggressive standup fighter in this bout.
Crane misses with a jab and misses with a cross straight after too.
Crane is looking to clinch.
Pericic tries to clinch but Crane moves out of range.
Pericic pulls out of a head kick attempt.
Pericic thows a body shot but no joy.
Pericic wants to clinch up but Crane keeps it at a distance.
Crane takes an uppercut right on the jaw but it doesn't phase him.
Crane tries to clinch up.
Pericic scores with a body shot.
Crane wants to clinch up but Pericic keeps it at a distance.
Crane has Pericic up against the ropes in a clinch.
That's one minute gone in the round.
Crane blocks a knee to the body. He'll have a nicely bruised forearm in the morning.
Pericic prevents Crane from breaking the clinch.
Crane is trying to slow down the pace in the clinch, to catch his breath.
Crane keeps the fight in the clinch, despite Pericic's efforts to push away.
Pericic misses with a punch to the body.
Crane is trying to slow down the pace of the fight but Pericic is keeping busy.
Pericic misses with a punch to the body.
Crane trying to land knees to the body.
Crane manages to break the clinch.
Pericic misses with a head kick.
Crane throws a low kick but Pericic moves out of range easily.
Pericic avoids a punch combination nicely.
Crane turns his hip over beautifully as he lands a nice leg kick.
That's two minutes gone in the round.
Pericic looking to throw a kick but he's pulled out of it.
Pericic clinches up with Crane and pushes him back against the ropes.
Crane's corner are urging him to control the action in the clinch for a moment, rather than mount any serious offense. I'm sure the crowd appreciate those instructions... not.
Crane wants to break free. God knows he wants to breaaaak freeee.
Crane tries a knee to the head but Pericic blocks it.
Pericic goes for a body shot but it's blocked.
Pericic tries to land a shot to the body but it's blocked.
Pericic misses with a shot to the kidneys.
Pericic prevents Crane from breaking the clinch.
Crane's corner calls for him to break the clinch, which he does.
Pericic swats away the attempt to clinch by Crane.
Pericic with a body punch. A glancing blow.
We've seen a great period of action over the last minute or so - credit to both fighters for going all out!
Pericic gets in close and instigates a clinch.
That's three minutes gone in the round.
Crane blocks a body shot from Pericic.
Pericic lands a body punch - he's looking to wear down Crane.
Crane is breathing heavily.
Pericic prevents Crane from breaking the clinch.
Pericic works on Crane's body with a couple of short punches.
Pericic tries to work over Crane's body with a swooping hook but it only glances the target.
Crane prevents a body shot from Pericic.
Pericic pushes off and circles away, back to the middle of the mat.
Crane tries to clinch there but Pericic circles away.
Pericic lands with a kick to the ribs.
Pericic has Crane up against the ropes in a clinch.
Crane can't break the clinch.
This is a great period of action - very entertaining stuff!
Pericic struggles to land a body shot inside as Crane controls his hands.
Pericic escapes the clinch and we're back to striking.
Pericic rushes Crane and pushes him back against the ropes in a clinch.
A short body shot lands from Pericic as the two fighters clinch.
Crane pushes off an throws an elbow but Pericic leans to the side and avoids it. We're back to clinching against the ropes.
Pericic misses with a punch to the body.
That's four minutes gone in the round.
Pericic scores a nice knee to the body.
Pericic lands a hook to the body. It's hard to tell if that hurt Crane or not.
Pericic misses the knee to the body. Nice hip positioning from Crane.
Pericic lands a body punch in the clinch.
Pericic lands a body punch in the clinch.
Pericic misses with a punch to the body.
Pericic is leaning against Crane and scores with a nice uppercut to the body.
Pericic misses with a punch to the body.
Crane wants to get back to striking at distance but Pericic won't allow it.
A right handed body shot lands from Pericic.
A right handed body shot lands from Pericic.
Pericic breaks the clinch.
Pericic lands with a kick to the ribs.
The crowd are going absolutely nuts as the round comes to an end - what a fantastic round of action!
Pericic has managed to clinch.
Pericic goes for a body shot but it's blocked.
Pericic is looking to score with knees to the body. Maybe he'll change it up and go body then head. Crane is defending well for now.
Pericic escapes the clinch and we're back to striking.
And thats the end of the round the fighters go back to their corners.
Jorge Pericic dominated that round.
That's time! Back to the action!
Pericic misses with a head kick.
Crane looks to land a body kick but Pericic moved away.
Pericic has closed the distance and engaged Crane in a clinch.
Pericic pushes off and circles away, back to the middle of the mat.
Pericic feints with a shoulder and throws a nice leg kick to Crane's calf.
Pericic scoring well with a low kick there.
Well, he's not going to score with shots like that. A lazy body kick attempt from Pericic.
Pericic closes the distance but Crane moves to the side
and Crane makes him pay by landing a thudding low kick.
Oooooooooooh, not good. A low kick from Crane lands where it shouldn't have, right in the... well, you know what he did? He kicked him in the penis. He's injured, injured bad. The referee sends both fighters to their corners and Pericic has 5 minutes to recover. He's OK now though... a thumbs up from Pericic and we're back underway with a touch of gloves.
Ichabod Crane is looking to throw some combinations by the looks of things.
Crane tries to clinch up but Pericic circles away and keeps his distance.
Pericic clinches.
Good body shot from Pericic.
Both fighters are absolutely exhausted here.
Crane breaks the clinch and we return to the middle of the mat.
Crane keeps the fight on the outside.
That's one minute gone in the round.
Pericic throws a series of strikes that have Crane backpedaling.
It looks like Ichabod Crane has been cut.
Pericic tries to clinch there but Crane circles away.
Pericic tries to clinch up against the ropes, rushing in the close the distance. Crane manages to break the clinch and circles back to the middle of the mat.
Pericic swings away but doesn't land with a series of punches.
Crane takes a jab on the nose there. A little bit of blood seems to be coming out. Hopefully that won't affect his breathing.
The fight moves into the clinch position.
The fans in attendance giving it up for the two fighters, who have really let it all hang out in the last minute or so!
Crane prevents a body shot from Pericic.
Crane trying to control the position but instead, Pericic has worked for underhooks and has pushed Crane into the ropes.
Crane tries to circle away but Pericic has him pinned against the ropes.
Pericic struggles to land a body shot inside as Crane controls his hands.
Pericic digs a right hand into Crane's ribs. Those have got to be taking their toll on Crane's gas tank.
Crane prevents a body shot from Pericic.
Pericic pushes Crane back against the ropes and unloads with a body punch.
Pericic tried to land a shot to the body but connects with Crane's elbow.
That's two minutes gone in the round.
A short body shot lands from Pericic as the two fighters clinch.
Pericic presses Crane against the ropes and delivers a mid-strength body shot.
Pericic lands a nice looking hook to the body, against the ropes.
Pericic softening up his opponent with strikes, against the ropes.
Crane prevents a body shot from Pericic.
Crane throws a knee to the head but misses.
Pericic lands a good knee to the midsection. Crane won't want to take too many of those.
Pericic tries to work over Crane's body with a swooping hook but it only glances the target.
Pericic tries to throw a body punch but Crane avoids it by throwing Pericic back against the ropes.
A right hand to the body from Pericic.
A left hand lands to the body for Pericic.
Pericic lands a nice shot to the body.
Pericic misses with a shot to the kidneys.
Good body shot from Pericic.
Pericic lands a body shot.
Pericic struggles to land a body shot inside as Crane controls his hands.
Pericic lands a body shot.
That's three minutes gone in the round.
Pericic tries to land a shot to the body but it's blocked.
Pericic lands a hook to the body. It's hard to tell if that hurt Crane or not.
Pericic scores with a hook to the body.
Pericic breaks the clinch and we're back to striking at distance.
Pericic fails with an attempt to clinch.
Pericic rushes forward with a series of wild hooks but Crane moves out of range and avoids them all easily.
Crane dodges the punch combination from Pericic.
Pericic tries a head kick but it misses.
Pericic closes the distance and clinches.
Crane is looking to score with knees to the body. Maybe he'll change it up and go body then head. Pericic is defending well for now.
Pericic throws a hook to the body. More of an arm punch but it's all scoring with the judges.
Pericic tried to land a shot to the body but connects with Crane's elbow.
Jorge Pericic seems to be working more effectively in the clinch in the fight so far.
Pericic works for underhooks and lands a body shot in the process.
Pericic pushes off and circles away, back to the middle of the mat.
The crowd cheering loudly, showing their appreciation for the quality fight we're seeing here.
Pericic moves into the clinch.
That's four minutes gone in the round.
Pericic misses with a hook to the ribs.
Pericic tries to throw a body punch but Crane avoids it by throwing Pericic back against the ropes.
Crane is trying to break the clinch but Pericic has him pressed against the ropes.
Pericic can't find room to land a body shot as Crane controls the action.
Pericic lands a body punch - he's looking to wear down Crane.
Pericic tries to land a shot to the body but it's blocked.
Pericic misses with a body punch.
Crane looks like he'd prefer to be striking at range right now.
Pericic throws a hook to the body. More of an arm punch but it's all scoring with the judges.
Pericic throws a hook to the body. More of an arm punch but it's all scoring with the judges.
Nice body punch from Pericic - that landed with a thud.
Pericic has been the more effective fighter overall so far.
Pericic misses with a shot to the kidneys.
Pericic pushes off and circles away, back to the middle of the mat.
The crowd are going absolutely nuts as the round comes to an end - what a fantastic round of action!
Pericic fails in his attempt to clinch.
Pericic lets loose with a powerful body kick. Crane will feel that in the morning.
Good leg kick by Pericic there. It's the ones that make that thud noise that hurt and that was an almighty thud.
And thats the end of the round the fighters go back to their corners.
Jorge Pericic showed his class in that round. I'd imagine he'll take it on all the scorecards.
The cut man is working on Ichabod Crane's cut.
That's time! Crane's corner gives him a slap on the ass as he gets ready to fight. The crowd applaud as we get ready to start the final round!
Pericic scores with the left hand. Crane knows he should have avoided that one.
Pericic looks to clinch
and Crane counters with a head kick. That will keep Pericic thinking before he tries any more sloppy attacks!
Pericic connects with a body shot.
Pericic is looking to slow Crane down with leg kicks.
Pericic throws a nice outside leg kick.
Crane takes a head kick and keeps coming.
This has been an exciting period of action!
Pericic rushes Crane and pushes him back against the ropes in a clinch.
Pericic tries to work over Crane's body with a swooping hook but it only glances the target.
Crane misses with a knee to the head.
Pericic throws a hook to the body. More of an arm punch but it's all scoring with the judges.
Pericic lands a nice shot to the body.
Pericic misses with a punch to the body.
Both fighters are breathing heavily.
Pericic missing with knees to the body.
Pericic tries to throw a body punch but Crane avoids it by throwing Pericic back against the ropes.
Nice body punch from Pericic.
Pericic stays in close to his opponent and throws a right hand to the body.
That's one minute gone in the round.
Pericic misses with a body punch.
Pericic breaks the clinch and we return to the middle of the mat.
Pericic scoring well with a low kick there.
Jorge Pericic seems to be getting the better of the standup.
Pericic tries a switch kick but it misses it's target.
Pericic scores with a sloppy punch to the body. Not much technique there but it did the business.
Crane takes a shot to the body in his stride.
Pericic lands a body shot.
Pericic lands a pitter patter jab to the forehead of his opponent.
Crane is rocked!
Fantastic stuff here - a very entertaining period of action, which has drawn cheers from the crowd.
Pericic lands a jab and follows it up with a massive straight that knocks Crane out cold! Crane is crumpled in the corner, his head only propped up by the ropes! That's one for the organiziational promos right there! Wow, what a finish!
Ladies and gentlemen, after 1:41 of round 3, we have a winner by way of KO (Punches). Jorge Pericic!
An out of breath Jorge Pericic thanked his loyal fans in his post fight interview, giving them credit for his success over the course of his career.
|
|
|
|
|
|
|
|
|
|
|
|
|
|
|
|
|
|
|
|
|
|
|
| S |
C
A |
G |
S |
C
B |
G |
|
S |
C |
G |
|
energy
A | B |
|
hype
A | B |
|
pop
A | B |
|
mgr
A | B |
|
FIGHT
RATING
100% |
|
|
|
|
|
|
|
Co-main event
|
Coming up we have a lightweight kickboxing rules bout between Sam Chell (ranked 0 p4p, 0 weight class) and Nikolai Peterson (ranked 0 p4p, 0 weight class). Nikolai Peterson has the better chin. Will he look to stand and bang today?
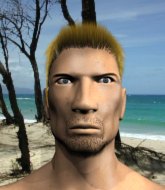 |
|
 |
| 181 cm
19
166 lbs
0 - 0 - 0 |
|
171 cm
23
145 lbs
3 - 2 - 0 |
Excellent boxer
Intelligent
|
|
Decent boxing
Good gas tank
|
|
| |
|
Ladies and gentlemen. This fight is 3 rounds, in the lightweight division.
Introducing the fighter to my left, fighting out of the red corner.
With a record of
0 - 0 - 0, fighting out of Helsinki, Sam Chell!
And introducing the fighter to my right, fighting out of the blue corner.
With a record of
3 - 2 - 0, fighting out of Amsterdam, Nikolai Peterson !
The judges for this bout are Paul Aken, Albert Achterberg and Aafke Stam.
The bell rings for round one and we are underway!
Peterson clinches up against the ropes.
Peterson lands a left hand.
Chell lands with a quick shot inside that doesn't really do much damage.
Chell misses with a punch to the body.
Peterson pushes off and circles away, back to the middle of the mat.
Peterson has Chell up against the ropes in a clinch.
Chell misses with a punch to the body.
Peterson displaying some good clinch control by pressing Chell up against the ropes.
Peterson scores with a nice hook to the head.
An uppercut on the inside fails to land for Chell.
Peterson taking a break, stalling in the clinch.
A short right from Peterson .
Peterson manages to break the clinch.
Peterson slips in close and lands a nice hook before moving back out of range.
Peterson has Chell up against the ropes in a clinch.
Wooooo! Give it up for these two warriors! They are putting on a show!
Peterson just leaning against Chell, taking a breather.
Chell can't break the clinch.
Peterson dictating the pace here, as the fighters clinch against the ropes.
That's one minute gone in the round.
Chell tries to land a knee to the head but Peterson blocks with his arms.
Peterson leaning against his opponent.
The ref breaks the fighters up, due to lack of action by Nikolai Peterson .
The crowd cheers as Chell lands an impressive looking overhand right. Peterson doesn't seem phased though.
Peterson gets to the clinch - let's see what his plan is here.
Chell is stalling here. The referee will be looking to step in if he doesn't pick up the pace.
Chell is trying to maintain a safe position but Peterson gets an underhook and turns Chell into the ropes.
Chell is trying to break free.
Chell struggles to land a body shot inside as Peterson controls his hands.
Peterson pressing his opponent against the ropes.
Peterson lands a hook that snaps the head of Chell backwards.
Chell has had enough of the clinch but Peterson keeps him there for the moment.
That's two minutes gone in the round.
Chell wants to break free but Peterson has control.
Peterson softening up his opponent with strikes, against the ropes.
Peterson lands with a short shot to the head.
Chell wants to get back to striking at distance but Peterson won't allow it.
A short right from Peterson .
Peterson controlling the action here for a moment.
Peterson keeps the fight in the clinch, despite Chell's efforts to push away.
The fans in attendance giving it up for the two fighters, who have really let it all hang out in the last minute or so!
Chell wants to push off and get back to the center of the mat but Peterson has him pressed against the ropes.
A shot in the inside from Peterson .
A frustrated look appears on Chell's face as he tries to break the clinch.
Peterson stalling.
Peterson continues to stall. The referee tells him to work or he's going to break them up.
Chell misses with a body punch.
Chell misses with a hook to the ribs.
Chell wants to strike at distance but he can't break free of the clinch.
That's three minutes gone in the round.
A short right hand to the side of the head by Peterson .
Peterson 's corner calls for him to break the clinch, which he does.
Wow, both these guys are really going for it!
Peterson lands with a good body shot.
Chell's hands are dropping dangerously low here and Peterson connects clean with a right hook that sends him down to one knee! Chell scrambles back to his feet.
Peterson misses with a two punch combination.
Peterson keeping a good distance there, avoiding the body shot.
Peterson moves into the clinch.
Chell tries to land a knee to the head but misses.
The fighters are pressed against the ropes, as the pace of the fight slows.
Chell trying to control the position but instead, Peterson has worked for underhooks and has pushed Chell into the ropes.
Peterson breaks the clinch.
Peterson dodges the punch combination from Chell.
Chell throws a combination but it was largely blocked by Peterson .
Peterson stuns Chell with a nice body shot, before stepping back out of range.
That's four minutes gone in the round.
The fighters circling - Chell throws out the jab but it was never going to land.
Peterson keeping a good distance there, avoiding the body shot.
This is a great period of action - very entertaining stuff!
Chell misses with a straight right.
Peterson dips to his left and cracks Chell with an uppercut!
Chell walks into a jab.
Chell is rocked!
Peterson blocks a jab.
Oh Chell is still all over the place! His legs are completely gone! Will he be able to recover?!!
Peterson connects with a picture perfect right hand that knocks Chell out cold! This one is over in a flash!
Ladies and gentlemen, after 4:23 of round 1, we have a winner by way of KO (Punch). Nikolai Peterson !
|
|
|
|
|
|
|
|
|
|
|
|
|
|
|
|
|
|
|
|
|
|
|
| S |
C
A |
G |
S |
C
B |
G |
|
S |
C |
G |
|
energy
A | B |
|
hype
A | B |
|
pop
A | B |
|
mgr
A | B |
|
FIGHT
RATING
65% |
|
|
|
|
|
|
|
Main event
|
Coming up we have a heavyweight kickboxing rules bout between Brooklyn Brawler (ranked 0 p4p, 0 weight class) and Jack Hammer (ranked 0 p4p, 0 weight class). Brawler kept the crowd waiting but all that was forgotten when his ring entrance music started. The incomparable musical genius that is Where Brooklyn At?!?!. Over to our ring announcer for the fighter introductions!
 |
|
 |
| 210 cm
26
277 lbs
4 - 1 - 0 |
|
190 cm
19
255 lbs
2 - 0 - 0 |
Excellent boxer
Granite chin
|
|
Excellent MT
Powerful
|
|
| |
|
Ladies and gentlemen. This fight is 5 rounds, for the heavyweight championship of the world!
Introducing the champion to my left, fighting out of the red corner.
With a record of
4 - 1 - 0, fighting out of Amsterdam, Brooklyn Brawler!
And introducing the challenger to my right, fighting out of the blue corner.
With a record of
2 - 0 - 0, fighting out of Amsterdam, Jack Hammer!
The judges for this bout are Daniel Blasius, Radbod Blank and Saam Ante.
The bell rings for round one and we are underway!
Hammer misses with a body kick.
Hammer misses with a half-hearted attempt at a head kick.
Hammer looks for the body kick but Brawler saw that one coming.
No joy there for Brawler, who threw a few shots but didn't land.
Hammer gets his head snapped back by a nice shot there.
Hammer looks for the body kick but Brawler saw that one coming.
Brawler thows a left - swing and a miss!
Hammer throws a sloppy head kick
and Hammer takes a counter punch right on the button for his troubles.
Hammer misses with a body kick.
Hammer looking to throw a kick but he's pulled out of it.
Hammer throws a leg kick but Brawler sees it coming and checks it nicely.
Brawler sees a low kick coming and goes to check it, but it's actually a body kick and it thuds into his unprotected ribs.
This is a great period of action - very entertaining stuff!
Hammer rushes Brawler and pushes him back against the ropes in a clinch.
That's one minute gone in the round.
Hammer is stalling here. The referee will be looking to step in if he doesn't pick up the pace.
Brawler blocks an elbow strike from Hammer.
Brawler wants to break the clinch but can't.
Hammer holding his opponent close, against the ropes.
Brawler dodges an elbow strike from Hammer.
Hammer throws an elbow but it's blocked.
Nice elbow from Hammer.
It looks like Brooklyn Brawler has been cut.
Brawler blocks an elbow strike from Hammer.
Hammer keeps the fight in the clinch, despite Brawler's efforts to push away.
Hammer lands a glancing elbow in the clinch.
Brawler is trying to work out of this bad position, with his back against the ropes.
Hammer controlling the action here for a moment.
Brawler is trying to push Hammer away but Hammer has him pressed against the ropes, so he's going nowhere.
That's two minutes gone in the round.
Brawler avoids the elbow strike from Hammer, against the ropes.
Hammer stalling here - the referee won't stand for too much of that.
The crowd are getting on Hammer's back here. They're not happy about his lack of aggression in the clinch.
Hammer lands a glancing elbow in the clinch.
Hammer gets an overhook and lands an elbow to the side of the head.
Brooklyn Brawler's cut is getting worse.
The referee is keeping an eye on Hammer - much more stalling and he will separate the fighters.
Brawler avoids the elbow strike from Hammer, against the ropes.
Hammer missing with knees to the body.
Hammer has Brawler pressed against the ropes.
Hammer landing knees to the body.
That's three minutes gone in the round.
The pace slowing considerably in the clinch, as Hammer takes a break from that fighting nonsense to think about the finer things in life.
Hammer misses the knee to the body. Nice hip positioning from Brawler.
Brawler is trying to break the clinch but Hammer has him pressed against the ropes.
A nice glancing elbow lands by Hammer.
A battle for position here, against the ropes.
Nice elbow from Hammer.
Brooklyn Brawler's cut is bleeding quite badly. He's got to try and protect it.
The two fighters are working to gain dominance in the clinch.
Hammer pushes off an throws an elbow but Brawler leans to the side and avoids it. We're back to clinching against the ropes.
Hammer crunches a lovely knee into Brawler's ribcage.
Brawler wants to strike at distance but he can't break free of the clinch.
Hammer crunches a lovely knee into Brawler's ribcage.
Brawler is breathing heavily.
Hammer gets an overhook and lands an elbow to the side of the head.
That's four minutes gone in the round.
The crowd cheering loudly, showing their appreciation for the quality fight we're seeing here.
Brawler tries to circle away but Hammer has him pinned against the ropes.
Brawler has had enough of the clinch but Hammer keeps him there for the moment.
Hammer's corner are urging him to control the action in the clinch for a moment, rather than mount any serious offense. I'm sure the crowd appreciate those instructions... not.
Brawler is trying to work out of this bad position, with his back against the ropes.
Hammer keeps control of Brawler as he tries to wriggle out of the double underhooks.
Hammer throws an elbow but it misses.
The two fighters are working to gain dominance in the clinch.
Brawler tries to circle away but Hammer has him pinned against the ropes.
The crowd are going absolutely nuts as the round comes to an end - what a fantastic round of action!
Hammer misses with an elbow over the top.
Hammer throws an elbow that misses.
And thats the end of the round the fighters go back to their corners.
Jack Hammer dominated that round.
The cut man is working on Brooklyn Brawler's cut.
The fighters' corners scream their final instructions, as the referee calls time. Here we go, back to the action!
Good work by Brawler as he checks the leg kick.
Hammer misses with a head kick.
Hammer tries a head kick but it misses.
Hammer misses with a half-hearted attempt at a head kick.
Hammer throws a half hearted mid kick.
Brawler keeps his opponent at a distance with a nice jab.
Hammer misses with a half-hearted attempt at a head kick.
Hammer looks shocked there as he takes a right hand to the temple.
Hammer throws the kick towards the body but Brawler avoids it.
Hammer has his hands up protecting his head but a hook from Brawler finds it's way round the side to connect with Hammer's head.
The step up in weight doesn't seem to be a problem for Hammer. He's performing admirably here against the bigger man.
Brawler changes levels and scores with a jab to the body.
The fans in attendance giving it up for the two fighters, who have really let it all hang out in the last minute or so!
Brawler misses with a body shot.
That's one minute gone in the round.
Brawler's corner calls for a 1, 2 combination and Brawler duly obliges.
It looks like Jack Hammer has been cut.
Brawler blocks the body kick.
Brawler is using his reach advantage well here, landing the more effective single shots from range.
Hammer tries to clinch but is not successful on this occasion.
Brawler misses with a body shot.
Hammer tries to close the distance and clinch but Brawler swats him to one side with an open hand palm strike and circles away.
Hammer ducks right into an uppercut from Brawler.
Brawler avoids a low kick by using good footwork.
The crowd are loving this. Great action here.
Hammer misses with a low kick.
Brawler lands a pitter patter jab to the forehead of his opponent.
Brawler works his jab well there, keeping his opponent at a distance.
Hammer tries to clinch but is not successful on this occasion.
That's two minutes gone in the round.
Well, he's not going to score with shots like that. A lazy body kick attempt from Hammer.
Brawler throws a combination but it was largely blocked by Hammer.
Hammer misses with a body shot. Nice footwork from Brawler.
Brawler scores with a reasonable looking shot to the body. Hammer doesn't seem bothered though.
Brawler is using his height advantage well here, landing a good percentage of his punches.
Hammer is breathing heavily.
Brawler clobbers Hammer with an overhand right that has the crowd gasping. That made a horrendous noise.
Brawler connects with a right hand. Hammer shakes it off.
Hammer pivots as if he's going to throw a leg kick but stops half way.
Hammer throws a sloppy head kick and Brawler moves out of range easily.
Jack Hammer is looking to throw some combinations by the looks of things.
Hammer misses with an attempted mid kick.
Brawler sees a low kick coming and goes to check it, but it's actually a body kick and it thuds into his unprotected ribs.
Hammer throws a wild body kick that Brawler sees coming a mile off.
A left lands for Brawler.
That's three minutes gone in the round.
Brawler lands a head shot.
That has opened up Jack Hammer's cut even more.
Brawler takes a step back and watches a body kick go sailing past his mid section.
Hammer lands a kick to the ribs of his opponent. Nice work there - in and out in a flash.
Brawler is moving around nicely and scores here with a single head shot.
Brawler lands a jab to Hammer's midsection.
The crowd cheering loudly, showing their appreciation for the quality fight we're seeing here.
Brawler cracks Hammer with a right hand to the side of the head.
Brawler connects with a hook to the side of his opponent's head.
Decent striking displayed by Brawler there.
Hammer is rocked!

Brawler catches his opponent with a big hook that sends him to the canvas! Hammer stumbles back to his feet but will the referee allow it to continue? Hammer walks forwards and this one will be allowed to continue! Come on!
Hammer is still on wobbly legs! Can Brawler finish him?
The cut above Jack Hammer's eye is starting to cause him problems now.
Hammer tries to move into range but Brawler moves to the side and lands with a nice right hand.
That's four minutes gone in the round.
Hammer tries to clinch there but Brawler circles away.
Hammer seems to have recovered his senses.
Brawler cracks Hammer with a left hand that drops him to the canvas, up against the ropes! Can Hammer get back up in time? 3, 4, 5, 6, 7... he's on one knee... 8, 9... he's up! 'Walk towards me' says the referee. Hammer looks steady enough to continue so we're going to continue!
Hammer ducks into a a hook from Brawler and goes down! He looks in a bit of a mess; will he beat the count?! 4,5,6,7,8 - he's up and looking to carry on! The referee looks into his eyes and sees that he's OK to continue!
Hammer throws a wild body kick that Brawler sees coming a mile off.
Brawler connects with a picture perfect right hand that knocks Hammer out cold! This one is over in a flash!
Ladies and gentlemen, after 4:31 of round 2, we have a winner by way of KO (Punch). Brooklyn Brawler!
Brooklyn Brawler is the new heavyweight champion!
Brooklyn Brawler tried to hype himself up post fight but didn't word it too well and it ended up with him sounding like a bit of a tool.
|
|
|
|
|
|
|
|
|
|
|
|
|
|
|
|
|
|
|
|
|
|
|
| S |
C
A |
G |
S |
C
B |
G |
|
S |
C |
G |
|
energy
A | B |
|
hype
A | B |
|
pop
A | B |
|
mgr
A | B |
|
FIGHT
RATING
40% |
|
|
|
|
|
|
|
|
|
|
