 |
HILITE 3: TBA PBP Commentary |
Undercard bout
|
|
|
|
Undercard bout
|
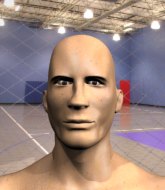
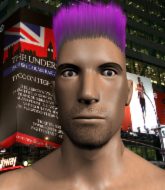
Coming up we have a heavyweight MMA rules bout between Robert Drago (ranked 0 p4p, 0 weight class) and Aldon Smith (ranked 0 p4p, 0 weight class). Drago kept the crowd waiting but all that was forgotten when his ring entrance music started. The incomparable musical genius that is Lateralus. Both fighters really staring each other down here, as Aldon Smith enters the cage!
 |
|
 |
| 200 cm
19
260 lbs
1 - 5 - 0 |
|
190 cm
18
245 lbs
1 - 0 - 0 |
BJJ White Belt
Brawler
KO power |
|
BJJ Blue Belt
Brawler
Determined |
|
| |
|
Ladies and gentlemen. This fight is 3 rounds, in the heavyweight division.
Introducing the fighter to my left, fighting out of the red corner.
With a record of
1 - 5 - 0, fighting out of Hilo, Robert Drago!
And introducing the fighter to my right, fighting out of the blue corner.
With a record of
1 - 0 - 0, fighting out of Hilo, Aldon Smith!
The judges for this bout are Chris Saunders, Paul Gruel and Roger Salmon.

The bell rings for round one and we are underway!
Smith tries to clinch but Drago is having none of it.

Smith closes the distance and after a bit of a stuggle, scores a takedown into Drago's guard.
Smith lands a couple of digs.
Smith stands up over Drago, holding his feet. He dives back in and lands a decent shot to the head.
Smith passes Drago's right leg, so he's now in half guard.
Drago looks like he's trying to stand up.
The ref warns both fighters not to hold the cage as they work up against the meshing.
Drago is looking for a sweep. Smith is wise to his cunning plan and keeps the top position.
Smith scoring with strikes to the body and head.
This is a great period of action - very entertaining stuff!

Smith is trying to work for a kimura. This could be trouble! No, Drago has managed to free his arm - good work.
Nice strikes from Smith there.
Drago is looking to escape.
Smith looks to score some points with some ground and pound.
Drago wants to improve his position but Smith is controlling well.
Smith prevents Drago from standing back up.
Smith is looking for a kimura here.
Smith working over Drago with some ground and pound. Drago looks like he wants out of this position, which is understandable.
Smith should think about turning a few of those tyres round his middle into muscle if he wants people to take him seriously as an athlete.

That's one minute gone in the round.
Drago tries to get to full guard but Smith has control of the leg.
Both fighters really going for it on the ground here!
Drago is refusing to be controlled, as Smith sits in half guard.
Smith seems to be looking for submissions.
Smith passes to side control.
Smith wants to work for a kimura but he's foiled early by Drago, who protects the arm well.
Drago taking a bit of punishment here - Smith scoring with strikes.
Drago taking punishment in the form of punches.
Smith working the body and head with strikes.
Wooooo! Give it up for these two warriors! They are putting on a show!
Smith looking for an arm triangle but it's way too loose to do anything.
Drago is not in a great position here, taking some shots.

That's two minutes gone in the round.
Smith wants to work for a kimura but he's foiled early by Drago, who protects the arm well.
Smith is looking to finish here, going for an Americana. Drago knows the correct defense though, so he's OK.
Drago knows he needs to get back to his feet asap. He's simply no match for Smith on the ground.
Smith working the head with strikes.
Smith tries for a kimura but Drago is defending well.
The fighters are pressed up against the cage, both looking to find a bit of space to work.
Drago tries to bench press Smith off him but Smith keeps the position.
Smith cracks Drago with an elbow. That is naaassty.
Smith tries for a kimura. Not really close to a finish though.

That's three minutes gone in the round.
Drago is trying to escape and get back to his feet.
Smith cracks Drago with a big elbow.
Drago takes a couple of big shots there - the referee warns him that he has to defend himself better.
Smith works a knee to the body and follows up with a nice elbow to the head.
Drago is looking for a sweep.
Smith is looking to finish here, going for an Americana. Drago knows the correct defense though, so he's OK.
Smith looks winded!
Smith staying calm.
Drago is pushing Smith's head away, looking to escape. Smith manages to hold on to the position though.

That's four minutes gone in the round.
Smith thinks about going for a far side armbar but bails out and retains the dominant position instead.
Smith has the superior BJJ but he's also working some ground strikes into his gameplan.
Drago on the wrong end of some ground and pound.
The crowd cheering loudly, showing their appreciation for the quality fight we're seeing here.
Drago manages to land a sweep and he's now on top! Lovely Jiu Jitsu!
Drago thumps the canvas. Not on purpose obviously - he just missed Smith's head.
Smith actively working from the bottom here.

Smith manages to escape and get back to his feet!
Smith walks into a jab.
Drago defends well against a solid takedown attempt from Smith.
The crowd are going absolutely nuts as the round comes to an end - what a fantastic round of action!
A thudding body kick lands there by Drago!
Drago is looking to clinch but Smith is avoiding it.
Smith avoids the head kick by Drago.
Drago throws a head kick that Smith semi-blocks.
Smith takes one on the chin but keeps coming.
And thats the end of the round the fighters go back to their corners.
Aldon Smith dominated that round.
That's time! Drago's corner gives him a slap on the ass as he gets ready to fight.

Drago lands with a head kick! That's gotta hurt.
Drago cracks Smith with a good jab.
Smith fails with an attempt to clinch.
Smith shoots in for a takedown and gets it.
The referee walks around the fighters to get a better view of the action. Smith lands a nice short elbow.
Smith is working for a submission of some sort.
Fantastic stuff here - a very entertaining period of action, which has drawn cheers from the crowd.
Smith lands strikes from half guard.
Smith scoring with strikes to the body and head.
Ground and pound from Smith.
Smith prevents Drago from standing back up.
Smith maintaining the dominant position here and is working for a kimura. He's locked it up! Drago could be in real trouble here! He's trying to wriggle out but Smith has cracked it and Drago is screaming in pain - he's tapped out! Great finish by Smith!
Ladies and gentlemen, after 1:58 of round 2, we have a winner by way of Submission (Kimura). Aldon Smith!
Aldon Smith looked relieved post fight as he said the following; 'i want to thank carlos for this fight , my sponsor mango nutrition and KAISER clothing company,and HILITE for putting together this event.'.
|
|
|
|
|
|
|
|
|
|
|
|
|
|
|
|
|
|
|
|
|
|
|
| S |
C
A |
G |
S |
C
B |
G |
|
S |
C |
G |
|
energy
A | B |
|
hype
A | B |
|
pop
A | B |
|
mgr
A | B |
|
FIGHT
RATING
100% |
|
|
|
|
|
|
|
Undercard bout
|
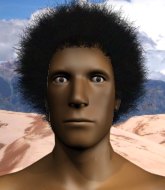
Coming up we have a lightweight MMA rules bout between Mike Alvarez (ranked 0 p4p, 0 weight class) and Johnny Belt (ranked 0 p4p, 0 weight class). Both fighters look fresh as a daisy as they make their way towards the cage.
 |
|
 |
| 180 cm
21
160 lbs
0 - 1 - 0 |
|
171 cm
19
164 lbs
2 - 2 - 0 |
BJJ Purple Belt
Brawler
Good chin |
|
BJJ Blue Belt
Basic striking
Granite chin |
|
| |
|
Ladies and gentlemen. This fight is 3 rounds, in the lightweight division.
Introducing the fighter to my left, fighting out of the red corner.
With a record of
0 - 1 - 0, fighting out of Hilo, Mike Alvarez!
And introducing the fighter to my right, fighting out of the blue corner.
With a record of
2 - 2 - 0, fighting out of Hilo, Johnny Belt!
The judges for this bout are Josh West, Colin Fray and Roger Salmon.
The bell rings for round one and we are underway!
Belt is looking to chop away at Alvarez's legs.

Belt drives through and clinches with Alvarez against the cage.
Alvarez drops down looking for an ankle pick but Belt pulls his leg out and moves away.
Alvarez with a lazy takedown attempt
and Belt counters with a left and a right that stings Alvarez.
Alvarez tries to clinch up but Belt circles away and keeps his distance.
Alvarez misses with a takedown attempt
and Belt counters with a nice body kick.
That's three failed takedown attempts in the round for Mike Alvarez. That's going to take a lot out of him.
Alvarez tries to close the distance and clinch up against the cage but Belt paws at him with a jab and circles away.
Belt tries to close the distance and clinch but Alvarez swats him to one side with an open hand palm strike and circles away.
Belt stuffs the takedown attempt from Alvarez. Alvarez gets slowly back to his feet.
Belt throws a right and a left that Alvarez avoids nicely.
Belt throws a nice looking combination but Alvarez bobs and weaves to avoid any damage.
Belt looks to land a combination but Alvarez avoids it well.
Belt throws a right and a left that Alvarez avoids nicely.
Alvarez has his takedown stuffed
and Belt counters with a leg kick.
Sloppy strikes from Belt. Those never looked like landing.
Belt fakes with an overhand right and moves in to clinch with Alvarez, pushing him back against the cage.
The crowd are loving this. Great action here.
Alvarez is working on a leg, looking for a takedown but Belt is defending well.
Alvarez wants a takedown but no success here.
That's one minute gone in the round.

Belt breaks the clinch and we're back to striking at distance.
Alvarez misses with a takedown
and Belt counters by clinching up.
Alvarez is breathing heavily.
Belt is trying to break the clinch but Alvarez is controlling him.
Alvarez blocking some punches.
Alvarez has hold of a leg and is looking for a trip takedown. Belt avoids it nicely though and we remain in the clinch.
Belt is trying to break free.
Belt prevents the takedown attempt.
Alvarez is working on a leg, looking for a takedown but Belt is defending well.
Belt's corner calls for him to break the clinch, which he does.
Belt clinches.
Alvarez has had enough of the clinch but Belt keeps him there for the moment.
Alvarez tries a knee to the head but Belt blocks it.
Alvarez keeps control of Belt as he tries to wriggle out of the double underhooks.
Alvarez has hold of a leg and is looking for a trip takedown. Belt avoids it nicely though and we remain in the clinch.
Belt escapes the clinch and we're back to striking.
That's two minutes gone in the round.
A nice combination there by Belt.
Belt closes the distance and presses his opponent up against the cage.
Wooooo! Give it up for these two warriors! They are putting on a show!
Belt is trying to break free.
Belt misses with a hook to the ribs.
Alvarez changes levels and goes for a takedown here. Belt fights it off and pushes away nicely.
Belt's corner calls for a 1-2. Belt obliges with the 1 part as he scores the single shot and moves back out of range.
Belt scores with a jab to the jaw.
Alvarez tries for a takedown but Belt circles away easily
letting Belt counter with a right hand.
Belt forces Alvarez back against the cage and clinches.
A real battle for position is taking place between these two warriors.
Belt escapes the clinch and we're back to striking.
Belt rushes Alvarez and pushes him back against the cage in a clinch.
Alvarez wants a takedown.
That's three minutes gone in the round.
Belt leaning against his opponent.
Belt breaks from the clinch.
Alvarez checks a leg kick.
Johnny Belt is looking to keep the fight on the feet at all costs.
A nice combination there by Belt.
Alvarez needs to keep his hands up - Belt had a free shot at his head there.
Belt pulls out of a head kick attempt.
Belt misses with a few strikes there.
Belt misses with a series of wild punches.
This is turning into a torrid day at the office for Alvarez. He's trying desperately to land a takedown but he's failing miserably and getting slapped silly on the feet to compound his misery.
Belt has taken the fight to the clinch.
Alvarez is looking to take this one to the mat.
Belt manages to break the clinch.
Belt tries a head kick but it misses.
Belt misses with a head kick.
Alvarez takes one to the side of the head.
No luck for Alvarez with that takedown attempt.
That's four minutes gone in the round.
Belt closes the distance and clinches.

Alvarez has dropped down and is working for a takedown. Belt is trying to keep an underhook but Alvarez manages to get the takedown into half guard.
The crowd are loving this. Great action here.
Belt looks like he's trying to stand up.

Alvarez is looking for a kimura. It's going to be difficult to finish that from half guard though and Belt defends it well.
Alvarez is looking for a kimura but Belt is holding onto that half guard position, so it's hard for Alvarez to get the leverage.
The crowd are going absolutely nuts as the round comes to an end - what a fantastic round of action!
Belt pushes Alvarez off looking to stand but Alvarez dives back in and keeps control.
Alvarez wants to control but Belt is keeping him busy.
Alvarez is trying to work for a kimura but Belt is defending well.
And thats the end of the round the fighters go back to their corners.
Johnny Belt dominated that round.
That's the end of the round. The referee orders the cornermen out of the cage so we can get back down to business.
Belt lands a jab to the head.
Alvarez fakes high and shoots in for a takedown but Belt avoids it really well and circles away.
Belt has managed to clinch.
Belt breaks the clinch.
Alvarez shoots in looking for a takedown. Belt tries to sprawl out of it but Alvarez keeps driving through. The fighters are pinned against the cage. Belt manages to get underhooks and after a bit of a struggle, circles away and we're back to standing.
Belt tries to clinch there but Alvarez circles away.
Belt throws a series of punches but Alvarez avoids them all with ease.
Alvarez has a takedown stuffed.
That's three failed takedown attempts in the round for Mike Alvarez. That's going to take a lot out of him.
Belt rushes forward with a series of wild hooks but Alvarez moves out of range and avoids them all easily.
Both fighters are absolutely exhausted here.
Alvarez wants to clinch.
That's one minute gone in the round.
Alvarez circles away from the clinch attempt.
Nice takedown defense from Belt. No joy for Alvarez on that attempt.
Mike Alvarez seems to be the more aggressive standup fighter in this bout.
Belt throws a right and a left that Alvarez avoids nicely.

Alvarez moves into the clinch.
Alvarez drops to a knee looking for a takedown but Belt gets the underhooks and prevents it.
Belt wants to strike at distance but he can't break free of the clinch.
Alvarez is working on a leg, looking for a takedown but Belt is defending well.
Belt breaks the clinch and we return to the middle of the mat.
Belt throws a sloppy head kick and Alvarez moves out of range easily.
Belt throws a right hand that Alvarez ducks under and follows up with a left that Alvarez also avoids with ease.
Alvarez with a poor takedown
and Belt holds on and brings the fighters into a clinch.
Johnny Belt seems to be working more effectively in the clinch in the fight so far.
Belt is trying to push Alvarez away but Alvarez has him pressed against the cage, so he's going nowhere.
That's two minutes gone in the round.
Belt manages to break the clinch.
Alvarez gets his takedown attempt stuffed easily
and Belt finishes the little exchange by landing a big kick to the body.
A combination from Belt does no damage.
Belt stalks Alvarez and leaps in with a furious combination of punches. Uppercuts and crosses smash into Alvarez's face. Alvarez staggers backwards, shaken.
Belt has taken the fight to the clinch.
This is a great period of action - very entertaining stuff!
Alvarez is looking for a takedown.
Belt breaks the clinch and we return to the middle of the mat.
Belt throws a right and a left that both miss.
Alvarez dodges the punch combination from Belt.
Alvarez misses with a takedown attempt
and Belt counters with an inside leg kick.
Belt fakes a head punch and goes low to the body. Nicely done.
Belt rushes forward with a series of wild hooks but Alvarez moves out of range and avoids them all easily.
Belt throws a nice outside leg kick.
Belt closes the distance and pushes Alvarez back into the cage.
That's three minutes gone in the round.
Belt is trying to slow down the pace of the fight but Alvarez is keeping busy.
Alvarez is looking for a takedown up against the cage. Belt gets underhooks though and prevents the takedown attempt.
Belt breaks the clinch and we're back to striking at distance.
Belt clinches.
Belt wants to push off and get back to the center of the mat but Alvarez has him pressed against the cage.
Alvarez tries to jump guard but he falls flat on his backside. Belt smiles and moves away.
Belt stuffs the takedown.
Belt fails with an attempt to clinch.
Belt has closed the distance and engaged Alvarez in a clinch.
Alvarez drops down looking for an ankle pick but Belt pulls his leg out and moves away.
Belt lands a two punch combo.
That's four minutes gone in the round.
A kick lands to the mid section there for Belt.
Belt tries to clinch but is not successful on this occasion.
Belt gets to the clinch - let's see what his plan is here.
Alvarez is trying to drag Belt to the mat but Belt just about manages to keep his footing. He used the cage to his advantage there.
Belt prevents the takedown attempt.
Alvarez is trying to pull guard but being pressed up against the cage enables Belt to keep the fight standing.
We've seen a great period of action over the last minute or so - credit to both fighters for going all out!
Alvarez wants a takedown but no success here.
As the round comes to an end the crowd are showing their appreciation for a great round of action.
Belt pushes off and circles away, back to the middle of the mat.
Belt clinches up against the cage.
Belt manages to break the clinch.
Belt keeps Alvarez at a distance using the push kick.
And thats the end of the round the fighters go back to their corners.
Johnny Belt showed his class in that round. I'd imagine he'll take it on all the scorecards.
The minute break is over - no more time for sponges and pep talks - back to the action! This is the final round!

Alvarez is pinned up against the cage taking some big shots here. The referee is looking closely deciding whether he should stop the fight.
Alvarez tries to close the distance and clinch but Belt swats him to one side with an open hand palm strike and circles away.
Alvarez fakes high and shoots in for a takedown but Belt avoids it really well and circles away.
Belt thows a body shot but no joy.
Belt looks to land a combination but Alvarez avoids it well.
Belt lands a leg kick that knocks Alvarez off balance momentarily.
Alvarez shoots in but doesn't get the takedown
and he gets countered with a snapping leg kick.
Belt displaying good standup as he scores with a three punch combination.
Alvarez misses with a takedown
and Belt counters with a two punch combo.
That's three failed takedown attempts in the round for Mike Alvarez. That's going to take a lot out of him.
Both fighters are breathing heavily.
Alvarez slips a jab and a cross from Belt.
Nice uppercut lands for Belt. That snapped Alvarez's head back.
Belt closes the distance and presses his opponent up against the cage.
Alvarez is looking to take this one to the mat.
That's one minute gone in the round.
Belt working on landing some head shots here - that one got through nicely.
Belt has had enough of the clinch and is looking to separate.
Belt breaks the clinch and we return to the middle of the mat.
Johnny Belt seems to be getting the better of the standup.
Belt moves into range and throws a combination. A nice jab followed by a hook to the body.
Belt swinging wildly here.
Belt misses with a jab and misses with a cross straight after too.
Belt tries to bum rush Alvarez with a series of wild strikes but Alvarez uses good footwork to avoid the assault.
Alvarez shoots in with a takedown attempt and he has Belt pinned against the cage. Belt gets the underhooks and manages to circle away.
Belt moves into the clinch successfully.
Belt manages to break the clinch.
Belt tries to bum rush Alvarez with a series of wild strikes but Alvarez uses good footwork to avoid the assault.
Alvarez with a lazy takedown attempt
and Belt counters with a two punch combo.
Johnny Belt is looking to throw some combinations by the looks of things.
That's two minutes gone in the round.
Belt misses with a low kick.
A punch combination from Belt misses.
Alvarez tries to shoot in for a takedown. He's got hold of a leg but Belt swivels and escapes.
Belt throws a right and a left that Alvarez avoids nicely.
Alvarez shoots in with a takedown attempt and he has Belt pinned against the cage. Belt gets the underhooks and manages to circle away.
Belt has Alvarez up against the cage in a clinch.
The fans in attendance giving it up for the two fighters, who have really let it all hang out in the last minute or so!
Alvarez goes for a takedown in the clinch but Belt prevents it.
Belt lands a body shot.
Belt has been the more effective fighter overall so far.
Belt wants to push off and get back to the center of the mat but Alvarez has him pressed against the cage.
Belt pushes off and circles away, back to the middle of the mat.
That's three minutes gone in the round.
Alvarez has his takedown stuffed
and Belt counters with a nice uppercut.
Belt throws a head kick that connects with a bit of head and a bit of hand.
Belt scores with the left hand. Alvarez knows he should have avoided that one.
Alvarez tries for a takedown but Belt sees it coming a mile off and avoids it easily.
A solid body kick from Belt.
Belt bobs and weaves and then throws a good body kick.
Alvarez feints and as Belt raises his hands in defense, Alvarez changes levels and drives through with a takedown into guard.
Alvarez drops back looking for a heel hook - he quickly realises he's not going to get it but Belt manages to dive on top of him before he can escape and now Alvarez has Belt in his guard.
Belt wants to stand but Alvarez is controlling his posture from full guard.
That's four minutes gone in the round.
Alvarez looking for a triangle here. Belt is fighting it but it looks tight! Alvarez pulls the arm across and this one won't last much longer! Nope, Belt is tapping out - this one is all over!
Ladies and gentlemen, after 4:29 of round 3, we have a winner by way of Submission (Triangle Choke). Mike Alvarez!
As Mike Alvarez got his breath back, he grabbed the microphone and managed to blurt out the following: i like to thank carlos for getting me this fight ,my sponsors mango nutrition and KAISER clothing company, and HILTE for putting this event together'.
|
|
|
|
|
|
|
|
|
|
|
|
|
|
|
|
|
|
|
|
|
|
|
| S |
C
A |
G |
S |
C
B |
G |
|
S |
C |
G |
|
energy
A | B |
|
hype
A | B |
|
pop
A | B |
|
mgr
A | B |
|
FIGHT
RATING
84% |
|
|
|
|
|
|
|
Undercard bout
|
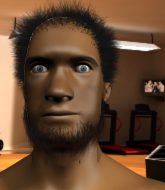
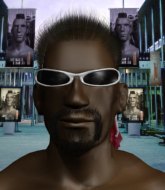
Coming up we have a middleweight MMA rules bout between Vick Michaels (ranked 0 p4p, 0 weight class) and Simon Guey (ranked 0 p4p, 0 weight class). The crowd giving both fighters a great reception on their way into the arena. That's good to see.
 |
|
 |
| 182 cm
21
185 lbs
0 - 1 - 0 |
|
186 cm
23
192 lbs
9 - 1 - 0 |
BJJ White Belt
Solid boxing
Granite chin |
|
BJJ White Belt
World class boxer
Good gas tank |
|
| |
|
Ladies and gentlemen. This fight is 3 rounds, in the middleweight division.
Introducing the fighter to my left, fighting out of the red corner.
With a record of
0 - 1 - 0, fighting out of Los Angeles, Vick Michaels!
And introducing the fighter to my right, fighting out of the blue corner.
With a record of
9 - 1 - 0, fighting out of Helsinki, Simon Guey!
The judges for this bout are Ryoma Takatsuka, Roger Salmon and Colin Fray.
The bell rings for round one and we are underway!
Nice uppercut lands for Michaels. That snapped Guey's head back.
Michaels shoots in for a takedown but Guey shows good takedown defense there and keeps this one on the feet.
Michaels looks for a takedown here. Will he get it? Guey is fending him off so far but Michaels persists. Nope, Guey circles away and we're back to standing.
Good standup being displayed there by Guey as he connects with a hook.
Decent striking displayed by Guey there.
Michaels moves his head to the side to avoid a jab but walks straight into a cross.
Michaels takes a shot to the body in his stride.
We've seen a great period of action over the last minute or so - credit to both fighters for going all out!
Michaels on the wrong end of an overhand right that came out of nowhere.
Michaels shoots in for a double leg but Guey sprawls well. That's going to sap some energy.
That's three failed takedown attempts in the round for Vick Michaels. That's going to take a lot out of him.
Guey scores with a sloppy right hand. Michaels should have avoided that one.
Good standup being displayed there by Guey as he connects with a hook.

Guey lands a big right hand that sends Michaels crashing to the mat! Guey stays standing though and waves Michaels back to his feet!

Michaels is rocked!
Michaels gets caught by a big overhand right and goes down! Guey gets on top of him and starts throwing some serious punches until the ref intervenes and stops the fight!
Ladies and gentlemen, after 0:46 of round 1, we have a winner by way of TKO (Strikes). Simon Guey!
A victorious Simon Guey thanked his army of followers in his post fight interview, telling people to make sure they follow him on Twitter.
|
|
|
|
|
|
|
|
|
|
|
|
|
|
|
|
|
|
|
|
|
|
|
| S |
C
A |
G |
S |
C
B |
G |
|
S |
C |
G |
|
energy
A | B |
|
hype
A | B |
|
pop
A | B |
|
mgr
A | B |
|
FIGHT
RATING
100% |
|
|
|
|
|
|
|
Co-main event
|
Coming up we have a lightweight MMA rules bout between Kato Munechika (ranked 0 p4p, 0 weight class) and Scotty McBiggy (ranked 0 p4p, 0 weight class). Munechika kept the crowd waiting but all that was forgotten when his ring entrance music started. The incomparable musical genius that is Requiem for a Dream. Rumors backstage are that the fighters have been paid to keep it standing but we know that would never happen in MMA!
 |
|
 |
| 173 cm
31
160 lbs
18 - 6 - 0 |
|
172 cm
28
160 lbs
12 - 5 - 0 |
BJJ Purple Belt
Decent elbows
KO power |
|
BJJ Purple Belt
Decent boxing
Granite chin |
|
| |
|
Ladies and gentlemen. This fight is 5 rounds, for the lightweight championship of the world!
Introducing the champion to my left, fighting out of the red corner.
With a record of
18 - 6 - 0, fighting out of Las Vegas, Kato Munechika!
And introducing the challenger to my right, fighting out of the blue corner.
With a record of
12 - 5 - 0, fighting out of Hilo, Scotty McBiggy!
The judges for this bout are Josh West, Ryoma Takatsuka and Jeff Smith.
The bell rings for round one and we are underway!
McBiggy tries to clinch up but Munechika circles away and keeps his distance.
Both fighters circling a little - Munechika finishes the exchange with a kick to the body.
Munechika fakes a couple of low kicks, before throwing one on the third attempt. It connects and McBiggy has to reset his feet before getting ready to engage.
McBiggy keeping a good distance there, avoiding the body shot.
McBiggy takes a swing at Munechika's ribcage but misses.
Munechika throws a decent looking leg kick but it doesn't land clean.
McBiggy throws a jab when Munechika was well out of range.
Wow, both these guys are really going for it!
McBiggy moves out of range as Munechika throws a body kick.
McBiggy lands a body shot.
McBiggy stalks Munechika and leaps in with a furious combination of punches. Uppercuts and crosses smash into Munechika's face. Munechika staggers backwards, shaken.

It looks like Kato Munechika has been cut.
Wooooo! Give it up for these two warriors! They are putting on a show!
Munechika lands a front kick.
McBiggy moves out of range of the leg kick from Munechika.
Nice shot by McBiggy.
McBiggy ducks right into an uppercut from Munechika.
McBiggy fails with a takedown attempt.
McBiggy tries to clinch up against the cage, rushing in the close the distance. Munechika manages to break the clinch and circles back to the middle of the mat.
McBiggy takes a thudding leg kick, right into the meat of the thigh.
Munechika misses with a low kick.
Munechika lands a leg kick that knocks McBiggy off balance momentarily.
Munechika lands a nice leg kick that just misses McBiggy's sensitive parts.
Munechika dodges the punch combination from McBiggy.
McBiggy closes the distance and takes a jab right on the nose as he does so.
That's one minute gone in the round.
Munechika with a nice looking leg kick. You could hear that one land in a back row.
McBiggy is looking to take this fight into the clinch.
Munechika swings away with a leg kick that misses.
McBiggy misses with a two punch combination.
McBiggy takes one on the button.
McBiggy looks to land a combination but Munechika avoids it well.
McBiggy shoots in and drives through. Munechika sprawls well.
McBiggy lands a leg kick that knocks Munechika off balance momentarily.
McBiggy is looking to take this fight into the clinch.
McBiggy shoots in looking for a takedown but Munechika manages to keep the fight standing, pushing McBiggy's face into the canvas for good measure before circling away.
Kato Munechika has stuffed three takedown attempts in the round now. That's going to take a lot out of Scotty McBiggy.
Munechika lands with a nice body punch.
Good shot there by Munechika.
Munechika takes one on the chin but seems OK.
Munechika throws a chopping leg kick but McBiggy manages to avoid taking any serious damage.
We've seen a great period of action over the last minute or so - credit to both fighters for going all out!
Munechika fakes a couple of low kicks, before throwing one on the third attempt. It connects and McBiggy has to reset his feet before getting ready to engage.
Munechika scores with a shot to the body.
Munechika has taken the fight to the clinch.
That's two minutes gone in the round.
Munechika lands a right hand that snaps the head of McBiggy backwards.
McBiggy swings away with an uppercut that misses.
McBiggy working aggressively here.
Munechika digs a right hand into McBiggy's ribs. Those have got to be taking their toll on McBiggy's gas tank.
McBiggy tries a shoulder strike but it doesn't do any damage.
A head punch on the inside from McBiggy fails to land.
McBiggy doesn't land with the attempted body shot.
Munechika pushes McBiggy back against the cage and lands a hook to the side of the head.
McBiggy working aggressively here.
Munechika lands with a short punch from the clinch.
McBiggy tries a shoulder strike but it doesn't do any damage.
Munechika lands with a quick shot inside that doesn't really do much damage.
McBiggy pushes Munechika back against the cage and lands a hook to the side of the head.
A hook to the body from Munechika.
McBiggy looks winded!
McBiggy swings wildly with an uppercut but Munechika uses good head movement to avoid it.
Munechika works on McBiggy's body with a couple of short punches.
Munechika lands a nice elbow.
That's three minutes gone in the round.
Munechika lands a hook that snaps the head of McBiggy backwards.
Munechika scores with a hook to the body.
McBiggy prevents a body shot from Munechika.
Munechika lands punches inside but they're not really causing much damage.
McBiggy tries a shoulder strike but it doesn't do any damage.

Munechika breaks the clinch.
Munechika avoids a punch combination nicely.
Munechika lands a lovely overhand right.
McBiggy tries to move into range but Munechika moves to the side and lands with a nice right hand.
Munechika lands a glancing blow to the side of McBiggy's head.
Munechika avoids a lazy jab quite easily.
McBiggy has his front leg slapped to the side - a nice low kick landing there from Munechika.
Munechika scores with a reasonable looking shot to the body. McBiggy doesn't seem bothered though.
Munechika lands a straight punch to the body, keeping McBiggy at a distance.
Munechika catches McBiggy with a nice straight right. He seems pissed - ooooh, it's on now! On like donkey kong!
Wooooo! Give it up for these two warriors! They are putting on a show!
Munechika keeps the fight standing with a nice sprawl.
McBiggy shoots for a takedown but Munechika saw that one coming a mile off and avoided it easily.
Munechika connects with a leg kick. He turned his hip over nicely there.
Munechika is really peppering his opponent's head with punches.
That's four minutes gone in the round.
Munechika with a nice looking leg kick. You could hear that one land in a back row.
Munechika fakes a couple of low kicks, before throwing one on the third attempt. It connects and McBiggy has to reset his feet before getting ready to engage.
Nice takedown defense from Munechika. No joy for McBiggy on that attempt.
Munechika feints a jab promting McBiggy to slip. Munechika then demonstrates his capabilities by jabbing again. McBiggy slips again and ducks right into an uppercut.
McBiggy slips a jab and a cross from Munechika.
McBiggy takes a jab on the nose there. A little bit of blood seems to be coming out. Hopefully that won't affect his breathing.
Munechika lands with a nice low kick. That'll leave a bruise.
McBiggy dives in and grabs Munechika's left leg, looking for a takedown. Munechika pushes down on McBiggy's head and hops out.
Munechika throws a nice outside leg kick.
Munechika with a nice looking leg kick. You could hear that one land in a back row.
Good exchange - Munechika coming out on top.
Munechika scores with a sloppy punch to the body. Not much technique there but it did the business.
A swing and a miss from McBiggy.
The crowd are going absolutely nuts as the round comes to an end - what a fantastic round of action!
McBiggy takes a shot to the nose. Hopefully that hasn't broken it.
A good leg kick by Munechika.
McBiggy's leg has a nasty welt from taking a succession of leg kicks. That must be slowing him down.
McBiggy falls off balance throwing a combination
and Munechika counters with a nice low kick that buckles McBiggy's knee momentarily.
McBiggy swings wildly with a right hand that was never going to find it's target.
And thats the end of the round the fighters go back to their corners.
Kato Munechika dominated that round.
The cut man is working on Kato Munechika's cut.
That's the end of the interval. I'm sure that seemed a lot quicker than a minute for our two fighters! Back to the action.
Munechika closes the distance and clinches up, looking for a takedown. He shifts his weight and gets a nice trip into half guard.
McBiggy has one foot on Munechika's thigh - he pushes off and manages to get back to his feet.
Munechika lands a nice leg kick that just misses McBiggy's sensitive parts.
A jab from Munechika finds it's way through McBiggy's defenses.
Scotty McBiggy seems to be the more aggressive standup fighter in this bout.
Munechika throws a feint and then finishes with a kick to the body.
McBiggy tries to shoot in for a takedown. He's got hold of a leg but Munechika swivels and escapes.
Munechika tried to score with a low kick but McBiggy checks it.
Munechika forces McBiggy back against the cage and clinches.
A nice right hand lands inside from Munechika.
The fighters are starting to perspire pretty heavily.
A head punch blocked on the inside by Munechika.
An uppercut on the inside fails to land for McBiggy.
McBiggy is trying desperately to land a takedown but Munechika is having absolutely none of it. This is turning into a bit of a nightmare for McBiggy.
Munechika breaks the clinch and we return to the middle of the mat.
Fantastic stuff here - a very entertaining period of action, which has drawn cheers from the crowd.
Munechika fakes a jab and scores with a low kick.
Munechika scores with a nice strike.
Munechika showing good head movement there, avoiding the strikes from McBiggy.
McBiggy looks for a takedown here. Will he get it? Munechika is fending him off so far but McBiggy persists. Nope, Munechika circles away and we're back to standing.
McBiggy is breathing heavily.
McBiggy gets cracked with a nice right hand there by Munechika.
Munechika lands with an uppercut that bounces McBiggy off the cage and back into range.
Kato Munechika is winning the standup battle so far.
That's one minute gone in the round.
McBiggy lands with a cross.
McBiggy takes a shot to the eye socket. That's gotta hurt.
Munechika thows a body kick. McBiggy tries to catch it but that hurt him.
Munechika feints and then cracks McBiggy's leading leg with a nice low kick. He's obviously looking to slow McBiggy down.
McBiggy avoids the body shot from Munechika.
McBiggy digs a good hook to Munechika's body.
Munechika throws a jab to the body, straight down the pipe. Boom. That sent McBiggy stumbling backwards but he manages to regain his composure quickly.
McBiggy throws a jab, cross combination which is slipped
and Munechika makes him pay by landing a thudding low kick.
Munechika lands with a nice combination. McBiggy backs away looking to recover.
Munechika on the wrong end of a nice jab.
McBiggy swings and misses with a hook to the body.
Munechika scores with a decent looking hook.
Munechika fakes a couple of low kicks, before throwing one on the third attempt. It connects and McBiggy has to reset his feet before getting ready to engage.
The crowd are loving this. Great action here.
McBiggy drops his hands momentarily and Munechika takes advantage with a crisp shot to the head.
McBiggy checks a low kick from Munechika.
Munechika tries to land a front kick but McBiggy steps back. That was a bit too telegraphed.
McBiggy keeping a good distance there, avoiding the body shot.
Munechika gets cracked there but stands up to it.
McBiggy throws a combination but it was largely blocked by Munechika.
That's two minutes gone in the round.
McBiggy misses with a series of wild punches.
Munechika moves away from the strike by McBiggy.
Munechika closes the distance and presses his opponent up against the cage.
Munechika lands a left hand that snaps the head of McBiggy backwards.
McBiggy blocks a body shot from Munechika.
McBiggy throws a head punch that misses.
Munechika scores with an uppercut up the middle.
McBiggy misses with some punches.
Munechika unloads a knee to the mid-section.
Munechika lands with a good tight uppercut to the head.
McBiggy has a couple of punches blocked by Munechika.
McBiggy misses with the head strike.
McBiggy doesn't land with the attempted body shot.
McBiggy tries a shoulder strike but it doesn't do any damage.
Munechika tried to land a shot to the body but connects with McBiggy's elbow.
McBiggy misses with a hook from the clinch.
Munechika softening up his opponent with strikes, against the cage.
That's three minutes gone in the round.
Munechika blocks a couple of punches on the inside.
Munechika lands a hook to the side of the head.
Nice body punch from Munechika.
Munechika works on McBiggy's body with a couple of short punches.
McBiggy swings away with an uppercut that misses.
A short right from Munechika on the inside.
Munechika lands a left hand.
Munechika lands a body punch - he's looking to wear down McBiggy.
McBiggy has a couple of punches blocked by Munechika.
A short uppercut from Munechika.
Kato Munechika has scored more points in the clinch so far.
Munechika lands a hook to the side of the head.
Munechika lands a left hand.
The fans in attendance giving it up for the two fighters, who have really let it all hang out in the last minute or so!
Munechika lands a left hand.
A right hand to the body from Munechika.
A short right from Munechika on the inside.
Munechika lands a short shot on the inside that snaps the head of McBiggy backwards.
Munechika manages to break the clinch.
Munechika throws a body punch but McBiggy moves out of range.
That's four minutes gone in the round.
A jab lands there for Munechika.
Munechika lands a nice leg kick that just misses McBiggy's sensitive parts.
Munechika lands with a thumping leg kick.
Munechika fakes a jab and scores with a low kick.
Munechika showing good head movement there, avoiding the strikes from McBiggy.
Munechika cracks McBiggy with a good jab.
Munechika scores with a hook to the body. McBiggy takes a step back and tries to catch his breath.
Munechika lands a leg kick that knocks McBiggy off balance momentarily.
Munechika throws a quick inside leg kick.
Munechika dodges the punch combination from McBiggy.
McBiggy takes a shot right to the liver - Bas would have been proud of that punch.
A left lands for Munechika.
The crowd are going absolutely nuts as the round comes to an end - what a fantastic round of action!
Munechika keeps the fight standing with a nice sprawl.
Kato Munechika has stuffed three takedown attempts in the round now. That's going to take a lot out of Scotty McBiggy.
Munechika ducks low and lands a nice hook to the body of his opponent.
Munechika scores with a jab.
And thats the end of the round the fighters go back to their corners.
Kato Munechika dominated that second round.
The cut man is working on Kato Munechika's cut.
The referee calls time. The cornermen exit stage left and we're back to business.
Munechika lands a leg kick and bounces back out of range.
McBiggy walks straight into a jab right on the nose. That one stung - he's blinking and trying to clear his head.
McBiggy misses with a looping right.
Munechika wants to clinch up but McBiggy keeps it at a distance.
Good leg kick by Munechika there. It's the ones that make that thud noise that hurt and that was an almighty thud.
Nice jab there from Munechika.
Munechika is looking to slow McBiggy down with leg kicks.
This fight brought to you by 5M nutrition - it's mmmmm tasty. Nice jab by Munechika.
Munechika tests McBiggy's chin there with a solid looking shot.
Munechika with a nice cross.
Munechika throws a nice hook to the body that draws an oooh from the crowd.
Munechika misses with a low kick.
Munechika scores with a slapping inside leg kick.
McBiggy shoots in for a takedown. He's persisting with it as Munechika sprawls well. Munechika wins this battle and keeps the fight standing. McBiggy gets slowly back to his feet.
Munechika fakes a jab and scores with a low kick.
McBiggy takes a big intake of breath there - he's definitely tired.
The fans in attendance giving it up for the two fighters, who have really let it all hang out in the last minute or so!
McBiggy fails in his attempt to clinch.
Munechika is really dominating this fight. Is there anything that McBiggy can do to turn this around?
That's one minute gone in the round.
Munechika lands a nice looking body shot.
McBiggy wants to clinch up but Munechika keeps it at a distance.
Munechika stuffs the takedown attempt from McBiggy. McBiggy gets slowly back to his feet.
Scotty McBiggy is looking to throw some combinations by the looks of things.
McBiggy will need to tighten up his combinations if he doesn't want to gas himself out, swinging at thin air.
Munechika throws a head kick but McBiggy moves out of range.
McBiggy throws a series of punches but Munechika avoids them all with ease.
A nice leg kick lands there from Munechika.
Munechika connects with a slap. Keep your fist closed son.
Munechika takes the fight into the clinch.
A nice right hand lands inside from Munechika.
McBiggy misses with a hook from the clinch.
McBiggy throws a punch but it's blocked by Munechika.
Munechika is working McBiggy over against the cage.
Munechika displaying some good clinch control by pressing McBiggy up against the cage.
A nice glancing elbow lands by Munechika.
McBiggy has a pretty nasty looking mouse under his right eye.
That's two minutes gone in the round.
The fans in attendance giving it up for the two fighters, who have really let it all hang out in the last minute or so!
Munechika lands a body punch in the clinch.
Munechika lands a nice shot to the body.
Munechika lands an elbow that stopped McBiggy in his tracks for a moment.
Munechika is leaning against McBiggy and scores with a nice uppercut to the body.
Munechika crunches a lovely knee into McBiggy's ribcage.
Munechika lands a nice elbow.
Munechika lands a short shot on the inside that snaps the head of McBiggy backwards.
A shot in the inside from Munechika.
A short right hand to the side of the head by Munechika.
A short right from Munechika.
Munechika is leaning against McBiggy and scores with a nice uppercut to the body.
Munechika digs a right hand underneath McBiggy's ribcage. McBiggy let out a lung full of air as it connected.
Munechika lands a body shot in the clinch.
A short right hand to the side of the head by Munechika.
Munechika lands with a right to the head.
Munechika lands a hook to the body. It's hard to tell if that hurt McBiggy or not.
That's three minutes gone in the round.
A nice right hand lands inside from Munechika.

McBiggy is rocked!
Munechika working on landing some head shots here - that one got through nicely.
McBiggy is still on wobbly legs! Can Munechika finish him?
Munechika lands a right uppercut that snaps the head of McBiggy backwards.
Munechika lands a damaging elbow.
Munechika dips a shoulder and cracks McBiggy with a mighty uppercut! McBiggy falls back against the cage and Munechika unloads with a barrage of strikes! McBiggy is completely out with his eyes open, only supported by the cage! Save him ref! Eventually the ref decides to do his job and jumps in - Munechika screams abuse at the incompetent official before going over to celebrate with his corner. Brutal stuff!
Ladies and gentlemen, after 3:19 of round 3, we have a winner by way of TKO (Strikes). Kato Munechika!
Kato Munechika is the new lightweight champion!
Jumping up and down and very excited, Kato Munechika waved his t-shirt featuring Hellbent 's logo in front of the cameras.
|
|
|
|
|
|
|
|
|
|
|
|
|
|
|
|
|
|
|
|
|
|
|
| S |
C
A |
G |
S |
C
B |
G |
|
S |
C |
G |
|
energy
A | B |
|
hype
A | B |
|
pop
A | B |
|
mgr
A | B |
|
FIGHT
RATING
100% |
|
|
|
|
|
|
|
Main event
|
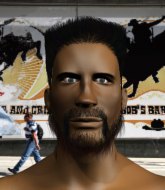
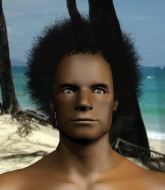
Coming up we have a welterweight MMA rules bout between Darrell Quaid (ranked 0 p4p, 0 weight class) and Mark Munoz (ranked 0 p4p, 0 weight class). Quaid kept the crowd waiting but all that was forgotten when his ring entrance music started. The incomparable musical genius that is Calm Like A Bomb- Rage Against The Machine. Munoz is bobbing his head along to his entrance song: Mga kababayan ko. Darrell Quaid could well score a knockout today. He has the power to get to Mark Munoz's chin.
 |
|
 |
| 188 cm
29
185 lbs
8 - 1 - 0 |
|
183 cm
33
185 lbs
12 - 8 - 0 |
BJJ Purple Belt
Solid boxing
Experienced |
|
Good wrestler
Excellent boxer
Good gas tank |
|
| |
|
Ladies and gentlemen. This fight is 5 rounds, for the welterweight championship of the world!
Introducing the champion to my left, fighting out of the red corner.
With a record of
8 - 1 - 0, fighting out of Las Vegas, Darrell Quaid!
And introducing the challenger to my right, fighting out of the blue corner.
With a record of
12 - 8 - 0, fighting out of Hilo, Mark Munoz!
The judges for this bout are Roger Salmon, Colin Fray and Chris Saunders.
The bell rings for round one and we are underway!
Munoz shoots in but Quaid avoids the takedown attempt easily.
A looping hook to the body misses from Quaid. Munoz does a little dance to reset his feet.
Some wild striking there from Munoz.
Quaid avoids a kick to the body.
Munoz looks for a takedown here. Will he get it? Quaid is fending him off so far but Munoz persists. Nope, Quaid circles away and we're back to standing.
Quaid throws an ugly left hook that misses
and Munoz counters with a head kick. That will keep Quaid thinking before he tries any more sloppy attacks!
Quaid avoids a low kick by using good footwork.
Quaid misses with a double jab.
Quaid throws a hook but Munoz blocks it.
Munoz shoots in for a takedown but doesn't get it.
Darrell Quaid has stuffed three takedown attempts in the round now. That's going to take a lot out of Mark Munoz.
Munoz lands the left hand.
That's one minute gone in the round.
Munoz throws a shot from downtown. Quaid moves away and avoids it.
Quaid with a body punch. A glancing blow.
Quaid stuffs the takedown attempt from Munoz. Munoz gets slowly back to his feet.
Munoz misses with a takedown attempt. He shot from a bit too far out.
Quaid scores with a leg kick.
Munoz throws a jab but it's blocked by Quaid.
Munoz on the wrong end of a nice low kick. He's acting like it's no big deal but he doesn't want to take many more of those.
Munoz misses with a head kick.
A solid leg kick lands there for Quaid.
That's two minutes gone in the round.
Munoz shoots in for a takedown but doesn't get it.
A looping hook to the body misses from Quaid. Munoz does a little dance to reset his feet.
Quaid throws a front kick that sends Munoz stumbling back into the cage.
A solid body kick from Quaid.
Fantastic stuff here - a very entertaining period of action, which has drawn cheers from the crowd.
Munoz shoots in for a double leg but Quaid sprawls well. That's going to sap some energy.
Mark Munoz seems to be the more aggressive standup fighter in this bout.
Munoz on the wrong end of a vicious looking body shot.
Quaid throws a hard body shot but it just misses.
Quaid throws a hook but Munoz avoids it easily.
Quaid smiles there as he lands a nice right hand right on the button.
Quaid lands with an uppercut that bounces Munoz off the cage and back into range.
Quaid fakes with a right hand and throws a good leg kick, right into the thigh. That had to hurt Munoz.
That's three minutes gone in the round.
Munoz shoots in looking for a double leg takedown. Quaid defends it nicely.
Quaid lands a nice hook to Munoz's body. Munoz takes it in his stride and looks to land his own strikes.
Munoz fails with a takedown attempt.
A really sloppy takedown attempt there from Munoz.
Munoz misses with a low kick.
Munoz throws a left and a right that both miss
and Quaid counters with a leg kick.
Munoz misses with a wild body shot.
That's four minutes gone in the round.
Munoz shoots in for a takedown. "Ole!" shouts Quaid as he jumps to the side.
Horrible takedown by Munoz or perhaps it was just good defense by Quaid which made him look bad.
Munoz throws a series of punches but Quaid moves out of range.
Munoz throws a jab when Quaid was well out of range.
Quaid throws a body punch but Munoz moves out of range.
Munoz throws a head kick that misses.
As the round comes to an end the crowd are showing their appreciation for a great round of action.
Quaid scores with a punch to the head.
Quaid is looking to wear down Munoz with body shots, infact he's throwing more body shots than head shots at the moment.
Munoz shoots in and drives through. Quaid sprawls well.
Quaid scores with a decent looking hook.
And thats the end of the round the fighters go back to their corners.
Darrell Quaid dominated that round.
That's the end of the interval. I'm sure that seemed a lot quicker than a minute for our two fighters! Back to the action.
A really sloppy takedown attempt there from Munoz.
Munoz shoots in for a takedown - he's clinched up with Quaid but Quaid pushes him off and we're back to square one.
Quaid avoids the body shot from Munoz.
Munoz swinging wildly here.
Munoz doesn't react quick enough there as he takes a shot to the body.
Munoz rushes forward with a series of wild hooks but Quaid moves out of range and avoids them all easily.
Munoz has his hands up protecting his head but a hook from Quaid finds it's way round the side to connect with Munoz's head.
Quaid uses good footwork to get in and out and land a nice right hand before Munoz has time to react.
Quaid throws a sloppy head kick and Munoz moves out of range easily.
That's one minute gone in the round.
Quaid with a nice cross.
Munoz fails with a rather predictable takedown attempt.
Darrell Quaid has stuffed three takedown attempts in the round now. That's going to take a lot out of Mark Munoz.
Munoz smiles there as he lands a nice right hand right on the button.
Quaid keeps the fight standing with a nice sprawl.
Darrell Quaid is winning the standup battle so far.
Quaid blocks a head kick by Munoz.
Quaid takes a step back and watches a body kick go sailing past his mid section.
Munoz throws a solid leg kick but Quaid takes the impact on his shin and smiles at Munoz.
Munoz slips a jab from Quaid.
Munoz throws a body kick that misses
and Quaid counters with a nice low kick that buckles Munoz's knee momentarily.
That's two minutes gone in the round.
Quaid connects with a slap. Keep your fist closed son.
Munoz has a takedown stuffed.
Quaid throws a head kick but Munoz moves out of range.
Thud! ouch! good body kick from Quaid - that will leave a mark!
Munoz is trying hard to land a takedown here. Quaid sprawls well and keeps this one on the feet.
Munoz is breathing heavily.
Quaid displays good takedown defense there as he swats away a double leg from Munoz.
Quaid fails to land with the punch combination there - jab, cross, hook, miss, miss, miss.
Fantastic stuff here - a very entertaining period of action, which has drawn cheers from the crowd.
Munoz tries for a takedown but Quaid sees it coming a mile off and avoids it easily.
That's three minutes gone in the round.
Munoz looks frustrated there after his takedown attempt is stuffed easily.
Quaid lands with a nice body punch.
Quaid wings a very wild body shot but it does the job and lands to the midsection.
Munoz takes a shot right to the bread basket.
Munoz throws a jab when Quaid was well out of range.
Munoz moves out of range as Quaid strikes.
Quaid avoids a punch combination nicely.
Munoz misses with a body shot. Nice footwork from Quaid.
Munoz throws a combination that misses
and Quaid counters with a nice leg kick.
That's four minutes gone in the round.
Munoz shoots in for a takedown. He's persisting with it as Quaid sprawls well. Quaid wins this battle and keeps the fight standing. Munoz gets slowly back to his feet.
Quaid scores with a slapping inside leg kick.
Munoz needs to keep his hands up - Quaid had a free shot at his head there.
Quaid looks to land a combination but Munoz avoids it well.
Mark Munoz is looking to throw some combinations by the looks of things.
Munoz misses with an attempted mid kick.
Quaid throws a hook to the body but it doesn't connect.
The crowd applaud the fighters efforts here as the round comes to an end.
A left lands for Quaid.
Wooooo! Give it up for these two warriors! They are putting on a show!
Quaid cracks Munoz with a hook to the jaw. Both fighters smile at eachother and high-five before getting back down to business.
Quaid keeps the fight standing with a nice sprawl.
And thats the end of the round the fighters go back to their corners.
Darrell Quaid dominated that second round.
Well, the break between rounds is over. Let's get back to the scrappin!
Quaid scores with a slapping inside leg kick.
Munoz misses with a jab, cross combination.
Munoz has a takedown stuffed.
Quaid connects with a hook to the side of his opponent's head.
Quaid scores with a big left there. The judges will like that one.
Munoz is rocked!
Quaid slips under a jab from Munoz.
Munoz is still on wobbly legs! Can Quaid finish him?
Munoz tries to land a body kick
and Quaid scores with a counter punch that sends Munoz to the canvas! Quaid smells blood - he's punishing Munoz with more strikes and the ref has stopped it! Munoz has no idea where he is - he's tackled the ref... oh dear, poor guy, the crowd is in hysterics!
Ladies and gentlemen, after 0:47 of round 3, we have a winner by way of TKO (Strikes). Darrell Quaid!
Darrell Quaid is the new welterweight champion!
|
|
|
|
|
|
|
|
|
|
|
|
|
|
|
|
|
|
|
|
|
|
|
| S |
C
A |
G |
S |
C
B |
G |
|
S |
C |
G |
|
energy
A | B |
|
hype
A | B |
|
pop
A | B |
|
mgr
A | B |
|
FIGHT
RATING
100% |
|
|
|
|
|
|
|
|
|
|
