 |
CCoR - XXV PBP Commentary |
Undercard bout
|
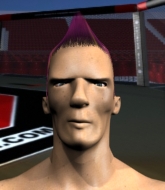
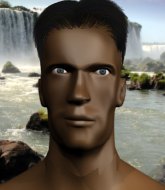
Coming up we have a light heavyweight MMA rules bout between Gerard Mousasi (ranked 0 p4p, 0 weight class) and Ben Riddler (ranked 0 p4p, 0 weight class). On his way into the cage it seems that Gerard Mousasi has been attacked by a crazed fan! It looks like it might have been the just bleed guy! Luckily Gerard Mousasi seems to be OK! I thought that lunatic was in prison!?
 |
|
 |
| 186 cm
26
205 lbs
5 - 7 - 0 |
|
198 cm
30
220 lbs
7 - 13 - 1 |
Good wrestling
Brawler
Granite chin |
|
BJJ Blue Belt
Excellent MT
Determined |
|
| |
|
Ladies and gentlemen. This fight is 3 rounds, in the light heavyweight division.
Introducing the fighter to my left, fighting out of the red corner.
With a record of
5 - 7 - 0, fighting out of Sydney, Gerard Mousasi!
And introducing the fighter to my right, fighting out of the blue corner.
With a record of
7 - 13 - 1, fighting out of Sydney, Ben Riddler!
The judges for this bout are John Mangel, Eliza Hachem and Summer Carpenter.

The bell rings for round one and we are underway!
Riddler lands a lovely overhand right.
Riddler avoids a punch combination nicely.
Riddler lands a nice leg kick that just misses Mousasi's sensitive parts.
Mousasi is on the wrong end of a nice combination from Riddler.

It looks like Gerard Mousasi has been cut.
Mousasi throws a leg kick that is checked
and Riddler counters with a lovely straight right hand!
Mousasi takes a shot right to the liver - Bas would have been proud of that punch.
Fantastic stuff here - a very entertaining period of action, which has drawn cheers from the crowd.

Riddler clinches up against the cage.

Riddler pushes off and circles away, back to the middle of the mat.
Mousasi throws a low kick but Riddler avoids it.
Riddler scores with a head kick.
Riddler throws a head kick but Mousasi moves out of range.
A head kick by Mousasi misses
and Riddler counters with a head kick.
Riddler connects with a looping left hand that seems like it dazed Mousasi momentarily.
Mousasi throws a body kick that misses.
Riddler misses with a half-hearted attempt at a head kick.
Riddler closes the distance and pushes Mousasi back into the cage.
A frustrated look appears on Riddler's face as he tries to break the clinch.
Riddler misses with a shot to the kidneys.

That's one minute gone in the round.
Mousasi tries for a takedown but Riddler manages to get underhooks.
Riddler pushes off and circles away, back to the middle of the mat.
Riddler dodges the punch combination from Mousasi.
Mousasi tries a switch kick but it misses it's target.
A head kick misses from Mousasi.
Mousasi takes a punch right to his stomach. That took the wind out of him momentarily.
Mousasi tries to land with a swinging hook to the body but Riddler was well out of range. Poor timing from Mousasi.
Mousasi looks to score with a combo but nothing lands.

Riddler sets himself and throws a head kick that knocks Mousasi to the ground! Riddler dives into full mount looking to finish!
The fans in attendance giving it up for the two fighters, who have really let it all hang out in the last minute or so!
Riddler unloads with some shots from mount but Mousasi bucks and avoids them well.

Riddler get's back to his feet.
Riddler scores with a straight right hand, right through his opponent's guard.
Riddler comes forward and lands a shot to the body, then darts back out of range.
Riddler is really turning it up, unleashing another crisp combination which drops Mousasi like a ton of bricks! The referee dives in to stop the fight, saving Mousasi from another fist facial!
Ladies and gentlemen, after 2:59 of round 1, we have a winner by way of TKO (Strikes). Ben Riddler!
|
|
|
|
|
|
|
|
|
|
|
|
|
|
|
|
|
|
|
|
|
|
|
| S |
C
A |
G |
S |
C
B |
G |
|
S |
C |
G |
|
energy
A | B |
|
hype
A | B |
|
pop
A | B |
|
mgr
A | B |
|
FIGHT
RATING
100% |
|
|
|
|
|
|
|
Undercard bout
|
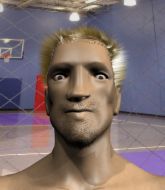
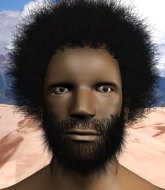
Coming up we have a heavyweight MMA rules bout between Brendon Scott (ranked 0 p4p, 0 weight class) and Tariq Hassan Hussain (ranked 0 p4p, 0 weight class). Both these guys have really solid chins. Will we see a standup war or will they both decide that a knockout is unlikely and try to win the fight elsewhere?
 |
|
 |
| 187 cm
22
240 lbs
2 - 5 - 0 |
|
170 cm
21
280 lbs
3 - 11 - 0 |
BJJ White Belt
Excellent MT
Very quick |
|
BJJ White Belt
Excellent boxer
Granite chin |
|
| |
|
Ladies and gentlemen. This fight is 3 rounds, in the heavyweight division.
Introducing the fighter to my left, fighting out of the red corner.
With a record of
2 - 5 - 0, fighting out of Sydney, Brendon Scott!
And introducing the fighter to my right, fighting out of the blue corner.
With a record of
3 - 11 - 0, fighting out of Sydney, Tariq Hassan Hussain!
The judges for this bout are Skip Squint, Winston Howard and John Mangel.
The bell rings for round one and we are underway!
Scott throws a nice inside leg kick.

Scott pushes Hussain up against the cage in a clinch.

Scott's corner calls for him to break the clinch, which he does.
Scott lands with a kick to the temple. Hussain shrugs as if to say "is that all you've got?"
Hussain misses with a looping right.
Hussain throws a shot from downtown. Scott moves away and avoids it.
Scott gets to the clinch - let's see what his plan is here.
A knee to the head by Scott.
Scott pushes off and circles away, back to the middle of the mat.
The fans in attendance giving it up for the two fighters, who have really let it all hang out in the last minute or so!
Scott lands with a nice body kick.
Scott scores with a head kick. Hussain tried to block it but didn't get his arm up in time.

It looks like Tariq Hassan Hussain has been cut.
Brendon Scott seems to be the more aggressive standup fighter in this bout.
Scott lands a high kick!

Scott lands a big head kick that sends Hussain tumbling to the mat! Scott takes a step backwards and waves Hussain back to his feet - he wants the finish!
Scott takes the fight into the clinch.
Hussain is trying to push Scott away but Scott has him pressed against the cage, so he's going nowhere.
That's one minute gone in the round.
Scott pushes off an throws an elbow but Hussain leans to the side and avoids it. We're back to clinching against the cage.
Scott breaks the clinch and we return to the middle of the mat.
Hussain tries to keep at a distance but Scott has taken the fight into the clinch.
Scott is stalling here.
Scott breaks the clinch.
Scott gets a clinch.
Scott breaks the clinch and we return to the middle of the mat.
Scott chopping away at his opponent's legs.
Scott goes for a high kick. It partially lands.
Wooooo! Give it up for these two warriors! They are putting on a show!
Scott tries to clinch there but Hussain circles away.
Scott connects with a lovely jab that went straight through the gap between Hussain's hands.
Scott moves into range and clinches up with Hussain.

That's two minutes gone in the round.
Hussain wants to break the clinch but can't.
Scott's corner calls for him to break the clinch, which he does.
Scott clinches.
Hussain takes an elbow to the forehead.
Hussain wants to strike at distance but he can't break free of the clinch.
Scott breaks the clinch.
Scott rushes Hussain and presses him up against the cage.
Scott manages to break the clinch.
Scott scores with a head kick. Hussain tried to block it but didn't get his arm up in time.
Scott fakes with an overhand right and moves in to clinch with Hussain, pushing him back against the cage.
Scott breaks the clinch.
Scott throws a head kick that Hussain semi-blocks.
Hussain stooping low to avoid any incoming strikes and then lunges in with an uppercut come cross that lands flush.

That's three minutes gone in the round.
Scott scores with a head kick.
Scott clinches up with Hussain and pushes him back against the cage.
Scott misses with a knee strike.
Scott breaks the clinch and we return to the middle of the mat.
Scott closes the distance and clinches.
Scott is pushing Hussain up against the cage, for a bit of lean and pray action. Action being used the in the loosest possible sense of the word.
Scott prevents Hussain from breaking the clinch.
Scott breaks the clinch.
Hussain takes a head kick and shrugs it off.
The fans in attendance giving it up for the two fighters, who have really let it all hang out in the last minute or so!
Scott swinging wildly here.
A chopping leg kick lands by Scott.

That's four minutes gone in the round.
Scott tries to close the distance and clinch up but Hussain swats him away and circles back towards the center.
Scott has Hussain up against the cage in a clinch.
Scott manages to break the clinch.
Scott lands a head kick!
Scott scores with a kick to the midsection.
Hussain looks winded!
Scott moves into the clinch.
Hussain is trying to break the clinch but Scott is controlling him.
The crowd are going absolutely nuts as the round comes to an end - what a fantastic round of action!
Scott misses the knee to the body. Nice hip positioning from Hussain.
Scott manages to break the clinch.
Scott fakes with an overhand right and moves in to clinch with Hussain, pushing him back against the cage.
And thats the end of the round the fighters go back to their corners.
Brendon Scott dominated that round.
The cut man is working on Tariq Hassan Hussain's cut.
That's the end of the round. The referee orders the cornermen out of the cage so we can get back down to business.

Scott connects with a single shot there.
Scott tries to clinch but Hussain moves out of range.
Scott scores with a head kick. Hussain tried to block it but didn't get his arm up in time.
Scott closes the distance and presses his opponent up against the cage.
Scott tries to land a knee to the head but Hussain blocks with his arms.
Scott pushes off and circles away, back to the middle of the mat.
Scott scores with a head kick. Hussain tried to block it but didn't get his arm up in time.
Scott has not gone for a single takedown so far in this fight, which seems like a very strange tactic when you consider that he has the superior wrestling and BJJ.
Wooooo! Give it up for these two warriors! They are putting on a show!
Scott doesn't manage to clinch there - Hussain circles away.
Scott pulls out of a head kick attempt.
Hussain avoids the head kick by Scott.
Scott is really dominating this fight. Is there anything that Hussain can do to turn this around?
Nice shot lands for Scott.
The fight moves into the clinch position.
With the fighters up against the cage, Scott throws an elbow but misses.
That's one minute gone in the round.
Scott manages to break the clinch.
Scott throws a head kick that misses and slips in the process. He scrambles back to his feet and the fighters circle.
Scott throws a head kick that Hussain semi-blocks.
Scott tries a switch kick but it misses it's target.
Scott tries to clinch up.
Scott is looking to take this fight into the clinch.
Hussain takes a push kick to the midsection and stumbles backwards.
A telegraphed right hand from Hussain misses the target.
Scott scores with a head kick.
Wooooo! Give it up for these two warriors! They are putting on a show!
Hussain takes a kick to the body and keeps moving.
That's two minutes gone in the round.
Scott fakes with an overhand right and moves in to clinch with Hussain, pushing him back against the cage.
Scott breaks the clinch and we return to the middle of the mat.
It really doesn't seem like the step up in weight is hurting Scott here at all. He's more than holding his own against the bigger man.
Hussain avoids the clinch attempt nicely.
Scott blocks a jab.
Scott moves into range and clinches up with Hussain.
Hussain wants to push off and get back to the center of the mat but Scott has him pressed against the cage.
Scott landing knees to the head.
Scott pushes off and circles away, back to the middle of the mat.
Hussain takes a head kick and keeps coming.
That has opened up Tariq Hassan Hussain's cut even more.
Scott tries a head kick but it misses.
Scott misses with a head kick.
Hussain keeps the fight on the outside.
Scott slips under a jab from Hussain.
Brendon Scott is winning the standup battle so far.
That's three minutes gone in the round.
Scott closes the distance and clinches.
Scott's corner calls for him to break the clinch, which he does.
Scott has Hussain up against the cage in a clinch.
Scott's corner are urging him to control the action in the clinch for a moment, rather than mount any serious offense. I'm sure the crowd appreciate those instructions... not.
Scott trying to land knees to the body.
Brendon Scott has scored more points in the clinch so far.
Scott lands with a light punch inside.
Scott escapes the clinch and we're back to striking.
Hussain takes a head kick and keeps coming.
Scott moves into the clinch.
Scott breaks the clinch.
That's four minutes gone in the round.
Scott lands a front kick.
The crowd cheering loudly, showing their appreciation for the quality fight we're seeing here.
Scott tries a switch kick but it misses it's target.
Scott moves into the clinch.
Scott lands a left hand.
Scott lands with a right to the head.
Scott breaks the clinch and we're back to striking at distance.
Scott tries to close the distance and clinch up but Hussain swats him away and circles back towards the center.
Scott instigates a clinch.
Hussain is trying to work out of this bad position, with his back against the cage.
The crowd are going absolutely nuts as the round comes to an end - what a fantastic round of action!
Scott is stalling here. The referee will be looking to step in if he doesn't pick up the pace.
Scott breaks the clinch and we return to the middle of the mat.
And thats the end of the round the fighters go back to their corners.
Brendon Scott dominated that second round.
The cut man is working on Tariq Hassan Hussain's cut.
That's the end of the interval. I'm sure that seemed a lot quicker than a minute for our two fighters! Back to the action. The crowd applaud as we get ready to start the final round!

Scott gets to the clinch - let's see what his plan is here.
Scott makes some space for himself and lands an uppercut.
Scott keeps the fight in the clinch, despite Hussain's efforts to push away.
Scott keeps the fight in the clinch, despite Hussain's efforts to push away.
Scott throws a knee to the head but misses.
Hussain blocks the elbow strike.
Scott pushes off and circles away, back to the middle of the mat.
Scott thows a body kick. Hussain tries to catch it but that hurt him.
Scott tries to clinch up but Hussain circles away and keeps his distance.
Scott has closed the distance and engaged Hussain in a clinch.
Scott's corner calls for him to break the clinch, which he does.
Brendon Scott is looking to throw some combinations by the looks of things.
Scott forces Hussain back against the cage and clinches.
That's one minute gone in the round.
Hussain looks like he'd prefer to be striking at range right now.
Scott breaks the clinch.
Hussain throws a looping overhand right but Scott ducks down to avoid it.
Scott tries a head kick but it misses.
Hussain avoids the clinch attempt nicely.
Hussain swats away the attempt to clinch by Scott.
Scott scores with a head kick. Hussain tried to block it but didn't get his arm up in time.
We've seen a great period of action over the last minute or so - credit to both fighters for going all out!
Scott doesn't manage to clinch there - Hussain circles away.
Scott tries to close the distance and clinch but Hussain swats him to one side with an open hand palm strike and circles away.
Scott darts in and clinches Hussain up against the cage.
Scott content to slow the pace in the clinch.
Tariq Hassan Hussain has stepped it up - he knows he needs a finish here!
That's two minutes gone in the round.
A frustrated look appears on Hussain's face as he tries to break the clinch.
Scott has Hussain pressed against the cage, preventing Hussain from circling away and getting back to striking at range.
Scott avoiding damage.
Hussain is really struggling to land any decent head shots against his taller opponent.
Scott throws a vicious knee straight up the middle but Hussain blocks it with crossed arms.
Scott pushes off and circles away, back to the middle of the mat.
Scott misses with a head kick.
Scott fails in his attempt to clinch.
Scott instigates a clinch.
Scott with the Thai clinch. He's looking to land a big knee but he's not managed it this time.
Hussain has developed a nice purple lump on his ribcage, as a result of some heavy body kicks from Scott.
Scott pushes off and circles away, back to the middle of the mat.
Scott lands with a head kick! That's gotta hurt.
Both fighters are breathing heavily.
Scott lands with a kick to the temple. Hussain shrugs as if to say "is that all you've got?"
Hussain throws a hook but Scott blocks it.
That's three minutes gone in the round.
Scott tries to clinch up.
Scott pushes Hussain up against the cage in a clinch.
Hussain wants to break free. God knows he wants to breaaaak freeee.
Hussain looks like he'd prefer to be striking at range right now.
Scott tries to land a knee to the head but Hussain blocks with his arms.
Scott's corner calls for him to break the clinch, which he does.
Scott tries to close the distance and clinch but Hussain swats him to one side with an open hand palm strike and circles away.
Scott tries to close the distance and clinch up but Hussain swats him away and circles back towards the center.
Scott avoids a lazy jab quite easily.
Hussain takes a head kick and keeps coming.
Hussain stuns Scott with a nice body shot, before stepping back out of range.
Scott tries to close the distance and clinch up against the cage but Hussain paws at him with a jab and circles away.
That's four minutes gone in the round.
Scott tries to close the distance and clinch but Hussain swats him to one side with an open hand palm strike and circles away.
Scott doesn't manage to clinch there - Hussain circles away.
Scott buckles his opponent's knee momentarily with a nice leg kick.
Wooooo! Give it up for these two warriors! They are putting on a show!
Scott tries to clinch there but Hussain circles away.
Scott moves into the clinch.
Scott's corner calls for him to break the clinch, which he does.
Scott tries to clinch up.
Hussain misses with a hook. Scott ducked under it nicely.
The crowd are going absolutely nuts as the round comes to an end - what a fantastic round of action!
Scott has managed to clinch.
Scott breaks the clinch.
Scott throws a quick head kick that skims the top of Hussain's head.
And that's the end of the fight!
Brendon Scott showed his dominance in that final round.
Well Scott has outscored his opponent in every aspect of the fight today. Only a scarily incompetent judge or two will keep him from a well deserved win... Over to the ring announcer for the scorecards.
Ladies and gentlemen, after 3 rounds of action, we go to the scorecards for a decision.
Judge Skip Squint scores the fight 30:25
Judge Winston Howard scores the fight 30:25
Judge John Mangel scores the fight 30:25
In favor of your winner, by unanimous decision... Brendon Scott!
A very excited looking Brendon Scott made sure he remembered to thank all the fans both in the arena and on the internet. He said all the coolest people spend all day on MMA websites, which got a big reaction.
|
|
|
|
|
|
|
|
|
|
|
|
|
|
|
|
|
|
|
|
|
|
|
| S |
C
A |
G |
S |
C
B |
G |
|
S |
C |
G |
|
energy
A | B |
|
hype
A | B |
|
pop
A | B |
|
mgr
A | B |
|
FIGHT
RATING
100% |
|
|
|
|
|
|
|
Undercard bout
|
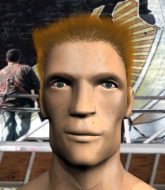
Coming up we have a bantamweight MMA rules bout between Luke Alkofer (ranked 0 p4p, 0 weight class) and Blair Davis (ranked 0 p4p, 0 weight class). Alkofer kept the crowd waiting but all that was forgotten when his ring entrance music started. The incomparable musical genius that is Jump Jump - Busta Rhymes. Blair Davis has the better chin. Will he look to stand and bang today?
 |
|
 |
| 170 cm
26
140 lbs
7 - 9 - 0 |
|
168 cm
20
135 lbs
4 - 2 - 0 |
Good wrestling
Solid boxing
Experienced |
|
BJJ Blue Belt
Dangerous knees
Good gas tank |
|
| |
|
Ladies and gentlemen. This fight is 3 rounds, in the bantamweight division.
Introducing the fighter to my left, fighting out of the red corner.
With a record of
7 - 9 - 0, fighting out of Hilo, Luke Alkofer!
And introducing the fighter to my right, fighting out of the blue corner.
With a record of
4 - 2 - 0, fighting out of Sydney, Blair Davis!
The judges for this bout are Steve Erwin, Donatello Bradman and Eliza Hachem.
The bell rings for round one and we are underway!

Alkofer scores a trip takedown into side control. Nice.
Davis is trying to get back to half guard. He's pushing on Alkofer's leg. He's managed it. Nice work.

Alkofer is looking for a kimura but Davis is holding onto that half guard position, so it's hard for Alkofer to get the leverage.
Alkofer is looking to advance position but Davis won't allow it.
Alkofer looking for a kimura but he'll have to free his other leg if he wants to finish that. Perhaps he's just using it as a distraction technique.
We get told so often about how wrestlers don't like to be on their backs. Let's see if Davis can do anything to dispel that myth.
Alkofer seems to be looking for submissions.
Davis wants to improve his position but Alkofer is controlling well.
Davis trying to control here.
Davis throws a strike from the bottom that misses.
That's one minute gone in the round.
Davis is in trouble now - Alkofer has advanced to mount!
Davis wants to control but Alkofer is having none of it.
Alkofer is going oldschool here, as he tries to force Davis to tap using a forearm choke. This isn't 1993 though, so Davis shrugs it off.
Davis really doesn't want to stay on the ground with Alkofer. If he can't get it back to his feet, it's only a matter of time before he'll be tapping out.
Davis is trying to get back to his feet but can't.
Davis taking shots to the head.
Davis slips a leg in and gets back to half guard.
Davis gets full guard.
Alkofer pressing down on his opponent's thigh, looking to pass guard. Davis is keeping the position for now.
Davis is looking to get back to his feet but can't, whilst Alkofer is controlling him.
That's two minutes gone in the round.
Alkofer trying to pass the guard but can't manage it just yet.
Alkofer passes into half guard.
This has been an exciting period of action!
Davis is trying to stand.
Davis is looking for a sweep. Alkofer is wise to his cunning plan and keeps the top position.
The fighters are pressed up against the cage, both looking to find a bit of space to work.
Alkofer works his foot free and advances to mount.
Alkofer fakes a shot to the body and cracks his opponent in the head. Nice ground and pound there!
Davis keeping his composure momentarily, calmly looking to get back to half guard.
Poor strikes thrown by Alkofer there. More accuracy and less frantic strikes would help!
Alkofer with a couple of short strikes.
That's three minutes gone in the round.
Alkofer is thinking about an arm triangle here, looking to tighten it up before moving to side control. Davis can see it coming though and defends well with a couple of strikes to the head and some good arm positioning.
Davis working to try and regain half guard.
Alkofer is going oldschool here, as he tries to force Davis to tap using a forearm choke. This isn't 1993 though, so Davis shrugs it off.
The ref warns both fighters not to hold the cage as they work up against the meshing.
Alkofer putting on the heat here with some good ground and pound!
Alkofer working for a guillotine from mount but Davis is in no mood to give up.
Poor strikes thrown by Alkofer there. More accuracy and less frantic strikes would help!
Alkofer prevents Davis from getting the reversal.
Both fighters really going for it on the ground here!
Davis bucks up and manages to get a nice reversal! He's in guard on the top - nicely done!
Alkofer manages to land a sweep and now he's in mount on top!
That's four minutes gone in the round.
Davis wants to use the cage to get back to his feet here.
Fantastic stuff here - a very entertaining period of action, which has drawn cheers from the crowd.
Alkofer swings around for an armbar but it's a sloppy attempt and Davis is now in Alkofer's guard. A big mistake from Alkofer there, giving up the dominant position!
Alkofer working the defensive guard well to avoid strikes from Davis.
Davis working from the guard for now, landing some ground and pound.
Alkofer looking to hit a scissor sweep but Davis is one step ahead there.
Alkofer is trying to control the position but Davis postures up.
The crowd are going absolutely nuts as the round comes to an end - what a fantastic round of action!
Alkofer pulls Davis in to control the position.
Alkofer working the defensive guard well to avoid strikes from Davis.
Davis working some ground and pound from guard but it's not doing any damage.
Davis trying to land body shots but he keeps hitting the mat.
Davis postures up.
And thats the end of the round the fighters go back to their corners.
Luke Alkofer dominated that round.
That's the end of the interval. I'm sure that seemed a lot quicker than a minute for our two fighters! Back to the action.
Alkofer shoots in with a takedown attempt and he has Davis pinned against the cage. Davis gets the underhooks and manages to circle away.
Davis tries to clinch up against the cage, rushing in the close the distance. Alkofer manages to break the clinch and circles back to the middle of the mat.
Alkofer shoots in looking for a takedown but Davis manages to keep the fight standing, pushing Alkofer's face into the canvas for good measure before circling away.
Wow, both these guys are really going for it!
Davis wants to clinch up but Alkofer keeps it at a distance.
Alkofer closes the distance, clinches up and gets a nice trip takedown into side control. Very smooth.
Alkofer tries for a kimura. Not really close to a finish though.
The ground and pound from Alkofer seems to be hitting the mat more than his opponent.
Davis tries to improve position but can't.
Davis is putting a lot of effort into getting back to his feet here.
Davis is trying to improve his position.
Alkofer tries for an arm triangle. That looks pretty tight to me. Is this one over!?! Possibly, maybe, no Alkofer has let go of the choke. Obviously it wasn't as tight as we thought!
That's one minute gone in the round.
Davis striking from the bottom but nothing landed.
Alkofer tries to cartwheel into mount but he doesn't manage it.
Davis tries to get back to his feet but has found himself mounted instead. Damn, that's gotta suck.
Alkofer jumps to side control looking for an arm triangle but Davis manages to avoid the submission attempt.
Davis tries to get back to half guard but can't.
Alkofer fails to land a wild elbow strike.
That's two minutes gone in the round.
Davis wants to get back to his feet.
Alkofer looking for an arm triangle but it's way too loose to do anything.
Davis is trying to get back to half guard.
Davis is putting a lot of effort into getting back to his feet here.
Davis tries to bench press Alkofer off him but Alkofer keeps the position.
Davis sneaks a leg under to get back to half guard.
Alkofer sitting in half guard, looking to land shots. Davis defending well though.
Alkofer looking to pass the half guard. Not this time.
The fans in attendance giving it up for the two fighters, who have really let it all hang out in the last minute or so!
Davis tries to kick Alkofer off but Alkofer keeps his base steady and stays in half guard.
That's three minutes gone in the round.
Alkofer works his way into full mount!
Davis sneaks a leg under to get to half guard.
Alkofer is looking to advance position but Davis won't allow it.
Alkofer moves nicely into side control.
Alkofer looking for an arm triangle but it's way too loose to do anything.
Alkofer working away.
Davis is pushing Alkofer's head away, looking to escape. Alkofer manages to hold on to the position though.
Davis is using up a lot of energy trying to get back to his feet. Perhaps he should improve his position first.
That's four minutes gone in the round.
Alkofer creates a bit of distance and throws down some hard shots.
Alkofer gets to mount! Davis was on the offensive and wasn't defending properly.
Davis tries to get back to half guard but can't.
Alkofer putting on the heat here with some good ground and pound!
The fans in attendance giving it up for the two fighters, who have really let it all hang out in the last minute or so!
Alkofer looks like he's working for a submission but he's not found anything just yet.
Alkofer working to secure an arm triangle but it's not happening for him just yet.
Davis gets back to half guard.
As the round comes to an end the crowd are showing their appreciation for a great round of action.
Alkofer is pressing down on Davis's thigh, looking to free his foot. Davis is holding on for now.
Davis is looking to regain full guard. Not this time though.
And thats the end of the round the fighters go back to their corners.
Luke Alkofer dominated that second round.
The fighters get back to their feet, the hooter sounds and we're back to the action! This is the final round!
Alkofer swats away the attempt to clinch by Davis.
Alkofer closes the distance and clinches up, looking for a takedown. He shifts his weight and gets a nice trip into half guard.
Davis tries to strike from the bottom but it doesn't land.
Alkofer wants to pass the guard but Davis is defending well.
Davis wants to control but Alkofer is keeping busy.
Alkofer passes the half guard and he's now in mount! Big trouble for Davis!
Alkofer looking to finish with strikes here!
Poor strikes thrown by Alkofer there. More accuracy and less frantic strikes would help!
Davis swinging wildly from the bottom but he's not landing.
Davis tries to lock up and control but Alkofer gives him a forearm to the face and pushes him away.
That's one minute gone in the round.
Davis is working to get back to half guard.
Alkofer is thinking about an arm triangle here, looking to tighten it up before moving to side control. Davis can see it coming though and defends well with a couple of strikes to the head and some good arm positioning.
Davis can't escape the position.
Alkofer in mount throwing good strikes here, bouncing his opponent's head off the canvas.
Davis is wriggling around trying to escape.
Alkofer looking for a guillotine from mount but Davis is having none of it.
Alkofer goes for an armbar but he's not got it
Davis turns into him and now he's in Alkofer's guard.
Davis connects with a couple of short punches.
That's two minutes gone in the round.
Alkofer keeping moving, preventing Davis from controlling successfully.
Davis loading up with the ground and pound but he's missing more than he's landing in this flurry.
Davis lands a couple of digs.
Alkofer is working the butterfly guard. He manages to land a nice scissor sweep and is now in half guard on the top. Nice move.
Fantastic stuff here - a very entertaining period of action, which has drawn cheers from the crowd.
Davis is looking to regain full guard. Not this time though.
Davis controlling the position for now.
Davis is looking to improve his position.
Alkofer tries to pass to full mount but Davis defends it.
Alkofer is working for a kimura but Davis is defending it quite comfortably.
That's three minutes gone in the round.
Davis is pressing down on Alkofer's left leg trying to get back to full guard. He's managed it.
Alkofer passes Davis's right leg, so he's now in half guard.
Davis manages to get to full guard.
Alkofer is pushing down on Davis's leg trying to pass to half guard. Davis is fighting to maintain full guard but Alkofer has managed to sneak the leg through.
Davis is looking to escape.
Luke Alkofer overall seems to be getting the better of the ground position in the fight so far.
Alkofer tries to pass to full mount but Davis defends it.
Davis is trying to maintain the position but Alkofer is very close to passing his half guard.
That's four minutes gone in the round.
Davis blocking the ground and pound attempt from Alkofer.
Davis trying to hold on to Alkofer's head to control him but Alkofer postures up.
Alkofer tries to pass to full mount but Davis defends it.
Alkofer is looking to pass the guard... He's managed it - he's now in full mount!
Luke Alkofer is fighting for a decision here - he's started to take the cautious approach.
Davis squirming around on the bottom, looking to escape.
The crowd are loving this. Great action here.
Alkofer wants to control the pace but Davis is squirming around nicely.
As the round comes to an end the crowd are showing their appreciation for a great round of action.
Davis really wants to buck Alkofer off and get back to his feet.
And that's the end of the fight!
Luke Alkofer showed his dominance in that final round.
Well Alkofer has outscored his opponent in every aspect of the fight today. Only a scarily incompetent judge or two will keep him from a well deserved win... Over to the ring announcer for the scorecards.
Ladies and gentlemen, after 3 rounds of action, we go to the scorecards for a decision.
Judge Steve Erwin scores the fight 30:27
Judge Donatello Bradman scores the fight 30:27
Judge Eliza Hachem scores the fight 30:27
In favor of your winner, by unanimous decision... Luke Alkofer!
|
|
|
|
|
|
|
|
|
|
|
|
|
|
|
|
|
|
|
|
|
|
|
| S |
C
A |
G |
S |
C
B |
G |
|
S |
C |
G |
|
energy
A | B |
|
hype
A | B |
|
pop
A | B |
|
mgr
A | B |
|
FIGHT
RATING
70% |
|
|
|
|
|
|
|
Undercard bout
|
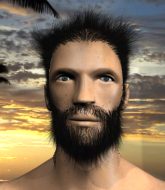
Coming up we have a heavyweight MMA rules bout between Akimoto Akira (ranked 0 p4p, 0 weight class) and Mychal Callahan (ranked 0 p4p, 0 weight class). Akimoto Akira could well score a knockout today. He has the power to get to Mychal Callahan's chin.
 |
|
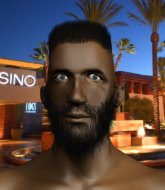 |
| 198 cm
24
260 lbs
2 - 3 - 0 |
|
193 cm
25
233 lbs
3 - 5 - 0 |
Good wrestling
Counter striker
Cuts easily |
|
BJJ White Belt
Excellent boxer
Determined |
|
| |
|
Ladies and gentlemen. This fight is 3 rounds, in the heavyweight division.
Introducing the fighter to my left, fighting out of the red corner.
With a record of
2 - 3 - 0, fighting out of Sydney, Akimoto Akira!
And introducing the fighter to my right, fighting out of the blue corner.
With a record of
3 - 5 - 0, fighting out of Sydney, Mychal Callahan!
The judges for this bout are Damien Edna, Donatello Bradman and Bruno Hogan.
The bell rings for round one and we are underway!
Callahan forces Akira back against the cage and clinches.
Akira jumps guard but Callahan stands there with Akira around his waist. Akira gives up and drops back to his feet. We remain in the clinch.
Akira blocks a punch to the side of the head.
Callahan tries a knee to the head but he's missed.
A quick uppercut on the inside from Callahan.
Callahan keeps the fight in the clinch, despite Akira's efforts to push away.
A battle for position here, against the cage.
Callahan lands a short shot on the inside that snaps the head of Akira backwards.
Akira tries to throw a body punch but Callahan avoids it by throwing Akira back against the cage.
Akira jumps guard and drags Callahan to the mat. He's obviously going to be looking for submissions off his back.
Akira wants to control here, rather than go for any submissions from the bottom. At least for now.
Callahan trying to control but Akira is working from the bottom.
That's one minute gone in the round.
Akira has a closed guard, preventing Callahan from standing up.
Akira lands a beautiful switch and he's in full mount! That could spell trouble for Callahan!
Callahan is writhing around trying to get back to his feet.
Akira looking to control but Callahan is working nicely, looking to advance position himself.
Callahan is working to get back to half guard.
The fighters are pressed up against the cage, both looking to find a bit of space to work.
Akira trying to control but he's not successful this time.
Callahan tries to hold on but Akira postures up.
That's two minutes gone in the round.
Callahan is trying to escape the mount.
Akira controlling from the full mount.
Callahan is trying to escape the mount.
Callahan is persisting with the attempt to improve his position.
Callahan tries to hold on but Akira pushes him away.
Akira takes Callahan's back.
Akira lands with a nice looking elbow that stuns Callahan.
That's three minutes gone in the round.
Akira controls the position.
Akira is looking to finish the fight by rear naked choke. Callahan knows exactly what he's got planned though, so he's defending well. Maybe a few strikes would soften Callahan for a finish.
Akira really has the hooks in deep now - there seems like no escape for Callahan.
Callahan is trying to stand back up.
The ref warns both fighters not to hold the cage as they work up against the meshing.
Akira controls the position.
That's four minutes gone in the round.
Callahan has the hand control, trying to stop the rear naked choke.
Akira trying to control momentarily.
Callahan wants to get back to his feet.
Akira is working the ground and pound. Can Callahan escape?
Akira tries to get the hooks in deep but Callahan pushed the leg off.
Akira slows the pace down here. Having a little breather whilst he's in a dominant position, looking to rest and regain some energy, ready to go for the finish.
As the round comes to an end the crowd are showing their appreciation for a great round of action.
Callahan wants to get back to his feet.
Callahan is in bad spot here.
Callahan trying to control the action but Akira just sinks the hooks in.
And thats the end of the round the fighters go back to their corners.
Akimoto Akira dominated that round.
That's time! Back to the action!
Akira misses with a takedown attempt. He shot from a bit too far out.
Akira throws an overhand right that lands on Callahan's shoulder, as Callahan tries to avoid the shot.
Callahan scores with a sloppy right hand. Akira should have avoided that one.
It looks like Akimoto Akira has been cut.
Akira misses with a jab, cross combination.
Callahan has Akira up against the cage in a clinch.
Callahan scores with a shot to the side of Akira's head.
Akira takes a knee right on the jaw!
The crowd cheering loudly, showing their appreciation for the quality fight we're seeing here.
Akira managing to block the knees to the body from Callahan.
Callahan throws a knee to the head but misses.
Callahan misses with a knee strike.
Both fighters are absolutely exhausted here.
Callahan keeps the fight in the clinch, despite Akira's efforts to push away.
Callahan landing knees to the head.
That's one minute gone in the round.
Callahan throws a nice elbow but it doesn't land.
Akira wants a takedown.
Callahan lands a knee to the head.

Akira is rocked!
A quick uppercut on the inside from Callahan.
Oh Akira is still all over the place! His legs are completely gone! Will he be able to recover?!!
Clinched against the cage, Callahan lands a big elbow that drops Akira! The ref dives in to save him from more shots - Akira is complaining that he's OK but he was done.
Ladies and gentlemen, after 1:25 of round 2, we have a winner by way of TKO (Strikes). Mychal Callahan!
Jumping up and down and very excited, Mychal Callahan waved his t-shirt featuring Al's Supplements - 160 Q for $150's logo in front of the cameras.
|
|
|
|
|
|
|
|
|
|
|
|
|
|
|
|
|
|
|
|
|
|
|
| S |
C
A |
G |
S |
C
B |
G |
|
S |
C |
G |
|
energy
A | B |
|
hype
A | B |
|
pop
A | B |
|
mgr
A | B |
|
FIGHT
RATING
88% |
|
|
|
|
|
|
|
Co-main event
|
Coming up we have a heavyweight MMA rules bout between Zombo Axe (ranked 0 p4p, 0 weight class) and Buster Hymen (ranked 0 p4p, 0 weight class). Buster Hymen has the power to score a knockout today if he connects clean with Zombo Axe's chin.
 |
|
 |
| 180 cm
26
255 lbs
6 - 4 - 0 |
|
198 cm
20
257 lbs
3 - 1 - 1 |
BJJ Blue Belt
Basic striking
Very strong |
|
BJJ White Belt
Excellent boxer
Granite chin |
|
| |
|
Ladies and gentlemen. This fight is 3 rounds, in the heavyweight division.
Introducing the fighter to my left, fighting out of the red corner.
With a record of
6 - 4 - 0, fighting out of Sydney, Zombo Axe!
And introducing the fighter to my right, fighting out of the blue corner.
With a record of
3 - 1 - 1, fighting out of Sydney, Buster Hymen!
The judges for this bout are Steve Erwin, Skip Squint and Summer Carpenter.
The bell rings for round one and we are underway!
Hymen takes a step towards his opponent and connects with a left hand, before circling away.
A jab from Hymen does it's job there.
Axe avoids a punch combination nicely.
Hymen lands with an overhand left.
Axe takes one to the side of the head.
The crowd are loving this. Great action here.
Hymen misses with a looping right.
Axe tries to close the distance and clinch but Hymen swats him to one side with an open hand palm strike and circles away.
Hymen lands a jab to the nose.
Axe is rocked!
Hymen is throwing a storm of strikes! Right hook, left hook and follows it up with a spinning back fist! Axe hits the canvas like a rag doll! And just like that, this one is over!
Ladies and gentlemen, after 0:37 of round 1, we have a winner by way of KO (Strikes). Buster Hymen!
|
|
|
|
|
|
|
|
|
|
|
|
|
|
|
|
|
|
|
|
|
|
|
| S |
C
A |
G |
S |
C
B |
G |
|
S |
C |
G |
|
energy
A | B |
|
hype
A | B |
|
pop
A | B |
|
mgr
A | B |
|
FIGHT
RATING
100% |
|
|
|
|
|
|
|
Main event
|
Coming up we have a light heavyweight MMA rules bout between Jake Miller (ranked 0 p4p, 0 weight class) and Gunner Reed (ranked 0 p4p, 0 weight class). These two fighters really are very evenly matched on the feet - it will be fascinating to see who can assert themselves in that aspect of the fight.
 |
|
 |
| 186 cm
26
219 lbs
5 - 6 - 1 |
|
174 cm
26
206 lbs
4 - 0 - 1 |
BJJ White Belt
Excellent boxer
Big right hand |
|
BJJ Blue Belt
Excellent boxer
Good gas tank |
|
| |
|
Ladies and gentlemen. This fight is 3 rounds, in the light heavyweight division.
Introducing the fighter to my left, fighting out of the red corner.
With a record of
5 - 6 - 1, fighting out of Sydney, Jake Miller!
And introducing the fighter to my right, fighting out of the blue corner.
With a record of
4 - 0 - 1, fighting out of Sydney, Gunner Reed!
The judges for this bout are Damien Edna, Winston Howard and Eliza Hachem.
The bell rings for round one and we are underway!
Reed clinches up against the cage.
Miller tries to take the fight to the ground by pulling guard but can't manage it.
A short right from Reed.
It looks like Jake Miller has been cut.
Reed lands a nice uppercut.
Miller working hard to break the clinch.
Miller jumps guard but Reed turns him against the cage and keeps the fight standing.
A short right from Reed on the inside.
Reed breaks from the clinch.
Reed moves into range and throws a big uppercut. OH! Miller goes down! Can Reed finish him!?
Miller is rocked!
We've seen a great period of action over the last minute or so - credit to both fighters for going all out!
Reed gets to his feet. Miller looking to butt scoot but the ref puts an end to that. On your feet son!
Oh Miller is still all over the place! His legs are completely gone! Will he be able to recover?!!
Reed connects with a nice cross there... Miller is looking wobbly and Reed recognises it - he's rushed in and lands two more brutal shots that send Miller to the canvas, out cold! A brutal finish to the fight - Reed jumps onto the cage to celebrate with the crowd!
Ladies and gentlemen, after 0:29 of round 1, we have a winner by way of KO (Punches). Gunner Reed!
Gunner Reed decided to hype himself up post fight. It was going well but he went on about it a bit too long and the crowd turned on him a little.
|
|
|
|
|
|
|
|
|
|
|
|
|
|
|
|
|
|
|
|
|
|
|
| S |
C
A |
G |
S |
C
B |
G |
|
S |
C |
G |
|
energy
A | B |
|
hype
A | B |
|
pop
A | B |
|
mgr
A | B |
|
FIGHT
RATING
100% |
|
|
|
|
|
|
|
|
|
|

