 |
TIP 3 - Kamikaze PBP Commentary |
Undercard bout
|
|
|
|
Undercard bout
|
|
|
|
Undercard bout
|
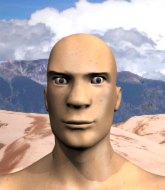
Coming up we have a light heavyweight MMA rules bout between Shaun Maloney (ranked 0 p4p, 0 weight class) and Charlie Morrison (ranked 0 p4p, 0 weight class). Maloney's ring entrance music is that housewives' favourite, enter sandman-metallica. The fight MMA fans around the world have waited their entire lives for!
 |
|
 |
| 190 cm
25
205 lbs
0 - 1 - 0 |
|
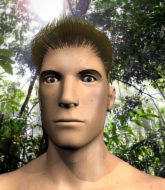
175 cm
18
215 lbs
0 - 0 - 0 |
BJJ White Belt
Excellent boxer
Big right hand |
|
BJJ Blue Belt
Counter fighter
Solid chin |
|
| |
|
Ladies and gentlemen. This fight is 3 rounds, in the light heavyweight division.
Introducing the fighter to my left, fighting out of the red corner.
With a record of
0 - 1 - 0, fighting out of London, Shaun Maloney!
And introducing the fighter to my right, fighting out of the blue corner.
With a record of
0 - 0 - 0, fighting out of London, Charlie Morrison!
The judges for this bout are Daniel Bishop, Donald Grub and Colin Fotheringham.

The bell rings for round one and we are underway!
Left hook, right uppercut from Maloney.
Morrison tries to clinch up against the cage, rushing in the close the distance. Maloney manages to break the clinch and circles back to the middle of the mat.
Morrison tries to close the distance and clinch up against the cage but Maloney paws at him with a jab and circles away.
Charlie Morrison seems to be the more aggressive standup fighter in this bout.
A really sloppy takedown attempt there from Morrison.
Maloney tries to bum rush Morrison with a series of wild strikes but Morrison uses good footwork to avoid the assault.
Morrison tries to close the distance and clinch but Maloney swats him to one side with an open hand palm strike and circles away.
Morrison throws a series of punches but Maloney moves out of range.

That's one minute gone in the round.
Morrison shoots and misses
and Maloney counters with a two punch combo.
Maloney lets the fists fly and connects with a left straight followed by a right hook.
Morrison wants to clinch up but Maloney keeps it at a distance.
Maloney throws a right hand that Morrison ducks under and follows up with a left that Morrison also avoids with ease.
Morrison misses with a takedown attempt
and Maloney counters with a two punch combo.
Shaun Maloney has stuffed three takedown attempts in the round now. That's going to take a lot out of Charlie Morrison.
Morrison wants to clinch.
Maloney circles away from the clinch attempt.

That's two minutes gone in the round.
Maloney checks a leg kick.
Morrison tries to clinch there but Maloney circles away.
Morrison fails with a takedown attempt.
Maloney avoids the clinch attempt nicely.

That's three minutes gone in the round.
Morrison looks for a takedown but Maloney sprawls well.
Maloney throws a combination but it was largely blocked by Morrison.
We're hearing some news coming in from back stage. It's official - Morrison has eaten all the pies!
Maloney's corner calls for a 1, 2 combination and Maloney duly obliges.
Maloney feints a jab promting Morrison to slip. Maloney then demonstrates his capabilities by jabbing again. Morrison slips again and ducks right into an uppercut.
No joy there for Maloney, who threw a few shots but didn't land.

That's four minutes gone in the round.

Morrison shoots in for a takedown and gets it.

Morrison is looking for a kimura. It's going to be difficult to finish that from half guard though and Maloney defends it well.
Morrison looks winded!
Maloney wants to get back to full guard.
And thats the end of the round the fighters go back to their corners.
That was a close round but I would say that Shaun Maloney will probably get the nod.
That's the end of the round. The referee orders the cornermen out of the cage so we can get back down to business.

Morrison throws a sloppy head kick and Maloney moves out of range easily.
Morrison closes the distance but Maloney moves to the side
and Maloney counters with a one-two to the body.
Morrison throws a leg kick but he was too far away and it doesn't land.
Morrison throws a leg kick
and Maloney counters with a left and a right that stings Morrison.
Morrison tries to close the distance and clinch up against the cage but Maloney paws at him with a jab and circles away.
Morrison fails in his attempt to clinch.
That's one minute gone in the round.
Maloney keeps the fight on the outside.

Morrison closes the distance and clinches.

Morrison pushes off and circles away, back to the middle of the mat.
Morrison misses with a body kick.
Maloney's corner calls for a 1, 2 combination and Maloney duly obliges.
Maloney fails to land with a series of punches.
Morrison throws a push kick but Maloney slaps the foot to one side.
That's two minutes gone in the round.
Morrison thuds his shin into the meat of Maloney's side.
Morrison fails with a takedown attempt.
Morrison is breathing heavily.
Morrison tries to grapple but his opponent circles
and Maloney counters with a series of strikes. Morrison will be more careful next time no doubt.
Maloney moves out of range of the leg kick from Morrison.
That's three minutes gone in the round.
Some wild striking there from Maloney.
Morrison shoots in but doesn't get the takedown
and Maloney counters with a one-two to the body.
Morrison is on the wrong end of a nice combination from Maloney.
Maloney goes to the watering hole and comes back with a big thumbs up from the judges as he scores a three punch combo.
The fight stays on the outside here - Morrison looks like he's thinking about clinching though.
Shaun Maloney is looking to throw some combinations by the looks of things.
That's four minutes gone in the round.
Maloney throws a combination that misses
and Morrison moves into the clinch.
Morrison jumps guard.
Maloney wants to control from the top but Morrison keeps moving.
Maloney will need to keep those long limbs tucked in whilst he's on the ground, to prevent any submissions.
Morrison has a closed guard, preventing Maloney from standing up.
Maloney slows down the pace of the fight, as he sits in guard.
If this pace continues, the referee will definitely step in and force a standup.
Maloney looking to sit in guard and control but Morrison gets the butterfly guard and sweeps. He's now in the guard on the top.
And thats the end of the round the fighters go back to their corners.
That was a close second round but I would say that Shaun Maloney will probably get the nod.
The minute break is over - no more time for sponges and pep talks - back to the action! The crowd applaud as we get ready to start the final round!

Maloney swings away but doesn't land with a series of punches.
Morrison clinches.
We've had a slow start to the round here - hopefully the action picks up.
Maloney is trying to work out of this bad position, with his back against the cage.
Knees in the clinch landing for Morrison.
Morrison tries to jump guard but he falls flat on his backside. Maloney smiles and moves away.
Maloney misses with the combination.
Both fighters are breathing heavily.
That's one minute gone in the round.
No luck for Morrison with that takedown attempt.
Maloney misses with a jab, cross combination.
Shaun Maloney is winning the standup battle so far.
That's two minutes gone in the round.
Neither fighter has done anything of merit for a good minute or two here and the crowd are not happy about it.
Morrison throws a lazy body kick
and Maloney counters with a left and a right that stings Morrison.
Morrison tries to clinch but is not successful on this occasion.
Maloney throws a nice looking combination but Morrison bobs and weaves to avoid any damage.
Maloney throws a series of punches but Morrison avoids them all with ease.
Morrison tries to clinch but fails miserably
and Maloney counters with a two punch combo.
Shaun Maloney is looking to keep the fight on the feet at all costs.
Morrison showing good head movement there, avoiding the strikes from Maloney.
Morrison wants to clinch up but Maloney keeps it at a distance.
That's three minutes gone in the round.
Morrison dodges the punch combination from Maloney.
Morrison tries a head kick but it misses.
Morrison fakes high and swings low for a body shot but Maloney manages to avoid it.
Maloney displays good takedown defense there as he swats away a double leg from Morrison.
Shaun Maloney has stuffed three takedown attempts in the round now. That's going to take a lot out of Charlie Morrison.
That's four minutes gone in the round.
The crowd are starting to boo a lack of action.
Morrison misses with a takedown
and Maloney counters with a left and a right that stings Morrison.
Morrison tries to clinch
and Maloney counters with a series of strikes. Morrison will be more careful next time no doubt.
Maloney avoids the clinch attempt nicely.
Morrison tries to close the distance and clinch up but Maloney swats him away and circles back towards the center.
And that's the end of the fight!
I would just about give that final round to Charlie Morrison.
I think Maloney has won this one but let's see what the judges have to say. Over to the ring announcer for the scorecards.
Ladies and gentlemen, after 3 rounds of action, we go to the scorecards for a decision.
Judge Daniel Bishop scores the fight 29:28
Judge Donald Grub scores the fight 29:28
Judge Colin Fotheringham scores the fight 29:28
In favor of your winner, by unanimous decision... Shaun Maloney!
Shaun Maloney made sure to mention his sponsor, Alpha-Male Supplements +Laundry Service in his post fight interview.
|
|
|
|
|
|
|
|
|
|
|
|
|
|
|
|
|
|
|
|
|
|
|
| S |
C
A |
G |
S |
C
B |
G |
|
S |
C |
G |
|
energy
A | B |
|
hype
A | B |
|
pop
A | B |
|
mgr
A | B |
|
FIGHT
RATING
23% |
|
|
|
|
|
|
|
Undercard bout
|
|
|
|
Undercard bout
|
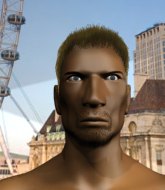
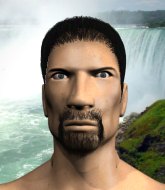
Coming up we have a welterweight MMA rules bout between Tony Blair (ranked 0 p4p, 0 weight class) and Michael Mason (ranked 0 p4p, 0 weight class). Mason comes into a darkened arena with his song building. Here Comes the Boom-Intimidation kicks in, the lights come on and the crowd goes wild! What a showman! Tony Blair could well score a knockout today. He has the power to get to Michael Mason's chin.
 |
|
 |
| 178 cm
25
178 lbs
0 - 1 - 0 |
|
190 cm
18
180 lbs
1 - 1 - 0 |
BJJ Purple Belt
Excellent boxer
Very strong |
|
BJJ Blue Belt
Solid Muay Thai
Enjoys gardening |
|
| |
|
Ladies and gentlemen. This fight is 3 rounds, in the welterweight division.
Introducing the fighter to my left, fighting out of the red corner.
With a record of
0 - 1 - 0, fighting out of London, Tony Blair!
And introducing the fighter to my right, fighting out of the blue corner.
With a record of
1 - 1 - 0, fighting out of London, Michael Mason!
The judges for this bout are Chris Edwards, James Ackerman and William Gold.
The bell rings for round one and we are underway!
Mason misses with a half-hearted attempt at a head kick.
A head kick misses from Blair.
Mason misses with a half-hearted attempt at a head kick.
Blair pivots as if he's going to throw a leg kick but stops half way.
Blair takes a nice looking leg kick right on the meat of his thigh there.
Mason lands with a slapping head kick.

It looks like Tony Blair has been cut.
Nice sprawl there from Mason as Blair shoots in.
Blair lands a jab to the nose.
The crowd are loving this. Great action here.
Mason lands a leg kick that knocks Blair off balance momentarily.
Blair throws a low kick but Mason avoids it.
Blair throws a leg kick
and Mason counters by moving into the clinch.
Blair wants to break free but Mason has control.
Mason lands a nice elbow from the clinch.

Blair jumps into guard, dragging Mason to the mat.
Mason wants to control from the top but Blair keeps moving.
Blair is trying to control the position from the bottom.

Blair is active off his back here, looking for submissions.

Blair is working an open guard so Mason takes the opportunity to get back to his feet.
That's one minute gone in the round.
That kick from Mason tenderised Blair's leg. Blair is trying to keep his angry face on.
Blair sees a low kick coming and goes to check it, but it's actually a body kick and it thuds into his unprotected ribs.
Mason throws a quick head kick that skims the top of Blair's head.
Blair tries for a takedown but Mason sees it coming a mile off and avoids it easily.
Blair connects with a lovely jab that went straight through the gap between Mason's hands.
Mason closes the distance and looks for a trip takedown... aaaand he's got it - Mason lands in his opponent's guard.
Blair throwing his legs up looking for a triangle.
Blair is breathing heavily.
This is a great period of action - very entertaining stuff!
Mason slows down the pace of the fight for a moment. He'll need to remain active if he doesn't want to see the fight stood back up.
Mason passes easily into side control. Nice work.
Blair tries to bench press Mason off him but Mason keeps the position.
That's two minutes gone in the round.
Both fighters really going for it on the ground here!
Mason wants to stand but Blair is controlling his arm.
Blair is trying to control Mason's posture but Mason avoids it.
Blair is trying to get back to half guard.
Blair is working hard here to advance position.
Mason trying to control the action but Blair is working from the bottom.
Blair tries to improve position but can't.
The fighters are going at a pretty good pace and they're both starting to sweat now.
Blair is trying to control Mason's posture but Mason avoids it.
Blair tries to get back to half guard but can't.
That's three minutes gone in the round.
Mason wants to control but Blair is keeping him busy.
Mason tries to get to his feet but he's trapped momentarily.
Blair is positioning himself to get back to half guard.
Mason wants to control but Blair is keeping him busy.
Blair might be looking to lock onto one of his opponent's long limbs for a submission, whilst we're on the ground.
Mason wants to stand but Blair is controlling his arm.
Blair gets back to half guard.
Blair has no desire to be mounted, so is trying to control. Mason is working away from the top position though.
That's four minutes gone in the round.
The fighters are battling for position here. Blair manages to regain full guard. Nice work.
Mason trying to control but Blair is working from the bottom.
The ref warns both fighters not to hold the cage as they work up against the meshing.
Mason wants to get up but he can't break Blair's closed guard. He needs to be careful trying to break the legs open, as he's open to submissions here.
Blair escapes his hips to the side and looks to be working for an armbar. Mason gives him a little smile and shakes his head. No chance.
The crowd cheering loudly, showing their appreciation for the quality fight we're seeing here.
Blair escapes his hips to the side and looks to be working for an armbar. Mason gives him a little smile and shakes his head. No chance.
Mason is trying to tuck his arms in to keep them safe but Blair has managed to isolate one of them and has got a loose triangle. Mason is looking to defend but Blair has done well to lock his legs together - this could be big trouble for Mason! Blair pulls down on the head and a little smile comes across his face - he knows he's got it. Yep, Mason taps out and this one is all over!
Ladies and gentlemen, after 4:55 of round 1, we have a winner by way of Submission (Triangle). Tony Blair!
|
|
|
|
|
|
|
|
|
|
|
|
|
|
|
|
|
|
|
|
|
|
|
| S |
C
A |
G |
S |
C
B |
G |
|
S |
C |
G |
|
energy
A | B |
|
hype
A | B |
|
pop
A | B |
|
mgr
A | B |
|
FIGHT
RATING
59% |
|
|
|
|
|
|
|
Undercard bout
|
Coming up we have a lightweight MMA rules bout between Donovan Duncan (ranked 0 p4p, 0 weight class) and Dennis Teller (ranked 0 p4p, 0 weight class). Duncan comes to the cage accompanied by Here Comes the Boom-Intimidation. Teller has chosen Warrior - Disturbed as his entrance music. Both fighter's entrance songs getting the crowd jumping here.
 |
|
 |
| 180 cm
18
160 lbs
1 - 2 - 0 |
|
175 cm
20
155 lbs
1 - 0 - 0 |
BJJ Purple Belt
Brawler
Intelligent |
|
BJJ Blue Belt
Decent boxing
Solid chin |
|
| |
|
Ladies and gentlemen. This fight is 3 rounds, in the lightweight division.
Introducing the fighter to my left, fighting out of the red corner.
With a record of
1 - 2 - 0, fighting out of London, Donovan Duncan!
And introducing the fighter to my right, fighting out of the blue corner.
With a record of
1 - 0 - 0, fighting out of London, Dennis Teller!
The judges for this bout are James Ackerman, Chris Edwards and Steven Brown.
The bell rings for round one and we are underway!
Duncan avoids a punch combination nicely.
Teller misses with a two punch combination.
Teller will need to tighten up his combinations if he doesn't want to gas himself out, swinging at thin air.
Teller will need to tighten up his combinations if he doesn't want to gas himself out, swinging at thin air.
Duncan with a lazy takedown attempt
and Teller counters with a one-two to the body.
Duncan fakes high and shoots in for a takedown but Teller avoids it really well and circles away.
Duncan tries to shoot in for a takedown. He's got hold of a leg but Teller swivels and escapes.
That's three failed takedown attempts in the round for Donovan Duncan. That's going to take a lot out of him.
Duncan shoots in for a takedown. "I don't think so" says Teller as he avoids it easily.
Duncan shoots in looking for a takedown but Teller manages to keep the fight standing, pushing Duncan's face into the canvas for good measure before circling away.
A left and a right from Teller both land. Nice combination.
Teller tries to bum rush Duncan with a series of wild strikes but Duncan uses good footwork to avoid the assault.
Donovan Duncan seems to be the more aggressive standup fighter in this bout.
Duncan shoots in for a takedown. He's persisting with it as Teller sprawls well. Teller wins this battle and keeps the fight standing. Duncan gets slowly back to his feet.
That's one minute gone in the round.
Teller tries to score with a low kick but Duncan moves his leg out of the way.
Duncan closes the distance and clinches up with Teller, looking for a takedown. Duncan pushes Teller against the cage but Teller circles to the side and manages to break the clinch.
Duncan is breathing heavily.
Teller defends well against a solid takedown attempt from Duncan.
Teller throws a leg kick but Duncan sees it coming and checks it nicely.
Dennis Teller is looking to keep the fight on the feet at all costs.
Teller misses with a two punch combination.
Teller misses with a double jab.
Teller looks to land a combination. Duncan sees it coming but can only parry a couple of the shots.
Duncan slips a jab and a cross from Teller.
Duncan shoots in but no luck this time.
Teller stuffs a takedown. It's all about dictating where the fight takes place and Teller wants it to stay on the feet.
Duncan shoots in but Teller avoids the takedown attempt easily.
That's two minutes gone in the round.
Teller misses with a few strikes there.
A combination from Teller does no damage.
Duncan closes the distance looking to clinch
and Teller counters with a crisp hook to the side of the head.
Duncan looks for a takedown here. Will he get it? Teller is fending him off so far but Duncan persists. Nope, Teller circles away and we're back to standing.
Duncan shoots in and drives through. Teller sprawls well.
Teller lands a head shot.
Good work by Duncan as he checks the leg kick.
Teller throws a one two combo.
The fans in attendance giving it up for the two fighters, who have really let it all hang out in the last minute or so!
Teller throws a nice looking combination but Duncan bobs and weaves to avoid any damage.
Teller lands a jab, followed by a cross and another cross, as Duncan backs up against the cage.
That's three minutes gone in the round.
Duncan gets his takedown attempt stuffed easily
and Teller counters with a nice uppercut.
Duncan closes the distance looking to clinch
and Teller counters with a series of strikes. Duncan will be more careful next time no doubt.
A left and a right from Teller both land. Nice combination.
Teller looks to score with a combo but nothing lands.
Duncan fails with the takedown
and Teller counters with a three punch combo that has Duncan backing up. Duncan nods at Teller to acknowledge the strikes.
Duncan is trying hard to land a takedown here. Teller sprawls well and keeps this one on the feet.
Duncan looks for a takedown here. Will he get it? Teller is fending him off so far but Duncan persists. Nope, Teller circles away and we're back to standing.
Duncan throws a looping left and ducks down for a takedown. He's got his arms around Teller's waist but Teller gets an underhook and avoids the takedown by throwing Duncan off to one side.
That's four minutes gone in the round.
Teller lands a jab-cross combination.
Teller moves into range and throws a combination. A nice jab followed by a hook to the body.
Duncan shoots in for a takedown but doesn't get it.
A right-left combo lands from Teller.
Teller tries to score with a leg kick but it misses it's target.
Teller misses with a jab, cross combination.
Teller throws a right and a left that both miss.
Teller throws a chopping leg kick but Duncan manages to avoid taking any serious damage.
Teller is working the combinations to good effect here.
Duncan shoots in for a takedown. "Ole!" shouts Teller as he jumps to the side.
The crowd cheering loudly, showing their appreciation for the quality fight we're seeing here.
As the round comes to an end the crowd are showing their appreciation for a great round of action.
Teller lands with a nice combination. Duncan backs away looking to recover.
Duncan tries to clinch but fails miserably
and Teller counters with a left and a right that stings Duncan.
And thats the end of the round the fighters go back to their corners.
Dennis Teller dominated that round.
The fighters get back to their feet, the hooter sounds and we're back to the action!
Duncan shoots in for a takedown but Teller shows good takedown defense.
Teller lands a jab-cross combination.
Duncan tries for a takedown but Teller sees it coming a mile off and avoids it easily.
A combination from Teller does no damage.
Duncan fakes high and shoots in for a takedown but Teller avoids it really well and circles away.
That's three failed takedown attempts in the round for Donovan Duncan. That's going to take a lot out of him.
Duncan keeping at a good range here, avoiding a leg kick.
Duncan shoots in for a takedown but Teller shows good takedown defense there and keeps this one on the feet.
Donovan Duncan is looking to throw some combinations by the looks of things.
Teller forces Duncan back against the cage and clinches.
Both fighters are absolutely exhausted here.
Duncan jumps guard but Teller stands there with Duncan around his waist. Duncan gives up and drops back to his feet. We remain in the clinch.
Teller is trying to break the clinch but Duncan is controlling him.
That's one minute gone in the round.
Teller looks like he'd prefer to be striking at range right now.
Duncan keeps the fight in the clinch, despite Teller's efforts to push away.
Teller lands with a good tight uppercut to the head.
Teller has had enough of the clinch and is looking to separate.
Teller is clearly stalling here... Pick up the pace son.
Duncan is working on a leg, looking for a takedown but Teller is defending well.
That's two minutes gone in the round.
Teller's corner calls for him to break the clinch, which he does.
Teller throws a one two combo.
Duncan tries to grapple but his opponent circles
and Teller counters with a series of strikes. Duncan will be more careful next time no doubt.
Duncan looks for a takedown but Teller sprawls well.
Duncan has his head slapped from side to side by a 3 punch combination. That must have hurt him.
Duncan throws a looping left and ducks down for a takedown. He's got his arms around Teller's waist but Teller gets an underhook and avoids the takedown by throwing Duncan off to one side.
Teller blocks a head kick by Duncan.
Teller misses with a jab and misses with a cross straight after too.
Duncan shoots in and drives through. Teller sprawls well.
Teller lands with a two punch combination before moving back out of range.
That's three minutes gone in the round.
Teller scores with a sloppy right hand. Duncan should have avoided that one.
Teller scores with a nice one two combo and darts back out of range to avoid anything coming in the opposite direction.
A really sloppy takedown attempt there from Duncan.
Teller works over Duncan's head and body with a nice combination.
Teller looks to score with a combo but nothing lands.
A nice combination there by Teller.
Teller fails to land with the punch combination there - jab, cross, hook, miss, miss, miss.
Duncan with a lazy takedown attempt
letting Teller counter with a right hand.
Teller lands three nice shots there - that looked like it hurt!
Teller misses with a jab, cross combination.
Teller lands a two punch combo.
That's four minutes gone in the round.
Duncan throws a body kick that misses.
Sloppy strikes from Teller. Those never looked like landing.
Duncan shoots for a takedown but Teller saw that one coming a mile off and avoided it easily.
Duncan takes a punch to the jaw and another one to the bread basket.
This is turning into a torrid day at the office for Duncan. He's trying desperately to land a takedown but he's failing miserably and getting slapped silly on the feet to compound his misery.
Teller scores with a nice looking left hook and follows it up with an uppercut!
Duncan looks for a takedown here. Will he get it? Teller is fending him off so far but Duncan persists. Nope, Teller circles away and we're back to standing.
Some wild striking there from Teller.
Duncan looks like he's developed a pretty tasty lump over his left eye. He'll need to avoid taking much more damage to that.
Duncan shoots in for a takedown - he's clinched up with Teller but Teller pushes him off and we're back to square one.
Wooooo! Give it up for these two warriors! They are putting on a show!
The crowd applaud the fighters efforts here as the round comes to an end.
Teller throws a series of strikes that have Duncan backpedaling.
And thats the end of the round the fighters go back to their corners.
Dennis Teller showed his class in that round. I'd imagine he'll take it on all the scorecards.
The fighters' corners scream their final instructions, as the referee calls time. Here we go, back to the action! This is the final round!
Teller leaves Duncan with his face pressed against the mat as he sprawls beautifully, defending against a solid takedown attempt.
Teller lands a jab followed by a nice looking cross.
The fighters are starting to get sweaty, which will make takedowns a bit more tricky.
Duncan looks for a takedown here. Will he get it? Teller is fending him off so far but Duncan persists. Nope, Teller circles away and we're back to standing.
Teller pushes forward with a 1-2 combination that forces Duncan back to the cage. Teller follows up with a solid lead hook to the liver.
Horrible takedown by Duncan or perhaps it was just good defense by Teller which made him look bad.
That's three failed takedown attempts in the round for Donovan Duncan. That's going to take a lot out of him.
A combination from Teller does no damage.
Teller throws a one two combo.
Duncan shoots in for a takedown but doesn't get it.
Both fighters are breathing heavily.
Duncan avoids a punch combination nicely.
Duncan shoots in for a takedown but Teller shows good takedown defense there and keeps this one on the feet.
That's one minute gone in the round.
Teller dips down and scores with a jab to the body.
Duncan shoots in for a takedown. "I don't think so" says Teller as he avoids it easily.
Duncan has his head slapped from side to side by a 3 punch combination. That must have hurt him.
Teller pushes Duncan up against the cage in a clinch.
Teller wants to break the clinch but can't.
Teller is trying to force a seperation but Duncan has the dominant position.
Teller is looking to break free of the clinch but Duncan has double underhooks.
Teller looks like he'd prefer to be striking at range right now.
Duncan keeps control of Teller as he tries to wriggle out of the double underhooks.
Teller has had enough of the clinch but Duncan keeps him there for the moment.
That's two minutes gone in the round.
Teller's corner are urging him to control the action in the clinch for a moment, rather than mount any serious offense. I'm sure the crowd appreciate those instructions... not.
Teller's corner calls for him to break the clinch, which he does.
Teller misses with a series of wild punches.
Duncan is trying hard to land a takedown here. Teller sprawls well and keeps this one on the feet.
Duncan shoots in for a takedown. He's persisting with it as Teller sprawls well. Teller wins this battle and keeps the fight standing. Duncan gets slowly back to his feet.
Teller throws a combination but comes up with nothing but fresh air.
That's three minutes gone in the round.
Duncan tries to bum rush Teller with a series of wild strikes but Teller uses good footwork to avoid the assault.
Duncan throws a sloppy head kick and Teller moves out of range easily.
Teller moves into the clinch successfully.
Duncan tries to jump guard but he falls flat on his backside. Teller smiles and moves away.
Teller shuffles to his left behind two crisp jabs. Duncan eats them both and turns towards Teller to reposition himself and eats a stinging right hand-left hook combo.
Teller misses with a few strikes there.
Duncan takes a jab on the nose. He smiles like he loves it and keeps coming.
Dennis Teller is fighting for a decision - hopefully he's judged it right and he's actually winning the fight.
That's four minutes gone in the round.
Duncan throws a looping left and ducks down for a takedown. He's got his arms around Teller's waist but Teller gets an underhook and avoids the takedown by throwing Duncan off to one side.
Duncan slips a jab and a cross from Teller.
Duncan shoots and misses
and Teller counters with a three punch combination, finished off with a leg kick. Nice work.
Duncan checks the leg kick.
No luck for Duncan with that takedown attempt.
Nice jab there from Teller.
Duncan looks frustrated there after his takedown attempt is stuffed easily.
Duncan will have to do better than that with his takedown attempts.
The crowd applaud the fighters efforts here as the round comes to an end.
Duncan avoids a punch combination nicely.
Donovan Duncan has stepped it up - he knows he needs a finish here!
Duncan throws a right and a left that Teller avoids nicely.
And that's the end of the fight!
Dennis Teller comfortably won the final round on my scorecard.
Well Teller has outworked and out performed his opponent in all aspects of the game today. He was simply too good and the decision should be no more than a formality. Over to the ring announcer for the scorecards.
Ladies and gentlemen, after 3 rounds of action, we go to the scorecards for a decision.
Judge James Ackerman scores the fight 27:30
Judge Chris Edwards scores the fight 27:30
Judge Steven Brown scores the fight 27:30
In favor of your winner, by unanimous decision... Dennis Teller!
Dennis Teller thanked the fans post fight for their support.
|
|
|
|
|
|
|
|
|
|
|
|
|
|
|
|
|
|
|
|
|
|
|
| S |
C
A |
G |
S |
C
B |
G |
|
S |
C |
G |
|
energy
A | B |
|
hype
A | B |
|
pop
A | B |
|
mgr
A | B |
|
FIGHT
RATING
48% |
|
|
|
|
|
|
|
Undercard bout
|
Coming up we have a lightweight MMA rules bout between Lane Sturgis (ranked 0 p4p, 0 weight class) and Sam Turbitt (ranked 0 p4p, 0 weight class). Over to our ring announcer for the fighter introductions!
 |
|
 |
| 175 cm
24
155 lbs
1 - 0 - 0 |
|
178 cm
19
164 lbs
2 - 6 - 0 |
BJJ White Belt
Solid boxing
Cuts easily |
|
BJJ Purple Belt
Counter fighter
Solid chin |
|
| |
|
Ladies and gentlemen. This fight is 3 rounds, in the lightweight division.
Introducing the fighter to my left, fighting out of the red corner.
With a record of
1 - 0 - 0, fighting out of London, Lane Sturgis!
And introducing the fighter to my right, fighting out of the blue corner.
With a record of
2 - 6 - 0, fighting out of London, Sam Turbitt!
The judges for this bout are Chris Edwards, James Glass and William Gold.
The bell rings for round one and we are underway!
Sturgis shoots in from a long way out. He's driving through with the takedown attempt and he eventually gets it, landing in Turbitt's guard.
Sturgis lands a couple of elbows.
Turbitt is trying to keep Sturgis in close.
Sturgis knows he needs to get back to his feet asap. He's simply no match for Turbitt on the ground.
A big thud reverberates around the arena there as Sturgis accidentally thumps the mat. Hopefully he's not broken his hand.
The ref warns both fighters not to hold the cage as they work up against the meshing.
Turbitt is working the butterfly guard. He manages to land a nice scissor sweep and is now in half guard on the top. Nice move.
Turbitt is thinking about going for an arm triangle but he can't free his leg.
Sturgis pushes Turbitt off looking to stand but Turbitt dives back in and keeps control.
Turbitt is looking for a kimura but Sturgis is holding onto that half guard position, so it's hard for Turbitt to get the leverage.
Wooooo! Give it up for these two warriors! They are putting on a show!
Turbitt prevents Sturgis from standing back up.
Sturgis is refusing to be controlled, as Turbitt sits in half guard.
Turbitt is trying to work for a kimura. This could be trouble! No, Sturgis has managed to free his arm - good work.
Turbitt controlling the action here.
That's one minute gone in the round.
Sturgis won't allow Turbitt to pass to mount.
Turbitt is keen to just control but Sturgis is a slippery customer.
Turbitt has hold of the far side arm. He's working for the Kimura, can Sturgis defend it? Turbitt steps over the head and cranks it - Sturgis is tapping out! That was textbook stuff right there - nice submission victory for Turbitt!
Ladies and gentlemen, after 1:40 of round 1, we have a winner by way of Submission (Kimura). Sam Turbitt!
|
|
|
|
|
|
|
|
|
|
|
|
|
|
|
|
|
|
|
|
|
|
|
| S |
C
A |
G |
S |
C
B |
G |
|
S |
C |
G |
|
energy
A | B |
|
hype
A | B |
|
pop
A | B |
|
mgr
A | B |
|
FIGHT
RATING
54% |
|
|
|
|
|
|
|
Undercard bout
|
|
|
|
Co-main event
|
|
|
|
Main event
|
Coming up we have a welterweight MMA rules bout between Phil Dragon (ranked 0 p4p, 0 weight class) and Walter William (ranked 0 p4p, 0 weight class). William has chosen Here Comes the Boom-Intimidation as his entrance music. Phil Dragon has the edge in experience - let's see if he can make that count tonight.
 |
|
 |
| 179 cm
20
180 lbs
3 - 0 - 0 |
|
190 cm
18
180 lbs
0 - 0 - 0 |
BJJ Blue Belt
Brawler
Very strong |
|
BJJ Blue Belt
Solid Muay Thai
Determined |
|
| |
|
Ladies and gentlemen. This fight is 3 rounds, in the welterweight division.
Introducing the fighter to my left, fighting out of the red corner.
With a record of
3 - 0 - 0, fighting out of London, Phil Dragon!
And introducing the fighter to my right, fighting out of the blue corner.
With a record of
0 - 0 - 0, fighting out of London, Walter William!
The judges for this bout are Chris Edwards, Donald Grub and Richard Clark.
The bell rings for round one and we are underway!
William rushes forward with a series of wild hooks but Dragon moves out of range and avoids them all easily.
William shoots in looking for a takedown. Dragon tries to sprawl out of it but William keeps driving through. The fighters are pinned against the cage. Dragon manages to get underhooks and after a bit of a struggle, circles away and we're back to standing.
A decent looking cross lands there for Dragon.

The fight moves into the clinch position.
Dragon tries to pull guard but William forces him back to his feet, against the cage.

Dragon manages to break the clinch.
Dragon moves into range and lands a nice leg kick.
Dragon scores with a body shot.
The fans in attendance giving it up for the two fighters, who have really let it all hang out in the last minute or so!
William chopped to the floor by a nice leg kick but he springs right back up before Dragon can pounce on him.
William throws a looping left and ducks down for a takedown. He's got his arms around Dragon's waist but Dragon gets an underhook and avoids the takedown by throwing William off to one side.

Oooooh!!! Dragon has knocked William down with a huge combo! Dragon steps away and waves a wobbly William back to his feet! This one might not go much longer!

William is rocked!

It looks like Walter William has been cut.
William looks winded!
Dragon stuffs the takedown.
William is still on wobbly legs! Can Dragon finish him?
Phil Dragon has stuffed three takedown attempts in the round now. That's going to take a lot out of Walter William.
A head kick misses from Dragon.
Dragon scores with a body shot.
William seems to have recovered his senses.
Phil Dragon seems to be the more aggressive standup fighter in this bout.
Dragon fakes a head punch and goes low to the body. Nicely done.
A shot to the liver by Dragon. Beautiful body shot.
A combination from Dragon does no damage.
Dragon lands with a right and another and another! William is in big trouble! Dragon lands again and this time it's lights out for William! A quality knockout there for Dragon.
Ladies and gentlemen, after 0:58 of round 1, we have a winner by way of KO (Strikes). Phil Dragon!
|
|
|
|
|
|
|
|
|
|
|
|
|
|
|
|
|
|
|
|
|
|
|
| S |
C
A |
G |
S |
C
B |
G |
|
S |
C |
G |
|
energy
A | B |
|
hype
A | B |
|
pop
A | B |
|
mgr
A | B |
|
FIGHT
RATING
100% |
|
|
|
|
|
|
|
|
|
|
