 |
AFC 8 Unitas vs Uzomaki PBP Commentary |
Undercard bout
|
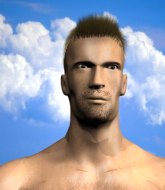
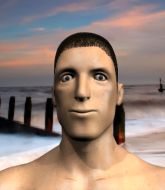
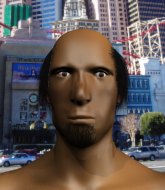
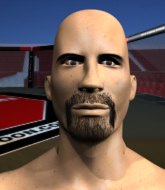
Coming up we have a heavyweight MMA rules bout between Dark Knight (ranked 0 p4p, 0 weight class) and Marcus J Whyte (ranked 0 p4p, 0 weight class). Man, I cannot wait for this one!
 |
|
 |
| 188 cm
26
245 lbs
2 - 2 - 0 |
|
183 cm
24
235 lbs
2 - 3 - 0 |
Decent wrestler
Basic striking
Self confident |
|
BJJ Blue Belt
Basic striking
Solid chin |
|
| |
|
Ladies and gentlemen. This fight is 3 rounds, in the heavyweight division.
Introducing the fighter to my left, fighting out of the red corner.
With a record of
2 - 2 - 0, fighting out of Amsterdam, Dark Knight!
And introducing the fighter to my right, fighting out of the blue corner.
With a record of
2 - 3 - 0, fighting out of Amsterdam, Marcus J Whyte!
The judges for this bout are Daniel Blasius, Radbod Blank and Wagner Zegers.

The bell rings for round one and we are underway!
Knight shoots in but Whyte avoids the takedown attempt easily.
Whyte lands with a slapping head kick.

It looks like Dark Knight has been cut.
Whyte tries to close the distance and clinch up but Knight swats him away and circles back towards the center.
Whyte scores with a leg kick.

Whyte drops down and drives through with a powerful takedown into guard.
This has been an exciting period of action!
It looks like the ref is thinking about a standup.
Whyte wants to pass the guard but Knight is keeping the position.
Whyte missing there with some ground and pound from the guard.
Whyte trying to control the position from guard on top but Knight is wriggling around, looking for whatever he can.
Knight wants to get back to his feet but Whyte is in a dominant position and won't allow it.

That's one minute gone in the round.
Whyte in full guard, throwing the ground and pound. No damage this time.
The ref warns both fighters not to hold the cage as they work up against the meshing.
Knight wants to stand but Whyte is controlling the position.
Knight trying desperately to get back to his feet here but he's not having any joy at all. He's going to tire himself out if he's not careful.
The fighters are pressed up against the cage, both looking to find a bit of space to work.
Whyte with a flurry of punches that miss.
Knight wants to stand up but Whyte is controlling him.
Whyte throwing shots from guard but he's hitting more mat than opponent.
Whyte is looking to work some ground and pound but Knight has wrist control.
Whyte is standing up over Knight. Knight looks to escape but Whyte dives into side control.
Whyte wants to lay and pray for a moment but Knight keeps working.

That's two minutes gone in the round.
Whyte working the ground and pound from side control.
Whyte throws an elbow but Knight slips to the side and avoids it well.
Whyte is looking to take a break and control but Knight is keeping him honest, looking to work from the bottom.
Knight wants to escape from the position here - easier said than done!
Whyte throwing strikes but missing, from side control.
Knight is putting a lot of effort into getting back to his feet here.
Fantastic stuff here - a very entertaining period of action, which has drawn cheers from the crowd.

That's three minutes gone in the round.
Sloppy strikes there by Whyte.
Whyte is working Knight over with some ground and pound from side control.
Knight wants to get back to his feet.
Whyte trying to control the action but Knight is working from the bottom.
Whyte landing with strikes to the head and body from side control.
Knight is working hard to escape and get back to his feet. After a battle for position, Whyte asserts his dominance and retains side control.

That's four minutes gone in the round.
Whyte sitting in side control, looking to soften his opponent up with elbows and hammerfists but Knight is avoiding damage well and looking to escape the position.
Whyte prevents Knight from escaping the position.
Whyte throwing ground and pound but whilst doing so, he forgets to control position and Knight works his way back to half guard. Good composure under pressure.
This has been an exciting period of action!
Whyte working the head and body with strikes.
As the round comes to an end the crowd are showing their appreciation for a great round of action.
Whyte wants to lay and pray for a moment but Knight keeps working.
And thats the end of the round the fighters go back to their corners.
Marcus J Whyte dominated that round.
The cut man is working on Dark Knight's cut.
OK. That's time! The bell goes and we're back to the action.

Whyte drives through with a takedown into Knight's guard. Let's see what he can do from the top position.
Knight is looking to stand up but Whyte isn't so interested in that idea.
A big thud reverberates around the arena there as Whyte accidentally thumps the mat. Hopefully he's not broken his hand.
Whyte stops Knight from standing up.
Whyte must be cautious of submissions here, given that his opponent has the superior Jiu Jitsu.
Whyte is standing up over Knight. Knight looks to escape but Whyte dives into side control.
Whyte wants to stand but Knight is controlling his arm.
Knight is trying to get back to his feet.
That's one minute gone in the round.
Knight on his back here. We all know that wrestlers don't like being on their back so let's see if Knight tries to get out of the position.
Knight could do with losing a few pounds - he looks very soft around the mid section, to put it politely.
Knight takes an elbow right on the bridge of the nose and winces in pain.
Whyte trying to control the position but Knight is working away.
Knight is trying to escape and get back to his feet.
Knight is not content to let Whyte control the position.
Whyte throws an elbow but Knight slips to the side and avoids it well.
That's two minutes gone in the round.
Knight wants to get back to his feet.
Whyte tries to land with some ground and pound but misses.
A bit of a lull in the action. I'm sure it will pick up again soon... even if the ref has to physically pick them up and put them back on their feet.
Knight avoids any damage from the ground and pound of Whyte.
Knight pushes Whyte away and creates a bit of space to escape. He's almost out here... but no, Whyte gets a good hold of his legs and remains firmly in side control.
Whyte tries to advance to mount but Knight denies him.

Whyte is trying to land an Americana. He has the arm isolated but Knight is keeping cool and he's avoided the danger for now.
That's three minutes gone in the round.
Whyte swings around for an armbar but Knight sees it coming a mile off and turns beautifully into Whyte's guard.
Whyte working a defensive guard here.
Knight seems content to control from guard here. He's going to have to remain active though if he doesn't want to get stood back up.
Knight trying to control the position from guard on top but Whyte is wriggling around, looking for whatever he can.
Knight working some strikes from top position.
Whyte is looking to get back to his feet but can't, whilst Knight is controlling him.
Whyte being controlled here, momentarily.
That's four minutes gone in the round.
Knight postures up.
Whyte is breathing heavily.
Knight lands a couple of decent looking shots.
Knight content to strike from guard, landing some decent shots.
Knight working from the guard for now, landing some ground and pound.
The fans in attendance giving it up for the two fighters, who have really let it all hang out in the last minute or so!
Knight landing with the ground and pound.
Knight lands a nice shot whilst sitting in his opponent's guard.
Knight postures up in Whyte's guard and throws a big left but Whyte blocks it.
Whyte working the defensive guard well to avoid strikes from Knight.
Knight showing good wrestling skills to control the position.
As the round comes to an end the crowd are showing their appreciation for a great round of action.
Whyte looking to control.
And thats the end of the round the fighters go back to their corners.
Dark Knight dominated that second round.
The cut man is working on Dark Knight's cut.
The fighters get back to their feet, the hooter sounds and we're back to the action! The crowd applaud as we get ready to start the final round!

Knight fails with a rather predictable takedown attempt.
Marcus J Whyte seems to be the more aggressive standup fighter in this bout.
Whyte sizes up Knight with a pawing jab and scores with a straight right down the middle.
Knight misses with a takedown attempt. He shot from a bit too far out.
Knight keeps the fight on the outside.
Whyte looks for a takedown here. Will he get it? Knight is fending him off so far but Whyte persists. Nope, Knight circles away and we're back to standing.

Knight shoots in from a long way out. He's driving through with the takedown attempt and he eventually gets it, landing in Whyte's guard.
Knight is sitting in guard, working some ground and pound.
Whyte is looking for a triangle but Knight pushes his legs off easily.
Knight is looking to work some ground and pound but Whyte has wrist control.
Knight throwing strikes but missing.
Knight stops Whyte from standing up.
Knight content to strike from guard, landing some decent shots.
Whyte takes a big intake of breath there - he's definitely tired.
That's one minute gone in the round.

Knight drops back looking for a leg! Whyte is in trouble here! The fighters roll with the hold and Whyte manages to kick Knight off! Knight jumps back into Whyte's guard.
Knight postures up and scores with a shot to the body and a follow up elbow to the head.
Both fighters really going for it on the ground here!
Whyte has a loose triangle. He'll be looking to tighten that up but Knight can see exactly what he's planning and manages to posture up and free himself.
Knight controls the pace of the fight for a moment.
Knight is in close to Whyte's body, working some short punches and elbows.
Whyte wants to get back to his feet but Knight is in a dominant position and won't allow it.
Knight working in close now, lands a nice elbow to the side of Whyte's head.
Knight postures up and lands some nice ground and pound.
Dark Knight overall seems to be getting the better of the ground position in the fight so far.
Hammerfist, elbow! yells Knight's corner. There ya go! There ya go!
That's two minutes gone in the round.
Whyte not looking particularly offensive just at the moment.
Whyte has a loose triangle. He'll be looking to tighten that up but Knight can see exactly what he's planning and manages to posture up and free himself.
Knight passes into half guard.
The crowd are loving this. Great action here.
Knight lands strikes from half guard.
Knight works his foot free and advances to mount.
Knight lands with some strikes.
Knight dominating with strikes here.
Knight lands a shot to the body, followed up by a shot to the exposed head of his trapped opponent.
Knight lands a shot to the body, followed up by a shot to the exposed head of his trapped opponent.
Knight landing strikes from the mount and Whyte is in trouble!
The crowd growing excited in anticipation of a finish here! Right on cue, Knight cracks his opponent with a massive right hand that draws loud cheers!
That's three minutes gone in the round.
Whyte defends a decent attempt at a guillotine from Knight.
Knight working the ground and pound effectively.
Knight landing strikes from the mount and Whyte is in trouble!
Knight connects with a couple of good shots from mount.
Knight has been looking to land a fair amount of strikes on the ground. He might be looking to soften his opponent up in order to work for a submission.
The crowd are loving this. Great action here.
Knight looking to finish Whyte with some ground and pound. This is bad for Whyte!
Knight is in the full mount, landing strikes.

Whyte is rocked!
Whyte is desperately trying to improve his position but Knight has a good base and remains in mount.
Whyte is still in real trouble! Can Knight finish him?
Knight with a couple of short strikes.
Knight connects with a bit shot that sees Whyte covering up! More strikes from Knight and the referee jumps in to stop the fight! Knight is our winner by TKO!
Ladies and gentlemen, after 4:57 of round 3, we have a winner by way of TKO (Strikes). Dark Knight!
After the fight, Dark Knight was humble in paying tribute to his opponent but made it clear he wants to go on to bigger and better things. It seemed to go down well with the crowd who cheered him loudly.
|
|
|
|
|
|
|
|
|
|
|
|
|
|
|
|
|
|
|
|
|
|
|
| S |
C
A |
G |
S |
C
B |
G |
|
S |
C |
G |
|
energy
A | B |
|
hype
A | B |
|
pop
A | B |
|
mgr
A | B |
|
FIGHT
RATING
84% |
|
|
|
|
|
|
|
Undercard bout
|
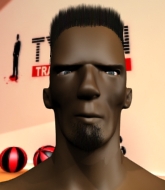
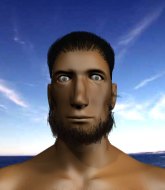
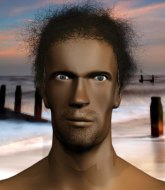
Coming up we have a light heavyweight MMA rules bout between Sonny Kewell (ranked 0 p4p, 0 weight class) and Aram Chivitchian (ranked 0 p4p, 0 weight class). Over to our ring announcer for the fighter introductions!
 |
|
 |
| 183 cm
29
205 lbs
7 - 6 - 0 |
|
182 cm
24
205 lbs
0 - 5 - 0 |
Good takedowns
Brawler
Experienced |
|
BJJ White Belt
World class MT
Good gas tank |
|
| |
|
Ladies and gentlemen. This fight is 3 rounds, in the light heavyweight division.
Introducing the fighter to my left, fighting out of the red corner.
With a record of
7 - 6 - 0, fighting out of Sydney, Sonny Kewell!
And introducing the fighter to my right, fighting out of the blue corner.
With a record of
0 - 5 - 0, fighting out of Amsterdam, Aram Chivitchian!
The judges for this bout are Daniel Blasius, Aafke Stam and Albert Achterberg.
The bell rings for round one and we are underway!
Chivitchian tries to clinch up but Kewell circles away and keeps his distance.
Chivitchian connects with a body shot.
Kewell shoots in with a lovely double leg takedown. Chivitchian manages to land in full guard to minimise the damage.
The fighters are pressed up against the cage, both looking to find a bit of space to work.
Kewell drops back for a leg! It's a sloppy attempt though and Kewell jumps back into guard quickly, to retain the dominant position.
Kewell with a couple of shots to the head there. Not particularly brutal.
Kewell stands and throws Chivitchian's legs to the side, diving into side control.
Chivitchian defending against the ground and pound.
Kewell tries for a kimura. Not really close to a finish though.
This has been an exciting period of action!
Chivitchian pushes Kewell away and creates a bit of space to escape. He's almost out here... but no, Kewell gets a good hold of his legs and remains firmly in side control.
That's one minute gone in the round.
Kewell works a knee to the body and follows up with a nice elbow to the head.
Kewell controlling the position.
Kewell lands some shots froms side control.
Kewell working the head with strikes.
Kewell lands a few punches from side control.
Kewell is staying tight to Chivitchian's torso, preventing him from escaping.
Kewell is in a dominant position here, looking for a kimura. Chivitchian looks calm but he's in trouble here. Kewell gets his leg over his opponent's head and yanks on the arm. Chivitchian is tapping like a morse code operator on the titanic! SOS! SOS! Kewell lets go of the hold and Chivitchian can pop his arm back in it's socket.
Ladies and gentlemen, after 2:56 of round 1, we have a winner by way of Submission (Kimura). Sonny Kewell!
A less than humble Sonny Kewell misjudged his post fight interview somewhat and came across a little too arrogant whilst trying to hype up his own abilities.
|
|
|
|
|
|
|
|
|
|
|
|
|
|
|
|
|
|
|
|
|
|
|
| S |
C
A |
G |
S |
C
B |
G |
|
S |
C |
G |
|
energy
A | B |
|
hype
A | B |
|
pop
A | B |
|
mgr
A | B |
|
FIGHT
RATING
51% |
|
|
|
|
|
|
|
Undercard bout
|
Coming up we have a middleweight MMA rules bout between Tomasz Drwal (ranked 0 p4p, 0 weight class) and Ade Winner (ranked 0 p4p, 0 weight class). Drwal comes into the arena with Nightwish Crimson Tide blaring out of the sound system. Ade Winner acknowledges the crowd's support as he enters the cage.
 |
|
 |
| 190 cm
28
187 lbs
12 - 16 - 1 |
|
191 cm
27
197 lbs
8 - 9 - 1 |
Good wrestling
World class boxer
KO power |
|
Good wrestler
Excellent boxer
Powerful |
|
| |
|
Ladies and gentlemen. This fight is 3 rounds, in the middleweight division.
Introducing the fighter to my left, fighting out of the red corner.
With a record of
12 - 16 - 1, fighting out of Amsterdam, Tomasz Drwal!
And introducing the fighter to my right, fighting out of the blue corner.
With a record of
8 - 9 - 1, fighting out of Amsterdam, Ade Winner!
The judges for this bout are Paul Aken, Paulsen Ambrosius and Aafke Stam.
The bell rings for round one and we are underway!
Drwal ducks low and lands a nice hook to the body of his opponent.

Drwal clinches.
Winner has a body lock and is looking for a takedown. Drwal is bouncing around trying to prevent the takedown and somehow he has indeed managed to stay on his feet.
Drwal working hard to break the clinch.
Drwal prevents the takedown attempt.
Winner blocks a body shot from Drwal.
Winner looking for a takedown.
Tomasz Drwal has stuffed three takedown attempts in the round now. That's going to take a lot out of Ade Winner.
Drwal stalls.
A nice left hand lands by Drwal.
Winner lands a takedown into guard.
Winner trying to control but Drwal is working from the bottom.
The ref warns both fighters not to hold the cage as they work up against the meshing.
Winner postures up and lands a big shot to Drwal's brow.
We've seen a great period of action over the last minute or so - credit to both fighters for going all out!
Winner with a couple of shots to the head there. Not particularly brutal.
Winner makes a bit of distance and scores with some ground and pound, still in guard.
Winner working some ground and pound from guard but it's not doing any damage.
Drwal pulls Winner in close to prevent any damage.
That's one minute gone in the round.
Drwal is looking to get back to his feet but can't, whilst Winner is controlling him.
Drwal keeping moving, preventing Winner from controlling successfully.
Winner throws a big elbow that misses.
Winner keeps in close for a moment and lands a decent shot to the side of Drwal's head.
Winner scoring with punches to the head and body.
Drwal trying to keep a closed guard but Winner is proving a slippery customer.
Drwal is looking to get back to his feet but can't, whilst Winner is controlling him.
Drwal keeping full guard, as Winner tries to pass.
Winner is working the ground and pound from guard. He might want to try advancing position though to get more of an impact.
The fighters are pressed up against the cage, both looking to find a bit of space to work.
Drwal is looking to stand up but Winner isn't so interested in that idea.
Drwal trying desperately to get back to his feet here but he's not having any joy at all. He's going to tire himself out if he's not careful.
That's two minutes gone in the round.
Winner postures up in Drwal's guard and throws a big left but Drwal blocks it.
Winner throws a strike but Drwal rolls with it and manages to sweep. Now he's in guard on top.
Winner has a closed guard, preventing Drwal from standing up.
Fantastic stuff here - a very entertaining period of action, which has drawn cheers from the crowd.
Drwal is fighting to break Winner's control of his arms but Winner is doing a good job of controlling the position at the moment.

Winner is working an open guard so Drwal takes the opportunity to get back to his feet.
Winner gets tackled into the cage by Drwal. Drwal maintains the clinch.
Winner presses Drwal against the cage and delivers a mid-strength body shot.
That's three minutes gone in the round.
Drwal gets double underhooks to prevent a takedown attempt from Winner.
Winner gets through Drwal's defenses to land a nice punch to the side of the head.
Winner is looking for a takedown up against the cage. Drwal gets underhooks though and prevents the takedown attempt.
Winner goes for a takedown in the clinch but Drwal prevents it.
The fighters are starting to perspire pretty heavily.
Drwal is trying to break free.
Drwal tries to break the clinch but Winner is controlling the position.
The pace slowing considerably in the clinch, as Drwal takes a break from that fighting nonsense to think about the finer things in life.
Winner goes for a takedown in the clinch but Drwal prevents it.
Winner tries to score a body lock takedown but Drwal shows good agility there to stay on his feet.
A battle for position here, against the cage.
Drwal works on Winner's body with a couple of short punches.
That's four minutes gone in the round.
Drwal is defending well against a takedown attempt.
Winner wants a takedown but no success here.
Drwal prevents the takedown attempt.

Drwal breaks the clinch.
This is a great period of action - very entertaining stuff!
Drwal moves into the clinch.
Drwal is pushing Winner up against the cage, for a bit of lean and pray action. Action being used the in the loosest possible sense of the word.
Winner lands a body shot.
Winner has Drwal pressed against the cage, preventing Drwal from circling away and getting back to striking at range.
Winner goes for a takedown attempt but Drwal pushes him away and we're back to fighting at a distance.
Tomasz Drwal is looking to keep the fight on the feet at all costs.
The crowd are going absolutely nuts as the round comes to an end - what a fantastic round of action!
Drwal throws a right and a left that Winner avoids nicely.
And thats the end of the round the fighters go back to their corners.
A close round but Ade Winner will probably get the nod.
The fighters' corners scream their final instructions, as the referee calls time. Here we go, back to the action!
Drwal fakes with an overhand right and moves in to clinch with Winner, pushing him back against the cage.
A right hook to the body lands for Drwal.
Winner is trying to drag Drwal to the mat but Drwal just about manages to keep his footing. He used the cage to his advantage there.
Drwal tries to throw a body punch but Winner avoids it by throwing Drwal back against the cage.
Winner prevents a body shot from Drwal.
Tomasz Drwal has scored more points in the clinch so far.
Drwal breaks the clinch and we return to the middle of the mat.
A right-left combo lands from Drwal.
Drwal has managed to clinch.
The fans in attendance giving it up for the two fighters, who have really let it all hang out in the last minute or so!
Winner struggles to land a body shot inside as Drwal controls his hands.
Winner scores with a hook to the body.
Drwal is working Winner over against the cage.
Winner has hold of a leg and is looking for a trip takedown. Drwal avoids it nicely though and we remain in the clinch.
Winner lands a shot to the body.
Winner drops to a knee looking for a takedown but Drwal gets the underhooks and prevents it.
Tomasz Drwal has stuffed three takedown attempts in the round now. That's going to take a lot out of Ade Winner.
That's one minute gone in the round.
Winner stalling in the clinch but Drwal improves position.
Drwal lands a short shot on the inside that snaps the head of Winner backwards.
Winner is working for takedown but Drwal is calmly controlling the position for now.
Drwal lands a good knee to the midsection. Winner won't want to take too many of those.
Winner is breathing heavily.
Drwal breaks from the clinch.
Winner takes a body punch that cleary hurt but he's trying not to show any weakness.
Tomasz Drwal seems to be the more aggressive standup fighter in this bout.
Drwal keeps his opponent at a distance with a nice jab.
The crowd cheering loudly, showing their appreciation for the quality fight we're seeing here.

Drwal drops Winner with a nice combination! Drwal dives into Winner's guard, looking to finish!
Winner is rocked!
Winner is working an open guard so Drwal takes the opportunity to get back to his feet.
Winner is still on wobbly legs! Can Drwal finish him?
Winner throws the kick towards the body but Drwal avoids it.
Drwal fires a straight punch through the middle that cracks Winner square on the jaw! Damn, Winner is out cold on his feet and topples face first to the canvas! Wow, I haven't seen a knockout that brutal in a long time!
Ladies and gentlemen, after 1:54 of round 2, we have a winner by way of KO (Punch). Tomasz Drwal!
Tomasz Drwal made sure to give a little speech post fight, saying 'POZDRAWIAM WSZYSTKICH POLAKÓW I MAMEDA KHALIDOVA. '.
|
|
|
|
|
|
|
|
|
|
|
|
|
|
|
|
|
|
|
|
|
|
|
| S |
C
A |
G |
S |
C
B |
G |
|
S |
C |
G |
|
energy
A | B |
|
hype
A | B |
|
pop
A | B |
|
mgr
A | B |
|
FIGHT
RATING
87% |
|
|
|
|
|
|
|
Undercard bout
|
Coming up we have a heavyweight MMA rules bout between Jose Medrado (ranked 0 p4p, 0 weight class) and William Johnson (ranked 0 p4p, 0 weight class). Both fighters look fresh as a daisy as they make their way towards the cage.
 |
|
 |
| 195 cm
25
250 lbs
5 - 3 - 0 |
|
194 cm
26
270 lbs
2 - 2 - 0 |
BJJ Purple Belt
Brawler
Granite chin |
|
BJJ Blue Belt
Decent boxing
Heavy handed |
|
| |
|
Ladies and gentlemen. This fight is 3 rounds, in the heavyweight division.
Introducing the fighter to my left, fighting out of the red corner.
With a record of
5 - 3 - 0, fighting out of Rio de Janeiro, Jose Medrado!
And introducing the fighter to my right, fighting out of the blue corner.
With a record of
2 - 2 - 0, fighting out of Amsterdam, William Johnson!
The judges for this bout are Daniel Blasius, Patrick Alders and Saam Ante.
The bell rings for round one and we are underway!
Johnson will need to tighten up his combinations if he doesn't want to gas himself out, swinging at thin air.
Johnson defends well against a solid takedown attempt from Medrado.
Medrado shoots in for a takedown. "Ole!" shouts Johnson as he jumps to the side.
Johnson fails to land with a series of punches.
Johnson throws a hard body shot but it just misses.
Medrado has Johnson up against the cage in a clinch.
Medrado has dropped down and is working for a takedown. Johnson is trying to keep an underhook but Medrado manages to get the takedown into half guard.
Johnson wants to get back to his feet.
Medrado has hold of the far side arm. He's working for the Kimura, can Johnson defend it? Medrado steps over the head and cranks it - Johnson is tapping out! That was textbook stuff right there - nice submission victory for Medrado!
Ladies and gentlemen, after 0:38 of round 1, we have a winner by way of Submission (Kimura). Jose Medrado!
Jose Medrado seemed lost for words in his post fight interview but he remembered to thank his fans and directed everyone to his website.
|
|
|
|
|
|
|
|
|
|
|
|
|
|
|
|
|
|
|
|
|
|
|
| S |
C
A |
G |
S |
C
B |
G |
|
S |
C |
G |
|
energy
A | B |
|
hype
A | B |
|
pop
A | B |
|
mgr
A | B |
|
FIGHT
RATING
59% |
|
|
|
|
|
|
|
Co-main event
|
Coming up we have a light heavyweight MMA rules bout between Nick James (ranked 0 p4p, 0 weight class) and Riad Radyan (ranked 0 p4p, 0 weight class). Well, I have no idea who's going to take this one!
 |
|
 |
| 189 cm
33
215 lbs
12 - 16 - 0 |
|
187 cm
25
205 lbs
2 - 1 - 0 |
Good takedowns
Counter fighter
Very quick |
|
BJJ Red Belt
Counter fighter
Good gas tank |
|
| |
|
Ladies and gentlemen. This fight is 3 rounds, in the light heavyweight division.
Introducing the fighter to my left, fighting out of the red corner.
With a record of
12 - 16 - 0, fighting out of Amsterdam, Nick James!
And introducing the fighter to my right, fighting out of the blue corner.
With a record of
2 - 1 - 0, fighting out of Amsterdam, Riad Radyan!
The judges for this bout are Paul Aken, Saam Ante and Radbod Blank.
The bell rings for round one and we are underway!
Radyan doesn't succeed with the takedown
enabling James to counter with a crisp jab.

It looks like Riad Radyan has been cut.
Radyan misses with a takedown attempt
and James counters with a takedown into side control! That could mean trouble for Radyan!
Radyan is trying to improve his position.
The crowd are loving this. Great action here.
Radyan wants to control but James postures up.
Both fighters really going for it on the ground here!
Radyan tries to work a leg under to get back to half guard but James wriggles his own leg back out and remains in side control.
James is trying to land an Americana. He has the arm isolated but Radyan is keeping cool and he's avoided the danger for now.
James is looking to finish here, going for an Americana. Radyan knows the correct defense though, so he's OK.
Radyan is looking to regain half guard here but James keeps moving and retains side control.
James working away.
That's one minute gone in the round.
James tries for a kimura but Radyan is defending well.
Radyan prevents James from moving into mount.
The ref warns both fighters not to hold the cage as they work up against the meshing.
James tries for a kimura but Radyan is defending well.
James working away.
James tries for an arm triangle. That looks pretty tight to me. Is this one over!?! Possibly, maybe, no James has let go of the choke. Obviously it wasn't as tight as we thought!
Radyan tries to get back to half guard but can't.
James advances to full mount.
Radyan gets back to half guard.
James knows he needs to get back to his feet asap. He's simply no match for Radyan on the ground.
Radyan is looking to sinch up a guillotine here but James pulls his head out easily.
That's two minutes gone in the round.
James is thinking about going for an arm triangle but he can't free his leg.
James seems to be looking for submissions.
Radyan wants to improve his position but James is controlling well.
Radyan is defending against the submission attempts here by James.
Radyan looking for submissions off his back.
Radyan is looking to sinch up a guillotine here but James pulls his head out easily.
This is a great period of action - very entertaining stuff!
James is keen to just control but Radyan is a slippery customer.
That's three minutes gone in the round.
Radyan makes his way to full guard. A much better position for Radyan.
Radyan is actively looking for submissions from his back. He's worked himself a little space on the bottom and seems to be going for a triangle. No, he's switched into an armbar! That was slick! James rolls with it to try and escape but Radyan cranks on the arm and James is forced to tap out! This one is aaaaaaaaall over!
Ladies and gentlemen, after 3:28 of round 1, we have a winner by way of Submission (Armbar). Riad Radyan!
Riad Radyan thanked the fans post fight for their support.
|
|
|
|
|
|
|
|
|
|
|
|
|
|
|
|
|
|
|
|
|
|
|
| S |
C
A |
G |
S |
C
B |
G |
|
S |
C |
G |
|
energy
A | B |
|
hype
A | B |
|
pop
A | B |
|
mgr
A | B |
|
FIGHT
RATING
52% |
|
|
|
|
|
|
|
Main event
|
Coming up we have a light heavyweight MMA rules bout between David Unitas (ranked 0 p4p, 0 weight class) and Kenichi Uzomaki (ranked 0 p4p, 0 weight class). Kenichi Uzomaki looks lathargic as he enters the arena. Wake up son, you're about to have a fight!
 |
|
 |
| 190 cm
26
215 lbs
11 - 10 - 1 |
|
190 cm
32
215 lbs
15 - 14 - 0 |
Good wrestling
Solid boxing
Insanely flexible |
|
Good takedowns
Decent boxing
Granite chin |
|
| |
|
Ladies and gentlemen. This fight is 3 rounds, in the light heavyweight division.
Introducing the fighter to my left, fighting out of the red corner.
With a record of
11 - 10 - 1, fighting out of New York, David Unitas!
And introducing the fighter to my right, fighting out of the blue corner.
With a record of
15 - 14 - 0, fighting out of Tokyo, Kenichi Uzomaki!
The judges for this bout are Albert Achterberg, Radbod Blank and Daniel Blasius.
The bell rings for round one and we are underway!
Unitas tests Uzomaki's chin there with a solid looking shot.
Unitas throws a nice looking combination but Uzomaki bobs and weaves to avoid any damage.
Uzomaki is on the wrong end of a nice combination from Unitas.
Uzomaki slips under a jab from Unitas.
Unitas fails to land with a series of punches.
Uzomaki tries for a takedown but Unitas circles away easily
and Unitas counters with a takedown into side control! That could mean trouble for Uzomaki!
The fans in attendance giving it up for the two fighters, who have really let it all hang out in the last minute or so!
Unitas working the ground and pound.
The ref warns both fighters not to hold the cage as they work up against the meshing.
Uzomaki avoids any damage from the ground and pound of Unitas.
Unitas in side control, throwing shots but Uzomaki defends.
That's one minute gone in the round.
Uzomaki takes a nasty elbow to the side of the head.
Unitas trying to control the position but Uzomaki is working away.
Unitas taking a breather here.
Uzomaki is trying to control Unitas's posture but Unitas avoids it.
Unitas misses with a strike but at least he's keeping busy, looking to cause some damage - that will still help him when it comes to the judges scorecards.
Unitas in side control, throwing shots but Uzomaki defends.
That's two minutes gone in the round.
Unitas tries for a kimura but Uzomaki is defending well.
Unitas working away.
Unitas lands an elbow.
Unitas working the ground and pound from side control.
We've seen a great period of action over the last minute or so - credit to both fighters for going all out!
Unitas scoring with punches and elbows.
Uzomaki takes a nasty elbow to the side of the head.
Uzomaki wants to control but Unitas postures up.
Unitas controlling the position from side mount.
That's three minutes gone in the round.
Unitas looking for an arm triangle but it's way too loose to do anything.
Unitas working the body and head with strikes.
Unitas working the head and body with strikes.
Unitas working hard here to secure a kimura but he's not really in the right position for it.
Unitas is looking to take a break and control but Uzomaki is keeping him honest, looking to work from the bottom.
That's four minutes gone in the round.
Unitas is trying to get an arm triangle but Uzomaki is defending well.
Unitas remains in side control and seems content to stay there. It's a versatile position from which he can work both strikes and submissions, whilst maintaining that control, so maybe he'll sit here for a while.
As the round comes to an end the crowd are showing their appreciation for a great round of action.
And thats the end of the round the fighters go back to their corners.
David Unitas dominated that round.
That's the end of the round. The referee orders the cornermen out of the cage so we can get back down to business.
Unitas fails to land with the punch combination there - jab, cross, hook, miss, miss, miss.
Unitas drops down and drives through with a powerful takedown into guard.
Unitas wants to pass the guard but Uzomaki is keeping the position.
Unitas won't allow Uzomaki to sweep him here.
David Unitas overall seems to be getting the better of the ground position in the fight so far.
Unitas missing there with some ground and pound from the guard.
Unitas looking to pass the guard.
Unitas throws a big right hand that misses.
That's one minute gone in the round.
Uzomaki avoiding any damage from the ground and pound.
Unitas connects with a couple of short punches.
Unitas tries to free his leg and advance position but Uzomaki is retaining full guard.
Unitas with a nice head shot there.
The fighters are pressed up against the cage, both looking to find a bit of space to work.
Uzomaki is working from a closed guard but he's struggling to control his opponent.
Uzomaki utilising some decent striking defenses from the guard, preventing the ground and pound.
Uzomaki trying to control the position.
Unitas throwing shots from guard but he's hitting more mat than opponent.
That's two minutes gone in the round.
Unitas trying to control but Uzomaki is working from the bottom.
Unitas is going to have to think about doing something other than just controlling because Uzomaki is managing to avoid having the position dictated to him.
Unitas postures up in Uzomaki's guard and throws a big left but Uzomaki blocks it.
Uzomaki wants to sweep but no luck.
Unitas postures up.
Unitas is stalling in the full guard.

The ref stands the fighters back up, due to lack of action by Kenichi Uzomaki.
Unitas fakes a jab and then connects with a hook.
That's three minutes gone in the round.
Unitas comes forward and lands a shot to the body, then darts back out of range.
Uzomaki is breathing heavily.
Unitas pivots as if he's going to throw a leg kick but stops half way.
A looping hook to the body misses from Unitas. Uzomaki does a little dance to reset his feet.
Uzomaki looking to score a takedown here. Unitas is defending well but Uzomaki drives through and ends up in Unitas's guard.
Uzomaki stands up and looks to throw the legs aside to pass to side control. Unitas swivels though and keeps the full guard.
Unitas wants to stand but Uzomaki is controlling the position.
Uzomaki got a little sloppy there for a moment and Unitas has worked his way into a loose triangle - can he finish it?! No, Uzomaki has managed to get both his arms back between Unitas's legs - danger averted.
That's four minutes gone in the round.
Unitas managing to control the position.
Unitas keeping moving, preventing Uzomaki from controlling successfully.
Unitas is pulling down on Uzomaki's head to control his posture.
The crowd applaud the fighters efforts here as the round comes to an end.
Uzomaki is looking to work some ground and pound but Unitas has wrist control.
And thats the end of the round the fighters go back to their corners.
David Unitas dominated that second round.
That's time! Unitas's corner gives him a slap on the ass as he gets ready to fight. This is the final round!
Uzomaki takes a punch to the jaw and another one to the bread basket.
Unitas connects with a high kick.
Uzomaki uses some good footwork to avoid the body shot by Unitas.
Unitas clobbers Uzomaki with an overhand right that has the crowd gasping. That made a horrendous noise.
This is a great period of action - very entertaining stuff!
Unitas stuns Uzomaki with a nice body shot, before stepping back out of range.
Unitas fails to land with a series of punches.
A telegraphed takedown attempt from Uzomaki is defended easily by Unitas.
Unitas buckles his opponent's knee momentarily with a nice leg kick.
Uzomaki takes a big intake of breath there - he's definitely tired.
That's one minute gone in the round.
Unitas looking to take his opponent's legs away with the low kicks.
Unitas throws a head kick but Uzomaki moves out of range.
David Unitas is winning the standup battle so far.
Uzomaki dodges the punch combination from Unitas.
Unitas throws a jab, cross combination which is slipped
and Uzomaki counters with a good right hand that lands right on the jaw.
Uzomaki takes a jab right on the nose. That must have hurt but he shrugs his shoulders and looks to return the favor.
Unitas lunges in with swinging rights and lefts but Uzomaki circles away quickly and effectively.
Unitas lunges in with swinging rights and lefts but Uzomaki circles away quickly and effectively.
Unitas tries a switch kick but it misses it's target.
Unitas is really dominating this fight. Is there anything that Uzomaki can do to turn this around?
That's two minutes gone in the round.
Unitas tries to bum rush Uzomaki with a series of wild strikes but Uzomaki uses good footwork to avoid the assault.
Unitas misses with a half-hearted attempt at a head kick.
Unitas misses with a two punch combination.
Uzomaki shoots in but doesn't get the takedown
and Unitas counters with a three punch combo that has Uzomaki backing up. Uzomaki nods at Unitas to acknowledge the strikes.
Nice defenses there by Uzomaki.
Uzomaki has a takedown stuffed.
David Unitas has stuffed three takedown attempts in the round now. That's going to take a lot out of Kenichi Uzomaki.
The crowd cheering loudly, showing their appreciation for the quality fight we're seeing here.
Uzomaki takes a body punch that cleary hurt but he's trying not to show any weakness.
That's three minutes gone in the round.
Unitas will need to tighten up his combinations if he doesn't want to gas himself out, swinging at thin air.
Unitas looking to shoot here. He's gone for it and he's landed a takedown into side control! Oh, that's bad for Uzomaki!
Unitas trying to control the action but Uzomaki is working from the bottom.
Unitas is pausing for a moment. What's he doing? It looks like he's clearing his nose. Oh dude! He's shot a load of snot all down Uzomaki's shoulder. That is not cool.
That's four minutes gone in the round.
Unitas is trying to get an arm triangle but Uzomaki is defending well.
You can see the frustration on Uzomaki's face, being in this tough position on the bottom.
Unitas is putting a hurting on Uzomaki here, landing some big shots from side control.
Kenichi Uzomaki has stepped it up - he knows he needs a finish here!
Uzomaki is looking for a sweep.
As the round comes to an end the crowd are showing their appreciation for a great round of action.
A lull in the action here as Unitas stalls from top position.
Unitas lands a decent elbow from side control.
And that's the end of the fight!
David Unitas showed his dominance in that final round.
Well Unitas has outscored his opponent in every aspect of the fight today. Only a scarily incompetent judge or two will keep him from a well deserved win... Over to the ring announcer for the scorecards.
Ladies and gentlemen, after 3 rounds of action, we go to the scorecards for a decision.
Judge Albert Achterberg scores the fight 30:27
Judge Radbod Blank scores the fight 30:26
Judge Daniel Blasius scores the fight 30:26
In favor of your winner, by unanimous decision... David Unitas!
After winning the bout, David Unitas thanked all his fans and promised he'd do even better in his next fight. The crowd seemed to love his humility.
|
|
|
|
|
|
|
|
|
|
|
|
|
|
|
|
|
|
|
|
|
|
|
| S |
C
A |
G |
S |
C
B |
G |
|
S |
C |
G |
|
energy
A | B |
|
hype
A | B |
|
pop
A | B |
|
mgr
A | B |
|
FIGHT
RATING
43% |
|
|
|
|
|
|
|
|
|
|

