 |
Right Pound 15 PBP Commentary |
Undercard bout
|
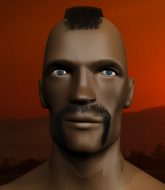
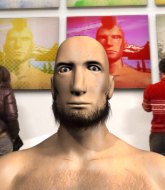
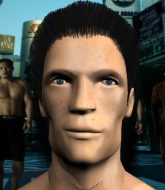
Coming up we have a featherweight MMA rules bout between Ferdnand Soiler (ranked 0 p4p, 0 weight class) and Peter Ward (ranked 0 p4p, 0 weight class). Ward has chosen Break Stuff as his entrance music. The crowd giving both fighters a great reception on their way into the arena. That's good to see.
 |
|
 |
| 150 cm
19
152 lbs
1 - 4 - 0 |
|
150 cm
18
135 lbs
3 - 2 - 0 |
BJJ White Belt
Excellent boxer
Granite chin |
|
BJJ Purple Belt
Basic striking
Intelligent |
|
| |
|
Ladies and gentlemen. This fight is 3 rounds, in the featherweight division.
Introducing the fighter to my left, fighting out of the red corner.
With a record of
1 - 4 - 0, fighting out of Sydney, Ferdnand Soiler!
And introducing the fighter to my right, fighting out of the blue corner.
With a record of
3 - 2 - 0, fighting out of Sydney, Peter Ward!
The judges for this bout are Bruno Hogan, Eliza Hachem and Donatello Bradman.

The bell rings for round one and we are underway!

Ward scores with a takedown into Soiler's guard.
We must be close to a standup if these guys don't pick up the pace.

Ward is trying to work a guillotine from the top, or something like that? Don't know how he thinks he's going to get a finish from there.
Ward advances to half guard.
Soiler is trying to stand up here but Ward is controlling him well.
Ward is looking for a kimura. It's going to be difficult to finish that from half guard though and Soiler defends it well.
Ward is working for a kimura but Soiler is defending it quite comfortably.
This is a great period of action - very entertaining stuff!
Ward in half guard on the top. He's looking for a kimura... He's got it locked and he's managed to free his trapped foot. Soiler tries to escape but it's on too tight and he has to tap! Great BJJ skills there from Ward!
Ladies and gentlemen, after 1:56 of round 1, we have a winner by way of Submission (Kimura). Peter Ward!
In his post fight interview, Peter Ward started talking himself up. Luckily his charisma kept the crowd on side and gave him a good reception.
|
|
|
|
|
|
|
|
|
|
|
|
|
|
|
|
|
|
|
|
|
|
|
| S |
C
A |
G |
S |
C
B |
G |
|
S |
C |
G |
|
energy
A | B |
|
hype
A | B |
|
pop
A | B |
|
mgr
A | B |
|
FIGHT
RATING
48% |
|
|
|
|
|
|
|
Undercard bout
|
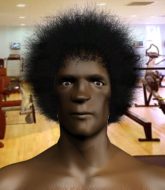
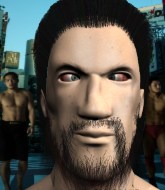
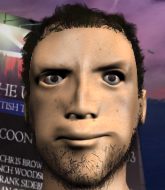
Coming up we have a welterweight MMA rules bout between Nuib Sharaz (ranked 0 p4p, 0 weight class) and Mario Trevis (ranked 0 p4p, 0 weight class). The key to victory for Nuib Sharaz has got to be keeping the fight on the feet.
 |
|
 |
| 160 cm
18
175 lbs
2 - 2 - 0 |
|
160 cm
18
175 lbs
2 - 3 - 0 |
BJJ Blue Belt
Brawler
Big heart |
|
BJJ Blue Belt
Brawler
Can Moonwalk |
|
| |
|
Ladies and gentlemen. This fight is 3 rounds, in the welterweight division.
Introducing the fighter to my left, fighting out of the red corner.
With a record of
2 - 2 - 0, fighting out of Sydney, Nuib Sharaz!
And introducing the fighter to my right, fighting out of the blue corner.
With a record of
2 - 3 - 0, fighting out of Sydney, Mario Trevis!
The judges for this bout are Donatello Bradman, Damien Edna and Eliza Hachem.
The bell rings for round one and we are underway!
A big right from Sharaz misses.
Sharaz connects with a jab and follows up with a big overhand right! Oh that's hurt Trevis! He's out on his feet! Sharaz rushes in and drops Trevis with another big right hand, forcing the referee to stop the fight!
Ladies and gentlemen, after 0:05 of round 1, we have a winner by way of TKO (Punches). Nuib Sharaz!
|
|
|
|
|
|
|
|
|
|
|
|
|
|
|
|
|
|
|
|
|
|
|
| S |
C
A |
G |
S |
C
B |
G |
|
S |
C |
G |
|
energy
A | B |
|
hype
A | B |
|
pop
A | B |
|
mgr
A | B |
|
FIGHT
RATING
14% |
|
|
|
|
|
|
|
Undercard bout
|
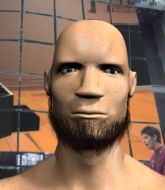
Coming up we have a light heavyweight MMA rules bout between Johnny Rivera (ranked 0 p4p, 0 weight class) and Erich Strada (ranked 0 p4p, 0 weight class). Both fighter's entrance songs getting the crowd jumping here.
 |
|
 |
| 170 cm
18
210 lbs
0 - 2 - 0 |
|
180 cm
25
205 lbs
0 - 0 - 0 |
BJJ Blue Belt
Basic striking
KO power |
|
BJJ White Belt
Excellent boxer
Inexperienced |
|
| |
|
Ladies and gentlemen. This fight is 3 rounds, in the light heavyweight division.
Introducing the fighter to my left, fighting out of the red corner.
With a record of
0 - 2 - 0, fighting out of Sydney, Johnny Rivera!
And introducing the fighter to my right, fighting out of the blue corner.
With a record of
0 - 0 - 0, fighting out of Sydney, Erich Strada!
The judges for this bout are Damien Edna, Eliza Hachem and Donatello Bradman.
The bell rings for round one and we are underway!
Rivera displays some good footwork, moving neatly out of range as Strada throws out the jab.
Rivera takes one on the chin but seems OK.
Strada cracks Rivera with a hook to the jaw. Both fighters smile at eachother and high-five before getting back down to business.
Rivera fails in his attempt to clinch.

Strada takes the fight into the clinch.
Strada should think about turning a few of those tyres round his middle into muscle if he wants people to take him seriously as an athlete.
Strada avoiding damage as Rivera throws knees to the body.
Strada taking a breather.
Some stalling of biblical proportions here from Rivera.
Rivera throws a vicious knee straight up the middle but Strada blocks it with crossed arms.
Strada has had enough of the clinch but Rivera keeps him there for the moment.
Strada pushes Rivera back against the cage and lands a hook to the side of the head.
Rivera is breathing heavily.
Fantastic stuff here - a very entertaining period of action, which has drawn cheers from the crowd.
A right hand to the body from Strada.
Rivera keeps control of Strada as he tries to wriggle out of the double underhooks.
Strada wants to get back to striking at distance but Rivera won't allow it.
Rivera keeps the fight in the clinch, despite Strada's efforts to push away.
Rivera trying to land knees to the body.
Strada lands with a short head shot on the inside.
Strada avoiding damage as Rivera throws knees to the body.
Rivera has Strada pressed against the cage, preventing Strada from circling away and getting back to striking at range.
Strada is looking to control Rivera's arms but Rivera gets an underhook and turns him. Now Strada has his back to the cage.
Strada blocks a knee to the body. He'll have a nicely bruised forearm in the morning.
Strada lands with a left to the head.
Strada wants to get back to striking at distance but Rivera won't allow it.

That's one minute gone in the round.
Strada managing to block the knees to the body from Rivera.
Strada working some nice short punches in the clinch.
Strada wants to strike at distance but he can't break free of the clinch.
Rivera prevents Strada from breaking the clinch.
Strada wants to get back to striking at distance but Rivera won't allow it.
Strada wants to break free. God knows he wants to breaaaak freeee.
A short uppercut from Strada.
Strada cracks Rivera with a nice body shot.
Strada is trying to break the clinch but Rivera has him pressed against the cage.
Strada working hard to break the clinch.
Strada working some nice short punches in the clinch.
Strada is trying to break the clinch but Rivera is controlling him.
Strada blocks a knee to the body. He'll have a nicely bruised forearm in the morning.
Strada lands a shoulder strike that jolts his opponent's head backwards.
Strada lands with a short head shot on the inside.
Strada wants to break free. God knows he wants to breaaaak freeee.
Strada throws a blind hook that connects with the side of Riveras head.
Strada is trying to break the clinch but Rivera has him pressed against the cage.
Strada lands punches inside but they're not really causing much damage.
Strada lands on the inside with an uppercut.
Strada wants to get back to striking at distance but Rivera won't allow it.
Strada lands with a short punch from the clinch.
This is a great period of action - very entertaining stuff!
Still in the clinch, Strada scores with a nice short uppercut.

That's two minutes gone in the round.
Strada is trying to break free.
Strada lands a nice looking hook to the body, against the cage.
Strada lands with a light punch inside.
Strada has had enough of the clinch but Rivera keeps him there for the moment.
Strada is looking to break free of the clinch but Rivera has double underhooks.
Strada managing to block the knees to the body from Rivera.

Strada escapes the clinch and we're back to striking.
Strada fakes a right and follows up with a big left that drops Rivera to one knee - oooooh, he's wobbly! Rivera looks to clinch but Strada throws him off and pummels him into the canvas! Rivera taps out under the strikes! The fight is over!
Ladies and gentlemen, after 2:27 of round 1, we have a winner by way of Submission (Strikes). Erich Strada!
|
|
|
|
|
|
|
|
|
|
|
|
|
|
|
|
|
|
|
|
|
|
|
| S |
C
A |
G |
S |
C
B |
G |
|
S |
C |
G |
|
energy
A | B |
|
hype
A | B |
|
pop
A | B |
|
mgr
A | B |
|
FIGHT
RATING
83% |
|
|
|
|
|
|
|
Undercard bout
|
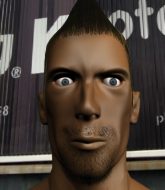
Coming up we have a heavyweight MMA rules bout between Terrence Mills (ranked 0 p4p, 0 weight class) and Roger Hutt (ranked 0 p4p, 0 weight class). Mills's ring entrance music is that housewives' favourite, Live and Let Die. The key to victory for Terrence Mills has got to be keeping the fight on the feet.
 |
|
 |
| 225 cm
19
260 lbs
5 - 5 - 0 |
|
175 cm
19
265 lbs
3 - 4 - 0 |
BJJ White Belt
Excellent boxer
Experienced |
|
BJJ Blue Belt
Counter fighter
Knockout power |
|
| |
|
Ladies and gentlemen. This fight is 3 rounds, in the heavyweight division.
Introducing the fighter to my left, fighting out of the red corner.
With a record of
5 - 5 - 0, fighting out of Sydney, Terrence Mills!
And introducing the fighter to my right, fighting out of the blue corner.
With a record of
3 - 4 - 0, fighting out of Sydney, Roger Hutt!
The judges for this bout are Eliza Hachem, Bruno Hogan and Damien Edna.
The bell rings for round one and we are underway!
Both fighters are only really looking to counter, so after a good 30 seconds of circling eachother endlessly, the referee has stepped in and told them both to be more aggressive.
Hutt closes the distance and clinches.
Hutt gets through Mills's defenses to land a nice punch to the side of the head.
Mills is trying to work out of this bad position, with his back against the cage.
We've had a slow start to the round here - hopefully the action picks up.
Hutt misses with a hook to the ribs.
Hutt lands a shoulder strike.
That's one minute gone in the round.
Mills tries to break free but Hutt pushes him back against the cage.
Hutt throws a punch but it's blocked by Mills.
Mills prevents a body shot from Hutt.
Mills blocks a couple of punches on the inside.
Mills has had enough of the clinch and is looking to separate.
Hutt lands a right hand.
That's two minutes gone in the round.
Mills is trying to break the clinch but Hutt is controlling him.
Hutt tries to work over Mills's body with a swooping hook but it only glances the target.
Hutt keeps the fight in the clinch, despite Mills's efforts to push away.
Hutt can't find room to land a body shot as Mills controls the action.
Hutt scores with a shoulder strike.

That's three minutes gone in the round.
A body shot lands from Hutt.
A frustrated look appears on Mills's face as he tries to break the clinch.

Mills pushes off and circles away, back to the middle of the mat.
Hutt fakes with an overhand right and moves in to clinch with Mills, pushing him back against the cage.
Hutt struggles to land a body shot inside as Mills controls his hands.
Mills tries to break the clinch but Hutt is controlling the position.

That's four minutes gone in the round.
Nice body punch from Hutt - that landed with a thud.
Mills is trying to break free.
Hutt has Mills pressed against the cage, preventing Mills from circling away and getting back to striking at range.
Mills misses with some punches.
Hutt misses with a body punch.
Hutt lands with a short head shot on the inside.
And thats the end of the round the fighters go back to their corners.
Roger Hutt dominated that round.
The minute break is over - no more time for sponges and pep talks - back to the action!

Hutt has closed the distance and engaged Mills in a clinch.
Mills really does look like a pencil wearing a pair of gloves. Let's hope he has a gameplan to suit that ridiculous body shape.
Hutt prevents Mills from breaking the clinch.
A short right from Hutt on the inside.
Hutt digs a right hand underneath Mills's ribcage. Mills let out a lung full of air as it connected.
Hutt tries to throw a body punch but Mills avoids it by throwing Hutt back against the cage.
Hutt can't find room to land a body shot as Mills controls the action.
That's one minute gone in the round.
Mills looks like he'd prefer to be striking at range right now.
Hutt softening up his opponent with strikes, against the cage.
Mills is trying to break the clinch but Hutt has him pressed against the cage.
Hutt stays in close to his opponent and throws a right hand to the body.
A frustrated look appears on Mills's face as he tries to break the clinch.
Hutt misses with a shot to the kidneys.
That's two minutes gone in the round.
Hutt lands a left hand that snaps the head of Mills backwards.
Hutt digs a right hand underneath Mills's ribcage. Mills let out a lung full of air as it connected.
Hutt lands with a quick shot inside that doesn't really do much damage.
Mills misses with some punches.
Mills wants to break the clinch but can't.
We are yet to see a takedown attempt from Hutt in the fight. On paper you would think he is the more dominant ground fighter so let's see if these unusual tactics pay off.
Hutt scores with a shot to the side of Mills's head.
Mills wants to break free but Hutt has control.
That's three minutes gone in the round.
Good body shot from Hutt.
Hutt scores with a hook to the body.
A right handed body shot lands from Hutt.
Hutt lands a hook to the body. It's hard to tell if that hurt Mills or not.
A short body shot lands from Hutt as the two fighters clinch.
A nice right hand lands inside from Hutt.
That's four minutes gone in the round.
Mills breaks from the clinch.
Mills misses with a combination
and Hutt counters with a nice body kick.
Hutt rushes Mills and presses him up against the cage.
Mills wants to get back to striking at distance but Hutt won't allow it.
And thats the end of the round the fighters go back to their corners.
Roger Hutt showed his class in that round. I'd imagine he'll take it on all the scorecards.
The minute break is over - no more time for sponges and pep talks - back to the action! Ladies and gentlemen, this is the final round!

The fighters are starting to perspire pretty heavily.
Hutt instigates a clinch.
A short body shot lands from Hutt as the two fighters clinch.
Hutt lands a body punch - he's looking to wear down Mills.
Mills prevents a body shot from Hutt.
Hutt lands a body shot.
Hutt digs a right hand into Mills's ribs. Those have got to be taking their toll on Mills's gas tank.
That's one minute gone in the round.
Hutt lands a short shot on the inside that snaps the head of Mills backwards.
Hutt throws a blind hook that connects with the side of Millss head.
Hutt tried to land a shot to the body but connects with Mills's elbow.
A hook to the body from Hutt.
Mills lands with a left to the head.
Mills can't break the clinch.
Terrence Mills has stepped it up - he knows he needs a finish here!
That's two minutes gone in the round.
Hutt blocks a couple of punches on the inside.
Hutt lands with a quick shot inside that doesn't really do much damage.
Hutt lands a body punch - he's looking to wear down Mills.
Mills tries to circle away but Hutt has him pinned against the cage.
Mills manages to break the clinch.
Hutt has taken the fight to the clinch.
That's three minutes gone in the round.
Hutt works for underhooks and lands a body shot in the process.
Hutt blocks an uppercut.
Hutt works for underhooks and lands a body shot in the process.
Hutt tried to land a shot to the body but connects with Mills's elbow.
Hutt tries a body shot but Mills blocks it.
Mills throws a punch but it's blocked by Hutt.
An uppercut to the body lands inside from Hutt.
That's four minutes gone in the round.
Mills misses with a short punch on the inside.
Hutt misses with a body punch.
Hutt tries to land a shot to the body but it's blocked.
Hutt can't find room to land a body shot as Mills controls the action.
Hutt struggles to land a body shot inside as Mills controls his hands.
Mills tries to circle away but Hutt has him pinned against the cage.
Hutt pushes Mills back against the cage and unloads with a body punch.
Mills doesn't land with the attempted body shot.
A head punch on the inside from Mills fails to land.
And that's the end of the fight!
Roger Hutt comfortably won the final round on my scorecard.
Well Hutt has outworked and out performed his opponent in all aspects of the game today. He was simply too good and the decision should be no more than a formality. Over to the ring announcer for the scorecards.
Ladies and gentlemen, after 3 rounds of action, we go to the scorecards for a decision.
Judge Eliza Hachem scores the fight 27:30
Judge Bruno Hogan scores the fight 27:30
Judge Damien Edna scores the fight 27:30
In favor of your winner, by unanimous decision... Roger Hutt!
|
|
|
|
|
|
|
|
|
|
|
|
|
|
|
|
|
|
|
|
|
|
|
| S |
C
A |
G |
S |
C
B |
G |
|
S |
C |
G |
|
energy
A | B |
|
hype
A | B |
|
pop
A | B |
|
mgr
A | B |
|
FIGHT
RATING
34% |
|
|
|
|
|
|
|
Undercard bout
|
Coming up we have a heavyweight MMA rules bout between Kien Ngo (ranked 0 p4p, 0 weight class) and Tyson Bennett (ranked 0 p4p, 0 weight class). There are an array of beautiful celebrities at ringside tonight! I wonder if any of them paid for their tickets.
 |
|
 |
| 190 cm
21
225 lbs
1 - 2 - 0 |
|
170 cm
19
265 lbs
3 - 1 - 0 |
BJJ White Belt
Excellent MT
KO power |
|
BJJ Purple Belt
Basic striking
Likes musicals |
|
| |
|
Ladies and gentlemen. This fight is 3 rounds, in the heavyweight division.
Introducing the fighter to my left, fighting out of the red corner.
With a record of
1 - 2 - 0, fighting out of Sydney, Kien Ngo!
And introducing the fighter to my right, fighting out of the blue corner.
With a record of
3 - 1 - 0, fighting out of Sydney, Tyson Bennett!
The judges for this bout are Eliza Hachem, Steve Erwin and Hugh Johnson.
The bell rings for round one and we are underway!
Bennett fails miserably with a takedown attempt.
Ngo fakes high and shoots in for a takedown but Bennett avoids it really well and circles away.
Ngo lands a body shot.
Bennett should think about turning a few of those tyres round his middle into muscle if he wants people to take him seriously as an athlete.
Bennett takes a head kick and keeps coming.
Ngo closes the distance and clinches up with Bennett, looking for a takedown. Ngo pushes Bennett against the cage but Bennett circles to the side and manages to break the clinch.
Ngo changes levels and looks for a double leg takedown. Bennett tries to avoid it but Ngo manages to keep hold of a leg and drag Bennett to the ground. Bennett escapes though and pops straight back up to his feet.
That's three failed takedown attempts in the round for Kien Ngo. That's going to take a lot out of him.
Bennett shoots in and gets a takedown into half guard. Bennett showed some decent athleticism there.
The fans in attendance giving it up for the two fighters, who have really let it all hang out in the last minute or so!
It looks like the ref is thinking about a standup.
Bennett is trying for a guillotine from the top but the pressure isn't in the right place so Ngo is just riding it out for now. Bennett eventually gives up the hold.
Bennett tries to pass to full mount but Ngo defends it.
Bennett is looking for a kimura. It's going to be difficult to finish that from half guard though and Ngo defends it well.
That's one minute gone in the round.
Bennett has hold of the far side arm. He's working for the Kimura, can Ngo defend it? Bennett steps over the head and cranks it - Ngo is tapping out! That was textbook stuff right there - nice submission victory for Bennett!
Ladies and gentlemen, after 1:11 of round 1, we have a winner by way of Submission (Kimura). Tyson Bennett!
|
|
|
|
|
|
|
|
|
|
|
|
|
|
|
|
|
|
|
|
|
|
|
| S |
C
A |
G |
S |
C
B |
G |
|
S |
C |
G |
|
energy
A | B |
|
hype
A | B |
|
pop
A | B |
|
mgr
A | B |
|
FIGHT
RATING
77% |
|
|
|
|
|
|
|
Undercard bout
|
Coming up we have a heavyweight MMA rules bout between Alex Soto Major (ranked 0 p4p, 0 weight class) and Odong Ocena Jr (ranked 0 p4p, 0 weight class). Odong Ocena Jr has the better chin. Will he look to stand and bang today?
 |
|
 |
| 172 cm
19
265 lbs
6 - 1 - 0 |
|
191 cm
23
264 lbs
2 - 0 - 0 |
BJJ Blue Belt
Counter fighter
Experienced |
|
Good wrestler
Counter fighter
Determined |
|
| |
|
Ladies and gentlemen. This fight is 3 rounds, in the heavyweight division.
Introducing the fighter to my left, fighting out of the red corner.
With a record of
6 - 1 - 0, fighting out of Sydney, Alex Soto Major!
And introducing the fighter to my right, fighting out of the blue corner.
With a record of
2 - 0 - 0, fighting out of Sydney, Odong Ocena Jr!
The judges for this bout are Skip Squint, Summer Carpenter and Donatello Bradman.
The bell rings for round one and we are underway!
Both fighters are only really looking to counter, so after a good 30 seconds of circling eachother endlessly, the referee has stepped in and told them both to be more aggressive.
Ocena Jr will need to tighten up his combinations if he doesn't want to gas himself out, swinging at thin air.
Ocena Jr wings a very wild body shot but it does the job and lands to the midsection.
We've had a slow start to the round here - hopefully the action picks up.
Ocena Jr looks to land a body kick but Soto Major moved away.
That's one minute gone in the round.
Ocena Jr throws a sloppy head kick and Soto Major moves out of range easily.
Soto Major with a poor takedown
and Ocena Jr counters with a nice uppercut.
Soto Major blocks a head kick by Ocena Jr.
Ocena Jr throws a sloppy head kick and Soto Major moves out of range easily.
That's two minutes gone in the round.
A few boos can be heard. I'm sure they will multiply if the fighters don't pick up the pace.
Soto Major with a lazy takedown attempt
and Ocena Jr decides to take the opportunity to score a takedown. He's landed in Soto Major's guard.
The referee wants the fighters to be more active or he's going to reset them on the feet.
Ocena Jr is pushing down on Soto Major's leg trying to pass to half guard. Soto Major is fighting to maintain full guard but Ocena Jr has managed to sneak the leg through.
Soto Major is looking to regain full guard. Not this time though.
Ocena Jr works his foot free and advances to mount.
Ocena Jr has his opponent pinned against the cage, landing some nasty ground and pound that is really making a bit of a mess out of Soto Major's face.
Soto Major on his back here. We all know that wrestlers don't like being on their back so let's see if Soto Major tries to get out of the position.
That's three minutes gone in the round.
Ocena Jr is still in mount, landing shots to his trapped opponent. Soto Major can't stay in a position like this for much longer.

It looks like Alex Soto Major has been cut.
Ocena Jr throws some wild stikes that Soto Major manages to avoid easily.
Soto Major knows he needs to get back to his feet asap. He's simply no match for Ocena Jr on the ground.
Ocena Jr landing strikes from the mount and Soto Major is in trouble!
Alex Soto Major's cut is getting worse.
Soto Major might be looking to lock onto one of his opponent's long limbs for a submission, whilst we're on the ground.
Wooooo! Give it up for these two warriors! They are putting on a show!
Ocena Jr misses with a head shot.
Ocena Jr softens up his opponent with a couple of shots there and then CRACK! One massive shot lands there and Soto Major is out cold! Ocena Jr jumps to his feet and celebrates on the cage with the fans, who are, quite frankly, going absolutely mental!
Ladies and gentlemen, after 3:45 of round 1, we have a winner by way of TKO (Strikes). Odong Ocena Jr!
Odong Ocena Jr thanked the fans post fight for their support.
|
|
|
|
|
|
|
|
|
|
|
|
|
|
|
|
|
|
|
|
|
|
|
| S |
C
A |
G |
S |
C
B |
G |
|
S |
C |
G |
|
energy
A | B |
|
hype
A | B |
|
pop
A | B |
|
mgr
A | B |
|
FIGHT
RATING
24% |
|
|
|
|
|
|
|
Undercard bout
|
Coming up we have a heavyweight MMA rules bout between Waine Bitterhall (ranked 0 p4p, 0 weight class) and Billie Bourne (ranked 0 p4p, 0 weight class). These two fighters really are very evenly matched on the feet - it will be fascinating to see who can assert themselves in that aspect of the fight.
 |
|
 |
| 170 cm
19
265 lbs
2 - 5 - 0 |
|
170 cm
19
265 lbs
2 - 4 - 0 |
BJJ Purple Belt
Brawler
KO power |
|
BJJ Purple Belt
Basic striking
Solid chin |
|
| |
|
Ladies and gentlemen. This fight is 3 rounds, in the heavyweight division.
Introducing the fighter to my left, fighting out of the red corner.
With a record of
2 - 5 - 0, fighting out of Sydney, Waine Bitterhall!
And introducing the fighter to my right, fighting out of the blue corner.
With a record of
2 - 4 - 0, fighting out of Sydney, Billie Bourne!
The judges for this bout are Winston Howard, Steve Erwin and Bruno Hogan.
The bell rings for round one and we are underway!
Bourne looks for a takedown. He's got it. We're now in half guard.
Bitterhall wants to control but Bourne is keeping busy and won't allow it.
Bourne is looking for a kimura. It's going to be difficult to finish that from half guard though and Bitterhall defends it well.
Bitterhall is defending against the submission attempts here by Bourne.
Bitterhall is defending against the submission attempts here by Bourne.
Bitterhall wants to get back to full guard.

Bitterhall looking to work for a kimura from the bottom.
Bourne is trying a forearm choke
I don't think that's going to do much at this level of the game.
That's one minute gone in the round.
Bourne is working for submissions here but there's nothing on.
Bourne is trying for a guillotine from the top but the pressure isn't in the right place so Bitterhall is just riding it out for now. Bourne eventually gives up the hold.
Bourne is working for a submission of some sort.
Bourne is trying a forearm choke
I don't think that's going to do much at this level of the game.
Bourne is sneakily working for an arm triangle but Bitterhall sees it coming and defends easily.
That's two minutes gone in the round.
Bourne is working for a kimura but Bitterhall is defending it quite comfortably.
The fighters are pressed up against the cage, both looking to find a bit of space to work.
Bitterhall is looking to sinch up a guillotine here but Bourne pulls his head out easily.
Bourne is trying a forearm choke
I don't think that's going to do much at this level of the game.
Bourne is trying to work for a kimura but Bitterhall is defending well.
Bourne looks winded!
Bourne is trying for a guillotine from the top but the pressure isn't in the right place so Bitterhall is just riding it out for now. Bourne eventually gives up the hold.
That's three minutes gone in the round.
Bitterhall is pressing down on Bourne's left leg trying to get back to full guard. He's managed it.
Bourne is holding a leg here, probably looking for an ankle lock - he drops back and goes for it! Bitterhall is in trouble! Is it all over??? No! Bitterhall has escaped and now he's on top!
Bitterhall trying to control but Bourne is working from the bottom.
Bitterhall looking to control the position here, rather than advance.
That's four minutes gone in the round.
Bourne is looking to get back to his feet but can't, whilst Bitterhall is controlling him.
And thats the end of the round the fighters go back to their corners.
Billie Bourne dominated that round.
OK. That's time! The bell goes and we're back to the action.
Bourne fails with the takedown

and Bitterhall counters by clinching up.
Bourne is working for a takedown up against the cage. He can't get it on this occasion though.
Bourne goes for a takedown attempt but Bitterhall pushes him away and we're back to fighting at a distance.
Waine Bitterhall has stuffed three takedown attempts in the round now. That's going to take a lot out of Billie Bourne.
Bourne stuffs the takedown.
Bourne fails with the takedown

and Bitterhall counters with a nice shoot takedown that brings the fighters to the ground.
Bitterhall wants to stand and escape but instead Bourne has hit a sweep and he's now on top in guard.
Bourne has gone for a leg lock! Bitterhall slips out almost immediately though and dives into Bourne's guard.
The crowd are loving this. Great action here.
Bourne wants to stand but Bitterhall is controlling the position.
Bourne is breathing heavily.
That's one minute gone in the round.
Bitterhall works a leg free and moves into half guard.
Bourne trying to control here.
Bitterhall is trying for a guillotine from the top but the pressure isn't in the right place so Bourne is just riding it out for now. Bitterhall eventually gives up the hold.
Bitterhall trying to control the action but Bourne is working from the bottom.
That's two minutes gone in the round.
Bitterhall is thwarting Bourne's attempts to control the position.

Bourne makes some distance and scrambles quickly back to his feet. Nice work!
That's three minutes gone in the round.
Bourne with a lazy takedown attempt
and Bitterhall counters with a takedown into side control.
Bitterhall is looking to take a break and control but Bourne is keeping him honest, looking to work from the bottom.
Waine Bitterhall overall seems to be getting the better of the ground position in the fight so far.
Bitterhall tries to score with some ground and pound. Bourne controls his posture well this time though and the shots don't do any damage.
Bourne throws Bitterhall to one side and escapes!
Bitterhall could do with losing a few pounds - he looks very soft around the mid section, to put it politely.
Bourne fails with the takedown
and Bitterhall counters with a nice uppercut.
Bitterhall leaves Bourne with his face pressed against the mat as he sprawls beautifully, defending against a solid takedown attempt.
The crowd cheering loudly, showing their appreciation for the quality fight we're seeing here.
Bourne swats away the attempt to clinch by Bitterhall.
That's four minutes gone in the round.
Bitterhall shoots in and drives through. Bourne sprawls well.
Bourne fails with a takedown attempt.
Bourne tries to score a power double leg takedown but Bitterhall sees that one coming and sprawls well. That will dishearten Bourne somewhat.
Bourne shoots in with a takedown attempt and he has Bitterhall pinned against the cage. Bitterhall gets the underhooks and manages to circle away.
Bitterhall closes the distance and gets a trip takedown into side control. Bourne quickly recovers to half guard.
As the round comes to an end the crowd are showing their appreciation for a great round of action.
Bitterhall is just sitting in half guard, waiting for something to happen.

Bitterhall decides to stand up.
And thats the end of the round the fighters go back to their corners.
Waine Bitterhall dominated that second round.
Well, the break between rounds is over. Let's get back to the scrappin! This is the final round!
A momentary lapse in concentration from Bourne enables Bitterhall to shoot in and score with a neat double leg. Bourne manages to secure a closed guard as the fighters hit the mat.
Bourne kicks Bitterhall off and gets to his feet.
Waine Bitterhall is looking to throw some combinations by the looks of things.
Bitterhall misses with a takedown attempt - Bourne sprawls well and throws a nice strike on the way out which just misses.
Bourne has a takedown stuffed.
Bourne scores with a takedown into Bitterhall's guard.
Bourne postures up as if he's going to throw some strikes but drops back for an ankle! Bitterhall is in big trouble! He looks ready to tap! But no, he's escaped and dives on top of Bourne, into his guard.
The ref warns both fighters not to hold the cage as they work up against the meshing.
Bitterhall stands up and waves to Bourne to follow him.
Bourne takes a big intake of breath there - he's definitely tired.
That's one minute gone in the round.
Bitterhall tries to clinch up but Bourne circles away and keeps his distance.
Bourne shoots in looking for a takedown. Bitterhall tries to sprawl out of it but Bourne keeps driving through. The fighters are pinned against the cage. Bitterhall manages to get underhooks and after a bit of a struggle, circles away and we're back to standing.
Bourne misses with a takedown
letting Bitterhall counter with a right hand.
Waine Bitterhall has stuffed three takedown attempts in the round now. That's going to take a lot out of Billie Bourne.
Bitterhall lands a nice shot to the body.
Bitterhall tries to clinch up.
Bourne tries for a takedown but Bitterhall circles away easily
and Bitterhall decides to take the opportunity to score a takedown. He's landed in Bourne's guard.
The crowd cheering loudly, showing their appreciation for the quality fight we're seeing here.
Bitterhall's corner is telling him to maintain position.
Bitterhall wants to control from the top but Bourne keeps moving.
That's two minutes gone in the round.
Bitterhall is going to have to think about doing something other than just controlling because Bourne is managing to avoid having the position dictated to him.

The ref stands the fighters back up because Waine Bitterhall just wasn't active enough.
Bitterhall will have to do better than that with his takedown attempts.
Bourne looks for a takedown but Bitterhall sprawls well.
Bitterhall shoots in and drives through. Bourne sprawls well.
Bitterhall fails with a takedown attempt from distance.
Bourne shoots for a double leg takedown but Bitterhall sprawls well. He's pushed Bourne's face into the mat and manages to get back to his feet relatively easily.
Bitterhall misses with a low kick.
Bourne shoots in looking for a single leg takedown. Bitterhall is trying to defend but Bourne finishes it well and ends up in half guard. Let's see if he can advance position further.
Bitterhall moves into full guard.
That's three minutes gone in the round.
Bourne wants to pass the guard but Bitterhall is keeping the position.
Bourne drops back looking for a heel hook - he quickly realises he's not going to get it but Bitterhall manages to dive on top of him before he can escape and now Bourne has Bitterhall in his guard.
Bitterhall working from the guard for now, landing some ground and pound.
That's four minutes gone in the round.
Bourne controls Bitterhall momentarily but Bitterhall frees himself.
Bitterhall wants to pass the guard but Bourne is keeping the position.
Bourne is working an open guard here, looking to improve his position. No doubt that will leave him open to counters but at least he's being more offensive.
As the round comes to an end the crowd are showing their appreciation for a great round of action.
Bourne is persisting with the attempt to improve his position.
And that's the end of the fight!
Waine Bitterhall showed his dominance in that final round.
Well Bitterhall has outscored his opponent in every aspect of the fight today. Only a scarily incompetent judge or two will keep him from a well deserved win... Over to the ring announcer for the scorecards.
Ladies and gentlemen, after 3 rounds of action, we go to the scorecards for a decision.
Judge Winston Howard scores the fight 29:28
Judge Steve Erwin scores the fight 29:28
Judge Bruno Hogan scores the fight 29:28
In favor of your winner, by unanimous decision... Waine Bitterhall!
|
|
|
|
|
|
|
|
|
|
|
|
|
|
|
|
|
|
|
|
|
|
|
| S |
C
A |
G |
S |
C
B |
G |
|
S |
C |
G |
|
energy
A | B |
|
hype
A | B |
|
pop
A | B |
|
mgr
A | B |
|
FIGHT
RATING
48% |
|
|
|
|
|
|
|
Undercard bout
|
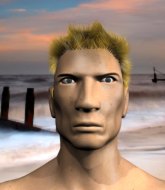
Coming up we have a welterweight MMA rules bout between Ryan Collen (ranked 0 p4p, 0 weight class) and Zachary Sawyer (ranked 0 p4p, 0 weight class). The key to victory for Ryan Collen has got to be keeping the fight on the feet.
 |
|
 |
| 160 cm
18
175 lbs
0 - 3 - 1 |
|
160 cm
18
175 lbs
3 - 2 - 0 |
BJJ Blue Belt
Brawler
Granite chin |
|
BJJ Purple Belt
Brawler
Determined |
|
| |
|
Ladies and gentlemen. This fight is 3 rounds, in the welterweight division.
Introducing the fighter to my left, fighting out of the red corner.
With a record of
0 - 3 - 1, fighting out of Sydney, Ryan Collen!
And introducing the fighter to my right, fighting out of the blue corner.
With a record of
3 - 2 - 0, fighting out of Sydney, Zachary Sawyer!
The judges for this bout are Steve Erwin, Damien Edna and Hugh Johnson.
The bell rings for round one and we are underway!
Collen misses with a takedown
and Sawyer counters with a shoot takedown. Collen fights it but they end up in guard.
The referee is pacing around the two fighters - he looks like he's thinking about a standup.
Sawyer stands and steps away. Collen gets to his feet too and we're back to the striking game.
Collen really is a fat lump.
Sawyer drives through with a takedown into guard.
Collen working a defensive guard here.
Sawyer stands and steps away. Collen gets to his feet too and we're back to the striking game.
The crowd are loving this. Great action here.
Collen tries to sprawl but Sawyer drives through with a takedown into half guard.
Collen wants to improve his position but Sawyer is controlling well.
Sawyer wants to stand but Collen has hold of a leg and an arm, so he's trapped for now.
Sawyer is trying to control the action in half guard but Collen is working away on the bottom, looking perhaps to get back to full guard.
That's one minute gone in the round.
Sawyer thows a wild elbow that connects with the canvas.
Sawyer is trying to work for a kimura. This could be trouble! No, Collen has managed to free his arm - good work.
Collen tries to roll over but Sawyer keeps him under control.
The fighters are pressed up against the cage, both looking to find a bit of space to work.
Neither fighter is being very active at the moment, with Sawyer in particular looking to stall.
Sawyer prevents Collen from improving his position.
The ref warns both fighters not to hold the cage as they work up against the meshing.
That's two minutes gone in the round.
Sawyer decides to stand up and try his luck on the feet.
A momentary lapse in concentration from Collen enables Sawyer to shoot in and score with a neat double leg. Collen manages to secure a closed guard as the fighters hit the mat.
Sawyer advances position into side control!
Sawyer tries for a kimura. Not really close to a finish though.
The crowd are loving this. Great action here.
Collen pushes Sawyer away and creates a bit of space to escape. He's almost out here... but no, Sawyer gets a good hold of his legs and remains firmly in side control.
That's three minutes gone in the round.
Collen stops Sawyer from passing to mount.
Sawyer wants to lay and pray for a moment but Collen keeps working.
Sawyer moving around in side mount but really he's just happy to control for now.
Collen is looking to reverse the position.
Sawyer tries for a kimura. Not really close to a finish though.
Collen is trying to control Sawyer's posture but Sawyer avoids it.
That's four minutes gone in the round.
Collen is looking to reverse the position.
Collen knows he needs to get back to his feet asap. He's simply no match for Sawyer on the ground.
Sawyer decides to stand up, so the ref orders Collen to his feet.
Collen is breathing heavily.
As the round comes to an end the crowd are showing their appreciation for a great round of action.
Collen wants to clinch.
Sawyer shoots in for a takedown but doesn't get it.
And thats the end of the round the fighters go back to their corners.
Zachary Sawyer dominated that round.
The fighters get back to their feet, the hooter sounds and we're back to the action!
Sawyer fails with a takedown attempt.
Ryan Collen is looking to throw some combinations by the looks of things.
Collen stuffs the takedown.
Collen with a poor takedown
and Sawyer counters by moving into the clinch. Good anticipation by Sawyer.
Collen misses with the head strike.
Collen goes for a body shot but it's blocked.
Sawyer escapes the clinch and we're back to striking.
Collen closes this distance looking for a takedown but Sawyer circles away.
Collen looks for a takedown here. Will he get it? Sawyer is fending him off so far but Collen persists. Nope, Sawyer circles away and we're back to standing.
That's three failed takedown attempts in the round for Ryan Collen. That's going to take a lot out of him.
Sawyer fails with the takedown.
Sawyer blocks a head kick by Collen.
That's one minute gone in the round.
Sawyer clinches up with Collen and pushes him back against the cage.
Collen pushes off and circles away, back to the middle of the mat.
Sawyer misses with a half-hearted attempt at a head kick.
Sawyer tries to close the distance and clinch up but Collen swats him away and circles back towards the center.
Collen moves into range and throws a lovely three punch combination.
Sawyer shoots in but Collen avoids the takedown attempt easily.
Sawyer fails with the takedown.
Sawyer is breathing heavily.
Sawyer is looking to clinch but Collen is avoiding it.
A really sloppy takedown attempt there from Collen.
That's two minutes gone in the round.
Sawyer tries to score a power double leg takedown but Collen sees that one coming and sprawls well. That will dishearten Sawyer somewhat.
Sawyer dives in and grabs Collen's left leg, looking for a takedown. Collen pushes down on Sawyer's head and hops out.
A telegraphed takedown attempt from Collen is defended easily by Sawyer.
Collen feints and as Sawyer raises his hands in defense, Collen changes levels and drives through with a takedown into guard.
The crowd cheering loudly, showing their appreciation for the quality fight we're seeing here.
Sawyer is controlling Collen's posture.
Sawyer wants to sweep here but Collen controlling him for the moment.
That's three minutes gone in the round.
Collen tries to free his leg and advance position but Sawyer is retaining full guard.
Sawyer is trying to control the position from the bottom.
Sawyer keeping moving, preventing Collen from controlling successfully.

Well, the referee has seen enough. Neither fighter is active enough on the ground so he's stood them back up.
Sawyer fails in his attempt to clinch.
Collen fails with a rather predictable takedown attempt.
Sawyer swings and misses with a hook to the body.
That's four minutes gone in the round.
Collen tries to shoot in for a takedown. He's got hold of a leg but Sawyer swivels and escapes.
Nice takedown defense from Collen. No joy for Sawyer on that attempt.
Sawyer tries to bum rush Collen with a series of wild strikes but Collen uses good footwork to avoid the assault.
Collen circles away from the clinch attempt.
Sawyer throws a leg kick but Collen sees it coming and moves out of range.
Nice sprawl there from Collen as Sawyer shoots in.
Collen pushes Sawyer up against the cage in a clinch.
The crowd applaud the fighters efforts here as the round comes to an end.
Collen breaks the clinch.
Collen tries for a takedown but Sawyer circles away easily
and Sawyer counters by moving into the clinch. Good anticipation by Sawyer.
And thats the end of the round the fighters go back to their corners.
That was a close second round but I would say that Ryan Collen will probably get the nod.
That's time! Collen's corner gives him a slap on the ass as he gets ready to fight. So, we enter the final round. Let's see if either fighter can bring us a finish, or whether we're going to the judges scorecards.
A punch combination from Sawyer misses.
Sawyer shoots in looking for a takedown but Collen manages to keep the fight standing, pushing Sawyer's face into the canvas for good measure before circling away.
Sawyer throws a half hearted mid kick.
Sawyer looks for a takedown but Collen sprawls well.
Collen shoots in for a takedown! He's got it and he's managed to land in side control! That's better than Collen was expecting from the takedown attempt, I'm sure!
Collen decides to stand back up.
Sawyer takes a big intake of breath there - he's definitely tired.
Collen has managed to clinch.
Collen content to slow the pace in the clinch.
Sawyer fails to pull the fight into his guard.
Ryan Collen has stuffed three takedown attempts in the round now. That's going to take a lot out of Zachary Sawyer.
The referee calls for Collen to work.
That's one minute gone in the round.
Collen gets a warning from the ref for wasting time.
Collen managing to block the knees to the body from Sawyer.
Sawyer tries to land knees in the clinch but Collen avoids the damage to the body.
Sawyer is looking for a takedown up against the cage. Collen gets underhooks though and prevents the takedown attempt.
Sawyer pulls guard successfully.
Sawyer keeping moving, preventing Collen from controlling successfully.
Collen in full guard, throwing the ground and pound. No damage this time.
That's two minutes gone in the round.
Collen trying to control but Sawyer is working from the bottom.
Collen preventing the sweep.
Sawyer is trying to keep Collen in close.
Collen advances to half guard.
Sawyer is looking to regain full guard. Not this time though.
Sawyer wants to control but Collen is keeping busy and won't allow it.
Sawyer tries to get to full guard but Collen has control of the leg.
That's three minutes gone in the round.
Collen wants to stand but Sawyer has hold of a leg and an arm, so he's trapped for now.
Sawyer is defending against the submission attempts here by Collen.
Sawyer manages to get to full guard.
Sawyer wants to control here, rather than go for any submissions from the bottom. At least for now.
That's four minutes gone in the round.
Sawyer working a defensive guard here.
Sawyer is looking for a triangle but Collen pushes his legs off easily.
Sawyer wants to get back to his feet but Collen is in a dominant position and won't allow it.
The crowd applaud the fighters efforts here as the round comes to an end.
Collen wants to stand but Sawyer has a closed guard, so he can't escape.
And that's the end of the fight!
That was a close round. You could make an argument for either fighter but I would give it to Ryan Collen.
I think Collen has won this one but let's see what the judges have to say. Over to the ring announcer for the scorecards.
Ladies and gentlemen, after 3 rounds of action, we go to the scorecards for a decision.
Judge Steve Erwin scores the fight 29:30
Judge Damien Edna scores the fight 29:28
Judge Hugh Johnson scores the fight 29:28
In favor of your winner, by split decision... Ryan Collen!
|
|
|
|
|
|
|
|
|
|
|
|
|
|
|
|
|
|
|
|
|
|
|
| S |
C
A |
G |
S |
C
B |
G |
|
S |
C |
G |
|
energy
A | B |
|
hype
A | B |
|
pop
A | B |
|
mgr
A | B |
|
FIGHT
RATING
52% |
|
|
|
|
|
|
|
Co-main event
|
Coming up we have a featherweight MMA rules bout between Nigel Coleman (ranked 0 p4p, 0 weight class) and Mark Wilson (ranked 0 p4p, 0 weight class). Mark Wilson will no doubt be trying to keep this one on the feet, where he has a distinct advantage.
 |
|
 |
| 150 cm
19
152 lbs
3 - 4 - 0 |
|
150 cm
19
152 lbs
2 - 2 - 2 |
BJJ Blue Belt
Counter fighter
Good chin |
|
BJJ Blue Belt
Basic striking
Prefers standup |
|
| |
|
Ladies and gentlemen. This fight is 3 rounds, in the featherweight division.
Introducing the fighter to my left, fighting out of the red corner.
With a record of
3 - 4 - 0, fighting out of Sydney, Nigel Coleman!
And introducing the fighter to my right, fighting out of the blue corner.
With a record of
2 - 2 - 2, fighting out of Sydney, Mark Wilson!
The judges for this bout are Damien Edna, John Mangel and Bruno Hogan.
The bell rings for round one and we are underway!
Wilson takes the fight into the clinch.
Coleman really is a fat lump.
Coleman blocks a knee to the body. He'll have a nicely bruised forearm in the morning.
Knees to the body from Wilson.
Wilson content to slow the pace in the clinch.
Wilson missing with knees to the body.
Wilson tries to land a knee to the head but Coleman blocks with his arms.
Wilson misses with a knee to the head.
Wilson misses the knee to the body. Nice hip positioning from Coleman.
Wilson scores with a knee to the head.
It looks like Nigel Coleman has been cut.
Coleman drops to a knee looking for a takedown but Wilson gets the underhooks and prevents it.
Coleman has moved round to his opponent's back and is looking for a suplex! Oh snap! He's tossed Wilson clear over his head and slammed him to the mat!
Coleman throwing strikes and Wilson squirms under the pressure, ending up mounted.
That's one minute gone in the round.
Wilson wriggling around on the bottom manages to avoid the strikes thrown by Coleman.
BOOM! Coleman connects with a massive shot to the dome!
Coleman misses with a head shot.
Coleman lands a big shot there that rocks Wilson but he's holding on and managing to survive for now.
Coleman misses with a head shot.
That's two minutes gone in the round.
Coleman lands a big elbow.
Coleman unloads with some shots from mount but Wilson bucks and avoids them well.
Coleman landing strikes from the mount.
The crowd cheering loudly, showing their appreciation for the quality fight we're seeing here.
Wilson is in a horrible position here, under a barrage of strikes, he's managing to avoid any damage.
Wilson is trying to escape the mount.
Coleman looking to ground and pound but Wilson is blocking nicely.
That's three minutes gone in the round.
Poor strikes thrown by Coleman there. More accuracy and less frantic strikes would help!
Coleman unloading with bombs!
Coleman throws some wild stikes that Wilson manages to avoid easily.
Coleman working away from the top, dropping strikes.
Coleman can't quite control the action as he would like just now, as Wilson is looking to escape.
That's four minutes gone in the round.
Wilson wants to hold on but Coleman pushes him away.
Coleman scoring with strikes but Wilson is staying in there.
As the round comes to an end the crowd are showing their appreciation for a great round of action.
Coleman tries to control but Wilson wriggling away.
Coleman looking to ground and pound his opponent to a finish here.
And thats the end of the round the fighters go back to their corners.
Nigel Coleman dominated that round.
The cut man is working on Nigel Coleman's cut.
That's time! Back to the action!
Wilson moves into the clinch.
Coleman is trying to trip Wilson. He has hold of a leg but Wilson is hopping around, keeping his balance for the moment. Coleman persists though and gets the takedown into guard.
Coleman prevents Wilson from getting back to his feet.
Coleman loading up with the ground and pound but he's missing more than he's landing in this flurry.
Coleman scoring with punches to the head and body.
Coleman has been looking to land a fair amount of strikes on the ground. He might be looking to soften his opponent up in order to work for a submission.
Coleman is looking to work some ground and pound but Wilson has wrist control.
Hammerfist, elbow! yells Coleman's corner. There ya go! There ya go!
Wilson is trying to control the position from the bottom.
That's one minute gone in the round.

OK we're going to have a standup here. Mark Wilson hasn't been effective enough on the ground and the referee wants a restart.
Wilson moves into the clinch.
Wilson is looking to score with knees to the body. Maybe he'll change it up and go body then head. Coleman is defending well for now.
Coleman avoiding damage as Wilson throws knees to the body.
Wilson pushes off an throws an elbow but Coleman leans to the side and avoids it. We're back to clinching against the cage.
Coleman takes a knee to the side of the body.
Coleman gets the body lock takedown. After a quick scramble, Wilson regains guard.
Coleman preventing the sweep.
Coleman loading up with the ground and pound but he's missing more than he's landing in this flurry.
Wilson avoiding any damage from the ground and pound.
That's two minutes gone in the round.
Coleman throws a big elbow that misses.
Coleman loading up with the ground and pound but he's missing more than he's landing in this flurry.
We could do with one of the fighters taking the initiative a bit more on the ground - they're both waiting to capitalize on a mistake.
The ref stands the fighters back up. Mark Wilson was stalling too much, according to the referee.
Coleman shoots in for a takedown. "I don't think so" says Wilson as he avoids it easily.
No luck for Coleman with that takedown attempt.
Wilson gets a clinch.
The fans in attendance giving it up for the two fighters, who have really let it all hang out in the last minute or so!
Wilson controlling the action here for a moment.
Coleman avoiding damage as Wilson throws knees to the body.
That's three minutes gone in the round.
Coleman avoiding damage as Wilson throws knees to the body.
Coleman has Wilson pressed up against the cage. He's trying to work for a single leg takedown. Coleman pulls back from the cage and twists to the side, sending Wilson tumbling to the mat - Coleman dives into Wilson's guard.
Wilson looking for a sweep. Not yet Wilson, not yet.
Coleman postures up and lands some nice ground and pound.
Coleman in full guard, throwing the ground and pound. No damage this time.
The ref warns both fighters not to hold the cage as they work up against the meshing.
Wilson is trying to control the position from the bottom.
That's four minutes gone in the round.
The referee looks like he's ready to step in and stand the fighters back up.
The ref stands the fighters back up, due to lack of action by Mark Wilson.
Wilson rushes Coleman and pushes him back against the cage in a clinch.
Coleman tries to pull guard but Wilson holds him up against the cage and eventually Coleman drops back down to his feet.
That's three failed takedown attempts in the round for Nigel Coleman. That's going to take a lot out of him.
Coleman on the defensive, avoiding the knees to the body.
Coleman wants a takedown.
Wilson tries to land a knee to the body but he is off balance and Coleman avoids it.
Wilson is looking to score with knees to the body. Maybe he'll change it up and go body then head. Coleman is defending well for now.
Wilson is looking to score with knees to the body. Maybe he'll change it up and go body then head. Coleman is defending well for now.
As the round comes to an end the crowd are showing their appreciation for a great round of action.
Coleman has a body lock and is looking for a takedown. Wilson is bouncing around trying to prevent the takedown and somehow he has indeed managed to stay on his feet.
Wilson looking to throw knees to the head but Coleman is blocking nicely.
We've seen a great period of action over the last minute or so - credit to both fighters for going all out!
Wilson missing with knees to the body.
And thats the end of the round the fighters go back to their corners.
Nigel Coleman dominated that second round.
The cut man is working on Nigel Coleman's cut.
OK. That's time! The bell goes and we're back to the action. Let's hear some noise people - this is the final round!
Wilson fakes with an overhand right and moves in to clinch with Coleman, pushing him back against the cage.
Coleman avoiding damage as Wilson throws knees to the body.
Wilson missing with knees to the body.
Wilson with an attempt at a knee that misses.
Wilson throws a vicious knee straight up the middle but Coleman blocks it with crossed arms.
Coleman has dropped down and is looking to force the takedown but it's defended by Wilson after a bit of a struggle.
Wilson trying to land knees to the body.
Wilson misses the knee to the body. Nice hip positioning from Coleman.
Both guys are working to get underhooks.
Coleman is trying to pull guard but being pressed up against the cage enables Wilson to keep the fight standing.
Coleman avoiding damage as Wilson throws knees to the body.
Wilson trying to control the position but instead, Coleman has worked for underhooks and has pushed Wilson into the cage.
Wilson takes a big intake of breath there - he's definitely tired.
That's one minute gone in the round.
Wilson creates a bit of distance and throws an elbow that only just misses.
Wilson tries to land a knee to the body but he is off balance and Coleman avoids it.
Wilson is looking to score with knees to the body. Maybe he'll change it up and go body then head. Coleman is defending well for now.
Coleman is working for a takedown up against the cage. He can't get it on this occasion though.
That's three failed takedown attempts in the round for Nigel Coleman. That's going to take a lot out of him.
Wilson tries to land a knee to the head but Coleman blocks with his arms.
Coleman looking for a takedown.
Wilson tries a knee to the head but Coleman blocks it.
Both guys are working to get underhooks.
Wilson misses with a knee strike.
Coleman is working on a single leg takedown against the cage. Wilson can't fight it off and eventually Coleman manages to take the fight to the floor. Wilson looks annoyed but at least he's managed to land in guard.
Wilson working the defensive guard well to avoid strikes from Coleman.
Mark Wilson has stepped it up - he knows he needs a finish here!
Nigel Coleman overall seems to be getting the better of the ground position in the fight so far.
That's two minutes gone in the round.
Coleman postures up and lands some nice ground and pound.
Coleman throwing strikes but missing.
Coleman throwing elbows and punches but not connecting, as Wilson works some decent striking defense from the bottom.
A big thud reverberates around the arena there as Coleman accidentally thumps the mat. Hopefully he's not broken his hand.
That's three minutes gone in the round.
Coleman trying to land body shots but he keeps hitting the mat.
Coleman throws a big right hand that misses.
A big thud reverberates around the arena there as Coleman accidentally thumps the mat. Hopefully he's not broken his hand.
OK we're going to have a standup here. Mark Wilson hasn't been effective enough on the ground and the referee wants a restart.
Wilson explodes with a nice body kick and back out of range. Nice work.
Wilson gets a clinch.
Wilson with an attempt at a knee that misses.
Wilson is looking to score with knees to the body. Maybe he'll change it up and go body then head. Coleman is defending well for now.
Wilson missing with knees to the body.
That's four minutes gone in the round.
Coleman gets the body lock takedown. After a quick scramble, Wilson regains guard.
Coleman working in close now, lands a nice elbow to the side of Wilson's head.
Coleman landing with the ground and pound.
The fighters are pressed up against the cage, both looking to find a bit of space to work.
Wilson working the defensive guard well to avoid strikes from Coleman.
The crowd applaud the fighters efforts here as the round comes to an end.
Coleman cracks Wilson with a solid left hand.
Wooooo! Give it up for these two warriors! They are putting on a show!
Wilson has an omoplata and is looking to use it perhaps as a submission or perhaps to transition. Coleman is in a bit of discomfort here, but he's managed to free himself and has dived into side control! That didn't work out too well for Wilson.
And that's the end of the fight!
Nigel Coleman showed his dominance in that final round.
Well I reckon that's a shut out for Coleman, winning every round. Will the judges agree? They are the ones who matter, even if they are often depressingly incompetent. Over to the ring announcer for the scorecards.
Ladies and gentlemen, after 3 rounds of action, we go to the scorecards for a decision.
Judge Damien Edna scores the fight 30:27
Judge John Mangel scores the fight 30:27
Judge Bruno Hogan scores the fight 30:27
In favor of your winner, by unanimous decision... Nigel Coleman!
|
|
|
|
|
|
|
|
|
|
|
|
|
|
|
|
|
|
|
|
|
|
|
| S |
C
A |
G |
S |
C
B |
G |
|
S |
C |
G |
|
energy
A | B |
|
hype
A | B |
|
pop
A | B |
|
mgr
A | B |
|
FIGHT
RATING
54% |
|
|
|
|
|
|
|
Main event
|
Coming up we have a featherweight MMA rules bout between Mateus Allen (ranked 0 p4p, 0 weight class) and Miles Steedman (ranked 0 p4p, 0 weight class). Steedman has chosen Last Man Standing as his entrance music. Miles Steedman is staring across the cage at his opponent, tweaking his nipples.
 |
|
 |
| 165 cm
33
152 lbs
18 - 5 - 0 |
|
150 cm
19
152 lbs
8 - 3 - 0 |
Great wrestler
Excellent boxer
Cardio machine |
|
BJJ Purple Belt
Basic striking
Knockout power |
|
| |
|
Ladies and gentlemen. This fight is 3 rounds, for the featherweight championship of the world!
Introducing the champion to my left, fighting out of the red corner.
With a record of
18 - 5 - 0, fighting out of Rio de Janeiro, Mateus Allen!
And introducing the challenger to my right, fighting out of the blue corner.
With a record of
8 - 3 - 0, fighting out of Sydney, Miles Steedman!
The judges for this bout are Skip Squint, Damien Edna and Hugh Johnson.
The bell rings for round one and we are underway!
Steedman with a poor takedown
and Allen cracks him with a counter punch right on the button.
Allen darts in and out, connecting with a jab.
Allen lands a jab.
Allen throws a combination but it was largely blocked by Steedman.
Steedman moves forwards but Allen connects with a nice, crisp jab.
Allen throws a good cross that connects.

Steedman is rocked!
Sloppy strikes from Allen. Those never looked like landing.
Steedman is still on wobbly legs! Can Allen finish him?
Steedman tries for a takedown but Allen circles away easily
and Allen counters with a straight that turns Steedman's legs to rubber! Allen pushes forward with more strikes and Steedman goes down, battered and bloody! That's a wrap folks!
Ladies and gentlemen, after 0:29 of round 1, we have a winner by way of TKO (Strikes). Mateus Allen!
Mateus Allen retains his featherweight title!
A relieved looking Mateus Allen thanked the fans for their support and gave the usual line about them being amazing. They seemed to believe that he actually meant it.
|
|
|
|
|
|
|
|
|
|
|
|
|
|
|
|
|
|
|
|
|
|
|
| S |
C
A |
G |
S |
C
B |
G |
|
S |
C |
G |
|
energy
A | B |
|
hype
A | B |
|
pop
A | B |
|
mgr
A | B |
|
FIGHT
RATING
100% |
|
|
|
|
|
|
|
|
|
|
