 |
RSR 1 PBP Commentary |
Undercard bout
|
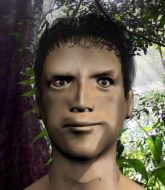
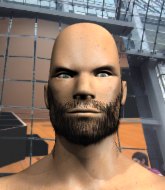
Coming up we have a heavyweight MMA rules bout between Amir Dunham (ranked 0 p4p, 0 weight class) and Donald Toosc (ranked 0 p4p, 0 weight class). Dunham's entrance music is Omar Khairat - Alexandria . A fine choice. Over to our ring announcer for the fighter introductions!
 |
|
 |
| 180 cm
30
156 lbs
17 - 12 - 0 |
|
180 cm
18
195 lbs
0 - 0 - 0 |
Powerful takedowns
Solid boxing
KO power |
|
Good wrestler
Counter fighter
Experienced |
|
| |
|
Ladies and gentlemen. This fight is 3 rounds, in the heavyweight division.
Introducing the fighter to my left, fighting out of the red corner.
With a record of
17 - 12 - 0, fighting out of London, Amir Dunham!
And introducing the fighter to my right, fighting out of the blue corner.
With a record of
0 - 0 - 0, fighting out of London, Donald Toosc!
The judges for this bout are Steven Brown, James Ackerman and James Glass.

The bell rings for round one and we are underway!
We've got one fighter who appears to only be looking to counter and the other not looking particularly aggressive either, so we could be in for a dull fight.

Dunham bobs and weaves into range and then changes levels and scores with a nice takedown into side control.
We must be close to a standup if these guys don't pick up the pace.

Dunham is trying to get an arm triangle but Toosc is defending well.
Toosc tries to work a leg under to get back to half guard but Dunham wriggles his own leg back out and remains in side control.
Dunham working away.
Dunham has worked his way into a potential kimura here. Toosc is trying to get out of the position but his squirming has just got him deeper into trouble. Dunham yanks on the arm and Toosc is forced to tap due to a very painful looking submission! Nice work by Dunham.
Ladies and gentlemen, after 0:33 of round 1, we have a winner by way of Submission (Kimura). Amir Dunham!
An out of breath Amir Dunham thanked his loyal fans in his post fight interview, giving them credit for his success over the course of his career.
|
|
|
|
|
|
|
|
|
|
|
|
|
|
|
|
|
|
|
|
|
|
|
| S |
C
A |
G |
S |
C
B |
G |
|
S |
C |
G |
|
energy
A | B |
|
hype
A | B |
|
pop
A | B |
|
mgr
A | B |
|
FIGHT
RATING
78% |
|
|
|
|
|
|
|
Undercard bout
|
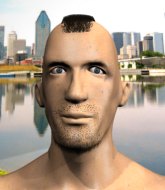
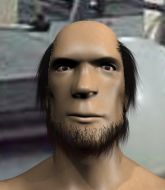
Coming up we have a heavyweight MMA rules bout between Ray Roto (ranked 0 p4p, 0 weight class) and Neil Ashworth (ranked 0 p4p, 0 weight class). Neil Ashworth has the better chin. Will he look to stand and bang today?
 |
|
 |
| 179 cm
18
180 lbs
0 - 0 - 0 |
|
184 cm
24
180 lbs
1 - 0 - 0 |
BJJ White Belt
Excellent boxer
KO power |
|
BJJ Blue Belt
Solid Muay Thai
Granite chin |
|
| |
|
Ladies and gentlemen. This fight is 3 rounds, in the heavyweight division.
Introducing the fighter to my left, fighting out of the red corner.
With a record of
0 - 0 - 0, fighting out of London, Ray Roto!
And introducing the fighter to my right, fighting out of the blue corner.
With a record of
1 - 0 - 0, fighting out of London, Neil Ashworth!
The judges for this bout are Andrew Berry, Steven Brown and Phil Schofield.
The bell rings for round one and we are underway!
Ashworth takes a shot right to the liver - Bas would have been proud of that punch.

Ashworth has closed the distance and engaged Roto in a clinch.

Ashworth jumps guard.
We must be close to a standup if these guys don't pick up the pace.
Ashworth has control of Roto's left arm, preventing Roto from doing any damage.
Ashworth lands a beautiful switch and he's in full mount! That could spell trouble for Roto!
The fighters are pressed up against the cage, both looking to find a bit of space to work.
Poor strikes thrown by Ashworth there. More accuracy and less frantic strikes would help!
Ashworth breaks from Roto's wrist control and lands an elbow.
Ashworth controlling the position easily from mount.

That's one minute gone in the round.

That's two minutes gone in the round.
Roto wants to control but Ashworth is having none of it.
Ashworth sitting in mount, just looking to control for the moment.

The ref stands the fighters back up, due to lack of action by Neil Ashworth.
Ashworth is trying hard to land a takedown here. Roto sprawls well and keeps this one on the feet.
Roto fakes a head shot and lands one to the body.

That's three minutes gone in the round.
Ashworth takes a body punch that cleary hurt but he's trying not to show any weakness.
Ray Roto is looking to keep the fight on the feet at all costs.
Ashworth looks for a takedown here. Will he get it? Roto is fending him off so far but Ashworth persists. Nope, Roto circles away and we're back to standing.
Roto loads up on a big right hand but Ashworth slips the punch.
Ashworth fakes high and shoots in for a takedown but Roto avoids it really well and circles away.
Ray Roto has stuffed three takedown attempts in the round now. That's going to take a lot out of Neil Ashworth.
Roto swats away the attempt to clinch by Ashworth.
Horrible takedown by Ashworth or perhaps it was just good defense by Roto which made him look bad.
Ashworth pushes Roto up against the cage in a clinch.
Roto wants to strike at distance but he can't break free of the clinch.
Roto is looking to break free of the clinch but Ashworth has double underhooks.

Ashworth escapes the clinch and we're back to striking.
Roto ducks down and throws a hook to the body but Ashworth moves away.
Ray Roto seems to be the more aggressive standup fighter in this bout.

That's four minutes gone in the round.
Roto listening to his corner there, landing a nice uppercut.

It looks like Neil Ashworth has been cut.
Roto works Ashworth's body with a nice hook.
Ashworth looks winded!
This has been an exciting period of action!
Ashworth shoots in and drives through. Roto sprawls well.
Ashworth takes one to the side of the head.
Roto pulls out of a head kick attempt.
A jab lands there for Roto.
Ashworth takes a big uppercut there. He seems a bit wobbly but no, he's OK.
Ashworth has a takedown stuffed.
Roto lands a jab to Ashworth's midsection.
As the round comes to an end the crowd are showing their appreciation for a great round of action.
Roto scores with a jab to the body.

Roto cracks Ashworth with a big right hand that sends him crashing to the floor. Roto has the opportunity to follow him to the ground but instead he's beckoning Ashworth to stand back up!

Ashworth is rocked!
Roto scores with a body shot.
Ashworth is still on wobbly legs! Can Roto finish him?
Roto is looking to wear down Ashworth with body shots, infact he's throwing more body shots than head shots at the moment.
Ashworth moves out of range of the body kick from Roto.
And thats the end of the round the fighters go back to their corners.
Ray Roto dominated that round.
The cut man is working on Neil Ashworth's cut.
Well, the break between rounds is over. Let's get back to the scrappin!

Roto cracks Ashworth with a nasty uppercut that draws ooohs from the crowd and sends Ashworth tumbling backwards onto the mat. He tries to recover but Roto pounces and lands a hail of unanswered strikes that forces the referee to step in to end the fight! Ashworth is not happy but he gave the referee no choice!
Ladies and gentlemen, after 0:05 of round 2, we have a winner by way of TKO (Strikes). Ray Roto!
|
|
|
|
|
|
|
|
|
|
|
|
|
|
|
|
|
|
|
|
|
|
|
| S |
C
A |
G |
S |
C
B |
G |
|
S |
C |
G |
|
energy
A | B |
|
hype
A | B |
|
pop
A | B |
|
mgr
A | B |
|
FIGHT
RATING
100% |
|
|
|
|
|
|
|
Co-main event
|
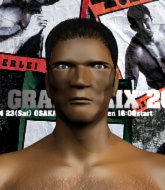
Coming up we have a heavyweight MMA rules bout between Firus Williams (ranked 0 p4p, 0 weight class) and Solidus Snake (ranked 0 p4p, 0 weight class). Williams comes into the arena with Fuel-Hemorrhage blaring out of the sound system. Firus Williams has the better chin. Will he look to stand and bang today?
 |
|
 |
| 178 cm
30
165 lbs
14 - 12 - 0 |
|
185 cm
28
220 lbs
11 - 9 - 0 |
Great wrestler
Excellent boxer
Insanely flexible |
|
BJJ Purple Belt
Excellent boxer
Knockout power |
|
| |
|
Ladies and gentlemen. This fight is 3 rounds, in the heavyweight division.
Introducing the fighter to my left, fighting out of the red corner.
With a record of
14 - 12 - 0, fighting out of London, Firus Williams!
And introducing the fighter to my right, fighting out of the blue corner.
With a record of
11 - 9 - 0, fighting out of London, Solidus Snake!
The judges for this bout are Richard Clark, Sam Margolis and Colin Fotheringham.
The bell rings for round one and we are underway!
Williams tries to clinch up but Snake circles away and keeps his distance.
Williams jabs Snake to the body, keeping him at a distance.
Williams throws a wild combination but nothing lands.
Williams throws a head kick that misses and slips in the process. He scrambles back to his feet and the fighters circle.
Snake drops his hands momentarily and Williams takes advantage with a crisp shot to the head.
Williams connects with a body shot.
Snake misses with a series of wild punches.
Williams tests Snake's chin there with a solid looking shot.
Williams connects with a solid leg kick.
Snake closes the distance and takes a jab right on the nose as he does so.
Williams throws a good cross that connects.
Snake with poor footwork there. He got himself in a bit of a tangle, enabling Williams to score with a decent uppercut.
Williams throws a right hand that Snake ducks under and follows up with a left that Snake also avoids with ease.
That's one minute gone in the round.
Williams connects with a lovely jab that went straight through the gap between Snake's hands.
A head kick from Williams lands but Snake takes it in his stride.
Snake takes a big uppercut there. He seems a bit wobbly but no, he's OK.
Williams throws the kick towards the body but Snake avoids it.
Williams lands a head kick. Snake smiles back at him and beckons him forward.
Snake avoids the head kick by Williams.
Williams shoots in for a takedown but Snake shows good takedown defense there and keeps this one on the feet.
Williams fails with a takedown attempt from distance.
Firus Williams seems to be the more aggressive standup fighter in this bout.
Williams is looking to clinch but Snake is avoiding it.
Williams shoots in for a takedown but doesn't get it.
That's three failed takedown attempts in the round for Firus Williams. That's going to take a lot out of him.
Williams cracks Snake with a nice right hand that draws applause from the crowd.
Snake gets his head snapped back by a nice shot there.
Williams throws a head kick that misses and slips in the process. He scrambles back to his feet and the fighters circle.
That's two minutes gone in the round.
Williams lands a nice looking kick to the body. Snake takes a step back to recover.
Williams connects with a hook to the side of his opponent's head.
Williams is really peppering his opponent's head with punches.
The fighters circle momentarily. Snake darts into range and connects with a nice straight punch.
Fantastic stuff here - a very entertaining period of action, which has drawn cheers from the crowd.
Williams throws a combination but it was largely blocked by Snake.
Williams waving his hands out in front of him, looking to distract Snake.
Snake takes a nasty kick to the mid section... That should keep him thinking. Does he try and block and risk a head kick landing?
Williams misses with a hook. Snake ducked under it nicely.
Williams looks for a takedown. He's got it. We're now in half guard.
We've had a lack of effective grappling in the last minute or so, which could well see a referee standup.
Snake avoiding damage under a succession of punches from Williams.
The fighters are pressed up against the cage, both looking to find a bit of space to work.
Snake trying to control here.
That's three minutes gone in the round.
Williams thows a wild elbow that connects with the canvas.
Williams is looking for a kimura but he's never going to get it from there.
Williams moves into full mount! Snake won't be happy about that!
Williams has been looking to land a fair amount of strikes on the ground. He might be looking to soften his opponent up in order to work for a submission.
Snake is really trying hard to get back to his feet.
Both fighters really going for it on the ground here!
Williams looking to control but Snake is working nicely, looking to advance position himself.
Snake tries to lock up and control but Williams gives him a forearm to the face and pushes him away.
Williams landing strikes from the mount and Snake is in trouble!
Williams scoring with some good ground and pound from mount here. Will he manage to finish Snake?
Williams loads up on a couple of big shots to the head that have Snake scrambling to escape. He can't get free though and several more unanswered shots from Williams land to the head. The referee has no choice but to stop the fight. Williams stands and salutes the crowd.
Ladies and gentlemen, after 4:57 of round 1, we have a winner by way of TKO (Strikes). Firus Williams!
A less than humble Firus Williams misjudged his post fight interview somewhat and came across a little too arrogant whilst trying to hype up his own abilities.
|
|
|
|
|
|
|
|
|
|
|
|
|
|
|
|
|
|
|
|
|
|
|
| S |
C
A |
G |
S |
C
B |
G |
|
S |
C |
G |
|
energy
A | B |
|
hype
A | B |
|
pop
A | B |
|
mgr
A | B |
|
FIGHT
RATING
40% |
|
|
|
|
|
|
|
Main event
|
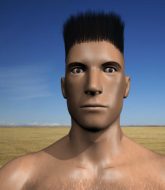
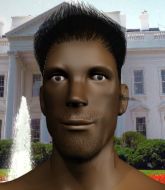
Coming up we have a heavyweight MMA rules bout between Ooga Booga (ranked 0 p4p, 0 weight class) and Dan Jordon (ranked 0 p4p, 0 weight class). Ooga Booga had real problems making weight for this fight. After initially coming in at 267.6lbs, he had two hours to make the official fight weight. He made it but it will have taken a lot out of him to cut those extra few pounds. Ooga Booga has a significant reach advantage - let's see if he can make it count.
 |
|
 |
| 199 cm
24
294 lbs
9 - 1 - 0 |
|
174 cm
31
190 lbs
18 - 10 - 1 |
Powerful takedowns
Excellent boxer
Cardio machine |
|
Good wrestler
Excellent MT
Powerful |
|
| |
|
Ladies and gentlemen. This fight is 3 rounds, in the heavyweight division.
Introducing the fighter to my left, fighting out of the red corner.
With a record of
9 - 1 - 0, fighting out of New York, Ooga Booga!
And introducing the fighter to my right, fighting out of the blue corner.
With a record of
18 - 10 - 1, fighting out of London, Dan Jordon!
The judges for this bout are Sam Margolis, James Ackerman and Phil Schofield.
The bell rings for round one and we are underway!
Booga doesn't manage to clinch there - Jordon circles away.
Booga tries to clinch but Jordon is having none of it.
Jordon cracks Booga with a nice right hand that draws applause from the crowd.
Booga tries to clinch
and Jordon counters with a shoot takedown. Booga fights it but they end up in guard.
Jordon preventing the sweep.
Jordon advances position into side control!

Jordon tries for a kimura. Not really close to a finish though.
Jordon avoids the strikes from the bottom by Booga.
Booga manages to land a sweep and he's now on top! Lovely Jiu Jitsu!
This is a great period of action - very entertaining stuff!
Booga lands strikes from half guard.
Booga prevents Jordon from improving his position.
Jordon actively working from the bottom here.
Jordon flails away from the bottom but he's not doing any damage.
Jordon looking for submissions from an awkward position here.
The fighters are pressed up against the cage, both looking to find a bit of space to work.
Jordon blocking the ground and pound attempt from Booga.
Jordon looking for submissions from an awkward position here.
That's one minute gone in the round.
Jordon on the receiving end of some nice ground and pound.
Jordon avoiding damage under a succession of punches from Booga.
Booga missing with some ground and pound from the half guard.
Jordon is trying to control but can't.
Booga missing with the ground and pound from half guard.
Jordon is looking to sinch up a guillotine here but Booga pulls his head out easily.
Jordon punching from the bottom.
Jordon avoiding damage under a succession of punches from Booga.
Booga prevents Jordon from improving his position.
Booga is scoring with some nice ground and pound from the dominant position.
Booga passes the half guard and he's now in mount! Big trouble for Jordon!
The fans in attendance giving it up for the two fighters, who have really let it all hang out in the last minute or so!
Booga lands a big shot there that rocks Jordon but he's holding on and managing to survive for now.
Booga scores with a couple of good head shots there.
Booga connects with a couple of good shots from mount.
Jordon is rocked!
That's two minutes gone in the round.
Jordon sneaks a leg under to get to half guard.
Jordon is looking to improve his position.
Booga not throwing his punches with enough precision this time.
Jordon is looking to sinch up a guillotine here but Booga pulls his head out easily.
Jordon blocking the ground and pound attempt from Booga.
Jordon is trying to get back to full guard.
Booga winds up and cracks Jordon with a swinging punch to the side of the head.
Booga throwing shots but Jordon is blocking nicely.
Booga missing with some ground and pound from the half guard.
Jordon looking for submissions from an awkward position here.
Jordon tries to roll over but Booga keeps him under control.
Booga winds up and cracks Jordon with a swinging punch to the side of the head.
Jordon wants to improve his position but Booga is controlling well.
Booga throwing shots but Jordon is blocking nicely.
That's three minutes gone in the round.
Jordon has hold of Booga's hands but Booga slips his arm to the side and lands an elbow.
Jordon looking to work for a kimura from the bottom.
The two fighters exchange a few words. I couldn't hear what they were saying but maybe it's more fun if you make it up yourself. Booga connects with a nice short shot to Jordon's temple.
Jordon keeping his head moving to avoid the ground and pound.
Jordon looking for submissions from an awkward position here.
Jordon looks winded!
Booga throwing shots but they're hitting the canvas more than the man.
Jordon actively working from the bottom here.
Jordon keeping his head moving to avoid the ground and pound.
Booga thumps the canvas. Not on purpose obviously - he just missed Jordon's head.
Booga seems to be taking a bit of a break to think of his next move. He lands a short punch in the meantime.
Booga will need to keep those long limbs tucked in whilst he's on the ground, to prevent any submissions.
Wooooo! Give it up for these two warriors! They are putting on a show!
Jordon looking to work for a kimura from the bottom.
Booga thows a wild elbow that connects with the canvas.
That's four minutes gone in the round.
Booga missing with some ground and pound from the half guard.
Jordon looking for submissions from an awkward position here.
Booga not landing any meaningful shots this time.
Both fighters really going for it on the ground here!
Jordon has hold of Booga's hands but Booga slips his arm to the side and lands an elbow.
Booga scores with a couple of good hammerfists.
Booga working the head and body with strikes.
Jordon is still in real trouble! Can Booga finish him?
Jordon trying to hold on to Booga's head to control him but Booga postures up.
Booga not landing any meaningful shots this time.
Jordon seems to have recovered his senses.
Booga thows a huge punch but Jordon dodges it nicely.
Jordon is looking to improve his position.
Jordon keeping his head moving to avoid the ground and pound.
Booga throwing punches and elbows but they're not doing any damage.
The crowd are going absolutely nuts as the round comes to an end - what a fantastic round of action!
Jordon blocking the ground and pound attempt from Booga.
Jordon has no desire to be mounted, so is trying to control. Booga is working away from the top position though.
Jordon slips a foot under and gets full guard. Nice work.
Jordon working a defensive guard here.
And thats the end of the round the fighters go back to their corners.
Ooga Booga dominated that round.
The referee calls time. The cornermen exit stage left and we're back to business.
Jordon fails with a takedown attempt.
Booga is looking to clinch but Jordon is avoiding it.
Jordon circles away from the clinch attempt.
Jordon shoots in for a double leg but Booga sprawls well. That's going to sap some energy.
The fight moves into the clinch position.
Jordon with an attempt at a knee that misses.
Jordon trying to land knees to the body.
Jordon looking to throw knees to the head but Booga is blocking nicely.
Jordon with a knee to the head.
Jordon with the Thai clinch. He's looking to land a big knee but he's not managed it this time.
Booga lands a takedown into guard.
Booga with a couple of shots to the head there. Not particularly brutal.
Booga in full guard, throwing the ground and pound. No damage this time.
That's one minute gone in the round.
Jordon looking for submissions off his back, moving his hips, looking for an opening.
Booga throws a big right hand that misses.
Booga working in close now, lands a nice elbow to the side of Jordon's head.
Jordon looking for submissions off his back, moving his hips, looking for an opening.
Ooga Booga overall seems to be getting the better of the ground position in the fight so far.
Jordon is breathing heavily.
Jordon looking to try and escape his hips here, looking for a submission. It looks like he's going for a triangle but Booga is defending well. Jordon quickly switches to an armbar and extends the arm! Booga has no choice but to tap, to a very quick submission! Wow, that was lightning fast! Jordon celebrates on the cage, with the crowd.
Ladies and gentlemen, after 1:36 of round 2, we have a winner by way of Submission (Armbar). Dan Jordon!
A relieved looking Dan Jordon thanked the fans for their support and gave the usual line about them being amazing. They seemed to believe that he actually meant it.
|
|
|
|
|
|
|
|
|
|
|
|
|
|
|
|
|
|
|
|
|
|
|
| S |
C
A |
G |
S |
C
B |
G |
|
S |
C |
G |
|
energy
A | B |
|
hype
A | B |
|
pop
A | B |
|
mgr
A | B |
|
FIGHT
RATING
100% |
|
|
|
|
|
|
|
|
|
|

