 |
EMMA-36 PBP Commentary |
Undercard bout
|
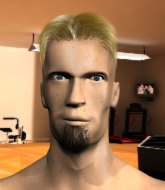
Coming up we have a lightweight MMA rules bout between Giorgio Abbiati (ranked 0 p4p, 0 weight class) and Christian Belmont (ranked 0 p4p, 0 weight class). Abbiati comes to the cage accompanied by Don't Speak - Eagles of Death Metal. Christian Belmont struggled to make weight for this fight. He only made it down to 156.7lbs at the first attempt and had to take the additional two hours to make the official bout weight. Let's see how much it's taken out of him. Christian Belmont has the better chin. Will he look to stand and bang today?
 |
|
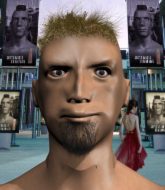 |
| 175 cm
21
155 lbs
5 - 4 - 0 |
|
190 cm
25
165 lbs
0 - 2 - 0 |
BJJ Purple Belt
Brawler
KO power |
|
BJJ Blue Belt
Decent boxing
Determined |
|
| |
|
Ladies and gentlemen. This fight is 3 rounds, in the lightweight division.
Introducing the fighter to my left, fighting out of the red corner.
With a record of
5 - 4 - 0, fighting out of Montreal, Giorgio Abbiati!
And introducing the fighter to my right, fighting out of the blue corner.
With a record of
0 - 2 - 0, fighting out of Montreal, Christian Belmont!
The judges for this bout are Robert Douchet, Ian Loll and Trevor Gratis.

The bell rings for round one and we are underway!

Abbiati forces Belmont back against the cage and clinches.
Good body shot from Abbiati.
Belmont wants to get back to striking at distance but Abbiati won't allow it.
Belmont prevents a body shot from Abbiati.
Belmont is looking for a takedown.
Belmont tries to score a body lock takedown but Abbiati shows good agility there to stay on his feet.
Abbiati content to slow the pace in the clinch.
Belmont looking to stall.

Belmont gets control of Abbiati's arms and successfully pulls guard. Belmont will no doubt be looking for submissions off his back.
Abbiati's corner is telling him to maintain position.
Abbiati passes Belmont's right leg, so he's now in half guard.
Abbiati looking to pass the half guard. Not this time.
Abbiati slows the pace down in half guard.

That's one minute gone in the round.

The ref stands the fighters back up. Giorgio Abbiati wasn't doing enough on the ground.
Belmont avoids a punch combination nicely.
Abbiati tries to clinch there but Belmont circles away.
Abbiati tries to clinch up.
Abbiati closes the distance and clinches.
Abbiati tries to throw a body punch but Belmont avoids it by throwing Abbiati back against the cage.
Belmont is trying to force a seperation but Abbiati has the dominant position.
Abbiati is defending well against a takedown attempt.
Giorgio Abbiati has stuffed three takedown attempts in the round now. That's going to take a lot out of Christian Belmont.

That's two minutes gone in the round.
Belmont tries to pull guard but Abbiati forces him back to his feet, against the cage.
Abbiati landing knees to the body.
Belmont looks winded!
Abbiati is working Belmont over against the cage.
Abbiati working some nice short punches in the clinch.
Abbiati scores with an uppercut up the middle.
Abbiati misses with a shot to the kidneys.
Abbiati has Belmont pressed against the cage.
Belmont tries to break the clinch but Abbiati is controlling the position.
Abbiati goes for a body shot but it's blocked.
This has been an exciting period of action!
Abbiati stalling.
Abbiati keeps control of Belmont as he tries to wriggle out of the double underhooks.
Belmont is a painfully thin specimen of a man. You do wonder whether a good body kick would snap him clean in two.
Belmont blocks a body shot from Abbiati.
A right handed body shot lands from Abbiati.
Belmont is trying to drag Abbiati to the mat but Abbiati just about manages to keep his footing. He used the cage to his advantage there.
Abbiati tries to throw a body punch but Belmont avoids it by throwing Abbiati back against the cage.

That's three minutes gone in the round.
Belmont managing to block the knees to the body from Abbiati.
Both guys are working to get underhooks.
Abbiati gets underhooks to prevent Belmont's takedown attempt.
Abbiati lands a body punch in the clinch.

Abbiati breaks the clinch.
Abbiati tries to clinch but Belmont moves out of range.
Abbiati scores with a jab to the jaw of his opponent.
Abbiati tries to clinch but Belmont moves out of range.
Abbiati throws a body kick but he was well out of range there.
Belmont has his head snapped back a nice jab. A little nod from Belmont there as he acknowledges the shot.
Abbiati is looking to clinch but Belmont is avoiding it.
Danga de danga de dang - Abbiati scores with a four punch combination!

Belmont is rocked!
The crowd cheering loudly, showing their appreciation for the quality fight we're seeing here.
Abbiati fails with an attempt to clinch.

That's four minutes gone in the round.
Belmont avoids the body shot from Abbiati.
Abbiati tries to clinch up against the cage, rushing in the close the distance. Belmont manages to break the clinch and circles back to the middle of the mat.
Abbiati takes the fight into the clinch.
Belmont avoiding damage as Abbiati throws knees to the body.
Belmont on the defensive, avoiding the knees to the body.
Abbiati breaks the clinch and we return to the middle of the mat.
Giorgio Abbiati is looking to keep the fight on the feet at all costs.
A punch combination from Abbiati misses.
Abbiati throws a right and a left that Belmont avoids nicely.
Abbiati throws a sloppy head kick and Belmont moves out of range easily.
As the round comes to an end the crowd are showing their appreciation for a great round of action.
Belmont tries to close the distance and clinch up but Abbiati swats him away and circles back towards the center.
Belmont misses with a takedown attempt - Abbiati sprawls well and throws a nice strike on the way out which just misses.
Abbiati tries to clinch but Belmont is having none of it.
And thats the end of the round the fighters go back to their corners.
Giorgio Abbiati dominated that round.
The corners get their ten second warning. Both fighters stand from their stools and stare eachother down, ready to get back to the action.

Abbiati fails in his attempt to clinch.

Belmont moves into range and clinches up with Abbiati.
Abbiati breaks the clinch and we're back to striking at distance.
Belmont circles away from the clinch attempt.
Abbiati will need to tighten up his combinations if he doesn't want to gas himself out, swinging at thin air.
Abbiati tries to clinch but is not successful on this occasion.
A jab from Belmont finds it's way through Abbiati's defenses.
Belmont swats away the attempt to clinch by Abbiati.
Abbiati closes the distance and presses his opponent up against the cage.
A right handed body shot lands from Abbiati.
Abbiati struggles to land a body shot inside as Belmont controls his hands.
Abbiati tries to land a knee to the body but he is off balance and Belmont avoids it.
Belmont blocks a body shot from Abbiati.
That's one minute gone in the round.
Belmont decides to pull guard.
Abbiati is frustrating his opponent with some stalling tactics from top position.
Belmont is breathing heavily.
Abbiati has decided he wants to stand but the closed guard of Belmont is proving hard to escape from.
We must be close to a standup if these guys don't pick up the pace.
Abbiati sitting in guard, not really doing much.
The ref stands the fighters back up. Giorgio Abbiati wasn't doing enough on the ground.
Belmont clinches up against the cage.
That's two minutes gone in the round.
Abbiati goes for a body shot but it's blocked.
Giorgio Abbiati has scored more points in the clinch so far.
A real battle for position is taking place between these two warriors.
Abbiati tries a body shot but Belmont blocks it.
Belmont managing to block the knees to the body from Abbiati.
Abbiati tries a body shot but Belmont blocks it.
Belmont missing with knees to the body.
Belmont is trying to slow down the pace of the fight but Abbiati is keeping busy.
Abbiati is pushing Belmont up against the cage, for a bit of lean and pray action. Action being used the in the loosest possible sense of the word.
Belmont goes for a takedown in the clinch but Abbiati prevents it.
Nice body punch from Abbiati - that landed with a thud.
The crowd are loving this. Great action here.
Abbiati has Belmont pushed against the cage.
That's three minutes gone in the round.
Abbiati stalling in the clinch but Belmont improves position.
Abbiati works for underhooks and lands a body shot in the process.
Belmont struggles to land a body shot inside as Abbiati controls his hands.
Abbiati effectively controlling the action here.
Belmont on the defensive, avoiding the knees to the body.
Abbiati has Belmont pressed against the cage, preventing Belmont from circling away and getting back to striking at range.
Abbiati gets double underhooks to prevent a takedown attempt from Belmont.
Abbiati trying to land knees to the body.
Abbiati is looking to score with knees to the body. Maybe he'll change it up and go body then head. Belmont is defending well for now.
Abbiati scores with a hook to the body.
That's four minutes gone in the round.
The referee calls for Abbiati to work.
Abbiati pushes off and circles away, back to the middle of the mat.
Abbiati fails in his attempt to clinch.
Abbiati moves into the clinch.
Abbiati tried to land a shot to the body but connects with Belmont's elbow.
Abbiati throws a head punch that misses.
Belmont blocks an elbow strike.
This is a great period of action - very entertaining stuff!
As the round comes to an end the crowd are showing their appreciation for a great round of action.
Belmont tries to pull guard but Abbiati holds him up against the cage and eventually Belmont drops back down to his feet.
Giorgio Abbiati has stuffed three takedown attempts in the round now. That's going to take a lot out of Christian Belmont.
Abbiati misses with a body punch.
Belmont is trying to pull guard but Abbiati has him pressed against the cage.
And thats the end of the round the fighters go back to their corners.
Giorgio Abbiati dominated that second round.
That's the end of the interval. I'm sure that seemed a lot quicker than a minute for our two fighters! Back to the action. The crowd applaud as we get ready to start the final round!

Belmont misses with a jab and misses with a cross straight after too.
The fight moves into the clinch position.
Abbiati trying to land knees to the body.
Belmont goes for a takedown in the clinch but Abbiati prevents it.
Abbiati scores with a hook to the body.
Abbiati dictating the pace here, as the fighters clinch against the cage.
Belmont prevents a body shot from Abbiati.
Abbiati tries to stall but Belmont uses the opportunity to gain a better position.
Belmont trying to land knees to the body.
Belmont takes a big intake of breath there - he's definitely tired.
Abbiati tried to land a shot to the body but connects with Belmont's elbow.
Belmont is trying to work for a single leg takedown but Abbiati pulls him back up using the underhooks.
Abbiati is really dominating this fight. Is there anything that Belmont can do to turn this around?
Abbiati digs a right hand underneath Belmont's ribcage. Belmont let out a lung full of air as it connected.
That's one minute gone in the round.
Abbiati working some nice short punches in the clinch.
Abbiati tries to land a knee to the body but he is off balance and Belmont avoids it.
Abbiati lands a knee to the body.
Abbiati tries to throw a body punch but Belmont avoids it by throwing Abbiati back against the cage.
Abbiati wants to stall.
Belmont managing to block the knees to the body from Abbiati.
A short body shot lands from Abbiati as the two fighters clinch.
Abbiati goes for a body shot but it's blocked.
Abbiati is stalling here.
Abbiati breaks the clinch and we return to the middle of the mat.
Belmont swats away the attempt to clinch by Abbiati.
Belmont throws a combination but comes up with nothing but fresh air.
That's two minutes gone in the round.
The fight stays on the outside here - Abbiati looks like he's thinking about clinching though.
Abbiati clinches with his opponent.
Abbiati using the Thai clinch to land knees to the body.
The crowd cheering loudly, showing their appreciation for the quality fight we're seeing here.
Abbiati misses with a punch to the body.
Abbiati misses with a shot to the kidneys.
An uppercut to the body lands inside from Abbiati.
Abbiati stalling against the cage.
Abbiati wants to stall.
Abbiati can't find room to land a body shot as Belmont controls the action.
Belmont blocks a body shot from Abbiati.
Abbiati scores with a nice hook to the head.
That's three minutes gone in the round.
Abbiati can't find room to land a body shot as Belmont controls the action.
Abbiati misses with a punch to the body.
Abbiati putting his Muay Thai to good use. He has Belmont in a tight clinch and is doing some damage with knees to the body.
A right hand to the body from Abbiati.
Stalling in the clinch from Abbiati.
Abbiati tries to throw a body punch but Belmont avoids it by throwing Abbiati back against the cage.
Belmont managing to block the knees to the body from Abbiati.
Belmont avoiding damage as Abbiati throws knees to the body.
Abbiati effectively controlling the action here.
Belmont tries to pull guard but Abbiati won't allow it.
Giorgio Abbiati has stuffed three takedown attempts in the round now. That's going to take a lot out of Christian Belmont.
Abbiati landing some nice looking knees to the body.
Abbiati misses with a hook to the ribs.
That's four minutes gone in the round.
Abbiati avoiding damage.
Abbiati tries to throw a body punch but Belmont avoids it by throwing Abbiati back against the cage.
Abbiati dictating the pace here, as the fighters clinch against the cage.
Abbiati lands a good knee to the midsection. Belmont won't want to take too many of those.
The fans in attendance giving it up for the two fighters, who have really let it all hang out in the last minute or so!
A body shot lands from Abbiati.
Belmont is trying to pull guard but Abbiati has him pressed against the cage.
Both guys are working to get underhooks.
As the round comes to an end the crowd are showing their appreciation for a great round of action.
Abbiati breaks from the clinch.
Abbiati tries to clinch but Belmont is having none of it.
Christian Belmont has stepped it up - he knows he needs a finish here!
Belmont pivots as if he's going to throw a leg kick but stops half way.
And that's the end of the fight!
Giorgio Abbiati showed his dominance in that final round.
Well Abbiati has outscored his opponent in every aspect of the fight today. Only a scarily incompetent judge or two will keep him from a well deserved win... Over to the ring announcer for the scorecards.
Ladies and gentlemen, after 3 rounds of action, we go to the scorecards for a decision.
Judge Robert Douchet scores the fight 30:27
Judge Ian Loll scores the fight 30:27
Judge Trevor Gratis scores the fight 30:27
In favor of your winner, by unanimous decision... Giorgio Abbiati!
During a confident post fight interview, Giorgio Abbiati thanked all his fans. He seemed very genuine when describing how motivated his fans keep him.
|
|
|
|
|
|
|
|
|
|
|
|
|
|
|
|
|
|
|
|
|
|
|
| S |
C
A |
G |
S |
C
B |
G |
|
S |
C |
G |
|
energy
A | B |
|
hype
A | B |
|
pop
A | B |
|
mgr
A | B |
|
FIGHT
RATING
67% |
|
|
|
|
|
|
|
Undercard bout
|
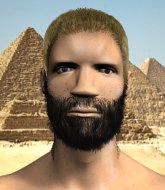
Coming up we have a light heavyweight MMA rules bout between Charle Sonnen (ranked 0 p4p, 0 weight class) and Henzo Diaz (ranked 0 p4p, 0 weight class). I don't know about you partner, but I'm pumped for this one!
 |
|
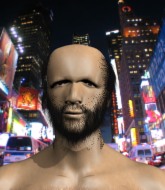 |
| 185 cm
25
210 lbs
1 - 0 - 0 |
|
190 cm
25
220 lbs
3 - 2 - 0 |
BJJ Blue Belt
Counter fighter
Self confident |
|
Good wrestler
Basic striking
Tends to cut |
|
| |
|
Ladies and gentlemen. This fight is 3 rounds, in the light heavyweight division.
Introducing the fighter to my left, fighting out of the red corner.
With a record of
1 - 0 - 0, fighting out of Montreal, Charle Sonnen!
And introducing the fighter to my right, fighting out of the blue corner.
With a record of
3 - 2 - 0, fighting out of Montreal, Henzo Diaz!
The judges for this bout are Robert Douchet, Alec Ball and Dillan Fox.
The bell rings for round one and we are underway!
Diaz looks frustrated there after his takedown attempt is stuffed easily.
Diaz leaves Sonnen with his face pressed against the mat as he sprawls beautifully, defending against a solid takedown attempt.
Diaz shoots for a takedown but Sonnen saw that one coming a mile off and avoided it easily.
Diaz fails miserably with a takedown attempt.
Charle Sonnen has stuffed three takedown attempts in the round now. That's going to take a lot out of Henzo Diaz.
Diaz looks frustrated there after his takedown attempt is stuffed easily.
Diaz fakes a strike and closes the distance, dragging Sonnen to the ground. Diaz is now in Sonnen's guard.
Diaz postures up and lands a big shot to Sonnen's brow.
Diaz throwing elbows and punches but not connecting, as Sonnen works some decent striking defense from the bottom.
Sonnen not looking particularly offensive just at the moment.
The ref warns both fighters not to hold the cage as they work up against the meshing.
Diaz working some ground and pound from guard but it's not doing any damage.
Diaz throwing strikes from guard but Sonnen blocks nicely.
That's one minute gone in the round.
Diaz's corner is telling him to maintain position.
Diaz throwing elbows and punches but not connecting, as Sonnen works some decent striking defense from the bottom.
Sonnen working the defensive guard well to avoid strikes from Diaz.
Diaz postures up in Sonnen's guard and throws a big left but Sonnen blocks it.
Diaz with a nice head shot there.
Diaz advances to half guard.
Sonnen is breathing heavily.

Diaz is trying to work for a kimura but Sonnen is defending well.
Diaz controlling the action here.
That's two minutes gone in the round.
Sonnen tries to kick Diaz off but Diaz keeps his base steady and stays in half guard.
Diaz thows a wild elbow that connects with the canvas.
Diaz is taking a breather. Sonnen says something to him but it's hard to make out. Perhaps he's telling him to get on with it and actually do something.
The fighters are pressed up against the cage, both looking to find a bit of space to work.
Diaz not throwing his punches with enough precision this time.
Diaz drops an elbow to the side of Sonnen's head.
Diaz thows a wild elbow that connects with the canvas.
Fantastic stuff here - a very entertaining period of action, which has drawn cheers from the crowd.
Diaz missing with some ground and pound from the half guard.
Diaz slips a nice elbow through Sonnen's hands, connecting with Sonnen's forehead.
Sonnen blocking the ground and pound attempt from Diaz.
That's three minutes gone in the round.
Diaz lands with an elbow from half guard - that looked like it hurt.
The fighters are starting to perspire pretty heavily.
Sonnen is looking for a sweep. Diaz is wise to his cunning plan and keeps the top position.
Diaz working Sonnen over with strikes.
Diaz lands a big shot. The thud that echoes around the arena is like music to the fans' ears.
Sonnen has hold of Diaz's hands but Diaz slips his arm to the side and lands an elbow.
Diaz wants to take a breather but Sonnen is having none of it.
Diaz in half guard on the top. He's looking for a kimura... He's got it locked and he's managed to free his trapped foot. Sonnen tries to escape but it's on too tight and he has to tap! Great BJJ skills there from Diaz!
Ladies and gentlemen, after 4:55 of round 1, we have a winner by way of Submission (Kimura). Henzo Diaz!
|
|
|
|
|
|
|
|
|
|
|
|
|
|
|
|
|
|
|
|
|
|
|
| S |
C
A |
G |
S |
C
B |
G |
|
S |
C |
G |
|
energy
A | B |
|
hype
A | B |
|
pop
A | B |
|
mgr
A | B |
|
FIGHT
RATING
40% |
|
|
|
|
|
|
|
Undercard bout
|
|
|
|
Undercard bout
|
Coming up we have a welterweight MMA rules bout between Alex Louvierre (ranked 0 p4p, 0 weight class) and Jackson Kendricks (ranked 0 p4p, 0 weight class). Chooooooooon! I think Louvierre might be my favorite fighter, now he's come out to Dirty House. Both fighters will be looking to make this an exciting fight for the fans, I'm sure!
 |
|
 |
| 178 cm
28
170 lbs
4 - 3 - 0 |
|
170 cm
24
182 lbs
5 - 0 - 0 |
Good wrestling
Counter fighter
KO power |
|
BJJ Brown Belt
Counter fighter
Granite chin |
|
| |
|
Ladies and gentlemen. This fight is 3 rounds, in the welterweight division.
Introducing the fighter to my left, fighting out of the red corner.
With a record of
4 - 3 - 0, fighting out of Montreal, Alex Louvierre!
And introducing the fighter to my right, fighting out of the blue corner.
With a record of
5 - 0 - 0, fighting out of Montreal, Jackson Kendricks!
The judges for this bout are Steve Smith, Elvis Blanc and Ian Loll.
The bell rings for round one and we are underway!
Kendricks fails with the takedown

and Louvierre counters with a crisp one two that drops Kendricks! Louvierre thinks about following him to the mat for a moment but instead steps back and waves Kendricks to his feet! Kendricks is in big trouble!
The crowd cheering loudly, showing their appreciation for the quality fight we're seeing here.
Louvierre swings away but doesn't land with a series of punches.

Louvierre drives through with a takedown into Kendricks's guard. Let's see what he can do from the top position.
We've had a lack of effective grappling in the last minute or so, which could well see a referee standup.
There's a bit of a scramble here and now Kendricks is on top in guard.
Kendricks is holding a leg here, probably looking for an ankle lock - he drops back and goes for it! Louvierre is in trouble! Is it all over??? No! Louvierre has escaped and now he's on top!
Louvierre postures up and lands a big shot to Kendricks's brow.
Kendricks is looking to sinch up a triangle. Louvierre throws the leg off to one side though and gets in tight to Kendricks's body to avoid the submission. Kendricks has instead reached around Louvierre's neck and now has a guillotine! Oh, this is biiiig trouble! Kendricks arches his back and squeezes and forces the tap from his hapless opponent.
Ladies and gentlemen, after 1:56 of round 1, we have a winner by way of Submission (Guillotine). Jackson Kendricks!
|
|
|
|
|
|
|
|
|
|
|
|
|
|
|
|
|
|
|
|
|
|
|
| S |
C
A |
G |
S |
C
B |
G |
|
S |
C |
G |
|
energy
A | B |
|
hype
A | B |
|
pop
A | B |
|
mgr
A | B |
|
FIGHT
RATING
90% |
|
|
|
|
|
|
|
Undercard bout
|
Coming up we have a welterweight MMA rules bout between Max Ford (ranked 0 p4p, 0 weight class) and Bobby Digital (ranked 0 p4p, 0 weight class). Digital is bouncing up and down as he enters the arena, backed by Wu-Tang Clan - Wu-Tang Clan Ain't Nuthing Ta F'Wit . The fight MMA fans around the world have waited their entire lives for!
 |
|
 |
| 183 cm
22
184 lbs
9 - 2 - 0 |
|
180 cm
22
175 lbs
7 - 0 - 0 |
Good wrestling
Solid boxing
Very quick |
|
Good wrestler
Excellent boxer
Good gas tank |
|
| |
|
Ladies and gentlemen. This fight is 5 rounds, for the welterweight championship of the world!
Introducing the champion to my left, fighting out of the red corner.
With a record of
9 - 2 - 0, fighting out of Montreal, Max Ford!
And introducing the challenger to my right, fighting out of the blue corner.
With a record of
7 - 0 - 0, fighting out of Hilo, Bobby Digital!
The judges for this bout are Steve Smith, Trevor Gratis and Alec Ball.
The bell rings for round one and we are underway!
Ford misses the shot to the body.
Ford misses with a wild body shot.
Ford throws a nice hook to the body that draws an oooh from the crowd.
Digital gets taken down but at least he's managed to land in guard.
Ford preventing the sweep.
Digital seems keen to control Ford's posture.
The fighters are pressed up against the cage, both looking to find a bit of space to work.
Ford postures up.
Ford controls from within his opponent's guard.
Digital wants to sweep but no luck.
Digital keeping full guard, as Ford tries to pass.

Well, the referee has seen enough. Neither fighter is active enough on the ground so he's stood them back up.
Digital throws a lazy right hand but Ford sees it coming a mile off and sidesteps it easily.
Bobby Digital is looking to keep the fight on the feet at all costs.
That's one minute gone in the round.
Digital moves into range and clinches up with Ford.

Digital manages to break the clinch.
Digital misses with a body shot. Nice footwork from Ford.
Ford throws an ugly left hook that misses
and Digital makes him pay by landing a nice hook to the body before moving out of range.
Nice defenses there by Digital.
Digital fakes with an overhand right and moves in to clinch with Ford, pushing him back against the cage.
Ford tries to take the fight to the ground by pulling guard but can't manage it.
A right hand to the body from Digital.
Ford takes a shot to the head.
A short right from Digital on the inside.
Digital tries to land a shot to the body but it's blocked.
Ford lands with a short shot to the head.
The crowd are loving this. Great action here.
Digital misses with a punch to the body.
A body shot lands from Ford.
Digital tries a body shot but Ford blocks it.
Digital breaks the clinch and we're back to striking at distance.
Ford throws a hook to the body but it doesn't connect.
Ford takes a nice looking leg kick right on the meat of his thigh there.
That's two minutes gone in the round.
Digital drives through and clinches with Ford against the cage.
Digital lands a shoulder strike that jolts his opponent's head backwards.
Digital tries a shoulder strike but it doesn't do any damage.
Ford swings away with an uppercut that misses.
Ford tried to land a shot to the body but connects with Digital's elbow.
Ford trying to stall but Digital improves his position.
Ford throws a head punch that misses.
Digital tries to land a shot to the body but it's blocked.
Digital lands an uppercut.
Ford misses with a body punch.
Digital lands a short shot on the inside that snaps the head of Ford backwards.
A short right from Ford.
Ford drops down looking for an ankle pick but Digital pulls his leg out and moves away.
Digital tries to clinch but Ford moves away
and Ford counters with a nice uppercut.
Digital is looking to clinch.
Ford with a lazy takedown attempt
and Ford takes a counter punch right on the button for his troubles.
That's three failed takedown attempts in the round for Max Ford. That's going to take a lot out of him.
A good leg kick by Digital.
The fight moves into the clinch position.
That's three minutes gone in the round.
A short right hand to the side of the head by Digital.
A frustrated look appears on Ford's face as he tries to break the clinch.
Digital throws a blind hook that connects with the side of Fords head.
An uppercut on the inside fails to land for Ford.
Ford lands a body shot.
A short left from Ford.
Good anti-grappling being displayed by Digital as Ford tries to tie him up.
Ford misses with a hook to the ribs.
Digital breaks from the clinch.
Digital scores with a hook to the body. Ford takes a step back and tries to catch his breath.
Ford swings and misses with a hook to the body.
Ford throws a hard body shot but it just misses.
A nice inside leg kick there by Digital. That's going to slow Ford down.
Ford is breathing heavily.
This has been an exciting period of action!
Digital clinches.
Digital digs a right hand underneath Ford's ribcage. Ford let out a lung full of air as it connected.
Digital gets through Ford's defenses to land a nice punch to the side of the head.
That's four minutes gone in the round.
Digital lands a body punch in the clinch.
Ford's head jolts backwards as he takes an uppercut right on the button!
Digital slowing the pace effectively.
Digital's corner calls for him to break the clinch, which he does.
Ford keeps the fight on the outside.
Digital is looking to take this fight into the clinch.
Digital lands with a good body shot.
Digital lands a right hook to the body.
Digital tries to close the distance and clinch up but Ford swats him away and circles back towards the center.
Digital tries to close the distance and clinch up but Ford swats him away and circles back towards the center.
Digital forces Ford back against the cage and clinches.
Digital presses Ford against the cage and delivers a mid-strength body shot.
The crowd are going absolutely nuts as the round comes to an end - what a fantastic round of action!
Digital lands a short shot on the inside that snaps the head of Ford backwards.
Good body shot from Digital.
Digital goes for a body shot but it's blocked.
Digital lands with a quick shot inside that doesn't really do much damage.
And thats the end of the round the fighters go back to their corners.
Bobby Digital dominated that round.
The corners get their ten second warning. Both fighters stand from their stools and stare eachother down, ready to get back to the action.
Digital with a body punch. A glancing blow.
Digital throws a combination but it was largely blocked by Ford.
Digital gets to the clinch - let's see what his plan is here.
A head punch blocked on the inside by Digital.
Digital blocks a body shot from Ford.
Digital lands a nice uppercut.
Digital lands a short shot on the inside that snaps the head of Ford backwards.
Digital takes a shot to the head.
Digital breaks from the clinch.
Digital cracks the inside of Ford's front leg.
The fans in attendance giving it up for the two fighters, who have really let it all hang out in the last minute or so!
Digital throws a right and a left that both miss.
The fight stays on the outside here - Digital looks like he's thinking about clinching though.
Digital tries to clinch but is not successful on this occasion.
Ford chopped to the floor by a nice leg kick but he springs right back up before Digital can pounce on him.
The fight moves into the clinch position.
Both fighters are absolutely exhausted here.
Ford doesn't land with the attempted body shot.
That's one minute gone in the round.
Digital misses with a body punch.
Digital lands a right hand that snaps the head of Ford backwards.
Digital lands a left hand.
Digital lands with a left to the head.
Ford looks like he'd prefer to be striking at range right now.
A short right from Digital.
Ford misses with a hook from the clinch.
Ford doesn't land with the attempted body shot.
Nice body punch from Digital - that landed with a thud.
Digital breaks the clinch and we return to the middle of the mat.
Ford avoids the clinch attempt nicely.
Ford takes a swing at Digital's ribcage but misses.
Digital tries to clinch but Ford moves out of range.
Digital with a jab.
Wooooo! Give it up for these two warriors! They are putting on a show!
Digital fails with an attempt to clinch.
Digital misses with a series of wild punches.
Digital misses with a telegraphed body shot
and Ford counters with a nice double leg into side control. Digital won't be happy with that.
That's two minutes gone in the round.
You can see the frustration on Digital's face, being in this tough position on the bottom.
Ford trying to control the position but Digital is working away.
Digital keeping his opponent close.
Ford throws a strike aimed at the side of Digital's head but Digital avoids it well.
Digital trying to remain calm as Ford controls from the top position.
Ford is trying to ground and pound but Digital uses the momentary lack of control by Ford to regain half guard.
Digital holds on for dear life, maintaining half guard for now.
That's three minutes gone in the round.
Ford is looking to take a break and control but Digital is keeping him honest, looking to work from the bottom.
Ford is looking to stall here but Digital recovers full guard.
Digital seems keen to control rather than go for a submission, at least for now.
Digital not looking particularly offensive just at the moment.
Ford trying to control but Digital is working from the bottom.
Digital controlling the position.
Neither fighter is doing enough for the referee's liking and he's decided to stand them back up.
Digital is looking to take this fight into the clinch.
That's four minutes gone in the round.
Ford on the wrong end of a nice jab.
Digital tries to clinch but Ford is having none of it.
Digital tries to clinch up but Ford circles away and keeps his distance.
Digital has been the more effective fighter overall so far.
Digital steps to the side to avoid the strikes from Ford.
Ford ducks under a wild hook from Digital.
A punch combination from Digital misses.
Ford throws a looping overhand right but Digital ducks down to avoid it.
Bobby Digital seems to be getting the better of the standup.
Ford misses with an uppercut.
Ford smiles there as he lands a nice right hand right on the button.
A telegraphed right hand from Ford misses the target.
Digital misses with a body shot. Nice footwork from Ford.
The fans in attendance giving it up for the two fighters, who have really let it all hang out in the last minute or so!
The crowd are going absolutely nuts as the round comes to an end - what a fantastic round of action!
A looping hook to the body misses from Ford. Digital does a little dance to reset his feet.
Ford misses with a body shot.
Digital lands a head shot.
Ford throws a hard body shot but it just misses.
And thats the end of the round the fighters go back to their corners.
Bobby Digital showed his class in that round. I'd imagine he'll take it on all the scorecards.
OK. That's time! The bell goes and we're back to the action.
Digital takes a big uppercut there. He seems a bit wobbly but no, he's OK.
Digital is looking to clinch but Ford is avoiding it.
Digital has closed the distance and engaged Ford in a clinch.
Digital lands with a short punch from the clinch.
Digital breaks from the clinch.
Digital lands with a straight right. Ford didn't see that one coming.
Ford swings and misses with a shot to the body
letting Digital counter with a right hand.

Ford is rocked!
Digital misses with a series of wild punches.
Digital slips under a jab.
Ford circles away from the clinch attempt.
Digital avoids the body shot from Ford.
The fans in attendance giving it up for the two fighters, who have really let it all hang out in the last minute or so!
Digital closes the distance and pushes Ford back into the cage.
Ford manages to break the clinch.
Ford shoots in for a takedown. "I don't think so" says Digital as he avoids it easily.
Digital tries to clinch up.
Ford tries to land with a swinging hook to the body but Digital was well out of range. Poor timing from Ford.
That's one minute gone in the round.
Ford takes a jab right on the nose. That must have hurt but he shrugs his shoulders and looks to return the favor.
Ford just misses with a punch to the body.
Both fighters are breathing heavily.
Digital punishes Ford's body with a nice straight punch.
Digital gets a clinch.
Ford misses with some punches.
Digital pushes off and circles away, back to the middle of the mat.
Digital lands a jab to Ford's midsection.
Ford avoids the clinch attempt nicely.
Digital moves into the clinch.
Digital breaks from the clinch.
Ford closes the distance and takes a jab right on the nose as he does so.
Oh Ford is still all over the place! His legs are completely gone! Will he be able to recover?!!
This has been an exciting period of action!
Ford throws out a token jab with nothing on it.
Digital lands hard precision jab right on the jaw that stiffens Ford up and sends him tumbling to the mat! The ref grabs Digital from behind before he can pounce. Some folks in the crowd didn't like that stoppage, but I saw Ford's eyes roll way back in his head, he was done.
Ladies and gentlemen, after 1:49 of round 3, we have a winner by way of KO (Punch). Bobby Digital! Bobby Digital retains his welterweight title!
Bobby Digital gave a mention to Sydney BEAST Clothing in his post fight interview. That will please them (and hopefully generate some sales).
|
|
|
|
|
|
|
|
|
|
|
|
|
|
|
|
|
|
|
|
|
|
|
| S |
C
A |
G |
S |
C
B |
G |
|
S |
C |
G |
|
energy
A | B |
|
hype
A | B |
|
pop
A | B |
|
mgr
A | B |
|
FIGHT
RATING
100% |
|
|
|
|
|
|
|
Co-main event
|
Coming up we have a heavyweight MMA rules bout between Jon Snow (ranked 0 p4p, 0 weight class) and Anaconda Yadav (ranked 0 p4p, 0 weight class). Yadav has chosen Shayad as his entrance music. Both fighters look fresh as a daisy as they make their way towards the cage.
 |
|
 |
| 191 cm
25
250 lbs
10 - 4 - 0 |
|
202 cm
31
275 lbs
14 - 18 - 0 |
Good wrestling
Excellent MT
Granite chin |
|
Good wrestler
Excellent boxer
Determined |
|
| |
|
Ladies and gentlemen. This fight is 3 rounds, in the heavyweight division.
Introducing the fighter to my left, fighting out of the red corner.
With a record of
10 - 4 - 0, fighting out of Montreal, Jon Snow!
And introducing the fighter to my right, fighting out of the blue corner.
With a record of
14 - 18 - 0, fighting out of Montreal, Anaconda Yadav!
The judges for this bout are Gregory Folan, Robert Douchet and William Peck.
The bell rings for round one and we are underway!
Yadav tries to sprawl but Snow drives through with a takedown into half guard.
The referee is asking the fighters to pick up the pace.
Yadav is not content to let Snow control the position.
Snow prevents Yadav from improving his position.
Yadav is looking to get full guard. It looks like he might be successful but at the last minute Snow jumps into side control!
Yadav tries to improve position but can't.

Snow tries for a kimura. Not really close to a finish though.
Yadav is looking to reverse the position.
Snow working hard here to secure a kimura but he's not really in the right position for it.
Snow trying to control the action but Yadav is working from the bottom.
That's one minute gone in the round.
Yadav is looking for a sweep.
The fighters are pressed up against the cage, both looking to find a bit of space to work.
Yadav sneaks back into half guard.
Yadav is looking to sinch up a guillotine here but Snow pulls his head out easily.
Yadav is looking to improve his position.
Snow wants to work for an arm triangle but Yadav is really keeping half guard well and defending the submission attempt.
Snow seems very keen to just sit and control from half guard but Yadav does not like that idea so much and is remaining active off his back.
Yadav looking to work for a kimura from the bottom.
Yadav gets full guard.
Snow wants to control from the top but Yadav keeps moving.
Yadav working from the bottom, still in full guard. He's managed to get a loose triangle. Snow doesn't seem to be doing much to defend here, obviously he feels comfortable in the position. Snow manages to throw the legs off his shoulder and he's back into guard - no problem.
That's two minutes gone in the round.
Snow has a momentary lapse of concentration, allowing Yadav to throw up a leg and lock on what appears to be a pretty tight triangle! Snow is fighting it off but it's all too little too late - Yadav pulls down on the head and he's put Snow to sleep! This one is all over!
Ladies and gentlemen, after 2:22 of round 1, we have a winner by way of Submission (Triangle). Anaconda Yadav!
|
|
|
|
|
|
|
|
|
|
|
|
|
|
|
|
|
|
|
|
|
|
|
| S |
C
A |
G |
S |
C
B |
G |
|
S |
C |
G |
|
energy
A | B |
|
hype
A | B |
|
pop
A | B |
|
mgr
A | B |
|
FIGHT
RATING
52% |
|
|
|
|
|
|
|
Main event
|
Coming up we have a bantamweight MMA rules bout between Valerio Bertoto (ranked 0 p4p, 0 weight class) and Emilio Del Geno (ranked 0 p4p, 0 weight class). Del Geno has chosen Santino Marella - La Vittoria as his entrance music. There are an array of beautiful celebrities at ringside tonight! I wonder if any of them paid for their tickets.
 |
|
 |
| 180 cm
27
140 lbs
10 - 3 - 0 |
|
159 cm
28
146 lbs
14 - 3 - 0 |
Good wrestling
Basic striking
Cardio machine |
|
ADCC Champion
Basic striking
Powerful |
|
| |
|
Ladies and gentlemen. This fight is 5 rounds, for the bantamweight championship of the world!
Introducing the champion to my left, fighting out of the red corner.
With a record of
10 - 3 - 0, fighting out of Montreal, Valerio Bertoto!
And introducing the challenger to my right, fighting out of the blue corner.
With a record of
14 - 3 - 0, fighting out of Montreal, Emilio Del Geno!
The judges for this bout are Steve Smith, Gregory Folan and Elvis Blanc.
The bell rings for round one and we are underway!
Bertoto closes the distance and looks for a trip takedown... aaaand he's got it - Bertoto lands in his opponent's guard.
Del Geno working a defensive guard here.
Bertoto postures up in Del Geno's guard and throws a big left but Del Geno blocks it.
Del Geno tries to land a sweep but no joy.
Bertoto will need to keep those long limbs tucked in whilst he's on the ground, to prevent any submissions.
Bertoto trying to control but Del Geno is working from the bottom.
Bertoto really does look like a pencil wearing a pair of gloves. Let's hope he has a gameplan to suit that ridiculous body shape.
Del Geno looking to sweep here. No luck so far.
Bertoto trying to control the position from guard on top but Del Geno is wriggling around, looking for whatever he can.
Del Geno looking for a sweep. Not yet Del Geno, not yet.
Bertoto in full guard, throwing the ground and pound. No damage this time.
Del Geno lands a beautiful switch and he's in full mount! That could spell trouble for Bertoto!
Bertoto keeping his composure momentarily, calmly looking to get back to half guard.
Bertoto tries to hold on but Del Geno postures up.
Both fighters really going for it on the ground here!
That's one minute gone in the round.
Bertoto is looking to improve his position but Del Geno isn't that keen on the idea.
Del Geno looking to control but Bertoto is working nicely, looking to advance position himself.
Bertoto is desperately trying to get back to half guard.
Bertoto gets back to half guard.
Del Geno not landing any meaningful shots this time.
Bertoto gets back to full guard.
Del Geno throwing strikes from guard but Bertoto blocks nicely.
Bertoto had isolated an arm as going for a kimura. Del Geno defends it easily.
Del Geno trying to control but Bertoto is working from the bottom.
Del Geno is pushing down on Bertoto's leg trying to pass to half guard. Bertoto is fighting to maintain full guard but Del Geno has managed to sneak the leg through.
That's two minutes gone in the round.
Bertoto is trying to control but can't.
Bertoto wants to get back to full guard.
Del Geno passes the guard and advances to mount!
BOOM! Del Geno connects with a massive shot to the dome!
This has been an exciting period of action!
Bertoto working to try and regain half guard.
Del Geno trying to control but he's not successful this time.
Bertoto takes a big shot to the head but keeps on trying to improve his position.
Del Geno has the superior BJJ but he's also working some ground strikes into his gameplan.
Del Geno unloading with bombs!
Bertoto wants to control but Del Geno is having none of it.
Bertoto is in all sorts of trouble here.
Del Geno lands a shot to the body, followed up by a shot to the exposed head of his trapped opponent.
Bertoto is rocked!
Bertoto takes a big shot to the dome and his eyes have rolled back in his head! Del Geno's killer instinct has kicked in as he finishes the fight with more strikes. Impressive finish.
Ladies and gentlemen, after 3:58 of round 1, we have a winner by way of TKO (Strikes). Emilio Del Geno! Emilio Del Geno retains his bantamweight title!
Our winner, Emilio Del Geno, made sure he spent some time buttering up the crowd during his post fight interview, which will no doubt bring him a few more fans.
|
|
|
|
|
|
|
|
|
|
|
|
|
|
|
|
|
|
|
|
|
|
|
| S |
C
A |
G |
S |
C
B |
G |
|
S |
C |
G |
|
energy
A | B |
|
hype
A | B |
|
pop
A | B |
|
mgr
A | B |
|
FIGHT
RATING
74% |
|
|
|
|
|
|
|
|
|
|

