 |
TUOW10: Saturday Night Fever PBP Commentary |
Undercard bout
|
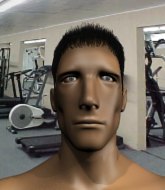
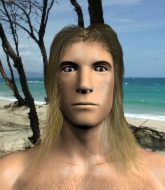
Coming up we have a welterweight MMA rules bout between Chips Salsa (ranked 0 p4p, 0 weight class) and Davy Geerts (ranked 0 p4p, 0 weight class). Both fighter's entrance songs getting the crowd jumping here.
 |
|
 |
| 185 cm
18
170 lbs
1 - 0 - 0 |
|
175 cm
18
170 lbs
4 - 0 - 0 |
BJJ Blue Belt
Brawler
Cuts easily |
|
BJJ Purple Belt
Counter striker
Determined |
|
| |
|
Ladies and gentlemen. This fight is 3 rounds, in the welterweight division.
Introducing the fighter to my left, fighting out of the red corner.
With a record of
1 - 0 - 0, fighting out of Tokyo, Chips Salsa!
And introducing the fighter to my right, fighting out of the blue corner.
With a record of
4 - 0 - 0, fighting out of Tokyo, Davy Geerts!
The judges for this bout are Yasuomi Hirokawa, Shirou Masuda and Yukihiro Yamamoto.

The bell rings for round one and we are underway!

Salsa gets taken down but at least he's managed to land in guard.
Salsa looks exhausted already! Oh dear, he should have come in in better shape than this!
Geerts loading up with the ground and pound but he's missing more than he's landing in this flurry.
Salsa wants to stand but Geerts is controlling the position.
Geerts pressing down on his opponent's thigh, looking to pass guard. Salsa is keeping the position for now.
Salsa keeping moving, preventing Geerts from controlling successfully.
The ref warns both fighters not to hold the cage as they work up against the meshing.
Geerts has decided he wants to stand but the closed guard of Salsa is proving hard to escape from.
Salsa keeping moving, preventing Geerts from controlling successfully.
Geerts tries to free his leg and advance position but Salsa is retaining full guard.

It looks like we're going to have a standup here. Neither fight is doing enough on the ground.
Salsa tries to clinch up.
Geerts shoots in but no luck this time.

That's one minute gone in the round.
Geerts shoots in and drives through. Salsa sprawls well.
Geerts shoots in with a takedown attempt and he has Salsa pinned against the cage. Salsa gets the underhooks and manages to circle away.
Chips Salsa has stuffed three takedown attempts in the round now. That's going to take a lot out of Davy Geerts.
Salsa fails in his attempt to clinch.
Geerts shoots in for a takedown and gets it. Oh and he's advanced to full mount straight away.
Salsa is squirming around, avoiding Geerts's attempts to control the action.

Geerts jumps to the side looking to secure the arm triangle
. Ooooh, that looks tight
Salsa is gargling but he's managed to escape! Nice work there by Salsa and Geerts has given up the dominant position trying to land that submission.
Geerts misses with an attempted head punch from side control.
Geerts is working to tighten is grip on Salsa's neck. He's isolated an arm and is working for an arm triangle. Salsa has recognised the danger and is trying to turn with the submission but Geerts is really squeezing tight and eventually Salsa passes out! Geerts breaks the hold and jumps onto the cage to celebrate! Submission of the night, I'd say!
Ladies and gentlemen, after 2:05 of round 1, we have a winner by way of Submission (Arm Triangle). Davy Geerts!
|
|
|
|
|
|
|
|
|
|
|
|
|
|
|
|
|
|
|
|
|
|
|
| S |
C
A |
G |
S |
C
B |
G |
|
S |
C |
G |
|
energy
A | B |
|
hype
A | B |
|
pop
A | B |
|
mgr
A | B |
|
FIGHT
RATING
45% |
|
|
|
|
|
|
|
Undercard bout
|
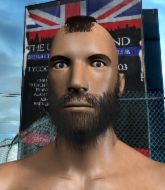
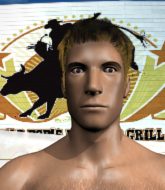
Coming up we have a featherweight MMA rules bout between Davy Mitshubishi (ranked 0 p4p, 0 weight class) and Bobo Plata (ranked 0 p4p, 0 weight class). Davy Mitshubishi had a look across the cage there at his opponent. He definitely means business
 |
|
 |
| 185 cm
22
145 lbs
1 - 2 - 0 |
|
180 cm
18
145 lbs
0 - 1 - 0 |
BJJ Blue Belt
Brawler
Big heart |
|
BJJ Blue Belt
Basic striking
Very confident |
|
| |
|
Ladies and gentlemen. This fight is 3 rounds, in the featherweight division.
Introducing the fighter to my left, fighting out of the red corner.
With a record of
1 - 2 - 0, fighting out of Tokyo, Davy Mitshubishi!
And introducing the fighter to my right, fighting out of the blue corner.
With a record of
0 - 1 - 0, fighting out of Tokyo, Bobo Plata!
The judges for this bout are Yuuki Gou, Shirou Masuda and Shigeki Fujiwara.
The bell rings for round one and we are underway!
Mitshubishi throws a combination but it was largely blocked by Plata.
Plata shoots in for a takedown. "I don't think so" says Mitshubishi as he avoids it easily.
Plata fails with a takedown attempt from distance.
Plata misses with the combination.
Mitshubishi connects with a looping right hand.
Mitshubishi lands with a head kick! That's gotta hurt.

Plata drives through and clinches with Mitshubishi against the cage.
Plata tries to land a shot to the body but it's blocked.
Mitshubishi wants to break the clinch but can't.

Mitshubishi breaks the clinch.
Mitshubishi really does look like a pencil wearing a pair of gloves. Let's hope he has a gameplan to suit that ridiculous body shape.
Mitshubishi misses with a takedown attempt. He shot from a bit too far out.
A punch combination from Plata misses.
Plata scores with a jab.
Mitshubishi wants to clinch.
Mitshubishi takes the fight into the clinch.
Plata is trying to break free.
Mitshubishi has a couple of punches blocked by Plata.
Plata wants to strike at distance but he can't break free of the clinch.
That's one minute gone in the round.
Mitshubishi is working for takedown but Plata is calmly controlling the position for now.
Mitshubishi turns his hips and lands a very nice judo throw into side control!
Mitshubishi is looking for a kimura. He might have it! No, Plata has escaped the position, nice work there.
Plata is pushing Mitshubishi's head away, looking to escape. Mitshubishi manages to hold on to the position though.
Plata looks to move to half guard but instead Mitshubishi has passed into mount! Damn!
Mitshubishi looking to control but Plata is working nicely, looking to advance position himself.
Plata tries to improve his position but instead Mitshubishi has taken his back!
Plata tries to roll but Mitshubishi sticks to his back.
Plata is persisting with the attempt to improve his position.
Plata looks gassed!

That's two minutes gone in the round.
Mitshubishi looking for the RNC.
Plata tries to escape the position - he's now mounted. Is that better or worse? Hard to tell!
Plata is looking to get to half guard.
BOOM! Mitshubishi connects with a massive shot to the dome!
Mitshubishi controlling his opponent.
The ref warns both fighters not to hold the cage as they work up against the meshing.
Mitshubishi with good strikes from the mount here!
Mitshubishi tries to control but Plata wriggling away.
Plata wants to hold on but Mitshubishi pushes him away.
The crowd growing excited in anticipation of a finish here! Right on cue, Mitshubishi cracks his opponent with a massive right hand that draws loud cheers!

That's three minutes gone in the round.
Mitshubishi trying to control but he's not successful this time.
Mitshubishi controlling from the full mount.
Mitshubishi is still in mount, landing shots to his trapped opponent. Plata can't stay in a position like this for much longer.
Plata can't escape the position.

Mitshubishi get's back to his feet.
Mitshubishi swings wildly with a right hand that was never going to find it's target.
Plata gets caught flat footed, as Mitshubishi shoots in with a quick takedown into guard.
Mitshubishi trying to control but Plata is working from the bottom.
Plata pushes Mitshubishi off and gets back to his feet.
Bobo Plata seems to be the more aggressive standup fighter in this bout.
Mitshubishi changes levels and drives through with a really nice takedown into side control. Plata looks really pissed at himself for not defending that better.

That's four minutes gone in the round.
A control attempt from Plata but he's now mounted!
Plata tries to hold on but Mitshubishi pushes him away.
Mitshubishi controlling the position easily from mount.
Plata is looking to improve his position but Mitshubishi isn't that keen on the idea.
Plata is writhing around trying to get back to his feet.
Plata is not a happy chappy
he wants out of there.
Plata tries to get back to half guard but can't.
Mitshubishi looking to secure an arm triangle but Plata defends it well.
The crowd applaud the fighters efforts here as the round comes to an end.
Plata tries to lock up and control but Mitshubishi gives him a forearm to the face and pushes him away.
And thats the end of the round the fighters go back to their corners.
Davy Mitshubishi dominated that round.
That's the end of the round. The referee orders the cornermen out of the cage so we can get back down to business.

Plata closes the distance but Mitshubishi moves to the side
and Mitshubishi counters with a nice single leg takedown and he's in Plata's guard now.
Plata looking to hit a scissor sweep but Mitshubishi is one step ahead there.
Plata wants to get back to his feet but Mitshubishi is in a dominant position and won't allow it.
Plata keeping moving, preventing Mitshubishi from controlling successfully.
Plata is working the butterfly guard. He manages to land a nice scissor sweep and is now in half guard on the top. Nice move.
Mitshubishi regains full guard. Nicely done.
Davy Mitshubishi overall seems to be getting the better of the ground position in the fight so far.
Mitshubishi managing to control the position.
Plata trying to stand up but can't free himself from Mitshubishi's guard.
The fighters are pressed up against the cage, both looking to find a bit of space to work.
That's one minute gone in the round.
Mitshubishi throws some shots to the body, keeping his opponent honest.
Plata is breathing heavily.
Plata is holding a leg here, probably looking for an ankle lock - he drops back and goes for it! Mitshubishi is in trouble! Is it all over??? No! Mitshubishi has escaped and now he's on top!
Plata working a defensive guard here.
Mitshubishi landing with the ground and pound.
Mitshubishi seems content to control from guard here. He's going to have to remain active though if he doesn't want to get stood back up.
Mitshubishi preventing the sweep.
That's two minutes gone in the round.
A few boos can be heard. I'm sure they will multiply if the fighters don't pick up the pace.
Plata trying to control the position.
Plata wants to sweep but no luck.
Plata working from the bottom, still in full guard. He's managed to get a loose triangle. Mitshubishi doesn't seem to be doing much to defend here, obviously he feels comfortable in the position. Mitshubishi manages to throw the legs off his shoulder and he's back into guard - no problem.
Mitshubishi preventing the sweep.
The referee has ruled that neither fighter is active enough on the ground and has stood them back up.
Mitshubishi shoots in for a takedown - he's clinched up with Plata but Plata pushes him off and we're back to square one.
Davy Mitshubishi is looking to throw some combinations by the looks of things.
Plata throws a hook but Mitshubishi avoids it easily.
Mitshubishi jabbing away but nothing is landing.
Mitshubishi lands a with a good body shot.
Plata has taken the fight to the clinch.
Mitshubishi tries to take the fight to the ground by pulling guard but can't manage it.
A head punch blocked on the inside by Mitshubishi.
Plata fails to pull guard.
Mitshubishi jumps into guard, dragging Plata to the mat.
A big thud reverberates around the arena there as Plata accidentally thumps the mat. Hopefully he's not broken his hand.
That's three minutes gone in the round.
Plata tries to stand but Mitshubishi is controlling from the bottom.
Mitshubishi controlling Plata's posture.
Plata wants to control from the top but Mitshubishi keeps moving.
Mitshubishi is trying to control the position from the bottom.
Plata trying to stand up but can't free himself from Mitshubishi's guard.
Mitshubishi pulls Plata in close to prevent any damage.
Mitshubishi keeping moving, preventing Plata from controlling successfully.
The referee has ruled that neither fighter is active enough on the ground and has stood them back up.
Mitshubishi tries to clinch up.
That's four minutes gone in the round.
There's not a lot going on here and the crowd are letting the fighters know they're not willing to tolerate a lack of action.
Plata clinches up with Mitshubishi and pushes him back against the cage.
Mitshubishi can't get the takedown.
That's three failed takedown attempts in the round for Davy Mitshubishi. That's going to take a lot out of him.
Plata makes some space for himself and lands an uppercut.
Plata escapes the clinch and we're back to striking.
Nice jab there from Plata.
Plata shoots in and gets a takedown into half guard. Plata showed some decent athleticism there.
Plata thows a huge punch but Mitshubishi dodges it nicely.
Mitshubishi is in trouble now - Plata has advanced to mount!
Mitshubishi wriggling around on the bottom manages to avoid the strikes thrown by Plata.
Plata stands up from mount. Strange move.
Plata swings wildly with a hook that is half blocked by Mitshubishi.
Mitshubishi feints and as Plata raises his hands in defense, Mitshubishi changes levels and drives through with a takedown into guard.
Mitshubishi advances position into side control!
And thats the end of the round the fighters go back to their corners.
That was a close second round but I would say that Davy Mitshubishi will probably get the nod.
OK. That's time! The bell goes and we're back to the action. Let's hear some noise people - this is the final round!

Mitshubishi clinches but Plata breaks the clinch
and Plata counters with a nice shoot takedown that brings the fighters to the ground.
Mitshubishi is trying to keep Plata in close.
Mitshubishi has a closed guard, preventing Plata from standing up.
Mitshubishi keeping moving, preventing Plata from controlling successfully.
Mitshubishi manages to escape and get back to his feet.
Mitshubishi looks for a takedown but Plata sprawls well.
Mitshubishi tries for a takedown but Plata sees it coming a mile off and avoids it easily.
Both fighters are breathing heavily.
Plata tries to clinch up.
Mitshubishi shoots in and drives through. Plata sprawls well.
That's three failed takedown attempts in the round for Davy Mitshubishi. That's going to take a lot out of him.
Mitshubishi shoots in but Plata avoids the takedown attempt easily.
Plata misses with a combination
and Mitshubishi counters with a shoot takedown into half guard.
That's one minute gone in the round.
Plata regains full guard. Nicely done.
Plata working a defensive guard here.
Plata has an omoplata and is looking to use it perhaps as a submission or perhaps to transition. Mitshubishi is in a bit of discomfort here, but he's managed to free himself and has dived into side control! That didn't work out too well for Plata.
Mitshubishi controlling the position from side mount.
Mitshubishi wants to lay and pray for a moment but Plata keeps working.
Plata is trying to get back to half guard.
You can see the frustration on Plata's face, being in this tough position on the bottom.
That's two minutes gone in the round.
A lull in the action here being met with boos from the crowd.
Plata gives up the full mount - oops, sloppy defensive grappling there!
Plata is squirming around, avoiding Mitshubishi's attempts to control the action.
Plata has given up his back, trying to stand up. Not clever.
Mitshubishi controlling the position well here. Plata rolled but Mitshubishi kept the hooks locked in and stayed in the dominant position.
Mitshubishi lands with a couple of good shots - one to the side of the head and one questionable shot that could be viewed as to the back of the head but the referee lets it go.
Mitshubishi is working really hard to secure the rear naked choke. Plata defends successfully for a significant amount of time. Both fighters are looking very determined.
Mitshubishi is working the ground and pound here and the referee is taking a close look at Plata. He must escape soon or this one will be stopped.
That's three minutes gone in the round.
Mitshubishi gets his hands free as Plata looks to control.
Mitshubishi lands strikes to the head.
Mitshubishi really has the hooks in deep now - there seems like no escape for Plata.
Mitshubishi trying to control momentarily.
Mitshubishi is cranking Plata's head sideways - that looks painful. He's managed to get his other arm under the chin and this looks bad for Plata! He's tightened the choke and Plata is tapping out!
Ladies and gentlemen, after 3:44 of round 3, we have a winner by way of Submission (RNC). Davy Mitshubishi!
|
|
|
|
|
|
|
|
|
|
|
|
|
|
|
|
|
|
|
|
|
|
|
| S |
C
A |
G |
S |
C
B |
G |
|
S |
C |
G |
|
energy
A | B |
|
hype
A | B |
|
pop
A | B |
|
mgr
A | B |
|
FIGHT
RATING
71% |
|
|
|
|
|
|
|
Undercard bout
|
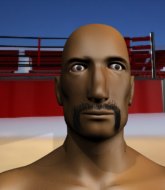
Coming up we have a light heavyweight MMA rules bout between Muay Plata (ranked 0 p4p, 0 weight class) and Turbo Rulez (ranked 0 p4p, 0 weight class). Over to our ring announcer for the fighter introductions!
 |
|
 |
| 183 cm
20
195 lbs
0 - 0 - 0 |
|
190 cm
20
210 lbs
1 - 2 - 0 |
BJJ White Belt
Brawler
Inexperienced |
|
BJJ Blue Belt
Brawler
Granite chin |
|
| |
|
Ladies and gentlemen. This fight is 3 rounds, in the light heavyweight division.
Introducing the fighter to my left, fighting out of the red corner.
With a record of
0 - 0 - 0, fighting out of Tokyo, Muay Plata!
And introducing the fighter to my right, fighting out of the blue corner.
With a record of
1 - 2 - 0, fighting out of Tokyo, Turbo Rulez!
The judges for this bout are Sosuke Kotani, Ren Mimura and Shirou Masuda.
The bell rings for round one and we are underway!
Rulez instigates a clinch.
Plata breaks the clinch.
Plata goes for a high kick. It partially lands.
Plata cracks Rulez with a big right hand that sends him crashing to the floor. Plata has the opportunity to follow him to the ground but instead he's beckoning Rulez to stand back up!

Rulez is rocked!
Wooooo! Give it up for these two warriors! They are putting on a show!
A solid body kick from Plata.
Rulez is still on wobbly legs! Can Plata finish him?
Rulez looks gassed!
Plata throws a pinpoint strike between Rulez's hands that connects right on the jaw and sends Rulez crashing to the floor! He's out before he even hits the mat and Plata scores a great knockout victory!
Ladies and gentlemen, after 0:17 of round 1, we have a winner by way of KO (Punch). Muay Plata!
|
|
|
|
|
|
|
|
|
|
|
|
|
|
|
|
|
|
|
|
|
|
|
| S |
C
A |
G |
S |
C
B |
G |
|
S |
C |
G |
|
energy
A | B |
|
hype
A | B |
|
pop
A | B |
|
mgr
A | B |
|
FIGHT
RATING
100% |
|
|
|
|
|
|
|
Undercard bout
|
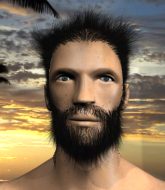
Coming up we have a middleweight MMA rules bout between Samuel Paelinck (ranked 0 p4p, 0 weight class) and Jet Lee (ranked 0 p4p, 0 weight class). Jet Lee has the power to score a knockout today if he connects clean with Samuel Paelinck's chin.
 |
|
 |
| 175 cm
18
185 lbs
2 - 2 - 0 |
|
170 cm
22
180 lbs
0 - 2 - 0 |
BJJ Blue Belt
Brawler
Cuts easily |
|
BJJ White Belt
Excellent boxer
Tends to cut |
|
| |
|
Ladies and gentlemen. This fight is 3 rounds, in the middleweight division.
Introducing the fighter to my left, fighting out of the red corner.
With a record of
2 - 2 - 0, fighting out of Tokyo, Samuel Paelinck!
And introducing the fighter to my right, fighting out of the blue corner.
With a record of
0 - 2 - 0, fighting out of Tokyo, Jet Lee!
The judges for this bout are Hirohito Nitta, Yasuomi Hirokawa and Tatsuya Matsuyama.
The bell rings for round one and we are underway!
Lee lands with a kick to the ribs.
Lee should think about turning a few of those tyres round his middle into muscle if he wants people to take him seriously as an athlete.
Lee misses with a body kick.
Lee fails in his attempt to clinch.
Paelinck has taken the fight to the clinch.
Paelinck lands a nice looking hook to the body, against the cage.
Paelinck breaks the clinch.
Paelinck scores with a takedown into Lee's guard.
Lee keeping full guard, as Paelinck tries to pass.
Paelinck passes Lee's right leg, so he's now in half guard.
Paelinck controlling the action here.
Paelinck stands up and beckons Lee to join him on the feet.
Lee scores with a kick to the body.
Lee misses with a takedown attempt. He shot from a bit too far out.
Lee checks the leg kick nicely there.
Paelinck has his head slapped from side to side by a 3 punch combination. That must have hurt him.
That's one minute gone in the round.
Nice body kick from Lee.
Paelinck shoots in and gets a takedown into half guard. Paelinck showed some decent athleticism there.
Lee flails away from the bottom but he's not doing any damage.
The ref warns both fighters not to hold the cage as they work up against the meshing.
Lee is trying to stand up here but Paelinck is controlling him well.
Paelinck escapes and gets back to his feet.
Lee lands with a two punch combination before moving back out of range.
Samuel Paelinck seems to be the more aggressive standup fighter in this bout.
A solid body kick from Lee.
Paelinck tries for a takedown but Lee sees it coming a mile off and avoids it easily.
Paelinck fails miserably with a takedown attempt.
Paelinck is breathing heavily.
Paelinck throws a combination but comes up with nothing but fresh air.
Paelinck shoots in for a takedown and gets it. Let's see what he's got on the mat.
Lee really doesn't want to stay on the ground with Paelinck. If he can't get it back to his feet, it's only a matter of time before he'll be tapping out.
Lee tries to land a sweep but no joy.
Paelinck sitting in guard, not really doing much.
Lee wants to sweep but no luck.
Paelinck not doing a lot at the moment. He'll have to show some more aggression or the fight will get stood up.
That's two minutes gone in the round.
Paelinck makes a bit of distance and scores with some ground and pound, still in guard.
Paelinck sitting in guard, not really doing much.
Paelinck slips nicely into half guard.
Paelinck gets to his feet - back to striking we go!
Wooooo! Give it up for these two warriors! They are putting on a show!
Lee keeps Paelinck at a distance using the push kick.
Paelinck tries a head kick but it misses.
Paelinck throws a wild combination but nothing lands.
Paelinck takes a nasty kick to the mid section... That should keep him thinking. Does he try and block and risk a head kick landing?
Paelinck sees a low kick coming and goes to check it, but it's actually a body kick and it thuds into his unprotected ribs.
Lee lands a nice looking kick to the body. Paelinck takes a step back to recover.
Paelinck closes the distance and looks for a trip takedown... aaaand he's got it - Paelinck lands in his opponent's guard.
That's three minutes gone in the round.
Lee keeping full guard, as Paelinck tries to pass.
Lee wants to get back to his feet but Paelinck is in a dominant position and won't allow it.
Lee looking to hit a scissor sweep but Paelinck is one step ahead there.
Lee is looking to stand up but Paelinck isn't so interested in that idea.
Paelinck passes Lee's left leg - he's now in half guard.
Paelinck wants to take a breather but Lee is having none of it.
Paelinck is looking to pass the guard... He's managed it - he's now in full mount!
The fighters are pressed up against the cage, both looking to find a bit of space to work.
Paelinck controlling from mount.
That's four minutes gone in the round.
A few boos can be heard. I'm sure they will multiply if the fighters don't pick up the pace.
Lee wants to try and get back to his feet.
Paelinck is in full mount, looking to secure a guillotine but Lee is surviving well by controlling Paelinck's body position as best he can.
Lee wants to try and get back to his feet.
Paelinck looking to secure an arm triangle but Lee defends it well.
Lee is trying desperately to improve position.
Paelinck content just to control the position here.
As the round comes to an end the crowd are showing their appreciation for a great round of action.
Paelinck is working close to his opponent, looking to work a submission by the looks of things. Oh, he's managed to get a guillotine from mount as his opponent reached up! That looks tiiiiight! Will he tap? YES, he's tapped! Impressive submission by Paelinck!
Ladies and gentlemen, after 4:56 of round 1, we have a winner by way of Submission (Guillotine). Samuel Paelinck!
|
|
|
|
|
|
|
|
|
|
|
|
|
|
|
|
|
|
|
|
|
|
|
| S |
C
A |
G |
S |
C
B |
G |
|
S |
C |
G |
|
energy
A | B |
|
hype
A | B |
|
pop
A | B |
|
mgr
A | B |
|
FIGHT
RATING
60% |
|
|
|
|
|
|
|
Undercard bout
|
Coming up we have a light heavyweight MMA rules bout between Belin Billet (ranked 0 p4p, 0 weight class) and Harry Bakker (ranked 0 p4p, 0 weight class). Belin Billet has the better chin. Will he look to stand and bang today?
 |
|
 |
| 185 cm
19
205 lbs
2 - 0 - 1 |
|
190 cm
22
210 lbs
0 - 2 - 1 |
BJJ Blue Belt
Counter striker
Granite chin |
|
BJJ Blue Belt
Nice elbows
Heavy handed |
|
| |
|
Ladies and gentlemen. This fight is 3 rounds, in the light heavyweight division.
Introducing the fighter to my left, fighting out of the red corner.
With a record of
2 - 0 - 1, fighting out of Tokyo, Belin Billet!
And introducing the fighter to my right, fighting out of the blue corner.
With a record of
0 - 2 - 1, fighting out of Tokyo, Harry Bakker!
The judges for this bout are Sosuke Kotani, Hirohito Nitta and Shirou Masuda.
The bell rings for round one and we are underway!
Billet looks to score with a combo but nothing lands.
Billet circles away from the clinch attempt.
Bakker circles away from the clinch attempt.
Billet throws a looping left and ducks down for a takedown. He's got his arms around Bakker's waist but Billet gets an underhook and avoids the takedown by throwing Billet off to one side.
Billet swinging wilding here.
Billet misses with a jab, cross combination.
Bakker drives through with a really nice takedown into side control.
Billet is not in a great position here, taking some shots.
Bakker really doesn't want to stay on the ground with Billet. If he can't get it back to his feet, it's only a matter of time before he'll be tapping out.
Billet is positioning himself to get back to half guard.
Billet is working hard here to advance position.
That's one minute gone in the round.
Bakker tries for a kimura. Not really close to a finish though.
Bakker trying to control the action but Billet is working from the bottom.
Billet is trying to get back to half guard.
The referee decides to stand the fighters back up.
Billet fails with an attempt to clinch.
Bakker with a poor takedown
and Billet counters with a three punch combination, finished off with a leg kick. Nice work.
Bakker misses with a takedown attempt
and Billet counters with a head kick.
Bakker looks gassed!
Bakker shoots and misses
and Billet counters with a driving takedown into guard. Nice work there by Billet.
Belin Billet has stuffed three takedown attempts in the round now. That's going to take a lot out of Harry Bakker.
Billet wants to pass the guard but Bakker is keeping the position.
That's two minutes gone in the round.
Billet drops back for a leg! It's a sloppy attempt though and Billet jumps back into guard quickly, to retain the dominant position.
Billet trying to pass the guard but can't manage it just yet.
Billet thinks about going for a leg but decides against it, in order to maintain the position.
Billet drops back looking for a leg! Bakker is in trouble here! The fighters roll with the hold and Bakker manages to kick Billet off! Billet jumps back into Bakker's guard.
Billet passes Bakker's left leg - he's now in half guard.
Billet wants to pass the guard but Bakker is defending well.
Billet works his way into full mount!
Billet is in full mount, looking to secure a guillotine but Bakker is surviving well by controlling Billet's body position as best he can.
The fighters are pressed up against the cage, both looking to find a bit of space to work.
That's three minutes gone in the round.
Billet wants to take his opponent's back but he's not managed it.
Bakker is trying desperately to improve position.
Bakker sneaks a leg under to get to half guard.
Billet is looking for a kimura. It's going to be difficult to finish that from half guard though and Bakker defends it well.
Bakker is trying to stand back up but Billet is controlling him
That's four minutes gone in the round.
Neither fighter has done anything of merit for a good minute or two here and the crowd are not happy about it.
Billet wants to work for an arm triangle but Bakker is really keeping half guard well and defending the submission attempt.
Billet trying to mount his opponent but Bakker defends it.
Bakker has no desire to be mounted, so is trying to control. Billet is working away from the top position though.
Bakker is controlling Billet's position as best he can from this difficult position.
Billet is working for a kimura but Bakker is defending it quite comfortably.
Bakker moves into full guard.
Billet drops back looking for a submission - "I'm sorry sir, but I'm gunna break your leg" says Billet as he cranks on the unfortunate limb! Bakker screams and taps out before any major damage is done! Don't mess with Billet! Nice submission victory there!
Ladies and gentlemen, after 4:55 of round 1, we have a winner by way of Submission (Kneebar). Belin Billet!
|
|
|
|
|
|
|
|
|
|
|
|
|
|
|
|
|
|
|
|
|
|
|
| S |
C
A |
G |
S |
C
B |
G |
|
S |
C |
G |
|
energy
A | B |
|
hype
A | B |
|
pop
A | B |
|
mgr
A | B |
|
FIGHT
RATING
45% |
|
|
|
|
|
|
|
Undercard bout
|
|
|
|
Undercard bout
|
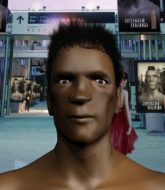
Coming up we have a welterweight MMA rules bout between Badr Hari (ranked 0 p4p, 0 weight class) and Yamapi Chan (ranked 0 p4p, 0 weight class). Both fighters will be looking to make this an exciting fight for the fans, I'm sure!
 |
|
 |
| 195 cm
20
165 lbs
0 - 2 - 1 |
|
173 cm
18
165 lbs
0 - 2 - 0 |
BJJ Blue Belt
Brawler
Intelligent |
|
BJJ Blue Belt
Basic striking
Solid chin |
|
| |
|
Ladies and gentlemen. This fight is 3 rounds, in the welterweight division.
Introducing the fighter to my left, fighting out of the red corner.
With a record of
0 - 2 - 1, fighting out of Tokyo, Badr Hari!
And introducing the fighter to my right, fighting out of the blue corner.
With a record of
0 - 2 - 0, fighting out of Tokyo, Yamapi Chan!
The judges for this bout are Yasuomi Hirokawa, Yukihiro Shimada and Hirohito Nitta.
The bell rings for round one and we are underway!
Chan has closed the distance and engaged Hari in a clinch.
Hari really does look like a pencil wearing a pair of gloves. Let's hope he has a gameplan to suit that ridiculous body shape.
Hari tries for a takedown. No joy.
Chan is working on a single leg takedown against the cage. Hari can't fight it off and eventually Chan manages to take the fight to the floor. Hari looks annoyed but at least he's managed to land in guard.
Hari looking to hit a scissor sweep but Chan is one step ahead there.
Hari working a defensive guard but Chan manages to pass into side control anyway.
Hari prevents Chan from moving into mount.
Chan wants to lay and pray for a moment but Hari keeps working.
Hari is looking for a sweep.
Hari struggling a bit here.
Hari is looking for a sweep.
Chan throws an elbow but Hari slips to the side and avoids it well.
The fighters are pressed up against the cage, both looking to find a bit of space to work.
Neither fighter is doing enough for the referee's liking and he's decided to stand them back up.
Hari tries to clinch up.
That's one minute gone in the round.
Chan swats away the attempt to clinch by Hari.
Chan drives through with a takedown into guard.
Hari working the defensive guard well to avoid strikes from Chan.
Chan stopping the sweep attempt from Hari.
Hari is trying to control the position but Chan postures up.
Hari will need to keep those long limbs tucked in whilst he's on the ground, to prevent any submissions.
A big thud reverberates around the arena there as Chan accidentally thumps the mat. Hopefully he's not broken his hand.
Hari working for a triangle but Chan defends it easily.
Chan wants to pass the guard but Hari is keeping the position.
Hari keeping moving, preventing Chan from controlling successfully.
That's two minutes gone in the round.
Chan would like to get this fight back to the feet but can't get free from the closed guard.
The referee has ruled that neither fighter is active enough on the ground and has stood them back up.
Hari feints with a shoulder and throws a nice leg kick to Chan's calf.
Hari tries to clinch there but Chan circles away.
Hari has a takedown stuffed.
Yamapi Chan seems to be the more aggressive standup fighter in this bout.
Hari bobs and weaves into range and then changes levels and scores with a nice takedown into side control.
Hari is breathing heavily.
Hari stands up and beckons Chan to his feet.
Chan shoots in for a takedown but doesn't get it.
Hari looks to clinch
and Chan counters with a left and a right that stings Hari.
Hari gets his takedown attempt stuffed easily
and Chan counters with a one-two to the body.
That's three failed takedown attempts in the round for Badr Hari. That's going to take a lot out of him.
Chan feints and as Hari raises his hands in defense, Chan changes levels and drives through with a takedown into guard.
The fans in attendance giving it up for the two fighters, who have really let it all hang out in the last minute or so!
Hari is looking to get back to his feet but can't, whilst Chan is controlling him.
Hari looking to control.
That's three minutes gone in the round.
Hari throws a couple of weedy looking strikes off his back.
Chan controlling from the guard. I say controlling but really, he's stalling.
There's a bit of a scramble here and now Hari is on top in guard.
Hari trying to control but Chan is working from the bottom.
Hari advances to half guard.
Hari wants to free his trapped foot but Chan is holding on for dear life with his legs.
Chan is looking to improve his position.
Hari wants to free his trapped foot but Chan is holding on for dear life with his legs.
That's four minutes gone in the round.
My god... these two guys really need to pick up the pace or everyone will leave to go get a beer.
Hari frees up his trapped foot and advances to mount.
The ref warns both fighters not to hold the cage as they work up against the meshing.
Hari is in full mount, looking to secure a guillotine but Chan is surviving well by controlling Hari's body position as best he can.
Hari wants to control the pace but Chan is squirming around nicely.
Hari controlling from the full mount.
Chan keeping his composure momentarily, calmly looking to get back to half guard.
Hari can't quite control the action as he would like just now, as Chan is looking to escape.
And thats the end of the round the fighters go back to their corners.
A close round but Yamapi Chan will probably get the nod.
That's the end of the interval. I'm sure that seemed a lot quicker than a minute for our two fighters! Back to the action.
Hari misses with a takedown attempt
and Chan counters with a takedown into full mount! That could mean trouble for Hari!
Chan with the ground and pound from mount.
Hari is desperately trying to get back to half guard.
Chan scoring with strikes but Hari is staying in there.
Hari working to try and regain half guard.
Hari is squirming around, avoiding Chan's attempts to control the action.
Hari is wriggling around trying to escape.
Chan tries to control but Hari wriggling away.
Chan with shots to the head and body - Hari looks very uncomfortable down there.
Chan postures up and cracks his opponent a couple of times before moving back into close ground control. Hari looks a forlorn figure.
That's one minute gone in the round.
Chan jumps to the side looking to secure the arm triangle
. Ooooh, that looks tight
Hari is gargling but he's managed to escape! Nice work there by Hari and Chan has given up the dominant position trying to land that submission.
Both fighters are absolutely exhausted here.
Hari struggling a bit here.
Chan lands a knee to the body and follows it up with some ground and pound to the head. That will wear Hari down.
Chan is looking to take a break and control but Hari is keeping him honest, looking to work from the bottom.
Hari manages to get one leg in to regain half guard.
Hari moves his hips nicely and gets into full guard.
Chan has a momentary lapse of concentration, allowing Hari to throw up a leg and lock on what appears to be a pretty tight triangle! Chan is fighting it off but it's all too little too late - Hari pulls down on the head and he's put Chan to sleep! This one is all over!
Ladies and gentlemen, after 2:03 of round 2, we have a winner by way of Submission (Triangle). Badr Hari!
|
|
|
|
|
|
|
|
|
|
|
|
|
|
|
|
|
|
|
|
|
|
|
| S |
C
A |
G |
S |
C
B |
G |
|
S |
C |
G |
|
energy
A | B |
|
hype
A | B |
|
pop
A | B |
|
mgr
A | B |
|
FIGHT
RATING
59% |
|
|
|
|
|
|
|
Undercard bout
|
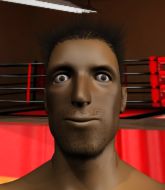
Coming up we have a welterweight MMA rules bout between Festus Sendora (ranked 0 p4p, 0 weight class) and Bruce Black (ranked 0 p4p, 0 weight class). Sendora comes to the cage accompanied by Creed - My sacrifice. Bruce Black acknowledges the crowd's support as he enters the cage.
 |
|
 |
| 181 cm
18
167 lbs
2 - 1 - 0 |
|
195 cm
22
165 lbs
2 - 1 - 0 |
BJJ Blue Belt
Basic striking
Intelligent |
|
BJJ Purple Belt
Brawler
Likes ground |
|
| |
|
Ladies and gentlemen. This fight is 3 rounds, in the welterweight division.
Introducing the fighter to my left, fighting out of the red corner.
With a record of
2 - 1 - 0, fighting out of Tokyo, Festus Sendora!
And introducing the fighter to my right, fighting out of the blue corner.
With a record of
2 - 1 - 0, fighting out of Tokyo, Bruce Black!
The judges for this bout are Taro Takaoka, Yukihiro Shimada and Shigeki Fujiwara.
The bell rings for round one and we are underway!
Black darts in and lands a nice takedown into half guard.
Sendora looking for submissions off his back.
Black takes a deep breath and rests his weight momentarily on top of his opponent, to control the position.
Sendora actively working from the bottom here.
Black stands up from half guard.
Black shoots in for a takedown! He's got it and he's managed to land in full mount! That's better than Black was expecting from the takedown attempt, I'm sure!
Black swings around for an armbar and he's got it! Wow, that came out of nowhere! What a finish!
Ladies and gentlemen, after 0:58 of round 1, we have a winner by way of Submission (Armbar). Bruce Black!
|
|
|
|
|
|
|
|
|
|
|
|
|
|
|
|
|
|
|
|
|
|
|
| S |
C
A |
G |
S |
C
B |
G |
|
S |
C |
G |
|
energy
A | B |
|
hype
A | B |
|
pop
A | B |
|
mgr
A | B |
|
FIGHT
RATING
66% |
|
|
|
|
|
|
|
Co-main event
|
Coming up we have a light heavyweight MMA rules bout between Brian Callaghan (ranked 0 p4p, 0 weight class) and Dimitri Reygaerts (ranked 0 p4p, 0 weight class). Rumors backstage are that the fighters have been paid to keep it standing but we know that would never happen in MMA!
 |
|
 |
| 185 cm
20
195 lbs
0 - 1 - 0 |
|
198 cm
20
204 lbs
2 - 2 - 0 |
BJJ Blue Belt
Counter striker
KO power |
|
BJJ Blue Belt
Brawler
Very confident |
|
| |
|
Ladies and gentlemen. This fight is 3 rounds, in the light heavyweight division.
Introducing the fighter to my left, fighting out of the red corner.
With a record of
0 - 1 - 0, fighting out of Tokyo, Brian Callaghan!
And introducing the fighter to my right, fighting out of the blue corner.
With a record of
2 - 2 - 0, fighting out of Tokyo, Dimitri Reygaerts!
The judges for this bout are Yukihiro Yamamoto, Tatsuya Matsuyama and Shigeki Sano.
The bell rings for round one and we are underway!
Reygaerts tries to clinch but is not successful on this occasion.
Callaghan moves into the clinch.
Callaghan misses with a knee to the head.
Reygaerts is working for takedown but Callaghan is calmly controlling the position for now.
Callaghan tries for a takedown but Reygaerts manages to get underhooks.
Callaghan goes for a takedown attempt but Reygaerts pushes him away and we're back to fighting at a distance.
Reygaerts fails with a rather predictable takedown attempt.
Callaghan looking for a takedown here - he's got it.
Callaghan prevents Reygaerts from getting back to his feet.
Callaghan in full guard, throwing the ground and pound. No damage this time.
Callaghan looking to pass the guard.
Reygaerts keeping moving, preventing Callaghan from controlling successfully.
That's one minute gone in the round.
Callaghan gets to his feet and steps away from his opponent.
Reygaerts wants to clinch
and Callaghan counters by moving into the clinch.
Reygaerts lands a nice uppercut.
Callaghan pulls Reygaerts into guard.
Reygaerts tries to stand but Callaghan is controlling from the bottom.
Reygaerts stands up and waves to Callaghan to follow him.
That's two minutes gone in the round.
Reygaerts misses with a takedown
and Callaghan holds on and brings the fighters into a clinch.
Brian Callaghan has stuffed three takedown attempts in the round now. That's going to take a lot out of Dimitri Reygaerts.
Callaghan breaks from the clinch.
Callaghan shoots in but no luck this time.
Reygaerts gets the takedown into side control.
Callaghan is breathing heavily.
Callaghan wants to get back to his feet.
Reygaerts decides to stand up, so the ref orders Callaghan to his feet.
Reygaerts shoots and misses
and Callaghan counters with a nice single leg takedown and he's in Reygaerts's guard now.
We've seen a great period of action over the last minute or so - credit to both fighters for leaving it all in the cage!
Callaghan won't allow Reygaerts to get back to his feet.
Reygaerts looking to sweep here. No luck so far.
Callaghan prevents Reygaerts from getting back to his feet.
That's three minutes gone in the round.
Reygaerts pushes Callaghan off for just long enough to get back to his feet. Very athletic spring there.
Reygaerts tries to grapple but his opponent circles
and Callaghan counters with a takedown into full mount! That could mean trouble for Reygaerts!
Reygaerts tries to get back to half guard but can't.
Callaghan manages to capitalize on a mistake by Reygaerts to take his back!
Reygaerts is trying to stand back up.
Callaghan lands a punch to the side of the head from the back.
That's four minutes gone in the round.
Reygaerts looking to stop the rear naked choke attempt by controlling the hands.
Callaghan is hanging on to Reygaerts's back as he tries to escape.
Callaghan looking for the RNC.
As the round comes to an end the crowd are showing their appreciation for a great round of action.
Reygaerts is trying to get back to his feet but he's not managed it yet.
And thats the end of the round the fighters go back to their corners.
Brian Callaghan dominated that round.
That's the end of the interval. I'm sure that seemed a lot quicker than a minute for our two fighters! Back to the action.
Reygaerts misses with a takedown attempt - Callaghan sprawls well and throws a nice strike on the way out which just misses.
Reygaerts tries to clinch up.
Callaghan drives through with a takedown into guard.
Callaghan pushing down on Reygaerts's thigh, trying to pass to half guard. He's managed it... Nice work.
Callaghan scores with a couple of good hammerfists.
Callaghan looks to score some points with some ground and pound.
Reygaerts pushes Callaghan off looking to stand but Callaghan dives back in and keeps control.
Callaghan sitting and controlling from the half guard.
Brian Callaghan overall seems to be getting the better of the ground position in the fight so far.
Callaghan is thinking about going for an arm triangle but he can't free his leg.
Reygaerts is breathing heavily.
That's one minute gone in the round.
Reygaerts wants to improve his position but Callaghan is controlling well.
Callaghan has freed up his trapped foot and advances to mount.
Callaghan scores with a couple of good head shots there.
That's two minutes gone in the round.
Well. There's a bit of a lull in the action here and the crowd are starting to get restless.
Callaghan get's back to his feet.
Callaghan shoots in but no luck this time.
The fight stays on the outside here - Reygaerts looks like he's thinking about clinching though.
Callaghan scoring well with a low kick there.
Excellent takedown into side control there by Reygaerts.
Callaghan sneaks a leg under to get back to half guard.
Reygaerts escapes and gets back to his feet.
Reygaerts shoots in but doesn't get the takedown
and Callaghan decides to take the opportunity to score a takedown. He's landed in Reygaerts's guard.
That's three minutes gone in the round.
Callaghan preventing the sweep.
Reygaerts trying to strike off his back.
Reygaerts is trying to hold Callaghan in close to prevent damage but Callaghan has managed to pass into half guard.
Callaghan is looking for a kimura but Reygaerts is holding onto that half guard position, so it's hard for Callaghan to get the leverage.
Callaghan is working for a kimura but Reygaerts is defending it quite comfortably.
Callaghan missing with the ground and pound from half guard.
That's four minutes gone in the round.
Neither fighter has done anything of merit for a good minute or two here and the crowd are not happy about it.
The referee calls for the fighters to work.
Reygaerts is defending against the submission attempts here by Callaghan.
Reygaerts manages to get to full guard.
And thats the end of the round the fighters go back to their corners.
Brian Callaghan dominated that second round.
That's time! Back to the action! This is the final round!
Callaghan pulls out of a head kick attempt.
Callaghan shoots in and drives through. Reygaerts sprawls well.
Reygaerts tries to clinch but is not successful on this occasion.
Callaghan misses with a few strikes there.
Callaghan gets his takedown attempt stuffed easily
and Reygaerts counters with a nice single leg takedown and he's in Callaghan's guard now.
Reygaerts would like to get this fight back to the feet but can't get free from the closed guard.
Reygaerts throwing strikes from guard but Callaghan blocks nicely.
Reygaerts takes a big intake of breath there - he's definitely tired.
Callaghan looking for submissions from the bottom here. Moving his hips around, possibly looking for an armbar.
Callaghan might be looking to lock onto one of his opponent's long limbs for a submission, whilst we're on the ground.
That's one minute gone in the round.
Callaghan is looking for a triangle but Reygaerts pushes his legs off easily.
Callaghan looking for a guillotine here but Reygaerts defends easily.
The fighters are pressed up against the cage, both looking to find a bit of space to work.
Callaghan looking to control but Reygaerts passes into half guard.
That's two minutes gone in the round.
My god... these two guys really need to pick up the pace or everyone will leave to go get a beer.
Callaghan has hold of Reygaerts's hands but Reygaerts slips his arm to the side and lands an elbow.
Reygaerts stands up and beckons Callaghan to join him on the feet.
Reygaerts thuds his shin into the meat of Callaghan's side.
Reygaerts wants to clinch up but Callaghan keeps it at a distance.
Reygaerts tries to clinch but Callaghan is having none of it.
Callaghan swats away the attempt to clinch by Reygaerts.
Callaghan fails with a takedown attempt.
That's three failed takedown attempts in the round for Brian Callaghan. That's going to take a lot out of him.
Callaghan has a takedown stuffed.
Reygaerts fails with an attempt to clinch.
That's three minutes gone in the round.
Callaghan has Reygaerts up against the cage in a clinch.
Callaghan changes levels and goes for a takedown here. Reygaerts fights it off and pushes away nicely.
Reygaerts gets taken down but at least he's managed to land in guard.
Callaghan trying to control but Reygaerts is working from the bottom.
Callaghan controls from within his opponent's guard.
Callaghan stands and steps away. Reygaerts gets to his feet too and we're back to the striking game.
That's four minutes gone in the round.
Callaghan decides to change it up a bit and drives through with a nice takedown into half guard.
Callaghan is taking a breather. Reygaerts says something to him but it's hard to make out. Perhaps he's telling him to get on with it and actually do something.
Reygaerts pushes Callaghan off looking to stand but Callaghan dives back in and keeps control.
Callaghan decides to stand and escape the position.
Dimitri Reygaerts has stepped it up - he knows he needs a finish here!
Callaghan walks into a jab.
Callaghan is rocked!

It looks like Brian Callaghan has been cut.The crowd applaud the fighters efforts here as the round comes to an end.
Callaghan dodges the punch combination from Reygaerts.
Callaghan blocks the body kick.
And that's the end of the fight!
I would just about give that final round to Dimitri Reygaerts.
I think Callaghan has won this one but let's see what the judges have to say. Over to the ring announcer for the scorecards.
Ladies and gentlemen, after 3 rounds of action, we go to the scorecards for a decision.
Judge Yukihiro Yamamoto scores the fight 29:28
Judge Tatsuya Matsuyama scores the fight 29:28
Judge Shigeki Sano scores the fight 29:28
In favor of your winner, by unanimous decision... Brian Callaghan!
|
|
|
|
|
|
|
|
|
|
|
|
|
|
|
|
|
|
|
|
|
|
|
| S |
C
A |
G |
S |
C
B |
G |
|
S |
C |
G |
|
energy
A | B |
|
hype
A | B |
|
pop
A | B |
|
mgr
A | B |
|
FIGHT
RATING
72% |
|
|
|
|
|
|
|
Main event
|
Coming up we have a super heavyweight MMA rules bout between Herman Ruttijn (ranked 0 p4p, 0 weight class) and Daemon Davies (ranked 0 p4p, 0 weight class). Both fighters look pumped up here. Let's hope this is a good fight!
 |
|
 |
| 202 cm
22
265 lbs
1 - 3 - 0 |
|
190 cm
18
300 lbs
4 - 0 - 0 |
BJJ White Belt
Brawler
Self confident |
|
BJJ White Belt
Good kicks
Solid chin |
|
| |
|
Ladies and gentlemen. This fight is 3 rounds, for the super heavyweight championship of the world!
Introducing the champion to my left, fighting out of the red corner.
With a record of
1 - 3 - 0, fighting out of Tokyo, Herman Ruttijn!
And introducing the challenger to my right, fighting out of the blue corner.
With a record of
4 - 0 - 0, fighting out of Tokyo, Daemon Davies!
The judges for this bout are Yasuomi Hirokawa, Yukihiro Yamamoto and Shirou Masuda.
The bell rings for round one and we are underway!
Davies throws a body kick but he wasn't in range.
Davies scores with a punch to the gut of his opponent.
Ruttijn bobs and weaves well there to avoid the strikes.
A head kick from Ruttijn lands but Davies takes it in his stride.
It looks like Daemon Davies has been cut.
Ruttijn ducks under a wild hook from Davies.
Davies swings and misses with a hook to the body.
Ruttijn is looking to clinch but Davies is avoiding it.
Herman Ruttijn seems to be the more aggressive standup fighter in this bout.
Davies slow jab from Ruttijn misses its intended target.
Davies moves into range and throws a big uppercut. OH! Ruttijn goes down! Can Davies finish him!?
Ruttijn is rocked!
Davies stands up and waves to Ruttijn to follow him.
Oh Ruttijn is still all over the place! His legs are completely gone! Will he be able to recover?!!
Ruttijn throws a nice looking combination but Davies bobs and weaves to avoid any damage.
Ruttijn throws a head kick that misses and slips in the process. He scrambles back to his feet and the fighters circle.
That's one minute gone in the round.
Davies connects with a nice cross there... Ruttijn is looking wobbly and Davies recognises it - he's rushed in and lands two more brutal shots that send Ruttijn to the canvas, out cold! A brutal finish to the fight - Davies jumps onto the cage to celebrate with the crowd!
Ladies and gentlemen, after 1:09 of round 1, we have a winner by way of KO (Punches). Daemon Davies! Daemon Davies retains his super heavyweight title!
|
|
|
|
|
|
|
|
|
|
|
|
|
|
|
|
|
|
|
|
|
|
|
| S |
C
A |
G |
S |
C
B |
G |
|
S |
C |
G |
|
energy
A | B |
|
hype
A | B |
|
pop
A | B |
|
mgr
A | B |
|
FIGHT
RATING
99% |
|
|
|
|
|
|
|
|
|
|

