 |
CCF 113: Diaz vs. Joe PBP Commentary |
Undercard bout
|
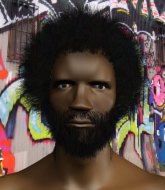
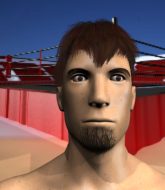
Coming up we have a middleweight MMA rules bout between Vak Yoo (ranked 0 p4p, 0 weight class) and Mike Stallion (ranked 0 p4p, 0 weight class). Vak Yoo has the better chin. Will he look to stand and bang today?
 |
|
 |
| 190 cm
30
197 lbs
14 - 4 - 0 |
|
197 cm
26
188 lbs
7 - 3 - 0 |
Decent wrestler
Lethal high kicks
Granite chin |
|
Good wrestler
Decent boxing
Heavy handed |
|
| |
|
Ladies and gentlemen. This fight is 3 rounds, in the middleweight division.
Introducing the fighter to my left, fighting out of the red corner.
With a record of
14 - 4 - 0, fighting out of Los Angeles, Vak Yoo!
And introducing the fighter to my right, fighting out of the blue corner.
With a record of
7 - 3 - 0, fighting out of Los Angeles, Mike Stallion!
The judges for this bout are Timothy Bukovac, Jack Bonds and .

The bell rings for round one and we are underway!
Yoo lands with a kick to the ribs.
Nice body punch from Yoo.
Yoo scores with a big left there. The judges will like that one.
Some wild striking there from Yoo.
Stallion throws a sloppy body shot
and Yoo counters with an inside leg kick.
Stallion takes a head kick and shrugs it off.
Stallion throws a hard body shot but it just misses.
Stallion misses with a body punch
and Yoo counters with a body kick that stops Stallion in his tracks momentarily.
Fantastic stuff here - a very entertaining period of action, which has drawn cheers from the crowd.
Yoo uses some good footwork to avoid the body shot by Stallion.
Yoo lands a right hook to the body.
Yoo swings and misses with a hook to the body.
Stallion throws a jab, cross combination which is slipped
and Yoo counters with a low kick, right behind Stallion 's knee.
Yoo digs a good body shot into Stallion's ribs.
Yoo throws a head kick that half lands.
Stallion jabbing away but nothing is landing.
Yoo connects with a leg kick. Stallion looked like he was expecting something else and didn't defend it.

That's one minute gone in the round.
Stallion just misses with a punch to the body.
Yoo throws a nice hook to the body that draws an oooh from the crowd.
Stallion throws a wild combination but nothing lands.
Yoo throws a head kick but Stallion moves out of range.
Stallion throws a combination that misses
and Yoo counters with a nice low kick that buckles Stallion's knee momentarily.
Stallion misses with a double jab

and Yoo counters with a crisp one two that drops Stallion! Yoo thinks about following him to the mat for a moment but instead steps back and waves Stallion to his feet! Stallion is in big trouble!

Stallion is rocked!
We've seen a great period of action over the last minute or so - credit to both fighters for going all out!
Yoo lands a monster head kick that reverborates around the arena! The crowd goes wild as Stallion crumples to the floor! Yoo milks the crowd's applause and if that isn't knockout of the night, I will be very surprised!
Ladies and gentlemen, after 1:36 of round 1, we have a winner by way of KO (Head Kick). Vak Yoo!
A very excited looking Vak Yoo made sure he remembered to thank all the fans both in the arena and on the internet. He said all the coolest people spend all day on MMA websites, which got a big reaction.
|
|
|
|
|
|
|
|
|
|
|
|
|
|
|
|
|
|
|
|
|
|
|
| S |
C
A |
G |
S |
C
B |
G |
|
S |
C |
G |
|
energy
A | B |
|
hype
A | B |
|
pop
A | B |
|
mgr
A | B |
|
FIGHT
RATING
93% |
|
|
|
|
|
|
|
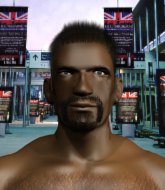
Undercard bout
|
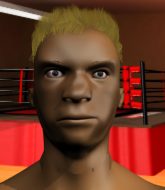
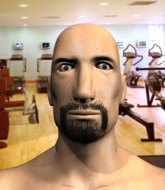
Coming up we have a light heavyweight MMA rules bout between Michael Johnson (ranked 0 p4p, 0 weight class) and Angel BloodWing (ranked 0 p4p, 0 weight class). Johnson comes into the arena with lunatic fringe blaring out of the sound system. Both fighters look pumped up here. Let's hope this is a good fight!
 |
|
 |
| 185 cm
32
210 lbs
13 - 16 - 0 |
|
190 cm
27
215 lbs
15 - 11 - 0 |
Good wrestling
Solid boxing
Experienced |
|
BJJ Purple Belt
Excellent boxer
Powerful |
|
| |
|
Ladies and gentlemen. This fight is 3 rounds, in the light heavyweight division.
Introducing the fighter to my left, fighting out of the red corner.
With a record of
13 - 16 - 0, fighting out of Los Angeles, Michael Johnson!
And introducing the fighter to my right, fighting out of the blue corner.
With a record of
15 - 11 - 0, fighting out of Los Angeles, Angel BloodWing!
The judges for this bout are Timothy Bukovac, Jack Bonds and .
The bell rings for round one and we are underway!
Johnson fails miserably with a takedown attempt.
BloodWing misses with a two punch combination.
BloodWing blocks a low kick nicely.
Johnson tries for a takedown but BloodWing sees it coming a mile off and avoids it easily.
Johnson misses with a lunging right hand

and BloodWing counters with a leg kick then a big left hand that sends Johnson down! BloodWing is looking to finish but Johnson is intelligently defending himself.
Fantastic stuff here - a very entertaining period of action, which has drawn cheers from the crowd.
We must be close to a standup if these guys don't pick up the pace.
Johnson wants to sweep here but BloodWing controlling him for the moment.
BloodWing cracks Johnson with a solid left hand.

Johnson looking for submissions off his back, moving his hips, looking for an opening.
Johnson bucks up whilst keeping hold of a body lock, managing to reverse the position. Now he's in top in BloodWing's guard.
BloodWing looking to hit a scissor sweep but Johnson is one step ahead there.
Johnson is fighting to break BloodWing's control of his arms but BloodWing is doing a good job of controlling the position at the moment.
That's one minute gone in the round.
Johnson keeps in close for a moment and lands a decent shot to the side of BloodWing's head.
BloodWing is working an open guard here, looking to improve his position. No doubt that will leave him open to counters but at least he's being more offensive.
Johnson throws a big right hand that misses.
The fighters are pressed up against the cage, both looking to find a bit of space to work.
BloodWing trying to strike from the bottom but really, it's not the best position to be doing that from!
Johnson won't allow BloodWing to sweep him here.
Johnson has been looking to land a fair amount of strikes on the ground. He might be looking to soften his opponent up in order to work for a submission.
BloodWing is trying to keep Johnson in close.
BloodWing is looking to get back to his feet but can't, whilst Johnson is controlling him.
Johnson preventing the sweep.
BloodWing keeping moving, preventing Johnson from controlling successfully.
The ref warns both fighters not to hold the cage as they work up against the meshing.
Johnson pressing down on his opponent's thigh, looking to pass guard. BloodWing is keeping the position for now.

That's two minutes gone in the round.

The referee decides to stand the fighters back up.
BloodWing stuffs a takedown. It's all about dictating where the fight takes place and BloodWing wants it to stay on the feet.
That's three failed takedown attempts in the round for Michael Johnson. That's going to take a lot out of him.
Johnson takes one on the button.
Nice takedown defense from BloodWing. No joy for Johnson on that attempt.
Johnson takes a shot to the eye socket. That's gotta hurt.
The fans in attendance giving it up for the two fighters, who have really let it all hang out in the last minute or so!
Nice takedown defense from BloodWing. No joy for Johnson on that attempt.
Johnson gets his takedown attempt stuffed easily
enabling BloodWing to counter with a crisp jab.
Johnson shoots in with a takedown attempt and he has BloodWing pinned against the cage. BloodWing gets the underhooks and manages to circle away.
Michael Johnson seems to be the more aggressive standup fighter in this bout.
Johnson misses with a takedown
and BloodWing counters with a head kick that wobbles Johnson - left then right he sways and one more bomb from BloodWing sends him down. This one is all over!
Ladies and gentlemen, after 2:49 of round 1, we have a winner by way of TKO (Strikes). Angel BloodWing!
Angel BloodWing took to the microphone after his victory and thanked his sponsors, KAISER Nutrition (160!) for their support in the buildup to the fight.
|
|
|
|
|
|
|
|
|
|
|
|
|
|
|
|
|
|
|
|
|
|
|
| S |
C
A |
G |
S |
C
B |
G |
|
S |
C |
G |
|
energy
A | B |
|
hype
A | B |
|
pop
A | B |
|
mgr
A | B |
|
FIGHT
RATING
69% |
|
|
|
|
|
|
|
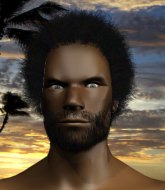
Undercard bout
|
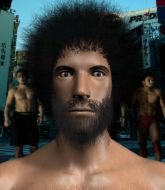
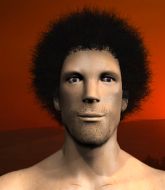
Coming up we have a light heavyweight MMA rules bout between Mookie Hamfist (ranked 0 p4p, 0 weight class) and Puff Masta Fluff (ranked 0 p4p, 0 weight class). On his way into the cage it seems that Mookie Hamfist has been attacked by a crazed fan! It looks like it might have been the just bleed guy! Luckily Mookie Hamfist seems to be OK! I thought that lunatic was in prison!?
 |
|
 |
| 190 cm
24
215 lbs
9 - 9 - 0 |
|
188 cm
28
213 lbs
15 - 13 - 0 |
Good wrestling
Solid boxing
Experienced |
|
BJJ Purple Belt
Excellent boxer
Good gas tank |
|
| |
|
Ladies and gentlemen. This fight is 3 rounds, in the light heavyweight division.
Introducing the fighter to my left, fighting out of the red corner.
With a record of
9 - 9 - 0, fighting out of Los Angeles, Mookie Hamfist!
And introducing the fighter to my right, fighting out of the blue corner.
With a record of
15 - 13 - 0, fighting out of Las Vegas, Puff Masta Fluff!
The judges for this bout are , Jack Bonds and Don Winkell.
The bell rings for round one and we are underway!
Fluff pulls out of a head kick attempt.
Hamfist walks straight into an uppercut. Luckily it didn't land flush.
Good standup being displayed there by Fluff as he connects with a hook.
Hamfist gets cracked there but stands up to it.

Hamfist is rocked!
Fluff slips under a jab.
Oh Hamfist is still all over the place! His legs are completely gone! Will he be able to recover?!!
This is a great period of action - very entertaining stuff!
Fluff looks to land a combination but Hamfist avoids it well.
Hamfist seems to have got his legs back now.
Puff Masta Fluff seems to be the more aggressive standup fighter in this bout.
Fluff fakes a head shot and lands one to the body.
Fluff pulls out of a head kick attempt.
Fluff connects with a nice cross there... Hamfist is looking wobbly and Fluff recognises it - he's rushed in and lands two more brutal shots that send Hamfist to the canvas, out cold! A brutal finish to the fight - Fluff jumps onto the cage to celebrate with the crowd!
Ladies and gentlemen, after 0:31 of round 1, we have a winner by way of KO (Punches). Puff Masta Fluff!
Puff Masta Fluff managed to slip a mention for his sponsors, TFP Graphics - Pit Inc, into his post fight interview.
|
|
|
|
|
|
|
|
|
|
|
|
|
|
|
|
|
|
|
|
|
|
|
| S |
C
A |
G |
S |
C
B |
G |
|
S |
C |
G |
|
energy
A | B |
|
hype
A | B |
|
pop
A | B |
|
mgr
A | B |
|
FIGHT
RATING
100% |
|
|
|
|
|
|
|
Undercard bout
|
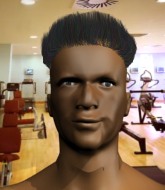
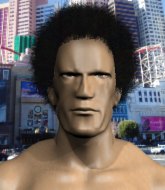
Coming up we have a super heavyweight MMA rules bout between Cael Sanderson Bot (ranked 0 p4p, 0 weight class) and Hugh G Rection (ranked 0 p4p, 0 weight class). Rection has chosen I Got Erection! as his entrance music. Both fighter's entrance songs getting the crowd jumping here.
 |
|
 |
| 177 cm
27
287 lbs
16 - 7 - 0 |
|
202 cm
34
265 lbs
14 - 11 - 0 |
Great wrestler
Solid boxing
Cardio machine |
|
Good wrestler
Excellent MT
Granite chin |
|
| |
|
Ladies and gentlemen. This fight is 3 rounds, in the super heavyweight division.
Introducing the fighter to my left, fighting out of the red corner.
With a record of
16 - 7 - 0, fighting out of Las Vegas, Cael Sanderson Bot!
And introducing the fighter to my right, fighting out of the blue corner.
With a record of
14 - 11 - 0, fighting out of Los Angeles, Hugh G Rection!
The judges for this bout are Don Winkell, Jack Bonds and .
The bell rings for round one and we are underway!
Bot misses with a body shot. Nice footwork from Rection.
Rection throws a head kick that misses
and Bot counters with a lovely straight right hand!
Rection feints and then cracks Bot's leading leg with a nice low kick. He's obviously looking to slow Bot down.
Bot catches Rection with a nice straight right. He seems pissed - ooooh, it's on now! On like donkey kong!
Rection tries to land with a swinging hook to the body but Bot was well out of range. Poor timing from Rection.
Oooooooooooh, not good. A low kick from Rection lands where it shouldn't have, right in the... well, you know what he did? He kicked him in the penis. He's injured, injured bad. The referee sends both fighters to their corners and Bot has 5 minutes to recover. He's OK now though... a thumbs up from Bot and we're back underway with a touch of gloves.
This has been an exciting period of action!
Bot has his front leg slapped to the side - a nice low kick landing there from Rection.
Bot throws the left hand but Rection avoids the punch easily.
Bot loads up on a big right hand but Rection slips the punch.
Bot avoids a low kick by using good footwork.
Bot throws a leg kick but Rection sees it coming and moves out of range.

Rection has taken the fight to the clinch.
Bot avoiding damage as Rection throws knees to the body.

Bot manages to pull guard. Let's see whether he can land a sub off his back.
The referee wants the fighters to be more active or he's going to reset them on the feet.
Rection sitting in guard, not really doing much.
Rection trying to pass the guard but can't manage it just yet.
That's one minute gone in the round.
Bot is working an open guard here, looking to improve his position. No doubt that will leave him open to counters but at least he's being more offensive.
There's a bit of a scramble here and now Bot is on top in guard.
The fighters are pressed up against the cage, both looking to find a bit of space to work.
Bot is looking to work some ground and pound but Rection has wrist control.
Bot stopping the sweep attempt from Rection.
Rection keeping moving, preventing Bot from controlling successfully.
That's two minutes gone in the round.
Bot loading up with the ground and pound but he's missing more than he's landing in this flurry.
Rection keeping moving, preventing Bot from controlling successfully.
Rection has a butterfly guard looking to sweep but Bot has passed into side control.
Bot cracks Rection with a big right hand but Rection just smiles back at him and invites him to have another go.
Rection is trying to improve his position.

That's three minutes gone in the round.
Bot lands a few punches from side control.
Bot working away diligently from side control. Landing strikes effectively there - that will score him some points on the judges scorecards.
Bot working the head with strikes.
Fantastic stuff here - a very entertaining period of action, which has drawn cheers from the crowd.
Rection on the wrong end of some ground and pound.
Rection is looking to reverse the position.
Bot throwing strikes but missing, from side control.
Bot throwing strikes but missing, from side control.
Rection tries to buck Bot off but Bot is having none of it.

That's four minutes gone in the round.
A big shot lands for Bot! That's hurt Rection! Will he recover? Bot fires away with more strikes and the referee has to step in to stop the fight!
Ladies and gentlemen, after 4:23 of round 1, we have a winner by way of TKO (Strikes). Cael Sanderson Bot!
Jumping up and down and very excited, Cael Sanderson Bot waved his t-shirt featuring CEC Nutrition Q160's logo in front of the cameras.
|
|
|
|
|
|
|
|
|
|
|
|
|
|
|
|
|
|
|
|
|
|
|
| S |
C
A |
G |
S |
C
B |
G |
|
S |
C |
G |
|
energy
A | B |
|
hype
A | B |
|
pop
A | B |
|
mgr
A | B |
|
FIGHT
RATING
45% |
|
|
|
|
|
|
|
Undercard bout
|
Coming up we have a light heavyweight MMA rules bout between Light Diode (ranked 0 p4p, 0 weight class) and Jia Le Li (ranked 0 p4p, 0 weight class). Li has chosen Die Monster Die! as his entrance music, which hasn't gone down very well with the crowd. Light Diode could well score a knockout today. He has the power to get to Jia Le Li's chin.
 |
|
 |
| 188 cm
23
216 lbs
6 - 0 - 0 |
|
185 cm
27
200 lbs
21 - 9 - 0 |
Good wrestling
Lethal high kicks
Granite chin |
|
Good wrestler
Great elbows
Good gas tank |
|
| |
|
Ladies and gentlemen. This fight is 3 rounds, in the light heavyweight division.
Introducing the fighter to my left, fighting out of the red corner.
With a record of
6 - 0 - 0, fighting out of Los Angeles, Light Diode!
And introducing the fighter to my right, fighting out of the blue corner.
With a record of
21 - 9 - 0, fighting out of Los Angeles, Jia Le Li!
The judges for this bout are Timothy Bukovac, Jack Bonds and Frank Antenori.
The bell rings for round one and we are underway!
Li is pinned up against the cage taking some big shots here. The referee is looking closely deciding whether he should stop the fight.
Li misses with a straight left.
Diode connects with a high kick.

It looks like Jia Le Li has been cut.
A head kick misses from Diode.
Li keeping his hands up high there, blocking the jab from Diode.
Diode lands a jab to the nose.
Li is rocked!
Diode moves in close and cracks Li with a massive right hand! Li, frozen momentarily in time, tumbles to the canvas, already out cold! A brutal knockout by Diode!
Ladies and gentlemen, after 0:23 of round 1, we have a winner by way of KO (Punch). Light Diode!
A less than humble Light Diode misjudged his post fight interview somewhat and came across a little too arrogant whilst trying to hype up his own abilities.
|
|
|
|
|
|
|
|
|
|
|
|
|
|
|
|
|
|
|
|
|
|
|
| S |
C
A |
G |
S |
C
B |
G |
|
S |
C |
G |
|
energy
A | B |
|
hype
A | B |
|
pop
A | B |
|
mgr
A | B |
|
FIGHT
RATING
100% |
|
|
|
|
|
|
|
Undercard bout
|
Coming up we have a super heavyweight MMA rules bout between John Bunting (ranked 0 p4p, 0 weight class) and Turo Hamara (ranked 0 p4p, 0 weight class). John Bunting has the better chin. Will he look to stand and bang today?
 |
|
 |
| 208 cm
24
297 lbs
13 - 1 - 0 |
|
201 cm
26
286 lbs
13 - 7 - 0 |
Good wrestling
Excellent boxer
Granite chin |
|
Good wrestler
World class boxer
Good gas tank |
|
| |
|
Ladies and gentlemen. This fight is 5 rounds, for the super heavyweight championship of the world!
Introducing the champion to my left, fighting out of the red corner.
With a record of
13 - 1 - 0, fighting out of Las Vegas, John Bunting!
And introducing the challenger to my right, fighting out of the blue corner.
With a record of
13 - 7 - 0, fighting out of Las Vegas, Turo Hamara!
The judges for this bout are Frank Antenori, Timothy Bukovac and .
The bell rings for round one and we are underway!
Bunting uses decent footwork to sidestep a right hand from Hamara.
Hamara misses with a body shot. Nice footwork from Bunting.
Bunting lands with a good body shot.
Bunting throws a sloppy head kick and Hamara moves out of range easily.
Hamara misses with a looping right.
Hamara uses good head movement to avoid the hook from Bunting.
Hamara tries to land with a swinging hook to the body but Bunting was well out of range. Poor timing from Hamara.
Bunting tries to land with a swinging hook to the body but Hamara was well out of range. Poor timing from Bunting.
A big right from Hamara misses.
Hamara misses with a series of wild punches.
Hamara lands a body shot.
Hamara looks to score with a jab to the body but Bunting is just out of range.
A head kick from Bunting lands but Hamara takes it in his stride.
We've seen a great period of action over the last minute or so - credit to both fighters for going all out!
Hamara waving his hands out in front of him, looking to distract Bunting.
That's one minute gone in the round.
Hamara checks a leg kick.
Hamara fakes high and swings low for a body shot but Bunting manages to avoid it.
Bunting gets the takedown into side control.
It looks like the ref is thinking about a standup.
Hamara parries the strikes from Bunting easily there. Bunting is wary of posturing up too much because it might enable Hamara to escape.
Bunting trying to control the action but Hamara is working from the bottom.
Bunting cracks Hamara with an elbow. That is naaassty.
Bunting working the ground and pound but he's contacting the mat, not the fighter.
The ref warns both fighters not to hold the cage as they work up against the meshing.
Hamara tries to get back to half guard but can't.
The fans in attendance giving it up for the two fighters, who have really let it all hang out in the last minute or so!
The fighters are pressed up against the cage, both looking to find a bit of space to work.
Bunting has been looking to land a fair amount of strikes on the ground. He might be looking to soften his opponent up in order to work for a submission.
That's two minutes gone in the round.
Bunting misses with an attempted head punch from side control.
Hamara tries to work a leg under to get back to half guard but Bunting wriggles his own leg back out and remains in side control.
Bunting working the head and body with strikes.
Bunting wants to control but Hamara is keeping him busy.
Bunting creates a bit of distance and throws down some hard shots.
Hamara avoids any damage from the ground and pound of Bunting.
Hamara tries to bench press Bunting off him but Bunting keeps the position.
Bunting working the body and head with strikes.
Bunting remains in side control and seems content to stay there. It's a versatile position from which he can work both strikes and submissions, whilst maintaining that control, so maybe he'll sit here for a while.
That's three minutes gone in the round.
Bunting lands a knee to the body and follows it up with some ground and pound to the head. That will wear Hamara down.
You can see the frustration on Hamara's face, being in this tough position on the bottom.
Bunting landing with strikes to the head and body from side control.
An elbow from Bunting crashes against the mat.
Hamara is looking for a sweep.
Bunting trying to control the position but Hamara is working away.
Hamara tries to work a leg under to get back to half guard but Bunting wriggles his own leg back out and remains in side control.
Bunting wants to lay and pray for a moment but Hamara keeps working.
Hamara is moving his hips around well on the bottom and has managed to get back to half guard.
That's four minutes gone in the round.
Hamara blocking the ground and pound attempt from Bunting.
Hamara tries to roll over but Bunting keeps him under control.
Bunting wants to free his trapped foot but Hamara is holding on for dear life with his legs.
This has been an exciting period of action!
Hamara is trying to control but can't.
Hamara keeping hold of Bunting's head, controlling as best he can.
Bunting is stalling here. Hamara is in no mood to hang around though. He's locked up a kimura from the bottom! Bunting seems to be keeping calm but he's forced to roll out of the hold and Hamara has ended up in side control on the top. Nice work.
The crowd are going absolutely nuts as the round comes to an end - what a fantastic round of action!
Hamara with the ground and pound but Bunting regains half guard under the barage of strikes.
And thats the end of the round the fighters go back to their corners.
John Bunting dominated that round.
The fighters get back to their feet, the hooter sounds and we're back to the action!

Bunting bobs and weaves well there to avoid the strikes.
Bunting cracks Hamara with a nice right hand that draws applause from the crowd.
It looks like Turo Hamara has been cut.
Hamara circles away from the clinch attempt.
Hamara is pinned up against the cage taking some big shots here. The referee is looking closely deciding whether he should stop the fight.
Hamara throws a right hand that Bunting ducks under and follows up with a left that Bunting also avoids with ease.
Oh, that's a big right hand from Bunting and Hamara goes tumbling to the canvas! Bunting follows him to the ground and looks to finish from half guard.
Hamara is rocked!
The crowd are loving this. Great action here.
Well, if Bunting is going to just lie there, perhaps we should talk about what we're having for dinner tonight
I'm having a ham and pineapple pizza
Yum. Can't wait.
Hamara is still in real trouble! Can Bunting finish him?
Bunting has freed up his trapped foot and advances to mount.
Whack. That's a big, big shot from Bunting! Hamara is out cold! This one is all over!
Ladies and gentlemen, after 1:57 of round 2, we have a winner by way of KO (Strikes). John Bunting!
John Bunting retains his super heavyweight title!
A victorious John Bunting thanked his army of followers in his post fight interview, telling people to make sure they follow him on Twitter.
|
|
|
|
|
|
|
|
|
|
|
|
|
|
|
|
|
|
|
|
|
|
|
| S |
C
A |
G |
S |
C
B |
G |
|
S |
C |
G |
|
energy
A | B |
|
hype
A | B |
|
pop
A | B |
|
mgr
A | B |
|
FIGHT
RATING
100% |
|
|
|
|
|
|
|
Undercard bout
|
Coming up we have a middleweight MMA rules bout between Major Lazer (ranked 0 p4p, 0 weight class) and Prince Valor (ranked 0 p4p, 0 weight class). Lazer comes into the arena with Major Lazer - Pon De Floor blaring out of the sound system. Valor has chosen Bad Religion - Dept. of False Hope as his entrance music. These two fighters really are very evenly matched on the feet - it will be fascinating to see who can assert themselves in that aspect of the fight.
 |
|
 |
| 190 cm
25
200 lbs
16 - 2 - 0 |
|
186 cm
27
198 lbs
14 - 5 - 0 |
Abu Dhabi Champ
Solid boxing
Cardio machine |
|
BJJ Brown Belt
Excellent MT
Granite chin |
|
| |
|
Ladies and gentlemen. This fight is 3 rounds, in the middleweight division.
Introducing the fighter to my left, fighting out of the red corner.
With a record of
16 - 2 - 0, fighting out of Los Angeles, Major Lazer!
And introducing the fighter to my right, fighting out of the blue corner.
With a record of
14 - 5 - 0, fighting out of Los Angeles, Prince Valor!
The judges for this bout are Timothy Bukovac, Jack Bonds and Frank Antenori.
The bell rings for round one and we are underway!
Lazer looks frustrated there after his takedown attempt is stuffed easily.
Lazer shoots in looking for a double leg takedown. Valor defends it nicely.
Valor dances in quickly and lands a nice inside leg kick on Lazer. That did some damage!
Valor misses with a low kick.
Valor fakes with a right hand and throws a good leg kick, right into the thigh. That had to hurt Lazer.
Valor is looking to score with low kicks.
Valor lands an overhand left. A wild punch that just about connected.
Lazer uses good footwork to avoid the strikes from Valor.
Lazer misses with a hook. Valor ducked under it nicely.
Valor clinches up against the cage.
Valor keeps control of Lazer as he tries to wriggle out of the double underhooks.
Lazer wants a takedown.
That's three failed takedown attempts in the round for Major Lazer. That's going to take a lot out of him.
Lazer tries to circle away but Valor has him pinned against the cage.
Valor swings wildly with an uppercut but Lazer uses good head movement to avoid it.
That's one minute gone in the round.
Valor lands with a short head shot on the inside.
Valor lands a left hand that snaps the head of Lazer backwards.
Valor's head jolts backwards as he takes an uppercut right on the button!
Valor misses with a hook from the clinch.
Lazer wants to take the fight to the mat but Valor manages to get underhooks and keep the fight in the clinch.
Valor misses with a body punch.
A head punch blocked on the inside by Lazer.
Lazer has hold of a leg and is looking for a trip takedown. Valor avoids it nicely though and we remain in the clinch.
Lazer turns his back and goes for a hip toss. It's a bit messy but it gets the job done and Lazer manages to end up in side control.
The ref warns both fighters not to hold the cage as they work up against the meshing.
A bit of a lull in the action here.
Lazer scores with a couple of short elbows.
Lazer working away.
Lazer has knee on belly momentarily but Valor bucks him off and regains half guard.
Fantastic stuff here - a very entertaining period of action, which has drawn cheers from the crowd.
Valor is trying to get back to full guard.
That's two minutes gone in the round.
Lazer works his foot free and advances to mount.
Lazer lands with some strikes.
Valor is wriggling around trying to escape.
Lazer scoring with strikes but Valor is staying in there.
Valor is wriggling around trying to escape.
That's three minutes gone in the round.
Valor tries to hold on but Lazer postures up.
Lazer can't quite control the action as he would like just now, as Valor is looking to escape.
Lazer landing punches.
Lazer has been looking to land a fair amount of strikes on the ground. He might be looking to soften his opponent up in order to work for a submission.
Lazer dominating with strikes here.
Valor is in a horrible position here. Lazer smacks him with another shot as he tries to escape the position.
We've seen a great period of action over the last minute or so - credit to both fighters for going all out!
Lazer landing strikes from the mount.
Valor is rocked!
Lazer drops a big elbow. That's hurt Valor! More shots from Lazer and the ref steps in! The fight is over!
Ladies and gentlemen, after 4:55 of round 1, we have a winner by way of TKO (Strikes). Major Lazer!
A very excited looking Major Lazer made sure he remembered to thank all the fans both in the arena and on the internet. He said all the coolest people spend all day on MMA websites, which got a big reaction.
|
|
|
|
|
|
|
|
|
|
|
|
|
|
|
|
|
|
|
|
|
|
|
| S |
C
A |
G |
S |
C
B |
G |
|
S |
C |
G |
|
energy
A | B |
|
hype
A | B |
|
pop
A | B |
|
mgr
A | B |
|
FIGHT
RATING
59% |
|
|
|
|
|
|
|
Undercard bout
|
Coming up we have a welterweight MMA rules bout between Ten Sixteen (ranked 0 p4p, 0 weight class) and Busy Signal (ranked 0 p4p, 0 weight class). Signal has chosen Busy Signal - Smoke Some High Grade as his entrance music. Busy Signal has the better chin. Will he look to stand and bang today?
 |
|
 |
| 180 cm
24
178 lbs
9 - 4 - 0 |
|
180 cm
26
179 lbs
21 - 4 - 0 |
Good wrestling
Great low kicks
Very quick |
|
ADCC Champion
Decent boxing
Good gas tank |
|
| |
|
Ladies and gentlemen. This fight is 3 rounds, in the welterweight division.
Introducing the fighter to my left, fighting out of the red corner.
With a record of
9 - 4 - 0, fighting out of Los Angeles, Ten Sixteen!
And introducing the fighter to my right, fighting out of the blue corner.
With a record of
21 - 4 - 0, fighting out of Los Angeles, Busy Signal!
The judges for this bout are Don Winkell, Jack Bonds and Frank Antenori.
The bell rings for round one and we are underway!
Sixteen throws a nice outside leg kick.
Sixteen defends well against a solid takedown attempt from Signal.
Ten Sixteen seems to be the more aggressive standup fighter in this bout.
Sixteen throws a low kick but Signal moves out of range easily.
Signal has his front leg slapped to the side - a nice low kick landing there from Sixteen.

Sixteen gets caught napping as Signal dives in and scores a takedown. Sixteen manages to retain guard.
Signal preventing the sweep.
Signal passes Sixteen's left leg - he's now in half guard.
Signal prevents Sixteen from improving his position.
Signal wants to take a breather but Sixteen is having none of it.
Sixteen tries to get to full guard but Signal has control of the leg.
Signal is taking a breather. Sixteen says something to him but it's hard to make out. Perhaps he's telling him to get on with it and actually do something.
Sixteen wants to improve his position but Signal is controlling well.
That's one minute gone in the round.

Signal is trying to work for a kimura. This could be trouble! No, Sixteen has managed to free his arm - good work.
Sixteen keeps control of the position for the meantime.
Signal is looking to pass the guard... He's managed it - he's now in full mount!
Signal scoring with some good ground and pound from mount here. Will he manage to finish Sixteen?
Sixteen is in all sorts of trouble here.
Signal sitting in mount, just looking to control for the moment.
Signal avoids the attempt from Sixteen to control.
That's two minutes gone in the round.
Signal wants to control the pace but Sixteen is squirming around nicely.
The fighters are pressed up against the cage, both looking to find a bit of space to work.
Sixteen tries to hold on but Signal pushes him away.
Sixteen is working to get back to half guard.
Signal is in the full mount, landing strikes.
We've seen a great period of action over the last minute or so - credit to both fighters for going all out!
Signal with some aggressive grappling here. He's looking for submissions here, rather than waiting for the opportunity to counter.
Signal lands a big elbow.
Signal lands with some strikes.
Signal scores with a couple of good head shots there.
Signal lands an elbow that was bordering on illegal but the referee lets it go with a warning.
Signal punishing his opponent with strikes.
Sixteen is rocked!
That's three minutes gone in the round.
Signal looking to finish here with some ground and pound. He lands one big shot that has Sixteen covering up... and two more big strikes land, forcing the referee to step in and put and end to proceedings! This fight is all over!
Ladies and gentlemen, after 3:21 of round 1, we have a winner by way of TKO (Strikes). Busy Signal!
Busy Signal thanked the fans post fight for their support.
|
|
|
|
|
|
|
|
|
|
|
|
|
|
|
|
|
|
|
|
|
|
|
| S |
C
A |
G |
S |
C
B |
G |
|
S |
C |
G |
|
energy
A | B |
|
hype
A | B |
|
pop
A | B |
|
mgr
A | B |
|
FIGHT
RATING
61% |
|
|
|
|
|
|
|
Co-main event
|
Coming up we have a middleweight MMA rules bout between Sub Zero (ranked 0 p4p, 0 weight class) and Gully God (ranked 0 p4p, 0 weight class). God has chosen Mavado - Gangsta Nuh Play as his entrance music. Gully God told me before the fight that he's been watching a lot of DVDs so let's see if that helps him in this one! I can't wait to find out!
 |
|
 |
| 180 cm
30
198 lbs
20 - 11 - 0 |
|
179 cm
26
180 lbs
20 - 2 - 1 |
Abu Dhabi Champ
Dangerous knees
Insanely flexible |
|
ADCC Champion
Excellent MT
Good gas tank |
|
| |
|
Ladies and gentlemen. This fight is 5 rounds, for the middleweight championship of the world!
Introducing the champion to my left, fighting out of the red corner.
With a record of
20 - 11 - 0, fighting out of Los Angeles, Sub Zero!
And introducing the challenger to my right, fighting out of the blue corner.
With a record of
20 - 2 - 1, fighting out of Los Angeles, Gully God!
The judges for this bout are Jack Bonds, Frank Antenori and .
The bell rings for round one and we are underway!
God checks a low kick from Zero.
Zero shoots in but God avoids the takedown attempt easily.
Zero fakes a jab and scores with a low kick.
God punishes Zero's body with a nice straight punch.
God scores with a punch to the gut of his opponent.
God checks the leg kick.
God attempts a leg kick but it's missed by a good margin.
Zero missing with a left hand there. God was out of range so wasted energy throwing that one.
God checks a low kick from Zero.
Zero cracks the inside of God's front leg.
Zero throws a leg kick but he was too far away and it doesn't land.
Zero throws a nice looking combination but God bobs and weaves to avoid any damage.
Like a baseball bat into the meat of his leg there - nice leg kick by God.
Good leg kick by Zero there. It's the ones that make that thud noise that hurt and that was an almighty thud.
That's one minute gone in the round.
Zero throws a right hand that God ducks under and follows up with a left that God also avoids with ease.
God scores with a sloppy right hand. Zero should have avoided that one.
God connects with a crisp jab.
A swing and a miss from Zero.
God misses with a head kick.
Zero throws a leg kick but God moved away.
An inside leg kick lands from Zero.
Zero fails with the takedown.
God avoids a low kick by using good footwork.
A lazy left from God finds it's target.
Zero throws a leg kick that misses.
God avoids a low kick by using good footwork.
Zero is looking to take this fight into the clinch.
That's two minutes gone in the round.
God digs a good hook to Zero's body.
A clash of legs there as God blocks the low kick.
Zero throws a head kick that misses
and God counters with a nice uppercut.
Nice defenses there by Zero.
Wooooo! Give it up for these two warriors! They are putting on a show!
Zero shoots in for a takedown but God shows good takedown defense.
That's three failed takedown attempts in the round for Sub Zero. That's going to take a lot out of him.
Zero scores with a nice takedown into half guard. Let's see what he's got on the ground.
Zero scores with a couple of good hammerfists.
God is working for an escape here. He's hooked one of Zero's legs and he's managed to sneak out and take Zero's back!
God controlling from the back.
Will God go for the finish here or will he try and keep control of the position?
That's three minutes gone in the round.
Zero tries to escape the position.
The referee is taking a good look at Zero as he is on the wrong end of some big shots from God!
Zero has been looking to land a fair amount of strikes on the ground. He might be looking to soften his opponent up in order to work for a submission.
God tries to get the hooks in deep but Zero pushed the leg off.
Zero is really stuck here.
Zero tries to escape the position - he's now mounted. Is that better or worse? Hard to tell!
Zero tries to reverse the position but God maintains control.
Zero wants to hold on but God pushes him away.
Zero really trying hard to get back to half guard here.
The ref warns both fighters not to hold the cage as they work up against the meshing.
That's four minutes gone in the round.
God lands a big elbow.
God prevents Zero from getting the reversal.
This has been an exciting period of action!
BOOM! God connects with a massive shot to the dome!
The fighters are pressed up against the cage, both looking to find a bit of space to work.
Zero gets back to half guard.
Zero is working for an escape here. He's hooked one of God's legs and he's managed to sneak out and take God's back!
The fighters are starting to get a bit slippery now, which will make submissions a bit more difficult.
God rolls and manages to get back to half guard. Nicely done.
God is looking to get back to full guard here but Zero has managed to pass to side control instead.
The crowd are going absolutely nuts as the round comes to an end - what a fantastic round of action!
God is trying to get back to half guard.
God is moving his hips around well on the bottom and has managed to get back to half guard.
And thats the end of the round the fighters go back to their corners.
A close round but Gully God will probably get the nod.
The minute break is over - no more time for sponges and pep talks - back to the action!
Oooooooooooh, not good. A low kick from God lands where it shouldn't have, right in the... well, you know what he did? He kicked him in the penis. He's injured, injured bad. The referee sends both fighters to their corners and Zero has 5 minutes to recover. He's OK now though... a thumbs up from Zero and we're back underway with a touch of gloves.
Zero cracks the inside of God's front leg.
God throws a body kick that misses
and Zero decides to take the opportunity to score a takedown. He's landed in God's guard.
Zero wants to control from the top but God keeps moving.
Zero pressing down on his opponent's thigh, looking to pass guard. God is keeping the position for now.
Zero throws an elbow that misses. God uses the momentum to reverse the position. He's now in Zero's guard. Nice move by God!
God passes easily into side control. Nice work.
Zero is looking for a sweep.
Zero struggling a bit here.
God creates a bit of distance and throws down some hard shots.
That's one minute gone in the round.
God wants to lay and pray for a moment but Zero keeps working.
Zero manages to land a sweep and he's now on top! Lovely Jiu Jitsu!
Zero working over God with some ground and pound. God looks like he wants out of this position, which is understandable.
God trying to keep hold of his opponent's head but Zero manages to pass to mount!
God really trying hard to get back to half guard here.
Zero working the ground and pound effectively.
God slips a leg in and gets back to half guard.
Zero is trying to control. God wants to improve his position but can't escape this time.
That's two minutes gone in the round.
The crowd cheering loudly, showing their appreciation for the quality fight we're seeing here.
Zero working to pass to mount. He's got his hand pressing down on God's thigh. God counters though and makes it back to full guard.
Zero wants to control from the top but God keeps moving.
Zero working some ground and pound from guard but it's not doing any damage.
God utilising some decent striking defenses from the guard, preventing the ground and pound.
Zero preventing the sweep.
Zero works over God with some ground and pound from guard.
Zero advances to half guard.
God missing with punches from the bottom.
God gets full guard.
God wants to sweep but no luck.
God working the defensive guard well to avoid strikes from Zero.
That's three minutes gone in the round.
Zero passes easily into side control. Nice work.
God tries to work a leg under to get back to half guard but Zero wriggles his own leg back out and remains in side control.
God is persisting with the attempt to improve his position.
Zero misses with the ground and pound.
God tries to bench press Zero off him but Zero keeps the position.
Zero lands a few punches from side control.
Zero trying to control the action but God is working from the bottom.
Zero creates a bit of distance and throws down some hard shots.
That's four minutes gone in the round.
This has been an exciting period of action!
God is looking to reverse the position.
Zero in side control lands a nice looking series of punches and elbows.
God tries to improve position but can't.
Zero lands an elbow.
Zero working the ground and pound but God is defending the strikes.
Zero working the ground and pound.
God is positioning himself to get back to half guard.
The crowd are going absolutely nuts as the round comes to an end - what a fantastic round of action!
God is not content to let Zero control the position.
And thats the end of the round the fighters go back to their corners.
Sub Zero dominated that second round.
That's time! Zero's corner gives him a slap on the ass as he gets ready to fight.

Zero tries to clinch up but God circles away and keeps his distance.
God has his front leg slapped to the side - a nice low kick landing there from Zero.
Zero motions for God to come forward. Zero throws a leg kick but it misses it's target.
The fighters circling - Zero throws out the jab but it was never going to land.
Zero moves out of range of the strikes.
Zero tries a low kick but God avoids it.
Good leg kick by Zero there. It's the ones that make that thud noise that hurt and that was an almighty thud.
Zero throws a body kick but he wasn't in range.
Zero steps to the side to avoid the strikes from God.
God defends well against a solid takedown attempt from Zero.
God blocks a low kick nicely.
Gully God is looking to keep the fight on the feet at all costs.
That's one minute gone in the round.
Zero slips a straight right by God.
A low kick from Zero misses
and God counters with a quick right hand to the jaw.
Zero misses with a leg kick
and God counters with a nice uppercut.
Zero closes this distance looking for a takedown but God circles away.
Zero misses with a kick to the body.
Sub Zero is looking to throw some combinations by the looks of things.
Zero looks for a takedown but God sprawls well.
That's three failed takedown attempts in the round for Sub Zero. That's going to take a lot out of him.
Zero shapes like he's going to throw a leg kick but settles back down.
God lands a jab to Zero's midsection.
Zero shoots in for a takedown. He's persisting with it as God sprawls well. God wins this battle and keeps the fight standing. Zero gets slowly back to his feet.
God lunges at Zero with a hook that half lands and is half blocked by Zero's hand.
Sub Zero seems to be the more aggressive standup fighter in this bout.
That's two minutes gone in the round.
Zero throws out a loose jab but God uses good head movement to avoid it.
God with a body punch. A glancing blow.
Sub Zero is winning the standup battle so far.
Zero tries to close the distance and clinch but God swats him to one side with an open hand palm strike and circles away.
God avoids the head kick by Zero.
God connects with a lovely right hand, straight down the pipe.
Zero tries to close the distance and clinch but God swats him to one side with an open hand palm strike and circles away.
A low kick from Zero misses
and God counters with a lovely straight right hand!
We've seen a great period of action over the last minute or so - credit to both fighters for going all out!
Boom, another hit is landed. "You're gunna get knocked out" taunts God, as that shot connected.
Zero closes this distance looking for a takedown but God circles away.
Zero slips a jab from God.
Zero blocks a jab.
God jabs Zero right on the nose. Zero blinks but takes it well.
That's three minutes gone in the round.
Zero walks straight into a jab right on the nose. That one stung - he's blinking and trying to clear his head.
God takes a head kick and shrugs it off.
Zero fails to land the takedown.
Zero takes a solid shot to the body. That one hurt him but he's trying not to show it.
Zero slips under a jab.
Zero fails with a takedown attempt.
Zero looking to take his opponent's legs away with the low kicks.
Zero looks to throw the jab but God is out of range.
Zero goes for a high kick. It partially lands.
That's four minutes gone in the round.
God tries to score with an inside leg kick but telegraphs it and Zero is able to avoid easily.
God throws a nice head kick!
God throws a monster uppercut resembling something out of street fighter but it doesn't land.
Zero shoots in with a lovely double leg takedown. God manages to land in full guard to minimise the damage.
Fantastic stuff here - a very entertaining period of action, which has drawn cheers from the crowd.
God keeping full guard, as Zero tries to pass.
There's a bit of a scramble here and now God is on top in guard.
Zero looking for subs off his back but God has passed one foot through into half guard.
As the round comes to an end the crowd are showing their appreciation for a great round of action.
God is looking to stall here but Zero recovers full guard.
And thats the end of the round the fighters go back to their corners.
A close third round but Gully God just about did enough to take it.
The fighters get back to their feet, the hooter sounds and we're back to the action!

Nice shot by God.
Zero lands a right hook to the body.
Nice sprawl there from God as Zero shoots in.
Zero checks a low kick from God.
Zero tries a switch kick but it misses it's target.
God misses the shot to the body.
Zero throws a right and a left that both miss.
God misses with a straight left.
Zero takes an uppercut right on the button but keeps his composure.
God looking to throw a kick but he's pulled out of it.
Zero connects with a solid leg kick.
That's one minute gone in the round.
God keeps the fight on the outside.
Zero wants to clinch up but God keeps it at a distance.
God throws a quick inside leg kick.
Zero takes a solid shot to the body. That one hurt him but he's trying not to show it.
God throws a leg kick but Zero checks it.
God connects with a leg kick. Zero looked like he was expecting something else and didn't defend it.
The fighters circle momentarily. God darts into range and connects with a nice straight punch.
Zero changes levels and looks for a double leg takedown. God tries to avoid it but Zero manages to keep hold of a leg and drag God to the ground. God escapes though and pops straight back up to his feet.
God lunges in with swinging rights and lefts but Zero circles away quickly and effectively.
Zero avoids a punch combination nicely.
Zero takes one to the chin there.
That's two minutes gone in the round.
Zero looking to throw a kick but he's pulled out of it.
Zero is looking to chop away at God's legs.
God throws a leg kick
and Zero counters with a nice shoot takedown that brings the fighters to the ground.
The crowd are loving this. Great action here.
God wants to sweep here but Zero controlling him for the moment.
Zero trying to control but God is working from the bottom.
Zero postures up and lands some nice ground and pound.
Zero working some ground and pound from guard but it's not doing any damage.
God has momentary wrist control but Zero slips an elbow through the middle.
Zero postures up in God's guard and throws a big left but God blocks it.
God wants to sweep here but Zero controlling him for the moment.
That's three minutes gone in the round.
God manages to sweep nicely, so he's now on top. Zero manages to get himself to full guard.
God stopping the sweep attempt from Zero.
Zero wants to improve his position but instead God has moved into half guard.
Zero trying to hold on to God's head to control him but God postures up.
God missing with the ground and pound from half guard.
Sub Zero overall seems to be getting the better of the ground position in the fight so far.
God lands with a punch from half guard.
That's four minutes gone in the round.
Zero trying to keep hold of his opponent's head but God manages to pass to mount!
Zero manages to regain half guard. Good work.
God winds up and cracks Zero with a swinging punch to the side of the head.
God trying to pass the guard but Zero defending well.
Zero is trying to control but can't.
Zero is trying is best to control the position here.
As the round comes to an end the crowd are showing their appreciation for a great round of action.
Zero works his way to full guard. Good work.
Wooooo! Give it up for these two warriors! They are putting on a show!
Zero utilising some decent striking defenses from the guard, preventing the ground and pound.
God trying to control the position from guard on top but Zero is wriggling around, looking for whatever he can.
And thats the end of the round the fighters go back to their corners.
That was a close fourth round but I would say that Sub Zero will probably get the nod.
That's time! Zero's corner gives him a slap on the ass as he gets ready to fight. Ladies and gentlemen, this is the final round!

Zero shoots in for a takedown but doesn't get it.
God circles away from the clinch attempt
and God counters with a quick right hand to the jaw.
God lands a head kick!
Zero has a takedown stuffed.
God thows a left - swing and a miss!
God leaves Zero with his face pressed against the mat as he sprawls beautifully, defending against a solid takedown attempt.
That's three failed takedown attempts in the round for Sub Zero. That's going to take a lot out of him.
Zero ducks right into an uppercut from God.
That's one minute gone in the round.
Zero lands with a nice low kick. That'll leave a bruise.
God displays good takedown defense there as he swats away a double leg from Zero.
Zero fakes a jab and then connects with a hook.
God swings for the body but Zero moves out of range.
God throws a looping overhand right but Zero ducks down to avoid it.
Zero doesn't manage to clinch there - God circles away.
Zero moves in looking to clinch but God pushes him off.
God tries to score with a leg kick but it misses it's target.
An inside leg kick lands from Zero.
Zero tries to clinch up.
That's two minutes gone in the round.
Some wild striking there from God.
Zero misses with a kick to the body.
Zero swings away with a leg kick that misses.
God displays good takedown defense there as he swats away a double leg from Zero.
Zero shoots in for a takedown but doesn't get it.
Zero displays some good footwork, moving neatly out of range as God throws out the jab.
Nice sprawl there from God as Zero shoots in.
God looks to score with a jab to the body but Zero is just out of range.
Zero has a takedown stuffed.
Both of our modern day gladiators look out of it here - an gruelling 5 rounds of action taking it's toll on them, no doubt.
That's three minutes gone in the round.
A looping hook to the body misses from God. Zero does a little dance to reset his feet.
Zero blocks a jab.
God throws a monster uppercut resembling something out of street fighter but it doesn't land.
Zero on the wrong end of a nice hook.
Zero punishes God's body with a nice straight punch.
Zero throws a low kick but God avoids it.
God will need to tighten up his combinations if he doesn't want to gas himself out, swinging at thin air.
Zero tries to score a power double leg takedown but God sees that one coming and sprawls well. That will dishearten Zero somewhat.
Zero will have to do better than that with his takedown attempts.
That's four minutes gone in the round.
Zero will have to do better than that with his takedown attempts.
God throws an uppercut from half a mile away. Zero sees it coming and avoids it easily.
Zero fails in his attempt to clinch.
God throws a head kick but Zero moves out of range.
God throws a couple of head shots and lands with the final one - a decent hook, which struck Zero on the side of the head.
Zero moves away from the strike by God.
Zero tries to close the distance and clinch up but God swats him away and circles back towards the center.
God tries a switch kick but it misses it's target.
The crowd applaud the fighters efforts here as the round comes to an end.
God bobs and weaves and unloads with a good uppercut.
God will need to tighten up his combinations if he doesn't want to gas himself out, swinging at thin air.
And that's the end of the fight!
Gully God comfortably won the final round on my scorecard.
I think God has won this one but let's see whether the judges agree with me. Over to the ring announcer for the scorecards.
Ladies and gentlemen, after 5 rounds of action, we go to the scorecards for a decision.
Judge Jack Bonds scores the fight for Sub Zero!
Judge Frank Antenori scores the fight for Sub Zero!
Judge Percy O'Donnell scores the fight for Gully God!
Sub Zero wins by split decision!
Sub Zero is the new middleweight champion!
Sub Zero tried to hype himself up post fight but didn't word it too well and it ended up with him sounding like a bit of a tool.
|
|
|
|
|
|
|
|
|
|
|
|
|
|
|
|
|
|
|
|
|
|
|
| S |
C
A |
G |
S |
C
B |
G |
|
S |
C |
G |
|
energy
A | B |
|
hype
A | B |
|
pop
A | B |
|
mgr
A | B |
|
FIGHT
RATING
100% |
|
|
|
|
|
|
|
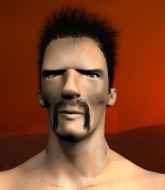
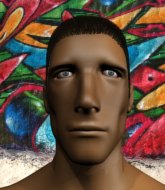
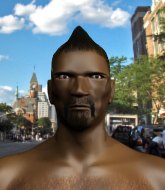
Main event
|
Coming up we have a heavyweight MMA rules bout between Romo Diaz (ranked 0 p4p, 0 weight class) and Joe The One Armed Man (ranked 0 p4p, 0 weight class). The One Armed Man is bobbing his head along to his entrance song: Stand Up To be C**ted. Romo Diaz had a look across the cage there at his opponent. He definitely means business
 |
|
 |
| 200 cm
25
285 lbs
12 - 1 - 0 |
|
185 cm
26
240 lbs
17 - 4 - 0 |
Good wrestling
Solid boxing
Insanely flexible |
|
Good wrestler
Excellent MT
Good gas tank |
|
| |
|
Ladies and gentlemen. This fight is 5 rounds, for the heavyweight championship of the world!
Introducing the champion to my left, fighting out of the red corner.
With a record of
12 - 1 - 0, fighting out of Los Angeles, Romo Diaz!
And introducing the challenger to my right, fighting out of the blue corner.
With a record of
17 - 4 - 0, fighting out of Los Angeles, Joe The One Armed Man!
The judges for this bout are , Timothy Bukovac and Jack Bonds.
The bell rings for round one and we are underway!
Diaz looks for a takedown. He's got it. We're now in half guard.
The One Armed Man manages to get to full guard.
Diaz working some ground and pound from guard but it's not doing any damage.
Diaz scoring with some ground and pound.
Diaz pressing down on his opponent's thigh, looking to pass guard. The One Armed Man is keeping the position for now.
Diaz controls from within his opponent's guard.
Diaz trying to control the position from guard on top but The One Armed Man is wriggling around, looking for whatever he can.
That's one minute gone in the round.
The One Armed Man is working from a closed guard but he's struggling to control his opponent.
The One Armed Man has Diaz pulled in close to control his posture.
The One Armed Man controls Diaz momentarily but Diaz frees himself.
The fighters are pressed up against the cage, both looking to find a bit of space to work.

The ref stands the fighters back up. Joe The One Armed Man was stalling too much, according to the referee.
The One Armed Man throws a hook to the body but it doesn't connect.
Diaz connects with a crisp jab.
Diaz connects with a jab.
That's two minutes gone in the round.
Diaz fails with the takedown.
A leg kick checked by Diaz.
Diaz connects with a jab.
Romo Diaz seems to be the more aggressive standup fighter in this bout.
Fantastic stuff here - a very entertaining period of action, which has drawn cheers from the crowd.
Diaz keeps his opponent at a distance with a nice jab.
Diaz moves his head to the side to avoid a jab but walks straight into a cross.

It looks like Romo Diaz has been cut.
Diaz jabs away that one connects to the head of his opponent.
Excellent takedown into side control there by Diaz.
That's three minutes gone in the round.
The One Armed Man is not in a great position here, taking some shots.
Diaz tries to cartwheel into mount but he doesn't manage it.
Diaz wants to lay and pray for a moment but The One Armed Man keeps working.
The One Armed Man is looking to regain half guard here but Diaz keeps moving and retains side control.
The One Armed Man is being controlled here.
Diaz working away diligently from side control. Landing strikes effectively there - that will score him some points on the judges scorecards.
That's four minutes gone in the round.
This has been an exciting period of action!
The One Armed Man takes a couple of big shots there - the referee warns him that he has to defend himself better.
Diaz wants to control but The One Armed Man is keeping him busy.
Diaz working the ground and pound but he's contacting the mat, not the fighter.
Diaz will need to keep those long limbs tucked in whilst he's on the ground, to prevent any submissions.
Diaz grinds an elbow into The One Armed Man's temple.
Diaz wants to take a breather but The One Armed Man manages to regain guard - a lesson learnt for Diaz.
The fighters are starting to perspire pretty heavily.
Diaz passes easily into side control. Nice work.
The crowd are going absolutely nuts as the round comes to an end - what a fantastic round of action!
Diaz is looking to take a break and control but The One Armed Man is keeping him honest, looking to work from the bottom.
And thats the end of the round the fighters go back to their corners.
Romo Diaz dominated that round.
The cut man is working on Romo Diaz's cut.
The minute break is over - no more time for sponges and pep talks - back to the action!
Diaz connects with a body shot.
Diaz fails with a rather predictable takedown attempt.
Diaz shoots in for a takedown but doesn't get it.
The One Armed Man displays some good footwork, moving neatly out of range as Diaz throws out the jab.
Diaz closes this distance looking for a takedown but The One Armed Man circles away.
That's three failed takedown attempts in the round for Romo Diaz. That's going to take a lot out of him.
That's one minute gone in the round.
Diaz throws out a loose jab but The One Armed Man uses good head movement to avoid it.
Diaz looks frustrated there after his takedown attempt is stuffed easily.
Nice sprawl there from The One Armed Man as Diaz shoots in.
The One Armed Man throws a quick inside leg kick.
Diaz connects with a lovely jab that went straight through the gap between The One Armed Man's hands.
Diaz shoots in and drives through. The One Armed Man sprawls well.
Diaz is trying hard to land a takedown here. The One Armed Man sprawls well and keeps this one on the feet.
That's two minutes gone in the round.
The One Armed Man stuffs the takedown attempt from Diaz. Diaz gets slowly back to his feet.
The One Armed Man fakes a jab and then connects with a hook.
Diaz looks for a takedown but The One Armed Man sprawls well.
Diaz ducks under an overhand right and circles away with a smile on his face.
The One Armed Man throws a jab when Diaz was well out of range.
The One Armed Man thows a left - swing and a miss!
That's three minutes gone in the round.
The One Armed Man throws a low kick, looking for Diaz's leg but Diaz calmly moves out of range.
Diaz scores with a punch to the head.
Diaz shoots in for a takedown - he's clinched up with The One Armed Man but The One Armed Man pushes him off and we're back to square one.
Diaz with a poor takedown
and The One Armed Man counters with a nice leg kick.
Diaz has a takedown stuffed.
Horrible takedown by Diaz or perhaps it was just good defense by The One Armed Man which made him look bad.
That's four minutes gone in the round.
The One Armed Man lands a high kick!
The crowd cheering loudly, showing their appreciation for the quality fight we're seeing here.
Diaz looks for a takedown but The One Armed Man sprawls well.
The One Armed Man misses with a half-hearted attempt at a head kick.
Diaz closes the distance and gets a trip takedown into side control. The One Armed Man quickly recovers to half guard.
Diaz has been looking to land a fair amount of strikes on the ground. He might be looking to soften his opponent up in order to work for a submission.
As the round comes to an end the crowd are showing their appreciation for a great round of action.
The One Armed Man moves his hips nicely and gets into full guard.
The One Armed Man keeping full guard, as Diaz tries to pass.
And thats the end of the round the fighters go back to their corners.
Joe The One Armed Man showed his class in that round. I'd imagine he'll take it on all the scorecards.
The cut man is working on Romo Diaz's cut.
That's time! Back to the action!
The One Armed Man throws the left hand but Diaz avoids the punch easily.
Diaz misses with a looping right.
Diaz fails with the takedown
and The One Armed Man counters with a slapping leg kick.
The One Armed Man tried to score with a low kick but Diaz checks it.
Diaz is using his reach advantage well here, landing the more effective single shots from range.
The One Armed Man scores with a slapping inside leg kick.
Diaz fails to land with the punch combination there - jab, cross, hook, miss, miss, miss.
That's one minute gone in the round.
Diaz shoots in looking for a takedown but The One Armed Man manages to keep the fight standing, pushing Diaz's face into the canvas for good measure before circling away.
Nice takedown defense from The One Armed Man. No joy for Diaz on that attempt.
That's three failed takedown attempts in the round for Romo Diaz. That's going to take a lot out of him.
Diaz with a poor takedown
and The One Armed Man counters with a nice leg kick.
Both fighters are breathing heavily.
The One Armed Man throws a mid kick that lands with a slap.
Joe The One Armed Man seems to be getting the better of the standup.
The One Armed Man buckles his opponent's knee momentarily with a nice leg kick.
The One Armed Man fakes a head punch and goes low to the body. Nicely done.
Joe The One Armed Man is looking to keep the fight on the feet at all costs.
The fans in attendance giving it up for the two fighters, who have really let it all hang out in the last minute or so!
The One Armed Man fakes a jab and then connects with a hook.
That's two minutes gone in the round.
Diaz shoots in looking for a takedown. The One Armed Man tries to sprawl out of it but Diaz keeps driving through. The fighters are pinned against the cage. The One Armed Man manages to get underhooks and after a bit of a struggle, circles away and we're back to standing.
Both fighters are looking to counter, which isn't making for the most exciting fight in the world.
The One Armed Man keeping a good distance there, avoiding the body shot.
Diaz throws a looping left and ducks down for a takedown. He's got his arms around The One Armed Man's waist but The One Armed Man gets an underhook and avoids the takedown by throwing Diaz off to one side.
A telegraphed right hand from Diaz misses the target.
Diaz throws a looping left and ducks down for a takedown. He's got his arms around The One Armed Man's waist but The One Armed Man gets an underhook and avoids the takedown by throwing Diaz off to one side.
The One Armed Man missing with a left hand there. Diaz was out of range so wasted energy throwing that one.
That's three minutes gone in the round.
The One Armed Man looks to land a left hand but Diaz moved out of range nicely.
Diaz is really head hunting here, hardly looking to strike to the body at all.
The One Armed Man displays good takedown defense there as he swats away a double leg from Diaz.
The One Armed Man lands with a nice low kick. That'll leave a bruise.
Diaz throws a left and a right that both miss
and The One Armed Man counters with a quick right hand to the jaw.
The One Armed Man pivots, looking for a leg kick but Diaz is out of range and The One Armed Man settles back down.
Diaz shoots in but The One Armed Man avoids the takedown attempt easily.
That's four minutes gone in the round.
The One Armed Man attempts a low kick but it misses it's target.
The crowd are loving this. Great action here.
The One Armed Man throws a head kick that misses and slips in the process. He scrambles back to his feet and the fighters circle.
Diaz ducks under an overhand right and circles away with a smile on his face.
Diaz lands an overhand right.
Diaz shoots in for a takedown - he's clinched up with The One Armed Man but The One Armed Man pushes him off and we're back to square one.
As the round comes to an end the crowd are showing their appreciation for a great round of action.
Diaz takes a swing at The One Armed Man's ribcage but misses.
And thats the end of the round the fighters go back to their corners.
Joe The One Armed Man really dominated that round.
The cut man is working on Romo Diaz's cut.
That's time! Diaz's corner gives him a slap on the ass as he gets ready to fight.
A telegraphed right hand from Diaz misses the target.
Diaz swings for the body but The One Armed Man moves out of range.
Diaz looks to land a combination but The One Armed Man avoids it well.
The One Armed Man connects with a hook to the side of his opponent's head.
The One Armed Man moves away from the strike by Diaz.
Nice jab there from Diaz.
The One Armed Man throws a leg kick
and Diaz counters with a single leg into guard. The One Armed Man didn't expect that.
We've seen a great period of action over the last minute or so - credit to both fighters for going all out!
The One Armed Man keeping moving, preventing Diaz from controlling successfully.
That's one minute gone in the round.
The One Armed Man wants to sweep but no luck.
Diaz throwing strikes from guard but The One Armed Man blocks nicely.
The One Armed Man is working an open guard here, looking to improve his position. No doubt that will leave him open to counters but at least he's being more offensive.
The One Armed Man is persisting with the attempt to improve his position.
The One Armed Man manages to sweep nicely, so he's now on top. Diaz manages to get himself to full guard.
That's two minutes gone in the round.
Diaz keeping moving, preventing The One Armed Man from controlling successfully.
The One Armed Man trying to pass the guard but can't manage it just yet.
The One Armed Man trying to control the position from guard on top but Diaz is wriggling around, looking for whatever he can.
The One Armed Man sneaks a leg through and gets to half guard. That was like a knife through butter how easily he passed Diaz's guard.
Diaz moves his hips nicely and gets into full guard.
Diaz is trying to control the position but The One Armed Man postures up.
The One Armed Man's corner is telling him to maintain position.
That's three minutes gone in the round.
Diaz is trying to control the position but The One Armed Man postures up.
The One Armed Man trying to control the position from guard on top but Diaz is wriggling around, looking for whatever he can.
The One Armed Man wants to pass the guard but Diaz is keeping the position.
If this pace continues, the referee will definitely step in and force a standup.
The One Armed Man working from the guard for now, landing some ground and pound.
The One Armed Man looking to sit in guard and control but Diaz gets the butterfly guard and sweeps. He's now in the guard on the top.
Diaz preventing the sweep.
The One Armed Man bucks up whilst keeping hold of a body lock, managing to reverse the position. Now he's in top in Diaz's guard.
The One Armed Man wants to pass the guard but Diaz is keeping the position.
That's four minutes gone in the round.
The One Armed Man postures up and lands a big shot to Diaz's brow.
The One Armed Man stands up and looks to throw the legs aside to pass to side control. Diaz swivels though and keeps the full guard.
Romo Diaz overall seems to be getting the better of the ground position in the fight so far.
The One Armed Man wants to control from the top but Diaz keeps moving.
The ref warns both fighters not to hold the cage as they work up against the meshing.
Diaz tries to land a sweep but no joy.
The One Armed Man postures up and lands a big shot to Diaz's brow.
The One Armed Man chips away with some ground and pound.
The crowd cheering loudly, showing their appreciation for the quality fight we're seeing here.
As the round comes to an end the crowd are showing their appreciation for a great round of action.
The One Armed Man trying to control but Diaz is working from the bottom.
Diaz manages to land a sweep and now he's in mount on top!
And thats the end of the round the fighters go back to their corners.
Joe The One Armed Man dominated that fourth round.
The cut man is working on Romo Diaz's cut.
The fighters get back to their feet, the hooter sounds and we're back to the action! And we move into the final round!
Diaz misses with a straight right.
A big left from The One Armed Man misses.
Diaz closes this distance looking for a takedown but The One Armed Man circles away.
We've had a slow start to the round here - hopefully the action picks up.
Diaz fakes a head punch and goes low to the body. Nicely done.
The One Armed Man moves away from the strike by Diaz.
That's one minute gone in the round.
The One Armed Man throws a leg kick but Diaz checks it.
Diaz looks frustrated there after his takedown attempt is stuffed easily.
Diaz keeping at a good range here, avoiding a leg kick.
Diaz misses with a body shot.
Diaz throws a looping left and ducks down for a takedown. He's got his arms around The One Armed Man's waist but The One Armed Man gets an underhook and avoids the takedown by throwing Diaz off to one side.
That's three failed takedown attempts in the round for Romo Diaz. That's going to take a lot out of him.
Diaz manages to get an easy takedown there - catching The One Armed Man on his heels. He'll look to pass The One Armed Man's guard now, I'm sure.
That's two minutes gone in the round.
The One Armed Man looking for submissions from the bottom but instead Diaz passes into half guard.
The One Armed Man is looking for a sweep. Diaz is wise to his cunning plan and keeps the top position.
The One Armed Man is trying to control but can't.
Diaz trying to mount his opponent but The One Armed Man defends it.
Diaz moves into full mount! The One Armed Man won't be happy about that!
Diaz misses with a head shot.
That's three minutes gone in the round.
Diaz lands a couple of good shots and The One Armed Man has given up his back, trying to escape the position!
The crowd hopeful of a finish here - Diaz's supporters are on their feet, screaming for him to go for the rear naked choke.
Diaz is punishing The One Armed Man with strikes - can he finish him?!
Diaz is trying to control but The One Armed Man is trying to escape here - he's now mounted.
Diaz throwing shots from mount but they're not landing.
The One Armed Man can't escape the position.
The crowd are loving this. Great action here.
Diaz with shots to the head and body - The One Armed Man looks very uncomfortable down there.
Diaz punishing his opponent with strikes.
The One Armed Man is rocked!
Diaz lands a heavy elbow.
The One Armed Man is still in real trouble! Can Diaz finish him?
That's four minutes gone in the round.
Diaz cracks The One Armed Man with a big head shot that has him covering up instantly! He's rolled onto his side and the referee has seen enough - this one is aaaaaaaaaaall over!
Ladies and gentlemen, after 4:23 of round 5, we have a winner by way of TKO (Strikes). Romo Diaz!
Romo Diaz retains his heavyweight title!
Romo Diaz seemed lost for words in his post fight interview but he remembered to thank his fans and directed everyone to his website.
|
|
|
|
|
|
|
|
|
|
|
|
|
|
|
|
|
|
|
|
|
|
|
| S |
C
A |
G |
S |
C
B |
G |
|
S |
C |
G |
|
energy
A | B |
|
hype
A | B |
|
pop
A | B |
|
mgr
A | B |
|
FIGHT
RATING
100% |
|
|
|
|
|
|
|
|
|
|

