 |
BFT-217 PBP Commentary |
Undercard bout
|
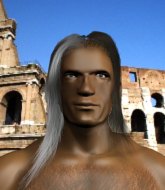
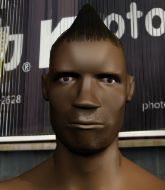
Coming up we have a heavyweight MMA rules bout between Mike McCallum (ranked 0 p4p, 0 weight class) and Buhju Banton (ranked 0 p4p, 0 weight class). Both fighter's entrance songs getting the crowd jumping here.
 |
|
 |
| 190 cm
26
247 lbs
8 - 10 - 0 |
|
203 cm
28
285 lbs
6 - 6 - 0 |
Good wrestling
Excellent boxer
Very quick |
|
BJJ Purple Belt
Excellent boxer
Solid chin |
|
| |
|
Ladies and gentlemen. This fight is 3 rounds, in the heavyweight division.
Introducing the fighter to my left, fighting out of the red corner.
With a record of
8 - 10 - 0, fighting out of Sydney, Mike McCallum!
And introducing the fighter to my right, fighting out of the blue corner.
With a record of
6 - 6 - 0, fighting out of Sydney, Buhju Banton!
The judges for this bout are Damien Edna, Steve Erwin and Winston Howard.

The bell rings for round one and we are underway!
Banton on the wrong end of a nice hook.
A jab from Banton does it's job there.

It looks like Mike McCallum has been cut.
McCallum takes a shot to the eye socket. That's gotta hurt.
Banton throws a low kick, looking for McCallum's leg but McCallum calmly moves out of range.
McCallum throws a series of punches but Banton moves out of range.
Banton misses with the combination.
A big left from Banton misses.
Banton swinging wildly here.
McCallum lands a slapping body shot.
Fantastic stuff here - a very entertaining period of action, which has drawn cheers from the crowd.
A telegraphed takedown attempt from McCallum is defended easily by Banton.
McCallum displays some good footwork, moving neatly out of range as Banton throws out the jab.
Banton displays good takedown defense there as he swats away a double leg from McCallum.
Banton tries to land with a swinging hook to the body but McCallum was well out of range. Poor timing from Banton.
Banton misses with a body shot. Nice footwork from McCallum.

That's one minute gone in the round.
Banton rushes forward with a series of wild hooks but McCallum moves out of range and avoids them all easily.
Banton throws a series of punches but McCallum moves out of range.
McCallum tries to shoot in for a takedown. He's got hold of a leg but Banton swivels and escapes.
That's three failed takedown attempts in the round for Mike McCallum. That's going to take a lot out of him.
Banton fakes a head punch and goes low to the body. Nicely done.
Banton fakes a head punch and goes low to the body. Nicely done.
Banton misses with a body shot.
Buhju Banton is looking to keep the fight on the feet at all costs.
McCallum tries to shoot in for a takedown. He's got hold of a leg but Banton swivels and escapes.
A big right from McCallum misses.
McCallum tries to score a power double leg takedown but Banton sees that one coming and sprawls well. That will dishearten McCallum somewhat.
Banton lands a right hook to the body.
McCallum looks frustrated there after his takedown attempt is stuffed easily.
Banton displays good takedown defense there as he swats away a double leg from McCallum.
McCallum is breathing heavily.
Banton stuffs the takedown attempt from McCallum. McCallum gets slowly back to his feet.

That's two minutes gone in the round.
McCallum moves out of range as Banton throws a body kick.
McCallum walks into a straight right hand from Banton.
Wooooo! Give it up for these two warriors! They are putting on a show!
Banton tries a switch kick but it misses it's target.
Banton just misses with a punch to the body.
Banton throws a wild combination but nothing lands.
McCallum will have to do better than that with his takedown attempts.
Banton fakes a head shot and lands one to the body.
Banton connects with a leg kick. McCallum looked like he was expecting something else and didn't defend it.
Banton scores with a jab. McCallum acknowledges it with a nod of the head.
Banton throws a leg kick but McCallum checks it.
McCallum throws a right hand that Banton ducks under and follows up with a left that Banton also avoids with ease.
McCallum fakes a head punch and goes low to the body. Nicely done.
McCallum shoots in but no luck this time.
Banton swinging wildly here.
Banton swings away but doesn't land with a series of punches.

That's three minutes gone in the round.
McCallum cracks Banton with a right hand to the side of the head.
Nice takedown defense from Banton. No joy for McCallum on that attempt.
Banton throws a hard body shot but it just misses.
Banton leaves McCallum with his face pressed against the mat as he sprawls beautifully, defending against a solid takedown attempt.
Nice cross by Banton.

McCallum scores a trip takedown into side control. Nice.
We may be looking at a referee standup if the pace doesn't pick up soon.
McCallum tries to score with some ground and pound. Banton controls his posture well this time though and the shots don't do any damage.
Banton is not in a great position here, taking some shots.
This has been an exciting period of action!
Banton wants to control but McCallum postures up.
McCallum throws a strike aimed at the side of Banton's head but Banton avoids it well.
The strikes coming from McCallum are missing the target in this wave of attacks.
Banton manages to get one leg in to regain half guard.
Banton won't allow McCallum to pass to mount.

That's four minutes gone in the round.
Banton is trying to control but can't.
Banton tries to roll over but McCallum keeps him under control.
McCallum trying to control from half guard but Banton is working away.
McCallum lands strikes from half guard.
The crowd are going absolutely nuts as the round comes to an end - what a fantastic round of action!
McCallum is keeping good posture, landing some ground and pound.
McCallum is looking to advance position but Banton won't allow it.
Banton is staying active underneath McCallum, who seems content to just control the action from this position.
And thats the end of the round the fighters go back to their corners.
A close round but Buhju Banton will probably get the nod.
The cut man is working on Mike McCallum's cut.
The corners get their ten second warning. Both fighters stand from their stools and stare eachother down, ready to get back to the action.

McCallum closes the distance and clinches up with Banton, looking for a takedown. McCallum pushes Banton against the cage but Banton circles to the side and manages to break the clinch.
Donk. McCallum catches Banton right on the button with a cross.
Banton tries to land with a swinging hook to the body but McCallum was well out of range. Poor timing from Banton.
McCallum fails to land the takedown.
Banton throws an overhand right that drops McCallum like a sack of potatoes! Banton dives in to finish the fight with more strikes and this one is all over!
Ladies and gentlemen, after 0:20 of round 2, we have a winner by way of TKO (Strikes). Buhju Banton!
Buhju Banton decided to thank the fans in attendance for making a great atmosphere. It seemed to go down pretty well.
|
|
|
|
|
|
|
|
|
|
|
|
|
|
|
|
|
|
|
|
|
|
|
| S |
C
A |
G |
S |
C
B |
G |
|
S |
C |
G |
|
energy
A | B |
|
hype
A | B |
|
pop
A | B |
|
mgr
A | B |
|
FIGHT
RATING
100% |
|
|
|
|
|
|
|
Undercard bout
|
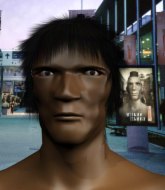
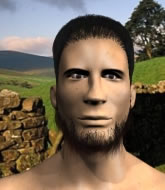
Coming up we have a middleweight MMA rules bout between Lee Flynn (ranked 0 p4p, 0 weight class) and Alex Doumbos (ranked 0 p4p, 0 weight class). I'm sure you'll be fascinated to know that I was talking to some pointless Z list celebrity before the fight and he thought that Alex Doumbos was going to win. Let's see if he was right.
 |
|
 |
| 180 cm
26
185 lbs
4 - 0 - 0 |
|
186 cm
19
200 lbs
0 - 0 - 0 |
BJJ White Belt
Great low kicks
KO power |
|
BJJ Blue Belt
Counter fighter
Good gas tank |
|
| |
|
Ladies and gentlemen. This fight is 3 rounds, in the middleweight division.
Introducing the fighter to my left, fighting out of the red corner.
With a record of
4 - 0 - 0, fighting out of Sydney, Lee Flynn!
And introducing the fighter to my right, fighting out of the blue corner.
With a record of
0 - 0 - 0, fighting out of Sydney, Alex Doumbos!
The judges for this bout are Steve Erwin, Damien Edna and Summer Carpenter.
The bell rings for round one and we are underway!
Doumbos misses with a straight left.

Doumbos clinches.
Flynn gets control of Doumbos's arms and successfully pulls guard. Flynn will no doubt be looking for submissions off his back.
The referee must be thinking about standing these guys back up.
Doumbos trying to control the position from guard on top but Flynn is wriggling around, looking for whatever he can.
Doumbos tries to free his leg and advance position but Flynn is retaining full guard.
Doumbos advances to half guard.
Doumbos landing with strikes to the body and head, softening up his opponent.
The fighters are pressed up against the cage, both looking to find a bit of space to work.
Doumbos is controlling the pace.
The two fighters exchange a few words. I couldn't hear what they were saying but maybe it's more fun if you make it up yourself. Doumbos connects with a nice short shot to Flynn's temple.
Doumbos content to control rather than advance.
This has been an exciting period of action!
Flynn avoiding damage under a succession of punches from Doumbos.
Doumbos scoring with strikes to the body and head.
That's one minute gone in the round.

Doumbos is working for a submission of some sort.
Doumbos maintaining the dominant position here and is working for a kimura. He's locked it up! Flynn could be in real trouble here! He's trying to wriggle out but Doumbos has cracked it and Flynn is screaming in pain - he's tapped out! Great finish by Doumbos!
Ladies and gentlemen, after 1:22 of round 1, we have a winner by way of Submission (Kimura). Alex Doumbos!
|
|
|
|
|
|
|
|
|
|
|
|
|
|
|
|
|
|
|
|
|
|
|
| S |
C
A |
G |
S |
C
B |
G |
|
S |
C |
G |
|
energy
A | B |
|
hype
A | B |
|
pop
A | B |
|
mgr
A | B |
|
FIGHT
RATING
55% |
|
|
|
|
|
|
|
Co-main event
|
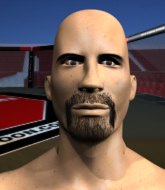
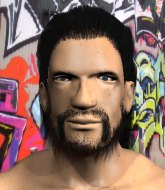
Coming up we have a light heavyweight MMA rules bout between Antoine Wallace (ranked 0 p4p, 0 weight class) and Forrest Gryphen (ranked 0 p4p, 0 weight class). Wallace's entrance music is Pray by Jay-Z feat. Rob Dougan. A fine choice. Gryphen is bouncing up and down as he enters the arena, backed by Tubthumping. Antoine Wallace has the better chin. Will he look to stand and bang today?
 |
|
 |
| 175 cm
34
204 lbs
23 - 17 - 0 |
|
191 cm
25
216 lbs
6 - 6 - 0 |
Good wrestling
Solid boxing
KO power |
|
BJJ Brown Belt
Good kicks
Powerful |
|
| |
|
Ladies and gentlemen. This fight is 3 rounds, in the light heavyweight division.
Introducing the fighter to my left, fighting out of the red corner.
With a record of
23 - 17 - 0, fighting out of Sydney, Antoine Wallace!
And introducing the fighter to my right, fighting out of the blue corner.
With a record of
6 - 6 - 0, fighting out of Sydney, Forrest Gryphen!
The judges for this bout are Skip Squint, Damien Edna and Winston Howard.
The bell rings for round one and we are underway!
Wallace throws a leg kick but Gryphen sees it coming and checks it nicely.
Antoine Wallace seems to be the more aggressive standup fighter in this bout.
Wallace throws a hook but Gryphen avoids it easily.
Wallace throws a lazy uppercut
and Gryphen counters with a body kick.
Gryphen uses some good footwork to avoid the body shot by Wallace.
Wallace misses with a looping right.
Wallace avoids a punch combination nicely.
Gryphen blocks a jab.
Wallace fails with a takedown attempt from distance.
Wallace throws a looping overhand right but Gryphen ducks down to avoid it.
Gryphen pushes forward with a 1-2 combination that forces Wallace back to the cage. Gryphen follows up with a solid lead hook to the liver.
This has been an exciting period of action!
Gryphen keeping his hands up high there, blocking the jab from Wallace.

Wallace has managed to clinch.
Wallace lands a left hand that snaps the head of Gryphen backwards.
Wallace lands a body punch.
Gryphen throws an elbow but it misses.
Wallace lands a right uppercut that snaps the head of Gryphen backwards.
A quick uppercut on the inside from Wallace.

It looks like Forrest Gryphen has been cut.
That's one minute gone in the round.
Gryphen misses with an elbow strike.
Wallace managing to block the knees to the body from Gryphen.
Gryphen misses the knee to the body. Nice hip positioning from Wallace.
Wallace throws a head punch that misses.
Wallace misses with the head strike.
Wallace is really struggling to find his range with his punches. Gryphen's reach advantage is clearly causing him problems.
Wallace lands a left hand.
Gryphen blocking some punches.
Wallace lands a right hand.
Gryphen looks to throw an elbow but misses.
Wallace throws a punch but it's blocked by Gryphen.
Gryphen tries to land knees in the clinch but Wallace avoids the damage to the body.
A short left from Wallace.
Gryphen throws an elbow but it's blocked.
Wallace is working hard here but doesn't seem to be able to control effectively, up against the cage.
Wallace misses with the head strike.
Wallace swings wildly with an uppercut but Gryphen uses good head movement to avoid it.
Wallace throws a head punch that misses.
That's two minutes gone in the round.
Gryphen tries a knee to the head but Wallace blocks it.
Wallace has moved round to his opponent's back and is looking for a suplex! Oh snap! He's tossed Gryphen clear over his head and slammed him to the mat!
This has been an exciting period of action!
Gryphen can't escape the position.
Gryphen breaks Wallace's hooks off and manages to turn into his guard.

Wallace is looking for a guillotine. You can't force these things though and Gryphen defends well.
Wallace working for submissions but it's allowed Gryphen to get to half guard.
Wallace keeping hold of Gryphen's head, controlling as best he can.
Gryphen sitting in half guard, looking to land shots. Wallace defending well though.
Wallace actively working from the bottom here.
Wallace might be looking to lock onto one of his opponent's long limbs for a submission, whilst we're on the ground.
That's three minutes gone in the round.
Gryphen not doing much here.
Wallace is trying to get back to full guard.
Gryphen not landing any meaningful shots this time.
The fighters are starting to get a bit slippery now, which will make submissions a bit more difficult.
Gryphen trying to control from half guard but Wallace is working away.
Gryphen thows a wild elbow that connects with the canvas.
Wallace has no desire to be mounted, so is trying to control. Gryphen is working away from the top position though.
Gryphen is looking to stall here but Wallace recovers full guard.
There's a bit of a scramble here and now Wallace is on top in guard.
That's four minutes gone in the round.
Wallace is intent on slowing down the pace of the fight, simply looking to control.
Wallace throwing strikes but missing.
Wallace throwing shots from guard but he's hitting more mat than opponent.
Wallace working some strikes from top position.
Gryphen looking for submissions off his back, moving his hips, looking for an opening.
Wallace stopping the sweep attempt from Gryphen.
Wooooo! Give it up for these two warriors! They are putting on a show!
Wallace distracts Gryphen with his right hand and drops a big elbow with his other arm.
The crowd are going absolutely nuts as the round comes to an end - what a fantastic round of action!
Wallace distracts Gryphen with his right hand and drops a big elbow with his other arm.
Gryphen keeping full guard, as Wallace tries to pass.
And thats the end of the round the fighters go back to their corners.
Antoine Wallace dominated that round.
The cut man is working on Forrest Gryphen's cut.
That's the end of the interval. I'm sure that seemed a lot quicker than a minute for our two fighters! Back to the action.
Gryphen looking to land some kicks to the body here.
Wallace tries a low kick but Gryphen avoids it.
A combination from Gryphen does no damage.
Wallace throws a big shot that misses.
Wallace shoots in with a takedown attempt and he has Gryphen pinned against the cage. Gryphen gets the underhooks and manages to circle away.
Gryphen lands a kick to the ribs of his opponent. Nice work there - in and out in a flash.
Wallace misses with a hook.
Gryphen misses with a head kick.
Gryphen takes a jab on the nose. He smiles like he loves it and keeps coming.
Wallace swings widly with a right hand
and Gryphen counters with a nice leg kick.
Wallace tests Gryphen's chin there with a solid looking shot.
The fans in attendance giving it up for the two fighters, who have really let it all hang out in the last minute or so!
Gryphen on the wrong end of a nice hook.

Gryphen is rocked!
That's one minute gone in the round.
BAM! Wallace delivers a spinning backfist that drops Gryphen like a ragdoll! This is all oooooveeeer! He was out before he hit the ground!
Ladies and gentlemen, after 1:13 of round 2, we have a winner by way of KO (Spinning Backfist). Antoine Wallace!
Post fight, an emotional Antoine Wallace said 'The A-Train rolls on! Find me someone else to put on their back.'.
|
|
|
|
|
|
|
|
|
|
|
|
|
|
|
|
|
|
|
|
|
|
|
| S |
C
A |
G |
S |
C
B |
G |
|
S |
C |
G |
|
energy
A | B |
|
hype
A | B |
|
pop
A | B |
|
mgr
A | B |
|
FIGHT
RATING
100% |
|
|
|
|
|
|
|
Main event
|
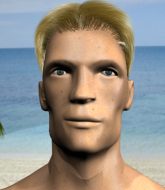
Coming up we have a heavyweight MMA rules bout between Alistair Overeem (ranked 0 p4p, 0 weight class) and Josh Barnett (ranked 0 p4p, 0 weight class). I don't know about you partner, but I'm pumped for this one!
 |
|
|
| 170 cm
28
280 lbs
10 - 4 - 0 |
|
191 cm
23
284 lbs
9 - 2 - 0 |
Good wrestling
Great elbows
Cardio machine |
|
ADCC Champion
Counter fighter
Granite chin |
|
| |
|
Ladies and gentlemen. This fight is 3 rounds, in the heavyweight division.
Introducing the fighter to my left, fighting out of the red corner.
With a record of
10 - 4 - 0, fighting out of Sydney, Alistair Overeem !
And introducing the fighter to my right, fighting out of the blue corner.
With a record of
9 - 2 - 0, fighting out of Sydney, Josh Barnett!
The judges for this bout are Summer Carpenter, Donatello Bradman and John Mangel.
The bell rings for round one and we are underway!
No joy there for Overeem , who threw a few shots but didn't land.
Overeem looks to score with a combo but nothing lands.
Overeem throws an uppercut from half a mile away. Barnett sees it coming and avoids it easily.

Overeem lands a left and a right that send Barnett crashing to the mat, dazed. Overeem thinks about following him to the mat but decides to wave him back up to his feet!
It looks like Josh Barnett has been cut.
Wooooo! Give it up for these two warriors! They are putting on a show!
Overeem throws a jab when Barnett was well out of range.
Overeem is looking to clinch.
Barnett showing good head movement there, avoiding the strikes from Overeem .
The fight stays on the outside here - Overeem looks like he's thinking about clinching though.
Overeem gets to the clinch - let's see what his plan is here.

Barnett is trying to trip Overeem . He has hold of a leg but Overeem is hopping around, keeping his balance for the moment. Barnett persists though and gets the takedown into guard.
That's one minute gone in the round.
The referee claps his hands together and tells the fighters to work.
Barnett trying to control the position from guard on top but Overeem is wriggling around, looking for whatever he can.
Overeem is trying to stand up but he's not managed so far.
Barnett slips effortlessly into side control - very nice.
Overeem on his back here. We all know that wrestlers don't like being on their back so let's see if Overeem tries to get out of the position.
Barnett has hold of Overeem 's arm. He's looking for a kimura. Overeem seems comfortable defending it but Barnett has shifted his position slighty and is cranking on the arm! Overeem is real pain and he's forced to tap out! Overeem is disgusted with himself for not defending it better but Barnett couldn't care less - he's delighted!
Ladies and gentlemen, after 1:28 of round 1, we have a winner by way of Submission (Kimura). Josh Barnett!
During a confident post fight interview, Josh Barnett thanked all his fans. He seemed very genuine when describing how motivated his fans keep him.
|
|
|
|
|
|
|
|
|
|
|
|
|
|
|
|
|
|
|
|
|
|
|
| S |
C
A |
G |
S |
C
B |
G |
|
S |
C |
G |
|
energy
A | B |
|
hype
A | B |
|
pop
A | B |
|
mgr
A | B |
|
FIGHT
RATING
73% |
|
|
|
|
|
|
|
|
|
|
