 |
Hilo Fight 2 PBP Commentary |
Undercard bout
|
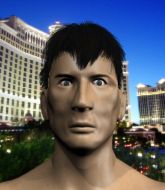
Coming up we have a welterweight MMA rules bout between BJ Hanson (ranked 0 p4p, 0 weight class) and Chuck Huggins (ranked 0 p4p, 0 weight class). Rumors backstage are that the fighters have been paid to keep it standing but we know that would never happen in MMA!
 |
|
 |
| 175 cm
20
180 lbs
1 - 3 - 0 |
|
179 cm
25
170 lbs
0 - 0 - 0 |
BJJ Blue Belt
Solid Muay Thai
Big heart |
|
BJJ White Belt
Excellent MT
Solid chin |
|
| |
|
Ladies and gentlemen. This fight is 3 rounds, in the welterweight division.
Introducing the fighter to my left, fighting out of the red corner.
With a record of
1 - 3 - 0, fighting out of Montreal, BJ Hanson!
And introducing the fighter to my right, fighting out of the blue corner.
With a record of
0 - 0 - 0, fighting out of Hilo, Chuck Huggins!
The judges for this bout are Chris Saunders, Jeff Smith and Micheangelo Fripello.

The bell rings for round one and we are underway!
Huggins defends well against a solid takedown attempt from Hanson.

Hanson pushes Huggins up against the cage in a clinch.
Huggins is pushing Hanson up against the cage, for a bit of lean and pray action. Action being used the in the loosest possible sense of the word.
A frustrated look appears on Hanson's face as he tries to break the clinch.
Hanson letting Huggins take a breather here.

Huggins breaks from the clinch.
Hanson has managed to clinch.
A frustrated look appears on Hanson's face as he tries to break the clinch.
Hanson is working for takedown but Huggins is calmly controlling the position for now.
Hanson stalling here - the referee won't stand for too much of that.
Hanson has a body lock and is looking for a takedown. Huggins is bouncing around trying to prevent the takedown and somehow he has indeed managed to stay on his feet.
That's three failed takedown attempts in the round for BJ Hanson. That's going to take a lot out of him.
Huggins pushes off and circles away, back to the middle of the mat.
Huggins throws a nice looking combination but Hanson bobs and weaves to avoid any damage.

Huggins closes the distance and clinches.
Hanson goes for a takedown in the clinch but Huggins prevents it.
Huggins lands a hook that snaps the head of Hanson backwards.

That's one minute gone in the round.
Huggins pushes off and circles away, back to the middle of the mat.
Huggins moves into range and clinches up with Hanson.
Huggins breaks from the clinch.
Huggins clinches up with Hanson and pushes him back against the cage.
Huggins breaks from the clinch.
Huggins moves into the clinch.
A short right from Huggins on the inside.
A frustrated look appears on Hanson's face as he tries to break the clinch.
Huggins stalling against the cage.
Huggins pushes off and circles away, back to the middle of the mat.
Hanson gets tackled into the cage by Huggins. Huggins maintains the clinch.
Huggins pushes off and circles away, back to the middle of the mat.
This fight brought to you by 5M nutrition - it's mmmmm tasty. Nice jab by Huggins.
Huggins misses with a series of wild punches.

That's two minutes gone in the round.
Huggins fakes with an overhand right and moves in to clinch with Hanson, pushing him back against the cage.
This is a great period of action - very entertaining stuff!
Huggins breaks from the clinch.
Huggins has Hanson up against the cage in a clinch.
Hanson has a body lock and is looking for a takedown. Huggins is bouncing around trying to prevent the takedown and somehow he has indeed managed to stay on his feet.
Huggins's corner calls for him to break the clinch, which he does.
Hanson's hands are dropping dangerously low here and Huggins connects clean with a right hook that sends him down to one knee! Hanson scrambles back to his feet.
Chuck Huggins is looking to keep the fight on the feet at all costs.
Huggins is looking to clinch but Hanson is avoiding it.
Huggins closes the distance and clinches.
Hanson tries to score a body lock takedown but Huggins shows good agility there to stay on his feet.
Huggins escapes the clinch and we're back to striking.
Huggins forces Hanson back against the cage and clinches.
Huggins manages to break the clinch.

That's three minutes gone in the round.
Huggins clinches with his opponent.
Huggins presses Hanson against the cage and delivers a mid-strength body shot.
Hanson goes for a takedown attempt but Huggins pushes him away and we're back to fighting at a distance.
Huggins fails in his attempt to clinch.
Hanson shoots for a double leg takedown but Huggins sprawls well. He's pushed Hanson's face into the mat and manages to get back to his feet relatively easily.
Hanson walks into a left hand.
Chuck Huggins seems to be the more aggressive standup fighter in this bout.
Huggins clinches up against the cage.
Huggins breaks the clinch.
Hanson takes a shot to the body in his stride.
Hanson is breathing heavily.
Huggins moves into the clinch.

That's four minutes gone in the round.
Fantastic stuff here - a very entertaining period of action, which has drawn cheers from the crowd.
Huggins breaks the clinch and we return to the middle of the mat.
Huggins scores with a crisp jab that stopped Hanson in his tracks.
Huggins scores to the head and body with a nice combination!

Hanson is rocked!
The fight stays on the outside here - Huggins looks like he's thinking about clinching though.
Huggins moves into the clinch successfully.
Huggins breaks from the clinch.
Huggins gets in close and instigates a clinch.
Huggins breaks the clinch and we're back to striking at distance.
Huggins has Hanson up against the cage in a clinch.
The crowd are going absolutely nuts as the round comes to an end - what a fantastic round of action!
Hanson is trying to break free.
Huggins breaks from the clinch.
Huggins tries to clinch but is not successful on this occasion.
And thats the end of the round the fighters go back to their corners.
Chuck Huggins dominated that round.
Well, the break between rounds is over. Let's get back to the scrappin!

Huggins darts in and clinches Hanson up against the cage.
Hanson is trying to force a seperation but Huggins has the dominant position.
Huggins's corner calls for him to break the clinch, which he does.
Hanson fakes high and swings low for a body shot but Huggins manages to avoid it.
Hanson looks shocked there as he takes a right hand to the temple.
Hanson misses with a takedown attempt - Huggins sprawls well and throws a nice strike on the way out which just misses.
Huggins clinches with his opponent.
Huggins manages to break the clinch.
Huggins forces Hanson back against the cage and clinches.
Huggins breaks the clinch and we're back to striking at distance.
Huggins has been the more effective fighter overall so far.
Huggins moves into the clinch.
Huggins escapes the clinch and we're back to striking.
Hanson tries to keep at a distance but Huggins has taken the fight into the clinch.
That's one minute gone in the round.
Hanson tries to land a knee to the body but he is off balance and Huggins avoids it.
Hanson is working for a takedown up against the cage. He can't get it on this occasion though.
Huggins breaks from the clinch.
Huggins tries to close the distance and clinch up against the cage but Hanson paws at him with a jab and circles away.
Huggins clinches up with Hanson and pushes him back against the cage.
Huggins breaks from the clinch.
Huggins lands a beauty of a right hand that gets the crowd cheering.
Hanson closes the distance and presses his opponent up against the cage.
Huggins breaks the clinch.
Huggins fails to land with a series of punches.
Hanson drives through and clinches with Huggins against the cage.
Hanson is working on a leg, looking for a takedown but Huggins is defending well.
That's three failed takedown attempts in the round for BJ Hanson. That's going to take a lot out of him.
Hanson trying to control the position but instead, Huggins has worked for underhooks and has pushed Hanson into the cage.
That's two minutes gone in the round.
Hanson tries to break free but Huggins pushes him back against the cage.
Hanson looking for a takedown.
Both fighters are absolutely exhausted here.
Huggins lands with a left to the head.
Fantastic stuff here - a very entertaining period of action, which has drawn cheers from the crowd.
A short uppercut from Huggins.
Hanson misses with an elbow over the top.
Huggins breaks the clinch and we're back to striking at distance.
Huggins clinches with his opponent.
Huggins manages to break the clinch.
Huggins gets a clinch.
Huggins breaks the clinch and we return to the middle of the mat.
Huggins catches Hanson with a nice straight right. He seems pissed - ooooh, it's on now! On like donkey kong!
Oh Hanson is still all over the place! His legs are completely gone! Will he be able to recover?!!
Hanson looks frustrated there after his takedown attempt is stuffed easily.
Hanson seems to have got his legs back now.
Huggins closes the distance and presses his opponent up against the cage.
That's three minutes gone in the round.
Huggins breaks the clinch.
Huggins wants to clinch.
Huggins moves into the clinch successfully.
Huggins manages to break the clinch.
Huggins drives through and clinches with Hanson against the cage.
Huggins breaks from the clinch.

Oooooh!!! Huggins has knocked Hanson down with a huge combo! Huggins steps away and waves a wobbly Hanson back to his feet! This one might not go much longer!
The crowd are loving this. Great action here.
Huggins has closed the distance and engaged Hanson in a clinch.
Huggins manages to break the clinch.
Huggins gets to the clinch - let's see what his plan is here.
That's four minutes gone in the round.
Huggins scores with a shoulder strike.
Huggins is pressed up against the cage. Hanson has hold of a leg and is looking to drag Huggins down to the mat. Huggins avoids the attempt though and has circled away. We're back to striking at a distance.
Chuck Huggins seems to be getting the better of the standup.
Huggins wants to clinch up but Hanson keeps it at a distance.
Huggins jabs Hanson right on the nose. Hanson blinks but takes it well.
Huggins fakes with an overhand right and moves in to clinch with Hanson, pushing him back against the cage.
Huggins manages to break the clinch.
Huggins has Hanson up against the cage in a clinch.
Huggins escapes the clinch and we're back to striking.
Hanson is sent reeling backwards by a solid uppercut. He barely regains his balance and Huggins moves in for the kill throwing a continuous barrage of punches that force the ref to step in.
Ladies and gentlemen, after 4:48 of round 2, we have a winner by way of TKO (Strikes). Chuck Huggins!
|
|
|
|
|
|
|
|
|
|
|
|
|
|
|
|
|
|
|
|
|
|
|
| S |
C
A |
G |
S |
C
B |
G |
|
S |
C |
G |
|
energy
A | B |
|
hype
A | B |
|
pop
A | B |
|
mgr
A | B |
|
FIGHT
RATING
52% |
|
|
|
|
|
|
|
Undercard bout
|
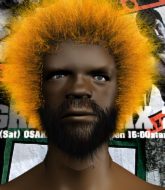
Coming up we have a welterweight MMA rules bout between Dan The Drunk (ranked 0 p4p, 0 weight class) and Torin Williams (ranked 0 p4p, 0 weight class). Williams is bobbing his head along to his entrance song: Whom Shall I Fear. Over to our ring announcer for the fighter introductions!
 |
|
 |
| 186 cm
25
170 lbs
0 - 1 - 0 |
|
185 cm
23
183 lbs
1 - 3 - 0 |
Good wrestling
Counter fighter
KO power |
|
Decent wrestler
Decent boxing
Granite chin |
|
| |
|
Ladies and gentlemen. This fight is 3 rounds, in the welterweight division.
Introducing the fighter to my left, fighting out of the red corner.
With a record of
0 - 1 - 0, fighting out of Hilo, Dan The Drunk!
And introducing the fighter to my right, fighting out of the blue corner.
With a record of
1 - 3 - 0, fighting out of Hilo, Torin Williams!
The judges for this bout are Micheangelo Fripello, Colin Fray and Chris Saunders.
The bell rings for round one and we are underway!
Nice sprawl there from The Drunk as Williams shoots in.
Williams cracks a nice hook into The Drunk's ribs.
Williams moves into range and throws a combination. A nice jab followed by a hook to the body.

It looks like Dan The Drunk has been cut.
Williams scores with a nice looking left hook and follows it up with an uppercut!
Williams is looking to take this fight into the clinch.
The Drunk misses with a wild body shot.
Williams feints a jab promting The Drunk to slip. Williams then demonstrates his capabilities by jabbing again. The Drunk slips again and ducks right into an uppercut.
Williams doesn't manage to clinch there - The Drunk circles away.
The Drunk swats away the attempt to clinch by Williams.
Williams scores with a nice right hand.
That's one minute gone in the round.
Williams lands three nice shots there - that looked like it hurt!
Williams tries to clinch up
and The Drunk counters into the clinch. Nicely done.
The Drunk avoids a wild elbow strike from Williams.
Williams is working for a takedown up against the cage. He can't get it on this occasion though.
Williams is trying to work for a single leg takedown but The Drunk pulls him back up using the underhooks.
Dan The Drunk has stuffed three takedown attempts in the round now. That's going to take a lot out of Torin Williams.
The Drunk has hold of a leg and is looking for a trip takedown. Williams avoids it nicely though and we remain in the clinch.
The Drunk keeps the fight in the clinch, despite Williams's efforts to push away.
The Drunk looking for a takedown.
Williams has had enough of the clinch but The Drunk keeps him there for the moment.
That's two minutes gone in the round.
Williams looking to slow down the pace here.
The Drunk tries to score a body lock takedown but Williams shows good agility there to stay on his feet.
The Drunk is looking for a takedown up against the cage. Williams gets underhooks though and prevents the takedown attempt.
The Drunk is working for takedown but Williams is calmly controlling the position for now.
The Drunk keeps the fight in the clinch, despite Williams's efforts to push away.
Williams has dropped down and is looking to force the takedown but it's defended by The Drunk after a bit of a struggle.
Nice body punch from Williams.
The fans in attendance giving it up for the two fighters, who have really let it all hang out in the last minute or so!
The Drunk has Williams pressed against the cage, preventing Williams from circling away and getting back to striking at range.
Williams manages to break the clinch.
Jab from Williams.
That's three minutes gone in the round.
Williams turns his hip over beautifully as he lands a nice leg kick.
Williams dips to his left and cracks The Drunk with an uppercut!
Williams tries to clinch up but The Drunk circles away and keeps his distance.
Williams displaying good standup as he scores with a three punch combination.
Williams clinches up with The Drunk and pushes him back against the cage.
Williams swings away with an uppercut that misses.
Williams wants to take the fight to the mat but The Drunk manages to get underhooks and keep the fight in the clinch.
The Drunk is pressed up against the cage. Williams has hold of a leg and is looking to drag The Drunk down to the mat. The Drunk avoids the attempt though and has circled away. We're back to striking at a distance.
Williams lands with a two punch combination before moving back out of range.

Williams closes the distance and looks for a trip takedown... aaaand he's got it - Williams lands in his opponent's guard.
The Drunk on his back here. We all know that wrestlers don't like being on their back so let's see if The Drunk tries to get out of the position.
Fantastic stuff here - a very entertaining period of action, which has drawn cheers from the crowd.
The referee looks like he's ready to step in and stand the fighters back up.
The Drunk pulls Williams in close to prevent any damage.
That's four minutes gone in the round.
The Drunk is working the butterfly guard. He manages to land a nice scissor sweep and is now in half guard on the top. Nice move.
The Drunk wants to control but Williams is keeping him busy.
Williams wants to control but The Drunk is keeping busy and won't allow it.
The Drunk seems very keen to just sit and control from half guard but Williams does not like that idea so much and is remaining active off his back.

The Drunk looking for a kimura but he'll have to free his other leg if he wants to finish that. Perhaps he's just using it as a distraction technique.
The Drunk wants to take a breather but Williams is having none of it.
And thats the end of the round the fighters go back to their corners.
Torin Williams dominated that round.
The cut man is working on Dan The Drunk's cut.
OK. That's time! The bell goes and we're back to the action.
The Drunk with a poor takedown
and Williams counters with a three punch combo that has The Drunk backing up. The Drunk nods at Williams to acknowledge the strikes.
The Drunk gets caught on his heels momentarily as he allows Williams to score an easy takedown into full guard.
Williams in full guard, throwing the ground and pound. No damage this time.
The ref warns both fighters not to hold the cage as they work up against the meshing.
The Drunk manages to land a sweep and now he's in mount on top!
The Drunk trying to control but he's not successful this time.
Williams is looking to get back to his feet - it's going to be hard from this position.
Williams tries to improve his position but The Drunk has taken his back! The Drunk has a choke - it's sunk in pretty tight... Will Williams tap? No... maybe... yes! He's tapped! The Drunk pushes Williams away and gets up to celebrate with his corner!
Ladies and gentlemen, after 1:55 of round 2, we have a winner by way of Submission (RNC). Dan The Drunk!
Dan The Drunk took his opportunity to call for a title shot in his post fight interview.
|
|
|
|
|
|
|
|
|
|
|
|
|
|
|
|
|
|
|
|
|
|
|
| S |
C
A |
G |
S |
C
B |
G |
|
S |
C |
G |
|
energy
A | B |
|
hype
A | B |
|
pop
A | B |
|
mgr
A | B |
|
FIGHT
RATING
100% |
|
|
|
|
|
|
|
Undercard bout
|
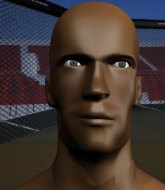
Coming up we have a welterweight MMA rules bout between Jay Penn (ranked 0 p4p, 0 weight class) and Leo Vieira (ranked 0 p4p, 0 weight class). Leo Vieira is the more experienced fighter, so let's see if that makes a difference tonight.
 |
|
 |
| 179 cm
23
178 lbs
0 - 0 - 0 |
|
183 cm
30
176 lbs
8 - 17 - 0 |
Good takedowns
Brawler
Good chin |
|
BJJ Purple Belt
Solid Muay Thai
Knockout power |
|
| |
|
Ladies and gentlemen. This fight is 3 rounds, in the welterweight division.
Introducing the fighter to my left, fighting out of the red corner.
With a record of
0 - 0 - 0, fighting out of Hilo, Jay Penn!
And introducing the fighter to my right, fighting out of the blue corner.
With a record of
8 - 17 - 0, fighting out of Hilo, Leo Vieira!
The judges for this bout are Josh West, Roger Salmon and Micheangelo Fripello.
The bell rings for round one and we are underway!

Penn shoots in for a takedown! He's got it and he's managed to land in side control! That's better than Penn was expecting from the takedown attempt, I'm sure!
The referee looks like he's ready to step in and stand the fighters back up.
Vieira is looking for a sweep.
Penn tries for an arm triangle. That looks pretty tight to me. Is this one over!?! Possibly, maybe, no Penn has let go of the choke. Obviously it wasn't as tight as we thought!
Vieira is positioning himself to get back to half guard.
Penn tries to advance to mount but Vieira instead regains half guard.
That's one minute gone in the round.
Penn is looking for the mount but instead finds himself back in full guard.
Penn looking to pass the guard.
Vieira not looking particularly offensive just at the moment.

Vieira escapes his hips to the side and looks to be working for an armbar. Penn gives him a little smile and shakes his head. No chance.
That's two minutes gone in the round.
Penn drops back looking for a heel hook - he quickly realises he's not going to get it but Vieira manages to dive on top of him before he can escape and now Penn has Vieira in his guard.
Vieira thinks about going for a leg but decides against it, in order to maintain the position.
Vieira drops back for a leg but he's not going to get it - he lets go and Penn dives on top into guard.
Penn drops back for a leg but he's not going to get it - he lets go and Vieira dives on top into guard.
That's three minutes gone in the round.
Penn looking for a sweep. Not yet Penn, not yet.
Penn has a loose triangle. He'll be looking to tighten that up but Vieira can see exactly what he's planning and manages to posture up and free himself.
Penn keeping moving, preventing Vieira from controlling successfully.
Vieira lands a nice shot whilst sitting in his opponent's guard.
Penn working from the bottom, still in full guard. He's managed to get a loose triangle. Vieira doesn't seem to be doing much to defend here, obviously he feels comfortable in the position. Vieira manages to throw the legs off his shoulder and he's back into guard - no problem.
Vieira is trying to work a guillotine from the top, or something like that? Don't know how he thinks he's going to get a finish from there.
Vieira drops back for a leg! It's a sloppy attempt though and Vieira jumps back into guard quickly, to retain the dominant position.
Vieira scores with a decent looking elbow strike.
That's four minutes gone in the round.
Vieira thinks about going for a leg but decides against it, in order to maintain the position.
Vieira missing there with some ground and pound from the guard.
Vieira wants to control from the top but Penn keeps moving.
Penn is trying to stand up but he's not managed so far.
Vieira trying to control but Penn is working from the bottom.
The crowd cheering loudly, showing their appreciation for the quality fight we're seeing here.
Vieira drops back looking for a leg! Penn is in trouble here! The fighters roll with the hold and Penn manages to kick Vieira off! Vieira jumps back into Penn's guard.
The crowd applaud the fighters efforts here as the round comes to an end.
Vieira slows down the pace of the fight, as he sits in guard.
And thats the end of the round the fighters go back to their corners.
A close round but Leo Vieira will probably get the nod.
That's the end of the interval. I'm sure that seemed a lot quicker than a minute for our two fighters! Back to the action.
Vieira dives in and grabs Penn's left leg, looking for a takedown. Penn pushes down on Vieira's head and hops out.
Vieira fails with a takedown attempt.
Penn shoots in and scores a nice double leg takedown into half guard.
Vieira works his way to full guard. Good work.
Vieira bucks up whilst keeping hold of a body lock, managing to reverse the position. Now he's in top in Penn's guard.
That's one minute gone in the round.
Vieira trying to control the position from guard on top but Penn is wriggling around, looking for whatever he can.
Vieira is holding a leg here, probably looking for an ankle lock - he drops back and goes for it! Penn is in trouble! Is it all over??? No! Penn has escaped and now he's on top!
The fighters are pressed up against the cage, both looking to find a bit of space to work.
Vieira looking for a sweep. Not yet Vieira, not yet.
Penn looking to pass the guard.
Penn pushing down on Vieira's thigh, trying to pass to half guard. He's managed it... Nice work.
That's two minutes gone in the round.
Penn is sneakily working for an arm triangle but Vieira sees it coming and defends easily.
Vieira makes his way to full guard. A much better position for Vieira.
Vieira working a defensive guard here.
Vieira wants to sweep but no luck.
Penn passes easily into side control. Nice work.
That's three minutes gone in the round.
Penn goes for an armbar! This could be all over! Wait, no, Vieira rolls with the submission and now he's on top in Penn's guard! Nice work there by Vieira!
Vieira trying to control the position from guard on top but Penn is wriggling around, looking for whatever he can.
Vieira must be cautious of submissions here, given that his opponent has the superior Jiu Jitsu.
Vieira drops back for a leg but he's not going to get it - he lets go and Penn dives on top into guard.
Vieira has his hands on Penn's head, controlling the position.
Penn pressing down on his opponent's thigh, looking to pass guard. Vieira is keeping the position for now.
That's four minutes gone in the round.
Vieira looking for a sweep. Not yet Vieira, not yet.
Vieira manages to land a sweep and now he's in mount on top!
The crowd applaud the fighters efforts here as the round comes to an end.
Penn is wriggling around trying to escape.
And thats the end of the round the fighters go back to their corners.
A close second round but Leo Vieira will probably get the nod - 10:9.
That's the end of the round. The referee orders the cornermen out of the cage so we can get back down to business. And we move into the final round!

Vieira shoots in for a takedown but Penn shows good takedown defense there and keeps this one on the feet.
Jay Penn is looking to throw some combinations by the looks of things.
Vieira fails with the takedown
and Penn counters with a takedown into side control! That could mean trouble for Vieira!
Vieira tries to bench press Penn off him but Penn keeps the position.
Penn has knee on belly and now moves to full mount! Trouble for Vieira!
Penn prevents Vieira from getting the reversal.
Penn is looking to secure an arm. He's managed it! He's pivoting for an armbar - that looks tight! But Vieira has managed to get out of it and now he's in a dominant position. Nice work from Vieira!
Vieira throws an elbow that misses. Penn uses the momentum to reverse the position. He's now in Vieira's guard. Nice move by Penn!
We've seen a great period of action over the last minute or so - credit to both fighters for going all out!
Vieira tries to land a sweep but no joy.
That's one minute gone in the round.
Penn pushing down on Vieira's thigh, trying to pass to half guard. He's managed it... Nice work.
Penn is working for a kimura but Vieira is defending it quite comfortably.
Penn is looking for a kimura. It's going to be difficult to finish that from half guard though and Vieira defends it well.
Penn tries to pass to full mount but Vieira defends it.
That's two minutes gone in the round.
Penn trying to advance position but Vieira counters by regaining guard.
Penn stands up and looks to throw the legs aside to pass to side control. Vieira swivels though and keeps the full guard.
Leo Vieira is fighting for a decision - hopefully he's judged it right and he's actually winning the fight.
Vieira seems keen to control Penn's posture.
That's three minutes gone in the round.
Penn pushes down on Vieira's leg and manages to get into half guard.
Penn is working for submissions here but there's nothing on.
Vieira is looking to improve his position.
Penn trying to pass the guard but Vieira defending well.
That's four minutes gone in the round.
Penn is thinking about going for an arm triangle but he can't free his leg.
Vieira is defending against the submission attempts here by Penn.
Both fighters are breathing heavily.
Penn trying to pass the guard but Vieira defending well.
And that's the end of the fight!
Jay Penn showed his dominance in that final round.
I think Vieira has won this one but let's see whether the judges agree with me. Over to the ring announcer for the scorecards.
Ladies and gentlemen, after 3 rounds of action, we go to the scorecards for a decision.
Judge Josh West scores the fight 29:29
Judge Roger Salmon scores the fight 29:29
Judge Micheangelo Fripello scores the fight 28:29
The fight is ruled a majority draw!
|
|
|
|
|
|
|
|
|
|
|
|
|
|
|
|
|
|
|
|
|
|
|
| S |
C
A |
G |
S |
C
B |
G |
|
S |
C |
G |
|
energy
A | B |
|
hype
A | B |
|
pop
A | B |
|
mgr
A | B |
|
FIGHT
RATING
38% |
|
|
|
|
|
|
|
Co-main event
|
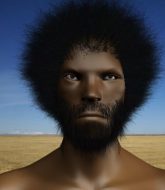
Coming up we have a bantamweight MMA rules bout between Dennis Tjaber (ranked 0 p4p, 0 weight class) and BabyJay Penn (ranked 0 p4p, 0 weight class). Fingers crossed for an exciting fight - I'm sure both fighters are looking for a nice under the table bonus!
 |
|
 |
| 170 cm
18
132 lbs
1 - 0 - 0 |
|
178 cm
22
142 lbs
1 - 0 - 0 |
BJJ White Belt
Solid boxing
Big heart |
|
Good takedowns
Brawler
Granite chin |
|
| |
|
Ladies and gentlemen. This fight is 3 rounds, in the bantamweight division.
Introducing the fighter to my left, fighting out of the red corner.
With a record of
1 - 0 - 0, fighting out of Hilo, Dennis Tjaber!
And introducing the fighter to my right, fighting out of the blue corner.
With a record of
1 - 0 - 0, fighting out of Hilo, BabyJay Penn!
The judges for this bout are Ryoma Takatsuka, Micheangelo Fripello and Colin Fray.
The bell rings for round one and we are underway!
Penn has his head slapped from side to side by a 3 punch combination. That must have hurt him.
Penn dives in and grabs Tjaber's left leg, looking for a takedown. Tjaber pushes down on Penn's head and hops out.
Penn closes the distance and gets a double leg, slamming Tjaber to the mat! Tjaber manages to get full guard.
Penn trying to pass the guard but can't manage it just yet.
Penn slips nicely into half guard.
Tjaber tries to get to full guard but Penn has control of the leg.
Penn is a painfully thin specimen of a man. You do wonder whether a good body kick would snap him clean in two.
Tjaber trying to control here.
Penn is trying for a guillotine from the top but the pressure isn't in the right place so Tjaber is just riding it out for now. Penn eventually gives up the hold.
Penn is working for a submission of some sort.
That's one minute gone in the round.
Tjaber is staying active underneath Penn, who seems content to just control the action from this position.
Tjaber knows he needs to get back to his feet asap. He's simply no match for Penn on the ground.
Penn prevents Tjaber from improving his position.
Penn seems like he's working for an arm triangle here. He's freed his trapped foot and he's rotating nicely. Tjaber is in big trouble! He's tapping out! This one is aaaaaaaaaaaall over!
Ladies and gentlemen, after 2:59 of round 1, we have a winner by way of Submission (Arm Triangle). BabyJay Penn!
|
|
|
|
|
|
|
|
|
|
|
|
|
|
|
|
|
|
|
|
|
|
|
| S |
C
A |
G |
S |
C
B |
G |
|
S |
C |
G |
|
energy
A | B |
|
hype
A | B |
|
pop
A | B |
|
mgr
A | B |
|
FIGHT
RATING
35% |
|
|
|
|
|
|
|
Main event
|
Coming up we have a welterweight MMA rules bout between Ford Prefect (ranked 0 p4p, 0 weight class) and Evaristus Cookescommons (ranked 0 p4p, 0 weight class). Prefect comes to the cage accompanied by For Whom The Bell Tolls. The crowd seem to be enjoying Cookescommons's choice of entrance music: Dropkick Murphys - Shipping up to Boston. Evaristus Cookescommons has the eye of the tiger tonight.
 |
|
 |
| 180 cm
32
181 lbs
8 - 10 - 0 |
|
179 cm
31
178 lbs
7 - 3 - 0 |
Powerful takedowns
Solid boxing
Cardio machine |
|
Good wrestler
Decent boxing
Solid chin |
|
| |
|
Ladies and gentlemen. This fight is 3 rounds, for the welterweight championship of the world!
Introducing the champion to my left, fighting out of the red corner.
With a record of
8 - 10 - 0, fighting out of Hilo, Ford Prefect!
And introducing the challenger to my right, fighting out of the blue corner.
With a record of
7 - 3 - 0, fighting out of Hilo, Evaristus Cookescommons!
The judges for this bout are Micheangelo Fripello, Jeff Smith and Paul Gruel.
The bell rings for round one and we are underway!
Prefect slips a jab and a cross from Cookescommons.
Cookescommons shoots in for a takedown from distance. He catches Prefect napping and manages to drive through into side control!
Prefect wants to get back to his feet.
Prefect takes a couple of big shots there - the referee warns him that he has to defend himself better.
Cookescommons prevents Prefect from escaping the position.
Prefect parries the strikes from Cookescommons easily there. Cookescommons is wary of posturing up too much because it might enable Prefect to escape.
Cookescommons tries for a kimura but Prefect is defending well.
Prefect is trying to get back to half guard. He's pushing on Cookescommons's leg. He's managed it. Nice work.
Prefect manages to get to full guard.
Prefect tries to land a sweep but no joy.
Cookescommons wants to stand and escape but instead Prefect has hit a sweep and he's now on top in guard.
We've seen a great period of action over the last minute or so - credit to both fighters for going all out!
Cookescommons is throwing his legs up, looking for submissions. Prefect is aware though and is defending well.
That's one minute gone in the round.
Cookescommons throws his legs up looking for a submission but Prefect uses it to pass to side control.
Prefect staying calm.
Cookescommons is putting a lot of effort into getting back to his feet here.
Cookescommons wants to control but Prefect postures up.
Cookescommons is not content to let Prefect control the position.
Prefect tries for an arm triangle. That looks pretty tight to me. Is this one over!?! Possibly, maybe, no Prefect has let go of the choke. Obviously it wasn't as tight as we thought!
Cookescommons is looking to get back to his feet here but Prefect is keeping cool and he's managed to take Cookescommons's back.
That's two minutes gone in the round.
The fighters are going at a pretty good pace and they're both starting to sweat now.
Cookescommons looking to stop the rear naked choke attempt by controlling the hands.
I really don't envy Cookescommons right now.
The ref warns both fighters not to hold the cage as they work up against the meshing.
Cookescommons is trying to get back to his feet but he's not managed it yet.
Prefect wants to control but Cookescommons is keeping busy.
Cookescommons holding both Prefect 's hands and preventing any damage.
A bit of a pause in the action here. Prefect controlling the positon.
Prefect is looking to control Cookescommons but Cookescommons is wriggling around and keeping busy.
Cookescommons rolls, trying to escape but Prefect keeps control of the position.
The crowd cheering loudly, showing their appreciation for the quality fight we're seeing here.
Prefect is not going to allow Cookescommons to sit and survive in this position.
That's three minutes gone in the round.
Prefect keeps control of the position as Cookescommons tries to break free.
You know, I was talking to some of our celebrities at ringside tonight and they were split right down the middle on who was going to win this fight.
Cookescommons wants to get back to his feet.
Cookescommons breaks Prefect's hooks off and manages to turn into his guard.
Prefect escapes his hips to the side and looks to be working for an armbar. Cookescommons gives him a little smile and shakes his head. No chance.
Prefect is controlling Cookescommons's posture.
Prefect escapes his hips to the side and looks to be working for an armbar. Cookescommons gives him a little smile and shakes his head. No chance.
Prefect is trying to keep Cookescommons in close.
That's four minutes gone in the round.
Cookescommons lands a couple of digs.
Cookescommons pressing down on his opponent's thigh, looking to pass guard. Prefect is keeping the position for now.
Both fighters really going for it on the ground here!
Prefect is active off his back here, looking for submissions.
The crowd cheering loudly, showing their appreciation for the quality fight we're seeing here.
Prefect escapes his hips to the side and looks to be working for an armbar. Cookescommons gives him a little smile and shakes his head. No chance.
Prefect preventing the ground and pound from doing any damage.
Prefect is trying to control the position but Cookescommons postures up.
Cookescommons working from the guard for now, landing some ground and pound.
Prefect wants to stand but Cookescommons is controlling the position.
As the round comes to an end the crowd are showing their appreciation for a great round of action.
Prefect working a defensive guard here.
Prefect has his foot on Cookescommons's thigh. He's trying to push off and get in position for a triangle, I think. Cookescommons works his way back into a safe position though.
And thats the end of the round the fighters go back to their corners.
Ford Prefect dominated that round.
The minute break is over - no more time for sponges and pep talks - back to the action!
Cookescommons will have to do better than that with his takedown attempts.
Prefect showing good head movement there, avoiding the strikes from Cookescommons.
Cookescommons shoots in for a takedown. He's persisting with it as Prefect sprawls well. Prefect wins this battle and keeps the fight standing. Cookescommons gets slowly back to his feet.
Cookescommons moves in looking to clinch but Prefect pushes him off.
Cookescommons fakes with an overhand right and moves in to clinch with Prefect, pushing him back against the cage.
Cookescommons has Prefect pressed up against the cage and is working for takedown. Prefect manages to improve position though and keeps the fight standing.
Ford Prefect has stuffed three takedown attempts in the round now. That's going to take a lot out of Evaristus Cookescommons.
Cookescommons wants to strike at distance but he can't break free of the clinch.
Cookescommons tries to score a body lock takedown but Prefect shows good agility there to stay on his feet.
Cookescommons tries to pull guard but can't drag his opponent to the mat. Prefect just stands there and leans against the cage.
A nice glancing elbow lands by Prefect.

It looks like Evaristus Cookescommons has been cut.
Cookescommons managing to block the knees to the body from Prefect.
Cookescommons has a body lock and is looking for a takedown. Prefect is bouncing around trying to prevent the takedown and somehow he has indeed managed to stay on his feet.
Cookescommons is working on a leg, looking for a takedown but Prefect is defending well.
Prefect lands an elbow inside that Cookescommons shrugs off.
That's one minute gone in the round.
Prefect misses the knee to the body. Nice hip positioning from Cookescommons.
Prefect stalling in the clinch.
Prefect stalling in the clinch but Cookescommons improves position.
Prefect stops a takedown attempt from Cookescommons.
Cookescommons is working for a takedown up against the cage. He can't get it on this occasion though.
Cookescommons is breathing heavily.
Prefect tries to land knees in the clinch but Cookescommons avoids the damage to the body.
Prefect landing knees to the body.
Wooooo! Give it up for these two warriors! They are putting on a show!
A nice glancing elbow lands by Prefect.
Prefect lands a nice elbow from the clinch.
Prefect lands an elbow inside.
Prefect stops a takedown attempt from Cookescommons.
Prefect is clearly stalling here... Pick up the pace son.
Prefect misses the knee to the body. Nice hip positioning from Cookescommons.
Prefect misses the knee to the body. Nice hip positioning from Cookescommons.
Cookescommons blocks a knee to the body. He'll have a nicely bruised forearm in the morning.
That's two minutes gone in the round.
Prefect is looking to score with knees to the body. Maybe he'll change it up and go body then head. Cookescommons is defending well for now.
Cookescommons working hard to break the clinch.
Prefect lands an elbow inside that Cookescommons shrugs off.
Prefect lands an elbow inside that Cookescommons shrugs off.
Prefect missing with knees to the body.
Prefect throws a vicious knee straight up the middle but Cookescommons blocks it with crossed arms.
Prefect gets an overhook and lands an elbow to the side of the head.
Cookescommons has a body lock and is looking for a takedown. Prefect is bouncing around trying to prevent the takedown and somehow he has indeed managed to stay on his feet.
Prefect throws an elbow that misses.
Cookescommons drops down for a takedown but doesn't get it.
Prefect lands a nice elbow.
Prefect lands an elbow inside.
Prefect tries to land knees in the clinch but Cookescommons avoids the damage to the body.
Cookescommons is looking to take this one to the mat.
Prefect landing some nice looking knees to the body.
That's three minutes gone in the round.
Cookescommons has Prefect pressed up against the cage and is working for takedown. Prefect manages to improve position though and keeps the fight standing.
A bit of stalling here from Prefect.
Prefect lands an elbow inside that Cookescommons shrugs off.
Cookescommons managing to block the knees to the body from Prefect.
Cookescommons managing to block the knees to the body from Prefect.
Prefect throws a nice elbow but it doesn't land.
Prefect missing with knees to the body.
Cookescommons can't get the takedown.
Prefect lands a damaging elbow.
Ford Prefect has scored more points in the clinch so far.
Prefect is looking to score with knees to the body. Maybe he'll change it up and go body then head. Cookescommons is defending well for now.
Prefect gets underhooks to prevent Cookescommons's takedown attempt.
Nice elbow from Prefect.
Prefect is looking to score with knees to the body. Maybe he'll change it up and go body then head. Cookescommons is defending well for now.
Prefect lands an elbow just above Cookescommons 's eye.
Cookescommons takes an elbow to the forehead.
Prefect is looking to score with knees to the body. Maybe he'll change it up and go body then head. Cookescommons is defending well for now.
That's four minutes gone in the round.
Prefect looks to throw an elbow but misses.
Prefect is defending well against a takedown attempt.
Prefect is struggling to control the position.
This has been an exciting period of action!
Prefect tries to land knees in the clinch but Cookescommons avoids the damage to the body.
Prefect looks to throw an elbow but misses.
Prefect gets an overhook and lands an elbow to the side of the head.
Cookescommons wants a takedown but no success here.
Prefect throws a knee to the head but misses.
Prefect tries to land a knee to the body but he is off balance and Cookescommons avoids it.
The crowd are going absolutely nuts as the round comes to an end - what a fantastic round of action!
Cookescommons is trying to trip Prefect. He has hold of a leg but Prefect is hopping around, keeping his balance for the moment. Cookescommons persists though and gets the takedown into guard.
Cookescommons stands and throws Prefect's legs to the side, diving into side control.
Prefect gets back to half guard.
And thats the end of the round the fighters go back to their corners.
Ford Prefect dominated that second round.
The cut man is working on Evaristus Cookescommons's cut.
OK. That's time! The bell goes and we're back to the action. This is the final round!
Prefect shoots in for a takedown! He's got it and he's managed to land in side control! That's better than Prefect was expecting from the takedown attempt, I'm sure!
Prefect tries to stand but Cookescommons is controlling his head.
Cookescommons is trying to get back to half guard.
Cookescommons is not content to let Prefect control the position.
Prefect wants to stand but Cookescommons has his arm trapped.
Cookescommons tries to improve position but can't.
Prefect tries to stand but Cookescommons is controlling his head.
That's one minute gone in the round.

Cookescommons explodes and escapes back to his feet! Nice escape there!
Cookescommons gets caught flat footed, as Prefect shoots in with a quick takedown into guard.
Prefect wanted to stand there but Cookescommons had control of the position.
Cookescommons wants to improve his position here. There's a bit of a scramble and Prefect has taken Cookescommons's back! He's locked on a rear naked choke here and Cookescommons has been forced to tap!
Ladies and gentlemen, after 1:36 of round 3, we have a winner by way of Submission (RNC). Ford Prefect!
Ford Prefect is the new welterweight champion!
A very excited looking Ford Prefect made sure he remembered to thank all the fans both in the arena and on the internet. He said all the coolest people spend all day on MMA websites, which got a big reaction.
|
|
|
|
|
|
|
|
|
|
|
|
|
|
|
|
|
|
|
|
|
|
|
| S |
C
A |
G |
S |
C
B |
G |
|
S |
C |
G |
|
energy
A | B |
|
hype
A | B |
|
pop
A | B |
|
mgr
A | B |
|
FIGHT
RATING
100% |
|
|
|
|
|
|
|
|
|
|

