 |
WarZone 6: War Councils PBP Commentary |
Undercard bout
|
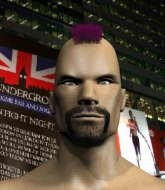
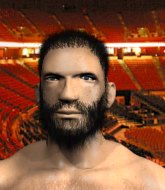
Coming up we have a heavyweight MMA rules bout between King Of Falusha (ranked 0 p4p, 0 weight class) and Jim Williams (ranked 0 p4p, 0 weight class). I'm sure you'll be fascinated to know that I was talking to some pointless Z list celebrity before the fight and he thought that Jim Williams was going to win. Let's see if he was right.
 |
|
 |
| 190 cm
20
240 lbs
0 - 1 - 0 |
|
196 cm
21
240 lbs
0 - 1 - 0 |
BJJ White Belt
Dangerous knees
KO power |
|
BJJ Blue Belt
Brawler
Determined |
|
| |
|
Ladies and gentlemen. This fight is 3 rounds, in the heavyweight division.
Introducing the fighter to my left, fighting out of the red corner.
With a record of
0 - 1 - 0, fighting out of Amsterdam, King Of Falusha!
And introducing the fighter to my right, fighting out of the blue corner.
With a record of
0 - 1 - 0, fighting out of Amsterdam, Jim Williams!
The judges for this bout are Aafke Stam, Patrick Alders and Albert Achterberg.

The bell rings for round one and we are underway!
Falusha fails in his attempt to clinch.

Williams closes the distance and clinches up, looking for a takedown. He shifts his weight and gets a nice trip into half guard.

Williams wants to work for an arm triangle but Falusha is really keeping half guard well and defending the submission attempt.
Williams controlling the pace.
Williams seems to be looking for submissions.
Well, if Williams is going to just lie there, perhaps we should talk about what we're having for dinner tonight
I'm having a ham and pineapple pizza
Yum. Can't wait.
The crowd are loving this. Great action here.
Williams prevents Falusha from improving his position.
Falusha is working hard here to advance position.
Falusha is trying to defend against the ground and pound but Williams scores with a couple of nice shots.

That's one minute gone in the round.
Williams is controlling the pace.
Williams is thwarting Falusha's attempts to control the position.

Williams decides to return to a standing position.
Falusha tests Williams's chin there with a solid looking shot.

It looks like Jim Williams has been cut.
Williams tries to clinch up.
Williams fails with an attempt to clinch.
Williams tries to close the distance and clinch up against the cage but Falusha paws at him with a jab and circles away.
Falusha shoots in but doesn't get the takedown
and Williams counters with a one-two to the body.
This is a great period of action - very entertaining stuff!
Falusha keeps the fight on the outside.

That's two minutes gone in the round.
Falusha fails with a takedown attempt.
Falusha shoots in with a takedown attempt and he has Williams pinned against the cage. Williams gets the underhooks and manages to circle away.
That's three failed takedown attempts in the round for King Of Falusha. That's going to take a lot out of him.
Williams moves in looking to clinch but Falusha pushes him off.
Falusha misses with a double jab.
Williams tries to clinch up against the cage, rushing in to close the distance. Falusha manages to break the clinch and circles back to the middle of the mat.
Falusha takes a head kick and shrugs it off.
Jim Williams seems to be the more aggressive standup fighter in this bout.
A punch combination from Falusha misses.
Williams doesn't manage to clinch there - Falusha circles away.
Williams tries to clinch but Falusha is having none of it.

The fight moves into the clinch position.
Falusha comes over the top with an elbow. That landed flush.

That's three minutes gone in the round.
Williams stops a takedown attempt from Falusha.
Falusha keeps control of Williams as he tries to wriggle out of the double underhooks.
Williams swings away with an uppercut that misses.
Williams has a couple of punches blocked by Falusha.
Williams wants to strike at distance but he can't break free of the clinch.
A frustrated look appears on Falusha's face as he tries to break the clinch.
Williams goes for a body shot but it's blocked.
Falusha jumps guard but his hands slip and he falls flat on his back. Well, he's made himself look a right mug there, as Williams walks away with a smile on his face. Falusha gets slowly back to his feet and shakes his head.
Falusha shoots for a takedown but Williams saw that one coming a mile off and avoided it easily.
Williams gets a clinch.
Williams tries to score a body lock takedown but Falusha shows good agility there to stay on his feet.
Williams pressing his opponent against the cage.
Williams has Falusha pressed up against the cage and is working for takedown. Falusha manages to improve position though and keeps the fight standing.

That's four minutes gone in the round.
Falusha is trying to slow down the pace in the clinch, to catch his breath.
Falusha fails to pull the fight into his guard.
Falusha is trying to work for a single leg takedown but Williams pulls him back up using the underhooks.
Williams can't break the clinch.
Falusha lands a good knee to the midsection. Williams won't want to take too many of those.
Falusha looks like he'd prefer to be striking at range right now.
Fantastic stuff here - a very entertaining period of action, which has drawn cheers from the crowd.
Williams swings away with an uppercut that misses.
A nice left hand lands by Williams.
Williams looks like he'd prefer to be striking at range right now.
Williams lands a hook to the side of the head.
The crowd are going absolutely nuts as the round comes to an end - what a fantastic round of action!
Falusha drops to a knee looking for a takedown but Williams gets the underhooks and prevents it.
Falusha is breathing heavily.
Williams wants to push off and get back to the center of the mat but Falusha has him pressed against the cage.
And thats the end of the round the fighters go back to their corners.
Jim Williams dominated that round.
The cut man is working on Jim Williams's cut.
The corners get their ten second warning. Both fighters stand from their stools and stare eachother down, ready to get back to the action.

Williams clinches.
Williams working hard to break the clinch.
Williams working hard to break the clinch.
Williams is trying to break the clinch but Falusha is controlling him.
Williams has had enough of the clinch but Falusha keeps him there for the moment.
Williams misses with a punch on the inside.
Falusha keeps control of Williams as he tries to wriggle out of the double underhooks.
Williams is looking for a takedown.
Williams lands with a short head shot on the inside.
Williams lands a shoulder strike that jolts his opponent's head backwards.
Falusha is trying to break the clinch but Williams has him pressed against the cage.
Williams tries to break the clinch but Falusha is controlling the position.
Williams throws a head punch that misses.
Falusha keeps control of Williams as he tries to wriggle out of the double underhooks.
Falusha jumps guard but Williams turns him against the cage and keeps the fight standing.
Williams blocks a body shot from Falusha.
That's one minute gone in the round.
Williams misses with a hook from the clinch.
Williams has Falusha pressed up against the cage and is working for takedown. Falusha manages to improve position though and keeps the fight standing.
Falusha is trying to push Williams away but Williams has him pressed against the cage, so he's going nowhere.
Falusha is trying to work out of this bad position, with his back against the cage.
Williams jumps guard and drags Falusha to the mat. He's obviously going to be looking for submissions off his back.
Falusha trying to control but Williams is working from the bottom.
Williams wriggles free and stands up.
Williams tries to close the distance and clinch but Falusha swats him to one side with an open hand palm strike and circles away.
Williams rushes Falusha and pushes him back against the cage in a clinch.
Falusha jumps guard but Williams turns him against the cage and keeps the fight standing.
Falusha wants to push off and get back to the center of the mat but Williams has him pressed against the cage.
Williams prevents Falusha from breaking the clinch.
That's two minutes gone in the round.
Williams is trying to push Falusha away but Falusha has him pressed against the cage, so he's going nowhere.
Williams is looking to control Falusha's arms but Falusha gets an underhook and turns him. Now Williams has his back to the cage.
Falusha has dropped down and is looking to force the takedown but it's defended by Williams after a bit of a struggle.
That's three failed takedown attempts in the round for King Of Falusha. That's going to take a lot out of him.
Falusha prevents the takedown attempt.
Falusha wants to push off and get back to the center of the mat but Williams has him pressed against the cage.
Williams takes a knee to the side of the body.
The crowd cheering loudly, showing their appreciation for the quality fight we're seeing here.
Falusha wants to break free but Williams has control.
Williams is trying to break the clinch but Falusha has him pressed against the cage.
Williams trying to control the position but instead, Falusha has worked for underhooks and has pushed Williams into the cage.
An uppercut on the inside fails to land for Williams.
Williams is looking for a takedown.
Falusha jumps guard but his hands slip and he falls flat on his back. Well, he's made himself look a right mug there, as Williams walks away with a smile on his face. Falusha gets slowly back to his feet and shakes his head.
Falusha shoots for a takedown but Williams saw that one coming a mile off and avoided it easily.
That's three minutes gone in the round.
No luck for Falusha with that takedown attempt.
Both fighters are absolutely exhausted here.
Williams circles away from the clinch attempt.
Williams looks to score with a jab to the body but Falusha is just out of range.
Williams tries to clinch but is not successful on this occasion.
Williams stuffs the takedown attempt from Falusha. Falusha gets slowly back to his feet.
Williams scores with a nice takedown into half guard. Let's see what he's got on the ground.
Falusha is looking to regain full guard. Not this time though.
Williams scoring with strikes to the body and head.
That's four minutes gone in the round.
Williams working over Falusha with some ground and pound. Falusha looks like he wants out of this position, which is understandable.
Williams seems to be taking a bit of a break to think of his next move. He lands a short punch in the meantime.
The crowd are loving this. Great action here.
Williams is controlling the pace.
Williams maintaining the dominant position here and is working for a kimura. He's locked it up! Falusha could be in real trouble here! He's trying to wriggle out but Williams has cracked it and Falusha is screaming in pain - he's tapped out! Great finish by Williams!
Ladies and gentlemen, after 4:54 of round 2, we have a winner by way of Submission (Kimura). Jim Williams!
After winning the bout, Jim Williams thanked all his fans and promised he'd do even better in his next fight. The crowd seemed to love his humility.
|
|
|
|
|
|
|
|
|
|
|
|
|
|
|
|
|
|
|
|
|
|
|
| S |
C
A |
G |
S |
C
B |
G |
|
S |
C |
G |
|
energy
A | B |
|
hype
A | B |
|
pop
A | B |
|
mgr
A | B |
|
FIGHT
RATING
46% |
|
|
|
|
|
|
|
Undercard bout
|
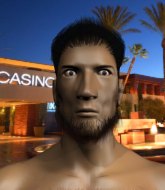
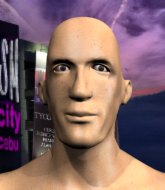
Coming up we have a light heavyweight MMA rules bout between Pits Guinto (ranked 0 p4p, 0 weight class) and Kevin Diaz (ranked 0 p4p, 0 weight class). Both fighters look fresh as a daisy as they make their way towards the cage.
 |
|
 |
| 189 cm
25
205 lbs
0 - 1 - 0 |
|
194 cm
25
213 lbs
0 - 1 - 0 |
BJJ White Belt
Excellent boxer
Granite chin |
|
BJJ Purple Belt
Counter fighter
Granite chin |
|
| |
|
Ladies and gentlemen. This fight is 3 rounds, in the light heavyweight division.
Introducing the fighter to my left, fighting out of the red corner.
With a record of
0 - 1 - 0, fighting out of Helsinki, Pits Guinto!
And introducing the fighter to my right, fighting out of the blue corner.
With a record of
0 - 1 - 0, fighting out of Amsterdam, Kevin Diaz!
The judges for this bout are Paulsen Ambrosius, Nard Betker and Aafke Stam.
The bell rings for round one and we are underway!
Diaz dodges the punch combination from Guinto.
Guinto throws a right and a left that both miss.
Guinto tries to clinch up.
Guinto tries to clinch there but Diaz circles away.
Diaz displays some good footwork, moving neatly out of range as Guinto throws out the jab.
Pits Guinto seems to be the more aggressive standup fighter in this bout.
Guinto displays good takedown defense there as he swats away a double leg from Diaz.
Guinto tries to clinch up but Diaz circles away and keeps his distance.
Diaz has a takedown stuffed.
Guinto misses with a wild combination.
That's one minute gone in the round.
Nice cross by Guinto.
It looks like Kevin Diaz has been cut.
Guinto pushing out the jab but it's not landing.

Guinto clinches up with Diaz and pushes him back against the cage.
Diaz is trying to force a seperation but Guinto has the dominant position.
Diaz looking to stall.
Guinto drops to a knee looking for a takedown but Diaz gets the underhooks and prevents it.
Diaz tries to circle away but Guinto has him pinned against the cage.

Diaz breaks from the clinch.
Pits Guinto is looking to keep the fight on the feet at all costs.
That's two minutes gone in the round.
Guinto tries to clinch but Diaz moves out of range.
Diaz has his head snapped back a nice jab. A little nod from Diaz there as he acknowledges the shot.
Wooooo! Give it up for these two warriors! They are putting on a show!
Some wild striking there from Guinto.
Guinto scores with a hook.
Guinto instigates a clinch.
Guinto jumps guard but his hands slip and he falls flat on his back. Well, he's made himself look a right mug there, as Diaz walks away with a smile on his face. Guinto gets slowly back to his feet and shakes his head.
Guinto throws a series of strikes that have Diaz backpedaling.
Guinto darts in and out, connecting with a jab.
Guinto looks to throw the jab but Diaz is out of range.
That's three minutes gone in the round.
Guinto looks to land a left hand but Diaz moved out of range nicely.
Guinto fails in his attempt to clinch.
Guinto tries to clinch but Diaz moves out of range.
Diaz bobs and weaves well there to avoid the strikes.
Guinto throws a combination that misses
and Diaz counters with a single leg into guard. Guinto didn't expect that.
The referee looks like he's ready to step in and stand the fighters back up.
Diaz thinks about going for a leg but decides against it, in order to maintain the position.
The ref warns both fighters not to hold the cage as they work up against the meshing.
Guinto wants to stand up but Diaz is controlling him.
Diaz wants to control from the top but Guinto keeps moving.
Diaz trying to pass the guard but can't manage it just yet.
That's four minutes gone in the round.
Diaz working some ground and pound from guard but it's not doing any damage.
Diaz advances to half guard.
Diaz wants to lay and pray for a moment but Guinto keeps working.
Wooooo! Give it up for these two warriors! They are putting on a show!
Diaz seems to be working for a kimura but Guinto defends the submission attempt.
Diaz wants to pass the guard but Guinto is defending well.
Diaz missing with some ground and pound from the half guard.
Diaz has freed up his trapped foot and advances to mount.
As the round comes to an end the crowd are showing their appreciation for a great round of action.
Guinto is in a horrible position here, under a barrage of strikes, he's managing to avoid any damage.
And thats the end of the round the fighters go back to their corners.
Pits Guinto dominated that round.
The cut man is working on Kevin Diaz's cut.
OK. That's time! The bell goes and we're back to the action.
Guinto rushes Diaz and pushes him back against the cage in a clinch.
Guinto is trying to force a seperation but Diaz has the dominant position.
Diaz tries to break the clinch but Guinto is controlling the position.
Diaz pushes off and circles away, back to the middle of the mat.
Diaz tries to move into range but Guinto moves to the side and lands with a nice right hand.
Guinto misses with a double jab
and Diaz counters with a leg kick.
Pits Guinto is looking to throw some combinations by the looks of things.
Diaz fails miserably with a takedown attempt.
Guinto moves into the clinch successfully.
Guinto wants to take the fight to the mat but Diaz manages to get underhooks and keep the fight in the clinch.
That's one minute gone in the round.
Diaz escapes the clinch and we're back to striking.
Guinto gets to the clinch - let's see what his plan is here.
Diaz pushes off and circles away, back to the middle of the mat.
Diaz is trying hard to land a takedown here. Guinto sprawls well and keeps this one on the feet.
Nice takedown defense from Guinto. No joy for Diaz on that attempt.
Pits Guinto has stuffed three takedown attempts in the round now. That's going to take a lot out of Kevin Diaz.
Guinto misses with a double jab.
Diaz staying out of range there.
A combination from Guinto does no damage.
Guinto jabbing away but nothing is landing.
Diaz gets his takedown attempt stuffed easily
and Guinto counters with a straight right hand.
That has opened up Kevin Diaz's cut even more.
Pits Guinto is winning the standup battle so far.
That's two minutes gone in the round.
Guinto keeping at a good range here, avoiding a leg kick.
Guinto wants to clinch up but Diaz keeps it at a distance.
A slow jab from Diaz misses its intended target.
Diaz circles away from the clinch attempt.
Guinto lands with an uppercut that bounces Diaz off the cage and back into range.
This has been an exciting period of action!
Guinto tries to clinch up but Diaz circles away and keeps his distance.
Diaz defending well as Guinto loads up on a big left hand.
Guinto fails with an attempt to clinch.
That's three minutes gone in the round.
Guinto with a nice cross.
Diaz has his hands up protecting his head but a hook from Guinto finds it's way round the side to connect with Diaz's head.
The cut above Kevin Diaz's eye is starting to cause him problems now.
A swing and a miss from Guinto.
Guinto closes the distance looking to clinch
and Diaz counters with a nice double leg into half guard.
The crowd cheering loudly, showing their appreciation for the quality fight we're seeing here.
Diaz moves into full mount! Guinto won't be happy about that!
Diaz working from mount. He moves in close and looks like he might be going for an arm triangle... He's hopped off to the side and he's transitioned into an Anaconda choke. Guinto turning a nasty shade of purple. He's refusing to tap but he's gone! He's out! The ref rips Diaz off and cradles Guinto's limp body as Diaz celebrates with his corner.
Ladies and gentlemen, after 4:55 of round 2, we have a winner by way of Submission (Anaconda Choke). Kevin Diaz!
Our winner, Kevin Diaz, made sure he spent some time buttering up the crowd during his post fight interview, which will no doubt bring him a few more fans.
|
|
|
|
|
|
|
|
|
|
|
|
|
|
|
|
|
|
|
|
|
|
|
| S |
C
A |
G |
S |
C
B |
G |
|
S |
C |
G |
|
energy
A | B |
|
hype
A | B |
|
pop
A | B |
|
mgr
A | B |
|
FIGHT
RATING
36% |
|
|
|
|
|
|
|
Undercard bout
|
Coming up we have a heavyweight MMA rules bout between Marko Horvat (ranked 0 p4p, 0 weight class) and Tyrone Slade (ranked 0 p4p, 0 weight class). Horvat comes to the cage accompanied by Dubioza kolektiv - Kau. These two fighters really are very evenly matched on the feet - it will be fascinating to see who can assert themselves in that aspect of the fight.
 |
|
 |
| 183 cm
18
261 lbs
0 - 1 - 0 |
|
195 cm
18
275 lbs
0 - 0 - 0 |
BJJ Brown Belt
Counter fighter
Granite chin |
|
Good wrestler
Counter fighter
Powerful |
|
| |
|
Ladies and gentlemen. This fight is 3 rounds, in the heavyweight division.
Introducing the fighter to my left, fighting out of the red corner.
With a record of
0 - 1 - 0, fighting out of Amsterdam, Marko Horvat!
And introducing the fighter to my right, fighting out of the blue corner.
With a record of
0 - 0 - 0, fighting out of Amsterdam, Tyrone Slade!
The judges for this bout are Patrick Alders, Saam Ante and Nard Betker.
The bell rings for round one and we are underway!
Horvat with a lazy takedown attempt
and Slade counters by moving into the clinch.
Slade lands a shoulder strike that jolts his opponent's head backwards.
Slade lands a body punch.
Horvat is breathing heavily.
Slade lands a body punch.
Fantastic stuff here - a very entertaining period of action, which has drawn cheers from the crowd.
Slade lands a right hand.
A nice right hand lands inside from Slade.
Slade lands with a left to the head.
Slade avoiding damage.
Slade works for underhooks and lands a body shot in the process.
Horvat could do with losing a few pounds - he looks very soft around the mid section, to put it politely.
Slade works for underhooks and lands a body shot in the process.
Slade lands a shoulder strike.
A short uppercut from Slade.
That's one minute gone in the round.
Slade lands a right hand.
Slade lands a hook to the side of the head.
Slade leaning against his opponent.
Slade is leaning against Horvat and scores with a nice uppercut to the body.
A left hand lands to the body for Slade.
We've seen a great period of action over the last minute or so - credit to both fighters for going all out!
Slade slowing the pace effectively.
A hook to the body from Slade.
Horvat wants to take the fight to the mat but Slade manages to get underhooks and keep the fight in the clinch.
Slade lands a shoulder strike that jolts his opponent's head backwards.
Slade taking a breather.
Slade is leaning against Horvat and scores with a nice uppercut to the body.
That's two minutes gone in the round.
Slade lands a right hand.
A right handed body shot lands from Slade.
A right hook to the body lands for Slade.
Slade stalling here - the referee won't stand for too much of that.
Slade creates a bit of space for himself and rocks Horvat with a big uppercut! Horvat tries to clinch up but Slade pushes him back against the cage and lands another monster strike that crumples Horvat to the mat! Horvat covers up and Slade unloads with more strikes until the referee steps in to end the bout!
Ladies and gentlemen, after 2:33 of round 1, we have a winner by way of TKO (Punches). Tyrone Slade!
|
|
|
|
|
|
|
|
|
|
|
|
|
|
|
|
|
|
|
|
|
|
|
| S |
C
A |
G |
S |
C
B |
G |
|
S |
C |
G |
|
energy
A | B |
|
hype
A | B |
|
pop
A | B |
|
mgr
A | B |
|
FIGHT
RATING
83% |
|
|
|
|
|
|
|
Undercard bout
|
|
|
|
Undercard bout
|
|
|
|
Undercard bout
|
Coming up we have a light heavyweight MMA rules bout between Adam Waleczny (ranked 0 p4p, 0 weight class) and Cyril Yamoth (ranked 0 p4p, 0 weight class). The crowd seem to be enjoying Yamoth's choice of entrance music: Enter Sandman - Metallica. Adam Waleczny looks tired to me. Hopefully he has got enough gas left in the tank to put in a good performance.
 |
|
 |
| 190 cm
18
200 lbs
0 - 1 - 0 |
|
170 cm
18
205 lbs
1 - 0 - 0 |
BJJ Blue Belt
Brawler
Good chin |
|
Good wrestler
Basic striking
Powerful |
|
| |
|
Ladies and gentlemen. This fight is 3 rounds, in the light heavyweight division.
Introducing the fighter to my left, fighting out of the red corner.
With a record of
0 - 1 - 0, fighting out of Amsterdam, Adam Waleczny!
And introducing the fighter to my right, fighting out of the blue corner.
With a record of
1 - 0 - 0, fighting out of Amsterdam, Cyril Yamoth!
The judges for this bout are Nard Betker, Daniel Blasius and Saam Ante.
The bell rings for round one and we are underway!
Nice cross by Waleczny.
Waleczny looks exhausted already! Oh dear, he should have come in in better shape than this!
Yamoth misses with an uppercut. Waleczny saw that one coming.
Yamoth avoids the head kick by Waleczny.
Yamoth darts in and lands a nice takedown into half guard.
Yamoth is nestled in close to Waleczny, controlling him well. He's worked in a nice elbow to the side of the head as well, for good measure.
Yamoth working the head and body with strikes.
Yamoth is nestled in close to Waleczny, controlling him well. He's worked in a nice elbow to the side of the head as well, for good measure.

It looks like Adam Waleczny has been cut.
The ref warns both fighters not to hold the cage as they work up against the meshing.
This has been an exciting period of action!
Waleczny has hold of Yamoth's hands but Yamoth slips his arm to the side and lands an elbow.
Yamoth has the superior BJJ but he's also working some ground strikes into his gameplan.
Yamoth wants to lay and pray for a moment but Waleczny keeps working.
Yamoth lands strikes from half guard.
Adam Waleczny's cut is getting worse.
Yamoth is scoring with some nice ground and pound from the dominant position.
Adam Waleczny's cut is bleeding quite badly. He's got to try and protect it.
The referee calls the doctor in to look at Adam Waleczny's cut. Oh no, the doctor has called an end to the bout!
Ladies and gentlemen, after 1:57 of round 1, we have a winner by way of TKO (Cut). Cyril Yamoth!
A very excited looking Cyril Yamoth made sure he remembered to thank all the fans both in the arena and on the internet. He said all the coolest people spend all day on MMA websites, which got a big reaction.
|
|
|
|
|
|
|
|
|
|
|
|
|
|
|
|
|
|
|
|
|
|
|
| S |
C
A |
G |
S |
C
B |
G |
|
S |
C |
G |
|
energy
A | B |
|
hype
A | B |
|
pop
A | B |
|
mgr
A | B |
|
FIGHT
RATING
72% |
|
|
|
|
|
|
|
Undercard bout
|
|
|
|
Undercard bout
|
|
|
|
Co-main event
|
|
|
|
Main event
|
Coming up we have a middleweight MMA rules bout between Michael Berzins (ranked 0 p4p, 0 weight class) and Aki Rikka (ranked 0 p4p, 0 weight class). Over to our ring announcer for the fighter introductions!
 |
|
 |
| 167 cm
24
185 lbs
5 - 1 - 0 |
|
185 cm
22
185 lbs
1 - 0 - 0 |
Powerful takedowns
Counter fighter
Very strong |
|
Decent wrestler
Counter fighter
Determined |
|
| |
|
Ladies and gentlemen. This fight is 3 rounds, in the middleweight division.
Introducing the fighter to my left, fighting out of the red corner.
With a record of
5 - 1 - 0, fighting out of Amsterdam, Michael Berzins!
And introducing the fighter to my right, fighting out of the blue corner.
With a record of
1 - 0 - 0, fighting out of Amsterdam, Aki Rikka!
The judges for this bout are Saam Ante, Patrick Alders and Paul Aken.
The bell rings for round one and we are underway!
Rikka dives in and scores a takedown into Berzins's guard.
The referee wants the fighters to be more active or he's going to reset them on the feet.
Berzins pulls Rikka in to control the position.
Berzins on his back here. We all know that wrestlers don't like being on their back so let's see if Berzins tries to get out of the position.
Berzins keeping full guard, as Rikka tries to pass.
Berzins has Rikka pulled in close to control his posture.
Rikka drops back, looking for a kneebar! Berzins looks panicked! The fighters roll across the mat, one looking to finish, one looking to escape. Berzins looks to have wriggled free... Yes, he's got his leg free and he's dived into side control! Good work there from Berzins!
Berzins wants to control but Rikka is keeping him busy.

Berzins wants to work for a kimura but he's foiled early by Rikka, who protects the arm well.
Berzins working hard here to secure a kimura but he's not really in the right position for it.
That's one minute gone in the round.
Berzins controlling the position from side mount.
The ref warns both fighters not to hold the cage as they work up against the meshing.
Rikka is trying to control Berzins's posture but Berzins avoids it.
Berzins trying to control the action but Rikka is working from the bottom.
Rikka wants to get back to his feet but Berzins drags him back down.
Rikka looks winded!
That's two minutes gone in the round.
Berzins goes for an armbar here - this could be all over! But no, Rikka has escaped beautifully and is now on top in side control! Oh, that's unlucky for Berzins but great work by Rikka.
Berzins tries to buck Rikka off but Rikka is having none of it.
Berzins can't do much from the bottom here.
Berzins is working hard to escape and get back to his feet. After a battle for position, Rikka asserts his dominance and retains side control.
Berzins manages to get back to half guard.
Berzins is looking for a sweep. Rikka is wise to his cunning plan and keeps the top position.
Rikka sitting in half guard, looking to land shots. Berzins defending well though.
Berzins is pressing down on Rikka's left leg trying to get back to full guard. He's managed it.
Rikka is looking to stand up but Berzins won't let him.
That's three minutes gone in the round.
Rikka is fighting to break Berzins's control of his arms but Berzins is doing a good job of controlling the position at the moment.
Berzins working the defensive guard well to avoid strikes from Rikka.
Berzins looking for a triangle here. Rikka is fighting it but it looks tight! Berzins pulls the arm across and this one won't last much longer! Nope, Rikka is tapping out - this one is all over!
Ladies and gentlemen, after 3:37 of round 1, we have a winner by way of Submission (Triangle Choke). Michael Berzins!
A victorious Michael Berzins thanked his army of followers in his post fight interview, telling people to make sure they follow him on Twitter.
|
|
|
|
|
|
|
|
|
|
|
|
|
|
|
|
|
|
|
|
|
|
|
| S |
C
A |
G |
S |
C
B |
G |
|
S |
C |
G |
|
energy
A | B |
|
hype
A | B |
|
pop
A | B |
|
mgr
A | B |
|
FIGHT
RATING
37% |
|
|
|
|
|
|
|
|
|
|
