 |
Carnage 4: Revolution PBP Commentary |
Undercard bout
|
|
|
|
Undercard bout
|
|
|
|
Undercard bout
|
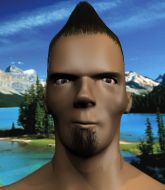
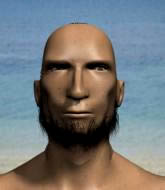
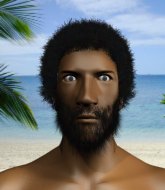
Coming up we have a heavyweight MMA rules bout between Zdeno Chara (ranked 0 p4p, 0 weight class) and John Cena (ranked 0 p4p, 0 weight class). Both fighters look fresh as a daisy as they make their way towards the cage.
 |
|
 |
| 206 cm
18
255 lbs
0 - 0 - 0 |
|
195 cm
23
251 lbs
0 - 1 - 0 |
BJJ Blue Belt
Counter fighter
Good chin |
|
BJJ Blue Belt
Brawler
Intelligent |
|
| |
|
Ladies and gentlemen. This fight is 3 rounds, in the heavyweight division.
Introducing the fighter to my left, fighting out of the red corner.
With a record of
0 - 0 - 0, fighting out of Los Angeles, Zdeno Chara!
And introducing the fighter to my right, fighting out of the blue corner.
With a record of
0 - 1 - 0, fighting out of New York, John Cena!
The judges for this bout are Timothy Bukovac, and Frank Antenori.

The bell rings for round one and we are underway!

Cena fakes an overhand right and shoots for a takedown. Chara sprawls well initially but Cena persists and gets the takedown into half guard.
The referee is asking the fighters to pick up the pace.
Chara trying to control from the bottom.

Cena looking for a kimura but he'll have to free his other leg if he wants to finish that. Perhaps he's just using it as a distraction technique.
Chara tries to roll over but Cena keeps him under control.
Cena content to sit in half guard and control for a moment.

That's one minute gone in the round.
Chara wants to get back to his feet.
Chara trying to hold on to Cena's head to control him but Cena postures up.
Cena is pressing down on Chara's thigh, looking to free his foot. Chara is holding on for now.

That's two minutes gone in the round.

John Cena has forced the referee to step in and restart the fight on the feet.

Chara shoots in with a lovely double leg takedown. Cena manages to land in full guard to minimise the damage.
Cena controlling the position.
Cena not looking particularly offensive just at the moment.
Chara is looking to advance position but Cena has hit a scissor sweep - now he's on top in mount!
Chara keeping his composure momentarily, calmly looking to get back to half guard.
The fighters are pressed up against the cage, both looking to find a bit of space to work.
Cena landing punches.
We've seen a great period of action over the last minute or so - credit to both fighters for going all out!
Cena is in the full mount, landing strikes.

That's three minutes gone in the round.
Cena goes for an armbar but he's not got it
Chara turns into him and now he's in Cena's guard.

Chara postures up as if he's going to throw some strikes but drops back for an ankle! Cena is in big trouble! He looks ready to tap! But no, he's escaped and dives on top of Chara, into his guard.

Chara is working an open guard so Cena takes the opportunity to get back to his feet.
Chara tries to check the leg kick but that clearly hurt him.

That's four minutes gone in the round.

Cena clinches.
Chara fails to pull guard.
Cena is pressed up against the cage. Chara has hold of a leg and is looking to drag Cena down to the mat. Cena avoids the attempt though and has circled away. We're back to striking at a distance.
Cena closes the distance and gets a trip takedown into side control. Chara quickly recovers to half guard.
The fans in attendance giving it up for the two fighters, who have really let it all hang out in the last minute or so!
Cena stops Chara from getting back to his feet.
Chara is working on a guillotine. He's managed to get to full guard and he's really squeezing tight! Cena is tapping! Great win for Chara!
Ladies and gentlemen, after 4:40 of round 1, we have a winner by way of Submission (Guillotine). Zdeno Chara!
A victorious Zdeno Chara thanked his army of followers in his post fight interview, telling people to make sure they follow him on Twitter.
|
|
|
|
|
|
|
|
|
|
|
|
|
|
|
|
|
|
|
|
|
|
|
| S |
C
A |
G |
S |
C
B |
G |
|
S |
C |
G |
|
energy
A | B |
|
hype
A | B |
|
pop
A | B |
|
mgr
A | B |
|
FIGHT
RATING
36% |
|
|
|
|
|
|
|
Undercard bout
|
Coming up we have a lightweight MMA rules bout between Ross Stuart (ranked 0 p4p, 0 weight class) and Chang Wong (ranked 0 p4p, 0 weight class). Over to our ring announcer for the fighter introductions!
 |
|
 |
| 179 cm
18
164 lbs
0 - 0 - 0 |
|
167 cm
25
155 lbs
0 - 1 - 0 |
BJJ Blue Belt
Brawler
Granite chin |
|
BJJ Blue Belt
Good kicks
Solid chin |
|
| |
|
Ladies and gentlemen. This fight is 3 rounds, in the lightweight division.
Introducing the fighter to my left, fighting out of the red corner.
With a record of
0 - 0 - 0, fighting out of Los Angeles, Ross Stuart!
And introducing the fighter to my right, fighting out of the blue corner.
With a record of
0 - 1 - 0, fighting out of Los Angeles, Chang Wong!
The judges for this bout are Jack Bonds, and Frank Antenori.
The bell rings for round one and we are underway!
Stuart looks to score with a jab to the body but Wong is just out of range.
Wong looks really tired already! That doesn't bode well for a good, competitive fight!
Wong on the wrong end of a nice jab.
A chopping leg kick lands by Stuart.
Stuart connects with a leg kick. Wong looked like he was expecting something else and didn't defend it.

Stuart pushes Wong up against the cage in a clinch.
Stuart wants to take the fight to the mat but Wong manages to get underhooks and keep the fight in the clinch.
Stuart wants to take the fight to the mat but Wong manages to get underhooks and keep the fight in the clinch.
Stuart lands a takedown into guard.
The crowd cheering loudly, showing their appreciation for the quality fight we're seeing here.
Stuart is looking to work some ground and pound but Wong has wrist control.
Stuart connects with a couple of short punches.
Stuart will need to keep those long limbs tucked in whilst he's on the ground, to prevent any submissions.
Stuart lands a couple of decent looking shots.
Stuart missing there with some ground and pound from the guard.
Wong is working an open guard here, looking to improve his position. No doubt that will leave him open to counters but at least he's being more offensive.
Stuart advances position into side control!
Wong is not in a great position here, taking some shots.
That's one minute gone in the round.
Stuart working the ground and pound.
Wong really doesn't want to stay on the ground with Stuart. If he can't get it back to his feet, it's only a matter of time before he'll be tapping out.
Wong on the wrong end of some ground and pound.
Stuart landing with strikes to the head and body from side control.
Stuart cracks Wong with a big right hand but Wong just smiles back at him and invites him to have another go.
Stuart lands an elbow.
Stuart advances nicely into full mount.
Stuart with a couple of short strikes.

Wong is rocked!
This is a great period of action - very entertaining stuff!
Stuart working the ground and pound effectively.
Wong is still in real trouble! Can Stuart finish him?
Stuart drops a big elbow. That's hurt Wong! More shots from Stuart and the ref steps in! The fight is over!
Ladies and gentlemen, after 2:58 of round 1, we have a winner by way of TKO (Strikes). Ross Stuart!
|
|
|
|
|
|
|
|
|
|
|
|
|
|
|
|
|
|
|
|
|
|
|
| S |
C
A |
G |
S |
C
B |
G |
|
S |
C |
G |
|
energy
A | B |
|
hype
A | B |
|
pop
A | B |
|
mgr
A | B |
|
FIGHT
RATING
82% |
|
|
|
|
|
|
|
Undercard bout
|
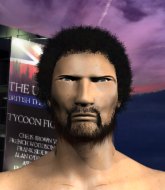
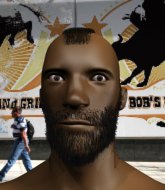
Coming up we have a light heavyweight MMA rules bout between Ron Harris (ranked 0 p4p, 0 weight class) and Thijs Brouwer (ranked 0 p4p, 0 weight class). We have two fighters making their debuts here, so let's see who comes out of this one with their first professional victory.
 |
|
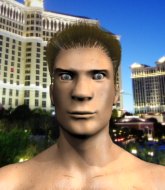 |
| 189 cm
21
210 lbs
0 - 0 - 0 |
|
200 cm
18
216 lbs
0 - 0 - 0 |
BJJ Blue Belt
Excellent MT
Cuts easily |
|
BJJ White Belt
Brawler
Solid chin |
|
| |
|
Ladies and gentlemen. This fight is 3 rounds, in the light heavyweight division.
Introducing the fighter to my left, fighting out of the red corner.
With a record of
0 - 0 - 0, fighting out of Los Angeles, Ron Harris!
And introducing the fighter to my right, fighting out of the blue corner.
With a record of
0 - 0 - 0, fighting out of Los Angeles, Thijs Brouwer!
The judges for this bout are Don Winkell, Frank Antenori and Jack Bonds.
The bell rings for round one and we are underway!
Harris misses with a few strikes there.
Brouwer misses with a takedown attempt - Harris sprawls well and throws a nice strike on the way out which just misses.
Harris throws a head kick but Brouwer moves out of range.
Harris moves out of range of the body kick from Brouwer.
Harris plants his feet and lands a nice head kick!

It looks like Thijs Brouwer has been cut.
Harris looks to land a combination. Brouwer sees it coming but can only parry a couple of the shots.
Harris throws a sloppy head kick and Brouwer moves out of range easily.
The crowd are loving this. Great action here.
Brouwer clinches up against the cage.
Harris is trying to break free.
Brouwer tries to pull guard but Harris won't allow it.
Brouwer tried to land a shot to the body but connects with Harris's elbow.
Brouwer has hold of a leg and is looking for a trip takedown. Harris avoids it nicely though and we remain in the clinch.
Ron Harris has stuffed three takedown attempts in the round now. That's going to take a lot out of Thijs Brouwer.
Harris is trying to work out of this bad position, with his back against the cage.
That's one minute gone in the round.
Brouwer changes levels and goes for a takedown here. Harris fights it off and pushes away nicely.
Harris lands a high kick!
Harris gets caught napping as Brouwer dives in and scores a takedown. Harris manages to retain guard.
Harris might be looking to lock onto one of his opponent's long limbs for a submission, whilst we're on the ground.
Brouwer showing good wrestling skills to control the position.
The fighters are pressed up against the cage, both looking to find a bit of space to work.
Harris is trying to control the position from the bottom.
That's two minutes gone in the round.
Harris is trying to stand up but he's not managed so far.
Brouwer slips effortlessly into side control - very nice.
Brouwer goes for an armbar! This could be all over! Wait, no, Harris rolls with the submission and now he's on top in Brouwer's guard! Nice work there by Harris!
The fans in attendance giving it up for the two fighters, who have really let it all hang out in the last minute or so!
Brouwer throwing his legs up looking for a triangle.
Brouwer working for a triangle but Harris defends it easily.
That's three minutes gone in the round.
Harris wants to control from the top but Brouwer keeps moving.
Brouwer working for submissions but it's allowed Harris to get to half guard.
Harris wants to stand up but Brouwer has a hold of him and won't allow it.
That's four minutes gone in the round.
Harris looking for a kimura but he'll have to free his other leg if he wants to finish that. Perhaps he's just using it as a distraction technique.
Harris trying to control from Brouwer's half guard. Brouwer has other ideas though and has regained full guard.
Brouwer keeping moving, preventing Harris from controlling successfully.
As the round comes to an end the crowd are showing their appreciation for a great round of action.
Harris is holding a leg here, probably looking for an ankle lock - he drops back and goes for it! Brouwer is in trouble! Is it all over??? No! Brouwer has escaped and now he's on top!
Harris working a defensive guard here.
And thats the end of the round the fighters go back to their corners.
Ron Harris dominated that round.
The cut man is working on Thijs Brouwer's cut.
Well, the break between rounds is over. Let's get back to the scrappin!

Harris lands a powerful looking uppercut that connected with his opponent's jaw.
Some wild striking there from Harris.
Brouwer misses with a half-hearted attempt at a head kick.
Brouwer tries to shoot in for a takedown. He's got hold of a leg but Harris swivels and escapes.
Harris throws a jab to the body, straight down the pipe. Boom. That sent Brouwer stumbling backwards but he manages to regain his composure quickly.
Brouwer gets the takedown into side control.
Harris is looking to regain half guard here but Brouwer keeps moving and retains side control.
Harris struggling a bit here.
Harris tries to escape but Brouwer is in control.
That's one minute gone in the round.
Brouwer is looking for a kimura. He might have it! No, Harris has escaped the position, nice work there.
Brouwer with the ground and pound but Harris regains half guard under the barage of strikes.
Well, if Brouwer is going to just lie there, perhaps we should talk about what we're having for dinner tonight
I'm having a ham and pineapple pizza
Yum. Can't wait.
The ref warns both fighters not to hold the cage as they work up against the meshing.
Harris trying to control here.
Brouwer wants to control but Harris is keeping him busy.
That's two minutes gone in the round.
Harris wants to get back to his feet.
Harris has no desire to be mounted, so is trying to control. Brouwer is working away from the top position though.
Brouwer keeping composed on the top, looking to control the action.
The referee is asking the fighters to pick up the pace.
The ref stands the fighters back up. Thijs Brouwer was stalling too much, according to the referee.
Harris throws a sloppy head kick and Brouwer moves out of range easily.
Harris connects with a jab.
Ron Harris is looking to throw some combinations by the looks of things.
Harris misses with a head kick.
Harris swings for the body but Brouwer moves out of range.
Brouwer throws a head kick that misses.
Harris lands a jab followed by a nice looking cross.
That's three minutes gone in the round.
Brouwer fails with a takedown attempt from distance.
Brouwer looking to score a takedown here. Harris is defending well but Brouwer drives through and ends up in Harris's guard.
Brouwer gets to his feet. Harris looking to butt scoot but the ref puts an end to that. On your feet son!
Brouwer is breathing heavily.
Brouwer looks for a takedown. He's got it. We're now in half guard.
Brouwer prevents Harris from improving his position.
Harris wants to get back to his feet.
Brouwer decides to stand and escape the position.
The fans in attendance giving it up for the two fighters, who have really let it all hang out in the last minute or so!
Brouwer takes a step back and watches a body kick go sailing past his mid section.
Ron Harris is looking to keep the fight on the feet at all costs.
That's four minutes gone in the round.
Harris stooping low to avoid any incoming strikes and then lunges in with an uppercut come cross that lands flush.
Brouwer fails with a takedown attempt from distance.
Ron Harris has stuffed three takedown attempts in the round now. That's going to take a lot out of Thijs Brouwer.
Harris's corner calls for a 1, 2 combination and Harris duly obliges.
Brouwer pulls out of a head kick attempt.
Harris ducks low and lands a nice hook to the body of his opponent.
Brouwer slips a jab and a cross from Harris.
Harris throws a wild combination but nothing lands.
Brouwer showing good head movement there, avoiding the strikes from Harris.
A telegraphed takedown attempt from Brouwer is defended easily by Harris.
As the round comes to an end the crowd are showing their appreciation for a great round of action.
A head kick misses from Harris.
And thats the end of the round the fighters go back to their corners.
That was a close second round but I would say that Ron Harris will probably get the nod.
The cut man is working on Thijs Brouwer's cut.
That's time! Harris's corner gives him a slap on the ass as he gets ready to fight. This is the final round!

Harris misses with a half-hearted attempt at a head kick.
Brouwer connects with a leg kick. Harris looked like he was expecting something else and didn't defend it.
Harris throws a head kick that misses and slips in the process. He scrambles back to his feet and the fighters circle.
Ron Harris is winning the standup battle so far.
Brouwer bobs and weaves well there to avoid the strikes.
Harris tries to bum rush Brouwer with a series of wild strikes but Brouwer uses good footwork to avoid the assault.
Harris slips in close and lands a nice hook before moving back out of range.
Brouwer throws a low kick but Harris moves out of range easily.
Brouwer bobs and weaves into range and then changes levels and scores with a nice takedown into side control.
Harris is moving his hips around well on the bottom and has managed to get back to half guard.
Harris is trying to get back to full guard.
Brouwer throwing punches and elbows but they're not doing any damage.
That's one minute gone in the round.
Brouwer content to sit in half guard and control for a moment.
Harris wants to control but Brouwer is keeping busy and won't allow it.
Brouwer seems very keen to just sit and control from half guard but Harris does not like that idea so much and is remaining active off his back.
Brouwer missing with some ground and pound from the half guard.
The referee looks like he's ready to step in and stand the fighters back up.
Harris won't allow Brouwer to pass to mount.
Harris is trying to stand.
Harris avoiding damage under a succession of punches from Brouwer.
That's two minutes gone in the round.
Harris is trying to control but can't.

Neither fighter is doing enough for the referee's liking and he's decided to stand them back up.
Brouwer shoots in for a takedown but Harris shows good takedown defense.
Brouwer avoids the head kick by Harris.
Brouwer instigates a clinch.
Brouwer scores with a nice hook to the head.

Brouwer breaks from the clinch.
Harris scores to the head and body with a nice combination!
Harris with a hook.
The crowd cheering loudly, showing their appreciation for the quality fight we're seeing here.
Nice takedown defense from Harris. No joy for Brouwer on that attempt.
Ron Harris seems to be the more aggressive standup fighter in this bout.
Brouwer takes a big intake of breath there - he's definitely tired.
Harris throws a quick head kick that skims the top of Brouwer's head.
That has opened up Thijs Brouwer's cut even more.
Harris throws a head kick that Brouwer semi-blocks.
That's three minutes gone in the round.
Harris delivers a nice body kick.
Harris lands a nice looking kick to the body. Brouwer takes a step back to recover.
Harris misses with a two punch combination.
Brouwer takes one on the chin but keeps coming.
Harris gets tackled into the cage by Brouwer. Brouwer maintains the clinch.
Brouwer tries to break free but Harris pushes him back against the cage.
Harris tries to circle away but Brouwer has him pinned against the cage.
Brouwer is trying to pull guard but being pressed up against the cage enables Harris to keep the fight standing.
Ron Harris has stuffed three takedown attempts in the round now. That's going to take a lot out of Thijs Brouwer.
Brouwer changes levels and goes for a takedown here. Harris fights it off and pushes away nicely.
Brouwer manages to get an easy takedown there - catching Harris on his heels. He'll look to pass Harris's guard now, I'm sure.
That's four minutes gone in the round.
Harris is working from a closed guard but he's struggling to control his opponent.
Harris is really struggling to control Brouwer but he's trying to hold on to the position.
Wooooo! Give it up for these two warriors! They are putting on a show!
As the round comes to an end the crowd are showing their appreciation for a great round of action.
Harris has his foot on Brouwer's thigh. He's trying to push off and get in position for a triangle, I think. Brouwer works his way back into a safe position though.
Brouwer trying to control the position from guard on top but Harris is wriggling around, looking for whatever he can.
Thijs Brouwer has stepped it up - he knows he needs a finish here!
Brouwer postures up in Harris's guard and throws a big left but Harris blocks it.
And that's the end of the fight!
Ron Harris showed his dominance in that final round.
Well I reckon that's a shut out for Harris, winning every round. Will the judges agree? They are the ones who matter, even if they are often depressingly incompetent. Over to the ring announcer for the scorecards.
Ladies and gentlemen, after 3 rounds of action, we go to the scorecards for a decision.
Judge Don Winkell scores the fight 30:27
Judge Frank Antenori scores the fight 30:27
Judge Jack Bonds scores the fight 30:27
In favor of your winner, by unanimous decision... Ron Harris!
Ron Harris decided to hype himself up post fight. It was going well but he went on about it a bit too long and the crowd turned on him a little.
|
|
|
|
|
|
|
|
|
|
|
|
|
|
|
|
|
|
|
|
|
|
|
| S |
C
A |
G |
S |
C
B |
G |
|
S |
C |
G |
|
energy
A | B |
|
hype
A | B |
|
pop
A | B |
|
mgr
A | B |
|
FIGHT
RATING
65% |
|
|
|
|
|
|
|
Undercard bout
|
Coming up we have a middleweight MMA rules bout between Tony Dunc (ranked 0 p4p, 0 weight class) and Ryan Oro (ranked 0 p4p, 0 weight class). Ryan Oro will no doubt be trying to keep this one on the feet, where he has a distinct advantage.
 |
|
 |
| 186 cm
23
185 lbs
1 - 1 - 0 |
|
187 cm
16
195 lbs
0 - 1 - 0 |
Good takedowns
Brawler
KO power |
|
BJJ White Belt
Brawler
Granite chin |
|
| |
|
Ladies and gentlemen. This fight is 3 rounds, in the middleweight division.
Introducing the fighter to my left, fighting out of the red corner.
With a record of
1 - 1 - 0, fighting out of Los Angeles, Tony Dunc!
And introducing the fighter to my right, fighting out of the blue corner.
With a record of
0 - 1 - 0, fighting out of Los Angeles, Ryan Oro!
The judges for this bout are Frank Antenori, Timothy Bukovac and Jack Bonds.
The bell rings for round one and we are underway!
Nice sprawl there from Oro as Dunc shoots in.
Jab by Oro.

It looks like Tony Dunc has been cut.
Dunc tries to score a power double leg takedown but Oro sees that one coming and sprawls well. That will dishearten Dunc somewhat.
Oro moves in looking to clinch but Dunc pushes him off.
Excellent takedown into side control there by Dunc.
Dunc has worked his way into a potential kimura here. Oro is trying to get out of the position but his squirming has just got him deeper into trouble. Dunc yanks on the arm and Oro is forced to tap due to a very painful looking submission! Nice work by Dunc.
Ladies and gentlemen, after 0:33 of round 1, we have a winner by way of Submission (Kimura). Tony Dunc!
|
|
|
|
|
|
|
|
|
|
|
|
|
|
|
|
|
|
|
|
|
|
|
| S |
C
A |
G |
S |
C
B |
G |
|
S |
C |
G |
|
energy
A | B |
|
hype
A | B |
|
pop
A | B |
|
mgr
A | B |
|
FIGHT
RATING
100% |
|
|
|
|
|
|
|
Undercard bout
|
|
|
|
Undercard bout
|
|
|
|
Co-main event
|
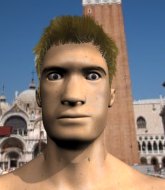
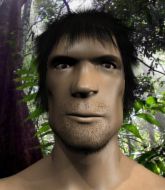
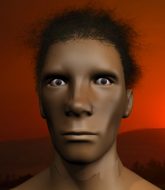
Coming up we have a light heavyweight MMA rules bout between Proffesor Ness (ranked 0 p4p, 0 weight class) and Jo Mac (ranked 0 p4p, 0 weight class). This should be fireworks!
 |
|
 |
| 188 cm
18
199 lbs
2 - 0 - 0 |
|
192 cm
24
205 lbs
1 - 0 - 0 |
BJJ Purple Belt
Basic striking
Cuts easily |
|
BJJ White Belt
Decent boxing
Heavy handed |
|
| |
|
Ladies and gentlemen. This fight is 3 rounds, in the light heavyweight division.
Introducing the fighter to my left, fighting out of the red corner.
With a record of
2 - 0 - 0, fighting out of Los Angeles, Proffesor Ness !
And introducing the fighter to my right, fighting out of the blue corner.
With a record of
1 - 0 - 0, fighting out of Los Angeles, Jo Mac!
The judges for this bout are Timothy Bukovac, Frank Antenori and Jack Bonds.
The bell rings for round one and we are underway!
Ness missing with a left hand there. Mac was out of range so wasted energy throwing that one.
A slow jab from Ness misses its intended target.
Ness misses with a jab and misses with a cross straight after too.
Ness fakes a head punch and goes low to the body. Nicely done.
The fight stays on the outside here - Ness looks like he's thinking about clinching though.
Ness rushes forward with a series of wild hooks but Mac moves out of range and avoids them all easily.
Ness misses with a left hand
and Mac counters with a crisp hook to the side of the head.
It looks like Proffesor Ness has been cut.
A looping hook to the body misses from Ness . Mac does a little dance to reset his feet.
Mac ducks under a wild hook from Ness .
A left lands for Ness .
Ness throws a lazy uppercut
letting Mac counter with a right hand.
That's one minute gone in the round.
Ness loads up on a big right hand but Mac slips the punch.
Mac slips under a jab from Ness .
Ness looks to score with a jab to the body but Mac is just out of range.
Ness digs a good body shot into Mac's ribs.
Ness misses with a lunging right hand
and Mac counters with a lovely straight right hand!
Ness swings widly with a right hand
and Mac counters with a crisp hook to the side of the head.
Ness swings and misses with a hook to the body.
Ness throws out a loose jab but Mac uses good head movement to avoid it.
Mac keeping a good distance there, avoiding the body shot.
Ness just misses with a punch to the body.
Ness misses with a hook
and Mac counters with a nice body shot.
That's two minutes gone in the round.
This is a great period of action - very entertaining stuff!
Ness loads up on a big right hand but Mac slips the punch.
Ness throws a hook to the body but it doesn't connect.
Ness throws a combination but it was largely blocked by Mac.
Ness rushes in with a sloppy looking punch
and Mac counters with a quick right hand to the jaw.
Ness loads up on a big right hand but Mac slips the punch.
Ness throws a hook to the side of Mac's head but Mac sees it coming and ducks under it beautifully.
Ness misses with a looping left.
Ness looks to throw the jab but Mac is out of range.
Ness throws the left hand but Mac avoids the punch easily.
Ness swinging wildly here.
That's three minutes gone in the round.
Ness ducks down and throws a hook to the body but Mac moves away.
Ness throws a poor cross that misses

and Mac counters with a crisp one two that drops Ness ! Mac thinks about following him to the mat for a moment but instead steps back and waves Ness to his feet! Ness is in big trouble!
The crowd cheering loudly, showing their appreciation for the quality fight we're seeing here.
Ness throws a body punch but Mac moves out of range.
Ness throws a jab, cross combination which is slipped
and Mac counters with a quick right hand to the jaw.
Ness swings and misses with a hook to the body.
Ness misses with a wild body shot.
Ness fakes high and swings low for a body shot but Mac manages to avoid it.
Ness misses with a body shot. Nice footwork from Mac.
Mac uses good head movement to avoid the hook from Ness .
That's four minutes gone in the round.
Ness throws an ugly left hook that misses
and Mac counters with a left and a right that stings Ness .
Ness throws a jab but it's blocked by Mac.
Ness tries to close the distance and clinch up against the cage but Mac paws at him with a jab and circles away.
Mac drops his hands momentarily and Ness takes advantage with a crisp shot to the head.
Ness throws an uppercut from half a mile away. Mac sees it coming and avoids it easily.
Proffesor Ness seems to be the more aggressive standup fighter in this bout.
Ness misses with a hook. Mac ducked under it nicely.
Ness throws a jab when Mac was well out of range.
The crowd are going absolutely nuts as the round comes to an end - what a fantastic round of action!
Ness swings and misses with a hook to the body.
Ness swings widly with a right hand
and Mac counters with a two punch combo.
Ness misses with a body shot. Nice footwork from Mac.
And thats the end of the round the fighters go back to their corners.
Jo Mac dominated that round.
The cut man is working on Proffesor Ness 's cut.
Well, the break between rounds is over. Let's get back to the scrappin!
Ness fakes high and swings low for a body shot but Mac manages to avoid it.
Ness misses with a body shot
and Mac cracks him with a counter punch right on the button.
Ness looks to throw the jab but Mac is out of range.
Ness tries to clinch there but Mac circles away.
Ness tries to clinch up against the cage, rushing in to close the distance. Mac manages to break the clinch and circles back to the middle of the mat.
Ness throws an off balance right hand
and Mac counters with a three punch combo that has Ness backing up. Ness nods at Mac to acknowledge the strikes.
Ness lands a right hook to the body.
Jo Mac is looking to throw some combinations by the looks of things.
Mac staying out of range there.
Ness misses with a straight left.
Ness throws a right hand that misses
letting Mac counter with a right hand.
This is a great period of action - very entertaining stuff!
Ness sizes up Mac with a pawing jab and scores with a straight right down the middle.
That's one minute gone in the round.
Ness throws a hard body shot but it just misses.
Ness throws a combination but comes up with nothing but fresh air.
Mac steps to the side to avoid the strikes from Ness .
A lazy left from Ness finds it's target.
Ness lands with a cross.
A big left from Ness misses.
A shot to the body from Ness misses
letting Mac counter with a right hand.
Proffesor Ness 's cut is getting worse.
Ness misses with a lunging right hand
and Mac counters with a straight punch to the midsection.
Ness falls off balance throwing a combination
letting Mac counter with a right hand.
That's two minutes gone in the round.
Ness swings widly with a right hand
and Mac counters with a straight right hand.
This has been an exciting period of action!
Ness is the aggressor but that punch slipped nicely by Mac.
Ness throws a right hand that misses
and Mac counters with a three punch combo that has Ness backing up. Ness nods at Mac to acknowledge the strikes.
Ness tries to clinch there but Mac circles away.
Mac slips under a jab from Ness .
Ness wants to clinch up but Mac keeps it at a distance.
Ness throws a combination but it was largely blocked by Mac.
Mac uses good head movement to avoid the hook from Ness .
Ness looks to land a right hand but Mac moved out of range.
That's three minutes gone in the round.
Mac keeping a good distance there, avoiding the body shot.
Ness throws a jab but it's blocked by Mac.
Jo Mac seems to be getting the better of the standup.
Mac gets tackled into the cage by Ness . Ness maintains the clinch.
Mac is trying to push Ness away but Ness has him pressed against the cage, so he's going nowhere.
Mac is trying to break the clinch but Ness is controlling him.
Ness swings wildly with an uppercut but Mac uses good head movement to avoid it.
Ness tried to land a shot to the body but connects with Mac's elbow.
Ness tries to pull guard but Mac forces him back to his feet, against the cage.
Ness lands a nice uppercut.
That's four minutes gone in the round.
Ness goes for a body shot but it's blocked.
Ness lands a right uppercut that snaps the head of Mac backwards.
Mac prevents a body shot from Ness .
Mac tries to circle away but Ness has him pinned against the cage.
Ness keeps control of Mac as he tries to wriggle out of the double underhooks.
Ness tries to jump guard but he falls flat on his backside. Mac smiles and moves away.
Ness tries to close the distance and clinch up against the cage but Mac paws at him with a jab and circles away.
And thats the end of the round the fighters go back to their corners.
That was a close second round but I would say that Proffesor Ness will probably get the nod.
The cut man is working on Proffesor Ness 's cut.
That's the end of the interval. I'm sure that seemed a lot quicker than a minute for our two fighters! Back to the action. And we move into the final round!
Ness looks to land a left hand but Mac moved out of range nicely.
Ness thows a left - swing and a miss!
Ness throws a right hand that misses
and Mac counters with a three punch combo that has Ness backing up. Ness nods at Mac to acknowledge the strikes.
Ness throws a nice looking combination but Mac bobs and weaves to avoid any damage.
Ness misses with a hook.
A slow jab from Ness misses its intended target.
Ness looks to score with a jab to the body but Mac is just out of range.
Mac might want to mix his strikes up a bit more. He's just going for head shots at the moment and that can become a bit predictable.
Ness misses with a left hand
and Mac counters with a two punch combo.
Ness throws a combination but comes up with nothing but fresh air.
Ness misses with a straight left.
That's one minute gone in the round.
Ness throws a right hand that misses
and Mac counters with a crisp one two that drops Ness ! Mac thinks about following him to the mat for a moment but instead steps back and waves Ness to his feet! Ness is in big trouble!

Ness is rocked!
Fantastic stuff here - a very entertaining period of action, which has drawn cheers from the crowd.
Ness throws a lazy uppercut
and Mac counters nicely by changing levels and landing a hook to the body.
Oh Ness is still all over the place! His legs are completely gone! Will he be able to recover?!!
Both fighters are breathing heavily.
Ness misses with a lunging right hand
and Mac scores with a counter punch that sends Ness to the canvas! Mac smells blood - he's punishing Ness with more strikes and the ref has stopped it! Ness has no idea where he is - he's tackled the ref... oh dear, poor guy, the crowd is in hysterics!
Ladies and gentlemen, after 1:16 of round 3, we have a winner by way of TKO (Strikes). Jo Mac!
|
|
|
|
|
|
|
|
|
|
|
|
|
|
|
|
|
|
|
|
|
|
|
| S |
C
A |
G |
S |
C
B |
G |
|
S |
C |
G |
|
energy
A | B |
|
hype
A | B |
|
pop
A | B |
|
mgr
A | B |
|
FIGHT
RATING
100% |
|
|
|
|
|
|
|
Main event
|
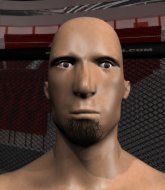
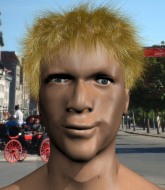
Coming up we have a heavyweight MMA rules bout between Chris Bravo (ranked 0 p4p, 0 weight class) and Robert Myres (ranked 0 p4p, 0 weight class). On his way into the cage it seems that Chris Bravo has been attacked by a crazed fan! It looks like it might have been the just bleed guy! Luckily Chris Bravo seems to be OK! I thought that lunatic was in prison!?
 |
|
 |
| 195 cm
23
270 lbs
5 - 0 - 0 |
|
198 cm
23
265 lbs
4 - 1 - 0 |
BJJ Purple Belt
Basic striking
Granite chin |
|
Good takedowns
Brawler
Very confident |
|
| |
|
Ladies and gentlemen. This fight is 3 rounds, in the heavyweight division.
Introducing the fighter to my left, fighting out of the red corner.
With a record of
5 - 0 - 0, fighting out of Los Angeles, Chris Bravo!
And introducing the fighter to my right, fighting out of the blue corner.
With a record of
4 - 1 - 0, fighting out of Los Angeles, Robert Myres!
The judges for this bout are Jack Bonds, Frank Antenori and Timothy Bukovac.
The bell rings for round one and we are underway!
Nice sprawl there from Bravo as Myres shoots in.
Myres shoots in for a takedown but Bravo shows good takedown defense.
Myres fails with the takedown.
Chris Bravo has stuffed three takedown attempts in the round now. That's going to take a lot out of Robert Myres.
Myres misses with a takedown attempt - Bravo sprawls well and throws a nice strike on the way out which just misses.
Myres looks winded!
Myres shoots and misses
and Bravo counters with a left to the body.
Bravo looking to shoot here. He's gone for it and he's landed a takedown into side control! Oh, that's bad for Myres!

Bravo stands up and beckons Myres to his feet.
Myres has his takedown stuffed
and Bravo counters with a nice leg kick.
Bravo closes the distance and after a bit of a stuggle, scores a takedown into Myres's guard.
The fans in attendance giving it up for the two fighters, who have really let it all hang out in the last minute or so!
Myres keeping moving, preventing Bravo from controlling successfully.
Bravo advances position into side control!
Bravo stands up and we're back to a striking position.
Bravo closes the distance, clinches up and gets a nice trip takedown into side control. Very smooth.
Bravo in side control lands a decent elbow.
That's one minute gone in the round.
Bravo stands up.
Bravo dives in and scores a takedown into Myres's guard.
Bravo passes Myres's left leg - he's now in half guard.
Bravo is sneakily working for an arm triangle but Myres sees it coming and defends easily.
Bravo missing with some ground and pound from the half guard.
Bravo is sneakily working for an arm triangle but Myres sees it coming and defends easily.
Bravo trying to control the action but Myres is working from the bottom.
Myres looking to work for a kimura from the bottom.
Bravo tries to stand but his arm is trapped.
Bravo is figuring out what he wants to do next.
That's two minutes gone in the round.
Bravo working Myres over with strikes.
The crowd are loving this. Great action here.
Myres is looking to sinch up a guillotine here but Bravo pulls his head out easily.
Bravo could do with losing a few pounds - he looks very soft around the mid section, to put it politely.
Myres avoiding damage under a succession of punches from Bravo.
Myres taking some punishment here, with Bravo in his half guard.
The referee calls for the fighters to work.
Bravo passes to full mount!
Myres tries to reverse the position but Bravo maintains control.
Myres is persisting with the attempt to improve his position.
Bravo working Myres over with strikes here.
Myres stops Bravo from taking his back. Still, being mounted isn't any better.
Myres keeping his composure momentarily, calmly looking to get back to half guard.
Bravo has hold of Myres's left arm, perhaps looking for a submission. The two fighters tussle over control of the isolated limb and Myres manages to get his arm back to his side and away from danger.
That's three minutes gone in the round.
Bravo can't quite control the action as he would like just now, as Myres is looking to escape.
Myres is trying to escape the mount.
Myres keeps trying to improve his position.
Myres prevents Bravo from taking his back.
Myres is bucking up trying to escape but Bravo cracks him with another couple of good strikes.
Bravo is in the full mount, landing strikes.
The fans in attendance giving it up for the two fighters, who have really let it all hang out in the last minute or so!
Bravo trying to control but Myres is having none of it.
Myres is wriggling around trying to escape.
That's four minutes gone in the round.
Myres takes a big shot to the dome and his eyes have rolled back in his head! Bravo's killer instinct has kicked in as he finishes the fight with more strikes. Impressive finish.
Ladies and gentlemen, after 4:19 of round 1, we have a winner by way of TKO (Strikes). Chris Bravo!
|
|
|
|
|
|
|
|
|
|
|
|
|
|
|
|
|
|
|
|
|
|
|
| S |
C
A |
G |
S |
C
B |
G |
|
S |
C |
G |
|
energy
A | B |
|
hype
A | B |
|
pop
A | B |
|
mgr
A | B |
|
FIGHT
RATING
63% |
|
|
|
|
|
|
|
|
|
|
