 |
Arena of Blood: The Arrival PBP Commentary |
Undercard bout
|
|
|
|
Undercard bout
|
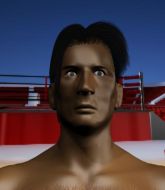
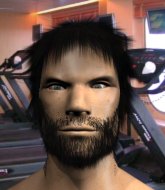
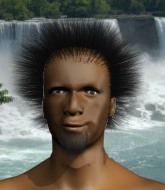
Coming up we have a heavyweight MMA rules bout between Baroev Radik (ranked 0 p4p, 0 weight class) and Jon Doe (ranked 0 p4p, 0 weight class). Over to our ring announcer for the fighter introductions!
 |
|
 |
| 185 cm
23
253 lbs
1 - 1 - 0 |
|
194 cm
18
280 lbs
1 - 1 - 0 |
Good takedowns
Brawler
KO power |
|
Good wrestler
Brawler
Granite chin |
|
| |
|
Ladies and gentlemen. This fight is 3 rounds, in the heavyweight division.
Introducing the fighter to my left, fighting out of the red corner.
With a record of
1 - 1 - 0, fighting out of Tokyo, Baroev Radik!
And introducing the fighter to my right, fighting out of the blue corner.
With a record of
1 - 1 - 0, fighting out of Tokyo, Jon Doe !
The judges for this bout are Ren Mimura, Shigeki Fujiwara and Taro Takaoka.

The bell rings for round one and we are underway!
Radik uses some good footwork to avoid the body shot by Doe .
Doe keeps the fight standing with a nice sprawl.
Radik shoots in for a double leg but Doe sprawls well. That's going to sap some energy.
Radik with a lazy takedown attempt

and Doe counters by clinching up.
That's three failed takedown attempts in the round for Baroev Radik. That's going to take a lot out of him.

Doe breaks the clinch.
Doe gets to the clinch - let's see what his plan is here.
Doe has had enough of the clinch but Radik keeps him there for the moment.
Doe breaks the clinch and we return to the middle of the mat.
Radik closes the distance and clinches up with Doe , looking for a takedown. Radik pushes Doe against the cage but Doe circles to the side and manages to break the clinch.
Radik misses with a takedown
and Doe counters into the clinch. Nicely done.
Radik drops down looking for an ankle pick but Doe pulls his leg out and moves away.
Doe tries to bum rush Radik with a series of wild strikes but Radik uses good footwork to avoid the assault.
Radik could do with losing a few pounds - he looks very soft around the mid section, to put it politely.
Doe is looking to clinch but Radik is avoiding it.
Doe stuffs the takedown attempt from Radik. Radik gets slowly back to his feet.
Doe forces Radik back against the cage and clinches.

That's one minute gone in the round.
Doe manages to break the clinch.
Doe paws at his opponent with the jab and then lunges in with a straight, right on the button.

It looks like Baroev Radik has been cut.
Radik closes this distance looking for a takedown but Doe circles away.
Radik shoots in for a double leg but Doe sprawls well. That's going to sap some energy.
Radik is breathing heavily.
Doe tries to close the distance and clinch up against the cage but Radik paws at him with a jab and circles away.
Doe gets in close and instigates a clinch.
Doe tries to land a knee to the body but he is off balance and Radik avoids it.
Doe is trying to force a seperation but Radik has the dominant position.
Doe 's corner calls for him to break the clinch, which he does.
Fantastic stuff here - a very entertaining period of action, which has drawn cheers from the crowd.
Radik avoids a punch combination nicely.
Radik fails with a takedown attempt.
Doe keeps the fight standing with a nice sprawl.
Radik fails to land the takedown.

That's two minutes gone in the round.
Doe moves into the clinch.
Doe escapes the clinch and we're back to striking.
Radik looks for a takedown but Doe sprawls well.
Radik misses with a takedown attempt

and Doe counters with a nice right hand that sends Radik toppling to the canvas! Radik scrambles and gets back to his feet - can Doe finish him?!
Radik with a poor takedown
and Doe holds on and brings the fighters into a clinch.
Doe escapes the clinch and we're back to striking.
Doe wobbles Radik with a right hand and the left hook that follows puts him on his rear! Doe dives in with a huge flying punch that connects right on the button and puts Radik to sleep! - What a violent and spectacular finish!
Ladies and gentlemen, after 2:32 of round 1, we have a winner by way of KO (Punches). Jon Doe !
|
|
|
|
|
|
|
|
|
|
|
|
|
|
|
|
|
|
|
|
|
|
|
| S |
C
A |
G |
S |
C
B |
G |
|
S |
C |
G |
|
energy
A | B |
|
hype
A | B |
|
pop
A | B |
|
mgr
A | B |
|
FIGHT
RATING
78% |
|
|
|
|
|
|
|
Undercard bout
|
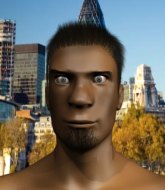
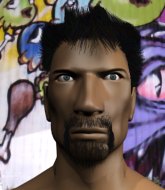
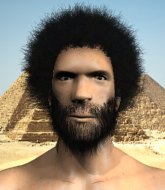
Coming up we have a welterweight MMA rules bout between Gilbert Solis (ranked 0 p4p, 0 weight class) and Max Porter (ranked 0 p4p, 0 weight class). The crowd giving both fighters a great reception on their way into the arena. That's good to see.
 |
|
 |
| 180 cm
25
175 lbs
0 - 0 - 0 |
|
180 cm
24
176 lbs
0 - 1 - 0 |
Good wrestling
Counter fighter
Very strong |
|
BJJ Purple Belt
Brawler
Granite chin |
|
| |
|
Ladies and gentlemen. This fight is 3 rounds, in the welterweight division.
Introducing the fighter to my left, fighting out of the red corner.
With a record of
0 - 0 - 0, fighting out of Tokyo, Gilbert Solis!
And introducing the fighter to my right, fighting out of the blue corner.
With a record of
0 - 1 - 0, fighting out of Tokyo, Max Porter!
The judges for this bout are Taro Takaoka, Yasuomi Hirokawa and Ren Mimura.
The bell rings for round one and we are underway!
Porter shoots in but doesn't get the takedown

and Solis decides to take the opportunity to score a takedown. He's landed in Porter's guard.
We could do with one of the fighters taking the initiative a bit more on the ground - they're both waiting to capitalize on a mistake.
Solis throws a strike but Porter rolls with it and manages to sweep. Now he's in guard on top.
Solis wants to sweep but no luck.
Porter wants to control from the top but Solis keeps moving.
Solis is trying to control the position but Porter postures up.
Porter pressing down on his opponent's thigh, looking to pass guard. Solis is keeping the position for now.
Solis controls Porter momentarily but Porter frees himself.
Solis is working an open guard here, looking to improve his position. No doubt that will leave him open to counters but at least he's being more offensive.
That's one minute gone in the round.

Solis manages to escape and get back to his feet.
Porter shoots and misses
and Solis counters with a shoot takedown. Porter fights it but they end up in guard.
The ref warns both fighters not to hold the cage as they work up against the meshing.

Solis avoids a guillotine attempt easily.
Solis has to be careful here, sitting in the guard of a superior BJJ player.
Solis preventing the sweep.
Porter throws his legs up looking to secure a triangle. Oh, that looks pretty tight, I gotta say! Solis escapes and throws Porter's legs to the side, diving into side control!
Solis lands some shots froms side control.
That's two minutes gone in the round.
Wooooo! Give it up for these two warriors! They are putting on a show!
Porter tries to bench press Solis off him but Solis keeps the position.
Solis is working Porter over with some ground and pound from side control.
Solis is putting a hurting on Porter here, landing some big shots from side control.
Solis fails to land a wild elbow strike.
Solis working away.
Porter is looking to reverse the position.
Solis lands some shots froms side control.
Solis controlling from side mount.

That's three minutes gone in the round.
Solis wants to lay and pray for a moment but Porter keeps working.
Porter tries to work a leg under to get back to half guard but Solis wriggles his own leg back out and remains in side control.
Solis trying to control the position but Porter is working away.
Porter is looking to regain half guard here but Solis keeps moving and retains side control.

That's four minutes gone in the round.
Porter is letting Solis control him for a moment.
The referee must be thinking about standing these guys back up.
Porter tries to bench press Solis off him but Solis keeps the position.
Solis moving around in side mount but really he's just happy to control for now.
As the round comes to an end the crowd are showing their appreciation for a great round of action.
Porter regains half guard.
And thats the end of the round the fighters go back to their corners.
Gilbert Solis dominated that round.
The referee calls time. The cornermen exit stage left and we're back to business.

Solis gets the takedown into side control.
Solis tries to score with some ground and pound. Porter controls his posture well this time though and the shots don't do any damage.
Solis working the ground and pound from side control.
Porter is trying to improve his position.
Porter takes a big shot right to the temple there but he's taken it well.
Solis lands a few punches from side control.
Solis scoring with punches from side control.
Porter is trying to control Solis's posture but Solis avoids it.
This is a great period of action - very entertaining stuff!
Porter is looking to regain half guard here but Solis keeps moving and retains side control.
That's one minute gone in the round.
Solis landing strikes.
The strikes coming from Solis are missing the target in this wave of attacks.
The strikes coming from Solis are missing the target in this wave of attacks.
Porter takes a big shot right to the temple there but he's taken it well.
Porter is moving his hips around well on the bottom and has managed to get back to half guard.
Porter avoiding damage under a succession of punches from Solis.
Solis trying to pass the guard but Porter defending well.
That's two minutes gone in the round.
Porter wants to get back to his feet.
Porter is not content to let Solis control the position.
The fighters are battling for position here. Porter manages to regain full guard. Nice work.
Solis throwing shots from guard but he's hitting more mat than opponent.
Solis is looking to work some ground and pound but Porter has wrist control.
That's three minutes gone in the round.
Porter keeping moving, preventing Solis from controlling successfully.
Solis throwing strikes but missing.
Porter has managed to work for a loose triangle. I think Solis should be able to defend this one pretty easily though. Oh, Porter has tightened it up now! Solis should have reacted faster there - he's in big trouble and yes, he's tapped out! This one is all over!
Ladies and gentlemen, after 3:42 of round 2, we have a winner by way of Submission (Triangle). Max Porter!
Max Porter seemed lost for words in his post fight interview but he remembered to thank his fans and directed everyone to his website.
|
|
|
|
|
|
|
|
|
|
|
|
|
|
|
|
|
|
|
|
|
|
|
| S |
C
A |
G |
S |
C
B |
G |
|
S |
C |
G |
|
energy
A | B |
|
hype
A | B |
|
pop
A | B |
|
mgr
A | B |
|
FIGHT
RATING
40% |
|
|
|
|
|
|
|
Undercard bout
|
|
|
|
Undercard bout
|
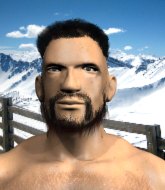
Coming up we have a light heavyweight MMA rules bout between Esist Stein (ranked 0 p4p, 0 weight class) and Slip Zacha (ranked 0 p4p, 0 weight class). Rumors backstage are that the fighters have been paid to keep it standing but we know that would never happen in MMA!
 |
|
 |
| 225 cm
20
204 lbs
0 - 2 - 0 |
|
185 cm
25
198 lbs
1 - 0 - 0 |
BJJ Blue Belt
Excellent MT
Big right hand |
|
BJJ White Belt
Excellent MT
Experienced |
|
| |
|
Ladies and gentlemen. This fight is 3 rounds, in the light heavyweight division.
Introducing the fighter to my left, fighting out of the red corner.
With a record of
0 - 2 - 0, fighting out of Tokyo, Esist Stein!
And introducing the fighter to my right, fighting out of the blue corner.
With a record of
1 - 0 - 0, fighting out of Tokyo, Slip Zacha!
The judges for this bout are Yukihiro Shimada, Sosuke Kotani and Yukihiro Yamamoto.
The bell rings for round one and we are underway!
Stein throws a series of punches but Zacha avoids them all with ease.
Zacha avoids a kick to the body.
Stein throws a head kick that misses and slips in the process. He scrambles back to his feet and the fighters circle.
Stein pulls out of a head kick attempt.
Stein throws a sloppy head kick and Zacha moves out of range easily.
Esist Stein seems to be the more aggressive standup fighter in this bout.
Zacha forces Stein back against the cage and clinches.
A body shot lands from Zacha.
Zacha drops down for a takedown but doesn't get it.
Zacha lands a nice looking hook to the body, against the cage.
Zacha lands with a short head shot on the inside.
Zacha is trying to work for a single leg takedown but Stein pulls him back up using the underhooks.
Stein is looking to break free of the clinch but Zacha has double underhooks.
Zacha changes levels and goes for a takedown here. Stein fights it off and pushes away nicely.
Esist Stein has stuffed three takedown attempts in the round now. That's going to take a lot out of Slip Zacha.
That's one minute gone in the round.
Stein tries a head kick but it misses.
Stein throws a right hand that Zacha ducks under and follows up with a left that Zacha also avoids with ease.
Zacha has managed to clinch.
Stein really does look like a pencil wearing a pair of gloves. Let's hope he has a gameplan to suit that ridiculous body shape.
Zacha manages to break the clinch.
Zacha blocks a head kick by Stein.
Stein throws a nice head kick!

It looks like Slip Zacha has been cut.
Horrible takedown by Zacha or perhaps it was just good defense by Stein which made him look bad.
Zacha avoids a kick to the body.
Stein throws a right and a left that Zacha avoids nicely.
Stein displays good takedown defense there as he swats away a double leg from Zacha.
Stein misses with a few strikes there.
Stein is breathing heavily.
Zacha closes the distance and lands a one-two.
Stein misses with a wild combination.
Zacha fakes with an overhand right and moves in to clinch with Stein, pushing him back against the cage.
That's two minutes gone in the round.
We've seen a great period of action over the last minute or so - credit to both fighters for going all out!
A right hand to the body from Zacha.
With the fighters clinched against the cage, Zacha creates a bit of distance for himself and scores with a nice uppercut.
A left hand lands to the body for Zacha.
A short right from Zacha.
Zacha lands a body shot in the clinch.
Zacha lands a shot to the body.
Stein wants to break free but Zacha has control.
Zacha is looking for a takedown up against the cage. Stein gets underhooks though and prevents the takedown attempt.
Zacha lands a left hand that snaps the head of Stein backwards.
Zacha has a body lock and is looking for a takedown. Stein is bouncing around trying to prevent the takedown and somehow he has indeed managed to stay on his feet.
That's three minutes gone in the round.
Zacha breaks from the clinch.
Stein throws a leg kick but Zacha moved away.
Zacha gets in close and instigates a clinch.
Zacha is trying to drag Stein to the mat but Stein just about manages to keep his footing. He used the cage to his advantage there.
Zacha fails to pull the fight into his guard.
Stein gets double underhooks to prevent a takedown attempt from Zacha.
Zacha effectively controlling the action here.
Zacha lands a nice uppercut.
That's four minutes gone in the round.
Zacha pressing his opponent against the cage.
Stein wants to get back to striking at distance but Zacha won't allow it.
Zacha lands a hook that snaps the head of Stein backwards.
Stein wants to break free but Zacha has control.
As the round comes to an end the crowd are showing their appreciation for a great round of action.
Zacha missing with knees to the body.
Zacha lands with a quick shot inside that doesn't really do much damage.
Zacha lands with a short punch from the clinch.
And thats the end of the round the fighters go back to their corners.
Slip Zacha dominated that round.
The cut man is working on Slip Zacha's cut.
That's the end of the round. The referee orders the cornermen out of the cage so we can get back down to business.
Some wild striking there from Stein.
Stein throws a head kick that misses.
Zacha closes the distance and presses his opponent up against the cage.
Zacha breaks the clinch and we return to the middle of the mat.
Zacha fails to land with the punch combination there - jab, cross, hook, miss, miss, miss.
Zacha misses with a low kick.
Stein looks to score with a combo but nothing lands.
Stein looks to land a combination but Zacha avoids it well.
Zacha blocks a head kick by Stein.
Stein throws a hook to the body but it doesn't connect.
Zacha misses with a few strikes there.
Esist Stein is looking to throw some combinations by the looks of things.
Zacha lands an overhand right.
Stein checks the leg kick nicely there.
Stein throws a right and a left that both miss.
Nice takedown defense from Stein. No joy for Zacha on that attempt.
Stein misses with a half-hearted attempt at a head kick.
Stein misses with a wild combination.
Zacha misses with a series of wild punches.
Both fighters are absolutely exhausted here.
That's one minute gone in the round.
Zacha shuffles to his left behind two crisp jabs. Stein eats them both and turns towards Zacha to reposition himself and eats a stinging right hand-left hook combo.
Crunch! Stein slams his shin into Zacha's torso.
Zacha moves into range and clinches up with Stein.
Stalling in the clinch from Zacha.
Stein gets double underhooks to prevent a takedown attempt from Zacha.
Zacha lands an uppercut.
Stein is trying to break free.
Zacha drops down looking for an ankle pick but Stein pulls his leg out and moves away.
Esist Stein has stuffed three takedown attempts in the round now. That's going to take a lot out of Slip Zacha.
That's two minutes gone in the round.
Zacha fails with a takedown attempt.
Zacha gets a clinch.
Stein has had enough of the clinch and is looking to separate.
Zacha breaks the clinch.
Stein tries a head kick but it misses.
Stein throws a jab, cross combination which is slipped
and Zacha holds on and brings the fighters into a clinch.
Wooooo! Give it up for these two warriors! They are putting on a show!
Zacha content to slow the pace in the clinch.
Zacha lands a body punch in the clinch.
That's three minutes gone in the round.
A nice left hand lands by Zacha.
Zacha breaks the clinch and we return to the middle of the mat.

A jab-cross combination lands for Stein and sends Zacha crashing to the mat! Stein follows him down to the mat - Zacha regains half guard but he's not out of trouble yet!
Wooooo! Give it up for these two warriors! They are putting on a show!
Stein wants to stand up but Zacha has a hold of him and won't allow it.
Zacha controlling the leg, holding on to half guard.
Stein tries to stand but his arm is trapped.
Zacha is looking to escape.
Stein seems to have lost interest with the ground game and is thinking about standing back up.
Zacha is trying is best to control the position here.
The fighters are pressed up against the cage, both looking to find a bit of space to work.
That's four minutes gone in the round.
Stein prevents Zacha from improving his position.
Stein decides to stand up and try his luck on the feet.
Zacha moves into range and clinches up with Stein.
Still in the clinch, Zacha scores with a nice short uppercut.
Zacha tries to pull guard but can't drag his opponent to the mat. Stein just stands there and leans against the cage.
The fighters are pressed against the cage, as the pace of the fight slows.
Stein wants to get back to striking at distance but Zacha won't allow it.
The crowd are going absolutely nuts as the round comes to an end - what a fantastic round of action!
Stein is trying to push Zacha away but Zacha has him pressed against the cage, so he's going nowhere.
And thats the end of the round the fighters go back to their corners.
Esist Stein dominated that second round.
The cut man is working on Slip Zacha's cut.
The referee calls time. The cornermen exit stage left and we're back to business. This is the final round!

Stein throws a combination but comes up with nothing but fresh air.
Zacha clinches up against the cage.
Zacha breaks the clinch.
Zacha takes a nasty kick to the mid section... That should keep him thinking. Does he try and block and risk a head kick landing?
Zacha clinches up against the cage.
Zacha leaning his opponent against the cage.
Zacha lands a short shot on the inside that snaps the head of Stein backwards.
Zacha taking a break, stalling in the clinch.
That's one minute gone in the round.
Zacha has hold of a leg and is looking for a trip takedown. Stein avoids it nicely though and we remain in the clinch.
Slip Zacha seems to be working more effectively in the clinch in the fight so far.
Zacha manages to break the clinch.
Zacha clinches up with Stein and pushes him back against the cage.
Zacha is stalling here.
Zacha pushes off and circles away, back to the middle of the mat.
Stein misses with a jab and misses with a cross straight after too.
Zacha fakes with an overhand right and moves in to clinch with Stein, pushing him back against the cage.
Zacha lands a nice uppercut.
Zacha tries for a takedown. No joy.
Stein wants to get back to striking at distance but Zacha won't allow it.
That's two minutes gone in the round.
Zacha tries to pull guard but can't drag his opponent to the mat. Stein just stands there and leans against the cage.
Esist Stein has stuffed three takedown attempts in the round now. That's going to take a lot out of Slip Zacha.
A short right from Zacha on the inside.
An uppercut to the body lands inside from Zacha.
Zacha lands with a right to the head.
Zacha keeps the fight in the clinch, despite Stein's efforts to push away.
Zacha lands with a short punch from the clinch.
Zacha tries to land a knee to the body but he is off balance and Stein avoids it.
Zacha lands punches inside but they're not really causing much damage.
We've seen a great period of action over the last minute or so - credit to both fighters for going all out!
Zacha is trying to pull guard but Stein turns him against the cage and we stay in the clinch.
That's three minutes gone in the round.
Zacha throws a hook to the body. More of an arm punch but it's all scoring with the judges.
Nice body punch from Zacha - that landed with a thud.
Zacha keeps control of Stein as he tries to wriggle out of the double underhooks.
Zacha slowing the pace effectively.
Zacha tries to pull guard but Stein holds him up against the cage and eventually Zacha drops back down to his feet.
Zacha lands a left hand.
Zacha working some nice short punches in the clinch.
Stein wants to strike at distance but he can't break free of the clinch.
Zacha jumps guard but Stein stands there with Zacha around his waist. Zacha gives up and drops back to his feet. We remain in the clinch.
That's four minutes gone in the round.
A left hand lands to the body for Zacha.
Zacha has Stein pressed against the cage, preventing Stein from circling away and getting back to striking at range.
A short left from Zacha.
Zacha lands a nice uppercut.
Zacha lands a short shot on the inside that snaps the head of Stein backwards.
Zacha pushes off and circles away, back to the middle of the mat.
Zacha moves into the clinch.
As the round comes to an end the crowd are showing their appreciation for a great round of action.

Zacha pulls guard successfully.
The fans in attendance giving it up for the two fighters, who have really let it all hang out in the last minute or so!
Stein is fighting to break Zacha's control of his arms but Zacha is doing a good job of controlling the position at the moment.
Stein decides to stand up and beckons his opponent to follow.
And that's the end of the fight!
Slip Zacha comfortably won the final round on my scorecard.
I think Zacha has won this one but let's see whether the judges agree with me. Over to the ring announcer for the scorecards.
Ladies and gentlemen, after 3 rounds of action, we go to the scorecards for a decision.
Judge Yukihiro Shimada scores the fight 28:29
Judge Sosuke Kotani scores the fight 28:29
Judge Yukihiro Yamamoto scores the fight 28:29
In favor of your winner, by unanimous decision... Slip Zacha!
|
|
|
|
|
|
|
|
|
|
|
|
|
|
|
|
|
|
|
|
|
|
|
| S |
C
A |
G |
S |
C
B |
G |
|
S |
C |
G |
|
energy
A | B |
|
hype
A | B |
|
pop
A | B |
|
mgr
A | B |
|
FIGHT
RATING
77% |
|
|
|
|
|
|
|
Undercard bout
|
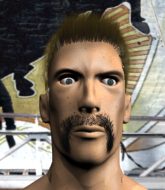
Coming up we have a welterweight MMA rules bout between Lee Armstrong (ranked 0 p4p, 0 weight class) and Dennis Pegeant (ranked 0 p4p, 0 weight class). Well, the cameraman is lingering on a pretty young lady for a bit too long there. Keep your eyes on the prize buddy or you'll miss the fighter intros!
 |
|
 |
| 180 cm
20
170 lbs
0 - 1 - 0 |
|
191 cm
25
170 lbs
1 - 0 - 0 |
BJJ White Belt
Excellent MT
Self confident |
|
BJJ Purple Belt
Counter fighter
Solid chin |
|
| |
|
Ladies and gentlemen. This fight is 3 rounds, in the welterweight division.
Introducing the fighter to my left, fighting out of the red corner.
With a record of
0 - 1 - 0, fighting out of Tokyo, Lee Armstrong!
And introducing the fighter to my right, fighting out of the blue corner.
With a record of
1 - 0 - 0, fighting out of Tokyo, Dennis Pegeant!
The judges for this bout are Yuuki Gou, Ren Mimura and Shigeki Sano.
The bell rings for round one and we are underway!
Armstrong throws a head kick that misses.
Armstrong tries to clinch but fails miserably
and Pegeant decides to take the opportunity to score a takedown. He's landed in Armstrong's guard.
The ref warns both fighters not to hold the cage as they work up against the meshing.
We must be close to a standup if these guys don't pick up the pace.
Pegeant drops back looking for a leg! Armstrong is in trouble here! The fighters roll with the hold and Armstrong manages to kick Pegeant off! Pegeant jumps back into Armstrong's guard.
Pegeant drops back for a leg here. A bit of a high risk move... He's looking for a kneebar by the looks of things. Now both of them are looking for submissions. Pegeant seems to have locked his on tight now - Armstrong screams in pain and taps out furiously! It certainly was a high risk move but it's paid off for Pegeant, as he picks up the win!
Ladies and gentlemen, after 0:29 of round 1, we have a winner by way of Submission (Kneebar). Dennis Pegeant!
|
|
|
|
|
|
|
|
|
|
|
|
|
|
|
|
|
|
|
|
|
|
|
| S |
C
A |
G |
S |
C
B |
G |
|
S |
C |
G |
|
energy
A | B |
|
hype
A | B |
|
pop
A | B |
|
mgr
A | B |
|
FIGHT
RATING
53% |
|
|
|
|
|
|
|
Undercard bout
|
|
|
|
Undercard bout
|
Coming up we have a heavyweight MMA rules bout between Skylar Meeks (ranked 0 p4p, 0 weight class) and Sean Paul Wyatt (ranked 0 p4p, 0 weight class). Wyatt has chosen ''Broken Out In Love'' as his entrance music, which hasn't gone down very well with the crowd. Sean Paul Wyatt will no doubt be looking to use his reach advantage to good effect.
 |
|
 |
| 179 cm
25
225 lbs
0 - 0 - 0 |
|
199 cm
18
270 lbs
3 - 1 - 0 |
Good takedowns
Excellent boxer
Good chin |
|
BJJ Blue Belt
Brawler
Solid chin |
|
| |
|
Ladies and gentlemen. This fight is 3 rounds, in the heavyweight division.
Introducing the fighter to my left, fighting out of the red corner.
With a record of
0 - 0 - 0, fighting out of Tokyo, Skylar Meeks!
And introducing the fighter to my right, fighting out of the blue corner.
With a record of
3 - 1 - 0, fighting out of Tokyo, Sean Paul Wyatt!
The judges for this bout are Ren Mimura, Kenichi Hosakawa and Hirohito Nitta.
The bell rings for round one and we are underway!
Meeks dodges the punch combination from Wyatt.
Meeks misses with a double jab.
Wyatt fails with a rather predictable takedown attempt.
Sean Paul Wyatt seems to be the more aggressive standup fighter in this bout.
Excellent takedown into side control there by Meeks.
The referee is pacing around the two fighters - he looks like he's thinking about a standup.
Wyatt is trying to get back to half guard.
Wyatt manages to work his way to half guard, despite Meeks's best efforts.
Both fighters really going for it on the ground here!
The fighters are battling for position here. Wyatt manages to regain full guard. Nice work.
Wyatt working from the bottom, still in full guard. He's managed to get a loose triangle. Meeks doesn't seem to be doing much to defend here, obviously he feels comfortable in the position. Oh but Wyatt is tightening it up a little... Meeks has to be careful here... He's got his foot tucked under now, this looks tight! Meeks reacted too slowly and this one could be over in a matter of seconds! YES! Meeks taps out! Nice BJJ there by Wyatt!
Ladies and gentlemen, after 0:57 of round 1, we have a winner by way of Submission (Triangle Choke). Sean Paul Wyatt!
Sean Paul Wyatt was full of energy after the big win and talked about how he thinks he can do big things in this sport. The crowd were appreciative of his determination to succeed.
|
|
|
|
|
|
|
|
|
|
|
|
|
|
|
|
|
|
|
|
|
|
|
| S |
C
A |
G |
S |
C
B |
G |
|
S |
C |
G |
|
energy
A | B |
|
hype
A | B |
|
pop
A | B |
|
mgr
A | B |
|
FIGHT
RATING
47% |
|
|
|
|
|
|
|
Co-main event
|
Coming up we have a welterweight MMA rules bout between Aleksander Grabinski (ranked 0 p4p, 0 weight class) and Dave Spiteri (ranked 0 p4p, 0 weight class). Dave Spiteri has the power to score a knockout today if he connects clean with Aleksander Grabinski's chin.
 |
|
 |
| 176 cm
25
170 lbs
1 - 1 - 0 |
|
172 cm
21
178 lbs
1 - 0 - 0 |
BJJ Blue Belt
Counter fighter
Self confident |
|
Decent wrestler
Decent boxing
Heavy handed |
|
| |
|
Ladies and gentlemen. This fight is 3 rounds, in the welterweight division.
Introducing the fighter to my left, fighting out of the red corner.
With a record of
1 - 1 - 0, fighting out of Tokyo, Aleksander Grabinski!
And introducing the fighter to my right, fighting out of the blue corner.
With a record of
1 - 0 - 0, fighting out of Tokyo, Dave Spiteri!
The judges for this bout are Ren Mimura, Taro Takaoka and Yasuomi Hirokawa.
The bell rings for round one and we are underway!
Spiteri swinging wildly here.
Spiteri scores with a punch to the head.
Crunch! Grabinski slams his shin into Spiteri's torso.
Spiteri throws a combination but it was largely blocked by Grabinski.
Grabinski shoots for a double leg takedown but Spiteri sprawls well. He's pushed Grabinski's face into the mat and manages to get back to his feet relatively easily.
Spiteri throws a nice hook to the body that draws an oooh from the crowd.
Grabinski tries to score a power double leg takedown but Spiteri sees that one coming and sprawls well. That will dishearten Grabinski somewhat.
Spiteri looks to land a right hand but Grabinski moved out of range.
Spiteri with a hook.
Spiteri looks to land a combination but Grabinski avoids it well.
This is a great period of action - very entertaining stuff!
Good exchange - Spiteri coming out on top.
Spiteri throws a shot to the body.
That's one minute gone in the round.
Spiteri throws a poor cross that misses
and Grabinski counters with a takedown into side control.

Grabinski wants to work for a kimura but he's foiled early by Spiteri, who protects the arm well.
Spiteri tries to get back to half guard but can't.
Spiteri keeps trying to improve his position.
Grabinski is looking to take a break and control but Spiteri is keeping him honest, looking to work from the bottom.
Spiteri struggling a bit here.
That's two minutes gone in the round.
Grabinski trying to control the position but Spiteri is working away.
This is a great period of action - very entertaining stuff!
Grabinski landing with strikes to the head and body from side control.
Grabinski creates a bit of distance and throws down some hard shots.
Spiteri struggling a bit here.
Grabinski working the ground and pound but he's contacting the mat, not the fighter.
Grabinski working the ground and pound but Spiteri is defending the strikes.
Grabinski connects with a decent looking elbow from side control that caused Spiteri some visible discomfort.
Spiteri is looking to reverse the position.
Grabinski landing with strikes to the head and body from side control.
You can see the frustration on Spiteri's face, being in this tough position on the bottom.
Spiteri keeping his opponent close.
We get told so often about how wrestlers don't like to be on their backs. Let's see if Spiteri can do anything to dispel that myth.
That's three minutes gone in the round.
Grabinski cracks Spiteri with a big right hand but Spiteri just smiles back at him and invites him to have another go.
Spiteri takes a nasty elbow to the side of the head.
Grabinski tries for an arm triangle. That looks pretty tight to me. Is this one over!?! Possibly, maybe, no Grabinski has let go of the choke. Obviously it wasn't as tight as we thought!
Grabinski wants to lay and pray for a moment but Spiteri keeps working.
Spiteri is looking to regain half guard here but Grabinski keeps moving and retains side control.
Spiteri tries to control the position but he's not in luck - Grabinski easily slips into full mount!
Grabinski lands a big elbow.
That's four minutes gone in the round.
Grabinski fakes a shot to the body and cracks his opponent in the head. Nice ground and pound there!
The crowd cheering loudly, showing their appreciation for the quality fight we're seeing here.
The crowd growing excited in anticipation of a finish here! Right on cue, Grabinski cracks his opponent with a massive right hand that draws loud cheers!
Grabinski landing strikes, looking to finish!
Spiteri in a bad spot here, taking shots to the head.
Grabinski has been looking to land a fair amount of strikes on the ground. He might be looking to soften his opponent up in order to work for a submission.
Grabinski cracks Spiteri with a nasty head shot there - the crowd let out an audible gasp there, as the noise reverberated around the arena.
Spiteri tries to hold on but Grabinski postures up.
Spiteri squirming around on the bottom, looking to escape.
Spiteri is working to get back to half guard.
Spiteri tries to hold on but Grabinski pushes him away.
The crowd are going absolutely nuts as the round comes to an end - what a fantastic round of action!
Grabinski tries to control but Spiteri wriggling away.
Grabinski cracks Spiteri with a nasty head shot there - the crowd let out an audible gasp there, as the noise reverberated around the arena.
And thats the end of the round the fighters go back to their corners.
Aleksander Grabinski dominated that round.
That's the end of the interval. I'm sure that seemed a lot quicker than a minute for our two fighters! Back to the action.
No luck for Grabinski with that takedown attempt.
Grabinski throws a looping left and ducks down for a takedown. He's got his arms around Spiteri's waist but Spiteri gets an underhook and avoids the takedown by throwing Grabinski off to one side.
Grabinski throws a jab when Spiteri was well out of range.
Spiteri thuds his right hand into Grabinski's forehead from close range. That could be painful for both fighters.
Dave Spiteri seems to be the more aggressive standup fighter in this bout.
Grabinski drives through with a takedown into Spiteri's guard. Let's see what he can do from the top position.
Spiteri pulls Grabinski in close to prevent any damage.
Spiteri looking to control.
Grabinski trying to control the position from guard on top but Spiteri is wriggling around, looking for whatever he can.
The fighters are pressed up against the cage, both looking to find a bit of space to work.
Spiteri wants to stand and escape but Grabinski is having none of it.
Spiteri looking to control.
Aleksander Grabinski overall seems to be getting the better of the ground position in the fight so far.
The referee is asking the fighters to pick up the pace.

Dave Spiteri has forced the referee to step in and restart the fight on the feet.
Spiteri keeps his opponent at a distance with a nice jab.
That's one minute gone in the round.
Spiteri misses with a double jab.
Spiteri throws an uppercut from half a mile away. Grabinski sees it coming and avoids it easily.
Dave Spiteri is looking to keep the fight on the feet at all costs.
Spiteri scores with a big left there. The judges will like that one.
Aleksander Grabinski is looking to throw some combinations by the looks of things.
Spiteri defending well as Grabinski loads up on a big left hand.
Grabinski shoots in for a double leg but Spiteri sprawls well. That's going to sap some energy.
That's three failed takedown attempts in the round for Aleksander Grabinski. That's going to take a lot out of him.
Grabinski fails with a rather predictable takedown attempt.
Spiteri drops Grabinski with a beautiful combination! Grabinski stares up at his opponent, who ushers him back to his feet - Spiteri is looking for the KO!

Grabinski is rocked!
We've seen a great period of action over the last minute or so - credit to both fighters for going all out!
Spiteri misses with a jab and misses with a cross straight after too.
Oh Grabinski is still all over the place! His legs are completely gone! Will he be able to recover?!!
Grabinski is wiping some vaseline out of his eye. Spiteri doesn't give a rats ass about fair play and cracks him with a massive hook to the side of the head! Grabinski crumples to the floor out cold! The cornerman is going to be in Grabinski's bad books for that mishap!
Ladies and gentlemen, after 1:47 of round 2, we have a winner by way of KO (Punch). Dave Spiteri!
Dave Spiteri gave a mention to Namunamu Clothing in his post fight interview. That will please them (and hopefully generate some sales).
|
|
|
|
|
|
|
|
|
|
|
|
|
|
|
|
|
|
|
|
|
|
|
| S |
C
A |
G |
S |
C
B |
G |
|
S |
C |
G |
|
energy
A | B |
|
hype
A | B |
|
pop
A | B |
|
mgr
A | B |
|
FIGHT
RATING
100% |
|
|
|
|
|
|
|
Main event
|
Coming up we have a lightweight MMA rules bout between Jake Horton (ranked 0 p4p, 0 weight class) and Mandasen Trono (ranked 0 p4p, 0 weight class). Both fighters look fresh as a daisy as they make their way towards the cage.
 |
|
 |
| 185 cm
20
152 lbs
2 - 3 - 0 |
|
169 cm
25
145 lbs
1 - 1 - 0 |
BJJ Purple Belt
Solid boxing
Big heart |
|
Good takedowns
Brawler
Enjoys gardening |
|
| |
|
Ladies and gentlemen. This fight is 3 rounds, in the lightweight division.
Introducing the fighter to my left, fighting out of the red corner.
With a record of
2 - 3 - 0, fighting out of Tokyo, Jake Horton!
And introducing the fighter to my right, fighting out of the blue corner.
With a record of
1 - 1 - 0, fighting out of Tokyo, Mandasen Trono!
The judges for this bout are Kenichi Hosakawa, Shirou Masuda and Shigeki Fujiwara.
The bell rings for round one and we are underway!
Trono drives through with a takedown into guard.
It looks like the ref is thinking about a standup.
Trono tries to free his leg and advance position but Horton is retaining full guard.
Horton working the defensive guard well to avoid strikes from Trono.
Horton knows he needs to get back to his feet asap. He's simply no match for Trono on the ground.
Trono wants to pass the guard but Horton is keeping the position.

We're going to have a standup here because Jake Horton wasn't active enough for the referee's liking.
Horton lands with a two punch combination before moving back out of range.
Trono fails with a takedown attempt.
That's one minute gone in the round.
Trono feints and then dives in with a takedown. That was a long way out but the feint bought him enough time to close the distance and complete the takedown. Now we'll play guard for a bit and see who can get the better of that position.
Trono wants to pass the guard but Horton is keeping the position.
Trono trying to pass the guard. He's being very persistent here but Horton manages to land a sweep and now he's on top!
Trono is looking for a triangle but Horton pushes his legs off easily.
Both fighters really going for it on the ground here!
Trono had isolated an arm as going for a kimura. Horton defends it easily.
The crowd cheering loudly, showing their appreciation for the quality fight we're seeing here.
Trono is trying to keep Horton in close.
That's two minutes gone in the round.
The fighters are starting to perspire pretty heavily.
Horton wants to control from the top but Trono keeps moving.
Trono is active off his back here, looking for submissions.
Horton has to be careful here, sitting in the guard of a superior BJJ player.
Trono working for a triangle but Horton defends it easily.
Trono throwing his legs up looking for a triangle.
Horton really does look like a pencil wearing a pair of gloves. Let's hope he has a gameplan to suit that ridiculous body shape.
Horton postures up.
Horton wants to control from the top but Trono keeps moving.
Trono looking for submissions from the bottom but instead Horton passes into half guard.
That's three minutes gone in the round.
Trono is pressing down on Horton's left leg trying to get back to full guard. He's managed it.
Trono working for a triangle but Horton defends it easily.
Horton trying to control the position from guard on top but Trono is wriggling around, looking for whatever he can.
Horton postures up and lands a big shot to Trono's brow.
Horton avoids a guillotine attempt easily.
The fighters are pressed up against the cage, both looking to find a bit of space to work.
Trono has his foot on Horton's thigh. He's trying to push off and get in position for a triangle, I think. Horton works his way back into a safe position though.
Trono is looking for a guillotine. You can't force these things though and Horton defends well.
We've seen a great period of action over the last minute or so - credit to both fighters for going all out!
Horton postures up to throw the ground and pound strikes but they don't connect.
That's four minutes gone in the round.
Horton landing with the ground and pound.
Horton trying to control the position from guard on top but Trono is wriggling around, looking for whatever he can.
Trono is active off his back here, looking for submissions.
Trono is throwing his legs up, looking for submissions. Horton is aware though and is defending well.
Horton cracks Trono with a solid left hand.
Horton trying to stand up but can't free himself from Trono's guard.
Horton in full guard, throwing the ground and pound. No damage this time.
The ref warns both fighters not to hold the cage as they work up against the meshing.
Horton stands up over Trono, holding his feet. He dives back in and lands a decent shot to the head.
Horton has a momentary lapse of concentration, allowing Trono to throw up a leg and lock on what appears to be a pretty tight triangle! Horton is fighting it off but it's all too little too late - Trono pulls down on the head and he's put Horton to sleep! This one is all over!
Ladies and gentlemen, after 4:58 of round 1, we have a winner by way of Submission (Triangle). Mandasen Trono!
During a confident post fight interview, Mandasen Trono thanked all his fans. He seemed very genuine when describing how motivated his fans keep him.
|
|
|
|
|
|
|
|
|
|
|
|
|
|
|
|
|
|
|
|
|
|
|
| S |
C
A |
G |
S |
C
B |
G |
|
S |
C |
G |
|
energy
A | B |
|
hype
A | B |
|
pop
A | B |
|
mgr
A | B |
|
FIGHT
RATING
67% |
|
|
|
|
|
|
|
|
|
|
