 |
EFL Kula vs Nelson PBP Commentary |
Undercard bout
|
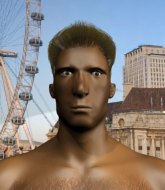
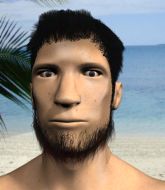
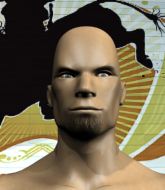
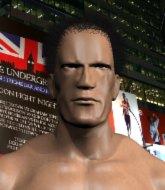
Coming up we have a super heavyweight MMA rules bout between Anderson Dos Santos (ranked 0 p4p, 0 weight class) and Gabriel Iglesias (ranked 0 p4p, 0 weight class). Gabriel Iglesias will no doubt be trying to keep this one on the feet, where he has a distinct advantage.
 |
|
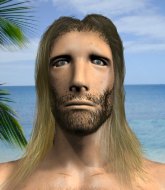 |
| 200 cm
25
290 lbs
3 - 1 - 0 |
|
218 cm
26
300 lbs
4 - 1 - 0 |
Good takedowns
Brawler
Cuts easily |
|
BJJ White Belt
Excellent boxer
Heavy handed |
|
| |
|
Ladies and gentlemen. This fight is 3 rounds, in the super heavyweight division.
Introducing the fighter to my left, fighting out of the red corner.
With a record of
3 - 1 - 0, fighting out of Las Vegas, Anderson Dos Santos!
And introducing the fighter to my right, fighting out of the blue corner.
With a record of
4 - 1 - 0, fighting out of Tokyo, Gabriel Iglesias!
The judges for this bout are Seu Braga, Thiago Cunha and Mauricio Rocha.

The bell rings for round one and we are underway!
Dos Santos closes the distance and clinches up with Iglesias, looking for a takedown. Dos Santos pushes Iglesias against the cage but Iglesias circles to the side and manages to break the clinch.
Anderson Dos Santos seems to be the more aggressive standup fighter in this bout.
Iglesias tries to bum rush Dos Santos with a series of wild strikes but Dos Santos uses good footwork to avoid the assault.
Iglesias lands a pitter patter jab to the forehead of his opponent.

It looks like Anderson Dos Santos has been cut.

Dos Santos decides to change it up a bit and drives through with a nice takedown into half guard.
Iglesias is not content to let Dos Santos control the position.
The ref warns both fighters not to hold the cage as they work up against the meshing.

Dos Santos is working for a submission here. He's got hold of the far side arm and he's looking for a kimura. He's cranking on the arm and he's got it! Iglesias is tapping out! Ouch, that looked like it hurt!
Ladies and gentlemen, after 0:31 of round 1, we have a winner by way of Submission (Kimura). Anderson Dos Santos!
A very excited looking Anderson Dos Santos rambled incoherently for about 5 minutes post fight about how awesome he is. It was kinda funny for a while but then everyone got annoyed.
|
|
|
|
|
|
|
|
|
|
|
|
|
|
|
|
|
|
|
|
|
|
|
| S |
C
A |
G |
S |
C
B |
G |
|
S |
C |
G |
|
energy
A | B |
|
hype
A | B |
|
pop
A | B |
|
mgr
A | B |
|
FIGHT
RATING
68% |
|
|
|
|
|
|
|
Undercard bout
|
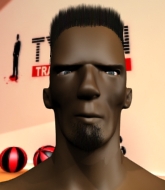
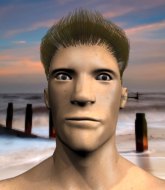
Coming up we have a super heavyweight MMA rules bout between Jose Medrado (ranked 0 p4p, 0 weight class) and Danko Savario (ranked 0 p4p, 0 weight class). Danko Savario will no doubt be looking to use his reach advantage to good effect.
 |
|
 |
| 195 cm
27
250 lbs
7 - 7 - 0 |
|
225 cm
25
300 lbs
1 - 1 - 0 |
BJJ Purple Belt
Brawler
Granite chin |
|
BJJ White Belt
Excellent boxer
Intelligent |
|
| |
|
Ladies and gentlemen. This fight is 3 rounds, in the super heavyweight division.
Introducing the fighter to my left, fighting out of the red corner.
With a record of
7 - 7 - 0, fighting out of Rio de Janeiro, Jose Medrado!
And introducing the fighter to my right, fighting out of the blue corner.
With a record of
1 - 1 - 0, fighting out of Amsterdam, Danko Savario!
The judges for this bout are Edson Gomes, Seu Braga and Thiago Cunha.
The bell rings for round one and we are underway!
Savario feints a jab promting Medrado to slip. Savario then demonstrates his capabilities by jabbing again. Medrado slips again and ducks right into an uppercut.
It looks like Jose Medrado has been cut.
Savario lands a nice looking body shot.
Savario lands with a right hand.
Medrado shoots in for a takedown from distance. He catches Savario napping and manages to drive through into side control!
The ref warns both fighters not to hold the cage as they work up against the meshing.
The fans in attendance giving it up for the two fighters, who have really let it all hang out in the last minute or so!
Medrado is trying to land an Americana. He has the arm isolated but Savario is keeping cool and he's avoided the danger for now.
Medrado thinks about going for a far side armbar but bails out and retains the dominant position instead.
Savario holding on.
Medrado tries to land with some ground and pound but misses.

That's one minute gone in the round.
Medrado trying to control the action but Savario is working from the bottom.
Savario tries to buck Medrado off but Medrado is having none of it.
Savario can't do much from the bottom here.
Medrado in side control, working for a kimura. He's got hold of an arm and he's torquing it... Savario is tapping! That's the end of the fight!
Ladies and gentlemen, after 2:57 of round 1, we have a winner by way of Submission (Kimura). Jose Medrado!
Jose Medrado thanked the fans post fight for their support.
|
|
|
|
|
|
|
|
|
|
|
|
|
|
|
|
|
|
|
|
|
|
|
| S |
C
A |
G |
S |
C
B |
G |
|
S |
C |
G |
|
energy
A | B |
|
hype
A | B |
|
pop
A | B |
|
mgr
A | B |
|
FIGHT
RATING
45% |
|
|
|
|
|
|
|
Undercard bout
|
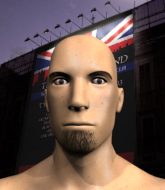
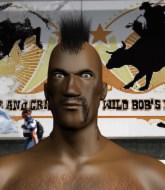
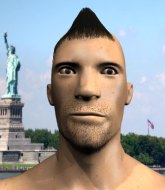
Coming up we have a light heavyweight MMA rules bout between Kyle Babcock (ranked 0 p4p, 0 weight class) and Conan Hatari (ranked 0 p4p, 0 weight class). Conan Hatari will no doubt be looking to use his reach advantage to good effect.
 |
|
|
| 175 cm
22
213 lbs
6 - 4 - 0 |
|
190 cm
27
218 lbs
3 - 5 - 0 |
BJJ Blue Belt
Solid boxing
Experienced |
|
BJJ Purple Belt
Brawler
Knockout power |
|
| |
|
Ladies and gentlemen. This fight is 3 rounds, in the light heavyweight division.
Introducing the fighter to my left, fighting out of the red corner.
With a record of
6 - 4 - 0, fighting out of Rio de Janeiro, Kyle Babcock!
And introducing the fighter to my right, fighting out of the blue corner.
With a record of
3 - 5 - 0, fighting out of Rio de Janeiro, Conan Hatari!
The judges for this bout are Thiago Cunha, Alexandre Firmino and Daniel Cesar.
The bell rings for round one and we are underway!
Babcock misses with a few strikes there.

Hatari rushes Babcock and presses him up against the cage.
Babcock lands a nice looking hook to the body, against the cage.

Hatari's corner calls for him to break the clinch, which he does.
Babcock lands with a right hand.
Hatari takes one to the chin there.
Babcock dodges the punch combination from Hatari.
Hatari shoots for a double leg takedown but Babcock sprawls well. He's pushed Hatari's face into the mat and manages to get back to his feet relatively easily.
Hatari takes a hook to the side of the head. I wonder if that's got his ears ringing.
The fighters circling - Babcock throws out the jab but it was never going to land.
Hatari tries for a takedown but Babcock sees it coming a mile off and avoids it easily.
Babcock swings wildly with a right hand that was never going to find it's target.
Hatari fails to land with a series of punches.
Hatari throws a series of punches but Babcock moves out of range.
Hatari uses some good footwork to avoid the body shot by Babcock.
A punch combination from Babcock misses.
That's one minute gone in the round.
Hatari gets his takedown attempt stuffed easily
and Babcock counters with a stiff right hand.
Kyle Babcock has stuffed three takedown attempts in the round now. That's going to take a lot out of Conan Hatari.
Babcock dives in and scores a takedown into Hatari's guard.
We must be close to a standup if these guys don't pick up the pace.
Babcock working in close now, lands a nice elbow to the side of Hatari's head.
Babcock working from the guard for now, landing some ground and pound.
Babcock loading up with the ground and pound but he's missing more than he's landing in this flurry.
Babcock trying to control but Hatari is working from the bottom.
Hatari seems keen to control Babcock's posture.
Hatari keeping moving, preventing Babcock from controlling successfully.
Babcock lands a couple of elbows.

That's two minutes gone in the round.
Hatari trying to strike off his back.
The fans in attendance giving it up for the two fighters, who have really let it all hang out in the last minute or so!
Babcock controlling from the top position.
Babcock in full guard, throwing the ground and pound. No damage this time.
Babcock wants to control from the top but Hatari keeps moving.
Hatari is trying to control the position but Babcock postures up.

We're going to have a standup here because Kyle Babcock wasn't active enough for the referee's liking.

Babcock moves into the clinch successfully.
Babcock lands with a right to the head.
Babcock works for the underhooks and manages to get a trip takedown into guard.
Babcock trying to control but Hatari is working from the bottom.
Babcock has to be careful here, sitting in the guard of a superior BJJ player.
Babcock sitting in guard, not really doing much.
Babcock might be looking to lock onto one of his opponent's long limbs for a submission, whilst we're on the ground.

That's three minutes gone in the round.
Babcock preventing the sweep.
Babcock is intent on slowing down the pace of the fight, simply looking to control.
The referee must be thinking about standing these guys back up.
Kyle Babcock has forced the referee to step in and bring the fight back to the feet.
Babcock scores with a jab.
Hatari avoids the body shot from Babcock.
Hatari is trying hard to land a takedown here. Babcock sprawls well and keeps this one on the feet.
Babcock has taken the fight to the clinch.
Hatari changes levels and goes for a takedown here. Babcock fights it off and pushes away nicely.
Babcock throws a hook to the body but it doesn't connect.
Hatari is looking to clinch but Babcock is avoiding it.

That's four minutes gone in the round.
Hatari with a lazy takedown attempt
and Babcock counters with a nice uppercut.
Babcock throws a nice looking combination but Hatari bobs and weaves to avoid any damage.
Babcock looks to land a combination but Hatari avoids it well.
Babcock tries to land with a swinging hook to the body but Hatari was well out of range. Poor timing from Babcock.
Babcock stuns Hatari with a nice body shot, before stepping back out of range.
Babcock works over Hatari's head and body with a nice combination.
This is a great period of action - very entertaining stuff!
Babcock missing with a left hand there. Hatari was out of range so wasted energy throwing that one.
Babcock has managed to clinch.
Hatari is trying to pull guard but Babcock has him pressed against the cage.
Hatari has had enough of the clinch and is looking to separate.
The crowd are going absolutely nuts as the round comes to an end - what a fantastic round of action!
Hatari breaks from the clinch.
Babcock gets a takedown into half guard.
Babcock is trying to control. Hatari wants to improve his position but can't escape this time.
And thats the end of the round the fighters go back to their corners.
Kyle Babcock dominated that round.
That's time! Babcock's corner gives him a slap on the ass as he gets ready to fight.

Hatari misses with a kick to the body
and Babcock counters by moving into the clinch.
A short uppercut from Babcock.
A bit of stalling here from Babcock.
Babcock keeps control of Hatari as he tries to wriggle out of the double underhooks.
Hatari looks like he'd prefer to be striking at range right now.
Babcock has had enough of the clinch but Hatari keeps him there for the moment.
Hatari prevents Babcock from breaking the clinch.
Babcock is pressed up against the cage. Hatari has hold of a leg and is looking to drag Babcock down to the mat. Babcock avoids the attempt though and has circled away. We're back to striking at a distance.
Hatari closes this distance looking for a takedown but Babcock circles away.
Babcock tries to land with a swinging hook to the body but Hatari was well out of range. Poor timing from Babcock.
Babcock shoots in for a takedown from distance. He catches Hatari napping and manages to drive through into side control!
Babcock is looking to take a break and control but Hatari is keeping him honest, looking to work from the bottom.
Babcock tries to move to mount but Hatari blocks the move with his legs.
That's one minute gone in the round.
Hatari manages to get one leg in to regain half guard.
Hatari tries to kick Babcock off but Babcock keeps his base steady and stays in half guard.
Hatari tries to get to full guard but Babcock has control of the leg.
Babcock lands with an elbow from half guard - that looked like it hurt.
Babcock content to sit in half guard and control for a moment.
Hatari avoiding damage under a succession of punches from Babcock.
That's two minutes gone in the round.
The referee walks around the fighters to get a better view of the action. Babcock lands a nice short elbow.
Babcock is looking to take a break and control but Hatari is keeping him honest, looking to work from the bottom.
Hatari is doing well to avoid being mounted. He's controlling the position at the moment.
The fighters are pressed up against the cage, both looking to find a bit of space to work.
Hatari trying to control but Babcock postures up.
Babcock slows the pace down in half guard.

Neither fighter is doing enough for the referee's liking and he's decided to stand them back up.
Hatari slips under a jab from Babcock.
Nice uppercut there from Babcock.
That's three minutes gone in the round.
Babcock lands with a nice body punch.
Hatari tries to close the distance and clinch up against the cage but Babcock paws at him with a jab and circles away.
Babcock throws a lazy right hand but Hatari sees it coming a mile off and sidesteps it easily.
Babcock tries to land with a swinging hook to the body but Hatari was well out of range. Poor timing from Babcock.
Hatari tries to clinch
and Babcock counters with a straight punch to the midsection.

Hatari shoots in with a lovely double leg takedown. Babcock manages to land in full guard to minimise the damage.
Babcock wants to sweep but no luck.
Hatari wants to control from the top but Babcock keeps moving.
Hatari got a little sloppy there for a moment and Babcock has worked his way into a loose triangle - can he finish it?! No, Hatari has managed to get both his arms back between Babcock's legs - danger averted.
Babcock had isolated an arm as going for a kimura. Hatari defends it easily.
That's four minutes gone in the round.
Hatari pushes down on Babcock's leg and manages to get into half guard.
Babcock trying to control here.
Hatari tries to pass the half guard into mount. Babcock knows what he's doing though and prevents the attempt.
Babcock is looking to regain full guard. Not this time though.
The fans in attendance giving it up for the two fighters, who have really let it all hang out in the last minute or so!
As the round comes to an end the crowd are showing their appreciation for a great round of action.
Babcock is staying active underneath Hatari, who seems content to just control the action from this position.
And thats the end of the round the fighters go back to their corners.
Kyle Babcock dominated that second round.
The fighters' corners scream their final instructions, as the referee calls time. Here we go, back to the action! This is the final round!

Hatari shoots in but doesn't get the takedown
and Babcock counters into the clinch. Nicely done.
Hatari tries to score a body lock takedown but Babcock shows good agility there to stay on his feet.
Babcock lands with a short punch from the clinch.
Hatari is trying to slow down the pace in the clinch, to catch his breath.
Babcock has had enough of the clinch and is looking to separate.
Babcock is trying to break free.
Babcock lands a body punch in the clinch.
Hatari tries for a takedown. No joy.
Kyle Babcock has stuffed three takedown attempts in the round now. That's going to take a lot out of Conan Hatari.
Hatari gets through Babcock's defenses to land a nice punch to the side of the head.
Hatari tries for a takedown. No joy.
Babcock wants to get back to striking at distance but Hatari won't allow it.
Babcock will no doubt start fighting again in a minute but for now he's just having a little rest, leaning Hatari up against the cage.
That's one minute gone in the round.
Babcock lands a body punch - he's looking to wear down Hatari.
Babcock is trying to break free.
Babcock lands with a light punch inside.
Hatari being controlled against the cage.

Babcock escapes the clinch and we're back to striking.
Kyle Babcock seems to be the more aggressive standup fighter in this bout.
Babcock throws a hook to the side of Hatari's head but Hatari sees it coming and ducks under it beautifully.
Babcock throws a right and a left that both miss.
Babcock uses good footwork to get in and out, landing a nice hook.
Babcock feints and as Hatari raises his hands in defense, Babcock changes levels and drives through with a takedown into guard.
Babcock passes Hatari's right leg, so he's now in half guard.
That's two minutes gone in the round.
Babcock missing with the ground and pound from half guard.
Babcock throwing shots but Hatari is blocking nicely.
Babcock knows he needs to get back to his feet asap. He's simply no match for Hatari on the ground.
Hatari keeping his head moving to avoid the ground and pound.
The crowd are loving this. Great action here.
Babcock missing with the ground and pound from half guard.
Still in half guard, Babcock seems content to control.
Hatari gets back to full guard.
Hatari utilising some decent striking defenses from the guard, preventing the ground and pound.
Babcock would like to get this fight back to the feet but can't get free from the closed guard.
Kyle Babcock overall seems to be getting the better of the ground position in the fight so far.
Babcock engaging in some classic timewasting tactics.
Babcock trying to control but Hatari is working from the bottom.
That's three minutes gone in the round.
The referee must be thinking about standing these guys back up.
Kyle Babcock has forced the referee to step in and bring the fight back to the feet.
A punch combination from Babcock misses.
Hatari gets tackled into the cage by Babcock. Babcock maintains the clinch.
A frustrated look appears on Hatari's face as he tries to break the clinch.
Babcock works for underhooks and lands a body shot in the process.
A shot in the inside from Babcock.
Babcock manages to break the clinch.
A combination from Babcock does no damage.
Babcock misses with a looping right.
Hatari takes a really solid shot there but just smiles back and shrugs his shoulders.
Hatari tries to shoot in for a takedown. He's got hold of a leg but Babcock swivels and escapes.
Hatari takes a big intake of breath there - he's definitely tired.
That's four minutes gone in the round.
Babcock closes the distance and after a bit of a stuggle, scores a takedown into Hatari's guard.
This is a great period of action - very entertaining stuff!
Babcock trying to control the position from guard on top but Hatari is wriggling around, looking for whatever he can.
Babcock is stalling in the full guard.
Babcock throwing strikes but missing.
As the round comes to an end the crowd are showing their appreciation for a great round of action.
Babcock wants to control from the top but Hatari keeps moving.
And that's the end of the fight!
Kyle Babcock showed his dominance in that final round.
Well Babcock has outscored his opponent in every aspect of the fight today. Only a scarily incompetent judge or two will keep him from a well deserved win... Over to the ring announcer for the scorecards.
Ladies and gentlemen, after 3 rounds of action, we go to the scorecards for a decision.
Judge Thiago Cunha scores the fight for Kyle Babcock!
Judge Alexandre Firmino scores the fight for Kyle Babcock!
Judge Daniel Cesar scores the fight for Kyle Babcock!
Kyle Babcock wins by unanimous decision!
A victorious Kyle Babcock thanked his army of followers in his post fight interview, telling people to make sure they follow him on Twitter.
|
|
|
|
|
|
|
|
|
|
|
|
|
|
|
|
|
|
|
|
|
|
|
| S |
C
A |
G |
S |
C
B |
G |
|
S |
C |
G |
|
energy
A | B |
|
hype
A | B |
|
pop
A | B |
|
mgr
A | B |
|
FIGHT
RATING
48% |
|
|
|
|
|
|
|
Undercard bout
|
Coming up we have a middleweight MMA rules bout between Dwight Howard (ranked 0 p4p, 0 weight class) and Rick Sharpie (ranked 0 p4p, 0 weight class). Howard comes into the arena with Superman blaring out of the sound system. Rick Sharpie will no doubt be trying to keep this one on the feet, where he has a distinct advantage.
 |
|
 |
| 201 cm
26
185 lbs
7 - 14 - 0 |
|
185 cm
26
185 lbs
3 - 14 - 0 |
BJJ Blue Belt
Brawler
Experienced |
|
BJJ Blue Belt
Solid Muay Thai
Knockout power |
|
| |
|
Ladies and gentlemen. This fight is 3 rounds, in the middleweight division.
Introducing the fighter to my left, fighting out of the red corner.
With a record of
7 - 14 - 0, fighting out of Tokyo, Dwight Howard!
And introducing the fighter to my right, fighting out of the blue corner.
With a record of
3 - 14 - 0, fighting out of London, Rick Sharpie!
The judges for this bout are Mauricio Rocha, Edson Gomes and Paulo Santos.
The bell rings for round one and we are underway!
No luck for Sharpie with that takedown attempt.
Sharpie slaps away a takedown attempt from Howard, before circling back to the center of the mat.
Sharpie closes the distance and clinches up with Howard, looking for a takedown. Sharpie pushes Howard against the cage but Howard circles to the side and manages to break the clinch.
Sharpie takes a kick to the body and keeps moving.
Sharpie fails to land with a series of punches.
Sharpie throws a solid leg kick but Howard takes the impact on his shin and smiles at Sharpie.
Howard lands a body shot.
Sharpie changes levels and looks for a double leg takedown. Howard tries to avoid it but Sharpie manages to keep hold of a leg and drag Howard to the ground. Howard escapes though and pops straight back up to his feet.
Dwight Howard has stuffed three takedown attempts in the round now. That's going to take a lot out of Rick Sharpie.
Sharpie misses with a few strikes there.
Howard clinches up against the cage.
Sharpie looking to throw knees to the head but Howard is blocking nicely.
Sharpie looks winded!
Sharpie with the Thai clinch. He's looking to land a big knee but he's not managed it this time.
Sharpie tries a knee to the head but he's missed.
That's one minute gone in the round.
Sharpie throws a knee to the head but misses.
Howard using the Thai plumb to throw knees but Sharpie has his back arched nicely, preventing the strike.
Howard jumps guard but Sharpie turns him against the cage and keeps the fight standing.
Howard effectively controlling the action here.
Howard tries to work over Sharpie's body with a swooping hook but it only glances the target.
Sharpie misses with a knee strike.
Sharpie prevents Howard from breaking the clinch.
Howard tries to pull guard but Sharpie won't allow it.
Howard manages to break the clinch.
Howard closes the distance, clinches up and gets a nice trip takedown into side control. Very smooth.
Howard trying to control the position but Sharpie is working away.

Howard decides to stand up, so the ref orders Sharpie to his feet.
That's two minutes gone in the round.
Howard tries for a takedown but Sharpie sees it coming a mile off and avoids it easily.
Sharpie tries to clinch but Howard is having none of it.
A telegraphed takedown attempt from Sharpie is defended easily by Howard.
Fantastic stuff here - a very entertaining period of action, which has drawn cheers from the crowd.
Sharpie wants to clinch up but Howard keeps it at a distance.
Sharpie tries to clinch up.
Howard fails to land the takedown.
Sharpie gets to the clinch - let's see what his plan is here.
Sharpie misses with a knee to the head.
That's three minutes gone in the round.
Sharpie throws a knee to the head but misses.
A knee to the head by Sharpie.
It looks like Dwight Howard has been cut.
Sharpie stops a takedown attempt from Howard.
Sharpie using the Thai plumb to throw knees but Howard has his back arched nicely, preventing the strike.
Sharpie is defending well against a takedown attempt.
Sharpie tries a knee to the head but he's missed.
Howard is trying to pull guard but Sharpie has him pressed against the cage.
Sharpie looking to throw knees to the head but Howard is blocking nicely.
Sharpie tries a knee to the head but Howard blocks it.
Howard has a body lock and is looking for a takedown. Sharpie is bouncing around trying to prevent the takedown and somehow he has indeed managed to stay on his feet.
Sharpie throws a knee to the head but misses.
Howard tries to take the fight to the ground by pulling guard but can't manage it.
Sharpie using the Thai plumb to throw knees but Howard has his back arched nicely, preventing the strike.
Howard pushes off and circles away, back to the middle of the mat.
Howard really does look like a pencil wearing a pair of gloves. Let's hope he has a gameplan to suit that ridiculous body shape.
Sharpie blocks a head kick by Howard.
That's four minutes gone in the round.
Sharpie misses with a double jab.
Howard misses with a series of wild punches.
Sharpie fails miserably with a takedown attempt.
Howard looking to shoot here. He's gone for it and he's landed a takedown into side control! Oh, that's bad for Sharpie!
The fans in attendance giving it up for the two fighters, who have really let it all hang out in the last minute or so!
Howard tries for a kimura. Not really close to a finish though.
As the round comes to an end the crowd are showing their appreciation for a great round of action.
A lull in the action here as Howard stalls from top position.
And thats the end of the round the fighters go back to their corners.
Dwight Howard dominated that round.
The cut man is working on Dwight Howard's cut.
OK. That's time! The bell goes and we're back to the action.
Sharpie misses with a double jab.
Sharpie lands a head shot.
Sharpie fakes with an overhand right and moves in to clinch with Howard, pushing him back against the cage.
Sharpie connects with a nasty looking knee right to Howard's face.
Howard takes a knee right on the jaw!

Howard is rocked!
Howard pulls Sharpie into guard.
Oh Howard is still in real trouble! Will he be able to recover?!!
Howard trying to keep a closed guard but Sharpie is proving a slippery customer.

Sharpie stands and steps away. Howard gets to his feet too and we're back to the striking game.
Both fighters are absolutely exhausted here.
Sharpie circles to his right before unloading a perfect head kick! Howard drops to the canvas, hurt badly! Sharpie follows Howard to the ground and unloads with a series of strikes that force the referee to step in and end the fight! This one is all over!
Ladies and gentlemen, after 1:57 of round 2, we have a winner by way of TKO (Strikes). Rick Sharpie!
|
|
|
|
|
|
|
|
|
|
|
|
|
|
|
|
|
|
|
|
|
|
|
| S |
C
A |
G |
S |
C
B |
G |
|
S |
C |
G |
|
energy
A | B |
|
hype
A | B |
|
pop
A | B |
|
mgr
A | B |
|
FIGHT
RATING
100% |
|
|
|
|
|
|
|
Undercard bout
|
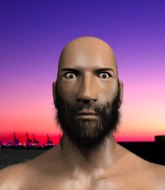
Coming up we have a welterweight MMA rules bout between Patrick Nolan (ranked 0 p4p, 0 weight class) and Holy Diver (ranked 0 p4p, 0 weight class). Diver has chosen Holy Diver by Dio as his entrance music. Patrick Nolan has the better chin. Will he look to stand and bang today?
 |
|
 |
| 182 cm
21
176 lbs
2 - 2 - 0 |
|
161 cm
23
168 lbs
7 - 10 - 0 |
BJJ Blue Belt
Brawler
Self confident |
|
Decent wrestler
Basic striking
Determined |
|
| |
|
Ladies and gentlemen. This fight is 3 rounds, in the welterweight division.
Introducing the fighter to my left, fighting out of the red corner.
With a record of
2 - 2 - 0, fighting out of Helsinki, Patrick Nolan!
And introducing the fighter to my right, fighting out of the blue corner.
With a record of
7 - 10 - 0, fighting out of Helsinki, Holy Diver!
The judges for this bout are Leandro Rodrigues, Mauricio Rocha and Seu Braga.
The bell rings for round one and we are underway!
Nolan gets off balance looking for a body kick
and Diver moves into the clinch.
Diver successfully pulls guard.
We must be close to a standup if these guys don't pick up the pace.
Nolan prevents Diver from getting back to his feet.
Nolan wants to control from the top but Diver keeps moving.
The ref warns both fighters not to hold the cage as they work up against the meshing.
Nolan throws a big right hand that misses.
Diver keeping full guard, as Nolan tries to pass.
Diver controlling the position.
Nolan trying to control but Diver is working from the bottom.
It looks like we're going to have a standup here. Neither fighter is doing enough on the ground.
Diver fails with a takedown attempt.
Nice sprawl there from Diver as Nolan shoots in.
Holy Diver seems to be the more aggressive standup fighter in this bout.
That's one minute gone in the round.
Nolan closes this distance looking for a takedown but Diver circles away.
Diver throws the overhand right but ducks down into a quick takedown attempt. Nolan was covering up waiting for the punch and Diver finishes the takedown easily into guard.
Nolan keeping moving, preventing Diver from controlling successfully.
Diver prevents Nolan from getting back to his feet.
Diver trying to control but Nolan is working from the bottom.
Nolan preventing the ground and pound from doing any damage.
Nolan looking for submissions from the bottom here. Moving his hips around, possibly looking for an armbar.
Diver lands a nice shot whilst sitting in his opponent's guard.
Diver throws a big elbow that misses.
Diver connects with a couple of short punches.
That's two minutes gone in the round.
Diver won't allow Nolan to sweep him here.
Diver won't allow Nolan to get back to his feet.
Diver postures up to throw the ground and pound strikes but they don't connect.
Diver lands a couple of elbows.
This is a great period of action - very entertaining stuff!
Nolan wants to stand up but Diver is controlling him.
Diver not doing a lot at the moment. He'll have to show some more aggression or the fight will get stood up.
Nolan is looking to get back to his feet but can't, whilst Diver is controlling him.
Nolan is breathing heavily.
Diver preventing the sweep.
Diver working in close now, lands a nice elbow to the side of Nolan's head.
Nolan is looking to stand up but Diver isn't so interested in that idea.
Diver pushes down on Nolan's leg and manages to get into half guard.
That's three minutes gone in the round.
Nice strikes from Diver there.
Diver seems to be taking a bit of a break to think of his next move. He lands a short punch in the meantime.
Nolan is trying to stand.
Diver looks to score some points with some ground and pound.
Diver looks over to his corner - he wants some instructions but his corner are not responding.
Nolan wants to get back to full guard.
Diver passes the half guard and he's now in mount! Big trouble for Nolan!
Diver with good strikes from the mount here!
Diver landing strikes from the mount.
We've seen a great period of action over the last minute or so - credit to both fighters for going all out!
Nolan in a bad spot here, taking shots to the head.
Diver has the superior BJJ but he's also working some ground strikes into his gameplan.
Nolan is in a horrible position here. Diver smacks him with another shot as he tries to escape the position.
Nolan is rocked!
That's four minutes gone in the round.
Diver lands a big elbow - Nolan is in trouble! More strikes from the mount and Nolan is forced to tap out!
Ladies and gentlemen, after 4:22 of round 1, we have a winner by way of Submission (Strikes). Holy Diver!
During a confident post fight interview, Holy Diver thanked all his fans. He seemed very genuine when describing how motivated his fans keep him.
|
|
|
|
|
|
|
|
|
|
|
|
|
|
|
|
|
|
|
|
|
|
|
| S |
C
A |
G |
S |
C
B |
G |
|
S |
C |
G |
|
energy
A | B |
|
hype
A | B |
|
pop
A | B |
|
mgr
A | B |
|
FIGHT
RATING
61% |
|
|
|
|
|
|
|
Undercard bout
|
Coming up we have a welterweight MMA rules bout between Harry Hardy (ranked 0 p4p, 0 weight class) and Brad Davis (ranked 0 p4p, 0 weight class). Brad Davis has the power to score a knockout today if he connects clean with Harry Hardy's chin.
 |
|
 |
| 199 cm
25
178 lbs
1 - 4 - 0 |
|
180 cm
21
170 lbs
4 - 0 - 0 |
BJJ White Belt
Solid boxing
Experienced |
|
BJJ Blue Belt
Basic striking
Tends to cut |
|
| |
|
Ladies and gentlemen. This fight is 3 rounds, in the welterweight division.
Introducing the fighter to my left, fighting out of the red corner.
With a record of
1 - 4 - 0, fighting out of London, Harry Hardy!
And introducing the fighter to my right, fighting out of the blue corner.
With a record of
4 - 0 - 0, fighting out of New York, Brad Davis!
The judges for this bout are Leandro Rodrigues, Matheus Silva and Paulo Santos.
The bell rings for round one and we are underway!
Davis delivers a nice body kick.
Davis throws out a token jab with nothing on it.
Davis tries a head kick but it misses.
Brad Davis seems to be the more aggressive standup fighter in this bout.
Danga de danga de dang - Davis scores with a four punch combination!
Hardy is looking to clinch.
A head kick from Davis lands but Hardy takes it in his stride.
Hardy looks to clinch
and Davis counters by clinching up.
Hardy drops down for a takedown but doesn't get it.
Davis is trying to pull guard but Hardy turns him against the cage and we stay in the clinch.
Hardy wants to stall.
Hardy lands a glancing elbow in the clinch.
That's one minute gone in the round.
Davis tries for a takedown but Hardy manages to get underhooks.
Hardy gets an overhook and lands an elbow to the side of the head.

It looks like Brad Davis has been cut.
Davis jumps guard but Hardy stands there with Davis around his waist. Davis gives up and drops back to his feet. We remain in the clinch.
Harry Hardy has stuffed three takedown attempts in the round now. That's going to take a lot out of Brad Davis.
A real battle for position is taking place between these two warriors.
Davis looks like he'd prefer to be striking at range right now.
Davis goes for a takedown attempt but Hardy pushes him away and we're back to fighting at a distance.
Hardy really does look like a pencil wearing a pair of gloves. Let's hope he has a gameplan to suit that ridiculous body shape.
Davis throws a sloppy head kick and Hardy moves out of range easily.
Hardy moves out of range as Davis throws a body kick.
That's two minutes gone in the round.
Davis lunges in with swinging rights and lefts but Hardy circles away quickly and effectively.
Davis misses with a half-hearted attempt at a head kick.
Hardy fails miserably with a takedown attempt.
Hardy is looking to take this fight into the clinch.
Davis looking to throw a kick but he's pulled out of it.
Brad Davis is looking to keep the fight on the feet at all costs.
Davis throws a right and a left that Hardy avoids nicely.
Davis throws a leg kick
and Hardy counters with a nice low kick that buckles Davis's knee momentarily.
Hardy fails with an attempt to clinch.
That's three minutes gone in the round.
A head kick misses from Davis.
Davis misses with a combination
and Hardy counters with a big head kick but Davis shrugs it off.
Hardy fails with an attempt to clinch.
A low kick from Davis is predictable there
and Hardy counters with a flying knee. Nice.
Davis throws a sloppy head kick
and Hardy counters with a straight punch to the midsection.
Davis swinging wildly here.
Davis throws a head kick that misses
and Hardy counters with a one-two to the body.

Davis is rocked!
Davis looks winded!
The crowd cheering loudly, showing their appreciation for the quality fight we're seeing here.
Davis throws a sloppy head kick
and Hardy counters by clinching up.
That's four minutes gone in the round.
Davis is trying to push Hardy away but Hardy has him pressed against the cage, so he's going nowhere.
Davis tries to score a body lock takedown but Hardy shows good agility there to stay on his feet.
Davis tries to pull guard but Hardy won't allow it.
Hardy has a body lock and is looking for a takedown. Davis is bouncing around trying to prevent the takedown and somehow he has indeed managed to stay on his feet.
Hardy prevents Davis from breaking the clinch.
A quick uppercut on the inside from Hardy.
Hardy is trying to stall.
Hardy is clearly stalling here... Pick up the pace son.
As the round comes to an end the crowd are showing their appreciation for a great round of action.
Davis takes an elbow to the temple.
And thats the end of the round the fighters go back to their corners.
Harry Hardy dominated that round.
The cut man is working on Brad Davis's cut.
OK. That's time! The bell goes and we're back to the action.
Hardy misses with a takedown
and Davis counters with a takedown into side control! That could mean trouble for Hardy!
The referee is pacing around the two fighters - he looks like he's thinking about a standup.
Davis slows the pace down.
Let's hope that Davis has the urge to step up the pace any second now because for the last 15 or 20 seconds he's just been holding on tight.
The strikes coming from Davis are missing the target in this wave of attacks.
Davis scoring with punches from side control.
Hardy trying to remain calm as Davis controls from the top position.

Davis is trying to land an Americana. He has the arm isolated but Hardy is keeping cool and he's avoided the danger for now.
That's one minute gone in the round.
Davis moves into full mount!
Hardy tries to get back to half guard but can't.
Davis is working close to his opponent, looking to work a submission by the looks of things. Oh, he's managed to get a guillotine from mount as his opponent reached up! That looks tiiiiight! Will he tap? YES, he's tapped! Impressive submission by Davis!
Ladies and gentlemen, after 1:57 of round 2, we have a winner by way of Submission (Guillotine). Brad Davis!
|
|
|
|
|
|
|
|
|
|
|
|
|
|
|
|
|
|
|
|
|
|
|
| S |
C
A |
G |
S |
C
B |
G |
|
S |
C |
G |
|
energy
A | B |
|
hype
A | B |
|
pop
A | B |
|
mgr
A | B |
|
FIGHT
RATING
60% |
|
|
|
|
|
|
|
Co-main event
|
Coming up we have a featherweight MMA rules bout between Ali Cali (ranked 0 p4p, 0 weight class) and Miles Steedman (ranked 0 p4p, 0 weight class). Cali comes to the cage accompanied by It's a Fight. Steedman has chosen Last Man Standing as his entrance music, which hasn't gone down very well with the crowd. Both fighters will be looking to make this an exciting fight for the fans, I'm sure!
 |
|
 |
| 167 cm
21
149 lbs
4 - 4 - 0 |
|
150 cm
21
152 lbs
11 - 5 - 0 |
BJJ Blue Belt
Good knees
Experienced |
|
BJJ Purple Belt
Basic striking
Knockout power |
|
| |
|
Ladies and gentlemen. This fight is 3 rounds, in the featherweight division.
Introducing the fighter to my left, fighting out of the red corner.
With a record of
4 - 4 - 0, fighting out of Tokyo, Ali Cali!
And introducing the fighter to my right, fighting out of the blue corner.
With a record of
11 - 5 - 0, fighting out of Sydney, Miles Steedman!
The judges for this bout are Seu Braga, Emerson Jorge and Paulo Santos.
The bell rings for round one and we are underway!
Steedman shoots for a double leg takedown but Cali sprawls well. He's pushed Steedman's face into the mat and manages to get back to his feet relatively easily.
Steedman shoots and misses
and Cali counters with a two punch combo.
Cali misses with a half-hearted attempt at a head kick.
Cali gets caught napping as Steedman dives in and scores a takedown. Cali manages to retain guard.
Steedman drops back for a leg! It's a sloppy attempt though and Steedman jumps back into guard quickly, to retain the dominant position.
Steedman passes Cali's left leg - he's now in half guard.
Cali tries to get to full guard but Steedman has control of the leg.
Steedman is working for a kimura but Cali is defending it quite comfortably.
Steedman seems to be looking for submissions.
Steedman blocks the strikes from Cali.
That's one minute gone in the round.
Cali is pressing down on Steedman's left leg trying to get back to full guard. He's managed it.
Steedman looking to pass the guard.
Cali will need to keep those long limbs tucked in whilst he's on the ground, to prevent any submissions.
Steedman has gone for a leg lock! Cali slips out almost immediately though and dives into Steedman's guard.
Cali is looking to stand up but Steedman won't let him.
Cali is standing up over Steedman. Steedman looks to escape but Cali dives into side control.
Cali working away.
Steedman managing to avoid any damage from the strikes thrown by Cali.
Cali wants to stand but Steedman is controlling his arm.
Cali decides to stand back up. Cali steps back and let's Steedman get back to his feet.
That's two minutes gone in the round.
Cali tries to clinch but Steedman moves out of range.
Cali moving in and out of range nicely, whilst landing the scoring shot.
Nice sprawl there from Cali as Steedman shoots in.
Ali Cali has stuffed three takedown attempts in the round now. That's going to take a lot out of Miles Steedman.
Cali connects with a lovely jab that went straight through the gap between Steedman's hands.
The fans in attendance giving it up for the two fighters, who have really let it all hang out in the last minute or so!
Cali drives through with a really nice takedown into side control.
Cali decides to stand up, so the ref orders Steedman to his feet.
Cali displays good takedown defense there as he swats away a double leg from Steedman.
Cali feints and as Steedman raises his hands in defense, Cali changes levels and drives through with a takedown into guard.
Cali prevents Steedman from getting back to his feet.
Cali is frustrating his opponent with some stalling tactics from top position.
That's three minutes gone in the round.
Steedman wants to control here, rather than go for any submissions from the bottom. At least for now.
Cali wants to control from the top but Steedman keeps moving.
Steedman pulls Cali in close to prevent any damage.
The referee decides to stand the fighters back up, due to lack of activity on the part of Ali Cali.
Steedman shoots and misses
and Cali counters with a big head kick but Steedman shrugs it off.
Steedman with a poor takedown
and Cali counters with a solid body kick.
Steedman drives through with a takedown into guard.
The fighters are pressed up against the cage, both looking to find a bit of space to work.
Steedman looks winded!
Steedman drops back for a leg but he's not going to get it - he lets go and Cali dives on top into guard.
Steedman is looking to get back to his feet but can't, whilst Cali is controlling him.
Steedman is doing well to control the posture of his opponent and prevent any damage.
That's four minutes gone in the round.
Cali wanted to stand there but Steedman had control of the position.
Cali trying desperately to get back to his feet here but he's not having any joy at all. He's going to tire himself out if he's not careful.
Fantastic stuff here - a very entertaining period of action, which has drawn cheers from the crowd.
Cali chips away with some ground and pound.
Steedman keeping full guard, as Cali tries to pass.
Cali has to be careful here, sitting in the guard of a superior BJJ player.
The crowd are going absolutely nuts as the round comes to an end - what a fantastic round of action!
Cali would like to get this fight back to the feet but can't get free from the closed guard.
And thats the end of the round the fighters go back to their corners.
Ali Cali dominated that round.
That's time! Back to the action!
Cali pulls out of a head kick attempt.
Miles Steedman seems to be the more aggressive standup fighter in this bout.
Cali leaves Steedman with his face pressed against the mat as he sprawls beautifully, defending against a solid takedown attempt.
Steedman shoots in for a double leg but Cali sprawls well. That's going to sap some energy.
Steedman is trying hard to land a takedown here. Cali sprawls well and keeps this one on the feet.
Ali Cali has stuffed three takedown attempts in the round now. That's going to take a lot out of Miles Steedman.
Cali misses with a double jab.
Ali Cali is looking to throw some combinations by the looks of things.
Cali pulls out of a head kick attempt.
Steedman moves out of range of the body kick.
Steedman shoots in for a takedown and gets it. Let's see what he's got on the mat.
Steedman postures up as if he's going to throw some strikes but drops back for an ankle! Cali is in big trouble! He looks ready to tap! But no, he's escaped and dives on top of Steedman, into his guard.
There's a bit of a scramble here and now Steedman is on top in guard.
That's one minute gone in the round.
Steedman has gone for a leg lock! Cali slips out almost immediately though and dives into Steedman's guard.
Cali prevents Steedman from getting back to his feet.
Cali decides to stand up and beckons his opponent to follow.
Sloppy strikes from Cali. Those never looked like landing.
Steedman shoots for a takedown but Cali saw that one coming a mile off and avoided it easily.
Steedman gets his takedown attempt stuffed easily
and Cali counters with a flying knee. Nice.
Steedman is breathing heavily.
Steedman blocks a head kick by Cali.
Steedman is looking for a takedown here. He's shot in and has managed to get it, finishing up in Cali's half guard.
That's two minutes gone in the round.
Cali wants to control but Steedman is keeping busy and won't allow it.
Steedman looking for a kimura but he'll have to free his other leg if he wants to finish that. Perhaps he's just using it as a distraction technique.
The fans in attendance giving it up for the two fighters, who have really let it all hang out in the last minute or so!
Cali is trying to get back to full guard.
Steedman moves nicely into side control.
Cali sneaks back into half guard.
That's three minutes gone in the round.
Steedman is trying for a guillotine from the top but the pressure isn't in the right place so Cali is just riding it out for now. Steedman eventually gives up the hold.
Steedman looking for a kimura but he'll have to free his other leg if he wants to finish that. Perhaps he's just using it as a distraction technique.
Cali wants to control but Steedman is keeping busy.
That's four minutes gone in the round.
Cali is trying to stand back up but Steedman is controlling him
Steedman is looking to pass Cali's guard but actually Cali recovers to full guard.
Steedman slips nicely into half guard.
Cali is looking to escape.
The crowd applaud the fighters efforts here as the round comes to an end.
Steedman is working for a kimura but Cali is defending it quite comfortably.
Steedman is trying a forearm choke
I don't think that's going to do much at this level of the game.
And thats the end of the round the fighters go back to their corners.
Miles Steedman showed his class in that round. I'd imagine he'll take it on all the scorecards.
The corners get their ten second warning. Both fighters stand from their stools and stare eachother down, ready to get back to the action. This is the final round!
Steedman shoots in but doesn't get the takedown
and Cali counters with a series of strikes. Steedman will be more careful next time no doubt.
Steedman throws the overhand right but ducks down into a quick takedown attempt. Cali was covering up waiting for the punch and Steedman finishes the takedown easily into guard.
Cali is controlling Steedman's posture.
Cali keeping full guard, as Steedman tries to pass.
Cali wants to sweep but no luck.
Cali throwing his legs up looking for a triangle.
Steedman wants to pass the guard but Cali is keeping the position.
That's one minute gone in the round.
Steedman is persisting with the attempt to improve his position.
Cali looking to control.
Steedman slips effortlessly into side control - very nice.
Cali wants to get back to his feet but Steedman drags him back down.
Both fighters are breathing heavily.
Steedman working hard here to secure a kimura but he's not really in the right position for it.
The ref warns both fighters not to hold the cage as they work up against the meshing.
Cali is looking for a sweep.
That's two minutes gone in the round.
Steedman tries for a kimura. Not really close to a finish though.
Steedman working hard here to secure a kimura but he's not really in the right position for it.
Steedman goes for an armbar here - this could be all over! But no, Cali has escaped beautifully and is now on top in side control! Oh, that's unlucky for Steedman but great work by Cali.
This has been an exciting period of action!
Steedman struggling a bit here.
Steedman is trying to improve his position.
That's three minutes gone in the round.
Steedman can't do much from the bottom here.
Steedman tries to buck Cali off but Cali is having none of it.
Steedman manages to get one leg in to regain half guard.
Cali seems to have lost interest with the ground game and is thinking about standing back up.
Cali looks over to his corner - he wants some instructions but his corner are not responding.
Steedman is trying to maintain the position but Cali is very close to passing his half guard.
Steedman moves his hips nicely and gets into full guard.
That's four minutes gone in the round.
Cali preventing the sweep.
Steedman wants to stand up but Cali is controlling him.
Steedman is working an open guard so Cali takes the opportunity to get back to his feet.
Steedman misses with a takedown attempt
and Cali counters with a good low kick that Steedman was not able to check.
Cali connects with the punch.
Steedman fails with the takedown
and Cali counters with a good right hand that lands right on the jaw.
Ali Cali has stuffed three takedown attempts in the round now. That's going to take a lot out of Miles Steedman.
This has been an exciting period of action!
As the round comes to an end the crowd are showing their appreciation for a great round of action.
Cali throws a sloppy head kick and Steedman moves out of range easily.
Cali thuds a mid kick into his opponent's body. That will wear on Steedman if he has to take too many more of those.
And that's the end of the fight!
Miles Steedman comfortably won the final round on my scorecard.
I think Steedman has won this one but let's see whether the judges agree with me. Over to the ring announcer for the scorecards.
Ladies and gentlemen, after 3 rounds of action, we go to the scorecards for a decision.
Judge Seu Braga scores the fight as a draw!
Judge Emerson Jorge scores the fight for Miles Steedman!
Judge Paulo Santos scores the fight for Miles Steedman!
Miles Steedman wins by majority decision!
|
|
|
|
|
|
|
|
|
|
|
|
|
|
|
|
|
|
|
|
|
|
|
| S |
C
A |
G |
S |
C
B |
G |
|
S |
C |
G |
|
energy
A | B |
|
hype
A | B |
|
pop
A | B |
|
mgr
A | B |
|
FIGHT
RATING
60% |
|
|
|
|
|
|
|
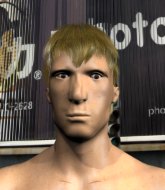
Main event
|
Coming up we have a featherweight MMA rules bout between Kalle Kula (ranked 0 p4p, 0 weight class) and Skyler Nelson (ranked 0 p4p, 0 weight class). Kula kept the crowd waiting but all that was forgotten when his ring entrance music started. The incomparable musical genius that is Bullet - Bite the Bullet. The crowd seem to be enjoying Nelson's choice of entrance music: One. Skyler Nelson has the better chin. Will he look to stand and bang today?
 |
|
 |
| 158 cm
22
133 lbs
8 - 3 - 0 |
|
180 cm
35
145 lbs
15 - 15 - 0 |
Abu Dhabi Champ
Basic striking
Very quick |
|
BJJ Brown Belt
Decent boxing
Granite chin |
|
| |
|
Ladies and gentlemen. This fight is 5 rounds, for the featherweight championship of the world!
Introducing the champion to my left, fighting out of the red corner.
With a record of
8 - 3 - 0, fighting out of Rio de Janeiro, Kalle Kula!
And introducing the challenger to my right, fighting out of the blue corner.
With a record of
15 - 15 - 0, fighting out of Helsinki, Skyler Nelson!
The judges for this bout are Leandro Rodrigues, Mauricio Rocha and Seu Braga.
The bell rings for round one and we are underway!
Kula gets his takedown attempt stuffed easily
and Nelson counters by moving into the clinch. Good anticipation by Nelson.
Kula tries for a takedown. No joy.
Kula is trying to work for a single leg takedown but Nelson pulls him back up using the underhooks.
That's three failed takedown attempts in the round for Kalle Kula. That's going to take a lot out of him.
Kula tries to score a body lock takedown but Nelson shows good agility there to stay on his feet.
Kula tries for a takedown but Nelson manages to get underhooks.
Nelson tries to circle away but Kula has him pinned against the cage.
Nelson prevents the takedown attempt.
Kula tries to score a body lock takedown but Nelson shows good agility there to stay on his feet.
Nelson is trying to break free.
Kula has Nelson pressed up against the cage and is working for takedown. Nelson manages to improve position though and keeps the fight standing.
That's one minute gone in the round.
Kula drops to a knee looking for a takedown but Nelson gets the underhooks and prevents it.
Nelson gets double underhooks to prevent a takedown attempt from Kula.
Kula goes for a takedown in the clinch but Nelson prevents it.
Kula gets a trip takedown into half guard.
Kula is working for submissions here but there's nothing on.
Nelson is defending against the submission attempts here by Kula.
That's two minutes gone in the round.
Kula is trying a forearm choke
I don't think that's going to do much at this level of the game.
Nelson is trying to get back to full guard.
Nelson throws a strike from the bottom that misses.
Kula wants to work for an arm triangle but Nelson is really keeping half guard well and defending the submission attempt.
Both fighters really going for it on the ground here!
Kula is trying to work for a kimura. This could be trouble! No, Nelson has managed to free his arm - good work.
Kula is trying for a guillotine from the top but the pressure isn't in the right place so Nelson is just riding it out for now. Kula eventually gives up the hold.
Kula moves into full mount! Nelson won't be happy about that!
That's three minutes gone in the round.
Nelson defends a decent attempt at a guillotine from Kula.
Kula wants to finish this one by submission but Nelson is holding onto his waist, trying to prevent any attacks from Kula.
Nelson is a painfully thin specimen of a man. You do wonder whether a good body kick would snap him clean in two.
Nelson tries to get back to half guard but can't.
Kula working for a guillotine from mount but Nelson is in no mood to give up.
The fighters are going at a pretty good pace and they're both starting to sweat now.
Nelson is wriggling around trying to escape.
Kula is going oldschool here, as he tries to force Nelson to tap using a forearm choke. This isn't 1993 though, so Nelson shrugs it off.
Nelson can't escape the position.
Nelson flailing away with punches but nothing is landing.
Nelson flailing away with punches but nothing is landing.
Kula looks like he's working for a submission but he's not found anything just yet.
Kula working for a guillotine from mount but Nelson is in no mood to give up.
The fighters are pressed up against the cage, both looking to find a bit of space to work.
That's four minutes gone in the round.
Nelson throwing punches from his back but nothing is landing.
Kula working to secure an arm triangle but it's not happening for him just yet.
Nelson is flailing around like a fish out of water, trying to land strikes.
Fantastic stuff here - a very entertaining period of action, which has drawn cheers from the crowd.
Kula has hold of Nelson's left arm, perhaps looking for a submission. The two fighters tussle over control of the isolated limb and Nelson manages to get his arm back to his side and away from danger.
Nelson is working to get back to half guard.
Kula working to secure an arm triangle but it's not happening for him just yet.
Kula is working for a guillotine from mount but Nelson frees his head quite easily.
As the round comes to an end the crowd are showing their appreciation for a great round of action.
Nelson can't escape the position.
Nelson is flailing around like a fish out of water, trying to land strikes.
Kula with some aggressive grappling here. He's looking for submissions here, rather than waiting for the opportunity to counter.
And thats the end of the round the fighters go back to their corners.
Kalle Kula dominated that round.
That's the end of the round. The referee orders the cornermen out of the cage so we can get back down to business.
Nelson stuffs a takedown. It's all about dictating where the fight takes place and Nelson wants it to stay on the feet.
Horrible takedown by Kula or perhaps it was just good defense by Nelson which made him look bad.
Nelson stuffs the takedown.
That's three failed takedown attempts in the round for Kalle Kula. That's going to take a lot out of him.
Kula shoots in looking for a takedown but Nelson manages to keep the fight standing, pushing Kula's face into the canvas for good measure before circling away.
Kula has his takedown stuffed
and Nelson counters with a nice single leg takedown and he's in Kula's guard now.
Nelson gets to his feet - Kula follows without any prompting.
Kula shoots in but doesn't get the takedown
and Nelson decides to take the opportunity to score a takedown. He's landed in Kula's guard.
That's one minute gone in the round.
Nelson tries to stand but Kula is controlling from the bottom.
Kula has a loose triangle. He'll be looking to tighten that up but Nelson can see exactly what he's planning and manages to posture up and free himself.
Kula wants to sweep here but Nelson controlling him for the moment.
Kula has his foot on Nelson's thigh. He's trying to push off and get in position for a triangle, I think. Nelson works his way back into a safe position though.
Kula is working an open guard so Nelson takes the opportunity to get back to his feet.
Kula tries to score a power double leg takedown but Nelson sees that one coming and sprawls well. That will dishearten Kula somewhat.
Both fighters are absolutely exhausted here.
Nelson gets caught napping as Kula dives in and scores a takedown. Nelson manages to retain guard.
That's two minutes gone in the round.
Nelson lands a decent shot there.
Kula drops back looking for a leg! Nelson is in trouble here! The fighters roll with the hold and Nelson manages to kick Kula off! Kula jumps back into Nelson's guard.
Kula drops back for a leg! It's a sloppy attempt though and Kula jumps back into guard quickly, to retain the dominant position.
Connects with an elbow from the bottom, proving to the judges that he's still active off his back.
Fantastic stuff here - a very entertaining period of action, which has drawn cheers from the crowd.
Kula is trying to work a guillotine from the top, or something like that? Don't know how he thinks he's going to get a finish from there.
Kula wants to pass the guard but Nelson is keeping the position.
Nelson lands an upkick as Kula stands over him.
Nelson bucks up whilst keeping hold of a body lock, managing to reverse the position. Now he's in top in Kula's guard.
Nelson with a nice head shot there.
That's three minutes gone in the round.
Nelson stands and steps away. Kula gets to his feet too and we're back to the striking game.
Kula misses with a takedown
and Nelson moves into the clinch.
Nelson escapes the clinch and we're back to striking.
Kula shoots and misses
and Nelson counters with a single leg into guard. Kula didn't expect that.
Nelson is sitting in guard, working some ground and pound.
Nelson wants to stand but Kula is controlling his posture from full guard.
Kula has his foot on Nelson's thigh. He's trying to push off and get in position for a triangle, I think. Nelson works his way back into a safe position though.
Nelson would like to get this fight back to the feet but can't get free from the closed guard.
Nelson wants to stand up, so he's looking to wriggle free of Kula's closed guard. He's half up but Kula has locked on to an arm! Uh oh! Kula pivots and extends the arm, Nelson falls face first to the mat and taps??... does he?? YES! He's tapping! Excellent counter grappling there by Kula! Well done that man!
Ladies and gentlemen, after 4:59 of round 2, we have a winner by way of Submission (Armbar). Kalle Kula!
Kalle Kula retains his featherweight title!
Our winner, Kalle Kula, made sure he spent some time buttering up the crowd during his post fight interview, which will no doubt bring him a few more fans.
|
|
|
|
|
|
|
|
|
|
|
|
|
|
|
|
|
|
|
|
|
|
|
| S |
C
A |
G |
S |
C
B |
G |
|
S |
C |
G |
|
energy
A | B |
|
hype
A | B |
|
pop
A | B |
|
mgr
A | B |
|
FIGHT
RATING
40% |
|
|
|
|
|
|
|
|
|
|
