 |
QFC Tournament 265 Round 2 PBP Commentary |
Undercard bout
|
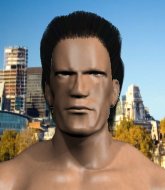
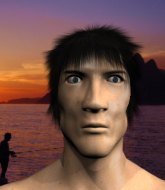
Coming up we have a super heavyweight MMA rules bout between Onca Musashi (ranked 0 p4p, 0 weight class) and Jon Goodman (ranked 0 p4p, 0 weight class). Onca Musashi has the edge in experience - let's see if he can make that count tonight.
 |
|
 |
| 180 cm
18
180 lbs
1 - 0 - 0 |
|
200 cm
22
265 lbs
1 - 0 - 0 |
BJJ White Belt
Brawler
KO power |
|
BJJ Purple Belt
Brawler
Tends to cut |
|
| |
|
Ladies and gentlemen. This fight is 3 rounds, in the super heavyweight division.
Introducing the fighter to my left, fighting out of the red corner.
With a record of
1 - 0 - 0, fighting out of London, Onca Musashi!
And introducing the fighter to my right, fighting out of the blue corner.
With a record of
1 - 0 - 0, fighting out of London, Jon Goodman!
The judges for this bout are Colin Fotheringham, Andrew Berry and Sam Margolis.

The bell rings for round one and we are underway!
Goodman darts in trying to clinch
and Musashi counters with a head kick.
Thud! ouch! good body kick from Musashi - that will leave a mark!
Musashi slips under a jab.
Goodman closes the distance but Musashi moves to the side
and Musashi counters with a nice leg kick.
Goodman throws a predictable looking body shot
and Musashi cracks him with a counter punch right on the button.

Musashi instigates a clinch.

Musashi manages to break the clinch.
Goodman is looking to clinch.
Musashi throws a shot to the body.
Goodman has his front leg slapped to the side - a nice low kick landing there from Musashi.
Wooooo! Give it up for these two warriors! They are putting on a show!
Goodman is looking to take this fight into the clinch.
Musashi bobs and weaves and then throws a good body kick.
Goodman throws a right and a left that Musashi avoids nicely.

That's one minute gone in the round.
Goodman misses with a right hand
and Musashi counters with a nice kick to the body.
Jab, cross, leg kick. Nice combination by Musashi!

It looks like Jon Goodman has been cut.
Musashi closes the distance and clinches.
Musashi keeps the fight in the clinch, despite Goodman's efforts to push away.
Musashi pushes off and circles away, back to the middle of the mat.
Musashi clinches with his opponent.
Musashi just leaning against Goodman, taking a breather.
Musashi pushes off and circles away, back to the middle of the mat.
A nice combination there by Musashi.
Wooooo! Give it up for these two warriors! They are putting on a show!
Goodman swings and misses with a hook to the body.
Musashi moves into range and throws a combination. A nice jab followed by a hook to the body.
A big left from Goodman misses.
A jab from Goodman misses.
Goodman misses with the combination.
Onca Musashi is looking to keep the fight on the feet at all costs.

That's two minutes gone in the round.
Goodman misses with a lunging right hand
and Musashi counters into the clinch. Nicely done.
Goodman tries to pull guard but Musashi forces him back to his feet, against the cage.
Some stalling of biblical proportions here from Musashi.
Goodman working aggressively here.
Musashi breaks from the clinch.
Musashi closes the distance and clinches.
Nice elbow from Musashi.
Musashi digs a right hand underneath Goodman's ribcage. Goodman let out a lung full of air as it connected.
Musashi's corner calls for him to break the clinch, which he does.
A jab from Goodman misses.
Like a baseball bat into the meat of his leg there - nice leg kick by Musashi.
Goodman is looking to clinch.
Goodman misses with a combination
and Musashi counters with a solid body kick.
Goodman avoids the head kick by Musashi.

That's three minutes gone in the round.
The fighters circling - Goodman throws out the jab but it was never going to land.
Goodman tries to shoot in for a takedown. He's got hold of a leg but Musashi swivels and escapes.
A kick lands to the mid section there for Musashi.
A head kick misses from Musashi.
Goodman lands a powerful looking uppercut that connected with his opponent's jaw.

It looks like Onca Musashi has been cut.
Musashi rushes Goodman and presses him up against the cage.
Musashi's corner calls for him to break the clinch, which he does.
Goodman gets tackled into the cage by Musashi. Musashi maintains the clinch.
The fans in attendance giving it up for the two fighters, who have really let it all hang out in the last minute or so!
Musashi scores with a nice hook to the head.
Musashi will no doubt start fighting again in a minute but for now he's just having a little rest, leaning Goodman up against the cage.
Musashi has Goodman pressed against the cage, preventing Goodman from circling away and getting back to striking at range.
Musashi escapes the clinch and we're back to striking.
Goodman throws an uppercut from half a mile away. Musashi sees it coming and avoids it easily.

That's four minutes gone in the round.
Goodman misses with the body kick
and Musashi counters into the clinch. Nicely done.
Goodman misses with a punch on the inside.
Goodman has had enough of the clinch but Musashi keeps him there for the moment.
Musashi wants to get back to striking at distance but Goodman won't allow it.
Goodman tries to break the clinch but Musashi is controlling the position.
Musashi blocks a punch to the side of the head.
Goodman keeps the fight in the clinch, despite Musashi's efforts to push away.
Goodman wants to break the clinch but can't.
A frustrated look appears on Goodman's face as he tries to break the clinch.
A right hand to the body from Musashi.
The crowd are going absolutely nuts as the round comes to an end - what a fantastic round of action!
Musashi manages to break the clinch.
Goodman looks to land a right hand but Musashi moved out of range.
Musashi bobs and weaves and unloads with a good uppercut.
Musashi closes the distance and presses his opponent up against the cage.
And thats the end of the round the fighters go back to their corners.
Onca Musashi dominated that round.
Both fighters have cut men working on them during the interval.
That's time! Musashi's corner gives him a slap on the ass as he gets ready to fight.

Goodman moves in looking to clinch but Musashi pushes him off.
A slow jab from Goodman misses its intended target.
Musashi throws a feint and then finishes with a kick to the body.
Musashi lands a front kick.
Onca Musashi is looking to throw some combinations by the looks of things.
Musashi thumps Goodman with a low kick.

Goodman cracks Musashi with an uppercut from hell and Musashi crumples to the canvas, he's out! Oh no, he's recovered and he's grabbed one of Goodman's legs and pulled him into guard. The ref thought about stopping it there but he's let it go - good reffing!
Fantastic stuff here - a very entertaining period of action, which has drawn cheers from the crowd.
Goodman trying to control but Musashi is working from the bottom.
Goodman looking to pass the guard.
Musashi might be looking to lock onto one of his opponent's long limbs for a submission, whilst we're on the ground.
Goodman trying to control but Musashi is working from the bottom.
The fighters are pressed up against the cage, both looking to find a bit of space to work.
Musashi throws a couple of shots from the bottom but they don't land.
That's one minute gone in the round.

The ref stands the fighters back up, due to lack of action by Jon Goodman.
Musashi turns his hip over beautifully as he lands a nice leg kick.
Musashi throws a head kick that looked like it stung.
Some wild striking there from Goodman.
The fighters are starting to perspire pretty heavily.
Goodman jabbing away but nothing is landing.
Goodman tries to clinch but Musashi is having none of it.
Musashi lands a jab followed by a nice looking cross.
Goodman tries to clinch up.
Musashi closes the distance and clinches.
Musashi tries to land knees in the clinch but Goodman avoids the damage to the body.
Musashi is trying to force a seperation but Goodman has the dominant position.
Musashi breaks the clinch and we're back to striking at distance.
Musashi moves into the clinch successfully.
Goodman tries to pull guard but Musashi forces him back to his feet, against the cage.
That's two minutes gone in the round.
Musashi pushes off and circles away, back to the middle of the mat.
Goodman misses with a combination
and Musashi holds on and brings the fighters into a clinch.
The fans in attendance giving it up for the two fighters, who have really let it all hang out in the last minute or so!
Goodman tried to land a shot to the body but connects with Musashi's elbow.
Goodman wants a takedown.
Musashi breaks the clinch.
Nice defenses there by Musashi.
Musashi misses with a half-hearted attempt at a head kick.
Musashi slips a straight right by Goodman.
Musashi closes the distance and presses his opponent up against the cage.
Goodman is looking to break free of the clinch but Musashi has double underhooks.
Musashi breaks the clinch.
Goodman is the aggressor but that punch slipped nicely by Musashi.
Jon Goodman seems to be the more aggressive standup fighter in this bout.
Musashi fakes low and throws an overhand right that catches Goodman on the side of the head.
That's three minutes gone in the round.
Goodman falls off balance throwing a combination
and Musashi counters with a head kick.
Goodman throws a lazy right hand but Musashi sees it coming a mile off and sidesteps it easily.
Goodman misses with a left hand
and Musashi counters with a straight right hand.
Goodman tries to clinch but Musashi moves out of range.
Onca Musashi is winning the standup battle so far.
Goodman throws an overhand right that lands on Musashi's shoulder, as Musashi tries to avoid the shot.
Musashi has Goodman up against the cage in a clinch.
Goodman lands a right hand.
Musashi breaks the clinch and we're back to striking at distance.
Goodman swinging wildly here.
Goodman tries to clinch but fails miserably
and Musashi counters with a lovely straight right hand!
A slow jab from Goodman misses its intended target.
Goodman throws a poor cross that misses
and Musashi moves into the clinch.
That's four minutes gone in the round.
Goodman tries for a takedown but Musashi manages to get underhooks.
Onca Musashi has stuffed three takedown attempts in the round now. That's going to take a lot out of Jon Goodman.
Musashi keeps the fight in the clinch, despite Goodman's efforts to push away.
Goodman being controlled against the cage.
The fans in attendance giving it up for the two fighters, who have really let it all hang out in the last minute or so!
Goodman tries a shoulder strike but it doesn't do any damage.
A left hand lands to the body for Musashi.
Goodman has had enough of the clinch and is looking to separate.
Musashi manages to break the clinch.
Goodman throws the left hand but Musashi avoids the punch easily.
The crowd are going absolutely nuts as the round comes to an end - what a fantastic round of action!
Goodman rushes in with a sloppy looking punch
and Musashi counters with a big head kick but Goodman shrugs it off.
Musashi dodges the punch combination from Goodman.
Goodman misses with a hook
and Musashi counters with a nice body kick.
And thats the end of the round the fighters go back to their corners.
A close second round but Jon Goodman will probably get the nod - 10:9.
Both fighters have cut men working on them during the interval.
OK. That's time! The bell goes and we're back to the action. This is the final round!

Musashi displays some good footwork, moving neatly out of range as Goodman throws out the jab.
Goodman tries to close the distance and clinch up but Musashi swats him away and circles back towards the center.
Goodman wants to clinch
and Musashi counters with a thumping low kick.
Musashi slips a jab from Goodman.
Goodman misses with a left hand
and Musashi counters with a three punch combination, finished off with a leg kick. Nice work.
Goodman throws a poor cross that misses
and Musashi counters with a flying knee. Nice.
Goodman might want to mix his strikes up a bit more. He's just going for head shots at the moment and that can become a bit predictable.
Musashi throws a nice outside leg kick.
The fight moves into the clinch position.
Musashi lands an elbow just above Goodman 's eye.
Goodman wants to get back to striking at distance but Musashi won't allow it.
Musashi escapes the clinch and we're back to striking.
Musashi clinches with his opponent.
Goodman is working on a leg, looking for a takedown but Musashi is defending well.
That's one minute gone in the round.
Musashi breaks the clinch and we return to the middle of the mat.
Musashi avoids a lazy jab quite easily.
Nice takedown defense from Musashi. No joy for Goodman on that attempt.
Musashi lands three nice shots there - that looked like it hurt!
Musashi moves out of range as Goodman strikes.
Goodman swinging wildly here.
Goodman takes a big intake of breath there - he's definitely tired.
Nice body punch from Musashi.
Goodman throws a poor cross that misses
and Musashi counters with a slapping leg kick.
Goodman looks to land a right hand but Musashi moved out of range.
Goodman has a takedown stuffed.
Onca Musashi has stuffed three takedown attempts in the round now. That's going to take a lot out of Jon Goodman.
Musashi throws a quick head kick that skims the top of Goodman's head.
Goodman throws a poor cross that misses
and he gets countered with a snapping leg kick.
That's two minutes gone in the round.
The crowd cheering loudly, showing their appreciation for the quality fight we're seeing here.
Musashi moves into range and lands a nice leg kick.
Musashi lands with a kick to the ribs.
Goodman throws a lazy uppercut
and Musashi counters into the clinch. Nicely done.
Musashi manages to break the clinch.
Goodman throws a predictable looking body shot
and Musashi counters with a nice body shot.
Musashi rushes Goodman and pushes him back against the cage in a clinch.
Goodman tries a knee to the head but he's missed.
Goodman throws a punch but it's blocked by Musashi.
Goodman tries to pull guard but Musashi holds him up against the cage and eventually Goodman drops back down to his feet.
Musashi pushes off and circles away, back to the middle of the mat.
Musashi gets to the clinch - let's see what his plan is here.
Onca Musashi has scored more points in the clinch so far.
Goodman has had enough of the clinch but Musashi keeps him there for the moment.
That's three minutes gone in the round.
Goodman tries to work over Musashi's body with a swooping hook but it only glances the target.
Goodman has developed a nice purple lump on his ribcage, as a result of some heavy body kicks from Musashi.
Musashi breaks the clinch and we return to the middle of the mat.
Musashi uses decent footwork to sidestep a right hand from Goodman.
Musashi lands a jab. Then a cross. Then finally a nice hook to the body. Good work there by Musashi.
Musashi throws a quick inside leg kick.
Musashi throws a head kick that misses.
Musashi clinches up against the cage.
The pace really dropping off here, momentarily.
Musashi breaks the clinch and we return to the middle of the mat.
Goodman throws a hard body shot but it just misses.
Goodman tries to clinch but fails miserably
and Musashi counters with a flying knee. Nice.
Musashi gets a clinch.
That's four minutes gone in the round.
Musashi is trying to slow down the pace of the fight but Goodman is keeping busy.
Musashi lands with a short punch from the clinch.
Musashi is trying to break free.
This has been an exciting period of action!
Goodman with the Thai clinch. He's looking to land a big knee but he's not managed it this time.
Goodman can't break the clinch.
Musashi breaks the clinch.
Goodman tries to clinch up.
Goodman fakes high and shoots in for a takedown but Musashi avoids it really well and circles away.
Goodman swings widly with a right hand
and Musashi counters with a head kick. That will keep Goodman thinking before he tries any more sloppy attacks!
The crowd are going absolutely nuts as the round comes to an end - what a fantastic round of action!
Musashi scores with a jab. Goodman acknowledges it with a nod of the head.
Goodman swings wildly with a right hand that was never going to find it's target.
Jon Goodman has stepped it up - he knows he needs a finish here!
Goodman misses with a hook to the body
and Musashi counters with a three punch combination, finished off with a leg kick. Nice work.
Goodman wings a very wild body shot but it does the job and lands to the midsection.
And that's the end of the fight!
Onca Musashi showed his dominance in that final round.
I think Musashi has won this one but let's see what the judges have to say. Over to the ring announcer for the scorecards.
Ladies and gentlemen, after 3 rounds of action, we go to the scorecards for a decision.
Judge Colin Fotheringham scores the fight for Onca Musashi!
Judge Andrew Berry scores the fight for Onca Musashi!
Judge Sam Margolis scores the fight for Onca Musashi!
Onca Musashi wins by unanimous decision!
Jon Goodman spoke after the fight, saying 'Well this sucks and I am sorry to disappoint all the fans. I will come back better.'.
|
|
|
|
|
|
|
|
|
|
|
|
|
|
|
|
|
|
|
|
|
|
|
| S |
C
A |
G |
S |
C
B |
G |
|
S |
C |
G |
|
energy
A | B |
|
hype
A | B |
|
pop
A | B |
|
mgr
A | B |
|
FIGHT
RATING
83% |
|
|
|
|
|
|
|
Undercard bout
|
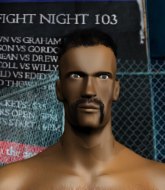
Coming up we have a super heavyweight MMA rules bout between Steven Caldwell (ranked 0 p4p, 0 weight class) and Bo Mackels (ranked 0 p4p, 0 weight class). Steven Caldwell could well score a knockout today. He has the power to get to Bo Mackels's chin.
 |
|
 |
| 150 cm
24
300 lbs
1 - 0 - 0 |
|
200 cm
24
289 lbs
1 - 0 - 0 |
Decent wrestler
Solid Muay Thai
Granite chin |
|
BJJ Blue Belt
Decent boxing
Determined |
|
| |
|
Ladies and gentlemen. This fight is 3 rounds, in the super heavyweight division.
Introducing the fighter to my left, fighting out of the red corner.
With a record of
1 - 0 - 0, fighting out of London, Steven Caldwell!
And introducing the fighter to my right, fighting out of the blue corner.
With a record of
1 - 0 - 0, fighting out of London, Bo Mackels!
The judges for this bout are James Atkins, Phil Schofield and Andrew Berry.
The bell rings for round one and we are underway!
Caldwell stuffs a takedown. It's all about dictating where the fight takes place and Caldwell wants it to stay on the feet.
Left hook, right uppercut from Caldwell.
It looks like Bo Mackels has been cut.
Caldwell tries to land with a swinging hook to the body but Mackels was well out of range. Poor timing from Caldwell.
Caldwell just misses with a punch to the body.
Mackels misses with a series of wild punches.
Caldwell misses with a body shot. Nice footwork from Mackels.
Caldwell ducks down and throws a hook to the body but Mackels moves away.
Caldwell is on the wrong end of a nice combination from Mackels.
It looks like Steven Caldwell has been cut.
That's one minute gone in the round.
Nice cross by Caldwell.
Caldwell ducks down and throws a hook to the body but Mackels moves away.
Mackels throws a combination but it was largely blocked by Caldwell.
Mackels takes a body punch but keeps moving.
Caldwell takes a swing at Mackels's ribcage but misses.
Mackels wants to clinch.
Mackels darts in trying to clinch
and Caldwell counters with a nice body shot.
That's two minutes gone in the round.
Fantastic stuff here - a very entertaining period of action, which has drawn cheers from the crowd.
Caldwell takes the fight into the clinch.
Caldwell misses with a body punch.
Caldwell tries to work over Mackels's body with a swooping hook but it only glances the target.
Mackels throws a head punch that misses.
Caldwell can't find room to land a body shot as Mackels controls the action.
Mackels missing with knees to the body.
Caldwell misses with a shot to the kidneys.
Mackels can't get the takedown.
That's three minutes gone in the round.
Mackels blocks a body shot from Caldwell.
Mackels can't find room to land a body shot as Caldwell controls the action.
Mackels tries to work over Caldwell's body with a swooping hook but it only glances the target.
A head punch blocked on the inside by Caldwell.
Caldwell struggles to land a body shot inside as Mackels controls his hands.
Mackels tries for a takedown. No joy.
Steven Caldwell has stuffed three takedown attempts in the round now. That's going to take a lot out of Bo Mackels.
Mackels has dropped down and is looking to force the takedown but it's defended by Caldwell after a bit of a struggle.
Caldwell struggles to land a body shot inside as Mackels controls his hands.
Mackels blocks a body shot from Caldwell.
Mackels wants a takedown but no success here.
Caldwell tries to land a shot to the body but it's blocked.
Caldwell tries to land a shot to the body but it's blocked.
Caldwell tried to land a shot to the body but connects with Mackels's elbow.
Caldwell struggles to land a body shot inside as Mackels controls his hands.
Mackels is trying to work out of this bad position, with his back against the cage.
That's four minutes gone in the round.
Mackels prevents a body shot from Caldwell.
Caldwell tries to land a shot to the body but it's blocked.
Caldwell doesn't land with the attempted body shot.
Caldwell misses with a body punch.
Mackels blocks a body shot from Caldwell.
Mackels working some nice short punches in the clinch.
Caldwell goes for a body shot but it's blocked.
Caldwell struggles to land a body shot inside as Mackels controls his hands.
Caldwell tries a body shot but Mackels blocks it.
A short body shot lands from Caldwell as the two fighters clinch.
This has been an exciting period of action!
Caldwell misses with a punch to the body.
The crowd are going absolutely nuts as the round comes to an end - what a fantastic round of action!
Mackels blocks a body shot from Caldwell.
Caldwell blocks a body shot from Mackels.
Caldwell struggles to land a body shot inside as Mackels controls his hands.
And thats the end of the round the fighters go back to their corners.
Steven Caldwell dominated that round.
Both fighters have cut men working on them during the interval.
The referee calls time. The cornermen exit stage left and we're back to business.
Caldwell lands with a nice body punch.
Caldwell forces Mackels back against the cage and clinches.
Mackels prevents a body shot from Caldwell.
Mackels should think about turning a few of those tyres round his middle into muscle if he wants people to take him seriously as an athlete.
Mackels goes for a body shot but it's blocked.
Caldwell tries a body shot but Mackels blocks it.
A left hand lands to the body for Caldwell.
Caldwell misses with a hook to the ribs.
Caldwell tries to land a shot to the body but it's blocked.
Mackels blocks a body shot from Caldwell.
Mackels tries a body shot but Caldwell blocks it.
Mackels tries a shoulder strike but it doesn't do any damage.
Caldwell tries a body shot but Mackels blocks it.
Caldwell misses with a shot to the kidneys.
That's one minute gone in the round.
Caldwell struggles to land a body shot inside as Mackels controls his hands.
Mackels prevents a body shot from Caldwell.
Caldwell tried to land a shot to the body but connects with Mackels's elbow.
Mackels working some nice short punches in the clinch.
Caldwell tries to throw a body punch but Mackels avoids it by throwing Caldwell back against the cage.
Caldwell is leaning against Mackels and scores with a nice uppercut to the body.
Mackels blocks a body shot from Caldwell.
Caldwell tries a body shot but Mackels blocks it.
Caldwell misses with a body punch.
Caldwell tried to land a shot to the body but connects with Mackels's elbow.
Mackels tries for a takedown but Caldwell manages to get underhooks.
Mackels changes levels and goes for a takedown here. Caldwell fights it off and pushes away nicely.
Caldwell lands a big right hook! Mackels looks hurt but is still standing! Caldwell lands a left jab and another right hook! This time Mackels falls down and Caldwell dives in with a huge hammer fist! Mackels's eyes roll back! The referee calls for the bell and Caldwell runs up the cage to celebrate with his fans!
Ladies and gentlemen, after 1:57 of round 2, we have a winner by way of KO (Punches). Steven Caldwell!
|
|
|
|
|
|
|
|
|
|
|
|
|
|
|
|
|
|
|
|
|
|
|
| S |
C
A |
G |
S |
C
B |
G |
|
S |
C |
G |
|
energy
A | B |
|
hype
A | B |
|
pop
A | B |
|
mgr
A | B |
|
FIGHT
RATING
69% |
|
|
|
|
|
|
|
Co-main event
|
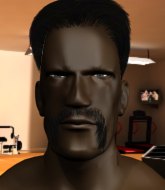
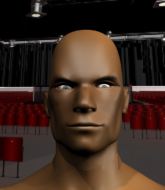
Coming up we have a super heavyweight MMA rules bout between Macaraeg Quiambao (ranked 0 p4p, 0 weight class) and Bongalos Labong (ranked 0 p4p, 0 weight class). Macaraeg Quiambao has the edge in experience - let's see if he can make that count tonight.
 |
|
 |
| 186 cm
24
290 lbs
1 - 0 - 0 |
|
186 cm
24
290 lbs
1 - 0 - 0 |
Good takedowns
Counter fighter
Granite chin |
|
Good takedowns
Counter fighter
Determined |
|
| |
|
Ladies and gentlemen. This fight is 3 rounds, in the super heavyweight division.
Introducing the fighter to my left, fighting out of the red corner.
With a record of
1 - 0 - 0, fighting out of London, Macaraeg Quiambao!
And introducing the fighter to my right, fighting out of the blue corner.
With a record of
1 - 0 - 0, fighting out of London, Bongalos Labong!
The judges for this bout are William Gold, Phil Schofield and Richard Clark.
The bell rings for round one and we are underway!
We've got one fighter who appears to only be looking to counter and the other not looking particularly aggressive either, so we could be in for a dull fight.

Quiambao gets a double leg takedown into Labong's guard.
Quiambao trying to control the position from guard on top but Labong is wriggling around, looking for whatever he can.

Labong throwing his legs up looking for a triangle.
Labong has Quiambao pulled in close to control his posture.
Quiambao is intent on slowing down the pace of the fight, simply looking to control.
Labong keeping moving, preventing Quiambao from controlling successfully.
That's one minute gone in the round.

The ref stands the fighters back up because Macaraeg Quiambao just wasn't active enough.
Quiambao shoots in and gets a takedown into half guard. Quiambao showed some decent athleticism there.
Quiambao wants to lay and pray for a moment but Labong keeps working.
Labong trying to hold on to Quiambao's head to control him but Quiambao postures up.
We get told so often about how wrestlers don't like to be on their backs. Let's see if Labong can do anything to dispel that myth.

Quiambao is trying to work for a kimura. This could be trouble! No, Labong has managed to free his arm - good work.
Quiambao trying to control the action but Labong is working from the bottom.
That's two minutes gone in the round.
Quiambao is working for a submission of some sort.
Quiambao seems very keen to just sit and control from half guard but Labong does not like that idea so much and is remaining active off his back.
Quiambao seems to be looking for submissions.
That's three minutes gone in the round.
Quiambao trying to control the action but Labong is working from the bottom.
Labong is trying to maintain the position but Quiambao is very close to passing his half guard.
Labong controlling the position well.
Quiambao is looking for a kimura. It's going to be difficult to finish that from half guard though and Labong defends it well.
Quiambao is breathing heavily.
That's four minutes gone in the round.
Quiambao wants to work for an arm triangle but Labong is really keeping half guard well and defending the submission attempt.
Labong trying to control but Quiambao postures up.
Quiambao trying to control from half guard but Labong is working away.
And thats the end of the round the fighters go back to their corners.
Macaraeg Quiambao dominated that round.
Well, the break between rounds is over. Let's get back to the scrappin!
Quiambao drives through with a really nice takedown into side control.
Labong can't do much from the bottom here.
The fighters are pressed up against the cage, both looking to find a bit of space to work.
Labong stuck in half guard on the bottom here.
Labong tries to work a leg under to get back to half guard but Quiambao wriggles his own leg back out and remains in side control.
That's one minute gone in the round.
Quiambao working away.
Quiambao tries for an arm triangle. That looks pretty tight to me. Is this one over!?! Possibly, maybe, no Quiambao has let go of the choke. Obviously it wasn't as tight as we thought!
You can see the frustration on Labong's face as Quiambao controls the position.
Quiambao working away.
Quiambao wants to control but Labong is keeping him busy.
Quiambao in side control, just content to control the action for now.
That's two minutes gone in the round.
Quiambao laying and praying for a moment but Labong takes advantage and regains half guard.
Quiambao tries to pass to full mount but Labong defends it.
Quiambao wants to lay and pray for a moment but Labong keeps working.
Both fighters are absolutely exhausted here.
That's three minutes gone in the round.
Labong is defending against the submission attempts here by Quiambao.
Quiambao wants to work for an arm triangle but Labong is really keeping half guard well and defending the submission attempt.
Quiambao is thinking about going for an arm triangle but he can't free his leg.
Labong looking for submissions off his back.
That's four minutes gone in the round.
Labong is concentrating on defense, preventing Quiambao from advancing position.
Labong trying to control but Quiambao postures up.
Quiambao content to sit in half guard and control for a moment.
Quiambao is trying to work for a kimura but Labong is defending well.
And thats the end of the round the fighters go back to their corners.
Macaraeg Quiambao dominated that second round.
OK. That's time! The bell goes and we're back to the action. And we move into the final round!

Labong shoots in and scores a nice double leg takedown into half guard.
Quiambao tries to get to full guard but Labong has control of the leg.
Labong wants to work for an arm triangle but Quiambao is really keeping half guard well and defending the submission attempt.
That's one minute gone in the round.
Labong is trying to control. Quiambao wants to improve his position but can't escape this time.
Quiambao tries to get to full guard but Labong has control of the leg.
Labong sitting and controlling from the half guard.
Labong looking for a kimura but he'll have to free his other leg if he wants to finish that. Perhaps he's just using it as a distraction technique.
Labong trying to control from half guard but Quiambao is working away.
Labong takes a big intake of breath there - he's definitely tired.
That's two minutes gone in the round.
Quiambao is looking to regain full guard. Not this time though.
Quiambao is doing well to control the position and prevent Labong from advancing to side control.
The ref warns both fighters not to hold the cage as they work up against the meshing.
Labong wants to lay and pray for a moment but Quiambao keeps working.
That's three minutes gone in the round.
Labong perhaps working for something from half guard, or maybe not. It looks like he's just sitting there.
We've had a lack of effective grappling in the last minute or so, which could well see a referee standup.
Quiambao controlling the leg, holding on to half guard.
The ref calls for a clean break and stands the fighters back up. Bongalos Labong wasn't active enough on the ground.
Quiambao shoots in for a takedown from distance. He catches Labong napping and manages to drive through into side control!
Quiambao is looking for a kimura. He might have it! No, Labong has escaped the position, nice work there.
Macaraeg Quiambao overall seems to be getting the better of the ground position in the fight so far.
That's four minutes gone in the round.
Labong can't do much from the bottom here.
Quiambao thinks about going for a far side armbar but bails out and retains the dominant position instead.
Quiambao is looking to finish here, going for an Americana. Labong knows the correct defense though, so he's OK.
Labong wants to control but Quiambao postures up.
And that's the end of the fight!
I would just about give that final round to Bongalos Labong.
Well Quiambao has outscored his opponent in every aspect of the fight today. Only a scarily incompetent judge or two will keep him from a well deserved win... Over to the ring announcer for the scorecards.
Ladies and gentlemen, after 3 rounds of action, we go to the scorecards for a decision.
Judge William Gold scores the fight for Macaraeg Quiambao!
Judge Phil Schofield scores the fight for Macaraeg Quiambao!
Judge Richard Clark scores the fight for Macaraeg Quiambao!
Macaraeg Quiambao wins by unanimous decision!
|
|
|
|
|
|
|
|
|
|
|
|
|
|
|
|
|
|
|
|
|
|
|
| S |
C
A |
G |
S |
C
B |
G |
|
S |
C |
G |
|
energy
A | B |
|
hype
A | B |
|
pop
A | B |
|
mgr
A | B |
|
FIGHT
RATING
21% |
|
|
|
|
|
|
|
Main event
|
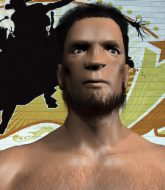
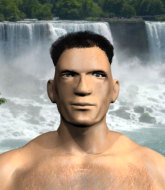
Coming up we have a super heavyweight MMA rules bout between Danny Caldwell (ranked 0 p4p, 0 weight class) and Raymond Jaeger (ranked 0 p4p, 0 weight class). Raymond Jaeger is the more experienced fighter, so let's see if that makes a difference tonight.
 |
|
 |
| 190 cm
24
300 lbs
1 - 0 - 0 |
|
169 cm
18
199 lbs
1 - 0 - 0 |
BJJ Purple Belt
Solid Muay Thai
KO power |
|
Good wrestler
Brawler
Intelligent |
|
| |
|
Ladies and gentlemen. This fight is 3 rounds, in the super heavyweight division.
Introducing the fighter to my left, fighting out of the red corner.
With a record of
1 - 0 - 0, fighting out of London, Danny Caldwell!
And introducing the fighter to my right, fighting out of the blue corner.
With a record of
1 - 0 - 0, fighting out of London, Raymond Jaeger!
The judges for this bout are Steven Brown, Andrew Berry and James Glass.
The bell rings for round one and we are underway!

Jaeger drives through and clinches with Caldwell against the cage.
Jaeger working hard to break the clinch.
Jaeger effectively controlling the action here.
Jaeger has dropped down and is working for a takedown. Caldwell is trying to keep an underhook but Jaeger manages to get the takedown into half guard.
Caldwell looking to work for a kimura from the bottom.
Caldwell wants to get back to full guard.
Caldwell trying to control from the bottom.
Jaeger missing with the ground and pound from half guard.
That's one minute gone in the round.
Caldwell is looking to sinch up a guillotine here but Jaeger pulls his head out easily.
Jaeger wants to lay and pray for a moment but Caldwell keeps working.
Jaeger wants to stand up but Caldwell is controlling the position.
Caldwell is looking to regain full guard. Not this time though.
Caldwell is working on a guillotine. He's managed to get to full guard and he's really squeezing tight! Jaeger is tapping! Great win for Caldwell!
Ladies and gentlemen, after 1:55 of round 1, we have a winner by way of Submission (Guillotine). Danny Caldwell!
|
|
|
|
|
|
|
|
|
|
|
|
|
|
|
|
|
|
|
|
|
|
|
| S |
C
A |
G |
S |
C
B |
G |
|
S |
C |
G |
|
energy
A | B |
|
hype
A | B |
|
pop
A | B |
|
mgr
A | B |
|
FIGHT
RATING
30% |
|
|
|
|
|
|
|
|
|
|

