 |
HBGG 4 - Mjolner v Sole PBP Commentary |
Undercard bout
|
|
|
|
Undercard bout
|
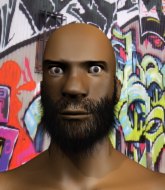
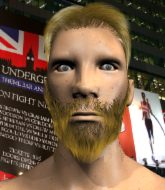
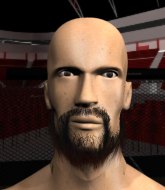
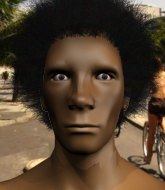
Coming up we have a heavyweight MMA rules bout between Muhammad Ward (ranked 0 p4p, 0 weight class) and Solomon Rosenzweig (ranked 0 p4p, 0 weight class). Ward's ring entrance music is that housewives' favourite, Feel The Music by Guru. Rosenzweig is bobbing his head along to his entrance song: Stamina. Over to our ring announcer for the fighter introductions!
 |
|
 |
| 193 cm
36
220 lbs
0 - 2 - 0 |
|
185 cm
26
205 lbs
4 - 5 - 0 |
BJJ Red Belt
Counter fighter
Granite chin |
|
Good wrestler
Lethal high kicks
Good gas tank |
|
| |
|
Ladies and gentlemen. This fight is 3 rounds, in the heavyweight division.
Introducing the fighter to my left, fighting out of the red corner.
With a record of
0 - 2 - 0, fighting out of New York, Muhammad Ward!
And introducing the fighter to my right, fighting out of the blue corner.
With a record of
4 - 5 - 0, fighting out of St Petersburg, Solomon Rosenzweig!
The judges for this bout are William Gold, Daniel Bishop and Chris Edwards.

The bell rings for round one and we are underway!

Rosenzweig closes the distance and after a bit of a stuggle, scores a takedown into Ward's guard.
The referee wants the fighters to be more active or he's going to reset them on the feet.
Rosenzweig advances to half guard.
Ward is in trouble now - Rosenzweig has advanced to mount!
Rosenzweig manages to capitalize on a mistake by Ward to take his back!
A lull in the action here.
Ward is really stuck here.

Rosenzweig looking to break Ward's wrist control so he can sink in the choke. Ward remaining controlled and patient though - he really has to keep calm otherwise Rosenzweig will wrap this one up with the rear naked choke!
Ward is in bad spot here.
Ward fending off the submission attempt from Rosenzweig.
Ward wants to escape the position.
The crowd cheering loudly, showing their appreciation for the quality fight we're seeing here.
Rosenzweig looking for the choke from the back.
Rosenzweig is working for the rear naked choke. He has one arm under the chin but Ward has hold of the other arm. A bit of a stalemate here.
Rosenzweig struggling to keep hold of the position.

That's one minute gone in the round.
Rosenzweig is trying to stick to Ward's back but Ward is turning into Rosenzweig. He's managed to reverse the position - now he's in Rosenzweig's guard. Polite applause from the crowd in appreciation of some nice Jiu Jitsu by Ward.
Ward forces his way into half guard.

Ward looking for a kimura but he'll have to free his other leg if he wants to finish that. Perhaps he's just using it as a distraction technique.
Ward prevents Rosenzweig from improving his position.
Ward is thinking about going for an arm triangle but he can't free his leg.
The fighters are tangled up in the ropes here. We might need a restart if the fighters can't break free themselves.

That's two minutes gone in the round.
Rosenzweig controlling the position for now.
Ward tries to pass the half guard into mount. Rosenzweig knows what he's doing though and prevents the attempt.
Rosenzweig wants to get back to full guard.
Ward wants to lay and pray for a moment but Rosenzweig keeps working.
Ward is looking for a kimura but Rosenzweig is holding onto that half guard position, so it's hard for Ward to get the leverage.

That's three minutes gone in the round.
Ward is keen to just control but Rosenzweig is a slippery customer.
Ward looking to pass the half guard. Not this time.
Ward is stalling here. Rosenzweig is in no mood to hang around though. He's locked up a kimura from the bottom! Ward seems to be keeping calm but he's forced to roll out of the hold and Rosenzweig has ended up in side control on the top. Nice work.
Rosenzweig works to advance to full mount. Ward defends for a few seconds but eventually he succumbs.
Ward tries to get back to half guard but can't.
Rosenzweig trying to control but Ward is having none of it.
Ward is wriggling around here but as he tries to escape, Rosenzweig has taken his back.

That's four minutes gone in the round.
Ward tries to escape the position - he's now mounted. Is that better or worse? Hard to tell!
Ward stops Rosenzweig from taking his back. Still, being mounted isn't any better.
The fighters are trapped in the ropes so we're going to have a reposition here. The ref calls for a break and repositions the fighters in the center of the ring.
Ward is wriggling around trying to escape.
Rosenzweig working for a guillotine from mount but Ward is in no mood to give up.
Ward tries to lock up and control but Rosenzweig gives him a forearm to the face and pushes him away.
Rosenzweig looking to control but Ward is working nicely, looking to advance position himself.
The fans in attendance giving it up for the two fighters, who have really let it all hang out in the last minute or so!
Rosenzweig tucks in and makes sure he doesn't lose the dominant position.
Rosenzweig trying to control but Ward is having none of it.
Ward wants to control but Rosenzweig is having none of it.

That's five minutes gone in the round.
Rosenzweig tries to control but Ward wriggling away.
Rosenzweig fails to take his opponent's back.
Ward wants to control but Rosenzweig is having none of it.
Both fighters really going for it on the ground here!
Rosenzweig wants to finish this one by submission but Ward is holding onto his waist, trying to prevent any attacks from Rosenzweig.
Ward is looking to get to half guard.
Ward bucks up and manages to get a nice reversal! He's in guard on the top - nicely done!
Ward wants to control from the top but Rosenzweig keeps moving.

That's six minutes gone in the round.
Rosenzweig pulls Ward in close to prevent any damage.
Rosenzweig keeping moving, preventing Ward from controlling successfully.
Rosenzweig is pulling down on Ward's head to control his posture.

That's seven minutes gone in the round.

The referee decides to stand the fighters back up.
A momentary lapse in concentration from Ward enables Rosenzweig to shoot in and score with a neat double leg. Ward manages to secure a closed guard as the fighters hit the mat.
Ward trying to control the position.
Rosenzweig trying to control the position from guard on top but Ward is wriggling around, looking for whatever he can.
Ward is trying to control the position from the bottom.
Ward throwing his legs up looking for a triangle.
Ward working from the bottom, still in full guard. He's managed to get a loose triangle. Rosenzweig doesn't seem to be doing much to defend here, obviously he feels comfortable in the position. Rosenzweig manages to throw the legs off his shoulder and he's back into guard - no problem.
Rosenzweig's corner is telling him to maintain position.
Ward bucks up whilst keeping hold of a body lock, managing to reverse the position. Now he's in top in Rosenzweig's guard.
Rosenzweig pulls Ward in close to prevent any damage.

That's eight minutes gone in the round.
Ward stands up and looks to throw the legs aside to pass to side control. Rosenzweig swivels though and keeps the full guard.
The crowd cheering loudly, showing their appreciation for the quality fight we're seeing here.
Ward trying to control but Rosenzweig is working from the bottom.

That's nine minutes gone in the round.
We must be close to a standup if these guys don't pick up the pace.
Rosenzweig is working an open guard here, looking to improve his position. No doubt that will leave him open to counters but at least he's being more offensive.

Muhammad Ward has forced the referee to step in and bring the fight back to the feet.
Ward misses with a takedown attempt
and Rosenzweig counters with a nice double leg into side control. Ward won't be happy with that.
Rosenzweig looking for an arm triangle but it's way too loose to do anything.
Rosenzweig remains in side control and seems content to stay there. It's a versatile position from which he can work both strikes and submissions, whilst maintaining that control, so maybe he'll sit here for a while.
Rosenzweig trying to control the action but Ward is working from the bottom.
As the round comes to an end the crowd are showing their appreciation for a great round of action.
Ward is moving his hips around well on the bottom and has managed to get back to half guard.
And thats the end of the round the fighters go back to their corners.
Solomon Rosenzweig dominated that round.
The referee calls time. The cornermen exit stage left and we're back to business.

Rosenzweig closes the distance, clinches up and gets a nice trip takedown into side control. Very smooth.
Ward tries to improve position but can't.
Rosenzweig wants to work for a kimura but he's foiled early by Ward, who protects the arm well.
Rosenzweig looking for an arm triangle but it's way too loose to do anything.
Rosenzweig trying to control the action but Ward is working from the bottom.
Ward prevents Rosenzweig from improving position.
Ward gives up the full mount - oops, sloppy defensive grappling there!
Ward is squirming around, avoiding Rosenzweig's attempts to control the action.
Rosenzweig sitting in mount, just looking to control for the moment.
That's one minute gone in the round.
Rosenzweig trying to control but Ward is having none of it.
Rosenzweig might have to switch it up a bit here because his efforts to control Ward haven't been going to plan, at least at the current moment in time.
Rosenzweig is trying to take his opponent's back.
Ward tries to lock up and control but Rosenzweig gives him a forearm to the face and pushes him away.
Rosenzweig wants to take Ward's back but he can't do it this time.
Rosenzweig controlling the pace for now.
That's two minutes gone in the round.
Ward regains half guard.
Ward wants to get back to full guard.

The ref stands the fighters back up. Solomon Rosenzweig was stalling too much, according to the referee.
Rosenzweig looking to score a takedown here. Ward is defending well but Rosenzweig drives through and ends up in Ward's guard.
Rosenzweig passes Ward's right leg, so he's now in half guard.
Ward actively working from the bottom here.
We've seen a great period of action over the last minute or so - credit to both fighters for going all out!
Rosenzweig prevents Ward from improving his position.
Rosenzweig tries to pass the half guard into mount. Ward knows what he's doing though and prevents the attempt.
Ward is working for an escape here. He's hooked one of Rosenzweig's legs and he's managed to sneak out and take Rosenzweig's back!
Ward has his hand under the chin of his opponent looking for the choke. He's nearly got it! This one could be all over! But no, Rosenzweig has freed his hand and lives to survive another
well, another couple of seconds at least!
That's three minutes gone in the round.
Rosenzweig can't escape the position.
Rosenzweig preventing the rear naked choke attempt from Ward.
Rosenzweig preventing the rear naked choke attempt from Ward.
Ward seems to be going for a rear naked choke. He has an arm under Rosenzweig's chin but Rosenzweig turns very nicely into Ward's guard. Good BJJ skills being displayed there by Rosenzweig.
That's four minutes gone in the round.
Rosenzweig engaging in some classic timewasting tactics.
Rosenzweig passes into half guard.
Ward is looking to sinch up a guillotine here but Rosenzweig pulls his head out easily.
Rosenzweig wants to pass the guard but Ward is defending well.
Ward looking to work for a kimura from the bottom.
Rosenzweig is looking for a kimura but Ward is holding onto that half guard position, so it's hard for Rosenzweig to get the leverage.
That's five minutes gone in the round.
Rosenzweig uses his free foot to push down on Ward's thigh. Eventually he works his other foot free and he's advanced to mount - this is trouble for Ward.
Rosenzweig working for a submission but Ward is keeping him at bay.
Rosenzweig trying to control but Ward is having none of it.
Ward is desperately trying to get back to half guard.
Rosenzweig takes Ward's back.
Rosenzweig looking for the RNC.
I really don't envy Ward right now.
That's six minutes gone in the round.
A lull in the action here.
Ward just trying to survive but Rosenzweig is wriggling into a better position, looking to finish.
Rosenzweig looking for the choke but no joy.
Rosenzweig doesn't have the hooks in and Ward manages to turn into his guard.
This has been an exciting period of action!
Rosenzweig can't keep his opponent in guard - Ward advances to half guard, no doubt looking to mount.
Ward is looking to advance position but Rosenzweig won't allow it.
Ward is looking to stall here but Rosenzweig recovers full guard.
That's seven minutes gone in the round.
Rosenzweig seems keen to control Ward's posture.
Ward tries to free his leg and advance position but Rosenzweig is retaining full guard.
Rosenzweig bucks up whilst keeping hold of a body lock, managing to reverse the position. Now he's in top in Ward's guard.
Ward looking to hit a scissor sweep but Rosenzweig is one step ahead there.
Solomon Rosenzweig has got the better of the ground game so far.
Rosenzweig stands up and looks to throw the legs aside to pass to side control. Ward swivels though and keeps the full guard.
Rosenzweig must be cautious of submissions here, given that his opponent has the superior Jiu Jitsu.
That's eight minutes gone in the round.
Ward is active off his back here, looking for submissions.
Ward manages to sweep nicely, so he's now on top. Rosenzweig manages to get himself to full guard.
Ward trying to control the position from guard on top but Rosenzweig is wriggling around, looking for whatever he can.
Ward wants to pass the guard but Rosenzweig is keeping the position.
Ward looking to sit in guard and control but Rosenzweig gets the butterfly guard and sweeps. He's now in the guard on the top.
Ward is active off his back here, looking for submissions.
That's nine minutes gone in the round.
Rosenzweig pressing down on his opponent's thigh, looking to pass guard. Ward is keeping the position for now.
Ward trying to keep a closed guard but Rosenzweig is proving a slippery customer.
Rosenzweig slips effortlessly into side control - very nice.
Rosenzweig content to control the pace. The referee will try and keep them active though.
Ward tries to get back to half guard but can't.
As the round comes to an end the crowd are showing their appreciation for a great round of action.
Rosenzweig tries to advance to mount but Ward denies him.
Ward being controlled for a moment.
And thats the end of the round the fighters go back to their corners.
Solomon Rosenzweig showed his class in that round. I'd imagine he'll take it on all the scorecards.
That's time! Ward's corner gives him a slap on the ass as he gets ready to fight. This is the final round!

Rosenzweig dives in and scores a takedown into Ward's guard.
Ward looking for submissions off his back, moving his hips, looking for an opening.
Rosenzweig wants to control from the top but Ward keeps moving.
Rosenzweig slips nicely into half guard.
Rosenzweig prevents Ward from improving his position.
Rosenzweig wants to take a breather but Ward is having none of it.
Ward slips a foot under and gets full guard. Nice work.
Ward working from the bottom, still in full guard. He's managed to get a loose triangle. Rosenzweig doesn't seem to be doing much to defend here, obviously he feels comfortable in the position. Rosenzweig manages to throw the legs off his shoulder and he's back into guard - no problem.
Both fighters are breathing heavily.
That's one minute gone in the round.
Ward is trying to control the position from the bottom.
Ward working for submissions but it's allowed Rosenzweig to get to half guard.
Ward is pressing down on Rosenzweig's left leg trying to get back to full guard. He's managed it.
Rosenzweig stopping the sweep attempt from Ward.
Rosenzweig trying to control the position from guard on top but Ward is wriggling around, looking for whatever he can.
Rosenzweig pushing down on Ward's thigh, trying to pass to half guard. He's managed it... Nice work.
That's two minutes gone in the round.
Rosenzweig seems like he's working for an arm triangle here. He's freed his trapped foot and he's rotating nicely. Ward is in big trouble! He's tapping out! This one is aaaaaaaaaaaall over!
Ladies and gentlemen, after 2:20 of round 3, we have a winner by way of Submission (Arm Triangle). Solomon Rosenzweig!
|
|
|
|
|
|
|
|
|
|
|
|
|
|
|
|
|
|
|
|
|
|
|
| S |
C
A |
G |
S |
C
B |
G |
|
S |
C |
G |
|
energy
A | B |
|
hype
A | B |
|
pop
A | B |
|
mgr
A | B |
|
FIGHT
RATING
100% |
|
|
|
|
|
|
|
Undercard bout
|
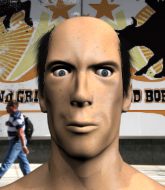
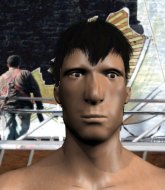
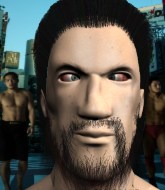
Coming up we have a heavyweight MMA rules bout between Rickson Silva (ranked 0 p4p, 0 weight class) and Michael Gleiser (ranked 0 p4p, 0 weight class). Silva's ring entrance music is that housewives' favourite, system of a down - violent pornography. Rickson Silva has the better chin. Will he look to stand and bang today?
 |
|
 |
| 200 cm
35
233 lbs
27 - 25 - 2 |
|
190 cm
35
230 lbs
9 - 13 - 1 |
Good wrestling
World class boxer
Very quick |
|
Good wrestler
World class boxer
Good gas tank |
|
| |
|
Ladies and gentlemen. This fight is 3 rounds, in the heavyweight division.
Introducing the fighter to my left, fighting out of the red corner.
With a record of
27 - 25 - 2, fighting out of Amsterdam, Rickson Silva!
And introducing the fighter to my right, fighting out of the blue corner.
With a record of
9 - 13 - 1, fighting out of London, Michael Gleiser!
The judges for this bout are Donald Grub, James Glass and Colin Fotheringham.
The bell rings for round one and we are underway!
Gleiser shoots in for a takedown - he's clinched up with Silva but Silva pushes him off and we're back to square one.
Gleiser shoots in looking for a takedown. Silva tries to sprawl out of it but Gleiser keeps driving through. The fighters are pinned against the ropes. Silva manages to get underhooks and after a bit of a struggle, circles away and we're back to standing.
Gleiser fails to land the takedown.
Rickson Silva has stuffed three takedown attempts in the round now. That's going to take a lot out of Michael Gleiser.
Silva stuffs the takedown attempt from Gleiser. Gleiser gets slowly back to his feet.
Gleiser shoots in but Silva avoids the takedown attempt easily.
Gleiser with a lazy takedown attempt

and Silva counters with a single leg into guard. Gleiser didn't expect that.
That's one minute gone in the round.
The referee is pacing around the two fighters - he looks like he's thinking about a standup.
Gleiser trying to control the position.
Silva looking to control the position here, rather than advance.
Silva pressing down on his opponent's thigh, looking to pass guard. Gleiser is keeping the position for now.
Gleiser looking for a triangle here. Silva is fighting it but it looks tight! Gleiser pulls the arm across and this one won't last much longer! Nope, Silva is tapping out - this one is all over!
Ladies and gentlemen, after 1:47 of round 1, we have a winner by way of Submission (Triangle Choke). Michael Gleiser!
A relieved looking Michael Gleiser thanked the fans for their support and gave the usual line about them being amazing. They seemed to believe that he actually meant it.
|
|
|
|
|
|
|
|
|
|
|
|
|
|
|
|
|
|
|
|
|
|
|
| S |
C
A |
G |
S |
C
B |
G |
|
S |
C |
G |
|
energy
A | B |
|
hype
A | B |
|
pop
A | B |
|
mgr
A | B |
|
FIGHT
RATING
29% |
|
|
|
|
|
|
|
Undercard bout
|
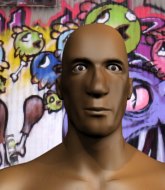
Coming up we have a light heavyweight MMA rules bout between Squirtle Blastoise (ranked 0 p4p, 0 weight class) and Tsuyoshi Tamatso (ranked 0 p4p, 0 weight class). Blastoise's ring entrance music is that housewives' favourite, The Rolling Stones: Sympathy For The Devil. Over to our ring announcer for the fighter introductions!
 |
|
 |
| 192 cm
32
200 lbs
11 - 7 - 2 |
|
180 cm
35
178 lbs
24 - 9 - 0 |
BJJ Red Belt
Solid boxing
Insanely flexible |
|
Olympic wrestler
World class boxer
Good gas tank |
|
| |
|
Ladies and gentlemen. This fight is 3 rounds, in the light heavyweight division.
Introducing the fighter to my left, fighting out of the red corner.
With a record of
11 - 7 - 2, fighting out of Amsterdam, Squirtle Blastoise!
And introducing the fighter to my right, fighting out of the blue corner.
With a record of
24 - 9 - 0, fighting out of Tokyo, Tsuyoshi Tamatso!
The judges for this bout are Andrew Berry, James Glass and James Atkins.
The bell rings for round one and we are underway!
Blastoise fails with the takedown
and Tamatso counters with a single leg into guard. Blastoise didn't expect that.
Tamatso stays in close to Blastoise's body and controls the position.
Tamatso trying to control but Blastoise is working from the bottom.
Tamatso trying to move into half guard but instead Blastoise has managed to sweep!
Blastoise will need to keep those long limbs tucked in whilst he's on the ground, to prevent any submissions.
There's a bit of a scramble here and now Tamatso is on top in guard.
Tamatso sitting in guard here, content to control.
That's one minute gone in the round.
Tamatso looking to sit in guard and control but Blastoise gets the butterfly guard and sweeps. He's now in the guard on the top.
Tamatso working away from the bottom but not quite defensive enough there because Blastoise has passed into half guard!
Blastoise is trying to work for a kimura. This could be trouble! No, Tamatso has managed to free his arm - good work.
Blastoise stalling away here and it's allowed Tamatso to slip out his trapped foot and regain full guard.
Tamatso working from the bottom, still in full guard. He's managed to get a loose triangle. Blastoise doesn't seem to be doing much to defend here, obviously he feels comfortable in the position. Blastoise manages to throw the legs off his shoulder and he's back into guard - no problem.
That's two minutes gone in the round.
Blastoise pressing down on his opponent's thigh, looking to pass guard. Tamatso is keeping the position for now.
Tamatso is trying to control the position but Blastoise postures up.
Blastoise trying to control the position from guard on top but Tamatso is wriggling around, looking for whatever he can.
Tamatso trying to control the position here.
Tamatso is trying to control the position from the bottom.
Tamatso keeping moving, preventing Blastoise from controlling successfully.
The referee decides to stand the fighters back up.
Tamatso throws the overhand right but ducks down into a quick takedown attempt. Blastoise was covering up waiting for the punch and Tamatso finishes the takedown easily into guard.
That's three minutes gone in the round.
Tamatso passes Blastoise's right leg, so he's now in half guard.
Tamatso is looking to stall here but Blastoise recovers full guard.
Tamatso trying to control the position from guard on top but Blastoise is wriggling around, looking for whatever he can.
That's four minutes gone in the round.
Tamatso looking to pass the guard.
Tamatso pushing down on Blastoise's thigh, trying to pass to half guard. He's managed it... Nice work.
Well, if Tamatso is going to just lie there, perhaps we should talk about what we're having for dinner tonight
I'm having a ham and pineapple pizza
Yum. Can't wait.
Blastoise trying to control but Tamatso postures up.
That's five minutes gone in the round.
It looks like the ref is thinking about a standup.
Tamatso seems very keen to just sit and control from half guard but Blastoise does not like that idea so much and is remaining active off his back.
The fighters are trapped in the ropes so we're going to have a reposition here. The ref calls for a break and repositions the fighters in the center of the ring.
Blastoise looking for submissions off his back.
Tamatso is controlling the pace.
That's six minutes gone in the round.
There's not a lot going on here and the crowd are letting the fighters know they're not willing to tolerate a lack of action.
Tamatso is trying to work for a kimura. This could be trouble! No, Blastoise has managed to free his arm - good work.
Tamatso is trying to advance to mount but he's lost his balance and Blastoise reverses the position - he's now on top in Tamatso's guard.
That's seven minutes gone in the round.
Tamatso looks to be working for a triangle here. Oh, it looks like he might have it! Blastoise has picked Tamatso up and slammed him! Tamatso can't keep hold of the triangle and Blastoise manages to pass to side control!
Blastoise tries for a kimura but Tamatso is defending well.
Blastoise looking for an arm triangle but it's way too loose to do anything.
Blastoise wants to lay and pray for a moment but Tamatso keeps working.
Blastoise is looking for a kimura. He might have it! No, Tamatso has escaped the position, nice work there.
Tamatso is trying to improve his position.
That's eight minutes gone in the round.
Blastoise goes for an armbar here - this could be all over! But no, Tamatso has escaped beautifully and is now on top in side control! Oh, that's unlucky for Blastoise but great work by Tamatso.
Tamatso is looking to take a break and control but Blastoise is keeping him honest, looking to work from the bottom.
The fighters are tangled up in the ropes here. We might need a restart if the fighters can't break free themselves.
Tamatso swings around for an armbar but Blastoise sees it coming a mile off and turns beautifully into Tamatso's guard.
That's nine minutes gone in the round.
Blastoise tries to free his leg and advance position but Tamatso is retaining full guard.
Blastoise sneaks a leg through and gets to half guard. That was like a knife through butter how easily he passed Tamatso's guard.
Tamatso is trying to maintain the position but Blastoise is very close to passing his half guard.
Blastoise is looking for a kimura. It's going to be difficult to finish that from half guard though and Tamatso defends it well.
Blastoise is looking to stall here but Tamatso recovers full guard.
Blastoise trying to control but Tamatso is working from the bottom.
The crowd applaud the fighters efforts here as the round comes to an end.
Blastoise engaging in some classic timewasting tactics.
Blastoise trying to control but Tamatso is working from the bottom.
And thats the end of the round the fighters go back to their corners.
Tsuyoshi Tamatso dominated that round.
That's the end of the interval. I'm sure that seemed a lot quicker than a minute for our two fighters! Back to the action.
A really sloppy takedown attempt there from Blastoise.
Blastoise misses with a takedown attempt - Tamatso sprawls well and throws a nice strike on the way out which just misses.
Tamatso throws the overhand right but ducks down into a quick takedown attempt. Blastoise was covering up waiting for the punch and Tamatso finishes the takedown easily into guard.
Blastoise can't keep his opponent in guard - Tamatso advances to half guard, no doubt looking to mount.
Tamatso is trying for a kimura here. Blastoise looks like he's in a lot of pain... and he's tapping out! Tamatso wins by kimura!
Ladies and gentlemen, after 1:56 of round 2, we have a winner by way of Submission (Kimura). Tsuyoshi Tamatso!
A relieved looking Tsuyoshi Tamatso thanked the fans for their support and gave the usual line about them being amazing. They seemed to believe that he actually meant it.
|
|
|
|
|
|
|
|
|
|
|
|
|
|
|
|
|
|
|
|
|
|
|
| S |
C
A |
G |
S |
C
B |
G |
|
S |
C |
G |
|
energy
A | B |
|
hype
A | B |
|
pop
A | B |
|
mgr
A | B |
|
FIGHT
RATING
100% |
|
|
|
|
|
|
|
Undercard bout
|
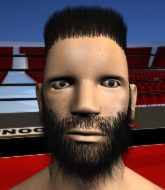
Coming up we have a lightweight MMA rules bout between Meguru Takayanagi (ranked 0 p4p, 0 weight class) and Cubensis Azul (ranked 0 p4p, 0 weight class). Takayanagi comes to the ring accompanied by All Rounder Meguru. Cubensis Azul has the better chin. Will he look to stand and bang today?
 |
|
 |
| 171 cm
24
160 lbs
1 - 0 - 0 |
|
174 cm
35
156 lbs
26 - 15 - 2 |
Powerful takedowns
Great low kicks
Insanely flexible |
|
Good wrestler
Excellent boxer
Powerful |
|
| |
|
Ladies and gentlemen. This fight is 3 rounds, in the lightweight division.
Introducing the fighter to my left, fighting out of the red corner.
With a record of
1 - 0 - 0, fighting out of Tokyo, Meguru Takayanagi!
And introducing the fighter to my right, fighting out of the blue corner.
With a record of
26 - 15 - 2, fighting out of Tokyo, Cubensis Azul!
The judges for this bout are James Ackerman, William Gold and Andrew Berry.
The bell rings for round one and we are underway!
Takayanagi looks for a takedown but Azul sprawls well.
Takayanagi looks for a takedown but Azul sprawls well.
Azul avoids the clinch attempt nicely.
A telegraphed takedown attempt from Takayanagi is defended easily by Azul.
That's three failed takedown attempts in the round for Meguru Takayanagi. That's going to take a lot out of him.
Azul leaves Takayanagi with his face pressed against the mat as he sprawls beautifully, defending against a solid takedown attempt.
Takayanagi doesn't manage to clinch there - Azul circles away.
That's one minute gone in the round.
Takayanagi shoots in and scores a nice double leg takedown into half guard.
Takayanagi is working for submissions here but there's nothing on.
Azul is looking for a sweep. Takayanagi is wise to his cunning plan and keeps the top position.
Takayanagi throwing shots but Azul is blocking nicely.
Takayanagi has been looking to land a fair amount of strikes on the ground. He might be looking to soften his opponent up in order to work for a submission.
That's two minutes gone in the round.
Takayanagi seems very keen to just sit and control from half guard but Azul does not like that idea so much and is remaining active off his back.
Takayanagi missing with some ground and pound from the half guard.
Takayanagi is sneakily working for an arm triangle but Azul sees it coming and defends easily.
Takayanagi is looking for a kimura but Azul is holding onto that half guard position, so it's hard for Takayanagi to get the leverage.
Takayanagi not throwing his punches with enough precision this time.
Takayanagi is keen to just control but Azul is a slippery customer.
Takayanagi trying to advance position but Azul counters by regaining guard.
That's three minutes gone in the round.
Azul trying to keep a closed guard but Takayanagi is proving a slippery customer.
Takayanagi landing with the ground and pound.
Azul wants to hit a switch here but Takayanagi passes into full mount! Oh no, disaster for Azul there!
Takayanagi trying to control but Azul is having none of it.
That's four minutes gone in the round.
Azul is trying desperately to improve position.
Takayanagi lands with some strikes.
Takayanagi swings around for an armbar but it's a sloppy attempt and Azul is now in Takayanagi's guard. A big mistake from Takayanagi there, giving up the dominant position!
Takayanagi working a defensive guard here.
That's five minutes gone in the round.
Takayanagi looking for a guillotine here but Azul defends easily.
Azul is working Takayanagi over from the guard. He should look to pass the guard and do a little more damage with these strikes.
Takayanagi has a loose triangle. He'll be looking to tighten that up but Azul can see exactly what he's planning and manages to posture up and free himself.
Takayanagi pulls Azul in to control the position.
That's six minutes gone in the round.
Takayanagi working from the bottom, still in full guard. He's managed to get a loose triangle. Azul doesn't seem to be doing much to defend here, obviously he feels comfortable in the position. Azul manages to throw the legs off his shoulder and he's back into guard - no problem.
The fighters are trapped in the ropes so we're going to have a reposition here. The ref calls for a break and repositions the fighters in the center of the ring.
Takayanagi isolates an arm and boxes in a triangle. Azul stacks Takayanagi on his neck as he steps over and passes to the side. He's now in a much more dominant position where he can look to do some serious damage. Nice move by Azul!
Azul lands an elbow.
Takayanagi wants to control but Azul postures up.
Azul wants to control but Takayanagi is keeping him busy.
The fans in attendance giving it up for the two fighters, who have really let it all hang out in the last minute or so!
Takayanagi can't do much from the bottom here.
That's seven minutes gone in the round.
Takayanagi takes a big shot right to the temple there but he's taken it well.
Takayanagi is moving his hips around well on the bottom and has managed to get back to half guard.
Takayanagi missing with punches from the bottom.
Takayanagi keeping his head moving to avoid the ground and pound.
Takayanagi blocking the ground and pound attempt from Azul.
Azul trying to mount his opponent but Takayanagi defends it.
Takayanagi regains full guard. Nicely done.
That's eight minutes gone in the round.
Azul trying to control but Takayanagi is working from the bottom.
Takayanagi lands an upkick as Azul stands over him.
Takayanagi tries to land a sweep but no joy.
Takayanagi escapes his hips to the side and looks to be working for an armbar. Azul gives him a little smile and shakes his head. No chance.
The fans in attendance giving it up for the two fighters, who have really let it all hang out in the last minute or so!
Azul loading up with the ground and pound but he's missing more than he's landing in this flurry.
Takayanagi tries to land a sweep but no joy.
Takayanagi is working hard here to advance position.
Takayanagi is throwing his legs up, looking for submissions. Azul is aware though and is defending well.
That's nine minutes gone in the round.
Takayanagi is striking off his back. Azul thinks nothing of it though and passes easily into half guard.
Takayanagi is positioning himself well to prevent Azul advancing to mount.
Takayanagi looking for submissions off his back.
Takayanagi is looking for a sweep. Azul is wise to his cunning plan and keeps the top position.
The crowd applaud the fighters efforts here as the round comes to an end.
Azul working some ground and pound from close in. He's looking to maintain this position and strike for a while by the looks of things... although he'll probably advance to full mount in a minute now I've said that.
Takayanagi is looking to get full guard. It looks like he might be successful but at the last minute Azul jumps into side control!
Takayanagi is not content to let Azul control the position.
And thats the end of the round the fighters go back to their corners.
Meguru Takayanagi dominated that round.
The fighters get back to their feet, the hooter sounds and we're back to the action!
Takayanagi shoots in for a takedown and gets it.
Takayanagi winds up and cracks Azul with a swinging punch to the side of the head.
Takayanagi trying to control from half guard but Azul is working away.
Azul is trying to control but can't.
That's one minute gone in the round.
Takayanagi not doing much here.
Takayanagi works his foot free and advances to mount.
Takayanagi wants to control the pace but Azul is squirming around nicely.
That's two minutes gone in the round.
Azul is wriggling around trying to escape.
Takayanagi pausing momentarily but resumes with a couple of decent strikes that do a bit of damage.
Takayanagi dominating with strikes here.
Takayanagi scoring with strikes but Azul is staying in there.
That's three minutes gone in the round.
Takayanagi prevents Azul from getting the reversal.
Azul wants to control but Takayanagi is having none of it.
Takayanagi raining down shots from the mount!
Takayanagi takes a little breather and maintains the position. The referee will be looking for him to stay active from such a dominant position though.
Takayanagi trying to control but he's not successful this time.
That's four minutes gone in the round.
Azul is desperately trying to improve his position but Takayanagi has a good base and remains in mount.
Azul looking to escape from mount but he's given up his back!
Takayanagi is looking for the choke from the back position but Azul is controlling his hands well.
Fantastic stuff here - a very entertaining period of action, which has drawn cheers from the crowd.
Azul tries to escape but Takayanagi has the hooks in and won't let him break free.
Takayanagi is remaining active here, looking for the choke. The more discerning members of the crowd will appreciate his efforts.
That's five minutes gone in the round.
The referee is taking a good look at Azul as he is on the wrong end of some big shots from Takayanagi!
Takayanagi avoiding Azul 's attempts to control his hands.
Takayanagi working for the rear naked choke here. He's got one arm under but Azul is defending well. A couple of punches soften him up though and Takayanagi has tightened the hold! This one could be all over! It is! Azul taps out!
Ladies and gentlemen, after 6:56 of round 2, we have a winner by way of Submission (RNC). Meguru Takayanagi!
Our winner, Meguru Takayanagi, made sure he spent some time buttering up the crowd during his post fight interview, which will no doubt bring him a few more fans.
|
|
|
|
|
|
|
|
|
|
|
|
|
|
|
|
|
|
|
|
|
|
|
| S |
C
A |
G |
S |
C
B |
G |
|
S |
C |
G |
|
energy
A | B |
|
hype
A | B |
|
pop
A | B |
|
mgr
A | B |
|
FIGHT
RATING
30% |
|
|
|
|
|
|
|
Undercard bout
|
Coming up we have a light heavyweight MMA rules bout between John Dummy (ranked 0 p4p, 0 weight class) and Aj Heid (ranked 0 p4p, 0 weight class). Over to our ring announcer for the fighter introductions!
 |
|
 |
| 180 cm
31
184 lbs
2 - 2 - 0 |
|
175 cm
39
175 lbs
9 - 4 - 0 |
BJJ Red Belt
Solid boxing
Intelligent |
|
BJJ Red Belt
Basic striking
Powerful |
|
| |
|
Ladies and gentlemen. This fight is 3 rounds, in the light heavyweight division.
Introducing the fighter to my left, fighting out of the red corner.
With a record of
2 - 2 - 0, fighting out of Amsterdam, John Dummy!
And introducing the fighter to my right, fighting out of the blue corner.
With a record of
9 - 4 - 0, fighting out of Amsterdam, Aj Heid!
The judges for this bout are Colin Fotheringham, James Atkins and Richard Clark.
The bell rings for round one and we are underway!
Heid misses with a takedown attempt
and Dummy counters with a straight right hand.
Heid with a poor takedown
and Dummy counters with a series of strikes. Heid will be more careful next time no doubt.
Heid gets his takedown attempt stuffed easily
and Dummy counters with a three punch combo that has Heid backing up. Heid nods at Dummy to acknowledge the strikes.
John Dummy has stuffed three takedown attempts in the round now. That's going to take a lot out of Aj Heid.
Heid fails with the takedown.
Heid doesn't succeed with the takedown
and Dummy cracks him with a counter punch right on the button.
Heid gets his takedown attempt stuffed easily
and Dummy cracks him with a counter punch right on the button.
Heid shoots in for a takedown. He's persisting with it as Dummy sprawls well. Dummy wins this battle and keeps the fight standing. Heid gets slowly back to his feet.
Heid misses with a takedown attempt
and Dummy counters with a good right hand that lands right on the jaw.
Wooooo! Give it up for these two warriors! They are putting on a show!
Heid shoots and misses
enabling Dummy to counter with a crisp jab.
Heid doesn't succeed with the takedown
and Dummy counters with a good right hand that lands right on the jaw.
That's one minute gone in the round.
Heid shoots and misses
and Dummy connects with a straight left hand counter down the middle.
Heid gets his takedown attempt stuffed easily
and Dummy counters with a nice uppercut.

Heid is rocked!
Heid doesn't succeed with the takedown
and Dummy counters with a right, left combo that wobbles Heid badly! Dummy follows up with a massive right hook, straight to the bridge of the nose that knocks Heid out cold! Oh wow, what a finish! Very reminiscent of Koscheck vs Yoshida as Dummy finished him against the ropes.
Ladies and gentlemen, after 1:25 of round 1, we have a winner by way of KO (Punches). John Dummy!
A relieved looking John Dummy thanked the fans for their support and gave the usual line about them being amazing. They seemed to believe that he actually meant it.
|
|
|
|
|
|
|
|
|
|
|
|
|
|
|
|
|
|
|
|
|
|
|
| S |
C
A |
G |
S |
C
B |
G |
|
S |
C |
G |
|
energy
A | B |
|
hype
A | B |
|
pop
A | B |
|
mgr
A | B |
|
FIGHT
RATING
59% |
|
|
|
|
|
|
|
Undercard bout
|
Coming up we have a lightweight MMA rules bout between Ai Za (ranked 0 p4p, 0 weight class) and Royler Bot (ranked 0 p4p, 0 weight class). Man, I cannot wait for this one!
 |
|
 |
| 181 cm
27
148 lbs
14 - 3 - 0 |
|
162 cm
31
169 lbs
9 - 4 - 0 |
Abu Dhabi Champ
Excellent boxer
Insanely flexible |
|
BJJ Red Belt
Excellent MT
Good gas tank |
|
| |
|
Ladies and gentlemen. This fight is 3 rounds, in the lightweight division.
Introducing the fighter to my left, fighting out of the red corner.
With a record of
14 - 3 - 0, fighting out of Amsterdam, Ai Za!
And introducing the fighter to my right, fighting out of the blue corner.
With a record of
9 - 4 - 0, fighting out of Las Vegas, Royler Bot!
The judges for this bout are Daniel Bishop, James Atkins and Chris Edwards.
The bell rings for round one and we are underway!
Za gets caught napping as Bot dives in and scores a takedown. Za manages to retain guard.
We've had a lack of effective grappling in the last minute or so, which could well see a referee standup.
Za is looking for a triangle here but Bot uses the submission attempt to pass into side control.
Za looking for a sweep but Bot has passed into full mount! Oh no!
Za defends a decent attempt at a guillotine from Bot.
Bot jumps to the side looking to secure the arm triangle
. Ooooh, that looks tight
Za is gargling but he's managed to escape! Nice work there by Za and Bot has given up the dominant position trying to land that submission.
That's one minute gone in the round.
Bot tries to move to full mount but Za actually manages to regain half guard.
Bot passes to side control.
That's two minutes gone in the round.
Bot is looking to finish here, going for an Americana. Za knows the correct defense though, so he's OK.
Bot is looking to finish here, going for an Americana. Za knows the correct defense though, so he's OK.
Za is looking for a sweep.
That's three minutes gone in the round.
Bot working away.
Bot is looking to finish here, going for an Americana. Za knows the correct defense though, so he's OK.
Za gets back to half guard.
That's four minutes gone in the round.
Bot passes the half guard and he's now in mount! Big trouble for Za!
Bot fails to advance to Za's back.
Za sneaks a leg under to get to half guard.
That's five minutes gone in the round.
Za won't allow Bot to pass to mount.
Bot keeps trying to improve his position.
Za moves his hips nicely and gets into full guard.
That's six minutes gone in the round.
Bot pressing down on his opponent's thigh, looking to pass guard. Za is keeping the position for now.
Za looks to be working for a triangle here. Oh, it looks like he might have it! Bot has picked Za up and slammed him! Za can't keep hold of the triangle and Bot manages to pass to side control!
That's seven minutes gone in the round.
Bot has knee on belly and moves into mount.
Za manages to regain half guard. Good work.
Za trying to control from the bottom.
Bot passes the half guard and he's now in mount! Big trouble for Za!
That's eight minutes gone in the round.
Bot goes for an armbar but Za turns quickly into his guard - lovely anticipation from Za.
Bot keeping full guard, as Za tries to pass.
Bot looking to hit a scissor sweep but Za is one step ahead there.
Za tries to free his leg and advance position but Bot is retaining full guard.
That's nine minutes gone in the round.
Za trying to control but Bot is working from the bottom.
Bot looking to hit a scissor sweep but Za is one step ahead there.
Za trying to control but Bot is working from the bottom.
Bot is active off his back here, looking for submissions.
And thats the end of the round the fighters go back to their corners.
Royler Bot dominated that round.
The corners get their ten second warning. Both fighters stand from their stools and stare eachother down, ready to get back to the action.
Za tries to shoot in for a takedown. He's got hold of a leg but Bot swivels and escapes.
Bot shoots in from a long way out. He's driving through with the takedown attempt and he eventually gets it, landing in Za's guard.
Royler Bot has got the better of the ground game so far.
Bot wants to pass the guard but Za is keeping the position.
Za is trying to keep Bot in close.
The fighters are trapped in the ropes so we're going to have a reposition here. The ref calls for a break and repositions the fighters in the center of the ring.
That's one minute gone in the round.
The referee is asking the fighters to pick up the pace.
Bot passes Za's left leg - he's now in half guard.
Bot works his way into full mount!
Bot moves into side control, trying to work for a kimura. That looks painful! Will he finish!!?? No, Za has worked his arm free - good work by Za!
That's two minutes gone in the round.
Bot swings around for an armbar but Za sees it coming a mile off and turns beautifully into Bot's guard.
Za passes easily into side control. Nice work.
Bot is not content to let Za control the position.
A bit of a lull in the action. I'm sure it will pick up again soon... even if the ref has to physically pick them up and put them back on their feet.
That's three minutes gone in the round.
Za swings around for an armbar but Bot sees it coming a mile off and turns beautifully into Za's guard.
Bot looking to pass the guard.
Bot stands and throws Za's legs to the side, diving into side control.
You can see the frustration on Za's face, being in this tough position on the bottom.
Bot works to advance to full mount. Za defends for a few seconds but eventually he succumbs.
That's four minutes gone in the round.
Bot jumps to the side looking to secure the arm triangle
. Ooooh, that looks tight
Za is gargling but he's managed to escape! Nice work there by Za and Bot has given up the dominant position trying to land that submission.
Za is trying to get back to half guard. He's pushing on Bot's leg. He's managed it. Nice work.
Bot moves into full mount! Za won't be happy about that!
That's five minutes gone in the round.
Za sneaks a leg back under and regains half guard and is working straight away to try and get back to guard. He hasn't managed just yet though.
Za has no desire to be mounted, so is trying to control. Bot is working away from the top position though.
Za regains full guard. Nicely done.
Za working for a triangle but Bot defends it easily.
That's six minutes gone in the round.
Bot is pushing down on Za's leg trying to pass to half guard. Za is fighting to maintain full guard but Bot has managed to sneak the leg through.
Za is pressing down on Bot's left leg trying to get back to full guard. He's managed it.
Bot got a little sloppy there for a moment and Za has worked his way into a loose triangle - can he finish it?! No, Bot has managed to get both his arms back between Za's legs - danger averted.
Bot trying to pass the guard but can't manage it just yet.
That's seven minutes gone in the round.
Za not looking particularly offensive just at the moment.
Za throws his legs up looking for a submission but Bot uses it to pass to side control.
That's eight minutes gone in the round.
Bot goes for an armbar! This could be all over! Wait, no, Za rolls with the submission and now he's on top in Bot's guard! Nice work there by Za!
Za passes easily into side control. Nice work.
Za really does look like a pencil wearing a pair of gloves. Let's hope he has a gameplan to suit that ridiculous body shape.
Za wants to work for a kimura but he's foiled early by Bot, who protects the arm well.
Bot is looking for a sweep.
That's nine minutes gone in the round.
Za wants to lay and pray for a moment but Bot keeps working.
Za is looking to finish here, going for an Americana. Bot knows the correct defense though, so he's OK.
Bot is looking for a sweep.
Za wants to control but Bot is keeping him busy.
And thats the end of the round the fighters go back to their corners.
That was a close second round but I would say that Ai Za will probably get the nod.
OK. That's time! The bell goes and we're back to the action. This is the final round!
Za with a poor takedown
and he gets countered with a snapping leg kick.
Za misses with a takedown attempt
and Bot counters with an outside leg kick.
Za gets a takedown into half guard.
Bot is pressing down on Za's left leg trying to get back to full guard. He's managed it.
Bot wants to sweep here but Za controlling him for the moment.
Bot is active off his back here, looking for submissions.
Za wants to control from the top but Bot keeps moving.
That's one minute gone in the round.
Bot manages to land a sweep and now he's in mount on top!
Bot pushing the pace here, looking to move to his opponents back and work for a finish.
Bot goes for an armbar but Za turns quickly into his guard - lovely anticipation from Za.
That's two minutes gone in the round.
Za trying to control the position from guard on top but Bot is wriggling around, looking for whatever he can.
Za will need to keep those long limbs tucked in whilst he's on the ground, to prevent any submissions.
Bot bucks up whilst keeping hold of a body lock, managing to reverse the position. Now he's in top in Za's guard.
Bot tries to free his leg and advance position but Za is retaining full guard.
Bot is looking to advance position but Za has hit a scissor sweep - now he's on top in mount!
Bot really trying hard to get back to half guard here.
That's three minutes gone in the round.
Za goes for an armbar but Bot turns quickly into his guard - lovely anticipation from Bot.
Bot passes easily into side control. Nice work.
Bot is looking to finish here, going for an Americana. Za knows the correct defense though, so he's OK.
That's four minutes gone in the round.
Bot swings around for an armbar but Za sees it coming a mile off and turns beautifully into Bot's guard.
Bot looking for a sweep. Not yet Bot, not yet.
Bot is active off his back here, looking for submissions.
Za is pushing down on Bot's leg trying to pass to half guard. Bot is fighting to maintain full guard but Za has managed to sneak the leg through.
That's five minutes gone in the round.
Bot wants to get back to full guard.
Za working to pass to mount. He's got his hand pressing down on Bot's thigh. Bot counters though and makes it back to full guard.
Bot keeping moving, preventing Za from controlling successfully.
Za stands up and looks to throw the legs aside to pass to side control. Bot swivels though and keeps the full guard.
Bot wants to sweep but no luck.
That's six minutes gone in the round.
Za trying to control but Bot is working from the bottom.
Bot is actively looking for submissions from his back. He's worked himself a little space on the bottom and seems to be going for a triangle. No, he's switched into an armbar! That was slick! Za rolls with it to try and escape but Bot cranks on the arm and Za is forced to tap out! This one is aaaaaaaaall over!
Ladies and gentlemen, after 6:35 of round 3, we have a winner by way of Submission (Armbar). Royler Bot!
|
|
|
|
|
|
|
|
|
|
|
|
|
|
|
|
|
|
|
|
|
|
|
| S |
C
A |
G |
S |
C
B |
G |
|
S |
C |
G |
|
energy
A | B |
|
hype
A | B |
|
pop
A | B |
|
mgr
A | B |
|
FIGHT
RATING
53% |
|
|
|
|
|
|
|
Undercard bout
|
Coming up we have a light heavyweight MMA rules bout between Nick Diaz (ranked 0 p4p, 0 weight class) and Rener Gracie (ranked 0 p4p, 0 weight class). Diaz comes to the ring accompanied by Fort Minor-Remember The Name. Rener Gracie told me before the fight that he's been watching a lot of DVDs so let's see if that helps him in this one! I can't wait to find out!
 |
|
 |
| 185 cm
26
180 lbs
5 - 4 - 0 |
|
190 cm
20
199 lbs
3 - 1 - 0 |
Abu Dhabi Champ
World class boxer
Insanely flexible |
|
Good wrestler
Counter fighter
Tends to cut |
|
| |
|
Ladies and gentlemen. This fight is 3 rounds, in the light heavyweight division.
Introducing the fighter to my left, fighting out of the red corner.
With a record of
5 - 4 - 0, fighting out of New York, Nick Diaz!
And introducing the fighter to my right, fighting out of the blue corner.
With a record of
3 - 1 - 0, fighting out of London, Rener Gracie!
The judges for this bout are Sam Margolis, James Ackerman and Andrew Berry.
The bell rings for round one and we are underway!
Diaz misses with a takedown attempt. He shot from a bit too far out.
Gracie with a lazy takedown attempt
and Diaz counters with a lovely shot to the body.
A really sloppy takedown attempt there from Diaz.
Diaz drives through with a really nice takedown into side control.
Diaz thinks about going for a far side armbar but bails out and retains the dominant position instead.
Diaz goes for an armbar here - this could be all over! But no, Gracie has escaped beautifully and is now on top in side control! Oh, that's unlucky for Diaz but great work by Gracie.
Diaz is trying to improve his position.
Gracie wants to lay and pray for a moment but Diaz keeps working.
Diaz is trying to control Gracie's posture but Gracie avoids it.
That's one minute gone in the round.
Gracie trying to control the position but Diaz is working away.
Gracie tries to move into full mount but can't pass Diaz's legs.
Diaz tries to buck Gracie off but Gracie is having none of it.
Gracie wants to control but Diaz is keeping him busy.
Diaz is trying to get back to half guard. He's pushing on Gracie's leg. He's managed it. Nice work.
Diaz wants to improve his position but Gracie is controlling well.
Gracie is thwarting Diaz's attempts to control the position.
Gracie is keen to just control but Diaz is a slippery customer.
That's two minutes gone in the round.
Gracie is looking for a kimura. It's going to be difficult to finish that from half guard though and Diaz defends it well.
Gracie is looking to take a break and control but Diaz is keeping him honest, looking to work from the bottom.
Diaz looking to work for a kimura from the bottom.
Diaz actively working from the bottom here.
The fighters are tangled up in the ropes here. We might need a restart if the fighters can't break free themselves.
Diaz missing with punches from the bottom.
Both fighters really going for it on the ground here!
Gracie uses his free foot to push down on Diaz's thigh. Eventually he works his other foot free and he's advanced to mount - this is trouble for Diaz.
Gracie fails to take his opponent's back.
Gracie jumps to side control looking for an arm triangle but Diaz manages to avoid the submission attempt.
The crowd cheering loudly, showing their appreciation for the quality fight we're seeing here.
Diaz gets back to half guard.
That's three minutes gone in the round.
Gracie tries to pass to full mount but Diaz defends it.
Gracie trying to control the pace.
Gracie seems very keen to just sit and control from half guard but Diaz does not like that idea so much and is remaining active off his back.
The fighters are battling for position here. Diaz manages to regain full guard. Nice work.
Gracie trying to control the position from guard on top but Diaz is wriggling around, looking for whatever he can.
Gracie tries to free his leg and advance position but Diaz is retaining full guard.
Gracie is persisting with the attempt to improve his position.
Gracie wants to control from the top but Diaz keeps moving.
Diaz is active off his back here, looking for submissions.
That's four minutes gone in the round.
Gracie is stalling in the full guard.
Gracie must be cautious of submissions here, given that his opponent has the superior Jiu Jitsu.
Gracie wants to control from the top but Diaz keeps moving.
The ref stands the fighters back up. Rener Gracie was stalling too much, according to the referee.
Diaz shoots in but doesn't get the takedown
and Gracie counters with a nice shoot takedown that brings the fighters to the ground.
That's three failed takedown attempts in the round for Nick Diaz. That's going to take a lot out of him.
This is a great period of action - very entertaining stuff!
Gracie wants to control from the top but Diaz keeps moving.
Diaz keeping full guard, as Gracie tries to pass.
Diaz working a defensive guard here.
Diaz looking for submissions from the bottom here. Moving his hips around, possibly looking for an armbar.
Diaz is throwing his legs up, looking for submissions. Gracie is aware though and is defending well.
The fighters are trapped in the ropes so we're going to have a reposition here. The ref calls for a break and repositions the fighters in the center of the ring.
That's five minutes gone in the round.
Gracie advances position into side control!
Diaz is not content to let Gracie control the position.
Diaz stops Gracie from passing to mount.
Gracie tries to advance position but instead Diaz slips a leg back in to half guard.
Diaz looking for submissions from an awkward position here.
Diaz is not content to let Gracie control the position.
Gracie content to sit in half guard and control for a moment.
Diaz is refusing to be controlled, as Gracie sits in half guard.
That's six minutes gone in the round.
Gracie prevents Diaz from improving his position.
Gracie tries to pass to full mount but Diaz defends it.
Diaz makes his way to full guard. A much better position for Diaz.
Gracie controlling from the top position.
It looks like the ref is thinking about a standup.
Gracie drops back looking for a leg! Diaz is in trouble here! The fighters roll with the hold and Diaz manages to kick Gracie off! Gracie jumps back into Diaz's guard.
Diaz has a loose triangle. He'll be looking to tighten that up but Gracie can see exactly what he's planning and manages to posture up and free himself.
That's seven minutes gone in the round.
Gracie wants to pass the guard but Diaz is keeping the position.
Diaz working from the bottom, still in full guard. He's managed to get a loose triangle. Gracie doesn't seem to be doing much to defend here, obviously he feels comfortable in the position. Gracie manages to throw the legs off his shoulder and he's back into guard - no problem.
Gracie stands up and looks to throw the legs aside to pass to side control. Diaz swivels though and keeps the full guard.
Gracie engaging in some classic timewasting tactics.
Gracie wants to control from the top but Diaz keeps moving.
Gracie got a little sloppy there for a moment and Diaz has worked his way into a loose triangle - can he finish it?! No, Gracie has managed to get both his arms back between Diaz's legs - danger averted.
Gracie trying to control but Diaz is working from the bottom.
That's eight minutes gone in the round.
Gracie trying to pass the guard but can't manage it just yet.
Diaz working from the bottom, still in full guard. He's managed to get a loose triangle. Gracie doesn't seem to be doing much to defend here, obviously he feels comfortable in the position. Gracie manages to throw the legs off his shoulder and he's back into guard - no problem.
Gracie passes Diaz's left leg - he's now in half guard.
Diaz is looking to improve his position.
Still in half guard, Gracie seems content to control.
This is a great period of action - very entertaining stuff!
Gracie uses his free foot to push down on Diaz's thigh. Eventually he works his other foot free and he's advanced to mount - this is trouble for Diaz.
Gracie wants to control the pace but Diaz is squirming around nicely.
That's nine minutes gone in the round.
Gracie pushing the pace here, looking to move to his opponents back and work for a finish.
Diaz is desperately trying to get back to half guard.
Diaz tries to hold on but Gracie postures up.
Gracie wants to control the pace but Diaz is squirming around nicely.
Diaz has worked his way to half guard, taking advantage of Gracie's lack of action.
Diaz is looking for a sweep. Gracie is wise to his cunning plan and keeps the top position.
As the round comes to an end the crowd are showing their appreciation for a great round of action.
Diaz trying to control here.
Gracie trying to control the action but Diaz is working from the bottom.
Diaz looking for submissions off his back.
And thats the end of the round the fighters go back to their corners.
Rener Gracie dominated that round.
That's time! Diaz's corner gives him a slap on the ass as he gets ready to fight.
Gracie shoots in looking for a double leg takedown. Diaz defends it nicely.
Diaz bobs and weaves into range and then changes levels and scores with a nice takedown into side control.
Diaz is trying to get an arm triangle but Gracie is defending well.
Diaz is looking to finish here, going for an Americana. Gracie knows the correct defense though, so he's OK.
Gracie is trying to improve his position.
That's one minute gone in the round.
Diaz goes for an armbar! This could be all over! Wait, no, Gracie rolls with the submission and now he's on top in Diaz's guard! Nice work there by Gracie!
Diaz throwing his legs up looking for a triangle.
Diaz keeping moving, preventing Gracie from controlling successfully.
Gracie got a little sloppy there for a moment and Diaz has worked his way into a loose triangle - can he finish it?! No, Gracie has managed to get both his arms back between Diaz's legs - danger averted.
Diaz pulls Gracie in close to prevent any damage.
Gracie trying to control the position from guard on top but Diaz is wriggling around, looking for whatever he can.
That's two minutes gone in the round.
Gracie pushes down on Diaz's leg and manages to get into half guard.
Diaz is looking to improve his position.
Gracie wants to take a breather but Diaz is having none of it.
Gracie looking to pass the half guard. Not this time.
Diaz trying to control from the bottom.
Gracie is trying to control the action in half guard but Diaz is working away on the bottom, looking perhaps to get back to full guard.
Gracie wants to free his trapped foot but Diaz is holding on for dear life with his legs.
Well, the referee has seen enough. Neither fighter is active enough on the ground so he's stood them back up.
Diaz fails with a rather predictable takedown attempt.
The fans in attendance giving it up for the two fighters, who have really let it all hang out in the last minute or so!
Diaz shoots in and bounces Gracie off the ropes to secure the takedown into guard.
That's three minutes gone in the round.
Diaz tries to free his leg and advance position but Gracie is retaining full guard.
Diaz slips nicely into half guard.
Diaz is keen to just control but Gracie is a slippery customer.
Gracie gets full guard.
Gracie working a defensive guard here.
Gracie preventing the ground and pound from doing any damage.
Diaz trying to pass the guard but can't manage it just yet.
Gracie working a defensive guard here.
That's four minutes gone in the round.
We may be looking at a referee standup if the pace doesn't pick up soon.
OK we're going to have a standup here. Rener Gracie hasn't been effective enough on the ground and the referee wants a restart.
Diaz shoots in and drives through. Gracie sprawls well.
Diaz gets a double leg takedown into Gracie's guard.
Both fighters are absolutely exhausted here.
Gracie wants to sweep but no luck.
Wooooo! Give it up for these two warriors! They are putting on a show!
Gracie is working from a closed guard but he's struggling to control his opponent.
Gracie looking to control the pace of the fight rather than finish it.
Gracie keeping moving, preventing Diaz from controlling successfully.
That's five minutes gone in the round.
Gracie managing to control the position.
Diaz pressing down on his opponent's thigh, looking to pass guard. Gracie is keeping the position for now.
The ref stands the fighters back up. Rener Gracie was stalling too much, according to the referee.
Diaz tries to drive through with a takedown attempt but Gracie defends well and Diaz ends up having to push Gracie into the ropes where they will battle it out in the clinch.
That's three failed takedown attempts in the round for Nick Diaz. That's going to take a lot out of him.
Diaz turns his hips and lands a very nice judo throw into side control!
Diaz thinks about going for a far side armbar but bails out and retains the dominant position instead.
Gracie is trying to improve his position.
That's six minutes gone in the round.
Diaz working away.
Diaz tries for a kimura. Not really close to a finish though.
Diaz is trying to get an arm triangle but Gracie is defending well.
Diaz is looking to finish here, going for an Americana. Gracie knows the correct defense though, so he's OK.
Gracie is trying to get back to half guard.
That's seven minutes gone in the round.
Gracie regains half guard.
Rener Gracie has got the better of the ground game so far.
Gracie is looking to improve his position.
Diaz wants to take a breather but Gracie is having none of it.
Gracie tries to get to full guard but Diaz has control of the leg.
Gracie is looking to sinch up a guillotine here but Diaz pulls his head out easily.
Gracie has no desire to be mounted, so is trying to control. Diaz is working away from the top position though.
The fighters are battling for position here. Gracie manages to regain full guard. Nice work.
That's eight minutes gone in the round.
Gracie trying to control the position.
Diaz is working Gracie over from the guard. He should look to pass the guard and do a little more damage with these strikes.
Diaz trying to control the position from guard on top but Gracie is wriggling around, looking for whatever he can.
Gracie trying to keep a closed guard but Diaz is proving a slippery customer.
Diaz stopping the sweep attempt from Gracie.
Diaz slows down the pace of the fight for a moment. He'll need to remain active if he doesn't want to see the fight stood back up.
Gracie is working from a closed guard but he's struggling to control his opponent.
That's nine minutes gone in the round.
Diaz is working the ground and pound from guard. He might want to try advancing position though to get more of an impact.
Gracie managing to control the position.
The referee is pacing around the two fighters - he looks like he's thinking about a standup.
The ref stands the fighters back up, due to lack of action by Rener Gracie.
Diaz shoots in but Gracie avoids the takedown attempt easily.
Nick Diaz seems to be the more aggressive standup fighter in this bout.
As the round comes to an end the crowd are showing their appreciation for a great round of action.
Diaz tries to clinch up but Gracie circles away and keeps his distance.
Diaz drops down and drives through with a powerful takedown into guard.
And thats the end of the round the fighters go back to their corners.
Nick Diaz dominated that second round.
The corners get their ten second warning. Both fighters stand from their stools and stare eachother down, ready to get back to the action. So, we enter the final round. Let's see if either fighter can bring us a finish, or whether we're going to the judges scorecards.
Diaz fails to land the takedown.
Gracie with a lazy takedown attempt
and Diaz counters with a series of strikes. Gracie will be more careful next time no doubt.
Gracie with a poor takedown
and Diaz counters with a nice uppercut.
Nice sprawl there from Gracie as Diaz shoots in.
Gracie gets his takedown attempt stuffed easily
and Diaz connects with a straight left hand counter down the middle.
Nick Diaz has stuffed three takedown attempts in the round now. That's going to take a lot out of Rener Gracie.
Gracie gets caught flat footed, as Diaz shoots in with a quick takedown into guard.
Gracie looking to sweep here. No luck so far.
Diaz trying to control the position from guard on top but Gracie is wriggling around, looking for whatever he can.
Gracie is trying to control the position from the bottom.
Both fighters are breathing heavily.
That's one minute gone in the round.
Diaz wants to pass the guard but Gracie is keeping the position.
Gracie looking for a sweep. Not yet Gracie, not yet.
Diaz slips nicely into half guard.
Gracie is defending against the submission attempts here by Diaz.
Gracie trying to control here.
That's two minutes gone in the round.
Diaz is looking for an arm triangle, whilst trying to pass to side control. Gracie doesn't seem that keen to cooperate though. No luck this time Diaz.
Diaz works his way into side control.
Diaz swings around for an armbar but Gracie sees it coming a mile off and turns beautifully into Diaz's guard.
Diaz is trying to keep Gracie in close.
Diaz wants to stand up but Gracie is controlling him.
That's three minutes gone in the round.
Gracie has gone for a leg lock! Diaz slips out almost immediately though and dives into Gracie's guard.
Gracie looking to control.
Gracie is working an open guard here, looking to improve his position. No doubt that will leave him open to counters but at least he's being more offensive.
Diaz wants to control from the top but Gracie keeps moving.
Gracie looking to hit a scissor sweep but Diaz is one step ahead there.
Gracie is avoiding any damage by keeping wrist control.
That's four minutes gone in the round.
Diaz with a couple of shots to the head there. Not particularly brutal.
Diaz pressing down on his opponent's thigh, looking to pass guard. Gracie is keeping the position for now.
Gracie wants to sweep but no luck.
Gracie trying to control the position.
Diaz throwing shots from guard but he's hitting more mat than opponent.
Diaz loading up with the ground and pound but he's missing more than he's landing in this flurry.
Gracie seems keen to control Diaz's posture.
Diaz trying to control but Gracie is working from the bottom.
That's five minutes gone in the round.
Gracie controls Diaz momentarily but Diaz frees himself.
The ref stands the fighters back up, due to lack of action by Rener Gracie.
Gracie tries to sprawl but Diaz drives through with a takedown into half guard.
Gracie tries to roll over but Diaz keeps him under control.
Gracie is refusing to be controlled, as Diaz sits in half guard.
Diaz is pressing down on Gracie's thigh, looking to free his foot. Gracie is holding on for now.
Diaz is sneakily working for an arm triangle but Gracie sees it coming and defends easily.
That's six minutes gone in the round.
Gracie trying to control but Diaz postures up.
Diaz is working for submissions here but there's nothing on.
Diaz trying to control from half guard but Gracie is working away.
Gracie tries to roll over but Diaz keeps him under control.
Diaz is working for submissions here but there's nothing on.
That's seven minutes gone in the round.
Diaz is sneakily working for an arm triangle but Gracie sees it coming and defends easily.
Diaz is working for a submission of some sort.
Gracie trying to hold on to Diaz's head to control him but Diaz postures up.
Diaz wants to work for an arm triangle but Gracie is really keeping half guard well and defending the submission attempt.
Gracie is pressing down on Diaz's left leg trying to get back to full guard. He's managed it.
Diaz throwing elbows and punches but not connecting, as Gracie works some decent striking defense from the bottom.
That's eight minutes gone in the round.
Gracie keeping moving, preventing Diaz from controlling successfully.
Diaz tries to free his leg and advance position but Gracie is retaining full guard.
Gracie working a defensive guard here.
Diaz trying to control the position from guard on top but Gracie is wriggling around, looking for whatever he can.
The referee has ruled that neither fighter is active enough on the ground and has stood them back up.
A solid leg kick lands there for Diaz.
Gracie doesn't react quick enough there as he takes a shot to the body.

Diaz has Gracie up against the ropes in a clinch.
That's nine minutes gone in the round.
Diaz lands a body punch in the clinch.
Diaz unloads a knee to the mid-section. Gracie lets out a prehistoric sounding urrrrgh.
Diaz gets control of Gracie's arms and successfully pulls guard. Diaz will no doubt be looking for submissions off his back.
Diaz trying to control the position.
Gracie tries to free his leg and advance position but Diaz is retaining full guard.
Diaz has a butterfly guard looking to sweep but Gracie has passed into side control.
Diaz gets one leg under and gets the fight to half guard.
As the round comes to an end the crowd are showing their appreciation for a great round of action.
Gracie stops Diaz from getting back to his feet.
Gracie is keen to just control but Diaz is a slippery customer.
Gracie is in a good position here but he's just trying to control... And he's not even managing to do that successfully.
And that's the end of the fight!
Nick Diaz showed his dominance in that final round.
Well Diaz has outscored his opponent in every aspect of the fight today. Only a scarily incompetent judge or two will keep him from a well deserved win... Over to the ring announcer for the scorecards.
Ladies and gentlemen, after 3 rounds of action, we go to the scorecards for a decision.
Judge Sam Margolis scores the fight for Nick Diaz!
Judge James Ackerman scores the fight for Nick Diaz!
Judge Andrew Berry scores the fight for Nick Diaz!
Nick Diaz wins by unanimous decision!
During a confident post fight interview, Nick Diaz thanked all his fans. He seemed very genuine when describing how motivated his fans keep him.
|
|
|
|
|
|
|
|
|
|
|
|
|
|
|
|
|
|
|
|
|
|
|
| S |
C
A |
G |
S |
C
B |
G |
|
S |
C |
G |
|
energy
A | B |
|
hype
A | B |
|
pop
A | B |
|
mgr
A | B |
|
FIGHT
RATING
58% |
|
|
|
|
|
|
|
Co-main event
|
Coming up we have a heavyweight MMA rules bout between Judge Holden (ranked 0 p4p, 0 weight class) and Elbrys Gora (ranked 0 p4p, 0 weight class). Chooooooooon! I think Holden might be my favorite fighter, now he's come out to Act a Fool. Gora has chosen Cadillac Records - Howlin' Wolf Sings as his entrance music. Over to our ring announcer for the fighter introductions!
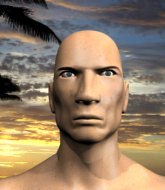 |
|
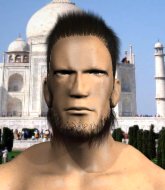 |
| 200 cm
34
219 lbs
20 - 13 - 0 |
|
184 cm
27
272 lbs
14 - 7 - 0 |
BJJ Red Belt
World class boxer
Cardio machine |
|
TWGC Champion
Excellent boxer
Good gas tank |
|
| |
|
Ladies and gentlemen. This fight is 5 rounds, in the heavyweight division.
Introducing the fighter to my left, fighting out of the red corner.
With a record of
20 - 13 - 0, fighting out of Las Vegas, Judge Holden!
And introducing the fighter to my right, fighting out of the blue corner.
With a record of
14 - 7 - 0, fighting out of London, Elbrys Gora!
The judges for this bout are Phil Schofield, James Atkins and Andrew Berry.
The bell rings for round one and we are underway!
Gora drops down and drives through with a powerful takedown into guard.
The referee is pacing around the two fighters - he looks like he's thinking about a standup.
Holden is working for submissions here. He's thrown up his legs looking for a triangle but Gora frees his head nicely. Oh but Holden has switched to an armbar! Gora is tapping furiously! Lovely submission there!
Ladies and gentlemen, after 0:18 of round 1, we have a winner by way of Submission (Triangle Armbar). Judge Holden!
Our winner, Judge Holden, made sure he spent some time buttering up the crowd during his post fight interview, which will no doubt bring him a few more fans.
|
|
|
|
|
|
|
|
|
|
|
|
|
|
|
|
|
|
|
|
|
|
|
| S |
C
A |
G |
S |
C
B |
G |
|
S |
C |
G |
|
energy
A | B |
|
hype
A | B |
|
pop
A | B |
|
mgr
A | B |
|
FIGHT
RATING
22% |
|
|
|
|
|
|
|
Main event
|
Coming up we have a super heavyweight MMA rules bout between Jacks Sole (ranked 0 p4p, 0 weight class) and Merrimac Mjolnir (ranked 0 p4p, 0 weight class). Mjolnir has chosen Die for Metal as his entrance music, which hasn't gone down very well with the crowd. These two fighters really are very evenly matched on the feet - it will be fascinating to see who can assert themselves in that aspect of the fight.
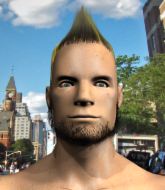 |
|
 |
| 195 cm
37
270 lbs
25 - 15 - 0 |
|
195 cm
35
271 lbs
33 - 8 - 0 |
Good wrestling
World class boxer
Cardio machine |
|
BJJ Purple Belt
Dangerous knees
Heavy handed |
|
| |
|
Ladies and gentlemen. This fight is 3 rounds, in the super heavyweight division.
Introducing the fighter to my left, fighting out of the red corner.
With a record of
25 - 15 - 0, fighting out of Los Angeles, Jacks Sole!
And introducing the fighter to my right, fighting out of the blue corner.
With a record of
33 - 8 - 0, fighting out of Amsterdam, Merrimac Mjolnir!
The judges for this bout are Colin Fotheringham, Chris Edwards and Phil Schofield.
The bell rings for round one and we are underway!
Sole takes one on the chin but seems OK.
Sole connects with a leg kick. Mjolnir looked like he was expecting something else and didn't defend it.
Sole keeping his hands up high there, blocking the jab from Mjolnir.
Merrimac Mjolnir seems to be the more aggressive standup fighter in this bout.
Sole connects with a jab.

It looks like Merrimac Mjolnir has been cut.
Sole checks a low kick. Bone on bone - not my idea of a good time.
Mjolnir on the receiving end of a decent leg kick there by Sole. Sole obviously looking to wear him down.
The crowd cheering loudly, showing their appreciation for the quality fight we're seeing here.
Sole throws a leg kick which misses Mjolnir's front leg but catches the back leg as Mjolnir tries to avoid it.
A slapping leg kick lands for Sole.
A punch combination from Mjolnir misses.
Mjolnir looks winded!
Sole displaying good standup as he scores with a three punch combination.
Mjolnir misses with a body kick.
Mjolnir scores with a jab to the jaw of his opponent.
Sole shoots in and scores a nice double leg takedown into half guard.
The referee must be thinking about standing these guys back up.
Sole passes the half guard and he's now in mount! Big trouble for Mjolnir!
The fighters are trapped in the ropes so we're going to have a reposition here. The ref calls for a break and repositions the fighters in the center of the ring.
That's one minute gone in the round.
Sole is still in mount, landing shots to his trapped opponent. Mjolnir can't stay in a position like this for much longer.
Sole lands an elbow that was bordering on illegal but the referee lets it go with a warning.
The cut above Merrimac Mjolnir's eye is starting to cause him problems now.
Mjolnir blocking the ground and pound.
Mjolnir is writhing around trying to get back to his feet.
That's two minutes gone in the round.
Sole lands a shot to the body, followed up by a shot to the exposed head of his trapped opponent.
We've seen a great period of action over the last minute or so - credit to both fighters for going all out!
Sole throwing sloppy strikes here. Perhaps if he tightened up his striking from such a dominant position, he'd be able to finish easier.
The crowd growing excited in anticipation of a finish here! Right on cue, Sole cracks his opponent with a massive right hand that draws loud cheers!
Merrimac Mjolnir's cut is absolute horrible now. This looks like something out of a horror film with blood covering both fighters.
The referee calls the doctor in to look at Merrimac Mjolnir's cut. Oh no, the doctor has called an end to the bout!
Ladies and gentlemen, after 2:51 of round 1, we have a winner by way of TKO (Cut). Jacks Sole!
A relieved looking Jacks Sole thanked the fans for their support and gave the usual line about them being amazing. They seemed to believe that he actually meant it.
|
|
|
|
|
|
|
|
|
|
|
|
|
|
|
|
|
|
|
|
|
|
|
| S |
C
A |
G |
S |
C
B |
G |
|
S |
C |
G |
|
energy
A | B |
|
hype
A | B |
|
pop
A | B |
|
mgr
A | B |
|
FIGHT
RATING
49% |
|
|
|
|
|
|
|
|
|
|
