 |
Carnage 7 PBP Commentary |
Undercard bout
|
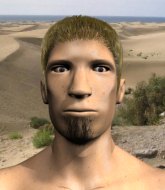
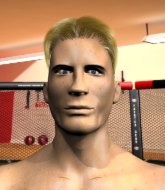
Coming up we have a middleweight MMA rules bout between Ryan Oro (ranked 0 p4p, 0 weight class) and Vito Rodriguez (ranked 0 p4p, 0 weight class). Both fighters look fresh as a daisy as they make their way towards the cage.
 |
|
 |
| 187 cm
16
195 lbs
1 - 2 - 0 |
|
185 cm
25
185 lbs
0 - 1 - 0 |
BJJ White Belt
Brawler
Granite chin |
|
BJJ Brown Belt
Decent boxing
Granite chin |
|
| |
|
Ladies and gentlemen. This fight is 3 rounds, in the middleweight division.
Introducing the fighter to my left, fighting out of the red corner.
With a record of
1 - 2 - 0, fighting out of Los Angeles, Ryan Oro!
And introducing the fighter to my right, fighting out of the blue corner.
With a record of
0 - 1 - 0, fighting out of Los Angeles, Vito Rodriguez!
The judges for this bout are Frank Antenori, Don Winkell and Timothy Bukovac.

The bell rings for round one and we are underway!
Oro scoring well with a low kick there.
Rodriguez fails miserably with a takedown attempt.
Rodriguez tries to clinch but Oro moves away
and Oro counters with a left to the body.
Rodriguez throws a head kick that misses.
Oro looking to land some kicks to the body here.
Rodriguez fails with a takedown attempt from distance.
Rodriguez closes the distance looking to clinch
and Oro counters with a good, hard body kick but Rodriguez shrugs it off.
Rodriguez swings for the body but Oro moves out of range.
Rodriguez closes the distance looking to clinch
and Oro counters with a leg kick that reverborates around the arena.
Rodriguez looks winded!
The crowd are loving this. Great action here.
Rodriguez shoots for a double leg takedown but Oro sprawls well. He's pushed Rodriguez's face into the mat and manages to get back to his feet relatively easily.
Ryan Oro has stuffed three takedown attempts in the round now. That's going to take a lot out of Vito Rodriguez.
Rodriguez shoots in looking for a takedown. Oro tries to sprawl out of it but Rodriguez keeps driving through. The fighters are pinned against the cage. Oro manages to get underhooks and after a bit of a struggle, circles away and we're back to standing.
Oro loads up on a big right hand but Rodriguez slips the punch.

That's one minute gone in the round.
Oro looking to take his opponent's legs away with the low kicks.
Rodriguez stumbles momentarily as he takes a strong leg kick from Oro.
Oro throws out a powerful jab.

It looks like Vito Rodriguez has been cut.
Oro fakes with a right hand and throws a good leg kick, right into the thigh. That had to hurt Rodriguez.
The crowd cheering loudly, showing their appreciation for the quality fight we're seeing here.
Rodriguez takes a kick to the body and keeps moving.
Oro tries to land with a swinging hook to the body but Rodriguez was well out of range. Poor timing from Oro.
A slapping body kick lands there for Oro.
Oro fakes a jab and scores with a low kick.
Donk. Oro catches Rodriguez right on the button with a cross.
Oro throws a hook but Rodriguez avoids it easily.
Rodriguez takes a big uppercut there. He seems a bit wobbly but no, he's OK.

That's two minutes gone in the round.
Oro thuds a left hand into Rodriguez's body.
Oro with a nice looking leg kick. You could hear that one land in a back row.
Nice body kick from Oro.
Oro throws a nice inside leg kick.
Oro lands with a nice body kick.
Rodriguez is trying desperately to land a takedown but Oro is having absolutely none of it. This is turning into a bit of a nightmare for Rodriguez.
Rodriguez throws a right and a left that Oro avoids nicely.
Oro lands with a nice body kick.
Oro moves into range and lands a nice body kick.
Oro moves into range and lands a nice leg kick.
Oro thows a body kick. Rodriguez tries to catch it but that hurt him.
Oro chopping away at his opponent's legs.
Rodriguez takes a push kick to the midsection and stumbles backwards.

That's three minutes gone in the round.
Oro pulls out of a head kick attempt.
Rodriguez has his front leg slapped to the side - a nice low kick landing there from Oro.
Oro throws a series of punches but Rodriguez avoids them all with ease.
Rodriguez chopped to the floor by a nice leg kick but he springs right back up before Oro can pounce on him.
Rodriguez tries to check the leg kick but that clearly hurt him.
A slapping body kick lands there for Oro.
Rodriguez has a nice red mark on his side after a thudding body kick by Oro.
The fans in attendance giving it up for the two fighters, who have really let it all hang out in the last minute or so!
Oro lands a big head kick that sends Rodriguez to the canvas! Oro follows up with strikes from the mount that forces the ref to step in and stop the fight!
Ladies and gentlemen, after 3:42 of round 1, we have a winner by way of TKO (Strikes). Ryan Oro!
Ryan Oro took some time post fight to say the following; 'BITCH ASS WRESTLER. Your my Bitch now.FUCK DA POLICE!!!!!!!!!!!!!'.
|
|
|
|
|
|
|
|
|
|
|
|
|
|
|
|
|
|
|
|
|
|
|
| S |
C
A |
G |
S |
C
B |
G |
|
S |
C |
G |
|
energy
A | B |
|
hype
A | B |
|
pop
A | B |
|
mgr
A | B |
|
FIGHT
RATING
75% |
|
|
|
|
|
|
|
Undercard bout
|
|
|
|
Undercard bout
|
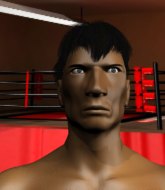
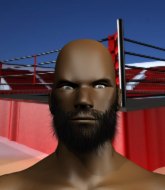
Coming up we have a light heavyweight MMA rules bout between Proffesor Ness (ranked 0 p4p, 0 weight class) and Jacob Liam (ranked 0 p4p, 0 weight class). Proffesor Ness is staring across the cage at his opponent, tweaking his nipples... Tweaking his own nipples that is.
 |
|
 |
| 188 cm
18
199 lbs
3 - 1 - 0 |
|
190 cm
18
210 lbs
1 - 0 - 0 |
BJJ Purple Belt
Brawler
Cuts easily |
|
BJJ Blue Belt
Brawler
Enjoys gardening |
|
| |
|
Ladies and gentlemen. This fight is 3 rounds, in the light heavyweight division.
Introducing the fighter to my left, fighting out of the red corner.
With a record of
3 - 1 - 0, fighting out of Los Angeles, Proffesor Ness !
And introducing the fighter to my right, fighting out of the blue corner.
With a record of
1 - 0 - 0, fighting out of Los Angeles, Jacob Liam!
The judges for this bout are , Don Winkell and Jack Bonds.
The bell rings for round one and we are underway!

Liam scores a trip takedown into side control. Nice.
The fighters are pressed up against the cage, both looking to find a bit of space to work.
Ness tries to improve position but can't.
Liam staying calm.
Liam misses with an attempted head punch from side control.
Liam taking a breather here.

Liam is trying to land an Americana. He has the arm isolated but Ness is keeping cool and he's avoided the danger for now.
Ness tries to work a leg under to get back to half guard but Liam wriggles his own leg back out and remains in side control.
Ness is trying to control Liam's posture but Liam avoids it.
Liam throwing shots but missing, from side control.
Liam thinks about going for a far side armbar but bails out and retains the dominant position instead.
That's one minute gone in the round.
Liam working away.
Ness is trying to get back to half guard. He's pushing on Liam's leg. He's managed it. Nice work.
Neither fighter is being very active at the moment, with Liam in particular looking to stall.
Ness is trying to control but can't.
Liam controlling the action here.

Ness with the active half guard here but Liam passes nicely into side control.
That's two minutes gone in the round.
Ness is positioning himself to get back to half guard.
Liam working the ground and pound but he's contacting the mat, not the fighter.
You can see the frustration on Ness 's face, being in this tough position on the bottom.
Ness tries to bench press Liam off him but Liam keeps the position.
Liam lands a knee to the body and follows it up with some ground and pound to the head. That will wear Ness down.
Ness sneaks a leg under to get back to half guard.
The fans in attendance giving it up for the two fighters, who have really let it all hang out in the last minute or so!
Ness is looking to improve his position.
Liam is looking to advance position but Ness won't allow it.
That's three minutes gone in the round.
Ness wants to control but Liam is keeping busy.
Liam looks over to his corner - he wants some instructions but his corner are not responding.
It looks like Liam might be adopting somewhat of a lay and pray gameplan here, which I'm sure won't go down too well with the paying fans in attendance... Or the ring announcers come to think of it.
Ness trying to control here.

The ref calls for a clean break and stands the fighters back up. Jacob Liam wasn't active enough on the ground.
Liam takes a hook to the side of the head. I wonder if that's got his ears ringing.

Liam rushes Ness and pushes him back against the cage in a clinch.
Ness tries to land a shot to the body but it's blocked.
Liam is working for a takedown up against the cage. He can't get it on this occasion though.
Ness tries to break the clinch but Liam is controlling the position.

That's four minutes gone in the round.
Ness avoiding damage as Liam throws knees to the body.
Ness doesn't land with the attempted body shot.
Ness wants to break free. God knows he wants to breaaaak freeee.
Both fighters working to control the clinch.
Liam is looking to score with knees to the body. Maybe he'll change it up and go body then head. Ness is defending well for now.
A head punch on the inside from Ness fails to land.
Ness is looking to break free of the clinch but Liam has double underhooks.
This is a great period of action - very entertaining stuff!
Liam has dropped down and is looking to force the takedown but it's defended by Ness after a bit of a struggle.
Ness misses with a short punch on the inside.
Ness fails to land with a short punch on the inside.
As the round comes to an end the crowd are showing their appreciation for a great round of action.
Ness has had enough of the clinch but Liam keeps him there for the moment.
Ness wants to break free. God knows he wants to breaaaak freeee.
Liam decides to pull guard.
Liam is pulling down on Ness 's head to control his posture.
And thats the end of the round the fighters go back to their corners.
A close round but Jacob Liam will probably get the nod.
The referee calls time. The cornermen exit stage left and we're back to business.

Liam bobs and weaves into range and then changes levels and scores with a nice takedown into side control.
Ness wants to control but Liam postures up.
Liam trying to control the position but Ness is working away.

Liam has had enough of the ground for now and decides to stand.
Liam throws the overhand right but ducks down into a quick takedown attempt. Ness was covering up waiting for the punch and Liam finishes the takedown easily into guard.
Liam throws a big right hand that misses.
Liam is sitting in guard, working some ground and pound.
Liam engaging in some classic timewasting tactics.
The crowd are loving this. Great action here.
Ness wants to sweep but no luck.
That's one minute gone in the round.
The ref warns both fighters not to hold the cage as they work up against the meshing.
Ness wants to control but instead he gets his guard passed and Liam is now in half guard.
Ness looking to work for a kimura from the bottom.
Ness tries to roll over but Liam keeps him under control.
Liam escapes and gets back to his feet.
Liam closes the distance, clinches up and gets a nice trip takedown into side control. Very smooth.
Liam stands up and beckons Ness to his feet.
Ness darts in and out, connecting with a jab.
That's two minutes gone in the round.
Wooooo! Give it up for these two warriors! They are putting on a show!
Ness throws a wild combination but nothing lands.
Ness misses with a wild body shot.
Liam showing good head movement there, avoiding the strikes from Ness .
Liam takes a jab on the nose there. A little bit of blood seems to be coming out. Hopefully that won't affect his breathing.
Liam drives through with a takedown into Ness 's guard. Let's see what he can do from the top position.
Liam works a leg free and moves into half guard.
Liam is thwarting Ness 's attempts to control the position.
Liam is working for a submission of some sort.
Ness has no desire to be mounted, so is trying to control. Liam is working away from the top position though.
That's three minutes gone in the round.
Liam prevents Ness from improving his position.
Ness trying to control but Liam postures up.
Liam trying to control the pace.
Jacob Liam has got the better of the ground game so far.
Liam lands with a punch from half guard.
Ness is looking for a sweep. Liam is wise to his cunning plan and keeps the top position.
Liam wants to pass to mount but Ness is defending the position.
That's four minutes gone in the round.
Ness wants to get back to full guard but Liam has passed into side control.
Ness stops Liam from passing to mount.
Liam in side control lands a decent elbow.
Ness tries to bench press Liam off him but Liam keeps the position.
Liam decides to take the fight back to the feet.
Wooooo! Give it up for these two warriors! They are putting on a show!
Liam moves his head to the side to avoid a jab but walks straight into a cross.
The crowd are going absolutely nuts as the round comes to an end - what a fantastic round of action!
A shot to the liver by Ness . Beautiful body shot.
Liam fakes a strike and closes the distance, dragging Ness to the ground. Liam is now in Ness 's guard.
Liam is breathing heavily.
Ness looking to sweep here. No luck so far.
And thats the end of the round the fighters go back to their corners.
Jacob Liam showed his class in that round. I'd imagine he'll take it on all the scorecards.
That's the end of the round. The referee orders the cornermen out of the cage so we can get back down to business. This is the final round!

Liam takes a big uppercut there. He seems a bit wobbly but no, he's OK.
Liam takes a really solid shot there but just smiles back and shrugs his shoulders.
Ness scores with a reasonable looking shot to the body. Liam doesn't seem bothered though.
Ness lands an overhand right.

Liam is rocked!
Ness looks to land a right hand but Liam moved out of range.
Ness drops Liam with a straight right hand, right on the button! Ness follows him down to the mat and pounds him out with hammerfists until the referee jumps in to end the fight!
Ladies and gentlemen, after 0:27 of round 3, we have a winner by way of TKO (Strikes). Proffesor Ness !
After the big win, Proffesor Ness made sure to do all the important stuff like thanking his sponsors Untouchable Fight Nutrition Q160 $125 and telling the interviewer how much he loves him.
|
|
|
|
|
|
|
|
|
|
|
|
|
|
|
|
|
|
|
|
|
|
|
| S |
C
A |
G |
S |
C
B |
G |
|
S |
C |
G |
|
energy
A | B |
|
hype
A | B |
|
pop
A | B |
|
mgr
A | B |
|
FIGHT
RATING
100% |
|
|
|
|
|
|
|
Undercard bout
|
Coming up we have a welterweight MMA rules bout between Mike Eash (ranked 0 p4p, 0 weight class) and Arn De Gothia (ranked 0 p4p, 0 weight class). Eash comes to the cage accompanied by Eminem-Bezerk. De Gothia has chosen Die for Metal as his entrance music. Arn De Gothia will no doubt be trying to keep this one on the feet, where he has a distinct advantage.
 |
|
 |
| 180 cm
22
170 lbs
1 - 0 - 0 |
|
175 cm
18
175 lbs
1 - 0 - 0 |
Decent wrestler
Brawler
Good chin |
|
Good takedowns
Basic striking
Experienced |
|
| |
|
Ladies and gentlemen. This fight is 3 rounds, in the welterweight division.
Introducing the fighter to my left, fighting out of the red corner.
With a record of
1 - 0 - 0, fighting out of Los Angeles, Mike Eash!
And introducing the fighter to my right, fighting out of the blue corner.
With a record of
1 - 0 - 0, fighting out of Los Angeles, Arn De Gothia!
The judges for this bout are Jack Bonds, Timothy Bukovac and .
The bell rings for round one and we are underway!
Eash keeping at a good range here, avoiding a leg kick.
De Gothia lands with a nice low kick. That'll leave a bruise.
Eash on the wrong end of a vicious looking body shot.
Eash fails in his attempt to clinch.
De Gothia tries to score with a leg kick but it misses it's target.
De Gothia looks for a takedown but Eash sprawls well.
De Gothia displays good takedown defense there as he swats away a double leg from Eash.
Eash pivots, looking for a leg kick but De Gothia is out of range and Eash settles back down.
De Gothia closes the distance and clinches up with Eash, looking for a takedown. De Gothia pushes Eash against the cage but Eash circles to the side and manages to break the clinch.
De Gothia lands with a right hand.
De Gothia fakes low and throws an overhand right that catches Eash on the side of the head.
Eash walks straight into an uppercut. Luckily it didn't land flush.
Eash stuffs the takedown attempt from De Gothia. De Gothia gets slowly back to his feet.
Mike Eash has stuffed three takedown attempts in the round now. That's going to take a lot out of Arn De Gothia.
De Gothia pivots, looking for a leg kick but Eash is out of range and De Gothia settles back down.
That's one minute gone in the round.
De Gothia lunges at Eash with a hook that half lands and is half blocked by Eash's hand.
De Gothia scores a trip takedown into side control. Nice.
Eash is breathing heavily.
Eash can't do much from the bottom here.
De Gothia throwing strikes but missing, from side control.
Eash tries to improve position but can't.
De Gothia is working for what looks like an arm triangle here. Eash is trying to escape and De Gothia transitions quickly into an armbar! He's slapped it on tight and Eash is forced to tap! Nice work there by De Gothia! Very nice indeed!
Ladies and gentlemen, after 1:52 of round 1, we have a winner by way of Submission (Armbar). Arn De Gothia!
Our winner, Arn De Gothia, made sure he spent some time buttering up the crowd during his post fight interview, which will no doubt bring him a few more fans.
Mike Eash was interviewed post fight and said 'Ill b back.'.
|
|
|
|
|
|
|
|
|
|
|
|
|
|
|
|
|
|
|
|
|
|
|
| S |
C
A |
G |
S |
C
B |
G |
|
S |
C |
G |
|
energy
A | B |
|
hype
A | B |
|
pop
A | B |
|
mgr
A | B |
|
FIGHT
RATING
42% |
|
|
|
|
|
|
|
Undercard bout
|
Coming up we have a featherweight MMA rules bout between Anthony Hammer (ranked 0 p4p, 0 weight class) and Notorious P I G (ranked 0 p4p, 0 weight class). Over to our ring announcer for the fighter introductions!
 |
|
 |
| 177 cm
24
154 lbs
0 - 1 - 0 |
|
166 cm
19
149 lbs
2 - 2 - 0 |
BJJ White Belt
Solid Muay Thai
KO power |
|
Good wrestler
Brawler
Determined |
|
| |
|
Ladies and gentlemen. This fight is 3 rounds, in the featherweight division.
Introducing the fighter to my left, fighting out of the red corner.
With a record of
0 - 1 - 0, fighting out of Amsterdam, Anthony Hammer!
And introducing the fighter to my right, fighting out of the blue corner.
With a record of
2 - 2 - 0, fighting out of Los Angeles, Notorious P I G!
The judges for this bout are Jack Bonds, Timothy Bukovac and Frank Antenori.
The bell rings for round one and we are underway!
P I G misses with a body shot. Nice footwork from Hammer.
Hammer takes a solid shot to the body. That one hurt him but he's trying not to show it.
P I G takes a swing at Hammer's ribcage but misses.
Hammer throws a quick head kick that skims the top of P I G's head.
It looks like Notorious P I G has been cut.
P I G just misses with a punch to the body.
A leg kick checked by Hammer.
Hammer throws a head kick that P I G semi-blocks.
P I G is rocked!
Hammer has a takedown stuffed.
P I G has a nice red mark on his side after a thudding body kick by Hammer.
This is a great period of action - very entertaining stuff!
Hammer fails with a takedown attempt from distance.
Hammer avoids the body shot from P I G.
Hammer walks straight into an uppercut. Luckily it didn't land flush.
P I G scores with a hook to the body. Hammer takes a step back and tries to catch his breath.
P I G is throwing a lot of body shots here, looking to wear down Hammer rather than just go for the knockout.
A jab lands there for P I G.
That's one minute gone in the round.
Hammer shoots in and drives through. P I G sprawls well.
That's three failed takedown attempts in the round for Anthony Hammer. That's going to take a lot out of him.
A combination from Hammer does no damage.
Hammer looks for a takedown but P I G sprawls well.
Hammer uses good head movement to avoid the hook from P I G.
Hammer goes for a double leg but P I G avoids the attempt and the two fighters end up clinched against the cage as P I G continues to drive forward.

Hammer escapes the clinch and we're back to striking.
P I G lands a jab to Hammer's midsection.
P I G looks to land a right hand but Hammer moved out of range.
P I G lands a body shot.
Hammer is breathing heavily.
P I G misses with a wild combination.
Hammer thows a body shot but no joy.
That's two minutes gone in the round.
Hammer throws a sloppy head kick
and P I G counters with a nice double leg into guard.
The fighters are pressed up against the cage, both looking to find a bit of space to work.
This has been an exciting period of action!
Hammer can't do much from the bottom at the moment, as P I G controls the pace.
P I G stops Hammer from standing up.
The ref stands the fighters back up, due to lack of action by Notorious P I G.
P I G cracks Hammer with an open hand slap.
P I G throws a jab when Hammer was well out of range.
Hammer blocks a leg kick.
P I G scores with a jab.
That's three minutes gone in the round.
P I G misses with a wild combination.
Hammer tries to clinch but P I G is having none of it.
Hammer shoots in but doesn't get the takedown
and P I G counters with a nice double leg into guard.
Hammer on his back here. We all know that wrestlers don't like being on their back so let's see if Hammer tries to get out of the position.
P I G controls the pace of the fight for a moment.

Hammer pushes P I G off and gets back to his feet.
P I G avoids a punch combination nicely.
That's four minutes gone in the round.
This fight brought to you by 5M nutrition - it's mmmmm tasty. Nice jab by P I G.
We've seen a great period of action over the last minute or so - credit to both fighters for going all out!
P I G throws a leg kick which misses Hammer's front leg but catches the back leg as Hammer tries to avoid it.
Hammer attempts a leg kick but it's missed by a good margin.
Notorious P I G is looking to keep the fight on the feet at all costs.
P I G looks to score with a jab to the body but Hammer is just out of range.
P I G stuffs a takedown. It's all about dictating where the fight takes place and P I G wants it to stay on the feet.
Hammer shoots in looking for a takedown. P I G tries to sprawl out of it but Hammer keeps driving through. The fighters are pinned against the cage. P I G manages to get underhooks and after a bit of a struggle, circles away and we're back to standing.
The crowd are going absolutely nuts as the round comes to an end - what a fantastic round of action!
P I G tries a low kick but Hammer avoids it.
Hammer shoots in but P I G avoids the takedown attempt easily.
And thats the end of the round the fighters go back to their corners.
Notorious P I G dominated that round.
The cut man is working on Notorious P I G's cut.
That's time! Hammer's corner gives him a slap on the ass as he gets ready to fight.
P I G digs a good body shot into Hammer's ribs.
P I G throws a lazy right hand but Hammer sees it coming a mile off and sidesteps it easily.
Hammer swinging wildly here.
Hammer misses with a two punch combination.
Hammer slips under a jab from P I G.
P I G comes forward and lands a shot to the body, then darts back out of range.
P I G dips down and scores with a jab to the body.
P I G misses with a looping right.
P I G connects with a body shot that sends Hammer's belly button to the back.
Hammer fails with a rather predictable takedown attempt.
Both fighters are absolutely exhausted here.
P I G motions for Hammer to come forward. P I G throws a leg kick but it misses it's target.
That's one minute gone in the round.
Hammer tries for a takedown but P I G sees it coming a mile off and avoids it easily.
A looping hook to the body misses from P I G. Hammer does a little dance to reset his feet.
Hammer gets cracked there but stands up to it.
P I G swings wildly with a hook that is half blocked by Hammer.
P I G throws a hook but Hammer blocks it.
Nice body punch from P I G.
P I G connects with a good right hand that stumbles Hammer. Hammer circles away out of range and recomposes himself.
P I G looking to take his opponent's legs away with the low kicks.
P I G blocks a head kick by Hammer.
Hammer doesn't react quick enough there as he takes a shot to the body.
P I G cracks the inside of Hammer's front leg.
Hammer with poor footwork there. He got himself in a bit of a tangle, enabling P I G to score with a decent uppercut.
The fans in attendance giving it up for the two fighters, who have really let it all hang out in the last minute or so!
P I G connects with a crisp jab.
That's two minutes gone in the round.
P I G jabs Hammer right on the nose. Hammer blinks but takes it well.
P I G throws a hook to the body but it doesn't connect.
P I G moves into range and connects with a jab.
Hammer looks for a takedown but P I G sprawls well.
That's three failed takedown attempts in the round for Anthony Hammer. That's going to take a lot out of him.
P I G gets in close and tags Hammer with a short punch that almost sends Hammer to the mat! Oh Hammer is in big trouble! He turns his back on P I G, trying to create some distance but P I G rushes him, striking wildly and Hammer goes down! The referee tackles P I G into the cage to end the fight! P I G is one violent man!
Ladies and gentlemen, after 2:29 of round 2, we have a winner by way of TKO (Strikes). Notorious P I G!
|
|
|
|
|
|
|
|
|
|
|
|
|
|
|
|
|
|
|
|
|
|
|
| S |
C
A |
G |
S |
C
B |
G |
|
S |
C |
G |
|
energy
A | B |
|
hype
A | B |
|
pop
A | B |
|
mgr
A | B |
|
FIGHT
RATING
76% |
|
|
|
|
|
|
|
Undercard bout
|
|
|
|
Co-main event
|
|
|
|
Main event
|
Coming up we have a heavyweight MMA rules bout between Tone Jenkins (ranked 0 p4p, 0 weight class) and Malcom McGregor (ranked 0 p4p, 0 weight class). Both fighters will be looking to make this an exciting fight for the fans, I'm sure!
 |
|
 |
| 202 cm
25
266 lbs
4 - 0 - 0 |
|
175 cm
25
266 lbs
4 - 0 - 0 |
Good takedowns
Brawler
Granite chin |
|
Good wrestler
Brawler
Likes musicals |
|
| |
|
Ladies and gentlemen. This fight is 5 rounds, for the heavyweight championship of the world!
Introducing the champion to my left, fighting out of the red corner.
With a record of
4 - 0 - 0, fighting out of Los Angeles, Tone Jenkins!
And introducing the challenger to my right, fighting out of the blue corner.
With a record of
4 - 0 - 0, fighting out of Los Angeles, Malcom McGregor!
The judges for this bout are Timothy Bukovac, and Jack Bonds.
The bell rings for round one and we are underway!
McGregor changes levels and looks for a double leg takedown. Jenkins tries to avoid it but McGregor manages to keep hold of a leg and drag Jenkins to the ground. Jenkins escapes though and pops straight back up to his feet.

Jenkins looking to score a takedown here. McGregor is defending well but Jenkins drives through and ends up in McGregor's guard.
Jenkins controlling from the guard. I say controlling but really, he's stalling.
Jenkins is looking to work some ground and pound but McGregor has wrist control.
The ref warns both fighters not to hold the cage as they work up against the meshing.
McGregor keeping moving, preventing Jenkins from controlling successfully.
We're hearing some news coming in from back stage. It's official - McGregor has eaten all the pies!
Jenkins won't allow McGregor to sweep him here.
Jenkins has been looking to land a fair amount of strikes on the ground. He might be looking to soften his opponent up in order to work for a submission.
McGregor is looking for a guillotine. You can't force these things though and Jenkins defends well.
McGregor keeping moving, preventing Jenkins from controlling successfully.
McGregor is looking to sweep but instead, Jenkins has passed into half guard.
McGregor is defending against the submission attempts here by Jenkins.
That's one minute gone in the round.
McGregor is trying to get back to full guard.
McGregor has no desire to be mounted, so is trying to control. Jenkins is working away from the top position though.
McGregor wants to improve his position but Jenkins is controlling well.
McGregor makes his way to full guard. A much better position for McGregor.
McGregor trying to keep a closed guard but Jenkins is proving a slippery customer.
That's two minutes gone in the round.
Jenkins working some ground and pound from guard but it's not doing any damage.
Jenkins controls the pace of the fight for a moment.
McGregor is working the butterfly guard. He manages to land a nice scissor sweep and is now in half guard on the top. Nice move.
Jenkins keeping his head moving to avoid the ground and pound.
McGregor wants to lay and pray for a moment but Jenkins keeps working.
McGregor is looking to advance position but Jenkins won't allow it.
McGregor throwing punches and elbows but they're not doing any damage.
McGregor missing with the ground and pound from half guard.
Jenkins is trying to escape back to his feet but McGregor uses the scramble to pass into side control.
The strikes coming from McGregor are missing the target in this wave of attacks.
That's three minutes gone in the round.
McGregor in side control, trying to ground and pound but not landing this time.
Jenkins wants to control but McGregor postures up.
McGregor is looking to take a break and control but Jenkins is keeping him honest, looking to work from the bottom.
McGregor working the ground and pound.
Jenkins is trying to get back to half guard. He's pushing on McGregor's leg. He's managed it. Nice work.
McGregor tries to pass the half guard into mount. Jenkins knows what he's doing though and prevents the attempt.
McGregor is trying to control the action in half guard but Jenkins is working away on the bottom, looking perhaps to get back to full guard.
That's four minutes gone in the round.
Jenkins is looking to improve his position.
The referee walks around the fighters to get a better view of the action. McGregor lands a nice short elbow.
Fantastic stuff here - a very entertaining period of action, which has drawn cheers from the crowd.
Jenkins tries to kick McGregor off but McGregor keeps his base steady and stays in half guard.
McGregor thows a huge punch but Jenkins dodges it nicely.
Jenkins is looking to regain full guard. Not this time though.
Jenkins is positioning himself well to prevent McGregor advancing to mount.
McGregor blocks the strikes from Jenkins.
As the round comes to an end the crowd are showing their appreciation for a great round of action.
McGregor not landing any meaningful shots this time.
Jenkins is trying to maintain the position but McGregor is very close to passing his half guard.
McGregor thows a huge punch but Jenkins dodges it nicely.
And thats the end of the round the fighters go back to their corners.
Malcom McGregor dominated that round.
Well, the break between rounds is over. Let's get back to the scrappin!
McGregor closes the distance and clinches up with Jenkins, looking for a takedown. McGregor pushes Jenkins against the cage but Jenkins circles to the side and manages to break the clinch.
McGregor gets his takedown attempt stuffed easily

and Jenkins counters with a head kick that drops McGregor to the mat! McGregor scrambles across the canvas and gets back to his feet, still wobbly!
The crowd cheering loudly, showing their appreciation for the quality fight we're seeing here.
McGregor tries to shoot in for a takedown. He's got hold of a leg but Jenkins swivels and escapes.
Tone Jenkins has stuffed three takedown attempts in the round now. That's going to take a lot out of Malcom McGregor.
McGregor closes the distance and looks for a trip takedown... aaaand he's got it - McGregor lands in his opponent's guard.
Jenkins bucks up whilst keeping hold of a body lock, managing to reverse the position. Now he's in top in McGregor's guard.
Jenkins is looking to work some ground and pound but McGregor has wrist control.
McGregor keeping moving, preventing Jenkins from controlling successfully.
Jenkins wanted to stand there but McGregor had control of the position.
Jenkins stopping the sweep attempt from McGregor.
McGregor is controlling Jenkins's posture.
That's one minute gone in the round.
McGregor wants to sweep here but Jenkins controlling him for the moment.
McGregor is working the butterfly guard. He manages to land a nice scissor sweep and is now in half guard on the top. Nice move.
McGregor thows a wild elbow that connects with the canvas.
Jenkins trying to control but McGregor postures up.
Jenkins blocking the ground and pound attempt from McGregor.
McGregor not landing any meaningful shots this time.
That's two minutes gone in the round.
Jenkins blocking the ground and pound attempt from McGregor.
McGregor trying to pass the guard but Jenkins defending well.
McGregor prevents Jenkins from improving his position.
Malcom McGregor has got the better of the ground game so far.
McGregor looks to score some points with some ground and pound.
Jenkins trying to control here.
The two fighters exchange a few words. I couldn't hear what they were saying but maybe it's more fun if you make it up yourself. McGregor connects with a nice short shot to Jenkins's temple.
The crowd are loving this. Great action here.
McGregor thows a huge punch but Jenkins dodges it nicely.
Jenkins blocking the ground and pound attempt from McGregor.
Jenkins is not content to let McGregor control the position.
Jenkins wants to get back to his feet.
That's three minutes gone in the round.
McGregor working Jenkins over with strikes.
McGregor prevents Jenkins from standing back up.
Jenkins is holding on to half guard well.
McGregor is looking to take a break and control but Jenkins is keeping him honest, looking to work from the bottom.
McGregor landing with strikes to the body and head, softening up his opponent.
McGregor is looking to pass the guard... He's managed it - he's now in full mount!
The crowd are loving this. Great action here.
McGregor working Jenkins over with strikes here.
Jenkins is writhing around trying to get back to his feet.
That's four minutes gone in the round.
McGregor working the ground and pound effectively.
McGregor lands an elbow that was bordering on illegal but the referee lets it go with a warning.
McGregor raining down shots from the mount!
McGregor looking to control but Jenkins is working nicely, looking to advance position himself.
McGregor landing shots from mount.
McGregor unloading with bombs!

Jenkins is rocked!
Whack. That's a big, big shot from McGregor! Jenkins is out cold! This one is all over!
Ladies and gentlemen, after 4:59 of round 2, we have a winner by way of KO (Strikes). Malcom McGregor!
Malcom McGregor is the new heavyweight champion!
Our winner, Malcom McGregor, made sure he spent some time buttering up the crowd during his post fight interview, which will no doubt bring him a few more fans.
|
|
|
|
|
|
|
|
|
|
|
|
|
|
|
|
|
|
|
|
|
|
|
| S |
C
A |
G |
S |
C
B |
G |
|
S |
C |
G |
|
energy
A | B |
|
hype
A | B |
|
pop
A | B |
|
mgr
A | B |
|
FIGHT
RATING
44% |
|
|
|
|
|
|
|
|
|
|
