 |
Disobedience 111: Homeroom PBP Commentary |
Undercard bout
|
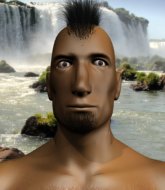
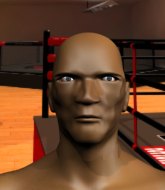
Coming up we have a lightweight MMA rules bout between Steve Vega (ranked 0 p4p, 0 weight class) and Ktm Power (ranked 0 p4p, 0 weight class). Ktm Power struggled to make weight for this fight. He only made it down to 157.1lbs at the first attempt and had to take the additional two hours to make the official bout weight. Let's see how much it's taken out of him. Ktm Power has the better chin. Will he look to stand and bang today?
 |
|
 |
| 178 cm
26
169 lbs
2 - 2 - 0 |
|
175 cm
22
168 lbs
2 - 1 - 0 |
BJJ Brown Belt
Counter fighter
Very strong |
|
BJJ Purple Belt
Decent boxing
Granite chin |
|
| |
|
Ladies and gentlemen. This fight is 3 rounds, in the lightweight division.
Introducing the fighter to my left, fighting out of the red corner.
With a record of
2 - 2 - 0, fighting out of Sydney, Steve Vega!
And introducing the fighter to my right, fighting out of the blue corner.
With a record of
2 - 1 - 0, fighting out of Sydney, Ktm Power!
The judges for this bout are Winston Howard, John Mangel and Skip Squint.

The bell rings for round one and we are underway!
Some wild striking there from Power.
Vega avoids a punch combination nicely.
Power swings wildly with a right hand that was never going to find it's target.
Vega is looking to score with low kicks.
We've been hearing reports that Vega has been drilling takedowns in recent sessions so let's see if that has an impact on the result of this fight.
Power looks to score with a combo but nothing lands.
Vega uses some good footwork to avoid the body shot by Power.
Power avoids the head kick by Vega.

Vega shoots in for a takedown and gets it. Let's see what he's got on the mat.
Power preventing the ground and pound from doing any damage.
Vega seems content to control from guard here. He's going to have to remain active though if he doesn't want to get stood back up.
Power working the defensive guard well to avoid strikes from Vega.

That's one minute gone in the round.
Vega is looking to work some ground and pound but Power has wrist control.
Vega passes easily into side control. Nice work.

Vega is trying to land an Americana. He has the arm isolated but Power is keeping cool and he's avoided the danger for now.
Vega is in a dominant position here, looking for a kimura. Power looks calm but he's in trouble here. Vega gets his leg over his opponent's head and yanks on the arm. Power is tapping like a morse code operator on the titanic! SOS! SOS! Vega lets go of the hold and Power can pop his arm back in it's socket.
Ladies and gentlemen, after 1:43 of round 1, we have a winner by way of Submission (Kimura). Steve Vega!
A pretty intense looking Steve Vega took the opportunity post-fight to ask for a shot at the title.
|
|
|
|
|
|
|
|
|
|
|
|
|
|
|
|
|
|
|
|
|
|
|
| S |
C
A |
G |
S |
C
B |
G |
|
S |
C |
G |
|
energy
A | B |
|
hype
A | B |
|
pop
A | B |
|
mgr
A | B |
|
FIGHT
RATING
39% |
|
|
|
|
|
|
|
Undercard bout
|
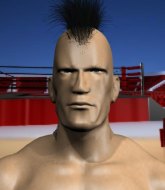
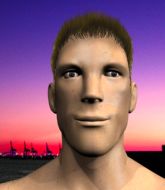
Coming up we have a heavyweight MMA rules bout between Tauno Tappelija (ranked 0 p4p, 0 weight class) and Boomer Balistia (ranked 0 p4p, 0 weight class). Tauno Tappelija has the edge in experience - let's see if he can make that count tonight.
 |
|
 |
| 210 cm
26
272 lbs
3 - 2 - 0 |
|
180 cm
25
225 lbs
1 - 2 - 0 |
Decent wrestler
Solid boxing
Prefers standup |
|
Good takedowns
Excellent boxer
Intelligent |
|
| |
|
Ladies and gentlemen. This fight is 3 rounds, in the heavyweight division.
Introducing the fighter to my left, fighting out of the red corner.
With a record of
3 - 2 - 0, fighting out of Helsinki, Tauno Tappelija!
And introducing the fighter to my right, fighting out of the blue corner.
With a record of
1 - 2 - 0, fighting out of Sydney, Boomer Balistia!
The judges for this bout are Steve Erwin, Damien Edna and Donatello Bradman.
The bell rings for round one and we are underway!
Tappelija scores with a jab to the jaw of his opponent.
Balistia tries to clinch but Tappelija is having none of it.
Tappelija walks into a left hand.

Tappelija pushes Balistia up against the cage in a clinch.
Balistia wants to strike at distance but he can't break free of the clinch.
A real battle for position is taking place between these two warriors.
Balistia working hard to break the clinch.
Tappelija definitely looks more muscular than last time we saw him fight.
Balistia is trying to force a seperation but Tappelija has the dominant position.
Tappelija is struggling to control the position.
Balistia drops down looking for an ankle pick but Tappelija pulls his leg out and moves away.
The crowd cheering loudly, showing their appreciation for the quality fight we're seeing here.
Balistia throws a head kick that misses and slips in the process. He scrambles back to his feet and the fighters circle.
That's one minute gone in the round.

Tappelija lands a left and a right that send Balistia crashing to the mat, dazed. Tappelija thinks about following him to the mat but decides to wave him back up to his feet!

Balistia is rocked!
The crowd are loving this. Great action here.
Balistia is starting to get sloppy and is letting his hands down. Tappelija just took advantage and landed a stinging jab. Oh! Now a right hook, right on the button! Balistia has gone limp and this one is over!
Ladies and gentlemen, after 1:12 of round 1, we have a winner by way of KO (Punches). Tauno Tappelija!
|
|
|
|
|
|
|
|
|
|
|
|
|
|
|
|
|
|
|
|
|
|
|
| S |
C
A |
G |
S |
C
B |
G |
|
S |
C |
G |
|
energy
A | B |
|
hype
A | B |
|
pop
A | B |
|
mgr
A | B |
|
FIGHT
RATING
79% |
|
|
|
|
|
|
|
Undercard bout
|
Coming up we have a light heavyweight MMA rules bout between Szymon Piechnicki (ranked 0 p4p, 0 weight class) and William Wellington (ranked 0 p4p, 0 weight class). Piechnicki comes to the cage accompanied by Shantel - Disko Partizani. William Wellington is the more experienced fighter, so let's see if that makes a difference tonight.
 |
|
 |
| 195 cm
24
217 lbs
2 - 1 - 0 |
|
188 cm
23
205 lbs
3 - 2 - 0 |
BJJ White Belt
Good knees
Good chin |
|
BJJ Blue Belt
Decent boxing
Heavy handed |
|
| |
|
Ladies and gentlemen. This fight is 3 rounds, in the light heavyweight division.
Introducing the fighter to my left, fighting out of the red corner.
With a record of
2 - 1 - 0, fighting out of Sydney, Szymon Piechnicki!
And introducing the fighter to my right, fighting out of the blue corner.
With a record of
3 - 2 - 0, fighting out of Sydney, William Wellington!
The judges for this bout are Skip Squint, Damien Edna and Hugh Johnson.
The bell rings for round one and we are underway!
Piechnicki closes the distance and clinches.
Piechnicki throws a punch but it's blocked by Wellington.
Piechnicki scores with a knee to the head.
Piechnicki lands a knee to the head there! That was nasty!
Piechnicki putting his Muay Thai to good use. He has Wellington in a tight clinch and is doing some damage with knees to the body.
Wellington is trying to work for a single leg takedown but Piechnicki pulls him back up using the underhooks.
A short body shot lands from Wellington as the two fighters clinch.
Piechnicki effectively controlling the action here.
Piechnicki tries to land a knee to the head but misses.
Wellington looks like he'd prefer to be striking at range right now.
Wellington working on landing some head shots here - that one got through nicely.
Wellington takes an elbow to the temple.
Wellington has Piechnicki pressed up against the cage and is working for takedown. Piechnicki manages to improve position though and keeps the fight standing.
We've seen a great period of action over the last minute or so - credit to both fighters for going all out!
Wellington wants to take the fight to the mat but Piechnicki manages to get underhooks and keep the fight in the clinch.
Szymon Piechnicki has stuffed three takedown attempts in the round now. That's going to take a lot out of William Wellington.
Piechnicki connects with a knee to the head.
Wellington takes a knee right on the jaw!
Wellington fails to pull guard.
Piechnicki misses with a knee to the head.
That's one minute gone in the round.
Piechnicki is trying to slow down the pace of the fight but Wellington is keeping busy.
Maybe Piechnicki would be better served going for some more strikes rather than trying to control so much.
Piechnicki lands a hook to the side of the head.
Wellington doesn't land with the attempted body shot.
Piechnicki connects with a knee to the head.

Wellington pulls Piechnicki into guard.
Wellington is adopting a defensive guard.
Wellington working a defensive guard here.
Piechnicki chips away with some ground and pound.
Piechnicki wants to stand but Wellington is controlling his posture from full guard.
Piechnicki being controlled here momentarily.

That's two minutes gone in the round.

Wellington has managed to work for a loose triangle. I think Piechnicki should be able to defend this one pretty easily though. Oh, Wellington has tightened it up now! Piechnicki should have reacted faster there - he's in big trouble and yes, he's tapped out! This one is all over!
Ladies and gentlemen, after 2:24 of round 1, we have a winner by way of Submission (Triangle). William Wellington!
Our winner, William Wellington, made sure he spent some time buttering up the crowd during his post fight interview, which will no doubt bring him a few more fans.
|
|
|
|
|
|
|
|
|
|
|
|
|
|
|
|
|
|
|
|
|
|
|
| S |
C
A |
G |
S |
C
B |
G |
|
S |
C |
G |
|
energy
A | B |
|
hype
A | B |
|
pop
A | B |
|
mgr
A | B |
|
FIGHT
RATING
58% |
|
|
|
|
|
|
|
Undercard bout
|
Coming up we have a welterweight MMA rules bout between Monroe Stark (ranked 0 p4p, 0 weight class) and Saul Goodman (ranked 0 p4p, 0 weight class). These two fighters really are very evenly matched on the feet - it will be fascinating to see who can assert themselves in that aspect of the fight.
 |
|
 |
| 180 cm
24
170 lbs
3 - 1 - 0 |
|
190 cm
19
178 lbs
3 - 1 - 0 |
BJJ Blue Belt
Solid boxing
Self confident |
|
BJJ Blue Belt
Decent boxing
Intelligent |
|
| |
|
Ladies and gentlemen. This fight is 3 rounds, in the welterweight division.
Introducing the fighter to my left, fighting out of the red corner.
With a record of
3 - 1 - 0, fighting out of Sydney, Monroe Stark!
And introducing the fighter to my right, fighting out of the blue corner.
With a record of
3 - 1 - 0, fighting out of Sydney, Saul Goodman!
The judges for this bout are Bruno Hogan, Hugh Johnson and Donatello Bradman.
The bell rings for round one and we are underway!
A combination from Stark does no damage.
Stark throws a body kick but he wasn't in range.
Goodman avoids a punch combination nicely.
A swing and a miss from Goodman.
Decent striking displayed by Stark there.
No joy there for Stark, who threw a few shots but didn't land.
Stark scores with a straight right hand, right through his opponent's guard.
Stark throws a combination but comes up with nothing but fresh air.
Stark swings and misses with a shot to the body
and Goodman counters with a left to the body.
Stark throws a nice looking combination but Goodman bobs and weaves to avoid any damage.
Monroe Stark seems to be the more aggressive standup fighter in this bout.
Stark lunges in with swinging rights and lefts but Goodman circles away quickly and effectively.
Goodman swinging wildly here.
Goodman looks to land a combination but Stark avoids it well.
Goodman rushes forward with a series of wild hooks but Stark moves out of range and avoids them all easily.
Stark avoids the body shot from Goodman.
Goodman slips under a jab.
That's one minute gone in the round.
Stark misses with a series of wild punches.
Stark looks to score with a combo but nothing lands.
Goodman fails to land with the punch combination there - jab, cross, hook, miss, miss, miss.
Goodman throws a right and a left that both miss.
Goodman misses with a combination
and Stark counters with a lovely straight right hand!
No joy there for Goodman, who threw a few shots but didn't land.
Goodman misses with a few strikes there.
Nice uppercut lands for Stark. That snapped Goodman's head back.
Stark slips a jab and a cross from Goodman.
Stark scores with a nice one two combo and darts back out of range to avoid anything coming in the opposite direction.
Stark throws a series of punches but Goodman avoids them all with ease.
Goodman avoids a punch combination nicely.
That's two minutes gone in the round.
Stark avoids a punch combination nicely.
Stark looks to score with a combo but nothing lands.
Stark lands a pitter patter jab to the forehead of his opponent.
Stark looks to be in better condition than last time we saw him fight. Obviously he's been working hard on his cardio.
Goodman waving his hands out in front of him, looking to distract Stark.
Stark takes one on the chin but keeps coming.
Stark misses with a low kick as Goodman jumps back.
Stark scores with a reasonable looking shot to the body. Goodman doesn't seem bothered though.
The fans in attendance giving it up for the two fighters, who have really let it all hang out in the last minute or so!
Some wild striking there from Stark.
Stark lands a jab, followed by a cross and another cross, as Goodman backs up against the cage.
Stark throws a low kick but it's checked well by Goodman.
Stark lands with a two punch combination before moving back out of range.
Goodman is rocked!

That's three minutes gone in the round.
Stark rushes forward with a series of wild hooks but Goodman moves out of range and avoids them all easily.
Goodman is still on wobbly legs! Can Stark finish him?
Stark tries a switch kick but it misses it's target.
Stark misses with a two punch combination.
Goodman showing good head movement there, avoiding the strikes from Stark.
Stark misses with a jab, cross combination.
Goodman will need to tighten up his combinations if he doesn't want to gas himself out, swinging at thin air.
Stark misses with a double jab.
Stark is breathing heavily.
No joy there for Stark, who threw a few shots but didn't land.
Stark swinging wildly here.
No joy there for Stark, who threw a few shots but didn't land.
Goodman misses with a wild combination.
Stark swings away but doesn't land with a series of punches.
Goodman throws a right and a left that both miss.
Goodman swings away but doesn't land with a series of punches.
Stark throws a right and a left that Goodman avoids nicely.
Stark looks to land a combination but Goodman avoids it well.
A jab from Goodman misses.
Stark lunges in with swinging rights and lefts but Goodman circles away quickly and effectively.
Goodman looks to score with a combo but nothing lands.
Goodman pushing out the jab but it's not landing.
Stark throws a combination but comes up with nothing but fresh air.
Goodman thuds his right hand into Stark's forehead from close range. That could be painful for both fighters.
Stark scores with a decent looking hook.
Stark throws a right and a left that Goodman avoids nicely.
Some wild striking there from Stark.
Stark lands a jab to the nose.
Stark throws a series of punches but Goodman avoids them all with ease.
No joy there for Stark, who threw a few shots but didn't land.
Wooooo! Give it up for these two warriors! They are putting on a show!
A punch combination from Goodman misses.
Stark throws a combination but it was largely blocked by Goodman.
Stark misses with a series of wild punches.
Stark misses with a wild combination.
Stark tries to bum rush Goodman with a series of wild strikes but Goodman uses good footwork to avoid the assault.
A punch combination from Stark misses.
Stark lunges in with swinging rights and lefts but Goodman circles away quickly and effectively.
Some wild striking there from Stark.
Stark swings away but doesn't land with a series of punches.
Stark swings away but doesn't land with a series of punches.
Goodman misses with a two punch combination.
Sloppy strikes from Stark. Those never looked like landing.
Stark scores with a jab. Goodman acknowledges it with a nod of the head.
Stark is really peppering his opponent's head with punches.

That's four minutes gone in the round.
Some wild striking there from Stark.
Stark throws a right and a left that Goodman avoids nicely.
Jab by Stark.
Stark misses with a jab and misses with a cross straight after too.
Stark misses with a jab and misses with a cross straight after too.
Stark throws a series of punches but Goodman avoids them all with ease.
Goodman throws a combination but it was largely blocked by Stark.
Stark will need to tighten up his combinations if he doesn't want to gas himself out, swinging at thin air.
Stark throws a right hand that Goodman ducks under and follows up with a left that Goodman also avoids with ease.
Stark connects nicely with a jab. Noted by the judges no doubt.
Stark cracks Goodman with a nice right hand that draws applause from the crowd.
Sloppy strikes from Stark. Those never looked like landing.
Stark misses with a jab, cross combination.
Stark misses with a jab, cross combination.
Goodman throws a right and a left that both miss.
Stark cracks Goodman with a good shot that sees him stumbling back into the cage.
Stark throws a series of punches but Goodman moves out of range.
Stark swinging wildly here.
Goodman avoids the head kick by Stark.
Goodman has his head snapped back a nice jab. A little nod from Goodman there as he acknowledges the shot.
Goodman avoids a punch combination nicely.
Stark looks to score with a combo but nothing lands.
Goodman fails to land with a series of punches.
Stark looks to land a combination but Goodman avoids it well.
Goodman throws a right hand that Stark ducks under and follows up with a left that Stark also avoids with ease.
Stark misses with a two punch combination.
Stark throws a right hand that Goodman ducks under and follows up with a left that Goodman also avoids with ease.
Stark throws a combination but it was largely blocked by Goodman.
Goodman throws a wild combination but nothing lands.
Stark with a jab.
Stark swings away but doesn't land with a series of punches.
Stark looks to land a combination but Goodman avoids it well.
A left lands for Stark.
Stark will need to tighten up his combinations if he doesn't want to gas himself out, swinging at thin air.
The crowd are going absolutely nuts as the round comes to an end - what a fantastic round of action!
Stark throws a wild combination but nothing lands.
Goodman swings and misses with a shot to the body
and Stark counters with a nice uppercut.
Stark misses with a jab, cross combination.
Stark throws a series of punches but Goodman moves out of range.
Stark getting the better of the striking in that exchange.
Good shot there by Stark.
Stark catches Goodman with a nice straight right. He seems pissed - ooooh, it's on now! On like donkey kong!
Stark misses with a few strikes there.
Stark throws a series of punches but Goodman avoids them all with ease.
Stark misses with a series of wild punches.
Stark misses with the combination.
And thats the end of the round the fighters go back to their corners.
Monroe Stark dominated that round.
The referee calls time. The cornermen exit stage left and we're back to business.

Sloppy strikes from Stark. Those never looked like landing.
Stark throws a nice looking combination but Goodman bobs and weaves to avoid any damage.
Stark throws a series of punches but Goodman moves out of range.
Goodman dodges the punch combination from Stark.
Goodman tries to bum rush Stark with a series of wild strikes but Stark uses good footwork to avoid the assault.
Goodman avoids a punch combination nicely.
Some wild striking there from Goodman.
Goodman misses with a few strikes there.
Stark misses with a two punch combination.
Stark lunges in with swinging rights and lefts but Goodman circles away quickly and effectively.
Some wild striking there from Goodman.
Goodman throws out a loose jab but Stark uses good head movement to avoid it.
Stark lunges in with swinging rights and lefts but Goodman circles away quickly and effectively.
Stark swings away but doesn't land with a series of punches.
Goodman throws a right hand that Stark ducks under and follows up with a left that Stark also avoids with ease.
Goodman slips a jab from Stark.
A punch combination from Goodman misses.
Stark throws a head kick but Goodman moves out of range.
Stark throws a series of punches but Goodman moves out of range.
No joy there for Stark, who threw a few shots but didn't land.
Stark swinging wildly here.
Stark rushes forward with a series of wild hooks but Goodman moves out of range and avoids them all easily.
Stark looks to land a combination but Goodman avoids it well.
Stark looks to land a combination but Goodman avoids it well.
Stark misses with a jab and misses with a cross straight after too.
Stark throws a wild combination but nothing lands.
Stark blocks a jab.
Stark looks to land a combination but Goodman avoids it well.
Sloppy strikes from Stark. Those never looked like landing.
Stark swinging wildly here.
Stark throws a wild combination but nothing lands.
Both fighters are absolutely exhausted here.
Fantastic stuff here - a very entertaining period of action, which has drawn cheers from the crowd.
Stark digs a good body shot into Goodman's ribs.
Stark uses decent footwork to sidestep a right hand from Goodman.
Goodman looks to land a combination but Stark avoids it well.
Stark misses with a few strikes there.
Stark misses with a jab, cross combination.
Goodman tries to score with an inside leg kick but telegraphs it and Stark is able to avoid easily.
Monroe Stark is looking to throw some combinations by the looks of things.
Donk. Stark catches Goodman right on the button with a cross.
Stark throws a nice looking combination but Goodman bobs and weaves to avoid any damage.
Goodman walks into a jab.
A combination from Stark does no damage.
Stark looks to land a combination but Goodman avoids it well.
Both these guys seem content to just stand up and trade with eachother but Goodman might want to think about changing up his gameplan a bit because over the course of the fight, Stark has got the better of the exchanges.
Goodman showing good head movement there, avoiding the strikes from Stark.
That's one minute gone in the round.
Goodman throws a series of punches but Stark moves out of range.
Stark throws a head kick that misses and slips in the process. He scrambles back to his feet and the fighters circle.
Stark scores with a jab to the jaw of his opponent.
Goodman takes a shot to the nose. Hopefully that hasn't broken it.
Sloppy strikes from Stark. Those never looked like landing.
Goodman takes a shot to the eye socket. That's gotta hurt.
Stark misses with a few strikes there.
Goodman avoids a punch combination nicely.
Stark throws a series of punches but Goodman avoids them all with ease.
Stark throws a right hand that Goodman ducks under and follows up with a left that Goodman also avoids with ease.
Stark misses with a wild combination.
Goodman swings and misses with a shot to the body
and Stark counters with a lovely shot to the body.
Monroe Stark is winning the standup battle so far.
Stark fails to land with a series of punches.
Stark misses with a wild combination.
Stark connects with a crisp jab.
Good standup being displayed there by Stark as he connects with a hook.
Goodman ducks right into an uppercut from Stark.
Stark throws a combination but comes up with nothing but fresh air.
Stark fails to land with a series of punches.
Stark will need to tighten up his combinations if he doesn't want to gas himself out, swinging at thin air.
Stark moves out of range as Goodman strikes.
A combination from Stark does no damage.
Goodman moves forwards but Stark connects with a nice, crisp jab.
Stark lunges in with swinging rights and lefts but Goodman circles away quickly and effectively.
Stark throws a nice looking combination but Goodman bobs and weaves to avoid any damage.
Stark looks to land a combination but Goodman avoids it well.
A shot to the body from Goodman misses
and Goodman takes a counter punch right on the button for his troubles.
The fans in attendance giving it up for the two fighters, who have really let it all hang out in the last minute or so!
Stark misses with a series of wild punches.
Goodman fails to land with the punch combination there - jab, cross, hook, miss, miss, miss.
Stark will need to tighten up his combinations if he doesn't want to gas himself out, swinging at thin air.
Goodman misses with a telegraphed body shot
and Stark counters with a lovely straight right hand!
Goodman swings wildly with a couple of big hooks
and Stark counters with a quick right hand to the jaw.
Goodman avoids a punch combination nicely.
Stark throws a nice looking combination but Goodman bobs and weaves to avoid any damage.
Stark misses with a double jab.
Nice shot by Stark.
Goodman will need to tighten up his combinations if he doesn't want to gas himself out, swinging at thin air.
Stark throws a right and a left that Goodman avoids nicely.
A combination from Stark does no damage.
Stark throws a series of punches but Goodman avoids them all with ease.
Stark misses with the combination.
Stark looks to land a combination but Goodman avoids it well.
That's two minutes gone in the round.
Stark swings away but doesn't land with a series of punches.
Stark lands with a straight right. Goodman didn't see that one coming.
Goodman tries to bum rush Stark with a series of wild strikes but Stark uses good footwork to avoid the assault.
Stark looks to land a combination but Goodman avoids it well.
Some wild striking there from Stark.
Stark connects with a single shot there.
No joy there for Stark, who threw a few shots but didn't land.
Stark fails to land with the punch combination there - jab, cross, hook, miss, miss, miss.
Stark swings away but doesn't land with a series of punches.
Stark connects with a crisp jab.
Stark jabs Goodman right on the nose. Goodman blinks but takes it well.
Stark misses with a double jab.
A combination from Stark does no damage.
Stark misses with a two punch combination.
Stark's corner calls for a 1-2. Stark obliges with the 1 part as he scores the single shot and moves back out of range.
Stark throws a combination but it was largely blocked by Goodman.
Stark misses with a wild combination.
Stark looks to land a combination but Goodman avoids it well.
Goodman showing good head movement there, avoiding the strikes from Stark.
Stark misses with a double jab.
Stark throws a combination but it was largely blocked by Goodman.
Goodman has a pretty nasty looking mouse under his right eye.
Stark throws a series of punches but Goodman moves out of range.
Goodman missing with a left hand there. Stark was out of range so wasted energy throwing that one.
Stark fakes a jab and then connects with a hook.
Stark throws a series of punches but Goodman moves out of range.
Stark misses with a two punch combination.
Sloppy strikes from Stark. Those never looked like landing.
Stark misses with a two punch combination.
Stark throws a right and a left that both miss.
Stark fails to land with the punch combination there - jab, cross, hook, miss, miss, miss.
Stark misses with the combination.
A punch combination from Stark misses.
Stark throws a series of punches but Goodman avoids them all with ease.
Stark fails to land with a series of punches.
Nice cross by Stark.
Stark looks to score with a combo but nothing lands.
Stark looks to score with a combo but nothing lands.
Stark misses with a wild combination.
Stark cracks Goodman with a right hand to the side of the head.
Stark lunges in with swinging rights and lefts but Goodman circles away quickly and effectively.
Stark avoids a punch combination nicely.
Goodman showing good head movement there, avoiding the strikes from Stark.
Stark dips to his left and cracks Goodman with an uppercut!
Stark misses with a jab and misses with a cross straight after too.
That's three minutes gone in the round.
Stark slips under a jab.
Stark misses with the combination.
Stark lands a pitter patter jab to the forehead of his opponent.
A cross from Stark lands.
No joy there for Goodman, who threw a few shots but didn't land.
Stark moving in and out of range nicely, whilst landing the scoring shot.
A combination from Stark does no damage.
Stark looks to land a combination but Goodman avoids it well.
Stark lunges in with swinging rights and lefts but Goodman circles away quickly and effectively.
Stark misses with the combination.
Good exchange - Stark coming out on top.
Stark throws a right hand that Goodman ducks under and follows up with a left that Goodman also avoids with ease.
Stark throws a right and a left that Goodman avoids nicely.
Goodman throws a nice looking combination but Stark bobs and weaves to avoid any damage.
Sloppy strikes from Stark. Those never looked like landing.
A punch combination from Stark misses.
Sloppy strikes from Stark. Those never looked like landing.
Goodman takes one to the side of the head.
Stark misses with a few strikes there.
Stark misses with a jab and misses with a cross straight after too.
A punch combination from Stark misses.
Stark throws a combination but it was largely blocked by Goodman.
Goodman avoids a punch combination nicely.
Stark misses with a double jab.
Stark tries to bum rush Goodman with a series of wild strikes but Goodman uses good footwork to avoid the assault.
Stark tries to bum rush Goodman with a series of wild strikes but Goodman uses good footwork to avoid the assault.
Stark misses with a jab, cross combination.
Stark throws a right and a left that both miss.
The crowd are loving this. Great action here.
Stark slips in close and lands a nice hook before moving back out of range.
Sloppy strikes from Stark. Those never looked like landing.
Stark scores with a jab. Goodman acknowledges it with a nod of the head.
Goodman walks straight into a right hand from Stark - that's dropped him! Stark jumps into mount and starts pounding away - can he finish?! More strikes go undefended and the referee has to dive in to save Goodman from any more punishment! Goodman complains about the stoppage but falls over as he tries to stand back up, so it was clearly a good stoppage.
Ladies and gentlemen, after 3:47 of round 2, we have a winner by way of TKO (Punches). Monroe Stark!
|
|
|
|
|
|
|
|
|
|
|
|
|
|
|
|
|
|
|
|
|
|
|
| S |
C
A |
G |
S |
C
B |
G |
|
S |
C |
G |
|
energy
A | B |
|
hype
A | B |
|
pop
A | B |
|
mgr
A | B |
|
FIGHT
RATING
56% |
|
|
|
|
|
|
|
Undercard bout
|
Coming up we have a welterweight MMA rules bout between Big Willy (ranked 0 p4p, 0 weight class) and Danny Glover (ranked 0 p4p, 0 weight class). Over to our ring announcer for the fighter introductions!
 |
|
 |
| 170 cm
27
170 lbs
5 - 1 - 0 |
|
180 cm
23
181 lbs
4 - 1 - 0 |
BJJ Purple Belt
Brawler
Big heart |
|
BJJ Purple Belt
Decent boxing
Heavy handed |
|
| |
|
Ladies and gentlemen. This fight is 3 rounds, in the welterweight division.
Introducing the fighter to my left, fighting out of the red corner.
With a record of
5 - 1 - 0, fighting out of Sydney, Big Willy!
And introducing the fighter to my right, fighting out of the blue corner.
With a record of
4 - 1 - 0, fighting out of Sydney, Danny Glover!
The judges for this bout are Bruno Hogan, Eliza Hachem and Skip Squint.
The bell rings for round one and we are underway!
Glover throws out a powerful jab.
Wow, both these guys are really going for it!
Willy uses good footwork to avoid the strikes from Glover.
Willy is pinned up against the cage taking some big shots here. The referee is looking closely deciding whether he should stop the fight.
Jab from Glover.
Glover throws a jab when Willy was well out of range.

Glover cracks Willy with a big right hand that sends him crashing to the floor. Glover has the opportunity to follow him to the ground but instead he's beckoning Willy to stand back up!

Willy is rocked!
This is a great period of action - very entertaining stuff!
BAM! Glover delivers a spinning backfist that drops Willy like a ragdoll! This is all oooooveeeer! He was out before he hit the ground!
Ladies and gentlemen, after 0:21 of round 1, we have a winner by way of KO (Spinning Backfist). Danny Glover!
|
|
|
|
|
|
|
|
|
|
|
|
|
|
|
|
|
|
|
|
|
|
|
| S |
C
A |
G |
S |
C
B |
G |
|
S |
C |
G |
|
energy
A | B |
|
hype
A | B |
|
pop
A | B |
|
mgr
A | B |
|
FIGHT
RATING
100% |
|
|
|
|
|
|
|
Undercard bout
|
Coming up we have a light heavyweight MMA rules bout between Nelson Rojas (ranked 0 p4p, 0 weight class) and Tsunami Wave (ranked 0 p4p, 0 weight class). Tsunami Wave has the power to score a knockout today if he connects clean with Nelson Rojas's chin.
 |
|
 |
| 185 cm
26
220 lbs
5 - 0 - 0 |
|
178 cm
19
204 lbs
2 - 1 - 0 |
BJJ White Belt
Excellent boxer
Cuts easily |
|
BJJ White Belt
Excellent boxer
Granite chin |
|
| |
|
Ladies and gentlemen. This fight is 3 rounds, in the light heavyweight division.
Introducing the fighter to my left, fighting out of the red corner.
With a record of
5 - 0 - 0, fighting out of Sydney, Nelson Rojas!
And introducing the fighter to my right, fighting out of the blue corner.
With a record of
2 - 1 - 0, fighting out of Sydney, Tsunami Wave!
The judges for this bout are Skip Squint, Donatello Bradman and Damien Edna.
The bell rings for round one and we are underway!
Rojas takes a swing at Wave's ribcage but misses.
Wave takes a shot to the eye socket. That's gotta hurt.
Rojas is looking to clinch.
Rojas tries to clinch but Wave moves out of range.
Rojas scores with a one two! Wave had his feet all tangled up there and couldn't avoid the strikes.
Wave avoids the clinch attempt nicely.
Rojas scores with a nice looking left hook and follows it up with an uppercut!
Rojas clinches with his opponent.
Rojas lands a nice shot to the body.
Wave has had enough of the clinch and is looking to separate.
Rojas has a couple of punches blocked by Wave.
A short uppercut from Rojas.
That's one minute gone in the round.

Rojas pushes off and circles away, back to the middle of the mat.
Wave lunges at Rojas with a hook that half lands and is half blocked by Rojas's hand.
A swing and a miss from Wave.
Rojas takes a jab on the nose there. A little bit of blood seems to be coming out. Hopefully that won't affect his breathing.

It looks like Nelson Rojas has been cut.
Rojas keeping a good distance there, avoiding the body shot.
Rojas tries to clinch up against the cage, rushing in to close the distance. Wave manages to break the clinch and circles back to the middle of the mat.
Rojas blocks a jab.
Rojas rushes Wave and pushes him back against the cage in a clinch.
We've seen a great period of action over the last minute or so - credit to both fighters for going all out!
Rojas lands a right hand that snaps the head of Wave backwards.
Rojas throws a head punch that misses.
That's two minutes gone in the round.
Rojas working on landing some head shots here - that one got through nicely.
Rojas pushes off and circles away, back to the middle of the mat.
Rojas goes to the watering hole and comes back with a big thumbs up from the judges as he scores a three punch combo.
Rojas falls off balance throwing a combination
and Wave counters with a crisp one two that drops Rojas! Wave thinks about following him to the mat for a moment but instead steps back and waves Rojas to his feet! Rojas is in big trouble!
Rojas is rocked!
Wave throws a series of punches but Rojas moves out of range.
Oh Rojas is still all over the place! His legs are completely gone! Will he be able to recover?!!
Rojas looks to score with a jab to the body but Wave is just out of range.
Rojas wants to clinch up but Wave keeps it at a distance.
Rojas seems to have got his legs back now.
A combination from Rojas does no damage.
Wave fakes with the hands and throws a leg kick but Rojas is out of range.
Nelson Rojas seems to be the more aggressive standup fighter in this bout.
Rojas connects nicely with a jab. Noted by the judges no doubt.
That's three minutes gone in the round.
Sloppy strikes from Rojas. Those never looked like landing.
Rojas lands with a two punch combination before moving back out of range.
Rojas walks into a stiff left hand from Wave.
Wave has his hands up protecting his head but a hook from Rojas finds it's way round the side to connect with Wave's head.
Rojas misses with a body shot.
Rojas digs a good body shot into Wave's ribs.
Wave waving his hands out in front of him, looking to distract Rojas.
Wave uses some good footwork to avoid the body shot by Rojas.
Rojas on the wrong end of a nice hook.
That's four minutes gone in the round.
Rojas is looking to clinch but Wave is avoiding it.
Wave keeps the fight on the outside.
Wooooo! Give it up for these two warriors! They are putting on a show!
Wave throws an overhand right that drops Rojas like a sack of potatoes! Wave dives in to finish the fight with more strikes and this one is all over!
Ladies and gentlemen, after 4:23 of round 1, we have a winner by way of TKO (Strikes). Tsunami Wave!
|
|
|
|
|
|
|
|
|
|
|
|
|
|
|
|
|
|
|
|
|
|
|
| S |
C
A |
G |
S |
C
B |
G |
|
S |
C |
G |
|
energy
A | B |
|
hype
A | B |
|
pop
A | B |
|
mgr
A | B |
|
FIGHT
RATING
49% |
|
|
|
|
|
|
|
Co-main event
|
Coming up we have a welterweight MMA rules bout between Keith Diaz (ranked 0 p4p, 0 weight class) and Timbo Styless (ranked 0 p4p, 0 weight class). Both fighters look fresh as a daisy as they make their way towards the cage.
 |
|
 |
| 190 cm
23
170 lbs
4 - 0 - 0 |
|
182 cm
19
184 lbs
2 - 0 - 0 |
BJJ Purple Belt
Brawler
Cuts easily |
|
BJJ Purple Belt
Good kicks
Good gas tank |
|
| |
|
Ladies and gentlemen. This fight is 5 rounds, for the welterweight championship of the world!
Introducing the champion to my left, fighting out of the red corner.
With a record of
4 - 0 - 0, fighting out of Sydney, Keith Diaz!
And introducing the challenger to my right, fighting out of the blue corner.
With a record of
2 - 0 - 0, fighting out of Sydney, Timbo Styless!
The judges for this bout are Eliza Hachem, Summer Carpenter and Winston Howard.
The bell rings for round one and we are underway!
Diaz keeps the fight standing with a nice sprawl.
A low kick from Diaz is predictable there
and Styless counters with a nice body shot.
Styless uses good head movement to avoid the hook from Diaz.
Ouch! a nice leg kick from Styless, right into the meat.
Styless gets caught on his heels momentarily as he allows Diaz to score an easy takedown into full guard.
We've had a lack of effective grappling in the last minute or so, which could well see a referee standup.
Diaz wants to stand and escape but instead Styless has hit a sweep and he's now on top in guard.
Diaz looking for a sweep. Not yet Diaz, not yet.
Diaz throwing his legs up looking for a triangle.
Diaz keeping moving, preventing Styless from controlling successfully.
Diaz is throwing his legs up, looking for submissions. Styless is aware though and is defending well.
Wooooo! Give it up for these two warriors! They are putting on a show!
Styless slips effortlessly into side control - very nice.
Diaz looks to move to half guard but instead Styless has passed into mount! Damn!
That's one minute gone in the round.
Styless tries to control but Diaz wriggling away.
Diaz is in all sorts of trouble here.
Styless is thinking about an arm triangle here, looking to tighten it up before moving to side control. Diaz can see it coming though and defends well with a couple of strikes to the head and some good arm positioning.
Styless has hold of Diaz's left arm, perhaps looking for a submission. The two fighters tussle over control of the isolated limb and Diaz manages to get his arm back to his side and away from danger.
Diaz really does look like a pencil wearing a pair of gloves. Let's hope he has a gameplan to suit that ridiculous body shape.
Diaz tries to get back to half guard but can't.
Styless wants to control the pace but Diaz is squirming around nicely.
Diaz bucks up and manages to get a nice reversal! He's in guard on the top - nicely done!
Both fighters really going for it on the ground here!
Diaz throwing shots from guard but he's hitting more mat than opponent.
Styless looking for a guillotine here but Diaz defends easily.
The fighters are starting to perspire pretty heavily.
Diaz drops back, looking for a kneebar! Styless looks panicked! The fighters roll across the mat, one looking to finish, one looking to escape. Styless looks to have wriggled free... Yes, he's got his leg free and he's dived into side control! Good work there from Styless!
That's two minutes gone in the round.
The crowd are loving this. Great action here.
Styless tries for a kimura but Diaz is defending well.
Diaz is trying to stand back up. He's worked his way up against the cage but Styless has just dragged him back down to the mat.
Diaz is trying to improve his position.
Styless working the ground and pound.
Diaz is trying to buck Styless off.
Styless sitting in side control, looking to soften his opponent up with elbows and hammerfists but Diaz is avoiding damage well and looking to escape the position.
Styless tries for an arm triangle. That looks pretty tight to me. Is this one over!?! Possibly, maybe, no Styless has let go of the choke. Obviously it wasn't as tight as we thought!
Diaz is looking to work his way out of this bad position but Styless is controlling him well.
That's three minutes gone in the round.
Diaz tries to buck Styless off but Styless is having none of it.
Styless is looking to finish here, going for an Americana. Diaz knows the correct defense though, so he's OK.
Styless tries for an arm triangle. That looks pretty tight to me. Is this one over!?! Possibly, maybe, no Styless has let go of the choke. Obviously it wasn't as tight as we thought!
Diaz tries to improve position but can't.
Styless tries to cartwheel into mount but he doesn't manage it.
Diaz regains half guard.
Styless is thinking about going for an arm triangle but he can't free his leg.
The fighters are pressed up against the cage, both looking to find a bit of space to work.
Diaz is looking to sinch up a guillotine here but Styless pulls his head out easily.
Styless is working for a kimura but Diaz is defending it quite comfortably.
That's four minutes gone in the round.
Diaz actively working from the bottom here.
Styless thows a huge punch but Diaz dodges it nicely.
Diaz looking for submissions from an awkward position here.
Diaz is trying to stand back up but Styless is controlling him
Styless wants to free his trapped foot but Diaz is holding on for dear life with his legs.
Styless wants to lay and pray for a moment but Diaz keeps working.
This has been an exciting period of action!
As the round comes to an end the crowd are showing their appreciation for a great round of action.
Diaz is looking to improve his position.
Diaz is in a tricky position. We've heard reports from his gym mates at A1 (Blackbelt BJJ Sparring, 13 Elite coaches!) that he's been drilling escapes, so let's see if he can get back to his feet.
Diaz looking for subs from the bottom but Styless mounts him!
The referee warns Diaz that he has to improve his position here as he takes two more clean shots to the head.
And thats the end of the round the fighters go back to their corners.
Timbo Styless dominated that round.
Well, the break between rounds is over. Let's get back to the scrappin!
Styless lunges at Diaz with a hook that half lands and is half blocked by Diaz's hand.
It looks like Keith Diaz has been cut.
Diaz on the wrong end of a nice low kick. He's acting like it's no big deal but he doesn't want to take many more of those.
Nice body kick from Styless.
A jab from Diaz misses.
Styless moves into range and lands a nice leg kick.
Diaz misses with a body shot.
The fighters circle, before Styless throws a beautiful high kick that crashes into Diaz's neck, sending him stumbling to the floor! Styless lands more strikes and forces a referee stoppage! That one ended in an instant!
Ladies and gentlemen, after 0:31 of round 2, we have a winner by way of TKO (Kick & Punches). Timbo Styless!
Timbo Styless is the new welterweight champion!
|
|
|
|
|
|
|
|
|
|
|
|
|
|
|
|
|
|
|
|
|
|
|
| S |
C
A |
G |
S |
C
B |
G |
|
S |
C |
G |
|
energy
A | B |
|
hype
A | B |
|
pop
A | B |
|
mgr
A | B |
|
FIGHT
RATING
100% |
|
|
|
|
|
|
|
Main event
|
Coming up we have a heavyweight MMA rules bout between Jussi Juntta (ranked 0 p4p, 0 weight class) and Mr Legendary (ranked 0 p4p, 0 weight class). Over to our ring announcer for the fighter introductions!
 |
|
 |
| 188 cm
20
260 lbs
4 - 1 - 0 |
|
225 cm
20
230 lbs
4 - 0 - 0 |
Good wrestling
Basic striking
Cardio machine |
|
Good wrestler
Good low kicks
Powerful |
|
| |
|
Ladies and gentlemen. This fight is 3 rounds, in the heavyweight division.
Introducing the fighter to my left, fighting out of the red corner.
With a record of
4 - 1 - 0, fighting out of Sydney, Jussi Juntta!
And introducing the fighter to my right, fighting out of the blue corner.
With a record of
4 - 0 - 0, fighting out of Rio de Janeiro, Mr Legendary!
The judges for this bout are Hugh Johnson, Skip Squint and Winston Howard.
The bell rings for round one and we are underway!
Juntta manages to get an easy takedown there - catching Legendary on his heels. He'll look to pass Legendary's guard now, I'm sure.
Juntta with a couple of shots to the head there. Not particularly brutal.
Legendary looking to control the pace of the fight rather than finish it.
Legendary being controlled here, momentarily.
Juntta missing there with some ground and pound from the guard.
Legendary trying to keep a closed guard but Juntta is proving a slippery customer.
Juntta trying to pass the guard. He's being very persistent here but Legendary manages to land a sweep and now he's on top!
Legendary looks more muscular than last time we saw him. He must have been on the weights.
The fighters are pressed up against the cage, both looking to find a bit of space to work.
Juntta wants to sweep but no luck.
Legendary is a painfully thin specimen of a man. You do wonder whether a good body kick would snap him clean in two.
Juntta is looking to get back to his feet but can't, whilst Legendary is controlling him.
That's one minute gone in the round.
Juntta pulls Legendary in close to his closed guard and prevents Legendary from doing any damage or advancing position.
Legendary trying to control the position from guard on top but Juntta is wriggling around, looking for whatever he can.
Juntta not looking particularly offensive just at the moment.

Jussi Juntta has forced the referee to step in and bring the fight back to the feet.
Legendary cracks Juntta with a good jab.
Legendary lands with a kick to the ribs.
Legendary stuffs a takedown. It's all about dictating where the fight takes place and Legendary wants it to stay on the feet.
No joy there for Juntta, who threw a few shots but didn't land.
Legendary lands with a cross.
Legendary gets caught flat footed, as Juntta shoots in with a quick takedown into guard.
Juntta tries to free his leg and advance position but Legendary is retaining full guard.
Juntta wants to control from the top but Legendary keeps moving.
We've seen a great period of action over the last minute or so - credit to both fighters for going all out!
Legendary tries to land a sweep but no joy.
That's two minutes gone in the round.
Juntta looking to sit in guard and control but Legendary gets the butterfly guard and sweeps. He's now in the guard on the top.
Legendary tries to free his leg and advance position but Juntta is retaining full guard.
Juntta can't keep his opponent in guard - Legendary advances to half guard, no doubt looking to mount.
Juntta tries to kick Legendary off but Legendary keeps his base steady and stays in half guard.
Juntta regains full guard. Nicely done.
Juntta controls Legendary momentarily but Legendary frees himself.
Legendary looking to pass the guard.
Juntta is working an open guard here, looking to improve his position. No doubt that will leave him open to counters but at least he's being more offensive.
That's three minutes gone in the round.
Legendary controls the pace of the fight for a moment.
Juntta lands a beautiful switch and he's in full mount! That could spell trouble for Legendary!
Legendary tries to hold on but Juntta pushes him away.
Legendary holds of for dear life.
Juntta putting on the heat here with some good ground and pound!
Oooooh, big shot lands for Juntta! Legendary is hurt baaadly! Juntta is firing away with more strikes - Legendary is covering up... the ref is warning him to do something. He's just covering up though still and the ref has to step in to end the fight! This one is all over!
Ladies and gentlemen, after 4:55 of round 1, we have a winner by way of TKO (Strikes). Jussi Juntta!
|
|
|
|
|
|
|
|
|
|
|
|
|
|
|
|
|
|
|
|
|
|
|
| S |
C
A |
G |
S |
C
B |
G |
|
S |
C |
G |
|
energy
A | B |
|
hype
A | B |
|
pop
A | B |
|
mgr
A | B |
|
FIGHT
RATING
44% |
|
|
|
|
|
|
|
|
|
|
