 |
MFL 11: Tournament Round 2 PBP Commentary |
Undercard bout
|
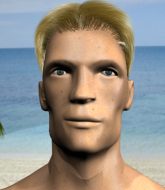
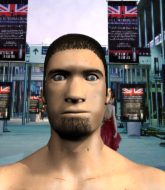
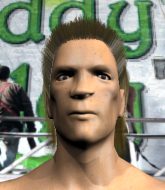
Coming up we have a lightweight MMA rules bout between Mark Coalman (ranked 0 p4p, 0 weight class) and Junior Duarte (ranked 0 p4p, 0 weight class). Junior Duarte has the power to score a knockout today if he connects clean with Mark Coalman's chin.
 |
|
 |
| 175 cm
25
160 lbs
2 - 1 - 0 |
|
175 cm
20
160 lbs
0 - 0 - 0 |
BJJ Blue Belt
Decent elbows
Intelligent |
|
BJJ Purple Belt
Basic striking
Granite chin |
|
| |
|
Ladies and gentlemen. This fight is 3 rounds, in the lightweight division.
Introducing the fighter to my left, fighting out of the red corner.
With a record of
2 - 1 - 0, fighting out of Los Angeles, Mark Coalman!
And introducing the fighter to my right, fighting out of the blue corner.
With a record of
0 - 0 - 0, fighting out of Los Angeles, Junior Duarte!
The judges for this bout are Don Winkell, Frank Antenori and Timothy Bukovac.

The bell rings for round one and we are underway!
Duarte avoids the clinch attempt nicely.
Duarte fails to land with the punch combination there - jab, cross, hook, miss, miss, miss.

Coalman fakes with an overhand right and moves in to clinch with Duarte, pushing him back against the cage.
Coalman lands a damaging elbow.
Coalman lands a knee to the head there! That was nasty!
Duarte being controlled against the cage.
Coalman with an attempt at a knee that misses.
Coalman stalling in the clinch.
Duarte is clearly stalling here... Pick up the pace son.
Duarte is working for a takedown up against the cage. He can't get it on this occasion though.
Coalman working Duarte over with knees to the body.
Coalman stalling in the clinch.

That's one minute gone in the round.
Duarte tries to pull guard but can't drag his opponent to the mat. Coalman just stands there and leans against the cage.
Kneeeeees! The crowd are calling for knees to the body. Coalman obliges.
Coalman putting his Muay Thai to good use. He has Duarte in a tight clinch and is doing some damage with knees to the body.
Coalman is trying to wear down his opponent with knees to the body.
Duarte looks winded!
Coalman is trying to wear down his opponent with knees to the body.
Coalman content to slow the pace in the clinch.
Coalman is trying to wear down his opponent with knees to the body.
Coalman connects with a knee to the head.
Coalman connects with a knee to the head.
Wooooo! Give it up for these two warriors! They are putting on a show!
Coalman creates a bit of space for himself and sneaks an elbow through Duarte's defenses.
A nice glancing elbow lands by Coalman.
Coalman slows down the pace here.

That's two minutes gone in the round.
Knees in the clinch landing for Coalman.
Coalman unloads a knee to the mid-section. Duarte lets out a prehistoric sounding urrrrgh.
Coalman stalling.
Coalman landing knees to the head.
Coalman holding his opponent close, against the cage.
Duarte fails to pull guard.
Mark Coalman has stuffed three takedown attempts in the round now. That's going to take a lot out of Junior Duarte.
Coalman lands a knee to the head.
Coalman lands an elbow just above Duarte 's eye.
Coalman lands a knee to the head.

That's three minutes gone in the round.
Knees in the clinch landing for Coalman.
The pace really dropping off here, momentarily.
Coalman lands a knee to the head.
Coalman lands a knee to the head there! That was nasty!
Coalman unloads a knee to the mid-section.
Duarte is trying to drag Coalman to the mat but Coalman just about manages to keep his footing. He used the cage to his advantage there.
Coalman lands an elbow just above Duarte 's eye.
Coalman connects with a nasty looking knee right to Duarte's face.
Coalman stalling in the clinch.

That's four minutes gone in the round.
Duarte drops to a knee looking for a takedown but Coalman gets the underhooks and prevents it.
Coalman utilising his Muay Thai to score with a knee to the body.
Coalman landing knees to the body. They look like they could hurt.
The fans in attendance giving it up for the two fighters, who have really let it all hang out in the last minute or so!
Kneeeeees! The crowd are calling for knees to the body. Coalman obliges.
Coalman working Duarte over with knees to the body.
Coalman controlling the action here for a moment.
The crowd are going absolutely nuts as the round comes to an end - what a fantastic round of action!
Coalman connects with a knee to the head.
And thats the end of the round the fighters go back to their corners.
Mark Coalman dominated that round.
The minute break is over - no more time for sponges and pep talks - back to the action!

Coalman rushes Duarte and presses him up against the cage.
Coalman is struggling to control the position.
Both fighters working to control the clinch.
Duarte misses with an elbow over the top.
Coalman holding his opponent close, against the cage.
Coalman creates a bit of space for himself and sneaks an elbow through Duarte's defenses.
Coalman with a knee to the head.
Coalman gets an overhook and lands an elbow to the side of the head.
Coalman landing knees to the body. They look like they could hurt.
Coalman is trying to wear down his opponent with knees to the body.
Coalman is really dominating this fight. Is there anything that Duarte can do to turn this around?
Duarte wants to break free. God knows he wants to breaaaak freeee.
Duarte is breathing heavily.
Coalman connects with a knee to the head.
That's one minute gone in the round.
Coalman connects with a nasty looking knee right to Duarte's face.
Coalman working Duarte over with knees to the body.
Coalman lands a damaging elbow.
Coalman utilising his Muay Thai to score with a knee to the body.
The fighters are going at a pretty good pace and they're both starting to sweat now.
Coalman lands a nice knee to the body.
The two fighters are working to gain dominance in the clinch.
Knees to the body from Coalman.
Coalman working Duarte over with knees to the body.
The crowd cheering loudly, showing their appreciation for the quality fight we're seeing here.
Coalman landing knees to the head.
Duarte takes a knee to the side of the body.
A bit of stalling here from Coalman.
That's two minutes gone in the round.
Coalman utilising his Muay Thai to score with a knee to the body.
Coalman comes over the top with an elbow. That landed flush.
Coalman lands a good knee to the midsection. Duarte won't want to take too many of those.
Coalman stalls.
Coalman lands a knee to the head there! That was nasty!
Coalman is trying to wear down his opponent with knees to the body.
Coalman with the Thai clinch, lands a knee to the head.
Coalman lands a good knee to the midsection. Duarte won't want to take too many of those.
Coalman lands a nice knee to the body.
That's three minutes gone in the round.
Coalman taking a breather.
Coalman landing knees to the head.
Coalman stalling the fight.
A nice glancing elbow lands by Coalman.
Coalman utilising his Muay Thai to score with a knee to the body.
Coalman avoiding damage.
Coalman landing some nice looking knees to the body.
That's four minutes gone in the round.
Coalman putting his Muay Thai to good use. He has Duarte in a tight clinch and is doing some damage with knees to the body.
Coalman lands a knee to the head there! That was nasty!
Duarte takes a knee right on the jaw!
Coalman lands a knee to the body.
Coalman unloads a knee to the mid-section.
Knees to the body from Coalman.
Wooooo! Give it up for these two warriors! They are putting on a show!
Duarte has a body lock and is looking for a takedown. Coalman is bouncing around trying to prevent the takedown and somehow he has indeed managed to stay on his feet.
A knee to the head by Coalman.
The crowd are going absolutely nuts as the round comes to an end - what a fantastic round of action!
Coalman landing some nice looking knees to the body.
Coalman looks to be in better condition than last time we saw him fight. Obviously he's been working hard on his cardio.
Coalman landing knees to the body.
Nice elbow from Coalman.
And thats the end of the round the fighters go back to their corners.
Mark Coalman dominated that second round.
That's the end of the round. The referee orders the cornermen out of the cage so we can get back down to business. This is the final round!

Coalman tries to close the distance and clinch up but Duarte swats him away and circles back towards the center.
Duarte will need to tighten up his combinations if he doesn't want to gas himself out, swinging at thin air.
Duarte keeps the fight on the outside.
Mark Coalman is looking to throw some combinations by the looks of things.

Duarte has closed the distance and engaged Coalman in a clinch.
Coalman with the Thai clinch. He's looking to land a big knee but he's not managed it this time.
Coalman prevents a takedown attempt there.
Duarte tries to break free but Coalman pushes him back against the cage.
Coalman tries to land a knee to the head but misses.
Coalman scores a nice knee to the body.
Coalman lands a knee to the head there! That was nasty!
Duarte is working on a leg, looking for a takedown but Coalman is defending well.
That's one minute gone in the round.
Coalman utilising his Muay Thai to score with a knee to the body.
Mark Coalman has scored more points in the clinch so far.
Both fighters are breathing heavily.
Coalman utilising his Muay Thai to score with a knee to the body.
Coalman stalling against the cage.
Knees in the clinch landing for Coalman.
Coalman landing knees to the body.
A knee to the head by Coalman.
Coalman is trying to wear down his opponent with knees to the body.
Coalman landing knees to the body.
Coalman with a knee to the head.
That's two minutes gone in the round.
Coalman creates a bit of space for himself and sneaks an elbow through Duarte's defenses.
This has been an exciting period of action!
Coalman lands a knee to the head.
Coalman lands a knee to the head there! That was nasty!
Coalman landing some nice looking knees to the body.
Coalman scores a nice knee to the body.
Coalman lands a knee to the head.
Duarte is trying to work out of this bad position, with his back against the cage.
Coalman lands a knee to the head.
Coalman tries a knee to the head but Duarte blocks it.
Coalman gets underhooks to prevent Duarte's takedown attempt.
Mark Coalman has stuffed three takedown attempts in the round now. That's going to take a lot out of Junior Duarte.
Coalman stalling the fight.
That's three minutes gone in the round.
Coalman tries to land knees in the clinch but Duarte avoids the damage to the body.
Coalman tries to stall but Duarte uses the opportunity to gain a better position.
Coalman lands a glancing elbow in the clinch.
Coalman comes over the top with an elbow. That landed flush.
Coalman scores a nice knee to the body.
Duarte looks like he'd prefer to be striking at range right now.
Duarte looking for a takedown.
Coalman connects with a knee to the head.
Coalman lands a knee to the head.
That's four minutes gone in the round.
Coalman is trying to wear down his opponent with knees to the body.
Coalman scores a nice knee to the body.
Knees in the clinch landing for Coalman.
Coalman with a knee to the head.

Duarte pulls guard effortlessly.
Coalman has to be careful here, sitting in the guard of a superior BJJ player.
Duarte trying to punch from his back but it's not doing any damage.

Duarte had isolated an arm as going for a kimura. Coalman defends it easily.
As the round comes to an end the crowd are showing their appreciation for a great round of action.
Coalman has decided he wants to stand but the closed guard of Duarte is proving hard to escape from.
And that's the end of the fight!
Mark Coalman showed his dominance in that final round.
Well I reckon that's a shut out for Coalman, winning every round. Will the judges agree? They are the ones who matter, even if they are often depressingly incompetent. Over to the ring announcer for the scorecards.
Ladies and gentlemen, after 3 rounds of action, we go to the scorecards for a decision.
Judge Don Winkell scores the fight 30:25
Judge Frank Antenori scores the fight 30:26
Judge Timothy Bukovac scores the fight 30:25
In favor of your winner, by unanimous decision... Mark Coalman!
|
|
|
|
|
|
|
|
|
|
|
|
|
|
|
|
|
|
|
|
|
|
|
| S |
C
A |
G |
S |
C
B |
G |
|
S |
C |
G |
|
energy
A | B |
|
hype
A | B |
|
pop
A | B |
|
mgr
A | B |
|
FIGHT
RATING
58% |
|
|
|
|
|
|
|
Undercard bout
|
|
|
|
Undercard bout
|
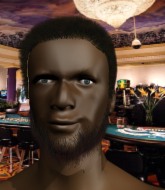
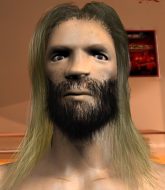
Coming up we have a middleweight MMA rules bout between Brian Banks (ranked 0 p4p, 0 weight class) and Reza Karimi (ranked 0 p4p, 0 weight class). Brian Banks has the edge in experience - let's see if he can make that count tonight.
 |
|
 |
| 200 cm
25
192 lbs
2 - 2 - 0 |
|
176 cm
21
190 lbs
3 - 0 - 0 |
BJJ Blue Belt
Solid Muay Thai
Cuts easily |
|
Good wrestler
Excellent boxer
Granite chin |
|
| |
|
Ladies and gentlemen. This fight is 5 rounds, for the middleweight championship of the world!
Introducing the champion to my left, fighting out of the red corner.
With a record of
2 - 2 - 0, fighting out of Los Angeles, Brian Banks!
And introducing the challenger to my right, fighting out of the blue corner.
With a record of
3 - 0 - 0, fighting out of Los Angeles, Reza Karimi!
The judges for this bout are Frank Antenori, Jack Bonds and Don Winkell.
The bell rings for round one and we are underway!
Karimi scores with a takedown into Banks's guard.
The ref warns both fighters not to hold the cage as they work up against the meshing.
We must be close to a standup if these guys don't pick up the pace.

Karimi stands up and waves to Banks to follow him.
A momentary lapse in concentration from Banks enables Karimi to shoot in and score with a neat double leg. Banks manages to secure a closed guard as the fighters hit the mat.
Karimi trying to land body shots but he keeps hitting the mat.
Karimi stops Banks from standing up.
Karimi postures up to throw the ground and pound strikes but they don't connect.
Karimi is holding a leg here, probably looking for an ankle lock - he drops back and goes for it! Banks is in trouble! Is it all over??? No! Banks has escaped and now he's on top!
Fantastic stuff here - a very entertaining period of action, which has drawn cheers from the crowd.
Karimi had isolated an arm as going for a kimura. Banks defends it easily.
Banks knows he needs to get back to his feet asap. He's simply no match for Karimi on the ground.
Banks got a little sloppy there for a moment and Karimi has worked his way into a loose triangle - can he finish it?! No, Banks has managed to get both his arms back between Karimi's legs - danger averted.
That's one minute gone in the round.
Banks postures up.
Banks trying to control the position from guard on top but Karimi is wriggling around, looking for whatever he can.
Karimi looking for a guillotine here but Banks defends easily.
Banks has to be careful here, sitting in the guard of a superior BJJ player.
Karimi is working actively off his back, looking to secure an arm or perhaps work for a triangle.
This has been an exciting period of action!
Karimi throws his legs up looking for a submission but Banks uses it to pass to side control.
That's two minutes gone in the round.
Karimi is moving his hips around well on the bottom and has managed to get back to half guard.
Karimi looking for submissions from an awkward position here.
Banks really does look like a pencil wearing a pair of gloves. Let's hope he has a gameplan to suit that ridiculous body shape.
Banks tries to stand but can't do so whilst Karimi controls his leg.
Karimi regains full guard. Nicely done.
Banks avoids a guillotine attempt easily.
Banks avoids a guillotine attempt easily.
Karimi looking for a triangle here. Banks is fighting it but it looks tight! Karimi pulls the arm across and this one won't last much longer! Nope, Banks is tapping out - this one is all over!
Ladies and gentlemen, after 3:18 of round 1, we have a winner by way of Submission (Triangle Choke). Reza Karimi!
Reza Karimi is the new middleweight champion!
|
|
|
|
|
|
|
|
|
|
|
|
|
|
|
|
|
|
|
|
|
|
|
| S |
C
A |
G |
S |
C
B |
G |
|
S |
C |
G |
|
energy
A | B |
|
hype
A | B |
|
pop
A | B |
|
mgr
A | B |
|
FIGHT
RATING
68% |
|
|
|
|
|
|
|
Undercard bout
|
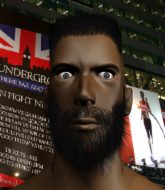
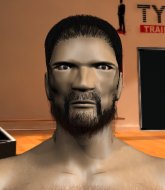
Coming up we have a welterweight MMA rules bout between Vegeta Breigh (ranked 0 p4p, 0 weight class) and Gustav Ragnarson (ranked 0 p4p, 0 weight class). The key to victory for Vegeta Breigh has got to be keeping the fight on the feet.
 |
|
 |
| 183 cm
25
180 lbs
2 - 0 - 0 |
|
179 cm
19
184 lbs
5 - 1 - 0 |
BJJ White Belt
Counter fighter
Granite chin |
|
Dangerous GnP
Basic striking
Powerful |
|
| |
|
Ladies and gentlemen. This fight is 5 rounds, for the welterweight championship of the world!
Introducing the champion to my left, fighting out of the red corner.
With a record of
2 - 0 - 0, fighting out of Los Angeles, Vegeta Breigh!
And introducing the challenger to my right, fighting out of the blue corner.
With a record of
5 - 1 - 0, fighting out of Los Angeles, Gustav Ragnarson!
The judges for this bout are Don Winkell, Frank Antenori and Jack Bonds.
The bell rings for round one and we are underway!
Breigh keeping a good distance there, avoiding the body shot.
Ragnarson shoots in looking for a single leg takedown. Breigh is trying to defend but Ragnarson finishes it well and ends up in half guard. Let's see if he can advance position further.
The referee looks like he's ready to step in and stand the fighters back up.
Ragnarson throwing shots but Breigh is blocking nicely.
Ragnarson winds up and cracks Breigh with a swinging punch to the side of the head.
Ragnarson thows a huge punch but Breigh dodges it nicely.
In the pre-fight buildup videos we saw Ragnarson working his ground and pound in the gym. He isn't landing a great percentage of his ground strikes so far though.
Breigh taking some punishment here, with Ragnarson in his half guard.
Ragnarson working over Breigh with some ground and pound. Breigh looks like he wants out of this position, which is understandable.
The fans in attendance giving it up for the two fighters, who have really let it all hang out in the last minute or so!
Breigh has hold of Ragnarson's hands but Ragnarson slips his arm to the side and lands an elbow.
Ragnarson slips a nice elbow through Breigh's hands, connecting with Breigh's forehead.
Ragnarson not throwing his punches with enough precision this time.
Ragnarson lands strikes from half guard.
Breigh on the receiving end of some nice ground and pound.
The ref warns both fighters not to hold the cage as they work up against the meshing.
Ragnarson wants to free his trapped foot but Breigh is holding on for dear life with his legs.
Breigh is looking to improve his position.
That's one minute gone in the round.
Breigh taking some punishment here, with Ragnarson in his half guard.
Ragnarson working the head and body with strikes.
Ragnarson working Breigh over with strikes.
Ragnarson has freed up his trapped foot and advances to mount.
Ragnarson connects with a couple of good shots from mount.
Breigh is breathing heavily.
This is a great period of action - very entertaining stuff!
Ragnarson postures up and connects with a big shot that has rocked Breigh badly. He's trying desperately to grab hold of Ragnarson around the waist but Ragnarson pushes him off and unloads with more strikes, forcing the referee to jump in and save him! Ragnarson is the winner by TKO! Ragnarson jumps onto the cage and shouts into the camera. "We did it momma!"
Ladies and gentlemen, after 2:59 of round 1, we have a winner by way of TKO (Strikes). Gustav Ragnarson!
Gustav Ragnarson is the new welterweight champion!
A victorious Gustav Ragnarson thanked his army of followers in his post fight interview, telling people to make sure they follow him on Twitter.
|
|
|
|
|
|
|
|
|
|
|
|
|
|
|
|
|
|
|
|
|
|
|
| S |
C
A |
G |
S |
C
B |
G |
|
S |
C |
G |
|
energy
A | B |
|
hype
A | B |
|
pop
A | B |
|
mgr
A | B |
|
FIGHT
RATING
81% |
|
|
|
|
|
|
|
Co-main event
|
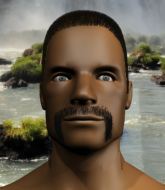
Coming up we have a super heavyweight MMA rules bout between Tadamasa Yamada (ranked 0 p4p, 0 weight class) and Jack Knife (ranked 0 p4p, 0 weight class). Over to our ring announcer for the fighter introductions!
 |
|
 |
| 186 cm
35
195 lbs
36 - 12 - 0 |
|
184 cm
26
169 lbs
5 - 1 - 0 |
Good wrestling
World class boxer
Insanely flexible |
|
Olympic wrestler
World class MT
Good gas tank |
|
| |
|
Ladies and gentlemen. This fight is 5 rounds, in the super heavyweight division.
Introducing the fighter to my left, fighting out of the red corner.
With a record of
36 - 12 - 0, fighting out of Los Angeles, Tadamasa Yamada!
And introducing the fighter to my right, fighting out of the blue corner.
With a record of
5 - 1 - 0, fighting out of Los Angeles, Jack Knife!
The judges for this bout are Jack Bonds, and Timothy Bukovac.
The bell rings for round one and we are underway!
Knife misses with a straight left.
Knife's jab looks to have found its range, popping Yamada under the eye.
Yamada darts in trying to clinch
and Knife counters with a stiff right hand.
Yamada throws a combination but comes up with nothing but fresh air.
Tadamasa Yamada seems to be the more aggressive standup fighter in this bout.
A clash of legs there as Yamada blocks the low kick.
No joy there for Yamada, who threw a few shots but didn't land.
Knife throws a hook to the side of Yamada's head but Yamada sees it coming and ducks under it beautifully.
The sound of bone on bone echoes around the arena as Yamada checks a leg kick.
Good leg kick by Knife there. It's the ones that make that thud noise that hurt and that was an almighty thud.
Yamada fails to land with a series of punches.
Knife connects with a lovely jab that went straight through the gap between Yamada's hands.
Yamada moves his head to the side to avoid a jab but walks straight into a cross.
Yamada avoids a kick to the body.
Nice uppercut lands for Knife. That snapped Yamada's head back.
Yamada fails in his attempt to clinch.
Yamada misses with the combination.
Knife fakes with a right hand and throws a good leg kick, right into the thigh. That had to hurt Yamada.
That's one minute gone in the round.
Yamada swings wildly with a couple of big hooks
and Yamada takes a counter punch right on the button for his troubles.
Knife throws a quick inside leg kick.
Yamada fails with an attempt to clinch.
Yamada moves to clinch but Knife breaks away
and Knife counters with a nice uppercut.
Knife has been working his punching technique in the buildup to the fight and it appears to be paying off.
Knife jabs away that one connects to the head of his opponent.
Yamada misses with a jab and misses with a cross straight after too.
Yamada fails in his attempt to clinch.
Yamada tries to close the distance and clinch but Knife swats him to one side with an open hand palm strike and circles away.
Yamada fails with an attempt to clinch.
Yamada scores with a shot to the body.
Knife fakes high and swings low for a body shot but Yamada manages to avoid it.
Yamada rushes forward with a series of wild hooks but Knife moves out of range and avoids them all easily.
Yamada gets to the clinch - let's see what his plan is here.
Yamada throws a vicious knee straight up the middle but Knife blocks it with crossed arms.
Yamada is looking to score with knees to the body. Maybe he'll change it up and go body then head. Knife is defending well for now.
Knife working aggressively here.
That's two minutes gone in the round.
Yamada misses with a knee strike.
Knife doesn't land with the attempted body shot.
This has been an exciting period of action!
Knife digs a right hand into Yamada's ribs. Those have got to be taking their toll on Yamada's gas tank.
Yamada throws a blind hook that connects with the side of Knifes head.
A short left from Knife.
Knife lands a hook to the side of the head.
Knife swings away with an uppercut that misses.
Knife stalling in the clinch but Yamada improves position.
A quick uppercut on the inside from Knife.
Yamada throws a vicious knee straight up the middle but Knife blocks it with crossed arms.
Knife throws a punch but it's blocked by Yamada.
Knife lands a nice uppercut.
Knife struggles to land a body shot inside as Yamada controls his hands.
Yamada blocks an uppercut.
Yamada tries to land a knee to the body but he is off balance and Knife avoids it.
Yamada misses the knee to the body. Nice hip positioning from Knife.
Nice body punch from Knife - that landed with a thud.
That's three minutes gone in the round.
Knife tries to stall but Yamada uses the opportunity to gain a better position.
Yamada working on landing some head shots here - that one got through nicely.
An uppercut on the inside fails to land for Knife.
Yamada prevents a body shot from Knife.
Yamada using the Thai plumb to throw knees but Knife has his back arched nicely, preventing the strike.
Yamada throws a vicious knee straight up the middle but Knife blocks it with crossed arms.
An uppercut to the body lands inside from Knife.
Knife is looking to control Yamada's arms but Yamada gets an underhook and turns him. Now Knife has his back to the cage.
Yamada tries to land a knee to the head but misses.
Yamada creates a bit of distance and throws an elbow that only just misses.
Yamada can't find room to land a body shot as Knife controls the action.
Good anti-grappling being displayed by Yamada as Knife tries to tie him up.
Yamada fails to land with a short punch on the inside.
Knife lands a right hand that snaps the head of Yamada backwards.
Knife is trying to stall.
That's four minutes gone in the round.
Knife has a couple of punches blocked by Yamada.
Yamada lands with a short head shot on the inside.
Knife taking a break, stalling in the clinch.
Knife avoiding damage as Yamada throws knees to the body.
Knife throws a punch but it's blocked by Yamada.
Knife pushes Yamada back against the cage and unloads with a body punch.
The crowd cheering loudly, showing their appreciation for the quality fight we're seeing here.
An uppercut on the inside fails to land for Yamada.
Knife misses with a short punch on the inside.
Knife goes for a body shot but it's blocked.
Yamada with the Thai clinch. He's looking to land a big knee but he's not managed it this time.
Some stalling of biblical proportions here from Knife.
Yamada using the Thai plumb to throw knees but Knife has his back arched nicely, preventing the strike.
As the round comes to an end the crowd are showing their appreciation for a great round of action.
Yamada misses with the head strike.
Yamada with an attempt at a knee that misses.
Knife scores with a shoulder strike.
Yamada missing with knees to the body.
And thats the end of the round the fighters go back to their corners.
Jack Knife dominated that round.
The corners get their ten second warning. Both fighters stand from their stools and stare eachother down, ready to get back to the action.
Yamada avoids the body shot from Knife.
Yamada tries to clinch but is not successful on this occasion.
Yamada moves his head to the side to avoid a jab but walks straight into a cross.
Yamada looks to have improved his striking defense since last time we saw him fight.
Knife missing with a left hand there. Yamada was out of range so wasted energy throwing that one.
Yamada slips under a jab.
Yamada misses with a shot to the body
and Knife counters with a low kick, right behind Yamada 's knee.
Knife connects with a leg kick. Yamada looked like he was expecting something else and didn't defend it.
Tadamasa Yamada is looking to throw some combinations by the looks of things.
Yamada throws a combination but comes up with nothing but fresh air.

Yamada drops Knife with a beautiful combination! Knife stares up at his opponent, who ushers him back to his feet - Yamada is looking for the KO!

It looks like Jack Knife has been cut.
Fantastic stuff here - a very entertaining period of action, which has drawn cheers from the crowd.
Knife throws a hook to the side of Yamada's head but Yamada sees it coming and ducks under it beautifully.
Yamada tries to clinch up.
Yamada is looking to clinch.
We are yet to see a takedown attempt from Knife in the fight. On paper you would think he is the more dominant ground fighter so let's see if these unusual tactics pay off.
Yamada keeping his hands up high there, blocking the jab from Knife.
Yamada is looking to chop away at Knife's legs.
Knife fakes a jab and throws a low kick but Yamada checks it well.
Yamada with poor footwork there. He got himself in a bit of a tangle, enabling Knife to score with a decent uppercut.
Yamada tries to clinch there but Knife circles away.
Knife bobs and weaves and throws out a fast jab that snaps Yamada's head backwards.
That's one minute gone in the round.
Knife circles away from the clinch attempt
enabling Knife to counter with a crisp jab.
Knife misses with a body kick.
Knife tries to keep at a distance but Yamada has taken the fight into the clinch.
Knife swings wildly with an uppercut but Yamada uses good head movement to avoid it.
Yamada misses with a knee strike.
Yamada blocks a couple of punches on the inside.
With the fighters clinched against the cage, Knife creates a bit of distance for himself and scores with a nice uppercut.
Jack Knife seems to be working more effectively in the clinch in the fight so far.
Yamada throws a knee to the head but misses.
Yamada misses with a knee strike.
Yamada looking to throw knees to the head but Knife is blocking nicely.
A short body shot lands from Knife as the two fighters clinch.
Yamada is looking to score with knees to the body. Maybe he'll change it up and go body then head. Knife is defending well for now.
That's two minutes gone in the round.
An uppercut on the inside fails to land for Yamada.
Yamada tries to land a knee to the body but he is off balance and Knife avoids it.
Yamada lands a shoulder strike.
A head punch blocked on the inside by Yamada.
The pace slowing considerably in the clinch, as Knife takes a break from that fighting nonsense to think about the finer things in life.
Knife throws a blind hook that connects with the side of Yamadas head.
Fantastic stuff here - a very entertaining period of action, which has drawn cheers from the crowd.
A short right from Yamada on the inside.

Knife is rocked!
Yamada tries to land a knee to the head but Knife blocks with his arms.
Knife is still on wobbly legs! Can Yamada finish him?
Yamada tries to land a knee to the head but Knife blocks with his arms.
Yamada throws a vicious knee straight up the middle but Knife blocks it with crossed arms.
Yamada throws a vicious knee straight up the middle but Knife blocks it with crossed arms.
Yamada gets an overhook and lands an elbow to the side of the head.
Yamada creates a bit of space for himself and rocks Knife with a big uppercut! Knife tries to clinch up but Yamada pushes him back against the cage and lands another monster strike that crumples Knife to the mat! Knife covers up and Yamada unloads with more strikes until the referee steps in to end the bout!
Ladies and gentlemen, after 2:43 of round 2, we have a winner by way of TKO (Punches). Tadamasa Yamada!
Tadamasa Yamada decided to go for the less than humble approach in his post fight interview, telling everyone how he is going to conquer the world. The crowd seemed to like it when really that sort of approach could have gone either way.
|
|
|
|
|
|
|
|
|
|
|
|
|
|
|
|
|
|
|
|
|
|
|
| S |
C
A |
G |
S |
C
B |
G |
|
S |
C |
G |
|
energy
A | B |
|
hype
A | B |
|
pop
A | B |
|
mgr
A | B |
|
FIGHT
RATING
83% |
|
|
|
|
|
|
|
Main event
|
Coming up we have a super heavyweight MMA rules bout between Frankestein Mir (ranked 0 p4p, 0 weight class) and Hank Patterson (ranked 0 p4p, 0 weight class). Mir kept the crowd waiting but all that was forgotten when his ring entrance music started. The incomparable musical genius that is SURF RIDER!!! by The lively ones!. Hank Patterson told me before the fight that he's been watching a lot of DVDs so let's see if that helps him in this one! I can't wait to find out!
 |
|
 |
| 185 cm
32
277 lbs
32 - 11 - 0 |
|
183 cm
33
185 lbs
25 - 12 - 0 |
Abu Dhabi Champ
Great elbows
Insanely flexible |
|
Good wrestler
World class boxer
Good gas tank |
|
| |
|
Ladies and gentlemen. This fight is 5 rounds, in the super heavyweight division.
Introducing the fighter to my left, fighting out of the red corner.
With a record of
32 - 11 - 0, fighting out of Los Angeles, Frankestein Mir!
And introducing the fighter to my right, fighting out of the blue corner.
With a record of
25 - 12 - 0, fighting out of Los Angeles, Hank Patterson!
The judges for this bout are Don Winkell, Timothy Bukovac and .
The bell rings for round one and we are underway!
Mir just misses with a punch to the body.
Mir has been working on his boxing with his coaches at BLKOUT Training Center in the buildup to the fight.
Patterson defending well as Mir loads up on a big left hand.
Mir closes the distance and pushes Patterson back into the cage.
Mir looking for a takedown.
Patterson lands a hook that snaps the head of Mir backwards.
Patterson tries a knee to the head but Mir blocks it.
Mir has hold of a leg and is looking for a trip takedown. Patterson avoids it nicely though and we remain in the clinch.
Patterson tries to land a shot to the body but it's blocked.
Patterson lands a left hand.
Mir tries to land knees in the clinch but Patterson avoids the damage to the body.
A short right hand to the side of the head by Patterson.
Patterson lands with a short head shot on the inside.
Patterson throws a vicious knee straight up the middle but Mir blocks it with crossed arms.
Mir tries to land knees in the clinch but Patterson avoids the damage to the body.
Mir tries to land a knee to the body but he is off balance and Patterson avoids it.
A right handed body shot lands from Patterson.
Mir is breathing heavily.
Wooooo! Give it up for these two warriors! They are putting on a show!
Mir tried to land a shot to the body but connects with Patterson's elbow.
Patterson is trying to break free.
Mir tries to score a body lock takedown but Patterson shows good agility there to stay on his feet.
That's three failed takedown attempts in the round for Frankestein Mir. That's going to take a lot out of him.

Patterson breaks from the clinch.
Patterson clinches up with Mir and pushes him back against the cage.
Patterson creates a bit of distance and throws an elbow that only just misses.
Mir lands with a short head shot on the inside.
That's one minute gone in the round.
Patterson scores with a nice hook to the head.
Mir takes a knee to the side of the body.
Stalling in the clinch from Patterson.
Patterson tries a knee to the head but Mir blocks it.
Patterson's corner calls for him to break the clinch, which he does.
Patterson rushes forward with a series of wild hooks but Mir moves out of range and avoids them all easily.
Patterson throws a right and a left that Mir avoids nicely.
Patterson fails with a takedown attempt.
Mir throws a hard body shot but it just misses.
Mir darts in looking for a takedown but Patterson gets double underhooks and turns Mir into the cage.
We've seen a great period of action over the last minute or so - credit to both fighters for going all out!
Mir takes a knee right on the jaw!
Patterson tries to land a knee to the head but misses.
Mir's head jolts backwards as he takes an uppercut right on the button!
Patterson scores with a shot to the side of Mir's head.
Patterson fails to land with a short punch on the inside.
Mir lands with a left to the head.
That's two minutes gone in the round.
Patterson gets underhooks to prevent Mir's takedown attempt.
Patterson is trying to wear down his opponent with knees to the body.
Mir working Patterson over with knees to the body.
Mir trying to land knees to the body.
Patterson looking to slow down the pace here.
Mir connects with a nasty looking knee right to Patterson's face.
Patterson tries to land a knee to the head but misses.
Patterson throws a punch but it's blocked by Mir.
Patterson tries a knee to the head but he's missed.
Mir looking for a takedown.
Patterson creates a bit of distance and throws an elbow that only just misses.
Patterson blocks a knee to the body. He'll have a nicely bruised forearm in the morning.
Come on Patterson - let's have some action - none of this stalling nonsense.
Patterson breaks from the clinch.
Mir moves in looking to clinch but Patterson pushes him off.
Mir connects with a solid leg kick.
Patterson stuffs a takedown. It's all about dictating where the fight takes place and Patterson wants it to stay on the feet.
That's three minutes gone in the round.
Patterson throws a nice looking combination but Mir bobs and weaves to avoid any damage.
The crowd cheers as Mir lands an impressive looking overhand right. Patterson doesn't seem phased though.
Mir fakes high and swings low for a body shot but Patterson manages to avoid it.
Patterson moves into the clinch.
Patterson lands with a quick shot inside that doesn't really do much damage.
Patterson misses with the head strike.
Patterson breaks the clinch and we're back to striking at distance.
Mir misses with a head kick.
A slow jab from Mir misses its intended target.
Patterson misses with a wild combination.
Mir throws a looping left and ducks down for a takedown. He's got his arms around Patterson's waist but Patterson gets an underhook and avoids the takedown by throwing Mir off to one side.
Mir tries to clinch there but Patterson circles away.
Mir throws a combination but comes up with nothing but fresh air.
A punch combination from Patterson misses.
Some wild striking there from Patterson.
Mir tries to clinch but is not successful on this occasion.
That's four minutes gone in the round.
Some bone on bone action there as Mir checks a low kick. Luckily it wasn't a particularly hard one.
Mir looks to score with a jab to the body but Patterson is just out of range.
Sloppy strikes from Patterson. Those never looked like landing.
Mir has closed the distance and engaged Patterson in a clinch.
The crowd are loving this. Great action here.
Mir blocks a couple of punches on the inside.
Patterson prevents the takedown attempt.
A right hook to the body lands for Patterson.
Mir lands a glancing elbow in the clinch.
It looks like Hank Patterson has been cut.

Mir tightens his grip and picks Patterson up, before dumping him to the ground. Patterson manages to land in guard.
Patterson looking for submissions off his back, moving his hips, looking for an opening.
Patterson is trying to stand up but he's not managed so far.
The crowd are going absolutely nuts as the round comes to an end - what a fantastic round of action!
The fighters are starting to get a bit slippery now, which will make submissions a bit more difficult.
Mir tries to free his leg and advance position but Patterson is retaining full guard.
There's a bit of a scramble here and now Patterson is on top in guard.
And thats the end of the round the fighters go back to their corners.
Hank Patterson dominated that round.
The cut man is working on Hank Patterson's cut.
Well, the break between rounds is over. Let's get back to the scrappin!
A solid body kick from Mir.
Mir throws a combination. Patterson tries to block but a couple of punches get through.
Patterson gets in close and instigates a clinch.
Mir unloads a knee to the mid-section. Patterson lets out a prehistoric sounding urrrrgh.
Mir avoiding damage as Patterson throws knees to the body.
The crowd are loving this. Great action here.
Patterson is trying to maintain a safe position but Mir gets an underhook and turns Patterson into the cage.
Mir keeps the fight in the clinch, despite Patterson's efforts to push away.
Mir lands with a short shot to the head.
Patterson is rocked!
Mir lands a big knee! That's hurt Patterson! Oh, he's all over the place! Mir lands another knee that sends Patterson to the floor and the referee steps in to end the fight!
Ladies and gentlemen, after 0:42 of round 2, we have a winner by way of TKO (Strikes). Frankestein Mir!
A determined Frankestein Mir didn't want to dwell on this fight in his post fight interview. Instead he was more keen to state he wants a title shot. Let's see if he gets it!
|
|
|
|
|
|
|
|
|
|
|
|
|
|
|
|
|
|
|
|
|
|
|
| S |
C
A |
G |
S |
C
B |
G |
|
S |
C |
G |
|
energy
A | B |
|
hype
A | B |
|
pop
A | B |
|
mgr
A | B |
|
FIGHT
RATING
100% |
|
|
|
|
|
|
|
|
|
|
