 |
Sacrament 5 PBP Commentary |
Undercard bout
|
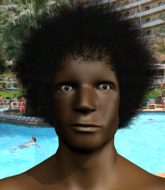
Coming up we have a light heavyweight MMA rules bout between Jefferey Gump (ranked 0 p4p, 0 weight class) and Curtis Angel (ranked 0 p4p, 0 weight class). Curtis Angel is the more experienced fighter, so let's see if that makes a difference tonight.
 |
|
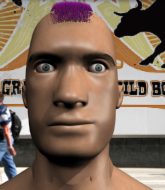 |
| 185 cm
24
210 lbs
0 - 0 - 0 |
|
182 cm
19
220 lbs
0 - 1 - 0 |
BJJ Blue Belt
Solid boxing
Granite chin |
|
BJJ Blue Belt
Brawler
Tends to cut |
|
| |
|
Ladies and gentlemen. This fight is 3 rounds, in the light heavyweight division.
Introducing the fighter to my left, fighting out of the red corner.
With a record of
0 - 0 - 0, fighting out of Montreal, Jefferey Gump!
And introducing the fighter to my right, fighting out of the blue corner.
With a record of
0 - 1 - 0, fighting out of Montreal, Curtis Angel!
The judges for this bout are Robert Douchet, Elvis Blanc and Gregory Folan.

The bell rings for round one and we are underway!
Angel stumbles momentarily as he takes a strong leg kick from Gump.
Angel throws a looping left and ducks down for a takedown. He's got his arms around Gump's waist but Gump gets an underhook and avoids the takedown by throwing Angel off to one side.
Sloppy strikes from Gump. Those never looked like landing.
Gump lands a two punch combo.

It looks like Curtis Angel has been cut.
Angel goes for a double leg but Gump avoids the attempt and the two fighters end up clinched against the cage as Gump continues to drive forward.
Angel wants to take the fight to the mat but Gump manages to get underhooks and keep the fight in the clinch.
Jefferey Gump has stuffed three takedown attempts in the round now. That's going to take a lot out of Curtis Angel.
Angel has dropped down and is looking to force the takedown but it's defended by Gump after a bit of a struggle.
Gump on the defensive, avoiding the knees to the body.
The fans in attendance giving it up for the two fighters, who have really let it all hang out in the last minute or so!
Gump has Angel pushed against the cage.
Angel tries to land a knee to the body but he is off balance and Gump avoids it.

Gump breaks the clinch and we return to the middle of the mat.
Sloppy strikes from Gump. Those never looked like landing.
Gump throws a nice looking combination but Angel bobs and weaves to avoid any damage.

That's one minute gone in the round.

Gump lands a left and a right that send Angel crashing to the mat, dazed. Gump thinks about following him to the mat but decides to wave him back up to his feet!

Angel is rocked!
The crowd cheering loudly, showing their appreciation for the quality fight we're seeing here.
Gump throws a nice looking combination but Angel bobs and weaves to avoid any damage.
Angel is still on wobbly legs! Can Gump finish him?
No joy there for Gump, who threw a few shots but didn't land.
Gump cracks Angel's jaw with two stiff jabs then ducks low and throws a soul-severing right uppercut to the mouth!! Angel slumps to the ground with blood on his lips. The referee steps in before Gump can do further damage! This one is done, son!
Ladies and gentlemen, after 1:15 of round 1, we have a winner by way of KO (Punch). Jefferey Gump!
|
|
|
|
|
|
|
|
|
|
|
|
|
|
|
|
|
|
|
|
|
|
|
| S |
C
A |
G |
S |
C
B |
G |
|
S |
C |
G |
|
energy
A | B |
|
hype
A | B |
|
pop
A | B |
|
mgr
A | B |
|
FIGHT
RATING
86% |
|
|
|
|
|
|
|
Co-main event
|
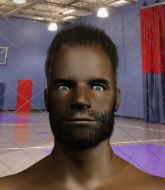
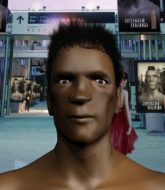
Coming up we have a light heavyweight MMA rules bout between Kazuteru Machida (ranked 0 p4p, 0 weight class) and John Big (ranked 0 p4p, 0 weight class). We have two fighters making their debuts here, so let's see who comes out of this one with their first professional victory.
 |
|
 |
| 182 cm
18
211 lbs
0 - 0 - 0 |
|
190 cm
25
215 lbs
0 - 0 - 0 |
BJJ Brown Belt
Counter fighter
Cuts easily |
|
Good wrestler
Brawler
Granite chin |
|
| |
|
Ladies and gentlemen. This fight is 3 rounds, in the light heavyweight division.
Introducing the fighter to my left, fighting out of the red corner.
With a record of
0 - 0 - 0, fighting out of Montreal, Kazuteru Machida!
And introducing the fighter to my right, fighting out of the blue corner.
With a record of
0 - 0 - 0, fighting out of Montreal, John Big!
The judges for this bout are Trevor Gratis, William Peck and Alec Ball.
The bell rings for round one and we are underway!
Machida looks frustrated there after his takedown attempt is stuffed easily.
Big ducks down and throws a hook to the body but Machida moves away.
Big fakes a head shot and lands one to the body.
Big is the aggressor but that punch slipped nicely by Machida.

Big is looking for a takedown here. He's shot in and has managed to get it, finishing up in Machida's half guard.
If this pace continues, the referee will definitely step in and force a standup.

Big gets to his feet - back to striking we go!
Machida needs to keep his hands up - Big had a free shot at his head there.

It looks like Kazuteru Machida has been cut.
Wooooo! Give it up for these two warriors! They are putting on a show!
Big scores a trip takedown into side control. Nice.
You can see the frustration on Machida's face, being in this tough position on the bottom.
Machida tries to get back to half guard but can't.
Machida wants to control but Big postures up.
Machida is trying to get back to half guard.
That's one minute gone in the round.
Machida sneaks back into half guard.
Big scores with a couple of good hammerfists.
Machida won't allow Big to pass to mount.
Machida is trying to get back to full guard.
Machida is looking to control Big's leg but it's slowly edging free. Can Machida avoid being mounted?
Big lands with an elbow from half guard - that looked like it hurt.
Machida slips a foot under and gets full guard. Nice work.
Big trying to control the position from guard on top but Machida is wriggling around, looking for whatever he can.

That's two minutes gone in the round.
Machida controls Big momentarily but Big frees himself.
Big has decided he wants to stand but the closed guard of Machida is proving hard to escape from.
Big trying to control the position from guard on top but Machida is wriggling around, looking for whatever he can.
The fighters are pressed up against the cage, both looking to find a bit of space to work.
We've had a lack of effective grappling in the last minute or so, which could well see a referee standup.

OK we're going to have a standup here. John Big hasn't been effective enough on the ground and the referee wants a restart.
Big looks to score with a jab to the body but Machida is just out of range.
Big scores with a straight right hand, right through his opponent's guard.
This is a great period of action - very entertaining stuff!
Machida misses with a takedown attempt

and Big counters by moving into the clinch. Good anticipation by Big.
Big is defending well against a takedown attempt.
That's three failed takedown attempts in the round for Kazuteru Machida. That's going to take a lot out of him.
Machida goes for a takedown attempt but Big pushes him away and we're back to fighting at a distance.
Big punishes Machida's body with a nice straight punch.

That's three minutes gone in the round.
Machida steps to the side to avoid the strikes from Big.
Big decides to change it up a bit and drives through with a nice takedown into half guard.

Machida looking to work for a kimura from the bottom.
Big wants to control but Machida is keeping him busy.
The fighters are going at a pretty good pace and they're both starting to sweat now.
Machida controlling the position well.
The fighters are battling for position here. Machida manages to regain full guard. Nice work.
Big looking to pass the guard.
Machida is trying to keep Big in close.
Big slips nicely into half guard.

That's four minutes gone in the round.
Big tries to pass the half guard into mount. Machida knows what he's doing though and prevents the attempt.
Machida trying to control but Big postures up.
The crowd are loving this. Great action here.
Big is scoring with some nice ground and pound from the dominant position.
Machida makes his way to full guard. A much better position for Machida.
Big is intent on slowing down the pace of the fight, simply looking to control.
Machida not looking particularly offensive just at the moment.
The crowd are going absolutely nuts as the round comes to an end - what a fantastic round of action!
Big pressing down on his opponent's thigh, looking to pass guard. Machida is keeping the position for now.
Machida can't do much from the bottom at the moment, as Big controls the pace.
And thats the end of the round the fighters go back to their corners.
John Big dominated that round.
The cut man is working on Kazuteru Machida's cut.
That's time! Machida's corner gives him a slap on the ass as he gets ready to fight.

Machida shoots in and drives through. Big sprawls well.
Big misses the shot to the body.
Machida fails with a rather predictable takedown attempt.
Big throws a big shot that misses.
Big is looking for a takedown here. He's shot in and has managed to get it, finishing up in Machida's half guard.
Big throwing shots but they're hitting the canvas more than the man.
Big thows a wild elbow that connects with the canvas.
Machida avoiding damage under a succession of punches from Big.
Machida wants to get back to full guard.
John Big has got the better of the ground game so far.
Machida trying to control from the bottom.
Big looks to score some points with some ground and pound.
Big landing with strikes to the body and head, softening up his opponent.
Big really doesn't want to stay on the ground with Machida. If he can't get it back to his feet, it's only a matter of time before he'll be tapping out.
That's one minute gone in the round.
The referee walks around the fighters to get a better view of the action. Big lands a nice short elbow.
Big wants to take a breather but Machida is having none of it.
Big prevents Machida from improving his position.
Nice strikes from Big there.
Machida gets back to full guard.
Machida is looking for a triangle here but Big uses the submission attempt to pass into side control.
Machida is looking for a sweep.
Machida is not in a great position here, taking some shots.
Big wants to lay and pray for a moment but Machida keeps working.
Big in side control lands a nice looking series of punches and elbows.
Wooooo! Give it up for these two warriors! They are putting on a show!
Big is looking to take a break and control but Machida is keeping him honest, looking to work from the bottom.
That's two minutes gone in the round.
Big works a knee to the body and follows up with a nice elbow to the head.

Big is looking for a kimura. He might have it! No, Machida has escaped the position, nice work there.
Machida tries to buck Big off but Big is having none of it.
Machida is working hard here to advance position.
Big tries to advance to mount but Machida denies him.
Machida sneaks a leg under to get back to half guard.
Big wants to control but Machida is keeping him busy.
Big is thwarting Machida's attempts to control the position.
Machida is trying to defend against the ground and pound but Big scores with a couple of nice shots.
That's three minutes gone in the round.
Big is trying to control. Machida wants to improve his position but can't escape this time.
Machida is looking to improve his position.
Big thows a wild elbow that connects with the canvas.
Machida is not content to let Big control the position.
Machida gets back to full guard.
Big wanted to stand there but Machida had control of the position.
The ref warns both fighters not to hold the cage as they work up against the meshing.
Big looking to pass the guard.
Big wants to control from the top but Machida keeps moving.
It looks like the ref is thinking about a standup.
That's four minutes gone in the round.
The ref stands the fighters back up, due to lack of action by John Big.
Big throws the overhand right but ducks down into a quick takedown attempt. Machida was covering up waiting for the punch and Big finishes the takedown easily into guard.
Machida managing to control the position.
Machida looking to control.
The crowd cheering loudly, showing their appreciation for the quality fight we're seeing here.
Machida preventing the ground and pound from doing any damage.
Machida is trying to keep Big in close.
Big must be cautious of submissions here, given that his opponent has the superior Jiu Jitsu.
The crowd are going absolutely nuts as the round comes to an end - what a fantastic round of action!
Big decides he's had enough of playing guard and decides to stand. Come on Machida, up you get!
Kazuteru Machida is looking to throw some combinations by the looks of things.
Big shoots in looking for a single leg takedown. Machida is trying to defend but Big finishes it well and ends up in half guard. Let's see if he can advance position further.
Machida trying to control but Big postures up.
And thats the end of the round the fighters go back to their corners.
John Big showed his class in that round. I'd imagine he'll take it on all the scorecards.
The cut man is working on Kazuteru Machida's cut.
That's the end of the interval. I'm sure that seemed a lot quicker than a minute for our two fighters! Back to the action. Let's hear some noise people - this is the final round!

Machida gets taken down but at least he's managed to land in guard.
Big in full guard, throwing the ground and pound. No damage this time.
Machida had isolated an arm as going for a kimura. Big defends it easily.
Big controlling from the top position.
Big lands a couple of elbows.
Big trying to control the position from guard on top but Machida is wriggling around, looking for whatever he can.
The crowd are loving this. Great action here.
Machida working a defensive guard here.
Big stays in close to Machida's body and controls the position.
That's one minute gone in the round.
We've had a lack of effective grappling in the last minute or so, which could well see a referee standup.
Big avoids a guillotine attempt easily.
Machida working a defensive guard here.
Big content to strike from guard, landing some decent shots.
Big wants to control from the top but Machida keeps moving.
Machida working from the bottom, still in full guard. He's managed to get a loose triangle. Big doesn't seem to be doing much to defend here, obviously he feels comfortable in the position. Oh but Machida is tightening it up a little... Big has to be careful here... He's got his foot tucked under now, this looks tight! Big reacted too slowly and this one could be over in a matter of seconds! YES! Big taps out! Nice BJJ there by Machida!
Ladies and gentlemen, after 2:57 of round 3, we have a winner by way of Submission (Triangle Choke). Kazuteru Machida!
|
|
|
|
|
|
|
|
|
|
|
|
|
|
|
|
|
|
|
|
|
|
|
| S |
C
A |
G |
S |
C
B |
G |
|
S |
C |
G |
|
energy
A | B |
|
hype
A | B |
|
pop
A | B |
|
mgr
A | B |
|
FIGHT
RATING
100% |
|
|
|
|
|
|
|
Main event
|
Coming up we have a light heavyweight MMA rules bout between Tyson Duke (ranked 0 p4p, 0 weight class) and Taishi Mori (ranked 0 p4p, 0 weight class). This should be a great matchup!
 |
|
 |
| 190 cm
23
209 lbs
2 - 2 - 0 |
|
183 cm
18
210 lbs
0 - 0 - 0 |
BJJ White Belt
Solid boxing
Prefers standup |
|
BJJ Purple Belt
Good kicks
Determined |
|
| |
|
Ladies and gentlemen. This fight is 3 rounds, in the light heavyweight division.
Introducing the fighter to my left, fighting out of the red corner.
With a record of
2 - 2 - 0, fighting out of Montreal, Tyson Duke!
And introducing the fighter to my right, fighting out of the blue corner.
With a record of
0 - 0 - 0, fighting out of Montreal, Taishi Mori!
The judges for this bout are Ian Loll, Elvis Blanc and Robert Douchet.
The bell rings for round one and we are underway!
Duke throws the kick towards the body but Mori avoids it.
A really sloppy takedown attempt there from Mori.
Mori tries a switch kick but it misses it's target.
Duke pulls out of a head kick attempt.
A really sloppy takedown attempt there from Mori.
Duke tries to clinch up against the cage, rushing in to close the distance. Mori manages to break the clinch and circles back to the middle of the mat.
Duke throws a head kick that misses and slips in the process. He scrambles back to his feet and the fighters circle.
Mori keeping at a good range here, avoiding a leg kick.
Duke throws a head kick that misses and slips in the process. He scrambles back to his feet and the fighters circle.
Mori throws a sloppy head kick and Duke moves out of range easily.
Duke throws a head kick that misses and slips in the process. He scrambles back to his feet and the fighters circle.
Mori looks for the body kick but Duke saw that one coming.
Duke throws a head kick that misses and slips in the process. He scrambles back to his feet and the fighters circle.
Mori moves into range and lands a nice leg kick.
Mori closes the distance and looks for a trip takedown... aaaand he's got it - Mori lands in his opponent's guard.
Duke wants to stand and escape but Mori is having none of it.
That's one minute gone in the round.
Mori decides he's had enough of playing guard and decides to stand. Come on Duke, up you get!
A swing and a miss from Mori.
Tyson Duke is looking to keep the fight on the feet at all costs.

Duke moves into the clinch.

Mori pushes off and circles away, back to the middle of the mat.
A slapping leg kick lands for Mori.
Duke tries to close the distance and clinch but Mori swats him to one side with an open hand palm strike and circles away.
Mori lands a leg kick that knocks Duke off balance momentarily.
Like a baseball bat into the meat of his leg there - nice leg kick by Mori.
Mori misses with a takedown attempt. He shot from a bit too far out.
Tyson Duke has stuffed three takedown attempts in the round now. That's going to take a lot out of Taishi Mori.
Mori is trying hard to land a takedown here. Duke sprawls well and keeps this one on the feet.
Mori shoots in from a long way out. He's driving through with the takedown attempt and he eventually gets it, landing in Duke's guard.

Duke kicks Mori off and gets to his feet.
This has been an exciting period of action!
Duke misses with a kick to the body
and Mori counters with a flying knee. Nice.
Mori connects with an inside leg kick.
That's two minutes gone in the round.
Mori pulls out of a head kick attempt.
Mori gets in close and instigates a clinch.
Duke is looking to break free of the clinch but Mori has double underhooks.
Mori has dropped down and is looking to force the takedown but it's defended by Duke after a bit of a struggle.
Mori manages to break the clinch.
Mori tries to shoot in for a takedown. He's got hold of a leg but Duke swivels and escapes.
Mori tries for a takedown but Duke sees it coming a mile off and avoids it easily.
Oooooooooooh, not good. A low kick from Duke lands where it shouldn't have, right in the... well, you know what he did? He kicked him in the penis. He's injured, injured bad. The referee sends both fighters to their corners and Mori has 5 minutes to recover. He's OK now though... a thumbs up from Mori and we're back underway with a touch of gloves.
Duke pulls out of a head kick attempt.
Duke stumbles momentarily as he takes a strong leg kick from Mori.
Mori lands a head kick. Duke smiles back at him and beckons him forward.
Duke misses with a leg kick.
Duke tries to close the distance and clinch but Mori swats him to one side with an open hand palm strike and circles away.
Mori scores with a leg kick.
A solid body kick from Mori.
A kick lands to the mid section there for Mori.
That's three minutes gone in the round.
Mori tries to score a power double leg takedown but Duke sees that one coming and sprawls well. That will dishearten Mori somewhat.
Duke tries a head kick but it misses.
No luck with that takedown attempt from Mori.
Mori tries to close the distance and clinch but Duke swats him to one side with an open hand palm strike and circles away.
Ouch! a nice leg kick from Mori, right into the meat.
Mori will have to do better than that with his takedown attempts.
Mori throws a head kick that looked like it stung.
Duke throws a head kick that misses and slips in the process. He scrambles back to his feet and the fighters circle.
Mori tries to clinch up against the cage, rushing in to close the distance. Duke manages to break the clinch and circles back to the middle of the mat.
Duke keeps the fight standing with a nice sprawl.
Mori checks a leg kick.
That's four minutes gone in the round.
Duke tries a head kick but it misses.
Duke takes a nice looking leg kick right on the meat of his thigh there.
Duke tries a head kick but it misses.
Mori throws a quick head kick that skims the top of Duke's head.
Taishi Mori seems to be the more aggressive standup fighter in this bout.
Mori blocks the body kick.
Mori buckles his opponent's knee momentarily with a nice leg kick.
Mori lands a head kick. Duke smiles back at him and beckons him forward.
The fans in attendance giving it up for the two fighters, who have really let it all hang out in the last minute or so!
Mori blocks the body kick.
Mori avoids the head kick by Duke.
Mori throws a head kick but Duke moves out of range.
Duke on the wrong end of a nice low kick. He's acting like it's no big deal but he doesn't want to take many more of those.
Mori throws a head kick that looked like it stung.
The crowd are going absolutely nuts as the round comes to an end - what a fantastic round of action!
Duke tries to close the distance and clinch but Mori swats him to one side with an open hand palm strike and circles away.
Mori shoots in for a takedown - he's clinched up with Duke but Duke pushes him off and we're back to square one.
Duke wants to clinch up but Mori keeps it at a distance.
And thats the end of the round the fighters go back to their corners.
Taishi Mori dominated that round.
The referee calls time. The cornermen exit stage left and we're back to business.
Mori fails with a takedown attempt from distance.
Duke tries to clinch there but Mori circles away.
Duke fails in his attempt to clinch.
Mori swats away the attempt to clinch by Duke.
Mori avoids the head kick by Duke.
Duke misses with a head kick.
Mori misses with a half-hearted attempt at a head kick.
Mori tries a head kick but it misses.
Mori goes for a spinning back kick but it misses.
Mori throws a quick inside leg kick.
Mori fakes a couple of low kicks, before throwing one on the third attempt. It connects and Duke has to reset his feet before getting ready to engage.
Duke tries a head kick but it misses.
Duke tries to clinch but Mori is having none of it.
Duke looks to have improved his striking defense since last time we saw him fight.
Mori fakes with a right hand and throws a good leg kick, right into the thigh. That had to hurt Duke.
Duke keeps the fight on the outside.
Duke fails with an attempt to clinch.
That's one minute gone in the round.
Duke tries to land a front kick but Mori steps back. That was a bit too telegraphed.
Duke sees a low kick coming and goes to check it, but it's actually a body kick and it thuds into his unprotected ribs.
Mori tries a head kick but it misses.
Duke takes a nice looking leg kick right on the meat of his thigh there.
Duke throws a sloppy head kick and Mori moves out of range easily.
Duke on the receiving end of a decent leg kick there by Mori. Mori obviously looking to wear him down.
Mori goes for a double leg but Duke avoids the attempt and the two fighters end up clinched against the cage as Duke continues to drive forward.
Duke swings away with an uppercut that misses.
Mori tries to land knees in the clinch but Duke avoids the damage to the body.
Mori blocks a couple of punches on the inside.
Duke wants to break the clinch but can't.
Mori tries to land a knee to the body but he is off balance and Duke avoids it.
Mori throws a knee to the head but misses.
Mori is working for takedown but Duke is calmly controlling the position for now.
Tyson Duke has stuffed three takedown attempts in the round now. That's going to take a lot out of Taishi Mori.
Mori keeps control of Duke as he tries to wriggle out of the double underhooks.
That's two minutes gone in the round.
Mori pushes off and circles away, back to the middle of the mat.
Tyson Duke is looking to throw some combinations by the looks of things.
Mori throws a leg kick which misses Duke's front leg but catches the back leg as Duke tries to avoid it.
Duke fails in his attempt to clinch.
Mori pivots as if he's going to throw a leg kick but stops half way.
Duke moves out of range as Mori throws a body kick.
No luck with that takedown attempt from Mori.
Mori tries a head kick but it misses.
Taishi Mori seems to be getting the better of the standup.
We've seen a great period of action over the last minute or so - credit to both fighters for going all out!
A leg kick checked by Mori.
Mori scores with a head kick. Duke tried to block it but didn't get his arm up in time.
Mori connects with a high kick.
Duke is looking to clinch.
Mori throws a loose over hand right and dives in with a double leg takedown. Duke tries to sprawl but it's too late and the fighters hit the mat. Mori is in Duke's guard.
Duke wants to stand but Mori is controlling the position.
Mori postures up to throw the ground and pound strikes but they don't connect.
That's three minutes gone in the round.
Duke is looking to stand up but Mori isn't so interested in that idea.
The fighters are pressed up against the cage, both looking to find a bit of space to work.
Both fighters are absolutely exhausted here.
Mori drops back looking for a submission - "I'm sorry sir, but I'm gunna break your leg" says Mori as he cranks on the unfortunate limb! Duke screams and taps out before any major damage is done! Don't mess with Mori! Nice submission victory there!
Ladies and gentlemen, after 3:30 of round 2, we have a winner by way of Submission (Kneebar). Taishi Mori!
|
|
|
|
|
|
|
|
|
|
|
|
|
|
|
|
|
|
|
|
|
|
|
| S |
C
A |
G |
S |
C
B |
G |
|
S |
C |
G |
|
energy
A | B |
|
hype
A | B |
|
pop
A | B |
|
mgr
A | B |
|
FIGHT
RATING
61% |
|
|
|
|
|
|
|
|
|
|
