 |
Sacrament 9 PBP Commentary |
Undercard bout
|
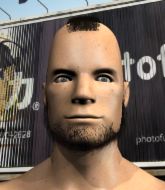
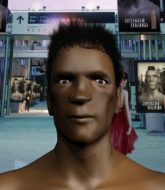
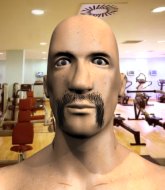
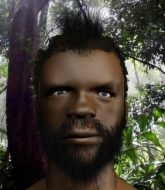
Coming up we have a super heavyweight MMA rules bout between Donkey Kong (ranked 0 p4p, 0 weight class) and Jun Mizuno (ranked 0 p4p, 0 weight class). Kong comes to the cage accompanied by Freak on a leash - Korn. Donkey Kong is staring across the cage at his opponent, tweaking his nipples... Tweaking his own nipples that is.
 |
|
 |
| 225 cm
21
300 lbs
1 - 0 - 0 |
|
194 cm
18
280 lbs
1 - 1 - 0 |
Decent wrestler
Excellent boxer
KO power |
|
BJJ Blue Belt
Excellent MT
Powerful |
|
| |
|
Ladies and gentlemen. This fight is 3 rounds, in the super heavyweight division.
Introducing the fighter to my left, fighting out of the red corner.
With a record of
1 - 0 - 0, fighting out of New York, Donkey Kong!
And introducing the fighter to my right, fighting out of the blue corner.
With a record of
1 - 1 - 0, fighting out of Montreal, Jun Mizuno!
The judges for this bout are Trevor Gratis, Alec Ball and Dillan Fox.

The bell rings for round one and we are underway!
Mizuno misses with a half-hearted attempt at a head kick.
Mizuno throws a head kick that misses and slips in the process. He scrambles back to his feet and the fighters circle.
Mizuno tries to clinch but is not successful on this occasion.
Nice body kick there by Mizuno.
A head kick misses from Mizuno.
Kong avoids the clinch attempt nicely.
Mizuno's coach down at Pitbull MMA was telling us pre-fight that they have been working on Mizuno's balance. Obviously they view that as a key factor in the outcome of this fight.
Mizuno throws a leg kick but Kong moved away.
Kong moves out of range of the body kick from Mizuno.
Kong has been working on his boxing with his coaches at BigMouth Cabrons in the buildup to the fight.
Kong stumbles momentarily as he takes a strong leg kick from Mizuno.
Mizuno looks to land a body kick but Kong moved away.
Mizuno wants to clinch
enabling Kong to counter with a crisp jab.

It looks like Jun Mizuno has been cut.
A slapping body kick lands there for Kong.
The crowd are loving this. Great action here.
Mizuno fails in his attempt to clinch.
Mizuno lands a nice looking body kick.
Mizuno tries to clinch but Kong is having none of it.
Kong throws a sloppy head kick and Mizuno moves out of range easily.
Kong darts in and out, connecting with a jab.
Mizuno ducks right into an uppercut from Kong.

That's one minute gone in the round.
Kong darts in and out, connecting with a jab.
Mizuno takes a big uppercut there. He seems a bit wobbly but no, he's OK.

Mizuno is rocked!
Mizuno tries to land a front kick but Kong steps back. That was a bit too telegraphed.
Mizuno is still on wobbly legs! Can Kong finish him?
Are you kidding me?! Kong ducked down and unloaded an uppercut from hell that sent Mizuno clean off his feet! Someone make me a GIF - that's knockout of the night for sure!
Ladies and gentlemen, after 1:16 of round 1, we have a winner by way of KO (Punch). Donkey Kong!
A determined Donkey Kong didn't want to dwell on this fight in his post fight interview. Instead he was more keen to state he wants a title shot. Let's see if he gets it!
|
|
|
|
|
|
|
|
|
|
|
|
|
|
|
|
|
|
|
|
|
|
|
| S |
C
A |
G |
S |
C
B |
G |
|
S |
C |
G |
|
energy
A | B |
|
hype
A | B |
|
pop
A | B |
|
mgr
A | B |
|
FIGHT
RATING
100% |
|
|
|
|
|
|
|
Undercard bout
|
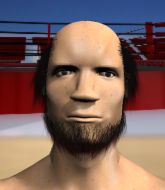
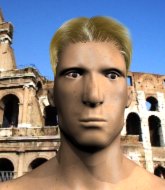
Coming up we have a light heavyweight MMA rules bout between Taishi Mori (ranked 0 p4p, 0 weight class) and Jefferey Gump (ranked 0 p4p, 0 weight class). This should be a great matchup!
 |
|
 |
| 183 cm
18
210 lbs
1 - 0 - 0 |
|
185 cm
24
210 lbs
1 - 0 - 0 |
BJJ Purple Belt
Good kicks
Cuts easily |
|
BJJ Blue Belt
Decent boxing
Granite chin |
|
| |
|
Ladies and gentlemen. This fight is 3 rounds, in the light heavyweight division.
Introducing the fighter to my left, fighting out of the red corner.
With a record of
1 - 0 - 0, fighting out of Montreal, Taishi Mori!
And introducing the fighter to my right, fighting out of the blue corner.
With a record of
1 - 0 - 0, fighting out of Montreal, Jefferey Gump!
The judges for this bout are Ian Loll, Trevor Gratis and Steve Smith.
The bell rings for round one and we are underway!
A head kick misses from Mori.
Mori throws a body kick that digs right into the meat.
Mori dodges the punch combination from Gump.
A slow jab from Mori misses its intended target.
Gump cracks Mori with a good jab.
No joy there for Gump, who threw a few shots but didn't land.
Gump misses with a double jab.
Mori feints with a shoulder and throws a nice leg kick to Gump's calf.
Gump leaves Mori with his face pressed against the mat as he sprawls beautifully, defending against a solid takedown attempt.
Gump keeps the fight standing with a nice sprawl.
Gump lands with a nice combination. Mori backs away looking to recover.

It looks like Taishi Mori has been cut.
Gump fails to land with the punch combination there - jab, cross, hook, miss, miss, miss.
This has been an exciting period of action!
Mori throws a leg kick but Gump moved away.
Nice body kick from Mori.
Mori scores with a leg kick.
Gump misses with a two punch combination.
Mori wants to clinch.
Mori fakes high and shoots in for a takedown but Gump avoids it really well and circles away.
That's three failed takedown attempts in the round for Taishi Mori. That's going to take a lot out of him.
That's one minute gone in the round.
Gump misses with a jab, cross combination.
A telegraphed right hand from Gump misses the target.
Gump takes a kick to the side of the head.
Gump fails to land with a series of punches.
Gump misses with the combination.
Gump looks winded!
Sloppy strikes from Gump. Those never looked like landing.
Jefferey Gump is looking to keep the fight on the feet at all costs.
A head kick misses from Mori.
Gump looks to land a combination but Mori avoids it well.
Mori tries to drive through with a takedown attempt but Gump defends well and Mori ends up having to push Gump into the cage where they will battle it out in the clinch.
Mori tries to jump guard but he falls flat on his backside. Gump smiles and moves away.
Mori tries to shoot in for a takedown. He's got hold of a leg but Gump swivels and escapes.
A good leg kick by Mori.
Gump fails to land with a series of punches.
Mori scores with a kick to the midsection.

That's two minutes gone in the round.
Mori tries a head kick but it misses.
Mori dodges the punch combination from Gump.
Gump misses with a double jab.
Mori thows a body kick. Gump tries to catch it but that hurt him.
Mori checks a low kick from Gump.
The fans in attendance giving it up for the two fighters, who have really let it all hang out in the last minute or so!
Nice body kick from Mori.
Gump blocks a head kick by Mori.
Mori pulls out of a head kick attempt.
Gump misses with a double jab.
Gump stuffs the takedown.
Mori tries to shoot in for a takedown. He's got hold of a leg but Gump swivels and escapes.
Gump stuffs a takedown. It's all about dictating where the fight takes place and Gump wants it to stay on the feet.
Mori shoots in for a takedown but doesn't get it.
Mori pulls out of a head kick attempt.
Mori tries a head kick but it misses.
Gump scores with a nice head shot.
A nice leg kick lands there from Mori.
Gump lets the fists fly and connects with a left straight followed by a right hook.

That's three minutes gone in the round.
Mori thows a body kick. Gump tries to catch it but that hurt him.
Mori shoots in looking for a takedown but Gump manages to keep the fight standing, pushing Mori's face into the canvas for good measure before circling away.
Gump blocks a head kick by Mori.
Gump has developed a nice purple lump on his ribcage, as a result of some heavy body kicks from Mori.
Mori connects with a leg kick. Gump looked like he was expecting something else and didn't defend it.
Mori tries to clinch up against the cage, rushing in to close the distance. Gump manages to break the clinch and circles back to the middle of the mat.
Mori throws a body kick, spinning off balance
enabling Gump to counter with a crisp jab.
Some wild striking there from Gump.
Gump chopped to the floor by a nice leg kick but he springs right back up before Mori can pounce on him.
Mori throws a mid kick that lands with a slap.
Gump scores with a punch to the head.
Mori throws a looping overhand right but Gump ducks down to avoid it.
Gump sees a low kick coming and goes to check it, but it's actually a body kick and it thuds into his unprotected ribs.
Gump misses with a double jab.
Mori tries a switch kick but it misses it's target.
Wow, both these guys are really going for it!
Gump avoids a kick to the body.
Mori goes for a double leg but Gump avoids the attempt and the two fighters end up clinched against the cage as Gump continues to drive forward.

That's four minutes gone in the round.
Gump has Mori pressed against the cage, preventing Mori from circling away and getting back to striking at range.
Mori working hard to break the clinch.

Gump breaks the clinch and we return to the middle of the mat.
Mori avoids a punch combination nicely.
The crowd cheering loudly, showing their appreciation for the quality fight we're seeing here.
Mori connects with a leg kick. Gump looked like he was expecting something else and didn't defend it.
Mori thows a body kick. Gump tries to catch it but that hurt him.
Horrible takedown by Mori or perhaps it was just good defense by Gump which made him look bad.
Gump throws a combination but comes up with nothing but fresh air.

Mori bobs and weaves into range and then changes levels and scores with a nice takedown into side control.

Mori tries for a kimura but Gump is defending well.
The crowd are going absolutely nuts as the round comes to an end - what a fantastic round of action!

Mori stands up and beckons Gump to his feet.
And thats the end of the round the fighters go back to their corners.
Taishi Mori dominated that round.
The cut man is working on Taishi Mori's cut.
The corners get their ten second warning. Both fighters stand from their stools and stare eachother down, ready to get back to the action.

Mori closes this distance looking for a takedown but Gump circles away.
Gump fails to land with a series of punches.
Mori misses with a head kick.
Nice sprawl there from Gump as Mori shoots in.
Mori bobs and weaves and then throws a good body kick.
Gump blocks a head kick by Mori.
Gump throws a combination but comes up with nothing but fresh air.
Mori misses with a half-hearted attempt at a head kick.
Gump looks to land a combination but Mori avoids it well.
Gump misses with a jab and misses with a cross straight after too.
A head kick misses from Mori.
Jefferey Gump is looking to throw some combinations by the looks of things.
Gump blocks the body kick.
Gump is looking to slow Mori down with leg kicks.
Mori tries to clinch up against the cage, rushing in to close the distance. Gump manages to break the clinch and circles back to the middle of the mat.
Gump looks to land a combination. Mori sees it coming but can only parry a couple of the shots.
Gump is breathing heavily.
Gump misses with a double jab.
Mori throws a quick inside leg kick.
Gump fails to land with a series of punches.
That's one minute gone in the round.
Mori lands a head kick!
Mori throws a head kick but Gump moves out of range.
Gump avoids a kick to the body.
Mori lands with a kick to the temple. Gump shrugs as if to say "is that all you've got?"
Mori changes levels and looks for a double leg takedown. Gump tries to avoid it but Mori manages to keep hold of a leg and drag Gump to the ground. Gump escapes though and pops straight back up to his feet.
That's three failed takedown attempts in the round for Taishi Mori. That's going to take a lot out of him.
Gump stumbles momentarily as he takes a strong leg kick from Mori.
Mori dodges the punch combination from Gump.
Taishi Mori is winning the standup battle so far.
Mori throws a big shot that misses.
Crunch! Mori slams his shin into Gump's torso.
Gump displaying good standup as he scores with a three punch combination.
Mori tries a switch kick but it misses it's target.
Mori swinging wildly here.
Mori showing good head movement there, avoiding the strikes from Gump.
Mori bobs and weaves and then throws a good body kick.
That's two minutes gone in the round.
Gump on the receiving end of a decent leg kick there by Mori. Mori obviously looking to wear him down.
This is a great period of action - very entertaining stuff!
Mori thows a body kick. Gump tries to catch it but that hurt him.
Mori fails with an attempt to clinch.
Gump throws a left and a right that both miss
and Mori finishes the little exchange by landing a big kick to the body.
Mori fakes a couple of low kicks, before throwing one on the third attempt. It connects and Gump has to reset his feet before getting ready to engage.
Mori delivers a nice body kick.
Mori shoots in looking for a takedown. Gump tries to sprawl out of it but Mori keeps driving through. The fighters are pinned against the cage. Gump manages to get underhooks and after a bit of a struggle, circles away and we're back to standing.
A slapping leg kick lands for Mori.
Mori tries to clinch up against the cage, rushing in to close the distance. Gump manages to break the clinch and circles back to the middle of the mat.
Mori turns his hip over beautifully as he lands a nice leg kick.
Mori lands with a nice body kick.
Mori throws a nice outside leg kick.
Crunch! Mori slams his shin into Gump's torso.
A thudding body kick lands there by Mori!
Gump jabs Mori right on the nose. Mori blinks but takes it well.
That's three minutes gone in the round.
A solid leg kick lands there for Gump.
Mori lands a nice looking kick to the body. Gump takes a step back to recover.
A really sloppy takedown attempt there from Mori.
Mori throws a head kick but Gump moves out of range.
Gump sees a low kick coming and goes to check it, but it's actually a body kick and it thuds into his unprotected ribs.
Mori pulls out of a head kick attempt.
Mori tries to close the distance and clinch up against the cage but Gump paws at him with a jab and circles away.
Mori shoots in for a takedown but Gump shows good takedown defense there and keeps this one on the feet.
Gump misses with a two punch combination.
Mori throws a head kick that misses and slips in the process. He scrambles back to his feet and the fighters circle.
Nice cross by Gump.
A combination from Gump does no damage.
Mori is looking to clinch.
A thudding body kick lands there by Mori!
Mori lands a leg kick that knocks Gump off balance momentarily.
A punch combination from Gump misses.
That's four minutes gone in the round.
Mori tries to drive through with a takedown attempt but Gump defends well and Mori ends up having to push Gump into the cage where they will battle it out in the clinch.
Mori keeps the fight in the clinch, despite Gump's efforts to push away.
Mori tries to pull guard but can't drag his opponent to the mat. Gump just stands there and leans against the cage.
Our sources have told us that Mori has been working on his elbows in the gym.
Mori scores with a knee to the head.
We've seen a great period of action over the last minute or so - credit to both fighters for going all out!
Mori tries to pull guard but can't drag his opponent to the mat. Gump just stands there and leans against the cage.
Mori is trying to drag Gump to the mat but Gump just about manages to keep his footing. He used the cage to his advantage there.
Mori tries to pull guard but Gump forces him back to his feet, against the cage.
The crowd are going absolutely nuts as the round comes to an end - what a fantastic round of action!
Gump breaks the clinch and we return to the middle of the mat.
And thats the end of the round the fighters go back to their corners.
Taishi Mori dominated that second round.
The cut man is working on Taishi Mori's cut.
The minute break is over - no more time for sponges and pep talks - back to the action! Ladies and gentlemen, this is the final round!

Gump lands a jab, followed by a cross and another cross, as Mori backs up against the cage.
Mori throws a head kick that misses.
A nice inside leg kick there by Mori. That's going to slow Gump down.
Mori tries to clinch but is not successful on this occasion.
Mori lands a leg kick. The shin dug right into the meat of the thigh.
Mori takes a jab right on the kisser.
Mori is looking to chop away at Gump's legs.
Some wild striking there from Gump.

Mori moves into range and clinches up with Gump.
Gump is pushing Mori up against the cage, for a bit of lean and pray action. Action being used the in the loosest possible sense of the word.
Gump prevents the takedown attempt.
Some stalling of biblical proportions here from Gump.
Gump takes a big intake of breath there - he's definitely tired.
Gump gets double underhooks to prevent a takedown attempt from Mori.
That's one minute gone in the round.
Mori can't get the takedown.
That's three failed takedown attempts in the round for Taishi Mori. That's going to take a lot out of him.
Gump avoiding damage.
Mori misses with a knee to the head.
Mori tries to land a knee to the body but he is off balance and Gump avoids it.
Gump prevents Mori from breaking the clinch.
Mori has a body lock and is looking for a takedown. Gump is bouncing around trying to prevent the takedown and somehow he has indeed managed to stay on his feet.
That's two minutes gone in the round.
Mori being controlled against the cage.
Mori trying to land knees to the body.
Mori tries to pull guard but Gump holds him up against the cage and eventually Mori drops back down to his feet.
Gump lands a shot to the body.
Gump content to slow the pace in the clinch.
Mori tries to take the fight to the ground by pulling guard but can't manage it.
Gump is defending well against a takedown attempt.
Mori has Gump pressed up against the cage and is working for takedown. Gump manages to improve position though and keeps the fight standing.
That's three minutes gone in the round.
Mori tries to stall but Gump uses the opportunity to gain a better position.
Mori can't break the clinch.
Mori wants to get back to striking at distance but Gump won't allow it.
Gump escapes the clinch and we're back to striking.
Gump works over Mori's head and body with a nice combination.
Mori has a takedown stuffed.
Gump misses with a few strikes there.
Jefferey Gump has stepped it up - he knows he needs a finish here!
Gump cracks Mori with a good shot that sees him stumbling back into the cage.
Gump swings away but doesn't land with a series of punches.
Mori takes an uppercut right on the button but keeps his composure.
A really sloppy takedown attempt there from Mori.
A head kick from Mori lands but Gump takes it in his stride.
Some wild striking there from Gump.
That's four minutes gone in the round.
Good leg kick by Mori there. It's the ones that make that thud noise that hurt and that was an almighty thud.
Mori thows a body kick. Gump tries to catch it but that hurt him.
The crowd are loving this. Great action here.
That kick from Gump tenderised Mori's leg. Mori is trying to keep his angry face on.
Mori throws a wild body kick that Gump sees coming a mile off.
Gump fakes a couple of low kicks, before throwing one on the third attempt. It connects and Mori has to reset his feet before getting ready to engage.
Mori shoots in but Gump avoids the takedown attempt easily.
Gump stuffs the takedown attempt from Mori. Mori gets slowly back to his feet.
Gump feints a jab promting Mori to slip. Gump then demonstrates his capabilities by jabbing again. Mori slips again and ducks right into an uppercut.
Mori throws a head kick that misses.
As the round comes to an end the crowd are showing their appreciation for a great round of action.
Gump lands a nice looking body shot.
A slapping body kick lands there for Mori.
Mori throws a quick inside leg kick.
Taishi Mori is fighting for a decision here - he's started to take the cautious approach.
Gump misses with a low kick.
And that's the end of the fight!
Jefferey Gump comfortably won the final round on my scorecard.
Well Mori has outscored his opponent in every aspect of the fight today. Only a scarily incompetent judge or two will keep him from a well deserved win... Over to the ring announcer for the scorecards.
Ladies and gentlemen, after 3 rounds of action, we go to the scorecards for a decision.
Judge Ian Loll scores the fight 29:28
Judge Trevor Gratis scores the fight 29:28
Judge Steve Smith scores the fight 29:28
In favor of your winner, by unanimous decision... Taishi Mori!
|
|
|
|
|
|
|
|
|
|
|
|
|
|
|
|
|
|
|
|
|
|
|
| S |
C
A |
G |
S |
C
B |
G |
|
S |
C |
G |
|
energy
A | B |
|
hype
A | B |
|
pop
A | B |
|
mgr
A | B |
|
FIGHT
RATING
94% |
|
|
|
|
|
|
|
Undercard bout
|
Coming up we have a lightweight MMA rules bout between Rob Boudreault (ranked 0 p4p, 0 weight class) and Richard Sharpe (ranked 0 p4p, 0 weight class). Both fighters will be looking to make this an exciting fight for the fans, I'm sure!
 |
|
 |
| 173 cm
24
165 lbs
1 - 0 - 0 |
|
177 cm
19
157 lbs
0 - 1 - 0 |
BJJ Blue Belt
Counter fighter
Cuts easily |
|
BJJ Blue Belt
Brawler
Likes musicals |
|
| |
|
Ladies and gentlemen. This fight is 3 rounds, in the lightweight division.
Introducing the fighter to my left, fighting out of the red corner.
With a record of
1 - 0 - 0, fighting out of Montreal, Rob Boudreault!
And introducing the fighter to my right, fighting out of the blue corner.
With a record of
0 - 1 - 0, fighting out of Montreal, Richard Sharpe!
The judges for this bout are Elvis Blanc, Gregory Folan and William Peck.
The bell rings for round one and we are underway!
Boudreault is looking to clinch.
Sharpe stooping low to avoid any incoming strikes and then lunges in with an uppercut come cross that lands flush.
Sharpe lands a jab followed by a nice looking cross.
It looks like Rob Boudreault has been cut.
Boudreault goes for a double leg but Sharpe avoids the attempt and the two fighters end up clinched against the cage as Sharpe continues to drive forward.
Sharpe's corner calls for him to break the clinch, which he does.
Sharpe misses with a takedown attempt
and Boudreault moves into the clinch.
Sharpe manages to break the clinch.
No joy there for Sharpe, who threw a few shots but didn't land.
Boudreault shoots in for a takedown but Sharpe shows good takedown defense.
The crowd are loving this. Great action here.
The fighters circling - Sharpe throws out the jab but it was never going to land.
Sharpe shoots in looking for a takedown but Boudreault manages to keep the fight standing, pushing Sharpe's face into the canvas for good measure before circling away.
Left hook, right uppercut from Sharpe.
An inside leg kick from Sharpe misses.
That's one minute gone in the round.
Boudreault takes an uppercut right on the button but keeps his composure.
Sharpe pushing out the jab but it's not landing.
Boudreault tries to check the leg kick but that clearly hurt him.
Sloppy strikes from Sharpe. Those never looked like landing.

Sharpe drives through with a takedown into Boudreault's guard. Let's see what he can do from the top position.
The referee claps his hands together and tells the fighters to work.
Boudreault has Sharpe pulled in close to control his posture.
Sharpe has decided he wants to stand but the closed guard of Boudreault is proving hard to escape from.
Boudreault looking to control.
That's two minutes gone in the round.
Sharpe trying to control but Boudreault is working from the bottom.
Sharpe won't allow Boudreault to sweep him here.

It looks like we're going to have a standup here. Neither fighter is doing enough on the ground.
Sharpe scores with a nice strike.
This has been an exciting period of action!
Sharpe gets the takedown into side control.

Sharpe stands up.
Boudreault shoots in for a takedown. He's persisting with it as Sharpe sprawls well. Sharpe wins this battle and keeps the fight standing. Boudreault gets slowly back to his feet.
That's three failed takedown attempts in the round for Rob Boudreault. That's going to take a lot out of him.
A combination from Sharpe does no damage.
That's three minutes gone in the round.
Boudreault goes for a double leg but Sharpe avoids the attempt and the two fighters end up clinched against the cage as Sharpe continues to drive forward.
Sharpe looks like he'd prefer to be striking at range right now.
Boudreault wants to take the fight to the mat but Sharpe manages to get underhooks and keep the fight in the clinch.
Sharpe lands a short shot on the inside that snaps the head of Boudreault backwards.
This is turning into a torrid day at the office for Boudreault. He's trying desperately to land a takedown but he's failing miserably and getting slapped silly on the feet to compound his misery.
Boudreault tries for a takedown. No joy.
Sharpe breaks the clinch.
Sharpe lands a jab. Then a cross. Then finally a nice hook to the body. Good work there by Sharpe.
Boudreault tries for a takedown but Sharpe sees it coming a mile off and avoids it easily.
Boudreault is breathing heavily.
Sharpe lunges in with swinging rights and lefts but Boudreault circles away quickly and effectively.
That's four minutes gone in the round.
Like a baseball bat into the meat of his leg there - nice leg kick by Sharpe.
Richard Sharpe seems to be the more aggressive standup fighter in this bout.

Sharpe lands a left and a right that send Boudreault crashing to the mat, dazed. Sharpe thinks about following him to the mat but decides to wave him back up to his feet!

Boudreault is rocked!
This has been an exciting period of action!
Sharpe dives in and gets a big takedown. He lands in full mount and immediately unloads a series of heavy strikes! Boudreault has had enough and taps out.
Ladies and gentlemen, after 4:22 of round 1, we have a winner by way of Submission (Strikes). Richard Sharpe!
Jumping up and down and very excited, Richard Sharpe waved his t-shirt featuring Sydney BEAST Clothing 's logo in front of the cameras.
|
|
|
|
|
|
|
|
|
|
|
|
|
|
|
|
|
|
|
|
|
|
|
| S |
C
A |
G |
S |
C
B |
G |
|
S |
C |
G |
|
energy
A | B |
|
hype
A | B |
|
pop
A | B |
|
mgr
A | B |
|
FIGHT
RATING
53% |
|
|
|
|
|
|
|
Co-main event
|
Coming up we have a light heavyweight MMA rules bout between Tom Bain (ranked 0 p4p, 0 weight class) and Kazuteru Machida (ranked 0 p4p, 0 weight class). Tom Bain is staring across the cage at his opponent, tweaking his nipples... Tweaking his own nipples that is.
 |
|
 |
| 195 cm
18
205 lbs
2 - 2 - 0 |
|
182 cm
18
211 lbs
1 - 0 - 0 |
BJJ Blue Belt
Great elbows
Very strong |
|
BJJ Brown Belt
Counter fighter
Tends to cut |
|
| |
|
Ladies and gentlemen. This fight is 3 rounds, in the light heavyweight division.
Introducing the fighter to my left, fighting out of the red corner.
With a record of
2 - 2 - 0, fighting out of Montreal, Tom Bain!
And introducing the fighter to my right, fighting out of the blue corner.
With a record of
1 - 0 - 0, fighting out of Montreal, Kazuteru Machida!
The judges for this bout are Elvis Blanc, Dillan Fox and Ian Loll.
The bell rings for round one and we are underway!

Machida instigates a clinch.
Bain is trying to break free.
Machida is working for takedown but Bain is calmly controlling the position for now.
Machida tries for a takedown. No joy.

Bain breaks from the clinch.
Nice takedown defense from Bain. No joy for Machida on that attempt.
Tom Bain has stuffed three takedown attempts in the round now. That's going to take a lot out of Kazuteru Machida.
Bain doesn't manage to clinch there - Machida circles away.
Machida looks more muscular than last time we saw him. He must have been on the weights.
Bain tries to clinch but Machida is having none of it.
Bain tries to grapple but his opponent circles
so Machida counters with a double leg into guard. Good agility.
The referee looks like he's ready to step in and stand the fighters back up.
Machida stays in close to Bain's body and controls the position.
Machida trying to control the position from guard on top but Bain is wriggling around, looking for whatever he can.
Machida won't allow Bain to get back to his feet.
Wooooo! Give it up for these two warriors! They are putting on a show!

Machida drops back looking for a leg! Bain is in trouble here! The fighters roll with the hold and Bain manages to kick Machida off! Machida jumps back into Bain's guard.
Machida pushing down on Bain's thigh, trying to pass to half guard. He's managed it... Nice work.
That's one minute gone in the round.
Bain is trying to stand back up but Machida is controlling him
Machida in half guard on the top. He's looking for a kimura... He's got it locked and he's managed to free his trapped foot. Bain tries to escape but it's on too tight and he has to tap! Great BJJ skills there from Machida!
Ladies and gentlemen, after 1:28 of round 1, we have a winner by way of Submission (Kimura). Kazuteru Machida!
|
|
|
|
|
|
|
|
|
|
|
|
|
|
|
|
|
|
|
|
|
|
|
| S |
C
A |
G |
S |
C
B |
G |
|
S |
C |
G |
|
energy
A | B |
|
hype
A | B |
|
pop
A | B |
|
mgr
A | B |
|
FIGHT
RATING
55% |
|
|
|
|
|
|
|
Main event
|
Coming up we have a welterweight MMA rules bout between Alphonse Tchami (ranked 0 p4p, 0 weight class) and Draymond Shammen (ranked 0 p4p, 0 weight class). Fingers crossed for an exciting fight - I'm sure both fighters are looking for a nice under the table bonus!
 |
|
 |
| 183 cm
19
178 lbs
2 - 1 - 0 |
|
187 cm
18
174 lbs
0 - 0 - 0 |
BJJ Blue Belt
Excellent MT
Granite chin |
|
BJJ Blue Belt
Basic striking
Determined |
|
| |
|
Ladies and gentlemen. This fight is 5 rounds, for the welterweight championship of the world!
Introducing the champion to my left, fighting out of the red corner.
With a record of
2 - 1 - 0, fighting out of Montreal, Alphonse Tchami!
And introducing the challenger to my right, fighting out of the blue corner.
With a record of
0 - 0 - 0, fighting out of Montreal, Draymond Shammen!
The judges for this bout are Gregory Folan, Elvis Blanc and Robert Douchet.
The bell rings for round one and we are underway!
Shammen looks frustrated there after his takedown attempt is stuffed easily.
Shammen misses with a takedown attempt. He shot from a bit too far out.
Shammen has closed the distance and engaged Tchami in a clinch.
I was talking to Tchami's coach per-fight and he was telling me that they'd been working on the clinch in the runup to this fight.
Tchami lands an elbow just above Shammen 's eye.
A real battle for position is taking place between these two warriors.
Shammen on the defensive, avoiding the knees to the body.
Shammen letting Tchami take a breather here.
Tchami gets an overhook and lands an elbow to the side of the head.
Shammen wants a takedown.
Alphonse Tchami has stuffed three takedown attempts in the round now. That's going to take a lot out of Draymond Shammen.
Tchami lands an elbow just above Shammen 's eye.
Shammen takes a knee to the side of the body.
Shammen looks winded!
Wooooo! Give it up for these two warriors! They are putting on a show!
Tchami lands with a quick shot inside that doesn't really do much damage.
Tchami displaying some good clinch control by pressing Shammen up against the cage.
That's one minute gone in the round.
Tchami breaks the clinch and we return to the middle of the mat.
Tchami bobbing and weaving, closes the distance and lands a hook to the side of Shammen's head.
Tchami circles to his right before unloading a perfect head kick! Shammen drops to the canvas, hurt badly! Tchami follows Shammen to the ground and unloads with a series of strikes that force the referee to step in and end the fight! This one is all over!
Ladies and gentlemen, after 1:23 of round 1, we have a winner by way of TKO (Strikes). Alphonse Tchami!
Alphonse Tchami retains his welterweight title!
Alphonse Tchami thanked the fans post fight for their support.
|
|
|
|
|
|
|
|
|
|
|
|
|
|
|
|
|
|
|
|
|
|
|
| S |
C
A |
G |
S |
C
B |
G |
|
S |
C |
G |
|
energy
A | B |
|
hype
A | B |
|
pop
A | B |
|
mgr
A | B |
|
FIGHT
RATING
54% |
|
|
|
|
|
|
|
|
|
|
