 |
DFC 12: Pullnate Vs. Logins PBP Commentary |
Undercard bout
|
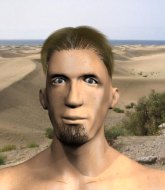
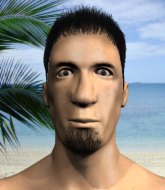
Coming up we have a welterweight MMA rules bout between Guy Pringle (ranked 0 p4p, 0 weight class) and Dimitris Aggelson (ranked 0 p4p, 0 weight class). Pringle comes to the cage accompanied by White Trash Party. Well, the cameraman is lingering on a pretty young lady for a bit too long there. Keep your eyes on the prize buddy or you'll miss the fighter intros!
 |
|
 |
| 172 cm
18
170 lbs
0 - 2 - 0 |
|
175 cm
19
170 lbs
1 - 2 - 0 |
BJJ White Belt
Solid boxing
KO power |
|
BJJ Blue Belt
Brawler
Solid chin |
|
| |
|
Ladies and gentlemen. This fight is 3 rounds, in the welterweight division.
Introducing the fighter to my left, fighting out of the red corner.
With a record of
0 - 2 - 0, fighting out of Sydney, Guy Pringle!
And introducing the fighter to my right, fighting out of the blue corner.
With a record of
1 - 2 - 0, fighting out of Sydney, Dimitris Aggelson!
The judges for this bout are Summer Carpenter, Damien Edna and Bruno Hogan.

The bell rings for round one and we are underway!
Aggelson lands with a right hand.
The fight stays on the outside here - Pringle looks like he's thinking about clinching though.
Aggelson swats away the attempt to clinch by Pringle.
Pringle fails with a takedown attempt.
A jab from Pringle does it's job there.
Aggelson is looking to clinch.
Pringle takes a push kick to the midsection and stumbles backwards.

Pringle darts in and clinches Aggelson up against the cage.
The crowd cheering loudly, showing their appreciation for the quality fight we're seeing here.

Aggelson's corner calls for him to break the clinch, which he does.
Aggelson closes the distance looking to clinch
and Pringle counters with a three punch combo that has Aggelson backing up. Aggelson nods at Pringle to acknowledge the strikes.

Aggelson fakes with an overhand right and moves in to clinch with Pringle, pushing him back against the cage.
Pringle is trying to push Aggelson away but Aggelson has him pressed against the cage, so he's going nowhere.
Aggelson escapes the clinch and we're back to striking.
Aggelson stuffs the takedown.
Aggelson clinches up with Pringle and pushes him back against the cage.
Pringle takes a knee to the side of the body.

That's one minute gone in the round.
Aggelson prevents a takedown attempt there.
That's three failed takedown attempts in the round for Guy Pringle. That's going to take a lot out of him.
Pringle is breathing heavily.
Pringle managing to block the knees to the body from Aggelson.
Pringle is trying to break the clinch but Aggelson has him pressed against the cage.
Pringle is trying to break the clinch but Aggelson has him pressed against the cage.
Aggelson landing knees to the body.
Aggelson breaks from the clinch.

Aggelson throws the overhand right but ducks down into a quick takedown attempt. Pringle was covering up waiting for the punch and Aggelson finishes the takedown easily into guard.
We must be close to a standup if these guys don't pick up the pace.
Aggelson lands a couple of decent looking shots.
Aggelson stands and throws Pringle's legs to the side, diving into side control.

Aggelson is working to tighten his grip on Pringle's neck. He's isolated an arm and is working for an arm triangle. Pringle has recognised the danger and is trying to turn with the submission but Aggelson is really squeezing tight and eventually Pringle passes out! Aggelson breaks the hold and jumps onto the cage to celebrate! Submission of the night, I'd say!
Ladies and gentlemen, after 2:57 of round 1, we have a winner by way of Submission (Arm Triangle). Dimitris Aggelson!
|
|
|
|
|
|
|
|
|
|
|
|
|
|
|
|
|
|
|
|
|
|
|
| S |
C
A |
G |
S |
C
B |
G |
|
S |
C |
G |
|
energy
A | B |
|
hype
A | B |
|
pop
A | B |
|
mgr
A | B |
|
FIGHT
RATING
79% |
|
|
|
|
|
|
|
Undercard bout
|
Coming up we have a featherweight MMA rules bout between Slyck Kira (ranked 0 p4p, 0 weight class) and Leung Cheong (ranked 0 p4p, 0 weight class). Kira comes to the cage accompanied by Prehistoric Dog by Red Fang. Over to our ring announcer for the fighter introductions!
 |
|
 |
| 189 cm
23
150 lbs
4 - 4 - 0 |
|
185 cm
25
150 lbs
0 - 2 - 0 |
BJJ Purple Belt
Brawler
Experienced |
|
BJJ Brown Belt
Counter fighter
Granite chin |
|
| |
|
Ladies and gentlemen. This fight is 3 rounds, in the featherweight division.
Introducing the fighter to my left, fighting out of the red corner.
With a record of
4 - 4 - 0, fighting out of Sydney, Slyck Kira!
And introducing the fighter to my right, fighting out of the blue corner.
With a record of
0 - 2 - 0, fighting out of Sydney, Leung Cheong!
The judges for this bout are Summer Carpenter, Eliza Hachem and Donatello Bradman.
The bell rings for round one and we are underway!
A punch combination from Kira misses.
Kira scores with the left hand. Cheong knows he should have avoided that one.
Kira uses good footwork to get in and out, landing a nice hook.
Kira scores with a shot to the body.
Cheong drops his hands momentarily and Kira takes advantage with a crisp shot to the head.
Cheong swats away the attempt to clinch by Kira.
Kira connects with a body shot.
Cheong keeping a good distance there, avoiding the body shot.
Cheong avoids a punch combination nicely.
Slyck Kira seems to be the more aggressive standup fighter in this bout.
Kira will need to tighten up his combinations if he doesn't want to gas himself out, swinging at thin air.
Kira throws a leg kick but he was too far away and it doesn't land.
That's one minute gone in the round.
Kira is looking to take this fight into the clinch.

Kira closes the distance and scores a nice trip takedown into half guard. Cheong did well to prevent Kira getting side control.
Cheong looking to work for a kimura from the bottom.

Kira is thinking about going for an arm triangle but he can't free his leg.
Kira is sneakily working for an arm triangle but Cheong sees it coming and defends easily.
Cheong wants to get back to full guard.
Kira really does look like a pencil wearing a pair of gloves. Let's hope he has a gameplan to suit that ridiculous body shape.
Kira is trying to work for a kimura. This could be trouble! No, Cheong has managed to free his arm - good work.
Kira seems to be looking for submissions.
Cheong is staying active underneath Kira, who seems content to just control the action from this position.

That's two minutes gone in the round.
Cheong looking for submissions off his back.
Kira maintaining the dominant position here and is working for a kimura. He's locked it up! Cheong could be in real trouble here! He's trying to wriggle out but Kira has cracked it and Cheong is screaming in pain - he's tapped out! Great finish by Kira!
Ladies and gentlemen, after 2:25 of round 1, we have a winner by way of Submission (Kimura). Slyck Kira!
Slyck Kira seemed lost for words in his post fight interview but he remembered to thank his fans and directed everyone to his website.
|
|
|
|
|
|
|
|
|
|
|
|
|
|
|
|
|
|
|
|
|
|
|
| S |
C
A |
G |
S |
C
B |
G |
|
S |
C |
G |
|
energy
A | B |
|
hype
A | B |
|
pop
A | B |
|
mgr
A | B |
|
FIGHT
RATING
37% |
|
|
|
|
|
|
|
Undercard bout
|
Coming up we have a featherweight MMA rules bout between TJ McA (ranked 0 p4p, 0 weight class) and James Brown (ranked 0 p4p, 0 weight class). James Brown has the power to score a knockout today if he connects clean with TJ McA's chin.
 |
|
 |
| 169 cm
23
140 lbs
2 - 0 - 0 |
|
165 cm
18
145 lbs
1 - 1 - 0 |
Decent wrestler
Counter fighter
Cuts easily |
|
BJJ Blue Belt
Counter fighter
Intelligent |
|
| |
|
Ladies and gentlemen. This fight is 3 rounds, in the featherweight division.
Introducing the fighter to my left, fighting out of the red corner.
With a record of
2 - 0 - 0, fighting out of Sydney, TJ McA!
And introducing the fighter to my right, fighting out of the blue corner.
With a record of
1 - 1 - 0, fighting out of Sydney, James Brown!
The judges for this bout are Bruno Hogan, Summer Carpenter and Donatello Bradman.
The bell rings for round one and we are underway!
McA feints and then dives in with a takedown. That was a long way out but the feint bought him enough time to close the distance and complete the takedown. Now we'll play guard for a bit and see who can get the better of that position.
McA is taking a break and basically stalling. The referee will not allow him to do that for long.
Brown wants to stand up but McA is controlling him.
McA is taking a break and basically stalling. The referee will not allow him to do that for long.

We're going to have a standup here because TJ McA wasn't active enough for the referee's liking.
McA keeps the fight on the outside.
A cross from Brown lands.
McA displays good takedown defense there as he swats away a double leg from Brown.
McA looking to shoot here. He's gone for it and he's landed a takedown into side control! Oh, that's bad for Brown!
That's one minute gone in the round.
Brown is being controlled here.
Brown is trying to control McA's posture but McA avoids it.
The referee asks McA politely if he wouldn't mind getting on with it and actually doing something. McA prefers to stall for the moment though.
We're going to have a standup here because TJ McA wasn't active enough for the referee's liking.
McA decides to change it up a bit and drives through with a nice takedown into half guard.
McA is just sitting in half guard, waiting for something to happen.
The fighters are pressed up against the cage, both looking to find a bit of space to work.
That's two minutes gone in the round.
McA has freed up his trapped foot and advances to mount.
The crowd are loving this. Great action here.
McA controlling the pace for now.
McA looking for an armbar but decides to keep the dominant position instead.
McA controlling the position easily from mount.

That's three minutes gone in the round.
Brown wants to hold on but McA pushes him away.
McA controlling the pace for now.
Brown is writhing around trying to get back to his feet.
The referee looks like he's ready to step in and stand the fighters back up.
McA trying to control but he's not successful this time.
McA controlling his opponent.

That's four minutes gone in the round.
Brown wants to control but McA is having none of it.
The referee decides to stand the fighters back up, due to lack of activity on the part of TJ McA.
Brown shoots in with a takedown attempt and he has McA pinned against the cage. McA gets the underhooks and manages to circle away.
Brown gets caught napping as McA dives in and scores a takedown. Brown manages to retain guard.
As the round comes to an end the crowd are showing their appreciation for a great round of action.
Brown looking for a triangle here. McA is fighting it but it looks tight! Brown pulls the arm across and this one won't last much longer! Nope, McA is tapping out - this one is all over!
Ladies and gentlemen, after 4:55 of round 1, we have a winner by way of Submission (Triangle Choke). James Brown!
|
|
|
|
|
|
|
|
|
|
|
|
|
|
|
|
|
|
|
|
|
|
|
| S |
C
A |
G |
S |
C
B |
G |
|
S |
C |
G |
|
energy
A | B |
|
hype
A | B |
|
pop
A | B |
|
mgr
A | B |
|
FIGHT
RATING
34% |
|
|
|
|
|
|
|
Undercard bout
|
Coming up we have a welterweight MMA rules bout between Trumi Drake (ranked 0 p4p, 0 weight class) and Ezekiel Town (ranked 0 p4p, 0 weight class). Town comes into a darkened arena with his song building. Old Tyme Religion kicks in, the lights come on and the crowd goes wild! What a showman! These two fighters really are very evenly matched on the feet - it will be fascinating to see who can assert themselves in that aspect of the fight.
 |
|
 |
| 180 cm
26
182 lbs
4 - 1 - 0 |
|
183 cm
18
170 lbs
2 - 2 - 0 |
BJJ White Belt
Decent elbows
Prefers standup |
|
BJJ White Belt
Counter fighter
Determined |
|
| |
|
Ladies and gentlemen. This fight is 3 rounds, in the welterweight division.
Introducing the fighter to my left, fighting out of the red corner.
With a record of
4 - 1 - 0, fighting out of Sydney, Trumi Drake!
And introducing the fighter to my right, fighting out of the blue corner.
With a record of
2 - 2 - 0, fighting out of Sydney, Ezekiel Town!
The judges for this bout are Eliza Hachem, Hugh Johnson and Donatello Bradman.
The bell rings for round one and we are underway!
Town connects nicely with a jab. Noted by the judges no doubt.
Drake is looking to clinch.
Drake slips under a jab.
Town is the aggressor but that punch slipped nicely by Drake.
Town has been spending a lot of time sparring his boxing in the run up to the fight, trying to sharpen up those hands and look for a knockout.
A jab from Drake misses.
Drake drives through and clinches with Town against the cage.
Drake comes over the top with an elbow. That landed flush.
Drake lands an elbow inside.

It looks like Ezekiel Town has been cut.
Drake with a knee to the head.
Drake using the Thai clinch to land knees to the body.
The crowd are loving this. Great action here.
Drake lands a damaging elbow.

Town is rocked!
Drake has Town pushed against the cage.
Town is looking to break free of the clinch but Drake has double underhooks.
Town takes an elbow to the forehead.
Town is still on wobbly legs! Can Drake finish him?
Town has had enough of the clinch but Drake keeps him there for the moment.
Town seems to have recovered his senses.
Drake lands a big knee! That's hurt Town! Oh, he's all over the place! Drake lands another knee that sends Town to the floor and the referee steps in to end the fight!
Ladies and gentlemen, after 0:57 of round 1, we have a winner by way of TKO (Strikes). Trumi Drake!
In defeat, Ezekiel Town stepped up to the mic, saying 'I didn't pray hard enough... I'll come back stronger. '.
|
|
|
|
|
|
|
|
|
|
|
|
|
|
|
|
|
|
|
|
|
|
|
| S |
C
A |
G |
S |
C
B |
G |
|
S |
C |
G |
|
energy
A | B |
|
hype
A | B |
|
pop
A | B |
|
mgr
A | B |
|
FIGHT
RATING
83% |
|
|
|
|
|
|
|
Undercard bout
|
Coming up we have a featherweight MMA rules bout between Chris Spyros (ranked 0 p4p, 0 weight class) and Rudy Eugene (ranked 0 p4p, 0 weight class). Spyros comes to the cage accompanied by The Bird and the Worm. Chris Spyros has the edge in experience - let's see if he can make that count tonight.
 |
|
 |
| 172 cm
25
145 lbs
1 - 2 - 0 |
|
180 cm
19
147 lbs
2 - 0 - 0 |
BJJ Blue Belt
Counter fighter
Granite chin |
|
BJJ White Belt
Excellent MT
Good gas tank |
|
| |
|
Ladies and gentlemen. This fight is 3 rounds, in the featherweight division.
Introducing the fighter to my left, fighting out of the red corner.
With a record of
1 - 2 - 0, fighting out of Sydney, Chris Spyros!
And introducing the fighter to my right, fighting out of the blue corner.
With a record of
2 - 0 - 0, fighting out of Sydney, Rudy Eugene!
The judges for this bout are Bruno Hogan, Winston Howard and Hugh Johnson.
The bell rings for round one and we are underway!
Eugene throws a nice hook to the body that draws an oooh from the crowd.
Eugene lands a nice looking body shot.
Spyros takes an uppercut right on the button but keeps his composure.
Eugene misses with a low kick.
A shot to the liver by Eugene. Beautiful body shot.
Eugene swinging wildly here.
Eugene scores with a body shot.
The crowd cheering loudly, showing their appreciation for the quality fight we're seeing here.
Eugene throws a head kick that misses.
Eugene has done a lot of speed work in the buildup to this fight.
Eugene cracks Spyros with a hook to the jaw. Both fighters smile at eachother and high-five before getting back down to business.
Eugene scores with a leg kick.
We've been hearing reports that Spyros has been drilling takedowns in recent sessions so let's see if that has an impact on the result of this fight.
Eugene looks for the body kick but Spyros saw that one coming.
That's one minute gone in the round.
Spyros doesn't react quick enough there as he takes a shot to the body.
Eugene rushes forward with a series of wild hooks but Spyros moves out of range and avoids them all easily.
Eugene lands with a straight right. Spyros didn't see that one coming.
A left lands for Eugene.
Eugene just misses with a punch to the body.
Eugene connects with a right hand. Spyros shakes it off.
Eugene connects nicely with a jab. Noted by the judges no doubt.
This is a great period of action - very entertaining stuff!
Spyros tries to close the distance and clinch up but Eugene swats him away and circles back towards the center.
A slapping leg kick lands for Eugene.
Eugene scores with a jab.
That's two minutes gone in the round.
Eugene scores with a jab.
A decent looking cross lands there for Eugene.
Spyros shoots in and drives through. Eugene sprawls well.
Eugene lands a nice hook to Spyros's body. Spyros takes it in his stride and looks to land his own strikes.
Eugene thuds a left hand into Spyros's body.
Spyros is breathing heavily.
Eugene scores with a reasonable looking shot to the body. Spyros doesn't seem bothered though.

Eugene drops Spyros with a beautiful combination! Spyros stares up at his opponent, who ushers him back to his feet - Eugene is looking for the KO!

Spyros is rocked!
Both fighters step back and shake their arms out. Eugene engages and cracks Spyros with a massive lead left hook - Spyros tumbles to the floor, out cold! What a shot! Eugene is delighted - all that hard work in training paid off!
Ladies and gentlemen, after 2:50 of round 1, we have a winner by way of KO (Punch). Rudy Eugene!
Rudy Eugene managed to slip a mention for his sponsors, xXx Clothing (Nothing Over $20), into his post fight interview.
|
|
|
|
|
|
|
|
|
|
|
|
|
|
|
|
|
|
|
|
|
|
|
| S |
C
A |
G |
S |
C
B |
G |
|
S |
C |
G |
|
energy
A | B |
|
hype
A | B |
|
pop
A | B |
|
mgr
A | B |
|
FIGHT
RATING
75% |
|
|
|
|
|
|
|
Undercard bout
|
Coming up we have a welterweight MMA rules bout between Buzz Sawyer (ranked 0 p4p, 0 weight class) and Ruslan Azarow (ranked 0 p4p, 0 weight class). These two fighters really are very evenly matched on the feet - it will be fascinating to see who can assert themselves in that aspect of the fight.
 |
|
 |
| 188 cm
24
181 lbs
2 - 0 - 0 |
|
180 cm
18
160 lbs
0 - 0 - 0 |
Decent wrestler
Counter fighter
Cuts easily |
|
BJJ Blue Belt
Decent boxing
Tends to cut |
|
| |
|
Ladies and gentlemen. This fight is 3 rounds, in the welterweight division.
Introducing the fighter to my left, fighting out of the red corner.
With a record of
2 - 0 - 0, fighting out of Sydney, Buzz Sawyer!
And introducing the fighter to my right, fighting out of the blue corner.
With a record of
0 - 0 - 0, fighting out of Sydney, Ruslan Azarow!
The judges for this bout are John Mangel, Steve Erwin and Skip Squint.
The bell rings for round one and we are underway!
Azarow doesn't succeed with the takedown
letting Sawyer counter with a right hand.
Azarow doesn't succeed with the takedown
and Azarow takes a counter punch right on the button for his troubles.
Azarow with a lazy takedown attempt
and Azarow takes a counter punch right on the button for his troubles.
Buzz Sawyer has stuffed three takedown attempts in the round now. That's going to take a lot out of Ruslan Azarow.
Azarow has his takedown stuffed
and Sawyer counters with a thumping low kick.
Azarow wants to slow Sawyer down by chopping away at his legs.
Azarow tries to clinch but Sawyer is having none of it.
Azarow with a lazy takedown attempt
and Sawyer makes him pay by landing a thudding low kick.
Sawyer lunges in with an uppercut that skims his opponent's chin.
Azarow is rocked!
Ruslan Azarow seems to be the more aggressive standup fighter in this bout.
We've seen a great period of action over the last minute or so - credit to both fighters for going all out!
BOOM! Sawyer lands a beautiful left hook that drops Azarow. Azarow tries to recover but Sawyer is having none of it, landing more punishing shots from mount. One final crushing shot and Azarow lies motionless on the canvas. The fight is over!
Ladies and gentlemen, after 1:55 of round 1, we have a winner by way of TKO (Strikes). Buzz Sawyer!
Buzz Sawyer seemed lost for words in his post fight interview but he remembered to thank his fans and directed everyone to his website.
|
|
|
|
|
|
|
|
|
|
|
|
|
|
|
|
|
|
|
|
|
|
|
| S |
C
A |
G |
S |
C
B |
G |
|
S |
C |
G |
|
energy
A | B |
|
hype
A | B |
|
pop
A | B |
|
mgr
A | B |
|
FIGHT
RATING
49% |
|
|
|
|
|
|
|
Undercard bout
|
Coming up we have a featherweight MMA rules bout between Tuomari Hurmio (ranked 0 p4p, 0 weight class) and Liam Ward (ranked 0 p4p, 0 weight class). Hurmio comes into the arena with Die for Metal blaring out of the sound system. These two fighters really are very evenly matched on the feet - it will be fascinating to see who can assert themselves in that aspect of the fight.
 |
|
 |
| 165 cm
19
155 lbs
3 - 0 - 0 |
|
159 cm
19
146 lbs
1 - 0 - 0 |
Good wrestling
Good kicks
Big heart |
|
BJJ Brown Belt
Counter fighter
Powerful |
|
| |
|
Ladies and gentlemen. This fight is 3 rounds, in the featherweight division.
Introducing the fighter to my left, fighting out of the red corner.
With a record of
3 - 0 - 0, fighting out of Los Angeles, Tuomari Hurmio!
And introducing the fighter to my right, fighting out of the blue corner.
With a record of
1 - 0 - 0, fighting out of Sydney, Liam Ward!
The judges for this bout are Skip Squint, Bruno Hogan and Summer Carpenter.
The bell rings for round one and we are underway!
Ward moves into range and connects with a jab.
Ward takes a thudding leg kick, right into the meat of the thigh.
Ward lands with a hook. Hurmio tried to avoid it but it clipped the top of his head.
Hurmio lands a leg kick and bounces back out of range.
Ward avoids a kick to the body.
Hurmio stuns Ward with a nice body shot, before stepping back out of range.
Ward misses with a wild combination.
Hurmio misses with a body kick.
Ward blocks a leg kick.
A head kick misses from Hurmio.
Ward throws a lazy uppercut
and Ward takes a counter punch right on the button for his troubles.
Ward misses with a body shot. Nice footwork from Hurmio.
Hurmio pushes Ward up against the cage in a clinch.
Nice body punch from Hurmio - that landed with a thud.
Ward wants to get back to striking at distance but Hurmio won't allow it.

Hurmio escapes the clinch and we're back to striking.
That's one minute gone in the round.
Hurmio throws a leg kick but Ward moved away.
A jab from Ward misses.
Hurmio lands with a nice low kick. That'll leave a bruise.
Hurmio misses with a low kick.
Ward throws a hook to the body but it doesn't connect.
Hurmio misses with a head kick.
Hurmio defending well as Ward loads up on a big left hand.
Hurmio lands a vicious shot with the stealth of a sniper and the strength of a viper. Are vipers that strong? I can think of lots of things that are stronger than a viper - not many rhyme with sniper though.
Hurmio misses with a low kick as Ward jumps back.
Tuomari Hurmio seems to be the more aggressive standup fighter in this bout.
Ward throws a hook to the side of Hurmio's head but Hurmio sees it coming and ducks under it beautifully.
Hurmio slips under a jab from Ward.
Hurmio does a little shimmy and throws a leg kick. The leg kick missed by a considerable margin though, making him look a little bit silly for doing the shimmy.
Hurmio throws a head kick that misses and slips in the process. He scrambles back to his feet and the fighters circle.
Ward moves out of range as Hurmio throws a body kick.
Hurmio uses good footwork to avoid the strikes from Ward.
That's two minutes gone in the round.
Ward lands a powerful looking uppercut that connected with his opponent's jaw.
Hurmio scores with a kick to the body.
Hurmio thuds his shin into the meat of Ward's side.
Hurmio lands a nice leg kick that just misses Ward's sensitive parts.
Hurmio throws a big shot that misses.
Horrible takedown by Hurmio or perhaps it was just good defense by Ward which made him look bad.
Wooooo! Give it up for these two warriors! They are putting on a show!
Hurmio shoots in for a takedown! He's got it and he's managed to land in side control! That's better than Hurmio was expecting from the takedown attempt, I'm sure!
Hurmio wants to lay and pray for a moment but Ward keeps working.
Ward tries to buck Hurmio off but Hurmio is having none of it.
Hurmio scores with a couple of short elbows.
That's three minutes gone in the round.
Ward looks to move to half guard but instead Hurmio has passed into mount! Damn!
Ward sneaks a leg back under and regains half guard and is working straight away to try and get back to guard. He hasn't managed just yet though.
Hurmio not throwing his punches with enough precision this time.
Hurmio prevents Ward from improving his position.
Hurmio trying to control the pace.
Ward is trying to maintain the position but Hurmio is very close to passing his half guard.
Ward tries to roll over but Hurmio keeps him under control.
That's four minutes gone in the round.
The two fighters exchange a few words. I couldn't hear what they were saying but maybe it's more fun if you make it up yourself. Hurmio connects with a nice short shot to Ward's temple.
Hurmio working Ward over with strikes.
Ward trying to control here.
The fighters are going at a pretty good pace and they're both starting to sweat now.
Ward manages to get to full guard.
The fighters are pressed up against the cage, both looking to find a bit of space to work.
Hurmio pressing down on his opponent's thigh, looking to pass guard. Ward is keeping the position for now.
As the round comes to an end the crowd are showing their appreciation for a great round of action.
Hurmio looking to control the position here, rather than advance.
Ward working a defensive guard but Hurmio passes into half guard.
And thats the end of the round the fighters go back to their corners.
Tuomari Hurmio dominated that round.
That's time! Hurmio's corner gives him a slap on the ass as he gets ready to fight.

Ward misses with a looping left.
Hurmio slips in close and lands a nice hook before moving back out of range.
Hurmio closes the distance and clinches.
Hurmio working aggressively here.
A frustrated look appears on Ward's face as he tries to break the clinch.
Ward lands a shoulder strike that jolts his opponent's head backwards.
Hurmio misses with a punch to the body.
Hurmio blocks an uppercut.
Ward swings away with an uppercut that misses.
Hurmio tries a shoulder strike but it doesn't do any damage.
A head punch on the inside from Hurmio fails to land.
Hurmio tries a shoulder strike but it doesn't do any damage.
Hurmio manages to break the clinch.
A shot to the body from Hurmio misses
and Ward counters with a crisp hook to the side of the head.
Ward moves out of range as Hurmio strikes.
Ward just misses with a punch to the body.
Hurmio looks to land a right hand but Ward moved out of range.
Ward thuds his right hand into Hurmio's forehead from close range. That could be painful for both fighters.
That's one minute gone in the round.
Ward moves out of range as Hurmio strikes.
Tuomari Hurmio is winning the standup battle so far.
Ward thows a body shot but no joy.
A looping hook to the body misses from Ward. Hurmio does a little dance to reset his feet.
Hurmio dances in quickly and lands a nice inside leg kick on Ward. That did some damage!
Hurmio throws a leg kick but Ward sees it coming and checks it nicely.
Ward displays some good footwork, moving neatly out of range as Hurmio throws out the jab.
Ward fakes high and swings low for a body shot but Hurmio manages to avoid it.
Ward fakes high and swings low for a body shot but Hurmio manages to avoid it.
Ward stumbles momentarily as he takes a strong leg kick from Hurmio.
Nice straight punches there by Hurmio. You know Roy Jones Jr respects the hands of Hurmio.
Liam Ward is looking to keep the fight on the feet at all costs.
Hurmio misses with a straight right.
Hurmio looking to take his opponent's legs away with the low kicks.
Ward fakes and then throws a beautiful body shot. Hurmio looks a bit winded and takes a step backwards to take a breath.
A solid leg kick lands there for Hurmio.
That's two minutes gone in the round.
Ward comes forward and lands a shot to the body, then darts back out of range.
Hurmio drives through and clinches with Ward against the cage.
Hurmio cracks Ward with a nice body shot.
Fantastic stuff here - a very entertaining period of action, which has drawn cheers from the crowd.
Hurmio lands with a left to the head.
Hurmio lands a right uppercut that snaps the head of Ward backwards.
Ward pushes off and circles away, back to the middle of the mat.
A slow jab from Hurmio misses its intended target.
Ooooh, nice body kick lands from Hurmio. Ward shrugs it off though.
Hurmio rushes Ward and pushes him back against the cage in a clinch.
Hurmio tries to throw a body punch but Ward avoids it by throwing Hurmio back against the cage.
Ward misses with a shot to the kidneys.
Ward doesn't land with the attempted body shot.
Hurmio misses with a hook to the ribs.
A short body shot lands from Hurmio as the two fighters clinch.
Hurmio lands a hook to the side of the head.
It looks like Liam Ward has been cut.
Hurmio tries to throw a body punch but Ward avoids it by throwing Hurmio back against the cage.
That's three minutes gone in the round.
Hurmio misses with some punches.
Ward working aggressively here.
Hurmio blocking some punches.
A head punch blocked on the inside by Ward.
Ward goes for a body shot but it's blocked.
With the fighters clinched against the cage, Hurmio creates a bit of distance for himself and scores with a nice uppercut.
A head punch on the inside from Ward fails to land.
Hurmio blocks a body shot from Ward.
Hurmio blocks a couple of punches on the inside.
Hurmio's corner calls for him to break the clinch, which he does.
Hurmio shoots in for a takedown! He's got it and he's managed to land in side control! That's better than Hurmio was expecting from the takedown attempt, I'm sure!
Ward is trying to control Hurmio's posture but Hurmio avoids it.
Ward is looking to reverse the position.
That's four minutes gone in the round.
Hurmio in side control lands a decent elbow.
Ward takes a big shot right to the temple there but he's taken it well.
The ref warns both fighters not to hold the cage as they work up against the meshing.
The crowd cheering loudly, showing their appreciation for the quality fight we're seeing here.
Hurmio grinds an elbow into Ward's temple.
Hurmio wants to control but Ward is keeping him busy.
Ward tries to bench press Hurmio off him but Hurmio keeps the position.
Hurmio working the ground and pound.
Tuomari Hurmio overall seems to be getting the better of the ground position in the fight so far.
As the round comes to an end the crowd are showing their appreciation for a great round of action.
Ward gives up the full mount - oops, sloppy defensive grappling there!
Ward tries to get back to half guard but can't.
And thats the end of the round the fighters go back to their corners.
Tuomari Hurmio dominated that second round.
The cut man is working on Liam Ward's cut.
The fighters' corners scream their final instructions, as the referee calls time. Here we go, back to the action! The crowd applaud as we get ready to start the final round!

Ward takes one to the chin there.
Hurmio closes the distance and clinches.
Hurmio keeps the fight in the clinch, despite Ward's efforts to push away.
Hurmio content to slow the pace in the clinch.
Ward misses with some punches.
Hurmio lands a right hand that snaps the head of Ward backwards.
Hurmio throws a punch but it's blocked by Ward.
Ward has had enough of the clinch but Hurmio keeps him there for the moment.
Ward can't find room to land a body shot as Hurmio controls the action.
Hurmio fails to land with a short punch on the inside.
Ward tries to work over Hurmio's body with a swooping hook but it only glances the target.
Ward is looking to break free of the clinch but Hurmio has double underhooks.
Hurmio keeps the fight in the clinch, despite Ward's efforts to push away.
A head punch on the inside from Ward fails to land.
Ward fails to land with a short punch on the inside.
Hurmio tried to land a shot to the body but connects with Ward's elbow.
That's one minute gone in the round.
Ward working aggressively here.
Hurmio lands a body shot in the clinch.
A bit of stalling here from Hurmio.
Ward has a couple of punches blocked by Hurmio.
An uppercut on the inside fails to land for Hurmio.
Hurmio blocks a body shot from Ward.
Hurmio misses with a hook from the clinch.
Ward misses with a punch on the inside.
Ward scores with a shoulder strike.
Hurmio working on landing some head shots here - that one got through nicely.
Hurmio misses with a punch to the body.
Ward throws a hook to the body. More of an arm punch but it's all scoring with the judges.
Ward is fighting off a takedown attempt but Hurmio is just too persistent for him and manages to trip Ward to the mat. Ward regains guard as soon as the fighters hit the mat.
Ward keeping moving, preventing Hurmio from controlling successfully.
This is a great period of action - very entertaining stuff!
Ward looking to sweep here. No luck so far.
That's two minutes gone in the round.
Ward can't keep his opponent in guard - Hurmio advances to half guard, no doubt looking to mount.
Ward is not content to let Hurmio control the position.
Ward has found himself in a tricky position here. He's been working his transitions in training so let's see if he can work his way out of it.
Ward regains full guard, whilst avoiding punches from Hurmio.
Ward is working actively off his back, looking to secure an arm or perhaps work for a triangle.
Hurmio pushing down on Ward's thigh, trying to pass to half guard. He's managed it... Nice work.
Ward looking for submissions from an awkward position here.
That's three minutes gone in the round.
Still in half guard, Hurmio seems content to control.
Hurmio wants to take a breather but Ward is having none of it.
Hurmio is just sitting in half guard, waiting for something to happen.
Tuomari Hurmio is fighting for a decision here - he's started to take the cautious approach.
Ward looking to work for a kimura from the bottom.
Ward looking for submissions from an awkward position here.
That's four minutes gone in the round.
Hurmio trying to control the pace.
Ward looking to work for a kimura from the bottom.
Hurmio seems content to maintain position for now, rather than mounting any offense.
As the round comes to an end the crowd are showing their appreciation for a great round of action.
And that's the end of the fight!
Tuomari Hurmio showed his dominance in that final round.
Well Hurmio has outscored his opponent in every aspect of the fight today. Only a scarily incompetent judge or two will keep him from a well deserved win... Over to the ring announcer for the scorecards.
Ladies and gentlemen, after 3 rounds of action, we go to the scorecards for a decision.
Judge Skip Squint scores the fight 30:27
Judge Bruno Hogan scores the fight 30:27
Judge Summer Carpenter scores the fight 30:27
In favor of your winner, by unanimous decision... Tuomari Hurmio!
Tuomari Hurmio thanked the fans post fight for their support.
|
|
|
|
|
|
|
|
|
|
|
|
|
|
|
|
|
|
|
|
|
|
|
| S |
C
A |
G |
S |
C
B |
G |
|
S |
C |
G |
|
energy
A | B |
|
hype
A | B |
|
pop
A | B |
|
mgr
A | B |
|
FIGHT
RATING
66% |
|
|
|
|
|
|
|
Undercard bout
|
Coming up we have a featherweight MMA rules bout between Carl Lynn (ranked 0 p4p, 0 weight class) and Kendrik Down (ranked 0 p4p, 0 weight class). Lynn comes to the cage accompanied by Pain. This should be a great matchup!
 |
|
 |
| 172 cm
19
147 lbs
3 - 1 - 0 |
|
183 cm
19
155 lbs
3 - 0 - 0 |
BJJ Purple Belt
Brawler
Cardio machine |
|
Good wrestler
Counter fighter
Determined |
|
| |
|
Ladies and gentlemen. This fight is 3 rounds, in the featherweight division.
Introducing the fighter to my left, fighting out of the red corner.
With a record of
3 - 1 - 0, fighting out of Sydney, Carl Lynn!
And introducing the fighter to my right, fighting out of the blue corner.
With a record of
3 - 0 - 0, fighting out of Sydney, Kendrik Down!
The judges for this bout are John Mangel, Steve Erwin and Winston Howard.
The bell rings for round one and we are underway!
Down has his hands up protecting his head but a hook from Lynn finds it's way round the side to connect with Down's head.
Lynn throws a hook but Down avoids it easily.
Lynn scores with a nice one two combo and darts back out of range to avoid anything coming in the opposite direction.
It looks like Kendrik Down has been cut.
Lynn throws a low kick but his opponent is out of range.
Down lands a nice shot to the body.
Down thuds his right hand into Lynn's forehead from close range. That could be painful for both fighters.
Down scores with a jab to the jaw of his opponent.
Lynn motions for Down to come forward. Lynn throws a leg kick but it misses it's target.
Down avoids a punch combination nicely.
The crowd cheers as Lynn lands an impressive looking overhand right. Down doesn't seem phased though.
Down cracks Lynn with a good shot that sees him stumbling back into the cage.
We've seen a great period of action over the last minute or so - credit to both fighters for going all out!
Lynn throws a lazy uppercut
and Down counters with a nice jab to the body that keeps Lynn thinking.
Down scores with a nice right hand.
We've been informed that Down has been sparring a lot of Muay Thai in the buildup to this fight so let's see if that has an impact on the result.
Down throws a hook but Lynn avoids it easily.
No joy there for Lynn, who threw a few shots but didn't land.
The crowd cheers as Lynn lands an impressive looking overhand right. Down doesn't seem phased though.
Down moves away from the strike by Lynn.
Lynn takes one to the side of the head.
That's one minute gone in the round.
Lynn takes one to the chin there.
Down uses good footwork to get in and out, landing a nice hook.
Lynn throws a head kick that misses and slips in the process. He scrambles back to his feet and the fighters circle.
Down displays some good footwork, moving neatly out of range as Lynn throws out the jab.
Down on the wrong end of a nice hook.
Down moves out of range of the body kick.
Lynn misses with a hook. Down ducked under it nicely.
Down with a nice cross.
Lynn takes one on the chin but keeps coming.
Lynn is rocked!
Down is using his reach advantage to land shots from outside his opponent's range.
Down misses with a jab and misses with a cross straight after too.
Oh Lynn is still all over the place! His legs are completely gone! Will he be able to recover?!!
Down is landing a lot of head punches in this opening round! Lynn had better start moving his head a bit unless he wants his face to turn into pâté.
Lynn tries to bum rush Down with a series of wild strikes but Down uses good footwork to avoid the assault.
Lynn misses with a right hand
and Down counters nicely by changing levels and landing a hook to the body.
Wooooo! Give it up for these two warriors! They are putting on a show!
Lynn throws a hook but Down blocks it.
Down cracks Lynn with a nice right hand that draws applause from the crowd.
Lynn misses with a combination
and Down counters with a crisp right that sends Lynn to the canvas! Down follows up with punches from the mount and this one is all over!
Ladies and gentlemen, after 1:54 of round 1, we have a winner by way of TKO (Strikes). Kendrik Down!
Carl Lynn spoke after the fight, saying 'I tried.'.
|
|
|
|
|
|
|
|
|
|
|
|
|
|
|
|
|
|
|
|
|
|
|
| S |
C
A |
G |
S |
C
B |
G |
|
S |
C |
G |
|
energy
A | B |
|
hype
A | B |
|
pop
A | B |
|
mgr
A | B |
|
FIGHT
RATING
92% |
|
|
|
|
|
|
|
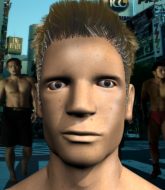
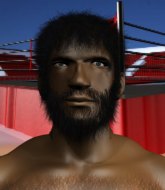
Co-main event
|
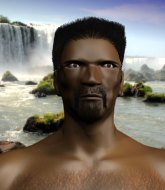
Coming up we have a heavyweight MMA rules bout between Robert Yolpan (ranked 0 p4p, 0 weight class) and Kreb Barishkov (ranked 0 p4p, 0 weight class). Barishkov has chosen Seek and Destroy as his entrance music, which hasn't gone down very well with the crowd. Both these guys have solid standup skills and neither is particularly fantastic on the ground, so let's hope for a nice standup war!
 |
|
 |
| 220 cm
26
281 lbs
6 - 2 - 0 |
|
190 cm
26
280 lbs
3 - 0 - 0 |
Decent wrestler
Excellent boxer
Experienced |
|
BJJ Blue Belt
Excellent boxer
Heavy handed |
|
| |
|
Ladies and gentlemen. This fight is 3 rounds, in the heavyweight division.
Introducing the fighter to my left, fighting out of the red corner.
With a record of
6 - 2 - 0, fighting out of Sydney, Robert Yolpan!
And introducing the fighter to my right, fighting out of the blue corner.
With a record of
3 - 0 - 0, fighting out of Sydney, Kreb Barishkov!
The judges for this bout are Bruno Hogan, Damien Edna and Steve Erwin.
The bell rings for round one and we are underway!
Barishkov chopping away at his opponent's legs.
Barishkov throws a right hand that misses
and Yolpan counters with a crisp hook to the side of the head.
Kreb Barishkov seems to be the more aggressive standup fighter in this bout.
Barishkov takes one on the chin but keeps coming.
Yolpan displays some good footwork, moving neatly out of range as Barishkov throws out the jab.
Barishkov moves into range and lands a nice leg kick.
Yolpan stumbles momentarily as he takes a strong leg kick from Barishkov.
Yolpan takes a jab on the nose. He smiles like he loves it and keeps coming.
Wooooo! Give it up for these two warriors! They are putting on a show!
Barishkov wings a very wild body shot but it does the job and lands to the midsection.
Barishkov misses with a low kick as Yolpan jumps back.
Barishkov lands a leg kick that knocks Yolpan off balance momentarily.
Barishkov takes a swing at Yolpan's ribcage but misses.
Barishkov shapes like he's going to throw a leg kick but settles back down.
Yolpan on the wrong end of a nice low kick. He's acting like it's no big deal but he doesn't want to take many more of those.
Yolpan is breathing heavily.
Barishkov jabs Yolpan to the body, keeping him at a distance.
Barishkov pushing out the jab but it's not landing.
That's one minute gone in the round.
Barishkov wings a very wild body shot but it does the job and lands to the midsection.
Barishkov cracks Yolpan with a big right hand that sends him to the floor! Yolpan looks wobbly but he's sprung back up to his feet straight away
can Barishkov finish him?
Yolpan is rocked!

It looks like Robert Yolpan has been cut.
The fans in attendance giving it up for the two fighters, who have really let it all hang out in the last minute or so!
A nice leg kick lands there from Barishkov.
Barishkov flashes Yolpan a smile before throwing a beast of a right hand, straight down the pipe. Yolpan's eyes follow the hand right onto his nose, taking in it's full glory... and then darkness. Yolpan crumples to the floor! He's out cold! Barishkov punches the air and yells at the top of his lungs - yeeeeeeeeeeah!!!! This one is all over!
Ladies and gentlemen, after 1:27 of round 1, we have a winner by way of KO (Punch). Kreb Barishkov!
Kreb Barishkov decided to thank the fans in attendance for making a great atmosphere. It seemed to go down pretty well.
|
|
|
|
|
|
|
|
|
|
|
|
|
|
|
|
|
|
|
|
|
|
|
| S |
C
A |
G |
S |
C
B |
G |
|
S |
C |
G |
|
energy
A | B |
|
hype
A | B |
|
pop
A | B |
|
mgr
A | B |
|
FIGHT
RATING
100% |
|
|
|
|
|
|
|
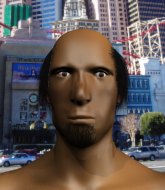
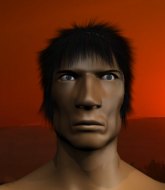
Main event
|
Coming up we have a heavyweight MMA rules bout between Garp Pullnate (ranked 0 p4p, 0 weight class) and David Logins (ranked 0 p4p, 0 weight class). Logins is bouncing up and down as he enters the arena, backed by Smashing Pumpkins - Bullets with butterfly wings. David Logins will no doubt be trying to keep this one on the feet, where he has a distinct advantage.
 |
|
 |
| 225 cm
26
288 lbs
3 - 1 - 0 |
|
193 cm
25
250 lbs
5 - 0 - 0 |
Good wrestling
Solid boxing
Very strong |
|
Decent wrestler
Decent boxing
Intelligent |
|
| |
|
Ladies and gentlemen. This fight is 5 rounds, for the heavyweight championship of the world!
Introducing the champion to my left, fighting out of the red corner.
With a record of
3 - 1 - 0, fighting out of Sydney, Garp Pullnate!
And introducing the challenger to my right, fighting out of the blue corner.
With a record of
5 - 0 - 0, fighting out of Sydney, David Logins!
The judges for this bout are Skip Squint, Winston Howard and Summer Carpenter.
The bell rings for round one and we are underway!
Logins takes a jab right on the nose. That must have hurt but he shrugs his shoulders and looks to return the favor.
Horrible takedown by Logins or perhaps it was just good defense by Pullnate which made him look bad.
Logins tries to land with a swinging hook to the body but Pullnate was well out of range. Poor timing from Logins.
Pullnate jabbing away but nothing is landing.
Logins slips a jab from Pullnate.
Pullnate definitely looks more muscular than last time we saw him fight.
Logins misses with a lunging right hand
and Pullnate counters into the clinch. Nicely done.
Logins taking a breather.
Pullnate lands with a left to the head.
Pullnate is leaning against Logins and scores with a nice uppercut to the body.
Logins swings wildly with an uppercut but Pullnate uses good head movement to avoid it.
Pullnate leaning his opponent against the cage.
Pullnate tries to work over Logins's body with a swooping hook but it only glances the target.
That's one minute gone in the round.
Pullnate prevents Logins from breaking the clinch.
Pullnate misses with a hook from the clinch.
Logins's corner calls for him to break the clinch, which he does.
Nice defenses there by Logins.
Pullnate rushes Logins and presses him up against the cage.
Pullnate lands a nice looking hook to the body, against the cage.
Pullnate tries to land a shot to the body but it's blocked.
Logins lands with a right to the head.
A short left from Pullnate.
Pullnate blocks a body shot from Logins.
Some stalling of biblical proportions here from Pullnate.
This has been an exciting period of action!
Pullnate misses with a short punch on the inside.
The pace really dropping off here, momentarily.
Pullnate throws a head punch that misses.
That's two minutes gone in the round.
Logins looks like he'd prefer to be striking at range right now.
Logins lands a nice looking hook to the body, against the cage.
Pullnate makes some space for himself and lands an uppercut.
Pullnate lands a right hand.
Pullnate avoiding damage.
Pullnate lands a right uppercut that snaps the head of Logins backwards.
With the fighters clinched against the cage, Pullnate creates a bit of distance for himself and scores with a nice uppercut.
An uppercut on the inside fails to land for Pullnate.
Logins is trying to work out of this bad position, with his back against the cage.
Logins blocking some punches.
A short uppercut from Pullnate.
Logins misses with the head strike.
Pullnate misses with a punch to the body.
Pullnate presses Logins against the cage and delivers a mid-strength body shot.
Logins goes for a body shot but it's blocked.
That's three minutes gone in the round.
Pullnate tries to throw a body punch but Logins avoids it by throwing Pullnate back against the cage.
Pullnate prevents a body shot from Logins.
Logins tries to throw a body punch but Pullnate avoids it by throwing Logins back against the cage.
Pullnate is leaning against Logins and scores with a nice uppercut to the body.
An uppercut on the inside fails to land for Logins.
The referee calls for Pullnate to work.
Logins has been looking to improve his clinch game in recent weeks. Pullnate seems to have the measure of him in the clinch so far, so let's see if Logins can turn it around.
Pullnate swings wildly with an uppercut but Logins uses good head movement to avoid it.
Pullnate throws a head punch that misses.
Logins tries to break the clinch but Pullnate is controlling the position.
Logins is trying to break the clinch but Pullnate has him pressed against the cage.
Pullnate goes for a body shot but it's blocked.
Logins is trying to force a seperation but Pullnate has the dominant position.
Pullnate misses with some punches.
Logins wants to break the clinch but can't.
Pullnate lands with a good tight uppercut to the head.
That's four minutes gone in the round.
Logins blocks a couple of punches on the inside.
We've seen a great period of action over the last minute or so - credit to both fighters for going all out!
Pullnate is leaning against Logins and scores with a nice uppercut to the body.
Logins looks winded!
Pullnate pressing his opponent against the cage.
Nice body punch from Pullnate.
A nice left hand lands by Pullnate.
Pullnate's corner are urging him to control the action in the clinch for a moment, rather than mount any serious offense. I'm sure the crowd appreciate those instructions... not.
Logins stalling in the clinch but Pullnate improves position.
Pullnate displaying some good clinch control by pressing Logins up against the cage.
The crowd are going absolutely nuts as the round comes to an end - what a fantastic round of action!
Still in the clinch, Pullnate scores with a nice short uppercut.
Logins wants to strike at distance but he can't break free of the clinch.
And thats the end of the round the fighters go back to their corners.
Garp Pullnate dominated that round.
The fighters get back to their feet, the hooter sounds and we're back to the action!
Logins works his jab well there, keeping his opponent at a distance.
Nice body punch from Pullnate.
Pullnate is really dominating this fight. Is there anything that Logins can do to turn this around?
Pullnate drops Logins with a big left hand! Logins is injured, injured bad! Pullnate jumps in and finished him with strikes! The fight is over!
Ladies and gentlemen, after 0:14 of round 2, we have a winner by way of TKO (Strikes). Garp Pullnate!
Garp Pullnate retains his heavyweight title!
A relieved looking Garp Pullnate thanked the fans for their support and gave the usual line about them being amazing. They seemed to believe that he actually meant it.
|
|
|
|
|
|
|
|
|
|
|
|
|
|
|
|
|
|
|
|
|
|
|
| S |
C
A |
G |
S |
C
B |
G |
|
S |
C |
G |
|
energy
A | B |
|
hype
A | B |
|
pop
A | B |
|
mgr
A | B |
|
FIGHT
RATING
100% |
|
|
|
|
|
|
|
|
|
|
