 |
Impact FC 1 PBP Commentary |
Undercard bout
|
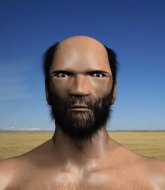
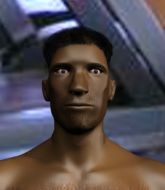
Coming up we have a welterweight MMA rules bout between Eerik Rikkonen (ranked 0 p4p, 0 weight class) and Vinnie Haz (ranked 0 p4p, 0 weight class). These two fighters really are very evenly matched on the feet - it will be fascinating to see who can assert themselves in that aspect of the fight.
 |
|
 |
| 180 cm
18
170 lbs
1 - 2 - 0 |
|
175 cm
20
170 lbs
0 - 1 - 0 |
BJJ Blue Belt
Brawler
Big heart |
|
BJJ White Belt
Decent boxing
Solid chin |
|
| |
|
Ladies and gentlemen. This fight is 3 rounds, in the welterweight division.
Introducing the fighter to my left, fighting out of the red corner.
With a record of
1 - 2 - 0, fighting out of London, Eerik Rikkonen!
And introducing the fighter to my right, fighting out of the blue corner.
With a record of
0 - 1 - 0, fighting out of London, Vinnie Haz!
The judges for this bout are Chris Edwards, Andrew Berry and Donald Grub.

The bell rings for round one and we are underway!

Rikkonen darts in and clinches Haz up against the cage.
Rikkonen blocks an uppercut.
Haz looks more muscular than last time we saw him. He must have been on the weights.
Haz dodges an elbow strike from Rikkonen.
Haz tries for a takedown but Rikkonen manages to get underhooks.
Haz has dropped down and is looking to force the takedown but it's defended by Rikkonen after a bit of a struggle.
Haz lands a body shot.
Haz is trying to pull guard but Rikkonen has him pressed against the cage.
Eerik Rikkonen has stuffed three takedown attempts in the round now. That's going to take a lot out of Vinnie Haz.
A bit of stalling here from Rikkonen.
Haz is defending well against a takedown attempt.
Haz taking a breather.
Haz is trying to pull guard but Rikkonen has him pressed against the cage.

Haz breaks the clinch and we return to the middle of the mat.
Rikkonen is looking to score with low kicks.
Vinnie Haz seems to be the more aggressive standup fighter in this bout.
Rikkonen dodges the punch combination from Haz.
Haz is trying hard to land a takedown here. Rikkonen sprawls well and keeps this one on the feet.
Haz shoots in for a takedown - he's clinched up with Rikkonen but Rikkonen pushes him off and we're back to square one.

That's one minute gone in the round.
Haz throws a right hand that Rikkonen ducks under and follows up with a left that Rikkonen also avoids with ease.
Haz stuffs the takedown attempt from Rikkonen. Rikkonen gets slowly back to his feet.
A punch combination from Haz misses.
Haz connects with a single shot there.
Rikkonen dives in and grabs Haz's left leg, looking for a takedown. Haz pushes down on Rikkonen's head and hops out.
Haz ducks down and throws a hook to the body but Rikkonen moves away.
Haz wants to clinch.
Haz throws a body kick, spinning off balance
enabling Rikkonen to counter with a crisp jab.
Haz moves into range and throws a lovely three punch combination.
Rikkonen fails with a rather predictable takedown attempt.
Haz motions for Rikkonen to come forward. Haz throws a leg kick but it misses it's target.

That's two minutes gone in the round.
Haz fakes a jab and throws a low kick but Rikkonen checks it well.
Haz throws a series of punches but Rikkonen avoids them all with ease.
Haz looks winded!
Haz scores with a three punch combo!
Fantastic stuff here - a very entertaining period of action, which has drawn cheers from the crowd.
A low kick from Haz is predictable there
and Rikkonen counters with a head kick. That will keep Haz thinking before he tries any more sloppy attacks!
Rikkonen moves into range and clinches up with Haz.
Haz trying to control the position but instead, Rikkonen has worked for underhooks and has pushed Haz into the cage.

Rikkonen works for the underhooks and manages to get a trip takedown into guard.
We've been hearing that Rikkonen has been drilling a lot of ground and pound in training, so let's see if he get the finish.
Rikkonen pushes down on Haz's leg and manages to get into half guard.

That's three minutes gone in the round.

Rikkonen decides to stand up.
Haz fails to land with the punch combination there - jab, cross, hook, miss, miss, miss.
Haz keeping a good distance there, avoiding the body shot.
Haz swinging wildly here.
Haz throws a right and a left that Rikkonen avoids nicely.
Rikkonen shoots in with a takedown attempt and he has Haz pinned against the cage. Haz gets the underhooks and manages to circle away.
Haz misses with a body shot. Nice footwork from Rikkonen.

That's four minutes gone in the round.
Haz tries to close the distance and clinch up against the cage but Rikkonen paws at him with a jab and circles away.
The fight moves into the clinch position.

Rikkonen breaks the clinch and we're back to striking at distance.
Haz tries to clinch but fails miserably
and Rikkonen counters by moving into the clinch.
Rikkonen breaks the clinch and we're back to striking at distance.
Haz shoots in for a takedown but Rikkonen shows good takedown defense.
Rikkonen throws a combination but it was largely blocked by Haz.
Rikkonen closes the distance and clinches up with Haz, looking for a takedown. Rikkonen pushes Haz against the cage but Haz circles to the side and manages to break the clinch.
Rikkonen shoots in with a takedown attempt and he has Haz pinned against the cage. Haz gets the underhooks and manages to circle away.
As the round comes to an end the crowd are showing their appreciation for a great round of action.
A nice leg kick lands there from Haz.
And thats the end of the round the fighters go back to their corners.
A close round but Vinnie Haz will probably get the nod.
That's the end of the round. The referee orders the cornermen out of the cage so we can get back down to business.

Rikkonen tries to clinch but is not successful on this occasion.
Haz takes a swing at Rikkonen's ribcage but misses.
Haz moves in looking to clinch but Rikkonen pushes him off.
Vinnie Haz seems to be getting the better of the standup.
Rikkonen checks a leg kick.
Rikkonen shoots in for a takedown but doesn't get it.
Haz connects with a right hand. Rikkonen shakes it off.
Rikkonen blocks a head kick by Haz.
Haz looking to take his opponent's legs away with the low kicks.
Haz throws a series of punches but Rikkonen moves out of range.
Haz tries to clinch there but Rikkonen circles away.
Haz is looking to clinch but Rikkonen is avoiding it.
Eerik Rikkonen is looking to throw some combinations by the looks of things.
Haz misses with a body punch
and Rikkonen counters by clinching up.
Haz tries to land a shot to the body but it's blocked.
Rikkonen manages to pull guard. Let's see whether he can land a sub off his back.
That's one minute gone in the round.
Rikkonen utilising some decent striking defenses from the guard, preventing the ground and pound.
Rikkonen is pulling down on Haz's head. It's preventing any offense from Haz, at least for the moment.
Rikkonen keeping moving, preventing Haz from controlling successfully.

The fighters are starting to get a bit slippery now, which will make submissions a bit more difficult.
Rikkonen had isolated an arm as going for a kimura. Haz defends it easily.
Haz wants to get up but he can't break Rikkonen's closed guard. He needs to be careful trying to break the legs open, as he's open to submissions here.
Rikkonen is pulling down on Haz's head to control his posture.
Haz would like to get this fight back to the feet but can't get free from the closed guard.
That's two minutes gone in the round.
Rikkonen is throwing his legs up, looking for submissions. Haz is aware though and is defending well.
Rikkonen manages to land a sweep and now he's in mount on top!
Rikkonen looking for a guillotine from mount but Haz is having none of it.
The ref warns both fighters not to hold the cage as they work up against the meshing.
Both fighters are absolutely exhausted here.
Haz wants to hold on but Rikkonen pushes him away.
That's three minutes gone in the round.
Rikkonen throws some wild stikes that Haz manages to avoid easily.
Rikkonen takes a little breather and maintains the position. The referee will be looking for him to stay active from such a dominant position though.
Haz reaches up to try and control the position but Rikkonen seems to have an arm triangle now! Uh oh! Haz rolls and tries to escape and now Rikkonen has his back!
What can Haz do to escape this position? He's going to have to figure it out pretty quick if he wants to stay in the fight!
Rikkonen is working for the rear naked choke. He has one arm under the chin but Haz has hold of the other arm. A bit of a stalemate here.
Rikkonen keeps control of the position easily here as Haz tries to buck him off.
That's four minutes gone in the round.
Haz looks to control his opponent's hands but he's not mananging it at the moment.
Haz is being controlled on the ground here - he must escape this position otherwise surely the end is near.
The crowd applaud the fighters efforts here as the round comes to an end.
And thats the end of the round the fighters go back to their corners.
Eerik Rikkonen dominated that second round.
Well, the break between rounds is over. Let's get back to the scrappin! Let's get this one finished - here comes the final round!

Rikkonen avoids the clinch attempt nicely.
Haz lands a glancing blow to the side of Rikkonen's head.
The fight moves into the clinch position.
Rikkonen breaks from the clinch.
Rikkonen shoots in looking for a double leg takedown. Haz defends it nicely.
Haz lunges in with swinging rights and lefts but Rikkonen circles away quickly and effectively.
Rikkonen moves into the clinch.
Rikkonen pulls guard.
Haz wanted to stand there but Rikkonen had control of the position.
Rikkonen controlling the position.
That's one minute gone in the round.
Rikkonen looking for submissions from the bottom here. Moving his hips around, possibly looking for an armbar.
The fighters are pressed up against the cage, both looking to find a bit of space to work.
Haz throws a strike but Rikkonen rolls with it and manages to sweep. Now he's in guard on top.

Haz throws his legs up looking to secure a triangle. Oh, that looks pretty tight, I gotta say! Rikkonen escapes and throws Haz's legs to the side, diving into side control!
Rikkonen tries for an arm triangle. That looks pretty tight to me. Is this one over!?! Possibly, maybe, no Rikkonen has let go of the choke. Obviously it wasn't as tight as we thought!
That's two minutes gone in the round.
Rikkonen decides to stand back up. Rikkonen steps back and let's Haz get back to his feet.
Haz throws a right and a left that both miss.
Haz swings wildly with a couple of big hooks
and Rikkonen counters with a flying knee. Nice.
Rikkonen dives in and grabs Haz's left leg, looking for a takedown. Haz pushes down on Rikkonen's head and hops out.
Both fighters are breathing heavily.
Haz lands with a slapping head kick.
Rikkonen darts in and clinches Haz up against the cage.
This is a great period of action - very entertaining stuff!
Rikkonen manages to break the clinch.
Haz throws a head kick that misses.
Haz tries to clinch up but Rikkonen circles away and keeps his distance.
Rikkonen has his hands up protecting his head but a hook from Haz finds it's way round the side to connect with Rikkonen's head.
That's three minutes gone in the round.
Rikkonen shoots in for a takedown - he's clinched up with Haz but Haz pushes him off and we're back to square one.
That's three failed takedown attempts in the round for Eerik Rikkonen. That's going to take a lot out of him.
Haz misses with a few strikes there.
Rikkonen throws a looping left and ducks down for a takedown. He's got his arms around Haz's waist but Haz gets an underhook and avoids the takedown by throwing Rikkonen off to one side.
Rikkonen doesn't react quick enough there as he takes a shot to the body.
Haz punishes Rikkonen's body with a nice straight punch.
Haz throws a chopping leg kick but Rikkonen manages to avoid taking any serious damage.
Haz tries to close the distance and clinch up but Rikkonen swats him away and circles back towards the center.
Haz throws a right hand that Rikkonen ducks under and follows up with a left that Rikkonen also avoids with ease.
Haz keeps the fight standing with a nice sprawl.
Haz looks to land a combination but Rikkonen avoids it well.
That's four minutes gone in the round.
Haz misses with a few strikes there.
Rikkonen swings and misses with a hook to the body.
A right-left combo lands from Haz.
Haz displays good takedown defense there as he swats away a double leg from Rikkonen.
Haz swinging wildly here.
Rikkonen has a takedown stuffed.
Haz cracks Rikkonen with a good jab.
As the round comes to an end the crowd are showing their appreciation for a great round of action.
Rikkonen shoots in for a takedown. He's persisting with it as Haz sprawls well. Haz wins this battle and keeps the fight standing. Rikkonen gets slowly back to his feet.
This is a great period of action - very entertaining stuff!
A really sloppy takedown attempt there from Haz.
And that's the end of the fight!
I would just about give that final round to Vinnie Haz.
I think Haz has won this one but let's see whether the judges agree with me. Over to the ring announcer for the scorecards.
Ladies and gentlemen, after 3 rounds of action, we go to the scorecards for a decision.
Judge Chris Edwards scores the fight 28:29
Judge Andrew Berry scores the fight 28:29
Judge Donald Grub scores the fight 29:29
In favor of your winner, by majority decision... Vinnie Haz!
|
|
|
|
|
|
|
|
|
|
|
|
|
|
|
|
|
|
|
|
|
|
|
| S |
C
A |
G |
S |
C
B |
G |
|
S |
C |
G |
|
energy
A | B |
|
hype
A | B |
|
pop
A | B |
|
mgr
A | B |
|
FIGHT
RATING
58% |
|
|
|
|
|
|
|
Undercard bout
|
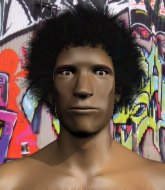
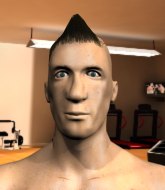
Coming up we have a light heavyweight MMA rules bout between Albin Han (ranked 0 p4p, 0 weight class) and Ernie Ball (ranked 0 p4p, 0 weight class). Well, the cameraman is lingering on a pretty young lady for a bit too long there. Keep your eyes on the prize buddy or you'll miss the fighter intros!
 |
|
 |
| 195 cm
18
208 lbs
0 - 1 - 0 |
|
185 cm
18
215 lbs
0 - 0 - 0 |
BJJ Blue Belt
Brawler
Cuts easily |
|
BJJ White Belt
Solid Muay Thai
Determined |
|
| |
|
Ladies and gentlemen. This fight is 3 rounds, in the light heavyweight division.
Introducing the fighter to my left, fighting out of the red corner.
With a record of
0 - 1 - 0, fighting out of London, Albin Han!
And introducing the fighter to my right, fighting out of the blue corner.
With a record of
0 - 0 - 0, fighting out of London, Ernie Ball!
The judges for this bout are James Ackerman, Sam Margolis and James Glass.
The bell rings for round one and we are underway!
Ball tries to close the distance and clinch up but Han swats him away and circles back towards the center.
Ball lands a slapping body shot.
Han looks for a takedown here. Will he get it? Ball is fending him off so far but Han persists. Nope, Ball circles away and we're back to standing.
Han shoots in looking for a double leg takedown. Ball defends it nicely.
Han dives in for a single leg takedown but Ball sprawls and the fighters end up clinched against the cage.
That's three failed takedown attempts in the round for Albin Han. That's going to take a lot out of him.
Ball scores with a hook to the body.
Ball lands a right hand that snaps the head of Han backwards.
Ball lands with a good tight uppercut to the head.
Ball makes some space for himself and lands an uppercut.
A nice right hand lands inside from Ball.
Han has dropped down and is looking to force the takedown but it's defended by Ball after a bit of a struggle.
Han is trying to work for a single leg takedown but Ball pulls him back up using the underhooks.
Han looking for a takedown.
Han is breathing heavily.
Ball lands a body shot.
Ball lands a shot to the body.
Ball lands a hook to the body. It's hard to tell if that hurt Han or not.
With the fighters clinched against the cage, Ball creates a bit of distance for himself and scores with a nice uppercut.
Ball lands a left hand.
Ball is defending well against a takedown attempt.
Ball lands a shot to the body.
Ball lands a right hand.
That's one minute gone in the round.
Ball lands punches inside but they're not really causing much damage.
Our sources have told us that Han has been working on his elbows in the gym.
Ball lands with a good tight uppercut to the head.
Ball prevents the takedown attempt.
With the fighters clinched against the cage, Ball creates a bit of distance for himself and scores with a nice uppercut.
A body shot lands from Ball.
Han has Ball pressed up against the cage and is working for takedown. Ball manages to improve position though and keeps the fight standing.
Ball stalling in the clinch.
A short right hand to the side of the head by Ball.
Ball stays in close to his opponent and throws a right hand to the body.
Ball works on Han's body with a couple of short punches.
Ball lands with a light punch inside.
With the fighters clinched against the cage, Ball creates a bit of distance for himself and scores with a nice uppercut.
Ball lands a nice looking hook to the body, against the cage.
A short right hand to the side of the head by Ball.
A short right hand to the side of the head by Ball.
Both fighters working to control the clinch.
A short uppercut from Ball.
Ball lands a right hand that snaps the head of Han backwards.
Ball lands with a good tight uppercut to the head.
Ball is working Han over against the cage.
That's two minutes gone in the round.
A body shot lands from Ball.
A short right from Ball on the inside.
Ball makes some space for himself and lands an uppercut.
Ball lands a hook that snaps the head of Han backwards.
Han goes for a takedown attempt but Ball pushes him away and we're back to fighting at a distance.
Ball tries to clinch there but Han circles away.
This is a great period of action - very entertaining stuff!
Ball fails in his attempt to clinch.

Ball clinches up against the cage.
Han drops down for a takedown but doesn't get it.
A short right from Ball.
Ball stops a takedown attempt from Han.
Ball lands a left hand.
Ball lands a shot to the body.
Ball lands an uppercut.
A short left from Ball.
Ball lands with a short shot to the head.
That's three minutes gone in the round.
Ball lands a left hand that snaps the head of Han backwards.
Ball works on Han's body with a couple of short punches.
Han is looking to take this one to the mat.
Ball lands a left hand.
Ball lands with a quick shot inside that doesn't really do much damage.
A short right hand to the side of the head by Ball.
Ball presses Han against the cage and delivers a mid-strength body shot.
Han has moved round to his opponent's back and is looking for a suplex! Oh snap! He's tossed Ball clear over his head and slammed him to the mat!
We may be looking at a referee standup if the pace doesn't pick up soon.
Han gets his hands free as Ball looks to control.
Ball might have to switch it up a bit here because his efforts to control Han haven't been going to plan, at least at the current moment in time.
Ball is trying to avoid being dragged into an even worse position than he's already in but Han is staying active.
Ball rolls, trying to escape but Han keeps control of the position.
Ball preventing the rear naked choke attempt from Han.
That's four minutes gone in the round.
This has been an exciting period of action!
Ball is really stuck here.
Han gets his hands free as Ball looks to control.
Han is hanging on to Ball's back as he tries to escape.
Han is working for the choke. He's slipped one arm under the chin. Ball has to defend the other arm for all he's worth... but Han has managed to get that arm free too and he's tightening the choke! Ball taps out and looks absolutely disgusted with himself. Han doesn't care though - he's delighted!
Ladies and gentlemen, after 4:37 of round 1, we have a winner by way of Submission (RNC). Albin Han!
|
|
|
|
|
|
|
|
|
|
|
|
|
|
|
|
|
|
|
|
|
|
|
| S |
C
A |
G |
S |
C
B |
G |
|
S |
C |
G |
|
energy
A | B |
|
hype
A | B |
|
pop
A | B |
|
mgr
A | B |
|
FIGHT
RATING
64% |
|
|
|
|
|
|
|
Undercard bout
|
|
|
|
Undercard bout
|
Coming up we have a light heavyweight MMA rules bout between Joey Kocur (ranked 0 p4p, 0 weight class) and Jimmy Sheppard (ranked 0 p4p, 0 weight class). Kocur comes to the cage accompanied by Head Crusher - Megadeth. We have two fighters making their debuts here, so let's see who comes out of this one with their first professional victory.
 |
|
 |
| 183 cm
18
220 lbs
0 - 0 - 0 |
|
180 cm
25
215 lbs
0 - 0 - 0 |
BJJ White Belt
Excellent boxer
Granite chin |
|
BJJ Blue Belt
Basic striking
Solid chin |
|
| |
|
Ladies and gentlemen. This fight is 3 rounds, in the light heavyweight division.
Introducing the fighter to my left, fighting out of the red corner.
With a record of
0 - 0 - 0, fighting out of London, Joey Kocur!
And introducing the fighter to my right, fighting out of the blue corner.
With a record of
0 - 0 - 0, fighting out of London, Jimmy Sheppard!
The judges for this bout are Paul Tew, Richard Clark and Sam Margolis.
The bell rings for round one and we are underway!
Kocur closes the distance and presses his opponent up against the cage.
Sheppard's corner calls for him to break the clinch, which he does.
Sheppard dives in for a single leg takedown but Kocur sprawls and the fighters end up clinched against the cage.
A head punch blocked on the inside by Sheppard.
Come on Sheppard - let's have some action - none of this stalling nonsense.
Sheppard pushes off and circles away, back to the middle of the mat.
Kocur tests Sheppard's chin there with a solid looking shot.

It looks like Jimmy Sheppard has been cut.
Sheppard changes levels and looks for a double leg takedown. Kocur tries to avoid it but Sheppard manages to keep hold of a leg and drag Kocur to the ground. Kocur escapes though and pops straight back up to his feet.
Kocur changes levels and scores with a jab to the body.
Sheppard fails miserably with a takedown attempt.
Joey Kocur has stuffed three takedown attempts in the round now. That's going to take a lot out of Jimmy Sheppard.
The fans in attendance giving it up for the two fighters, who have really let it all hang out in the last minute or so!
Sheppard takes a solid shot to the body. That one hurt him but he's trying not to show it.
Sheppard tries to close the distance and clinch but Kocur swats him to one side with an open hand palm strike and circles away.
Sheppard misses the shot to the body.
Kocur lands with a good body shot.
Kocur fails to land with a series of punches.
Kocur scores with a nice right hand.
Left hook, right uppercut from Kocur.
That's one minute gone in the round.
Kocur lands a head shot.
Kocur wings a very wild body shot but it does the job and lands to the midsection.
Sheppard looks winded!
Sheppard takes a shot right to the liver - Bas would have been proud of that punch.
Joey Kocur is looking to keep the fight on the feet at all costs.
Kocur changes levels and scores with a jab to the body.
Fantastic stuff here - a very entertaining period of action, which has drawn cheers from the crowd.
Sheppard moves his head to the side to avoid a jab but walks straight into a cross.
Sheppard on the wrong end of a vicious looking body shot.

Kocur lands a left and a right that send Sheppard crashing to the mat, dazed. Kocur thinks about following him to the mat but decides to wave him back up to his feet!

Sheppard is rocked!
That has opened up Jimmy Sheppard's cut even more.
Kocur dips down and scores with a jab to the body.
Kocur connects with a superb combination that knocks Sheppard out cold! The referee charges across the mat and tackles Kocur before he can land any more shots to the unconscious Sheppard!
Ladies and gentlemen, after 1:36 of round 1, we have a winner by way of KO (Punches). Joey Kocur!
|
|
|
|
|
|
|
|
|
|
|
|
|
|
|
|
|
|
|
|
|
|
|
| S |
C
A |
G |
S |
C
B |
G |
|
S |
C |
G |
|
energy
A | B |
|
hype
A | B |
|
pop
A | B |
|
mgr
A | B |
|
FIGHT
RATING
100% |
|
|
|
|
|
|
|
Undercard bout
|
Coming up we have a welterweight MMA rules bout between Alex Wright (ranked 0 p4p, 0 weight class) and Janne Simila (ranked 0 p4p, 0 weight class). Simila has chosen Sydän, sydän - Täydellinen kusetus as his entrance music. These two fighters really are very evenly matched on the feet - it will be fascinating to see who can assert themselves in that aspect of the fight.
 |
|
 |
| 175 cm
23
170 lbs
0 - 0 - 0 |
|
185 cm
18
179 lbs
1 - 0 - 0 |
BJJ Blue Belt
Basic striking
Cuts easily |
|
BJJ Blue Belt
Brawler
Determined |
|
| |
|
Ladies and gentlemen. This fight is 3 rounds, in the welterweight division.
Introducing the fighter to my left, fighting out of the red corner.
With a record of
0 - 0 - 0, fighting out of London, Alex Wright!
And introducing the fighter to my right, fighting out of the blue corner.
With a record of
1 - 0 - 0, fighting out of Helsinki, Janne Simila!
The judges for this bout are Donald Grub, James Glass and Daniel Bishop.
The bell rings for round one and we are underway!
Simila shoots in for a takedown. He's persisting with it as Wright sprawls well. Wright wins this battle and keeps the fight standing. Simila gets slowly back to his feet.
Wright keeps the fight standing with a nice sprawl.
Horrible takedown by Wright or perhaps it was just good defense by Simila which made him look bad.
Simila darts in trying to clinch
and Wright counters with a nice double leg into guard.
Wright stands and throws Simila's legs to the side, diving into side control.
Simila seems a little lost for a moment, as Wright dominates the positioning.
Simila really doesn't want to stay on the ground with Wright. If he can't get it back to his feet, it's only a matter of time before he'll be tapping out.
Wright has an Americana. Simila didn't react quickly enough there and he's in big trouble now! He tries to squirm out but is forced to tap! Wright is delighted and gyrates in front of the ring girls. They seem to like the attention - it'll be interesting to see if Wright hooks up with any of them at the after show party.
Ladies and gentlemen, after 0:56 of round 1, we have a winner by way of Submission (Americana). Alex Wright!
A victorious Alex Wright thanked his army of followers in his post fight interview, telling people to make sure they follow him on Twitter.
|
|
|
|
|
|
|
|
|
|
|
|
|
|
|
|
|
|
|
|
|
|
|
| S |
C
A |
G |
S |
C
B |
G |
|
S |
C |
G |
|
energy
A | B |
|
hype
A | B |
|
pop
A | B |
|
mgr
A | B |
|
FIGHT
RATING
52% |
|
|
|
|
|
|
|
Undercard bout
|
|
|
|
Co-main event
|
Coming up we have a light heavyweight MMA rules bout between Sheldon McManus (ranked 0 p4p, 0 weight class) and Ryan Conner (ranked 0 p4p, 0 weight class). Buckle up people - heeeeeeeeeere we go!
 |
|
 |
| 188 cm
25
215 lbs
1 - 0 - 0 |
|
179 cm
25
218 lbs
1 - 0 - 0 |
BJJ Blue Belt
Good knees
Cuts easily |
|
BJJ White Belt
Excellent boxer
Heavy handed |
|
| |
|
Ladies and gentlemen. This fight is 3 rounds, in the light heavyweight division.
Introducing the fighter to my left, fighting out of the red corner.
With a record of
1 - 0 - 0, fighting out of London, Sheldon McManus!
And introducing the fighter to my right, fighting out of the blue corner.
With a record of
1 - 0 - 0, fighting out of London, Ryan Conner!
The judges for this bout are Donald Grub, Andrew Berry and Steven Brown.
The bell rings for round one and we are underway!
Conner takes a push kick to the midsection and stumbles backwards.
McManus misses with a half-hearted attempt at a head kick.
Conner fakes and then throws a beautiful body shot. McManus looks a bit winded and takes a step backwards to take a breath.
McManus blocks a leg kick.
Conner works McManus's body with a nice hook.
A lazy left from Conner finds it's target.
This has been an exciting period of action!
Conner scores with a jab. McManus acknowledges it with a nod of the head.
Conner misses with a wild combination.
Conner misses with a hook.
Conner cracks McManus with a good shot that sees him stumbling back into the cage.
Conner throws a half hearted mid kick.
McManus lands a big head kick that sends Conner tumbling to the mat! McManus takes a step backwards and waves Conner back to his feet - he wants the finish!
It looks like Ryan Conner has been cut.
Conner changes levels and scores with a jab to the body.
McManus jabs Conner right on the nose. Conner blinks but takes it well.
Conner stumbles momentarily as he takes a strong leg kick from McManus.
That's one minute gone in the round.
Conner ducks right into an uppercut from McManus.
Conner is rocked!
A chopping leg kick lands by McManus.
Conner dips down and scores with a jab to the body.
McManus throws a body punch but Conner moves out of range.
Conner bobbing and weaving, closes the distance and lands a hook to the side of McManus's head.
McManus tries to close the distance and clinch but Conner swats him to one side with an open hand palm strike and circles away.
Conner tests McManus's chin there with a solid looking shot.
McManus fails with an attempt to clinch.
Ryan Conner seems to be the more aggressive standup fighter in this bout.
McManus avoids the body shot from Conner.
McManus looks to be in better condition than last time we saw him fight. Obviously he's been working hard on his cardio.
McManus lands a big head kick that sends Conner tumbling to the mat! McManus takes a step backwards and waves Conner back to his feet - he wants the finish!
Conner is still on wobbly legs! Can McManus finish him?
Fantastic stuff here - a very entertaining period of action, which has drawn cheers from the crowd.
Conner lands with a nice body punch.
Conner seems to have recovered his senses.
That's two minutes gone in the round.
A jab lands there for McManus.
Conner checks the leg kick.
McManus looking to take his opponent's legs away with the low kicks.
Nice jab there from Conner.
Conner scores with a jab to the head.
Conner connects with a lovely right hand, straight down the pipe.

McManus is rocked!

It looks like Sheldon McManus has been cut.
McManus tries to clinch up.
Oh McManus is still all over the place! His legs are completely gone! Will he be able to recover?!!
Conner is the aggressor but that punch slipped nicely by McManus.
McManus seems to have got his legs back now.
Conner avoids the head kick by McManus.
Conner wants to clinch.
Conner throws a series of punches but McManus moves out of range.
That's three minutes gone in the round.
Conner clinches.
Conner lands with a left to the head.
McManus tries a knee to the head but Conner blocks it.
McManus trying to control the position but instead, Conner has worked for underhooks and has pushed McManus into the cage.
Conner blocks a knee to the body. He'll have a nicely bruised forearm in the morning.
Conner lands a hook that snaps the head of McManus backwards.
We've been informed that Conner has been working hard on his conditioning in the buildup to the fight.
Conner digs a right hand into McManus's ribs. Those have got to be taking their toll on McManus's gas tank.
Conner blocks a knee to the body. He'll have a nicely bruised forearm in the morning.
Conner lands with a left to the head.
Good anti-grappling being displayed by Conner as McManus tries to tie him up.
McManus wants to strike at distance but he can't break free of the clinch.
McManus throws a knee to the head but misses.
The referee is keeping an eye on McManus - much more stalling and he will separate the fighters.
With the fighters clinched against the cage, Conner creates a bit of distance for himself and scores with a nice uppercut.
McManus is breathing heavily.
That's four minutes gone in the round.
A quick uppercut on the inside from Conner.
Conner lands a shot to the body.
Conner working on landing some head shots here - that one got through nicely.
McManus avoids the elbow strike from Conner, against the cage.
Conner scores with a nice hook to the head.
Wooooo! Give it up for these two warriors! They are putting on a show!
Conner is leaning against McManus and scores with a nice uppercut to the body.
Conner misses the knee to the body. Nice hip positioning from McManus.
McManus is looking to score with knees to the body. Maybe he'll change it up and go body then head. Conner is defending well for now.
A short right from Conner.
Conner lands an uppercut.
McManus managing to block the knees to the body from Conner.
A frustrated look appears on McManus's face as he tries to break the clinch.
The crowd are going absolutely nuts as the round comes to an end - what a fantastic round of action!
McManus throws a vicious knee straight up the middle but Conner blocks it with crossed arms.
McManus stalling in the clinch but Conner improves position.
Conner pushes McManus back against the cage and lands a hook to the side of the head.
Conner lands a body punch.
And thats the end of the round the fighters go back to their corners.
That was a close round but I would say that Sheldon McManus will probably get the nod.
Both fighters have cut men working on them during the interval.
The corners get their ten second warning. Both fighters stand from their stools and stare eachother down, ready to get back to the action.
Conner misses with the combination.
Conner fakes a head punch and goes low to the body. Nicely done.
McManus is looking to clinch but Conner is avoiding it.
Conner has taken the fight to the clinch.
Conner working on landing some head shots here - that one got through nicely.
A short uppercut from Conner.
Conner lands on the inside with an uppercut.
Conner keeps the fight in the clinch, despite McManus's efforts to push away.
McManus tries to land a knee to the body but he is off balance and Conner avoids it.
McManus is trying to wear down his opponent with knees to the body.
McManus lands a knee to the body.
Conner softening up his opponent with strikes, against the cage.
Conner keeps the fight in the clinch, despite McManus's efforts to push away.
Conner trying to land knees to the body.
That's one minute gone in the round.
A right hand to the body from Conner.
McManus trying to land knees to the body.
Conner on the defensive, avoiding the knees to the body.
McManus is trying to break free.
Conner trying to land knees to the body.
Conner looking to stall.
A right hook to the body lands for Conner.
McManus throws a vicious knee straight up the middle but Conner blocks it with crossed arms.
Both fighters are absolutely exhausted here.
McManus wants to push off and get back to the center of the mat but Conner has him pressed against the cage.
An uppercut to the body lands inside from Conner.
Conner pushes McManus back against the cage and lands a hook to the side of the head.
Conner scores with a nice hook to the head.
Conner blocks a knee to the body. He'll have a nicely bruised forearm in the morning.
McManus's corner calls for him to break the clinch, which he does.
McManus looks shocked there as he takes a right hand to the temple.
That's two minutes gone in the round.
McManus takes a punch right to his stomach. That took the wind out of him momentarily.
This is a great period of action - very entertaining stuff!
Conner is throwing punches like he's double parked. Oh my word! Huge right hand from Conner shuts the power down on McManus. Lights out, game over! Conner is your winner.
Ladies and gentlemen, after 2:12 of round 2, we have a winner by way of KO (Punches). Ryan Conner!
Ryan Conner really struggled to get his t-shirt on before his hand was raised. Making sure that Merciless Gladiators logo gets some air time is pretty tricky when you're all sweaty.
|
|
|
|
|
|
|
|
|
|
|
|
|
|
|
|
|
|
|
|
|
|
|
| S |
C
A |
G |
S |
C
B |
G |
|
S |
C |
G |
|
energy
A | B |
|
hype
A | B |
|
pop
A | B |
|
mgr
A | B |
|
FIGHT
RATING
100% |
|
|
|
|
|
|
|
Main event
|
Coming up we have a welterweight MMA rules bout between Aamer Khan (ranked 0 p4p, 0 weight class) and Alex Jump (ranked 0 p4p, 0 weight class). Both fighters look fresh as a daisy as they make their way towards the cage.
 |
|
 |
| 185 cm
20
180 lbs
3 - 1 - 0 |
|
185 cm
25
184 lbs
1 - 0 - 0 |
BJJ White Belt
Solid boxing
Cuts easily |
|
BJJ White Belt
Good kicks
Tends to cut |
|
| |
|
Ladies and gentlemen. This fight is 3 rounds, in the welterweight division.
Introducing the fighter to my left, fighting out of the red corner.
With a record of
3 - 1 - 0, fighting out of London, Aamer Khan!
And introducing the fighter to my right, fighting out of the blue corner.
With a record of
1 - 0 - 0, fighting out of St Petersburg, Alex Jump!
The judges for this bout are Andrew Berry, James Glass and Steven Brown.
The bell rings for round one and we are underway!
Jump shuffles to his left behind two crisp jabs. Khan eats them both and turns towards Jump to reposition himself and eats a stinging right hand-left hook combo.
It looks like Aamer Khan has been cut.
A really sloppy takedown attempt there from Khan.
Khan circles away from the clinch attempt.
Khan fakes an overhand right and shoots for a takedown. Jump sprawls well initially but Khan persists and gets the takedown into half guard.
The referee looks like he's ready to step in and stand the fighters back up.
Jump is looking to control Khan's leg but it's slowly edging free. Can Jump avoid being mounted?
Khan takes a deep breath and rests his weight momentarily on top of his opponent, to control the position.
Khan prevents Jump from improving his position.
Khan working some ground and pound from close in. He's looking to maintain this position and strike for a while by the looks of things... although he'll probably advance to full mount in a minute now I've said that.
Jump wants to control but Khan is keeping busy and won't allow it.
Khan wants to pass to mount but Jump is defending the position.
We've seen a great period of action over the last minute or so - credit to both fighters for going all out!
That's one minute gone in the round.
Jump looks like he's trying to stand up.
Khan seems content to maintain position for now, rather than mounting any offense.

Well, the referee has seen enough. Neither fighter is active enough on the ground so he's stood them back up.
Jump misses with a series of wild punches.
Jump with a body punch. A glancing blow.
Jump tries to clinch up against the cage, rushing in to close the distance. Khan manages to break the clinch and circles back to the middle of the mat.
Jump tries to clinch up but Khan circles away and keeps his distance.
That's two minutes gone in the round.
Jump misses with a jab, cross combination.
Khan moves into the clinch successfully.
Khan misses with some punches.
Jump is trying to break free.
Khan is trying to slow down the pace in the clinch, to catch his breath.
Jump lands a right hand.
Jump wants to break the clinch but can't.
Jump tries to throw a body punch but Khan avoids it by throwing Jump back against the cage.
Khan tries to pull guard but Jump holds him up against the cage and eventually Khan drops back down to his feet.
Khan tries to pull guard but Jump won't allow it.
Jump looks more muscular than last time we saw him. He must have been on the weights.
That's three failed takedown attempts in the round for Aamer Khan. That's going to take a lot out of him.
Good anti-grappling being displayed by Khan as Jump tries to tie him up.
That's three minutes gone in the round.
Khan tries to pull guard but Jump holds him up against the cage and eventually Khan drops back down to his feet.
Jump tries to break the clinch but Khan is controlling the position.
Khan tries to jump guard but he falls flat on his backside. Jump smiles and moves away.
Jump clinches up against the cage.
Khan prevents Jump from breaking the clinch.
Khan is trying to break free.
Khan tries for a takedown but Jump manages to get underhooks.
Khan trying to control the position but instead, Jump has worked for underhooks and has pushed Khan into the cage.
Jump is trying to push Khan away but Khan has him pressed against the cage, so he's going nowhere.
That's four minutes gone in the round.
Khan is trying to pull guard but being pressed up against the cage enables Jump to keep the fight standing.
Khan tries to break the clinch but Jump is controlling the position.
Jump's corner calls for him to break the clinch, which he does.
Jump tries to close the distance and clinch but Khan swats him to one side with an open hand palm strike and circles away.
Jump takes a swing at Khan's ribcage but misses.
Khan throws a head kick that misses and slips in the process. He scrambles back to his feet and the fighters circle.
Khan takes a kick to the body and keeps moving.
Alex Jump is looking to keep the fight on the feet at all costs.
Jump avoids a punch combination nicely.
As the round comes to an end the crowd are showing their appreciation for a great round of action.
Jump defends well against a solid takedown attempt from Khan.
Khan is breathing heavily.
Jump throws a head kick that Khan semi-blocks.
And thats the end of the round the fighters go back to their corners.
Alex Jump dominated that round.
The cut man is working on Aamer Khan's cut.
That's the end of the round. The referee orders the cornermen out of the cage so we can get back down to business.
Khan gets to the clinch - let's see what his plan is here.
Jump trying to stall but Khan improves his position.
Khan is trying to drag Jump to the mat but Jump just about manages to keep his footing. He used the cage to his advantage there.
Jump tries a body shot but Khan blocks it.
Jump is trying to force a seperation but Khan has the dominant position.
Khan is trying to pull guard but Jump turns him against the cage and we stay in the clinch.
Jump's corner calls for him to break the clinch, which he does.
Khan has taken the fight to the clinch.
Khan is trying to pull guard but Jump turns him against the cage and we stay in the clinch.
That's three failed takedown attempts in the round for Aamer Khan. That's going to take a lot out of him.
Jump taking a breather.
Jump tries to stall but Khan uses the opportunity to gain a better position.
That's one minute gone in the round.
Khan tries to pull guard but Jump won't allow it.
Jump tries to stall but Khan uses the opportunity to gain a better position.
Jump misses with a shot to the kidneys.
Khan drops down looking for an ankle pick but Jump pulls his leg out and moves away.
Khan drives through and clinches with Jump against the cage.
Khan stalling here - the referee won't stand for too much of that.
Khan is working on a leg, looking for a takedown but Jump is defending well.
Khan prevents a body shot from Jump.
Jump manages to break the clinch.
Jump wings a very wild body shot but it does the job and lands to the midsection.
That's two minutes gone in the round.
Jump tries to clinch but is not successful on this occasion.
Jump throws a combination but it was largely blocked by Khan.
Jump lands with a hook. Khan tried to avoid it but it clipped the top of his head.
Jump gets in close and instigates a clinch.
Jump trying to stall but Khan improves his position.
Jump has Khan pressed against the cage, preventing Khan from circling away and getting back to striking at range.
Khan looking for a takedown.
Both fighters are absolutely exhausted here.
This is a great period of action - very entertaining stuff!
Khan wants to push off and get back to the center of the mat but Jump has him pressed against the cage.
Khan wants to take the fight to the mat but Jump manages to get underhooks and keep the fight in the clinch.
Alex Jump seems to be working more effectively in the clinch in the fight so far.
Jump is trying to push Khan away but Khan has him pressed against the cage, so he's going nowhere.
Jump has had enough of the clinch but Khan keeps him there for the moment.
Jump wants to stall.
That's three minutes gone in the round.
Khan jumps guard but Jump stands there with Khan around his waist. Khan gives up and drops back to his feet. We remain in the clinch.
Both fighters working to control the clinch.
Khan prevents Jump from breaking the clinch.
Khan is trying to slow down the pace of the fight but Jump is keeping busy.
Khan tries to land a knee to the head but misses.
Khan misses with a hook from the clinch.
Jump is trying to break the clinch but Khan has him pressed against the cage.
Jump lands punches inside but they're not really causing much damage.
Jump pushes off and circles away, back to the middle of the mat.
Jump displays good takedown defense there as he swats away a double leg from Khan.
That's four minutes gone in the round.
Jump paws at his opponent with the jab and then lunges in with a straight, right on the button.
Jump lands a big head kick that sends Khan to the canvas! Jump follows up with strikes from the mount that forces the ref to step in and stop the fight!
Ladies and gentlemen, after 4:17 of round 2, we have a winner by way of TKO (Strikes). Alex Jump!
|
|
|
|
|
|
|
|
|
|
|
|
|
|
|
|
|
|
|
|
|
|
|
| S |
C
A |
G |
S |
C
B |
G |
|
S |
C |
G |
|
energy
A | B |
|
hype
A | B |
|
pop
A | B |
|
mgr
A | B |
|
FIGHT
RATING
34% |
|
|
|
|
|
|
|
|
|
|

