 |
Extreme MMA-13 PBP Commentary |
Undercard bout
|
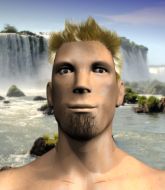
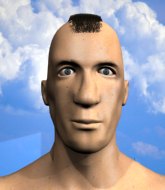
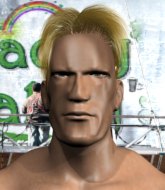
Coming up we have a welterweight MMA rules bout between Knock Out (ranked 0 p4p, 0 weight class) and Jamie Oro (ranked 0 p4p, 0 weight class). Over to our ring announcer for the fighter introductions!
 |
|
 |
| 180 cm
18
183 lbs
0 - 1 - 0 |
|
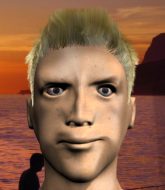
178 cm
16
171 lbs
0 - 0 - 0 |
BJJ Brown Belt
Brawler
Very strong |
|
BJJ Brown Belt
Brawler
Determined |
|
| |
|
Ladies and gentlemen. This fight is 3 rounds, in the welterweight division.
Introducing the fighter to my left, fighting out of the red corner.
With a record of
0 - 1 - 0, fighting out of Sydney, Knock Out!
And introducing the fighter to my right, fighting out of the blue corner.
With a record of
0 - 0 - 0, fighting out of Sydney, Jamie Oro!
The judges for this bout are Chris Dean, Ben Watson and Skip Squint.

The bell rings for round one and we are underway!
Out looking to throw a kick but he's pulled out of it.
Oro throws a chopping leg kick but Out manages to avoid taking any serious damage.
Oro tries to close the distance and clinch up but Out swats him away and circles back towards the center.

Oro fakes an overhand right and shoots for a takedown. Out sprawls well initially but Oro persists and gets the takedown into half guard.
Oro takes a deep breath and rests his weight momentarily on top of his opponent, to control the position.
Oro tries to stand but his arm is trapped.
Oro is controlling the pace.
The fighters are battling for position here. Out manages to regain full guard. Nice work.
Oro tries to free his leg and advance position but Out is retaining full guard.
Oro throwing elbows and punches but not connecting, as Out works some decent striking defense from the bottom.

That's one minute gone in the round.
Oro stops Out from standing up.
Oro is looking to stand up but Out won't let him.
Out looking to sweep here. No luck so far.
Oro wants to control from the top but Out keeps moving.

OK we're going to have a standup here. Jamie Oro hasn't been effective enough on the ground and the referee wants a restart.
Oro looks to clinch
and Out counters with a two punch combo.
Oro misses with a body shot.
Out tries to close the distance and clinch but Oro swats him to one side with an open hand palm strike and circles away.
Oro doesn't succeed with the takedown

and Out counters by clinching up.

Out jumps guard.
Out has improved his flexibility recently so we will have to see if he can use that to his advantage.

Out looking for a guillotine here but Oro defends easily.
Oro controls from within his opponent's guard.
The fighters are pressed up against the cage, both looking to find a bit of space to work.

That's two minutes gone in the round.
Out looking to sweep here. No luck so far.
Oro not doing a lot at the moment. He'll have to show some more aggression or the fight will get stood up.
Oro wants to stand but Out is controlling his posture from full guard.
If this pace continues, the referee will definitely step in and force a standup.
Out is working from a closed guard but he's struggling to control his opponent.

That's three minutes gone in the round.
Out manages to sweep nicely, so he's now on top. Oro manages to get himself to full guard.
Out postures up.
Oro keeping moving, preventing Out from controlling successfully.
The fighters are starting to perspire pretty heavily.
Out throwing elbows and punches but not connecting, as Oro works some decent striking defense from the bottom.
Out throwing strikes but missing.

It looks like we're going to have a standup here. Neither fighter is doing enough on the ground.
Out moves in looking to clinch but Oro pushes him off.
Out tries to clinch there but Oro circles away.
Oro closes the distance and clinches up with Out, looking for a takedown. Oro pushes Out against the cage but Out circles to the side and manages to break the clinch.
Out ducks down and throws a hook to the body but Oro moves away.

That's four minutes gone in the round.
Oro tries to clinch but Out moves out of range.
Oro throws a series of punches but Out avoids them all with ease.
Oro is looking to clinch but Out is avoiding it.
Out is trying hard to land a takedown here. Oro sprawls well and keeps this one on the feet.
Oro fakes high and swings low for a body shot but Out manages to avoid it.
Oro throws a series of punches but Out moves out of range.
Out shoots in for a takedown but Oro shows good takedown defense.
Oro closes the distance and looks for a trip takedown... aaaand he's got it - Oro lands in his opponent's guard.
This is a great period of action - very entertaining stuff!
Oro sitting in guard here, content to control.
As the round comes to an end the crowd are showing their appreciation for a great round of action.
Oro looking to pass the guard.
And thats the end of the round the fighters go back to their corners.
Jamie Oro dominated that round.
The referee calls time. The cornermen exit stage left and we're back to business.

Oro will have to do better than that with his takedown attempts.
Out closes the distance and clinches up with Oro, looking for a takedown. Out pushes Oro against the cage but Oro circles to the side and manages to break the clinch.
Out has a takedown stuffed.
Out avoids the clinch attempt nicely.
Oro is trying hard to land a takedown here. Out sprawls well and keeps this one on the feet.
Oro tries to clinch up against the cage, rushing in to close the distance. Out manages to break the clinch and circles back to the middle of the mat.
Oro goes for a double leg but Out avoids the attempt and the two fighters end up clinched against the cage as Out continues to drive forward.
Knock Out has stuffed three takedown attempts in the round now. That's going to take a lot out of Jamie Oro.
Out blocks a knee to the body. He'll have a nicely bruised forearm in the morning.
Oro prevents the takedown attempt.
Out blocks a couple of punches on the inside.
Oro tries to pull guard but Out forces him back to his feet, against the cage.
That's one minute gone in the round.

Out manages to break the clinch.
Out moves into the clinch.
Out stalls.
Out pulls guard effortlessly.
Oro wants to control from the top but Out keeps moving.
Oro wants to stand and escape but instead Out has hit a sweep and he's now on top in guard.
Oro pulls Out in close to his closed guard and prevents Out from doing any damage or advancing position.
Oro wants to control but instead he gets his guard passed and Out is now in half guard.
That's two minutes gone in the round.
Oro slips a foot under and gets full guard. Nice work.
Oro utilising some decent striking defenses from the guard, preventing the ground and pound.

Oro had isolated an arm as going for a kimura. Out defends it easily.
Oro is working from a closed guard but he's struggling to control his opponent.
Out advances to half guard.
That's three minutes gone in the round.
Oro is refusing to be controlled, as Out sits in half guard.
Oro wants to improve his position but Out is controlling well.
Jamie Oro has got the better of the ground game so far.
Out passes to full mount!
Oro tries to reverse the position but Out maintains control.
Out manages to capitalize on a mistake by Oro to take his back!
Out is persistently looking for the submission but Oro is defending it well.
Out trying desperately to keep hold of the dominant position.
That's four minutes gone in the round.
You can see the frustration on Oro's face
He knows he is in trouble unless he improves his position sooner rather than later.
The crowd hopeful of a finish here - Out's supporters are on their feet, screaming for him to go for the rear naked choke.
Oro is in bad spot here.
The crowd hopeful of a finish here - Out's supporters are on their feet, screaming for him to go for the rear naked choke.
Out controlling well, preventing Oro from escaping the position.
The crowd applaud the fighters efforts here as the round comes to an end.
Oro looking very determined here, making life difficult for Out.
The ref warns both fighters not to hold the cage as they work up against the meshing.
Out not allowing Oro to control his hands.
And thats the end of the round the fighters go back to their corners.
That was a close second round but I would say that Knock Out will probably get the nod.
Well, the break between rounds is over. Let's get back to the scrappin! This is the final round!

Oro doesn't manage to clinch there - Out circles away.
Out tries to drive through with a takedown attempt but Oro defends well and Out ends up having to push Oro into the cage where they will battle it out in the clinch.
Oro jumps guard.
Out wants to control from the top but Oro keeps moving.
Oro wants to improve his position but instead Out has moved into half guard.
Out is keen to just control but Oro is a slippery customer.
Out seems to be working for a kimura but Oro defends the submission attempt.
Out seems very keen to just sit and control from half guard but Oro does not like that idea so much and is remaining active off his back.
That's one minute gone in the round.
Oro wants to get back to full guard.
Out seems very keen to just sit and control from half guard but Oro does not like that idea so much and is remaining active off his back.
Out missing with the ground and pound from half guard.
Oro is trying to maintain the position but Out is very close to passing his half guard.
Out trying to control from half guard but Oro is working away.
If this pace continues, the referee will definitely step in and force a standup.

The ref stands the fighters back up. Knock Out wasn't doing enough on the ground.
Oro circles away from the clinch attempt.
Oro stuffs a takedown. It's all about dictating where the fight takes place and Oro wants it to stay on the feet.
Out connects with a body shot that sends Oro's belly button to the back.
Out manages to get an easy takedown there - catching Oro on his heels. He'll look to pass Oro's guard now, I'm sure.
That's two minutes gone in the round.
Oro working a defensive guard but Out manages to pass into side control anyway.
Who's going to make the next move?
Oro wants to control but Out postures up.
Oro sneaks a leg under to get back to half guard.
The crowd are loving this. Great action here.
Oro is trying to get back to full guard.
Out is trying to control the action in half guard but Oro is working away on the bottom, looking perhaps to get back to full guard.
Oro wants to improve his position but Out is controlling well.
That's three minutes gone in the round.
Oro has no desire to be mounted, so is trying to control. Out is working away from the top position though.
Oro is holding on to half guard well.
The referee wants the fighters to be more active or he's going to reset them on the feet.
Out wants to pass to mount but Oro is defending the position.
The referee has ruled that neither fighter is active enough on the ground and has stood them back up.
Out shoots in with a lovely double leg takedown. Oro manages to land in full guard to minimise the damage.
Out stopping the sweep attempt from Oro.
Out works a leg free and moves into half guard.
That's four minutes gone in the round.
Out is trying to control the action in half guard but Oro is working away on the bottom, looking perhaps to get back to full guard.
Out tries to pass the half guard into mount. Oro knows what he's doing though and prevents the attempt.
Oro moves into full guard.
The crowd applaud the fighters efforts here as the round comes to an end.
Oro is striking but Out is not phased and passes to half guard.
And that's the end of the fight!
Knock Out showed his dominance in that final round.
I think Out has won this one but let's see what the judges have to say. Over to the ring announcer for the scorecards.
Ladies and gentlemen, after 3 rounds of action, we go to the scorecards for a decision.
Judge Chris Dean scores the fight 29:29
Judge Ben Watson scores the fight 29:28
Judge Skip Squint scores the fight 29:29
The fight is ruled a majority draw!
|
|
|
|
|
|
|
|
|
|
|
|
|
|
|
|
|
|
|
|
|
|
|
| S |
C
A |
G |
S |
C
B |
G |
|
S |
C |
G |
|
energy
A | B |
|
hype
A | B |
|
pop
A | B |
|
mgr
A | B |
|
FIGHT
RATING
50% |
|
|
|
|
|
|
|
Undercard bout
|
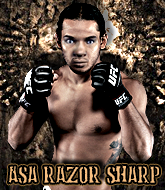
Coming up we have a bantamweight MMA rules bout between Asa Sharp (ranked 0 p4p, 0 weight class) and Torben Hansen (ranked 0 p4p, 0 weight class). Well, I have no idea who's going to take this one!
 |
|
 |
| 170 cm
18
145 lbs
2 - 0 - 0 |
|
164 cm
25
135 lbs
2 - 3 - 0 |
BJJ Brown Belt
Counter fighter
Cuts easily |
|
BJJ Blue Belt
Decent boxing
Granite chin |
|
| |
|
Ladies and gentlemen. This fight is 3 rounds, in the bantamweight division.
Introducing the fighter to my left, fighting out of the red corner.
With a record of
2 - 0 - 0, fighting out of Sydney, Asa Sharp!
And introducing the fighter to my right, fighting out of the blue corner.
With a record of
2 - 3 - 0, fighting out of Sydney, Torben Hansen!
The judges for this bout are Ben Hemmingworth, Eliza Hachem and Summer Carpenter.
The bell rings for round one and we are underway!
Hansen changes levels and drives through with a really nice takedown into side control. Sharp looks really pissed at himself for not defending that better.
We could do with one of the fighters taking the initiative a bit more on the ground - they're both waiting to capitalize on a mistake.
The referee is pacing around the two fighters - he looks like he's thinking about a standup.
Sharp tries to improve position but can't.
Hansen tries to move into full mount but can't pass Sharp's legs.
Sharp is trying to improve his position.
Sharp prevents Hansen from improving position.
The fighters are pressed up against the cage, both looking to find a bit of space to work.

Hansen stands up.
The fight stays on the outside here - Sharp looks like he's thinking about clinching though.
Sharp takes a big uppercut there. He seems a bit wobbly but no, he's OK.
That's one minute gone in the round.
Hansen closes the distance and looks for a trip takedown... aaaand he's got it - Hansen lands in his opponent's guard.
Sharp has a loose triangle. He'll be looking to tighten that up but Hansen can see exactly what he's planning and manages to posture up and free himself.
Sharp is looking for a triangle but Hansen pushes his legs off easily.
The ref warns both fighters not to hold the cage as they work up against the meshing.
Sharp is throwing his legs up, looking for submissions. Hansen is aware though and is defending well.
The fans in attendance giving it up for the two fighters, who have really let it all hang out in the last minute or so!
Sharp throwing his legs up looking for a triangle.
Sharp has a loose triangle. He'll be looking to tighten that up but Hansen can see exactly what he's planning and manages to posture up and free himself.
That's two minutes gone in the round.
Sharp looking for submissions off his back, moving his hips, looking for an opening.
Sharp looking for a guillotine here but Hansen defends easily.
Sharp has managed to work for a loose triangle. I think Hansen should be able to defend this one pretty easily though. Oh, Sharp has tightened it up now! Hansen should have reacted faster there - he's in big trouble and yes, he's tapped out! This one is all over!
Ladies and gentlemen, after 2:44 of round 1, we have a winner by way of Submission (Triangle). Asa Sharp!
Asa Sharp took to the mic in his post fight interview and said 'First, I want to give all praise to my Lord and Savior Jesus Christ. I also want to thank all my fans for your support!!!'.
|
|
|
|
|
|
|
|
|
|
|
|
|
|
|
|
|
|
|
|
|
|
|
| S |
C
A |
G |
S |
C
B |
G |
|
S |
C |
G |
|
energy
A | B |
|
hype
A | B |
|
pop
A | B |
|
mgr
A | B |
|
FIGHT
RATING
46% |
|
|
|
|
|
|
|
Undercard bout
|
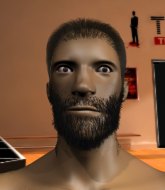
Coming up we have a heavyweight MMA rules bout between Neil Raster (ranked 0 p4p, 0 weight class) and Takuji Kawashima (ranked 0 p4p, 0 weight class). Raster kept the crowd waiting but all that was forgotten when his ring entrance music started. The incomparable musical genius that is Time Bomb. Man, I cannot wait for this one!
 |
|
 |
| 200 cm
18
287 lbs
1 - 1 - 0 |
|
190 cm
18
280 lbs
2 - 0 - 0 |
BJJ White Belt
Excellent boxer
KO power |
|
BJJ Blue Belt
Basic striking
Good gas tank |
|
| |
|
Ladies and gentlemen. This fight is 3 rounds, in the heavyweight division.
Introducing the fighter to my left, fighting out of the red corner.
With a record of
1 - 1 - 0, fighting out of Sydney, Neil Raster!
And introducing the fighter to my right, fighting out of the blue corner.
With a record of
2 - 0 - 0, fighting out of Sydney, Takuji Kawashima!
The judges for this bout are Ben Hemmingworth, Chris Dean and Bruno Hogan.
The bell rings for round one and we are underway!
Kawashima shoots in for a takedown from distance. He catches Raster napping and manages to drive through into side control!
A lull in the action here.
Kawashima postures up a little and throws a couple of hammerfists but they don't connect properly.
Kawashima works a knee to the body and follows up with a nice elbow to the head.

It looks like Neil Raster has been cut.
Raster definitely looks more muscular than last time we saw him fight.
Kawashima has the superior BJJ but he's also working some ground strikes into his gameplan.
Check out the look on Kawashima's face as he threw that strike - that's one determined fighter!
This is a great period of action - very entertaining stuff!
Kawashima lands a nice forearm strike.
Jeez, Neil Raster's cut is really nasty now. The referee must be thinking about getting that checked.
The referee calls the doctor in to look at Neil Raster's cut. Oh no, the doctor has called an end to the bout!
Ladies and gentlemen, after 0:51 of round 1, we have a winner by way of TKO (Cut). Takuji Kawashima!
Takuji Kawashima took to the microphone after his victory and thanked his sponsors, Knox Energy for their support in the buildup to the fight.
Neil Raster was interviewed post fight and said 'Gonna go get some tacos'.
|
|
|
|
|
|
|
|
|
|
|
|
|
|
|
|
|
|
|
|
|
|
|
| S |
C
A |
G |
S |
C
B |
G |
|
S |
C |
G |
|
energy
A | B |
|
hype
A | B |
|
pop
A | B |
|
mgr
A | B |
|
FIGHT
RATING
70% |
|
|
|
|
|
|
|
Undercard bout
|
Coming up we have a lightweight MMA rules bout between George Gifford (ranked 0 p4p, 0 weight class) and Kumi Ku (ranked 0 p4p, 0 weight class). Kumi Ku struggled to make weight for this fight. He only made it down to 156.2lbs at the first attempt and had to take the additional two hours to make the official bout weight. Let's see how much it's taken out of him. Both fighter's entrance songs getting the crowd jumping here.
 |
|
 |
| 180 cm
20
156 lbs
1 - 4 - 0 |
|
177 cm
25
166 lbs
1 - 0 - 0 |
BJJ White Belt
Excellent boxer
Cardio machine |
|
Good takedowns
Brawler
Very confident |
|
| |
|
Ladies and gentlemen. This fight is 3 rounds, in the lightweight division.
Introducing the fighter to my left, fighting out of the red corner.
With a record of
1 - 4 - 0, fighting out of Sydney, George Gifford!
And introducing the fighter to my right, fighting out of the blue corner.
With a record of
1 - 0 - 0, fighting out of Las Vegas, Kumi Ku!
The judges for this bout are John Mangel, Bruno Hogan and Chris Dean.
The bell rings for round one and we are underway!
Gifford tests Ku's chin there with a solid looking shot.
Ku misses with a takedown attempt. He shot from a bit too far out.
Ku darts in looking for a takedown but Gifford gets double underhooks and turns Ku into the cage.
Gifford looking to stall.
Ku wants to break free. God knows he wants to breaaaak freeee.
Ku pulls guard effortlessly.
Gifford trying to control but Ku is working from the bottom.
Gifford would like to get this fight back to the feet but can't get free from the closed guard.
Ku keeping moving, preventing Gifford from controlling successfully.
That's one minute gone in the round.
Ku has managed to work for a loose triangle. I think Gifford should be able to defend this one pretty easily though. Oh, Ku has tightened it up now! Gifford should have reacted faster there - he's in big trouble and yes, he's tapped out! This one is all over!
Ladies and gentlemen, after 1:19 of round 1, we have a winner by way of Submission (Triangle). Kumi Ku!
|
|
|
|
|
|
|
|
|
|
|
|
|
|
|
|
|
|
|
|
|
|
|
| S |
C
A |
G |
S |
C
B |
G |
|
S |
C |
G |
|
energy
A | B |
|
hype
A | B |
|
pop
A | B |
|
mgr
A | B |
|
FIGHT
RATING
32% |
|
|
|
|
|
|
|
Undercard bout
|
Coming up we have a heavyweight MMA rules bout between Rory Velko (ranked 0 p4p, 0 weight class) and Johnny Hotsauce (ranked 0 p4p, 0 weight class). Velko's ring entrance music is that housewives' favourite, Wild Eyes. Over to our ring announcer for the fighter introductions!
 |
|
 |
| 190 cm
29
260 lbs
8 - 8 - 1 |
|
188 cm
25
254 lbs
4 - 1 - 0 |
BJJ Blue Belt
Solid Muay Thai
Good chin |
|
Decent wrestler
Counter fighter
Solid chin |
|
| |
|
Ladies and gentlemen. This fight is 3 rounds, in the heavyweight division.
Introducing the fighter to my left, fighting out of the red corner.
With a record of
8 - 8 - 1, fighting out of Sydney, Rory Velko!
And introducing the fighter to my right, fighting out of the blue corner.
With a record of
4 - 1 - 0, fighting out of Sydney, Johnny Hotsauce!
The judges for this bout are Francis DeMontford, John Mangel and Ben Watson.
The bell rings for round one and we are underway!
Hotsauce shoots in for a takedown. "Ole!" shouts Velko as he jumps to the side.
Hotsauce walks into a left hand.
No luck for Hotsauce with that takedown attempt.
Hotsauce drives through with a takedown into guard.
The referee is asking the fighters to pick up the pace.
Hotsauce trying to control but Velko is working from the bottom.
Velko is trying to keep Hotsauce in close.
Hotsauce throws a big elbow that misses.
Hotsauce with a flurry of punches that miss.
Hotsauce trying to control the position from guard on top but Velko is wriggling around, looking for whatever he can.
That's one minute gone in the round.
Velko preventing the ground and pound from doing any damage.
Hotsauce in full guard, throwing the ground and pound. No damage this time.
Hotsauce throws a big elbow that misses.
Hotsauce loading up with the ground and pound but he's missing more than he's landing in this flurry.
The fighters are pressed up against the cage, both looking to find a bit of space to work.
A big thud reverberates around the arena there as Hotsauce accidentally thumps the mat. Hopefully he's not broken his hand.
Hotsauce trying to pass the guard but can't manage it just yet.
Velko looks to be in better condition than last time we saw him fight. Obviously he's been working hard on his cardio.
Hotsauce pushing down on Velko's thigh, trying to pass to half guard. He's managed it... Nice work.
Velko is staying active underneath Hotsauce, who seems content to just control the action from this position.
Hotsauce seems to be looking for submissions.
Hotsauce misses with a head shot. Velko uses the momentum to regain guard.
That's two minutes gone in the round.
Hotsauce prevents Velko from getting back to his feet.
Hotsauce wants to control from the top but Velko keeps moving.
Hotsauce is sitting in guard, working some ground and pound.
Hotsauce has the superior BJJ but he's also working some ground strikes into his gameplan.
A big thud reverberates around the arena there as Hotsauce accidentally thumps the mat. Hopefully he's not broken his hand.
Hotsauce throws a big right hand that misses.
Fantastic stuff here - a very entertaining period of action, which has drawn cheers from the crowd.
Hotsauce missing there with some ground and pound from the guard.
Hotsauce postures up.
That's three minutes gone in the round.
Hotsauce wants to control from the top but Velko keeps moving.
Hotsauce trying to land body shots but he keeps hitting the mat.
Hotsauce postures up in Velko's guard and throws a big left but Velko blocks it.
Hotsauce throwing strikes from guard but Velko blocks nicely.
Velko is trying to control the position from the bottom.
Hotsauce is pushing down on Velko's leg trying to pass to half guard. Velko is fighting to maintain full guard but Hotsauce has managed to sneak the leg through.
That's four minutes gone in the round.
Hotsauce has hold of the far side arm. He's working for the Kimura, can Velko defend it? Hotsauce steps over the head and cranks it - Velko is tapping out! That was textbook stuff right there - nice submission victory for Hotsauce!
Ladies and gentlemen, after 4:08 of round 1, we have a winner by way of Submission (Kimura). Johnny Hotsauce!
|
|
|
|
|
|
|
|
|
|
|
|
|
|
|
|
|
|
|
|
|
|
|
| S |
C
A |
G |
S |
C
B |
G |
|
S |
C |
G |
|
energy
A | B |
|
hype
A | B |
|
pop
A | B |
|
mgr
A | B |
|
FIGHT
RATING
32% |
|
|
|
|
|
|
|
Undercard bout
|
Coming up we have a welterweight MMA rules bout between Hector Lombard (ranked 0 p4p, 0 weight class) and Mike The Shark (ranked 0 p4p, 0 weight class). Lombard's entrance music is cant be touched. A fine choice. The crowd seem to be enjoying The Shark's choice of entrance music: Still. The key to victory for Hector Lombard has got to be keeping the fight on the feet.
 |
|
 |
| 175 cm
26
182 lbs
8 - 15 - 0 |
|
179 cm
24
175 lbs
5 - 0 - 0 |
BJJ White Belt
Excellent boxer
Very quick |
|
BJJ White Belt
Excellent MT
Powerful |
|
| |
|
Ladies and gentlemen. This fight is 3 rounds, in the welterweight division.
Introducing the fighter to my left, fighting out of the red corner.
With a record of
8 - 15 - 0, fighting out of Sydney, Hector Lombard!
And introducing the fighter to my right, fighting out of the blue corner.
With a record of
5 - 0 - 0, fighting out of Sydney, Mike The Shark!
The judges for this bout are Winston Howard, Ron Honeybunn and Eliza Hachem.
The bell rings for round one and we are underway!
The Shark uses some good footwork to avoid the body shot by Lombard.
The Shark misses with a looping right.
The Shark has been spending a lot of time sparring his boxing in the run up to the fight, trying to sharpen up those hands and look for a knockout.
Lombard connects with a body shot.
The Shark avoids a punch combination nicely.
Lombard throws a wild combination but nothing lands.

The Shark pushes Lombard up against the cage in a clinch.
The Shark jumps guard.
Lombard wants to stand and escape but instead The Shark has hit a sweep and he's now on top in guard.
The Shark chips away with some ground and pound.
The Shark sitting in guard here, content to control.
Lombard wants to stand but The Shark is controlling the position.
Lombard can't do much from the bottom at the moment, as The Shark controls the pace.
The Shark throwing shots from guard but he's hitting more mat than opponent.
The Shark content to stall in guard here.
Fantastic stuff here - a very entertaining period of action, which has drawn cheers from the crowd.
Lombard is trying to stand up but he's not managed so far.
That's one minute gone in the round.
The Shark scores with a decent looking elbow strike.
Lombard knows he needs to get back to his feet asap. He's simply no match for The Shark on the ground.
Lombard is looking to stand up but The Shark isn't so interested in that idea.
Lombard trying desperately to get back to his feet here but he's not having any joy at all. He's going to tire himself out if he's not careful.
The fighters are pressed up against the cage, both looking to find a bit of space to work.
The Shark scores with a decent looking elbow strike.
The Shark lands a couple of digs.
The Shark is standing up over Lombard. Lombard looks to escape but The Shark dives into side control.
Lombard is breathing heavily.
The Shark working away diligently from side control. Landing strikes effectively there - that will score him some points on the judges scorecards.
Lombard takes a couple of big shots there - the referee warns him that he has to defend himself better.
The Shark controlling the position from side mount.
The fans in attendance giving it up for the two fighters, who have really let it all hang out in the last minute or so!
Lombard takes a couple of big shots there - the referee warns him that he has to defend himself better.
That's two minutes gone in the round.
The Shark scores with a couple of nice shots to the head there. The referee takes a look at Lombard to see if he's OK.

Lombard is rocked!
A big shot lands for The Shark! That's hurt Lombard! Will he recover? The Shark fires away with more strikes and the referee has to step in to stop the fight!
Ladies and gentlemen, after 2:27 of round 1, we have a winner by way of TKO (Strikes). Mike The Shark!
Mike The Shark decided to thank the fans in attendance for making a great atmosphere. It seemed to go down pretty well.
In defeat, Hector Lombard stepped up to the mic, saying 'this was the last time you saw me in the octagon i hope ive given you fans some good entertaining fights and knockouts but its time to retire now.'.
|
|
|
|
|
|
|
|
|
|
|
|
|
|
|
|
|
|
|
|
|
|
|
| S |
C
A |
G |
S |
C
B |
G |
|
S |
C |
G |
|
energy
A | B |
|
hype
A | B |
|
pop
A | B |
|
mgr
A | B |
|
FIGHT
RATING
71% |
|
|
|
|
|
|
|
Undercard bout
|
Coming up we have a middleweight MMA rules bout between Bembol Oblaks (ranked 0 p4p, 0 weight class) and Mercito Gesta (ranked 0 p4p, 0 weight class). There are an array of beautiful celebrities at ringside tonight! I wonder if any of them paid for their tickets.
 |
|
 |
| 180 cm
36
190 lbs
15 - 9 - 1 |
|
182 cm
37
190 lbs
12 - 12 - 0 |
BJJ Brown Belt
Counter fighter
Insanely flexible |
|
BJJ Brown Belt
Solid Muay Thai
Powerful |
|
| |
|
Ladies and gentlemen. This fight is 3 rounds, in the middleweight division.
Introducing the fighter to my left, fighting out of the red corner.
With a record of
15 - 9 - 1, fighting out of Sydney, Bembol Oblaks!
And introducing the fighter to my right, fighting out of the blue corner.
With a record of
12 - 12 - 0, fighting out of Sydney, Mercito Gesta!
The judges for this bout are Topper Green, Skip Squint and Winston Howard.
The bell rings for round one and we are underway!
Oblaks throws a feint and then finishes with a kick to the body.
Gesta throws a head kick that misses
and Oblaks counters with a nice double leg into side control. Gesta won't be happy with that.
Gesta is looking to regain half guard here but Oblaks keeps moving and retains side control.
Oblaks is looking for a kimura. He might have it! No, Gesta has escaped the position, nice work there.
Oblaks is looking to take a break and control but Gesta is keeping him honest, looking to work from the bottom.
Gesta tries to work a leg under to get back to half guard but Oblaks wriggles his own leg back out and remains in side control.
Both fighters really going for it on the ground here!
Oblaks is looking to finish here, going for an Americana. Gesta knows the correct defense though, so he's OK.
The ref warns both fighters not to hold the cage as they work up against the meshing.
Fantastic stuff here - a very entertaining period of action, which has drawn cheers from the crowd.
Gesta prevents Oblaks from moving into mount.
Gesta is looking to reverse the position.
Gesta tries to get back to his feet but has found himself mounted instead. Damn, that's gotta suck.
Oblaks looking to control but Gesta is working nicely, looking to advance position himself.
Gesta looks more muscular than last time we saw him. He must have been on the weights.
That's one minute gone in the round.
Oblaks wants to take his opponent's back but Gesta doesn't allow it.
Oblaks prevents Gesta from getting the reversal.
Oblaks is thinking about an arm triangle here, looking to tighten it up before moving to side control. Gesta can see it coming though and defends well with a couple of strikes to the head and some good arm positioning.
Oblaks prevents Gesta from getting the reversal.
Gesta tries to buck Oblaks off but he can't manage it.
Oblaks goes for an armbar but Gesta turns quickly into his guard - lovely anticipation from Gesta.
Oblaks looking for a sweep. Not yet Oblaks, not yet.
Gesta stands up and waves to Oblaks to follow him.
Gesta tries to close the distance and clinch up but Oblaks swats him away and circles back towards the center.
That's two minutes gone in the round.
Oblaks closes the distance and scores a nice trip takedown into half guard. Gesta did well to prevent Oblaks getting side control.
Gesta trying to control from the bottom.
The fans in attendance giving it up for the two fighters, who have really let it all hang out in the last minute or so!
Gesta wants to get back to full guard.
Oblaks is working for submissions here but there's nothing on.
The fighters are starting to get a bit slippery now, which will make submissions a bit more difficult.
Oblaks is looking to advance position but Gesta won't allow it.
Gesta is looking to regain full guard. Not this time though.
Gesta trying to control from the bottom.
Gesta is in trouble now - Oblaks has advanced to mount!
The fighters are pressed up against the cage, both looking to find a bit of space to work.
Gesta sneaks a leg under to get to half guard.
Gesta is looking for a sweep. Oblaks is wise to his cunning plan and keeps the top position.
Oblaks definitely looks more muscular than last time we saw him fight.
Oblaks is trying to control the action in half guard but Gesta is working away on the bottom, looking perhaps to get back to full guard.
That's three minutes gone in the round.
Oblaks takes a deep breath and rests his weight momentarily on top of his opponent, to control the position.
Gesta actively working from the bottom here.
Oblaks is working for submissions here but there's nothing on.
Gesta is trying to control but can't.
Oblaks looking to pass the half guard. Not this time.
Oblaks wants to control but Gesta is keeping him busy.
Gesta trying to control but Oblaks postures up.
Oblaks is trying a forearm choke
I don't think that's going to do much at this level of the game.
Oblaks moves into full mount! Gesta won't be happy about that!
That's four minutes gone in the round.
Oblaks moves to the back position.
Gesta breaks Oblaks's hooks off and manages to turn into his guard.
Gesta trying to control but Oblaks is working from the bottom.
Fantastic stuff here - a very entertaining period of action, which has drawn cheers from the crowd.
Oblaks looking to sweep here. No luck so far.
The crowd are going absolutely nuts as the round comes to an end - what a fantastic round of action!
Oblaks is working hard here to advance position.
Gesta throws a big elbow that misses.
Oblaks looking for submissions off his back, moving his hips, looking for an opening.
And thats the end of the round the fighters go back to their corners.
Bembol Oblaks dominated that round.
The referee calls time. The cornermen exit stage left and we're back to business.
Oblaks scores with a nice one two combo and darts back out of range to avoid anything coming in the opposite direction.
Gesta is looking to clinch.
Oblaks fakes an overhand right and shoots for a takedown. Gesta sprawls well initially but Oblaks persists and gets the takedown into half guard.
Gesta is looking for a sweep. Oblaks is wise to his cunning plan and keeps the top position.
Oblaks wants to control but Gesta is keeping him busy.
Oblaks looks over to his corner - he wants some instructions but his corner are not responding.
Gesta is defending against the submission attempts here by Oblaks.
Gesta moves his hips nicely and gets into full guard.
Gesta looking for submissions off his back, moving his hips, looking for an opening.
Gesta has a loose triangle. He'll be looking to tighten that up but Oblaks can see exactly what he's planning and manages to posture up and free himself.
That's one minute gone in the round.
Oblaks trying to control but Gesta is working from the bottom.
Gesta has a closed guard, preventing Oblaks from standing up.
Gesta wants to stand up but Oblaks is controlling him.
Gesta has a loose triangle. He'll be looking to tighten that up but Oblaks can see exactly what he's planning and manages to posture up and free himself.
Oblaks slips nicely into half guard.
Oblaks is trying for a guillotine from the top but the pressure isn't in the right place so Gesta is just riding it out for now. Oblaks eventually gives up the hold.
Gesta wants to improve his position but Oblaks is controlling well.
That's two minutes gone in the round.
Oblaks trying to control the action but Gesta is working from the bottom.
Gesta wants to get back to his feet.

Oblaks decides he's had enough of the ground and stands up.
Oblaks closes the distance, clinches up and gets a nice trip takedown into side control. Very smooth.
Gesta regains half guard.
The crowd are loving this. Great action here.
Oblaks stalling away here and it's allowed Gesta to slip out his trapped foot and regain full guard.
Oblaks seems content to control from guard here. He's going to have to remain active though if he doesn't want to get stood back up.
Oblaks trying to control but Gesta is working from the bottom.
That's three minutes gone in the round.
Gesta working a defensive guard here.
Oblaks pushing down on Gesta's thigh, trying to pass to half guard. He's managed it... Nice work.
Oblaks is pressing down on Gesta's thigh, looking to free his foot. Gesta is holding on for now.
Oblaks passes to full mount!
Gesta is looking to improve his position but Oblaks isn't that keen on the idea.
Oblaks has hold of Gesta's left arm, perhaps looking for a submission. The two fighters tussle over control of the isolated limb and Gesta manages to get his arm back to his side and away from danger.
Oblaks tries to control but Gesta wriggling away.
Gesta wants to control but Oblaks is having none of it.
Bembol Oblaks overall seems to be getting the better of the ground position in the fight so far.
That's four minutes gone in the round.
Oblaks works his way to his opponent's back.
Gesta is staying cool under pressure, defending well against the rear naked choke attempt from his opponent.
Gesta trying to control the hands but Oblaks won't let him.
This is a great period of action - very entertaining stuff!
Oblaks doesn't have the hooks in and Gesta manages to turn into his guard.
Gesta won't allow Oblaks to sweep him here.
Gesta cracks Oblaks with a solid left hand.
Gesta trying to control but Oblaks is working from the bottom.
As the round comes to an end the crowd are showing their appreciation for a great round of action.
Oblaks has a closed guard, preventing Gesta from standing up.
Oblaks keeping moving, preventing Gesta from controlling successfully.
And thats the end of the round the fighters go back to their corners.
Bembol Oblaks dominated that second round.
That's time! Oblaks's corner gives him a slap on the ass as he gets ready to fight. This is the final round!
Oblaks shoots in for a takedown and gets it.
Gesta looking for submissions off his back.
Gesta tries to roll over but Oblaks keeps him under control.
Oblaks wants to control but Gesta is keeping him busy.
Gesta wants to get back to full guard.
Neither fighter is being very active at the moment, with Oblaks in particular looking to stall.
Oblaks is trying to control the action in half guard but Gesta is working away on the bottom, looking perhaps to get back to full guard.
The ref stands the fighters back up because Bembol Oblaks just wasn't active enough.
Gesta darts in and clinches Oblaks up against the cage.
That's one minute gone in the round.
Gesta is looking for a takedown up against the cage. Oblaks gets underhooks though and prevents the takedown attempt.
Oblaks jumps into guard, dragging Gesta to the mat.
Oblaks working for a triangle but Gesta defends it easily.
Oblaks is looking for a guillotine. You can't force these things though and Gesta defends well.
Oblaks is looking to get back to his feet but can't, whilst Gesta is controlling him.
Gesta wants to control from the top but Oblaks keeps moving.
Gesta might have to switch it up a bit here because his efforts to control Oblaks haven't been going to plan, at least at the current moment in time.
That's two minutes gone in the round.
Gesta stopping the sweep attempt from Oblaks.
The referee is pacing around the two fighters - he looks like he's thinking about a standup.
The ref stands the fighters back up, due to lack of action by Mercito Gesta.
Oblaks avoids the head kick by Gesta.
Gesta throws a low kick but Oblaks avoids it.
Oblaks stuffs a takedown. It's all about dictating where the fight takes place and Oblaks wants it to stay on the feet.
Gesta ducks right into an uppercut from Oblaks.
Gesta throws a head kick that misses and slips in the process. He scrambles back to his feet and the fighters circle.
Oblaks throws a nice head kick!
The crowd are loving this. Great action here.
Gesta darts in looking for a takedown but Oblaks gets double underhooks and turns Gesta into the cage.
Bembol Oblaks has stuffed three takedown attempts in the round now. That's going to take a lot out of Mercito Gesta.
Gesta takes a big intake of breath there - he's definitely tired.
Gesta is trying to break the clinch but Oblaks has him pressed against the cage.
That's three minutes gone in the round.
Gesta is looking to break free of the clinch but Oblaks has double underhooks.
Oblaks looking to throw knees to the head but Gesta is blocking nicely.
Gesta tries to land knees in the clinch but Oblaks avoids the damage to the body.
Oblaks holding his opponent close, against the cage.
Oblaks works for the underhooks and manages to get a trip takedown into guard.
Gesta is active off his back here, looking for submissions.
Oblaks passes into half guard.
Oblaks is looking for an arm triangle, whilst trying to pass to side control. Gesta doesn't seem that keen to cooperate though. No luck this time Oblaks.
Gesta is trying to maintain the position but Oblaks is very close to passing his half guard.
That's four minutes gone in the round.
Oblaks wants to stand but Gesta has hold of a leg and an arm, so he's trapped for now.
Oblaks is thwarting Gesta's attempts to control the position.
Oblaks passes the guard and advances to mount!
Gesta bucks up and manages to get a nice reversal! He's in guard on the top - nicely done!
Fantastic stuff here - a very entertaining period of action, which has drawn cheers from the crowd.
Gesta trying to control the position from guard on top but Oblaks is wriggling around, looking for whatever he can.
As the round comes to an end the crowd are showing their appreciation for a great round of action.
Gesta is looking to stand up but Oblaks won't let him.
And that's the end of the fight!
Bembol Oblaks showed his dominance in that final round.
Well I reckon that's a shut out for Oblaks, winning every round. Will the judges agree? They are the ones who matter, even if they are often depressingly incompetent. Over to the ring announcer for the scorecards.
Ladies and gentlemen, after 3 rounds of action, we go to the scorecards for a decision.
Judge Topper Green scores the fight 30:27
Judge Skip Squint scores the fight 30:27
Judge Winston Howard scores the fight 30:27
In favor of your winner, by unanimous decision... Bembol Oblaks!
A relieved looking Bembol Oblaks thanked the fans for their support and gave the usual line about them being amazing. They seemed to believe that he actually meant it.
|
|
|
|
|
|
|
|
|
|
|
|
|
|
|
|
|
|
|
|
|
|
|
| S |
C
A |
G |
S |
C
B |
G |
|
S |
C |
G |
|
energy
A | B |
|
hype
A | B |
|
pop
A | B |
|
mgr
A | B |
|
FIGHT
RATING
80% |
|
|
|
|
|
|
|
Undercard bout
|
Coming up we have a middleweight MMA rules bout between Muraki Tunamoto (ranked 0 p4p, 0 weight class) and John McNamara (ranked 0 p4p, 0 weight class). This should be a great matchup!
 |
|
 |
| 180 cm
30
194 lbs
15 - 15 - 0 |
|
180 cm
31
200 lbs
16 - 15 - 1 |
BJJ White Belt
World class boxer
Cardio machine |
|
Good wrestler
World class boxer
Good gas tank |
|
| |
|
Ladies and gentlemen. This fight is 3 rounds, in the middleweight division.
Introducing the fighter to my left, fighting out of the red corner.
With a record of
15 - 15 - 0, fighting out of Sydney, Muraki Tunamoto!
And introducing the fighter to my right, fighting out of the blue corner.
With a record of
16 - 15 - 1, fighting out of Sydney, John McNamara!
The judges for this bout are Winston Howard, Topper Green and Damien Edna.
The bell rings for round one and we are underway!
McNamara misses with a left hand
and Tunamoto makes him pay by landing a thudding low kick.
McNamara fakes high and swings low for a body shot but Tunamoto manages to avoid it.
Tunamoto fakes with a right hand and throws a good leg kick, right into the thigh. That had to hurt McNamara.
A solid leg kick lands there for Tunamoto.
McNamara connects with a body shot that sends Tunamoto's belly button to the back.
McNamara throws a jab but it's blocked by Tunamoto.
McNamara swings away with a body shot that misses
and Tunamoto counters with a stiff right hand.
McNamara fakes high and swings low for a body shot but Tunamoto manages to avoid it.
Tunamoto avoids the body shot from McNamara.
Tunamoto misses with a looping left.
Wooooo! Give it up for these two warriors! They are putting on a show!
Tunamoto keeping a good distance there, avoiding the body shot.
McNamara throws a right hand that misses
and he gets countered with a snapping leg kick.
A big left from McNamara misses.
McNamara is throwing a lot of body shots here, looking to wear down Tunamoto rather than just go for the knockout.
That's one minute gone in the round.
McNamara lands with a nice body punch.
Tunamoto defending well as McNamara loads up on a big left hand.
McNamara misses with a lunging right hand
letting Tunamoto counter with a right hand.
Tunamoto misses with an uppercut. McNamara saw that one coming.
Tunamoto misses with a left hand
and McNamara counters with a nice uppercut.
McNamara connects with a body shot that sends Tunamoto's belly button to the back.
McNamara throws a predictable looking body shot
and Tunamoto counters with a crisp hook to the side of the head.
McNamara misses with a jab to the body
and Tunamoto counters with an inside leg kick.
The fans in attendance giving it up for the two fighters, who have really let it all hang out in the last minute or so!
McNamara misses the shot to the body.
McNamara lands a straight punch to the body, keeping Tunamoto at a distance.
McNamara throws an off balance right hand
and Tunamoto counters with a leg kick that reverborates around the arena.
McNamara jabs at Tunamoto's body.
That's two minutes gone in the round.
McNamara lands a pitter patter jab to the forehead of his opponent.
McNamara misses with a wild body shot.
McNamara tries to land with a swinging hook to the body but Tunamoto was well out of range. Poor timing from McNamara.
The fighters circling - McNamara throws out the jab but it was never going to land.
Sloppy strikes from Tunamoto. Those never looked like landing.
Tunamoto blocks a jab.
Tunamoto uses some good footwork to avoid the body shot by McNamara.
A big right from Tunamoto misses.
McNamara throws a hook to the body but it doesn't connect.
McNamara is the aggressor but that punch slipped nicely by Tunamoto.
Tunamoto throws an ugly left hook that misses
and McNamara counters with a lovely shot to the body.
That's three minutes gone in the round.
Tunamoto lands an overhand left. A wild punch that just about connected.
Tunamoto uses good head movement to avoid the hook from McNamara.
McNamara misses with an uppercut
and Tunamoto counters with a quick right hand to the jaw.
McNamara misses with a hook.
Tunamoto misses with a double jab
and McNamara counters with a nice uppercut.
McNamara throws a lazy right hand but Tunamoto sees it coming a mile off and sidesteps it easily.
Tunamoto doesn't react quick enough there as he takes a shot to the body.
McNamara misses with a wild body shot.
McNamara waving his hands out in front of him, looking to distract Tunamoto.
McNamara throws a shot from downtown. Tunamoto moves away and avoids it.
McNamara throws a hard body shot but it just misses.
That's four minutes gone in the round.
McNamara swings wildly with a couple of big hooks

and Tunamoto counters with a head kick that drops McNamara to the mat! McNamara scrambles across the canvas and gets back to his feet, still wobbly!

McNamara is rocked!
The fans in attendance giving it up for the two fighters, who have really let it all hang out in the last minute or so!
A telegraphed right hand from McNamara misses the target.
McNamara is still on wobbly legs! Can Tunamoto finish him?
McNamara throws a sloppy body shot
enabling Tunamoto to counter with a crisp jab.
A jab from Tunamoto misses.
John McNamara seems to be the more aggressive standup fighter in this bout.
Tunamoto walks into a stiff left hand from McNamara.
Tunamoto misses with a looping left.
McNamara seems to have recovered his senses.
Tunamoto lands with a cross to side of his opponent's head.
Tunamoto drops his hands momentarily and McNamara takes advantage with a crisp shot to the head.
The crowd are going absolutely nuts as the round comes to an end - what a fantastic round of action!
Tunamoto throws a head kick that misses.
Tunamoto slips under a jab.
The crowd cheers as McNamara lands an impressive looking overhand right. Tunamoto doesn't seem phased though.
And thats the end of the round the fighters go back to their corners.
A close round but John McNamara will probably get the nod.
The minute break is over - no more time for sponges and pep talks - back to the action!
Tunamoto avoids the body shot from McNamara.
Tunamoto lands a big head kick that sends McNamara tumbling to the mat! Tunamoto takes a step backwards and waves McNamara back to his feet - he wants the finish!
The crowd cheering loudly, showing their appreciation for the quality fight we're seeing here.
McNamara lands with a good body shot.
McNamara loads up on a big right hand but Tunamoto slips the punch.
A shot to the liver by McNamara. Beautiful body shot.
McNamara scores with a jab to the jaw.
Tunamoto is rocked!
McNamara thows a left - swing and a miss!
McNamara misses with a jab, cross combination.
McNamara takes a swing at Tunamoto's ribcage but misses.
McNamara swings away with a body shot that misses
and McNamara takes a counter punch right on the button for his troubles.
McNamara throws a predictable looking body shot
and Tunamoto cracks him with a counter punch right on the button.
McNamara throws a body punch but Tunamoto moves out of range.
That's one minute gone in the round.
McNamara misses the jab.
McNamara tries to check the leg kick but that clearly hurt him.
McNamara misses the shot to the body.
McNamara throws a big shot that misses.
Sloppy strikes from Tunamoto. Those never looked like landing.
Muraki Tunamoto is winning the standup battle so far.
Tunamoto uses some good footwork to avoid the body shot by McNamara.
McNamara misses with a right hand
and Tunamoto counters with a good right hand that lands right on the jaw.
Tunamoto connects with a hook to the side of his opponent's head.
McNamara loads up on a big right hand but Tunamoto slips the punch.
McNamara scores with a crisp jab that stopped Tunamoto in his tracks.
McNamara throws a hook to the body but it doesn't connect.
That's two minutes gone in the round.
The fans in attendance giving it up for the two fighters, who have really let it all hang out in the last minute or so!
McNamara throws a poor cross that misses
and Tunamoto counters with a nice uppercut.
Tunamoto is looking light on his feet compared to last time was saw him fight.
Jab by McNamara.
McNamara throws an overhand right that lands on Tunamoto's shoulder, as Tunamoto tries to avoid the shot.
McNamara swings for the body but Tunamoto moves out of range.
Tunamoto uses some good footwork to avoid the body shot by McNamara.
McNamara throws a predictable looking body shot
and Tunamoto connects with a straight left hand counter down the middle.
McNamara misses with a straight right.
McNamara looks to land a left hand but Tunamoto moved out of range nicely.
Tunamoto takes a shot to the nose. Hopefully that hasn't broken it.
A big left from McNamara misses.
McNamara misses with a body shot. Nice footwork from Tunamoto.
McNamara ducks down and throws a hook to the body but Tunamoto moves away.
That's three minutes gone in the round.
Tunamoto moves out of range of the strikes.
McNamara misses the shot to the body.
McNamara misses with a body punch
and Tunamoto counters with a nice uppercut.
McNamara throws an uppercut from half a mile away. Tunamoto sees it coming and avoids it easily.
Tunamoto thumps McNamara with a low kick.
Good standup being displayed there by Tunamoto as he connects with a hook.
McNamara's leg has a nasty welt from taking a succession of leg kicks. That must be slowing him down.
McNamara ducks down and throws a hook to the body but Tunamoto moves away.
McNamara throws a looping overhand right but Tunamoto ducks down to avoid it.
Tunamoto cracks McNamara with a big right hand that sends him crashing to the floor. Tunamoto has the opportunity to follow him to the ground but instead he's beckoning McNamara to stand back up!
This has been an exciting period of action!
McNamara throws a body punch but Tunamoto moves out of range.
McNamara misses with a jab to the body
and Tunamoto scores with a counter punch that sends McNamara to the canvas! Tunamoto smells blood - he's punishing McNamara with more strikes and the ref has stopped it! McNamara has no idea where he is - he's tackled the ref... oh dear, poor guy, the crowd is in hysterics!
Ladies and gentlemen, after 4:56 of round 2, we have a winner by way of TKO (Strikes). Muraki Tunamoto!
An out of breath Muraki Tunamoto thanked his loyal fans in his post fight interview, giving them credit for his success over the course of his career.
|
|
|
|
|
|
|
|
|
|
|
|
|
|
|
|
|
|
|
|
|
|
|
| S |
C
A |
G |
S |
C
B |
G |
|
S |
C |
G |
|
energy
A | B |
|
hype
A | B |
|
pop
A | B |
|
mgr
A | B |
|
FIGHT
RATING
74% |
|
|
|
|
|
|
|
Co-main event
|
Coming up we have a middleweight MMA rules bout between Seth Wray (ranked 0 p4p, 0 weight class) and Patrick Seven (ranked 0 p4p, 0 weight class). Wray comes to the cage accompanied by The Leprechan Song. Both fighters look fresh as a daisy as they make their way towards the cage.
 |
|
 |
| 185 cm
27
195 lbs
17 - 9 - 0 |
|
186 cm
27
185 lbs
14 - 4 - 0 |
Good wrestling
Great elbows
Insanely flexible |
|
Excellent grappler
Excellent MT
Granite chin |
|
| |
|
Ladies and gentlemen. This fight is 3 rounds, in the middleweight division.
Introducing the fighter to my left, fighting out of the red corner.
With a record of
17 - 9 - 0, fighting out of Sydney, Seth Wray!
And introducing the fighter to my right, fighting out of the blue corner.
With a record of
14 - 4 - 0, fighting out of Sydney, Patrick Seven!
The judges for this bout are Bruno Hogan, Ron Honeybunn and Donatello Bradman.
The bell rings for round one and we are underway!
Wray misses with a wild body shot.
No luck for Seven with that takedown attempt.
Wray keeps the fight standing with a nice sprawl.
Patrick Seven seems to be the more aggressive standup fighter in this bout.
Seven has his takedown stuffed
and Wray counters by clinching up.
Seth Wray has stuffed three takedown attempts in the round now. That's going to take a lot out of Patrick Seven.
Seven is looking to score with knees to the body. Maybe he'll change it up and go body then head. Wray is defending well for now.
A right handed body shot lands from Wray.
Wray breaks the clinch and we return to the middle of the mat.
Wray looks to throw the jab but Seven is out of range.
Wray has been working on his boxing with his coaches at LOD-Guts & Glory Gym in the buildup to the fight.
Wray lands with a shot to the body.
Wray misses with a body shot. Nice footwork from Seven.
Seven shoots in for a takedown. "Ole!" shouts Wray as he jumps to the side.
Wray darts in and out, connecting with a jab.
Seven throws a head kick that connects with a bit of head and a bit of hand.
Wooooo! Give it up for these two warriors! They are putting on a show!
Seven on the wrong end of an overhand right that came out of nowhere.
Wray with a body punch. A glancing blow.
Seven shoots in looking for a takedown but Wray manages to keep the fight standing, pushing Seven's face into the canvas for good measure before circling away.
That's one minute gone in the round.
Seven tries to shoot in for a takedown. He's got hold of a leg but Wray swivels and escapes.
Seven shoots in for a takedown. "Ole!" shouts Wray as he jumps to the side.
Seven throws out a leg kick but Wray moves out of range and Seven only half commits.
Wray thows a body shot but no joy.
Seven needs to keep his hands up - Wray had a free shot at his head there.
Seven fails miserably with a takedown attempt.
Seth Wray is looking to keep the fight on the feet at all costs.
Seven on the wrong end of a nice hook.
Wray throws a hook to the body but it doesn't connect.
Seven finds nothing but air with that leg kick attempt.
Seven tries to score a power double leg takedown but Wray sees that one coming and sprawls well. That will dishearten Seven somewhat.
Wray connects with a body shot.
Seven looks winded!
This has been an exciting period of action!
Wray lands a lovely overhand right.
That's two minutes gone in the round.
Seven misses with a takedown attempt
and Wray counters by moving into the clinch. Good anticipation by Wray.
Wray can't find room to land a body shot as Seven controls the action.
Wray lands punches inside but they're not really causing much damage.
Wray lands an elbow that stopped Seven in his tracks for a moment.
Wray is defending well against a takedown attempt.
Wray stops a takedown attempt from Seven.
Wray throws a nice elbow but it doesn't land.
The referee calls for Wray to work.
Wray manages to break the clinch.
Good standup being displayed there by Wray as he connects with a hook.
Wray throws a jab to the body, straight down the pipe. Boom. That sent Seven stumbling backwards but he manages to regain his composure quickly.
Decent striking displayed by Wray there.
Seven tries to score a power double leg takedown but Wray sees that one coming and sprawls well. That will dishearten Seven somewhat.
Seven with a poor takedown
and Wray counters with a lovely straight right hand!
Wray jabs at Seven's body.
That's three minutes gone in the round.
Wray cracks Seven with a good shot that sees him stumbling back into the cage.
Seven throws a front kick that sends Wray stumbling back into the cage.
Seven keeping a good distance there, avoiding the body shot.
Seven takes a shot to the body in his stride.
Seven shoots in for a takedown - he's clinched up with Wray but Wray pushes him off and we're back to square one.
Wray will need to tighten up his combinations if he doesn't want to gas himself out, swinging at thin air.
Seven has his hands up protecting his head but a hook from Wray finds it's way round the side to connect with Seven's head.
Seven tries for a takedown but Wray circles away easily
and Wray moves into the clinch.
Wray pushes off and fires off an elbow that misses, before clinching up again, against the cage.
Wray breaks the clinch and we're back to striking at distance.
Seven shoots for a takedown but Wray saw that one coming a mile off and avoided it easily.
A decent looking cross lands there for Wray.
The fans in attendance giving it up for the two fighters, who have really let it all hang out in the last minute or so!
Wray throws a combination but it was largely blocked by Seven.
Wray is really peppering his opponent's head with punches.
That's four minutes gone in the round.
Seven takes a big uppercut there. He seems a bit wobbly but no, he's OK.
Seven walks straight into a jab right on the nose. That one stung - he's blinking and trying to clear his head.
Wray lands a powerful looking uppercut that connected with his opponent's jaw.
Seven is trying desperately to land a takedown but Wray is having absolutely none of it. This is turning into a bit of a nightmare for Seven.
Seven goes for a double leg but Wray avoids the attempt and the two fighters end up clinched against the cage as Wray continues to drive forward.
Seven has Wray pressed up against the cage and is working for takedown. Wray manages to improve position though and keeps the fight standing.
Seven is trying to slow down the pace in the clinch, to catch his breath.
Wray prevents the takedown attempt.
Seven's head jolts backwards as he takes an uppercut right on the button!
Seven tries to pull guard but can't drag his opponent to the mat. Wray just stands there and leans against the cage.
Wray manages to break the clinch.
Wray closes the distance and lands a one-two.
The crowd are going absolutely nuts as the round comes to an end - what a fantastic round of action!
Wray keeps the fight standing with a nice sprawl.
A jab from Wray misses.
Wray connects with a lovely jab that went straight through the gap between Seven's hands.
And thats the end of the round the fighters go back to their corners.
Seth Wray dominated that round.
The fighters' corners scream their final instructions, as the referee calls time. Here we go, back to the action!
Wray misses with an uppercut.
Oooooh!!! Wray has knocked Seven down with a huge combo! Wray steps away and waves a wobbly Seven back to his feet! This one might not go much longer!
Seven is rocked!
Wooooo! Give it up for these two warriors! They are putting on a show!
Seven misses with a takedown attempt - Wray sprawls well and throws a nice strike on the way out which just misses.
Seven is still on wobbly legs! Can Wray finish him?
Wray lands a head shot.
Seven fails with a takedown attempt.
Wray fakes a head shot and lands one to the body.
Seven shoots in looking for a double leg takedown. Wray defends it nicely.
Seven seems to have recovered his senses.
Seth Wray has stuffed three takedown attempts in the round now. That's going to take a lot out of Patrick Seven.
Wray's corner calls for a 1-2. Wray obliges with the 1 part as he scores the single shot and moves back out of range.
Wray is really dominating this fight. Is there anything that Seven can do to turn this around?
Seven shakes his hands off, looking to compose himself, but takes a jab to the jaw whilst he does it.
Wray displays good takedown defense there as he swats away a double leg from Seven.
Seven is breathing heavily.
The crowd cheers as Wray lands an impressive looking overhand right. Seven doesn't seem phased though.
That's one minute gone in the round.
A punch combination from Wray misses.
Seven fails with a rather predictable takedown attempt.
Seven avoids a punch combination nicely.
Seven shoots in looking for a takedown. Wray tries to sprawl out of it but Seven keeps driving through. The fighters are pinned against the cage. Wray manages to get underhooks and after a bit of a struggle, circles away and we're back to standing.
Wray uses good footwork to get in and out and land a nice right hand before Seven has time to react.
Seven has a pretty nasty looking mouse under his right eye.
Boom, another hit is landed. "You're gunna get knocked out" taunts Wray, as that shot connected.
Wray misses with a few strikes there.
Seven looks frustrated there after his takedown attempt is stuffed easily.
Wray drops Seven with a beautiful combination! Seven stares up at his opponent, who ushers him back to his feet - Wray is looking for the KO!
We've seen a great period of action over the last minute or so - credit to both fighters for going all out!
Seven is holding his hands too far apart here. Wray throws a hard, straight punch right down the pipe and BOOM! Seven is out! That punch landed square on the jaw - what a shot!
Ladies and gentlemen, after 2:56 of round 2, we have a winner by way of KO (Punch). Seth Wray!
Seth Wray very nearly forgot to thank Sydney BEAST Clothing amongst all the excitement of his win but just as the interview came to a close, he screamed their name. Hopefully he'll get a few nice freebies in the mail as a thank you.
|
|
|
|
|
|
|
|
|
|
|
|
|
|
|
|
|
|
|
|
|
|
|
| S |
C
A |
G |
S |
C
B |
G |
|
S |
C |
G |
|
energy
A | B |
|
hype
A | B |
|
pop
A | B |
|
mgr
A | B |
|
FIGHT
RATING
100% |
|
|
|
|
|
|
|
Main event
|
Coming up we have a heavyweight MMA rules bout between Constantine Titanus (ranked 0 p4p, 0 weight class) and Just Falcon (ranked 0 p4p, 0 weight class). Titanus comes into the arena with To Glory blaring out of the sound system. Over to our ring announcer for the fighter introductions!
 |
|
 |
| 195 cm
31
275 lbs
16 - 4 - 1 |
|
200 cm
24
250 lbs
4 - 2 - 0 |
Good wrestling
World class MT
Insanely flexible |
|
Good wrestler
Dangerous knees
Good gas tank |
|
| |
|
Ladies and gentlemen. This fight is 3 rounds, in the heavyweight division.
Introducing the fighter to my left, fighting out of the red corner.
With a record of
16 - 4 - 1, fighting out of Sydney, Constantine Titanus!
And introducing the fighter to my right, fighting out of the blue corner.
With a record of
4 - 2 - 0, fighting out of Sydney, Just Falcon!
The judges for this bout are Hugh Johnson, Eliza Hachem and Steve Erwin.
The bell rings for round one and we are underway!
Falcon takes one to the side of the head.
Falcon jabs at Titanus's body.
Falcon lands with a nice body punch.
Titanus tries to land a leg kick but Falcon saw it coming and moves away.
Falcon avoids the body shot from Titanus.
Good work by Falcon as he checks the leg kick.
Titanus thumps Falcon with a low kick.
Constantine Titanus seems to be the more aggressive standup fighter in this bout.
The crowd cheering loudly, showing their appreciation for the quality fight we're seeing here.
Titanus slips under a jab.
Ouch! a nice leg kick from Falcon, right into the meat.
Titanus moves in looking to clinch but Falcon pushes him off.
Falcon connects with a looping right hand.
Titanus tries to clinch up but Falcon circles away and keeps his distance.
Titanus with a nice looking leg kick. You could hear that one land in a back row.
Titanus moves out of range as Falcon strikes.
Falcon uses good head movement to avoid the hook from Titanus.
Titanus throws a big shot that misses.
Falcon misses with the combination.
That's one minute gone in the round.
Titanus pushing out the jab but it's not landing.
A jab from Falcon misses.
An inside leg kick from Titanus misses.
Falcon misses with an attempted mid kick.
A punch lands to the side of Falcon 's head but he takes it in his stride.
Falcon takes a nice looking leg kick right on the meat of his thigh there.
Falcon dodges the punch combination from Titanus.
Falcon misses with a wild body shot.
Falcon just misses with a punch to the body.
Titanus lands a big head kick that sends Falcon tumbling to the mat! Titanus takes a step backwards and waves Falcon back to his feet - he wants the finish!
Falcon is rocked!

It looks like Just Falcon has been cut.
The crowd are loving this. Great action here.
A head kick by Titanus - that's a beauty! Falcon is out but he's somehow still standing... he's going... going... gone. Like a drunk walking down the middle of the road, the inevitable face plant follows and the delayed knockout arrives. Even Titanus can't help but laugh at the bizarre end to this one!
Ladies and gentlemen, after 1:52 of round 1, we have a winner by way of KO (Head Kick). Constantine Titanus!
Jumping up and down and very excited, Constantine Titanus waved his t-shirt featuring El Zoido's Feeble Fightwear *** ROUPA DOS BROTHER*'s logo in front of the cameras.
|
|
|
|
|
|
|
|
|
|
|
|
|
|
|
|
|
|
|
|
|
|
|
| S |
C
A |
G |
S |
C
B |
G |
|
S |
C |
G |
|
energy
A | B |
|
hype
A | B |
|
pop
A | B |
|
mgr
A | B |
|
FIGHT
RATING
100% |
|
|
|
|
|
|
|
|
|
|
