 |
Death Squad 75:Eddie vs Lou PBP Commentary |
Undercard bout
|
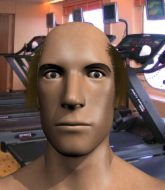
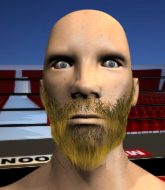
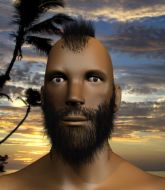
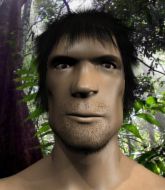
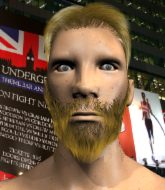
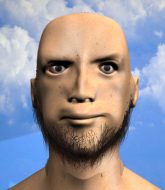
Coming up we have a super heavyweight MMA rules bout between Dean Moshterd (ranked 0 p4p, 0 weight class) and Tauno Tappelija (ranked 0 p4p, 0 weight class). Dean Moshterd has a significant reach advantage - let's see if he can make it count.
 |
|
 |
| 225 cm
25
280 lbs
0 - 2 - 0 |
|
210 cm
28
272 lbs
5 - 6 - 0 |
BJJ Blue Belt
Good kicks
Big heart |
|
Decent wrestler
Decent boxing
Knockout power |
|
| |
|
Ladies and gentlemen. This fight is 3 rounds, in the super heavyweight division.
Introducing the fighter to my left, fighting out of the red corner.
With a record of
0 - 2 - 0, fighting out of Las Vegas, Dean Moshterd!
And introducing the fighter to my right, fighting out of the blue corner.
With a record of
5 - 6 - 0, fighting out of Helsinki, Tauno Tappelija!
The judges for this bout are Alan Glass, Stewart Dunkirk and Gwen Towbar.

The bell rings for round one and we are underway!

Moshterd rushes Tappelija and pushes him back against the cage in a clinch.
Moshterd tries to jump guard but he falls flat on his backside. Tappelija smiles and moves away.
Tappelija rushes forward with a series of wild hooks but Moshterd moves out of range and avoids them all easily.
Moshterd lands with a kick to the temple. Tappelija shrugs as if to say "is that all you've got?"

It looks like Tauno Tappelija has been cut.
Tappelija looks to land a combination but Moshterd avoids it well.
Tappelija looks more muscular than last time we saw him. He must have been on the weights.
Tappelija throws a wild combination but nothing lands.
Horrible takedown by Moshterd or perhaps it was just good defense by Tappelija which made him look bad.
Tappelija throws a wild combination but nothing lands.
Tappelija throws a series of punches but Moshterd avoids them all with ease.
Tauno Tappelija seems to be the more aggressive standup fighter in this bout.
Tappelija swinging wildly here.
The crowd cheering loudly, showing their appreciation for the quality fight we're seeing here.
Tappelija scores with a jab.
Moshterd seems to be moving with more speed, compared to his last bout. He must have been working on that in the gym.
Moshterd misses with a two punch combination.
A lazy left from Tappelija finds it's target.

That's one minute gone in the round.
Moshterd scores with a head kick.
Moshterd shoots in for a takedown. "Ole!" shouts Tappelija as he jumps to the side.
That's three failed takedown attempts in the round for Dean Moshterd. That's going to take a lot out of him.
Moshterd closes this distance looking for a takedown but Tappelija circles away.
Moshterd throws a left and a right that both miss
and Tappelija counters with a two punch combo.
Wooooo! Give it up for these two warriors! They are putting on a show!
Moshterd dives in and grabs Tappelija's left leg, looking for a takedown. Tappelija pushes down on Moshterd's head and hops out.
Moshterd tries to clinch up but Tappelija circles away and keeps his distance.
Tappelija lands a lovely overhand right.

Moshterd is rocked!
Moshterd is breathing heavily.
Tappelija throws a combination but comes up with nothing but fresh air.
Tappelija scores with a punch to the gut of his opponent.
Moshterd shoots in looking for a double leg takedown. Tappelija defends it nicely.
No luck for Moshterd with that takedown attempt.

That's two minutes gone in the round.
OH! Moshterd has been rocked by a huge right hand and is in deep trouble! Tappelija smells blood and charges in for the finish! Tappelija unloads a vicious overhand right and connects to the jaw of Moshterd sending him face first to the canvas! Unbelievable!
Ladies and gentlemen, after 2:08 of round 1, we have a winner by way of KO (Punches). Tauno Tappelija!
|
|
|
|
|
|
|
|
|
|
|
|
|
|
|
|
|
|
|
|
|
|
|
| S |
C
A |
G |
S |
C
B |
G |
|
S |
C |
G |
|
energy
A | B |
|
hype
A | B |
|
pop
A | B |
|
mgr
A | B |
|
FIGHT
RATING
87% |
|
|
|
|
|
|
|
Undercard bout
|
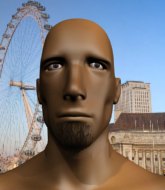
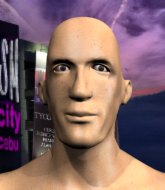
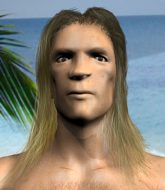
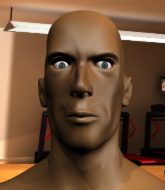
Coming up we have a welterweight MMA rules bout between Birdman Lugz (ranked 0 p4p, 0 weight class) and Joe Sajdak (ranked 0 p4p, 0 weight class). Sajdak has chosen Thrift Shop as his entrance music. I can't wait for this one - let's get the fighter introductions out of the way and get this one started!
 |
|
 |
| 181 cm
38
171 lbs
3 - 38 - 0 |
|
181 cm
21
159 lbs
3 - 7 - 0 |
BJJ White Belt
Excellent MT
Experienced |
|
BJJ Blue Belt
Decent boxing
Knockout power |
|
| |
|
Ladies and gentlemen. This fight is 3 rounds, in the welterweight division.
Introducing the fighter to my left, fighting out of the red corner.
With a record of
3 - 38 - 0, fighting out of Las Vegas, Birdman Lugz!
And introducing the fighter to my right, fighting out of the blue corner.
With a record of
3 - 7 - 0, fighting out of Las Vegas, Joe Sajdak!
The judges for this bout are Wesley Smith, Alan Glass and Stewart Dunkirk.
The bell rings for round one and we are underway!
Sajdak shoots in for a double leg but Lugz sprawls well. That's going to sap some energy.
A combination from Sajdak does no damage.
Sajdak throws a low kick but it's checked well by Lugz.
Lugz fails with a takedown attempt.
Sajdak swinging wildly here.
Lugz blocks a leg kick.
Horrible takedown by Lugz or perhaps it was just good defense by Sajdak which made him look bad.
Sajdak throws a low kick but it's checked well by Lugz.
Sajdak misses with a combination
and Lugz counters with a lovely straight right hand!
Lugz wants to clinch

and Sajdak counters into the clinch. Nicely done.
Sajdak wants to break free but Lugz has control.
Sajdak looks more muscular than last time we saw him. He must have been on the weights.
Sajdak can't break the clinch.
That's one minute gone in the round.
Sajdak wants to push off and get back to the center of the mat but Lugz has him pressed against the cage.

Sajdak manages to pull guard.
We may be looking at a referee standup if the pace doesn't pick up soon.
Sajdak keeping moving, preventing Lugz from controlling successfully.
Lugz knows he needs to get back to his feet asap. He's simply no match for Sajdak on the ground.
Sajdak is trying to stand up but he's not managed so far.
Lugz wants to control from the top but Sajdak keeps moving.
Sajdak pulls Lugz in close to prevent any damage.
The ref warns both fighters not to hold the cage as they work up against the meshing.
There's a bit of a scramble here and now Sajdak is on top in guard.
Sajdak slows down the pace of the fight, as he sits in guard.
That's two minutes gone in the round.

The referee decides to stand the fighters back up, due to lack of activity on the part of Birdman Lugz.
Lugz is looking to clinch but Sajdak is avoiding it.
Sajdak shoots in with a takedown attempt and he has Lugz pinned against the cage. Lugz gets the underhooks and manages to circle away.
Sajdak fails to land with the punch combination there - jab, cross, hook, miss, miss, miss.
Sloppy strikes from Sajdak. Those never looked like landing.
Sajdak takes a jab on the nose there. A little bit of blood seems to be coming out. Hopefully that won't affect his breathing.
It looks like Joe Sajdak has been cut.
This has been an exciting period of action!
Lugz tries to clinch up.
Sajdak fails with a rather predictable takedown attempt.
Birdman Lugz has stuffed three takedown attempts in the round now. That's going to take a lot out of Joe Sajdak.
Sajdak shoots in for a takedown. "Ole!" shouts Lugz as he jumps to the side.
Lugz moves in looking to clinch but Sajdak pushes him off.
Lugz is looking to take this fight into the clinch.
Sajdak throws a head kick that misses and slips in the process. He scrambles back to his feet and the fighters circle.

That's three minutes gone in the round.
Sajdak avoids the clinch attempt nicely.
Sajdak will need to tighten up his combinations if he doesn't want to gas himself out, swinging at thin air.
Lugz checks the leg kick.
Sajdak closes the distance and pushes Lugz back into the cage.
Lugz drops to a knee looking for a takedown but Sajdak gets the underhooks and prevents it.
Lugz looking for a takedown.
Sajdak prevents the takedown attempt.
A frustrated look appears on Sajdak's face as he tries to break the clinch.
Lugz keeps the fight in the clinch, despite Sajdak's efforts to push away.

That's four minutes gone in the round.
Sajdak stops a takedown attempt from Lugz.
Sajdak wants to break free. God knows he wants to breaaaak freeee.
Lugz has a body lock and is looking for a takedown. Sajdak is bouncing around trying to prevent the takedown and somehow he has indeed managed to stay on his feet.
Lugz is looking for a takedown up against the cage. Sajdak gets underhooks though and prevents the takedown attempt.
Sajdak is looking to break free of the clinch but Lugz has double underhooks.
Sajdak dictating the pace here, as the fighters clinch against the cage.
As the round comes to an end the crowd are showing their appreciation for a great round of action.
Sajdak can't break the clinch.
Sajdak tries to circle away but Lugz has him pinned against the cage.
And thats the end of the round the fighters go back to their corners.
Joe Sajdak dominated that round.
The cut man is working on Joe Sajdak's cut.
That's time! Back to the action!

Lugz tries to clinch up.
Lugz blocks a head kick by Sajdak.
Sajdak swings wildly with a couple of big hooks
and Lugz counters with a stiff right hand.
Sajdak moves into the clinch successfully.
Sajdak wants to get back to striking at distance but Lugz won't allow it.
Sajdak is trying to slow down the pace of the fight but Lugz is keeping busy.
Lugz is working on a leg, looking for a takedown but Sajdak is defending well.
Sajdak has had enough of the clinch but Lugz keeps him there for the moment.
Sajdak is defending well against a takedown attempt.
Lugz is looking for a takedown up against the cage. Sajdak gets underhooks though and prevents the takedown attempt.
That's three failed takedown attempts in the round for Birdman Lugz. That's going to take a lot out of him.
Sajdak wants to get back to striking at distance but Lugz won't allow it.
That's one minute gone in the round.
A frustrated look appears on Sajdak's face as he tries to break the clinch.
Sajdak content to slow the pace in the clinch.
Sajdak is trying to break the clinch but Lugz has him pressed against the cage.
Lugz wants to take the fight to the mat but Sajdak manages to get underhooks and keep the fight in the clinch.
Sajdak jumps guard.
Sajdak keeping moving, preventing Lugz from controlling successfully.
Sajdak is working from a closed guard but he's struggling to control his opponent.
Sajdak seems keen to control rather than go for a submission, at least for now.

The ref calls for a clean break and stands the fighters back up. Joe Sajdak wasn't active enough on the ground.
Sajdak throws a looping left and ducks down for a takedown. He's got his arms around Lugz's waist but Lugz gets an underhook and avoids the takedown by throwing Sajdak off to one side.
That's two minutes gone in the round.
Sajdak fails to land the takedown.
Lugz tries to clinch but is not successful on this occasion.
Lugz tries to close the distance and clinch up but Sajdak swats him away and circles back towards the center.
Lugz misses with a takedown attempt. He shot from a bit too far out.
Sajdak looks to score with a combo but nothing lands.
Lugz tries to clinch but is not successful on this occasion.
Lugz tries to clinch but Sajdak moves out of range.
Sajdak circles away from the clinch attempt
and Sajdak counters with a left and a right that stings Lugz.
Lugz is looking to clinch.
This is a great period of action - very entertaining stuff!
Lugz instigates a clinch.
Sajdak working hard to break the clinch.
That's three minutes gone in the round.
Sajdak gets underhooks to prevent Lugz's takedown attempt.
Sajdak tries for a takedown. No joy.
Sajdak working hard to break the clinch.
Sajdak is trying to break the clinch but Lugz is controlling him.
Lugz is looking to take this one to the mat.
Sajdak wants to get back to striking at distance but Lugz won't allow it.
Sajdak tries to throw a body punch but Lugz avoids it by throwing Sajdak back against the cage.
Sajdak wants to strike at distance but he can't break free of the clinch.
Sajdak is trying to push Lugz away but Lugz has him pressed against the cage, so he's going nowhere.
Lugz is trying to drag Sajdak to the mat but Sajdak just about manages to keep his footing. He used the cage to his advantage there.
That's four minutes gone in the round.
Sajdak wants to break free but Lugz has control.
Lugz drops down for a takedown but doesn't get it.
Sajdak jumps into guard, dragging Lugz to the mat.
The crowd applaud the fighters efforts here as the round comes to an end.
Sajdak is trying to stand up but he's not managed so far.
Sajdak tries to strike from the bottom.
The fighters are pressed up against the cage, both looking to find a bit of space to work.
Sajdak is working the butterfly guard. He manages to land a nice scissor sweep and is now in half guard on the top. Nice move.
And thats the end of the round the fighters go back to their corners.
Joe Sajdak showed his class in that round. I'd imagine he'll take it on all the scorecards.
The cut man is working on Joe Sajdak's cut.
Well, the break between rounds is over. Let's get back to the scrappin! Let's hear some noise people - this is the final round!

Lugz avoids the body shot from Sajdak.
Sajdak stuns Lugz with a nice body shot, before stepping back out of range.
Oooooooooooh, not good. A low kick from Lugz lands where it shouldn't have, right in the... well, you know what he did? He kicked him in the penis. He's injured, injured bad. The referee sends both fighters to their corners and Sajdak has 5 minutes to recover. He's OK now though... a thumbs up from Sajdak and we're back underway with a touch of gloves.
Sajdak just misses with a punch to the body.
The step up in weight doesn't seem to be a problem for Sajdak. He's performing admirably here against the bigger man.
A punch combination from Sajdak misses.
Sajdak throws a right and a left that both miss.
Lugz tries to close the distance and clinch up against the cage but Sajdak paws at him with a jab and circles away.
Sajdak misses with the combination.
Sajdak shoots in with a takedown attempt and he has Lugz pinned against the cage. Lugz gets the underhooks and manages to circle away.
Lugz fails with an attempt to clinch.
Sajdak takes a big intake of breath there - he's definitely tired.
No joy there for Sajdak, who threw a few shots but didn't land.
A combination from Sajdak does no damage.
Sajdak throws a series of punches but Lugz avoids them all with ease.
That's one minute gone in the round.
Lugz is looking to take this fight into the clinch.
Lugz wants to clinch.
Lugz sizes up Sajdak with a pawing jab and scores with a straight right down the middle.
Sajdak drops his hands momentarily and Lugz takes advantage with a crisp shot to the head.

Sajdak is rocked!
Sajdak circles away from the clinch attempt.
Sajdak is still on wobbly legs! Can Lugz finish him?
Lugz wants to clinch.
Lugz wants to clinch.
Lugz wants to clinch.
Nice defenses there by Lugz.
Lugz lands with a massive overhand right! Stick a fork in Sajdak - he's out cold! Ermm... I think I just mixed my metaphors but yeah... That was a nice KO! Big win for Lugz!
Ladies and gentlemen, after 2:58 of round 3, we have a winner by way of KO (Punch). Birdman Lugz!
|
|
|
|
|
|
|
|
|
|
|
|
|
|
|
|
|
|
|
|
|
|
|
| S |
C
A |
G |
S |
C
B |
G |
|
S |
C |
G |
|
energy
A | B |
|
hype
A | B |
|
pop
A | B |
|
mgr
A | B |
|
FIGHT
RATING
100% |
|
|
|
|
|
|
|
Undercard bout
|
Coming up we have a light heavyweight MMA rules bout between Sebastian Kraft (ranked 0 p4p, 0 weight class) and Muhammed Lawal (ranked 0 p4p, 0 weight class). Over to our ring announcer for the fighter introductions!
 |
|
 |
| 198 cm
25
213 lbs
0 - 1 - 0 |
|
183 cm
29
205 lbs
4 - 6 - 0 |
Good wrestling
Counter fighter
Good chin |
|
BJJ White Belt
Excellent boxer
Knockout power |
|
| |
|
Ladies and gentlemen. This fight is 3 rounds, in the light heavyweight division.
Introducing the fighter to my left, fighting out of the red corner.
With a record of
0 - 1 - 0, fighting out of Las Vegas, Sebastian Kraft!
And introducing the fighter to my right, fighting out of the blue corner.
With a record of
4 - 6 - 0, fighting out of Las Vegas, Muhammed Lawal!
The judges for this bout are Alan Glass, Cecil Peabody and Wesley Smith.
The bell rings for round one and we are underway!
Kraft rushes Lawal and presses him up against the cage.
Kraft struggles to land a body shot inside as Lawal controls his hands.
Kraft misses with a punch to the body.
Lawal tries to break the clinch but Kraft is controlling the position.
Lawal is trying to force a seperation but Kraft has the dominant position.
Lawal misses with a body punch.
Kraft misses with a hook from the clinch.
Kraft has been talking about how he's improved his wrestling in the run up to the fight so let's see if that's enough to sway the balance.
Lawal can't break the clinch.
Kraft slows down the pace here.
A frustrated look appears on Lawal's face as he tries to break the clinch.
A short right from Kraft.
Lawal has had enough of the clinch and is looking to separate.
Lawal takes an elbow to the forehead.
It looks like Muhammed Lawal has been cut.
Lawal is looking to break free of the clinch but Kraft has double underhooks.
Kraft's corner are urging him to control the action in the clinch for a moment, rather than mount any serious offense. I'm sure the crowd appreciate those instructions... not.
Lawal tries to break the clinch but Kraft is controlling the position.

Kraft is working on a single leg takedown against the cage. Lawal can't fight it off and eventually Kraft manages to take the fight to the floor. Lawal looks annoyed but at least he's managed to land in guard.
That's one minute gone in the round.
Kraft prevents Lawal from getting back to his feet.
Kraft will need to keep those long limbs tucked in whilst he's on the ground, to prevent any submissions.
Kraft postures up to throw the ground and pound strikes but they don't connect.
Lawal wants to stand but Kraft is controlling the position.
Kraft trying to control but Lawal is working from the bottom.
Kraft prevents Lawal from getting back to his feet.
Kraft loading up with the ground and pound but he's missing more than he's landing in this flurry.
Lawal wants to get back to his feet but Kraft is in a dominant position and won't allow it.
Kraft throwing elbows and punches but not connecting, as Lawal works some decent striking defense from the bottom.
Kraft stays in close to Lawal's body and controls the position.
That's two minutes gone in the round.

The referee decides to stand the fighters back up.
Lawal misses with a series of wild punches.
Muhammed Lawal is looking to keep the fight on the feet at all costs.
Lawal lands a jab.
No luck for Kraft with that takedown attempt.
Lawal tries to clinch up against the cage, rushing in to close the distance. Kraft manages to break the clinch and circles back to the middle of the mat.
Lawal scores with a nice one two combo and darts back out of range to avoid anything coming in the opposite direction.
The fans in attendance giving it up for the two fighters, who have really let it all hang out in the last minute or so!
Kraft moves out of range of the body kick from Lawal.
Muhammed Lawal seems to be the more aggressive standup fighter in this bout.
Lawal bobbing and weaving, closes the distance and lands a hook to the side of Kraft's head.
Lawal pulls out of a head kick attempt.
Kraft swats away the attempt to clinch by Lawal.
That's three minutes gone in the round.
Kraft clinches.
Kraft lands a knee to the head.
Kraft drops down looking for an ankle pick but Lawal pulls his leg out and moves away.
Lawal throws a sloppy head kick and Kraft moves out of range easily.
Kraft tries to close the distance and clinch but Lawal swats him to one side with an open hand palm strike and circles away.
Kraft goes for a double leg but Lawal avoids the attempt and the two fighters end up clinched against the cage as Lawal continues to drive forward.
That's three failed takedown attempts in the round for Sebastian Kraft. That's going to take a lot out of him.
Kraft holding his opponent close, against the cage.
Good body shot from Lawal.
Kraft is breathing heavily.
Kraft displaying some good clinch control by pressing Lawal up against the cage.

Kraft breaks from the clinch.
That's four minutes gone in the round.
Lawal lands with a kick to the ribs.
Lawal pulls out of a head kick attempt.
Lawal has managed to clinch.
Kraft goes for a takedown in the clinch but Lawal prevents it.
This has been an exciting period of action!
Lawal fails to land with a short punch on the inside.
Lawal has had enough of the clinch but Kraft keeps him there for the moment.
Lawal is trying to break the clinch but Kraft is controlling him.

Lawal breaks the clinch and we return to the middle of the mat.
Lawal doesn't manage to clinch there - Kraft circles away.
Oooooooooooh, not good. A low kick from Lawal lands where it shouldn't have, right in the... well, you know what he did? He kicked him in the penis. He's injured, injured bad. The referee sends both fighters to their corners and Kraft has 5 minutes to recover. He's OK now though... a thumbs up from Kraft and we're back underway with a touch of gloves.
The crowd are going absolutely nuts as the round comes to an end - what a fantastic round of action!
Lawal misses with a half-hearted attempt at a head kick.
A good leg kick by Lawal.
Kraft swats away the attempt to clinch by Lawal.
And thats the end of the round the fighters go back to their corners.
Muhammed Lawal dominated that round.
The cut man is working on Muhammed Lawal's cut.
The corners get their ten second warning. Both fighters stand from their stools and stare eachother down, ready to get back to the action.

Lawal throws a left that rocks Kraft and follows with a right that sends him tumbling to the canvas! Lawal dives into side control, looking to finish! Can Kraft regain composure!

It looks like Sebastian Kraft has been cut.
The crowd cheering loudly, showing their appreciation for the quality fight we're seeing here.
Kraft is trying to control Lawal's posture but Lawal avoids it.
Lawal tries to get to his feet but he's trapped momentarily.
Kraft is trying to control Lawal's posture but Lawal avoids it.
Lawal wants to stand but Kraft has his arm trapped.
Kraft is trying to get back to his feet.
That's one minute gone in the round.
Both fighters are absolutely exhausted here.
Lawal wants to stand but Kraft is controlling his arm.
Kraft has been looking to land a fair amount of strikes on the ground. He might be looking to soften his opponent up in order to work for a submission.
Kraft manages to work his way to half guard, despite Lawal's best efforts.
Lawal wants to stand up but Kraft has a hold of him and won't allow it.
That's two minutes gone in the round.

Kraft makes some distance and scrambles quickly back to his feet. Nice work!
Lawal gets caught flat footed, as Kraft shoots in with a quick takedown into guard.
Lawal wants to get back to his feet but he's too absorbed in his own little project and Kraft manages to pass to side control.
The fans in attendance giving it up for the two fighters, who have really let it all hang out in the last minute or so!
Kraft is trying to control. Lawal wants to improve his position but can't escape this time.
Kraft stops Lawal from getting back to his feet.
Lawal is refusing to be controlled, as Kraft sits in half guard.
Well, if Kraft is going to just lie there, perhaps we should talk about what we're having for dinner tonight
I'm having a ham and pineapple pizza
Yum. Can't wait.
Lawal looks like he's trying to stand up.
That's three minutes gone in the round.
Lawal is trying to escape back to his feet but Kraft uses the scramble to pass into side control.
Lawal is putting a lot of effort into getting back to his feet here.
Kraft trying to control the position but Lawal is working away.
Lawal is working hard to escape and get back to his feet. After a battle for position, Kraft asserts his dominance and retains side control.
The ref warns both fighters not to hold the cage as they work up against the meshing.
Lawal is not content to let Kraft control the position.
Kraft tries to land with some ground and pound but misses.
That's four minutes gone in the round.
Kraft scores with a couple of nice shots to the head there. The referee takes a look at Lawal to see if he's OK.
The fighters are pressed up against the cage, both looking to find a bit of space to work.
Kraft cracks Lawal with a big elbow.
Lawal wants to get back to his feet but Kraft drags him back down.
Kraft trying to control the action but Lawal is working from the bottom.
Kraft is putting a hurting on Lawal here, landing some big shots from side control.
Lawal is trying to escape and get back to his feet.
Kraft in side control lands a decent elbow.
The crowd are going absolutely nuts as the round comes to an end - what a fantastic round of action!
Lawal pushes Kraft away and creates a bit of space to escape. He's almost out here... but no, Kraft gets a good hold of his legs and remains firmly in side control.
And thats the end of the round the fighters go back to their corners.
Muhammed Lawal showed his class in that round. I'd imagine he'll take it on all the scorecards.
Both fighters have cut men working on them during the interval.
The fighters get back to their feet, the hooter sounds and we're back to the action! And we move into the final round!
Kraft closes the distance and clinches.
Kraft is looking for a takedown.
Stalling in the clinch from Kraft.
Lawal wants to strike at distance but he can't break free of the clinch.
Both guys are working to get underhooks.
Kraft will no doubt start fighting again in a minute but for now he's just having a little rest, leaning Lawal up against the cage.
Kraft tries to throw a body punch but Lawal avoids it by throwing Kraft back against the cage.
Kraft lands a nice elbow from the clinch.
Kraft misses with a body punch.
Kraft is looking to take this one to the mat.
Lawal goes for a takedown in the clinch but Kraft prevents it.
That's one minute gone in the round.
Lawal's corner calls for him to break the clinch, which he does.
Both fighters are breathing heavily.
Lawal tries to clinch up but Kraft circles away and keeps his distance.
Lawal throws a leg kick but Kraft checks it.
Kraft clinches up against the cage.
Lawal prevents a takedown attempt there.
That's three failed takedown attempts in the round for Sebastian Kraft. That's going to take a lot out of him.
With the two fighters working up against the cage, Kraft just misses with a elbow thrown towards Lawal's brow.
Kraft is trying to trip Lawal. He has hold of a leg but Lawal is hopping around, keeping his balance for the moment. Kraft persists though and gets the takedown into guard.
Lawal wants to stand up but Kraft is controlling him.
That's two minutes gone in the round.
We get told so often about how wrestlers don't like to be on their backs. Let's see if Lawal can do anything to dispel that myth.
Lawal is looking to stand back up... there's a bit of a scramble and Kraft dives into side control.
Sebastian Kraft has stepped it up - he knows he needs a finish here!
Kraft wants to control but Lawal is keeping him busy.
The fans in attendance giving it up for the two fighters, who have really let it all hang out in the last minute or so!
Kraft scores with punches from side control.
Sebastian Kraft overall seems to be getting the better of the ground position in the fight so far.
Lawal is trying to get back to his feet.
Kraft is looking to take a break and control but Lawal is keeping him honest, looking to work from the bottom.
That's three minutes gone in the round.
Kraft passes to full mount! That's big trouble for Lawal!
Lawal wants to use the cage to get back to his feet here.
Kraft lands with some strikes.
Kraft lands a big elbow.
That's four minutes gone in the round.
Lawal tries to buck Kraft off but he can't manage it.
Kraft controlling his opponent.
Lawal really wants to buck Kraft off and get back to his feet.
Kraft working Lawal over with strikes here.
Lawal really wants to buck Kraft off and get back to his feet.
Kraft tucks in and makes sure he doesn't lose the dominant position.
Kraft lands a couple of good shots and Lawal has given up his back, trying to escape the position!
The fans in attendance giving it up for the two fighters, who have really let it all hang out in the last minute or so!
As the round comes to an end the crowd are showing their appreciation for a great round of action.
Kraft punches Lawal on the ear.
Muhammed Lawal is fighting for a decision - hopefully he's judged it right and he's actually winning the fight.

Kraft is working hard for the rear naked choke here.
And that's the end of the fight!
Sebastian Kraft showed his dominance in that final round.
I think Lawal has won this one but let's see whether the judges agree with me. Over to the ring announcer for the scorecards.
Ladies and gentlemen, after 3 rounds of action, we go to the scorecards for a decision.
Judge Alan Glass scores the fight 28:29
Judge Cecil Peabody scores the fight 28:29
Judge Wesley Smith scores the fight 28:29
In favor of your winner, by unanimous decision... Muhammed Lawal!
|
|
|
|
|
|
|
|
|
|
|
|
|
|
|
|
|
|
|
|
|
|
|
| S |
C
A |
G |
S |
C
B |
G |
|
S |
C |
G |
|
energy
A | B |
|
hype
A | B |
|
pop
A | B |
|
mgr
A | B |
|
FIGHT
RATING
81% |
|
|
|
|
|
|
|
Undercard bout
|
Coming up we have a welterweight MMA rules bout between Shane MacLain (ranked 0 p4p, 0 weight class) and Nick Diaz (ranked 0 p4p, 0 weight class). Chooooooooon! I think MacLain might be my favorite fighter, now he's come out to Drowning Pool - Bodies (Let The Bodies Hit The Floor. Over to our ring announcer for the fighter introductions!
 |
|
 |
| 174 cm
33
169 lbs
13 - 20 - 1 |
|
182 cm
23
180 lbs
8 - 13 - 0 |
BJJ Blue Belt
Basic striking
Good chin |
|
BJJ Brown Belt
Excellent boxer
Determined |
|
| |
|
Ladies and gentlemen. This fight is 3 rounds, in the welterweight division.
Introducing the fighter to my left, fighting out of the red corner.
With a record of
13 - 20 - 1, fighting out of London, Shane MacLain!
And introducing the fighter to my right, fighting out of the blue corner.
With a record of
8 - 13 - 0, fighting out of St Petersburg, Nick Diaz!
The judges for this bout are Gwen Towbar, Daniel Franklin and Tiny Johnson.
The bell rings for round one and we are underway!
Diaz moves into range and connects with a jab.
It looks like Shane MacLain has been cut.
Diaz misses with a body shot.
Diaz gets caught on his heels momentarily as he allows MacLain to score an easy takedown into full guard.
The referee claps his hands together and tells the fighters to work.
Diaz is trying to stand up but he's not managed so far.
MacLain throwing strikes but missing.

Diaz looking for submissions from the bottom here. Moving his hips around, possibly looking for an armbar.
The fighters are pressed up against the cage, both looking to find a bit of space to work.
We've seen a great period of action over the last minute or so - credit to both fighters for going all out!
Diaz is throwing his legs up, looking for submissions. MacLain is aware though and is defending well.
MacLain distracts Diaz with his right hand and drops a big elbow with his other arm.
MacLain pressing down on his opponent's thigh, looking to pass guard. Diaz is keeping the position for now.
Diaz is working for submissions here. He's thrown up his legs looking for a triangle but MacLain frees his head nicely. Oh but Diaz has switched to an armbar! MacLain is tapping furiously! Lovely submission there!
Ladies and gentlemen, after 0:57 of round 1, we have a winner by way of Submission (Triangle Armbar). Nick Diaz!
|
|
|
|
|
|
|
|
|
|
|
|
|
|
|
|
|
|
|
|
|
|
|
| S |
C
A |
G |
S |
C
B |
G |
|
S |
C |
G |
|
energy
A | B |
|
hype
A | B |
|
pop
A | B |
|
mgr
A | B |
|
FIGHT
RATING
100% |
|
|
|
|
|
|
|
Undercard bout
|
Coming up we have a lightweight MMA rules bout between Rick Johnson (ranked 0 p4p, 0 weight class) and Ceasar Morgan (ranked 0 p4p, 0 weight class). Morgan has chosen Fat Lip as his entrance music. This should be a great matchup!
 |
|
 |
| 178 cm
25
152 lbs
3 - 0 - 0 |
|
175 cm
26
145 lbs
3 - 2 - 0 |
BJJ White Belt
Solid boxing
Big right hand |
|
Good takedowns
Basic striking
Determined |
|
| |
|
Ladies and gentlemen. This fight is 3 rounds, in the lightweight division.
Introducing the fighter to my left, fighting out of the red corner.
With a record of
3 - 0 - 0, fighting out of New York, Rick Johnson!
And introducing the fighter to my right, fighting out of the blue corner.
With a record of
3 - 2 - 0, fighting out of Los Angeles, Ceasar Morgan!
The judges for this bout are Cecil Peabody, Tiny Johnson and Wesley Smith.
The bell rings for round one and we are underway!
Morgan is looking for a takedown here. He's shot in and has managed to get it, finishing up in Johnson's half guard.
Morgan is pressing down on Johnson's thigh, looking to free his foot. Johnson is holding on for now.
Morgan is trying for a kimura here. Johnson looks like he's in a lot of pain... and he's tapping out! Morgan wins by kimura!
Ladies and gentlemen, after 0:26 of round 1, we have a winner by way of Submission (Kimura). Ceasar Morgan!
A victorious Ceasar Morgan thanked his army of followers in his post fight interview, telling people to make sure they follow him on Twitter.
|
|
|
|
|
|
|
|
|
|
|
|
|
|
|
|
|
|
|
|
|
|
|
| S |
C
A |
G |
S |
C
B |
G |
|
S |
C |
G |
|
energy
A | B |
|
hype
A | B |
|
pop
A | B |
|
mgr
A | B |
|
FIGHT
RATING
42% |
|
|
|
|
|
|
|
Undercard bout
|
Coming up we have a heavyweight MMA rules bout between Nobero Shimasaki (ranked 0 p4p, 0 weight class) and Ava Mullen (ranked 0 p4p, 0 weight class). Both fighters look fresh as a daisy as they make their way towards the cage.
 |
|
 |
| 184 cm
22
211 lbs
3 - 3 - 0 |
|
190 cm
25
265 lbs
3 - 1 - 0 |
BJJ Blue Belt
Solid Muay Thai
Cardio machine |
|
Good takedowns
Basic striking
Very confident |
|
| |
|
Ladies and gentlemen. This fight is 3 rounds, in the heavyweight division.
Introducing the fighter to my left, fighting out of the red corner.
With a record of
3 - 3 - 0, fighting out of Las Vegas, Nobero Shimasaki!
And introducing the fighter to my right, fighting out of the blue corner.
With a record of
3 - 1 - 0, fighting out of Las Vegas, Ava Mullen!
The judges for this bout are George Francis, Frank Dennis and Chris Downing.
The bell rings for round one and we are underway!
Mullen keeps the fight on the outside.
Shimasaki is looking to take this fight into the clinch.
Mullen dives in for a single leg takedown but Shimasaki sprawls and the fighters end up clinched against the cage.
Shimasaki gets control of Mullen's arms and successfully pulls guard. Shimasaki will no doubt be looking for submissions off his back.
The referee claps his hands together and tells the fighters to work.
Shimasaki wants to sweep but no luck.
Mullen trying to pass the guard but can't manage it just yet.
Mullen postures up to throw the ground and pound strikes but they don't connect.
Shimasaki keeping full guard, as Mullen tries to pass.
Mullen throws a strike but Shimasaki rolls with it and manages to sweep. Now he's in guard on top.
Mullen working for a triangle but Shimasaki defends it easily.
We've seen a great period of action over the last minute or so - credit to both fighters for going all out!
Shimasaki is looking to stand up but Mullen won't let him.
That's one minute gone in the round.
Shimasaki advances position into side control!
Mullen tries to work a leg under to get back to half guard but Shimasaki wriggles his own leg back out and remains in side control.
Shimasaki sitting in side control, looking to soften his opponent up with elbows and hammerfists but Mullen is avoiding damage well and looking to escape the position.
Shimasaki tries to move to mount but Mullen blocks the move with his legs.
Mullen is trying to get back to half guard. He's pushing on Shimasaki's leg. He's managed it. Nice work.
Mullen is trying to stand.
Mullen gets full guard.
The fighters are pressed up against the cage, both looking to find a bit of space to work.
That's two minutes gone in the round.
Shimasaki got a little sloppy there for a moment and Mullen has worked his way into a loose triangle - can he finish it?! No, Shimasaki has managed to get both his arms back between Mullen's legs - danger averted.
This has been an exciting period of action!
Shimasaki pressing down on his opponent's thigh, looking to pass guard. Mullen is keeping the position for now.
Mullen is working actively off his back, looking to secure an arm or perhaps work for a triangle.
Mullen lands a beautiful switch and he's in full mount! That could spell trouble for Shimasaki!
Mullen working to secure an arm triangle but it's not happening for him just yet.
Shimasaki working to try and regain half guard.
That's three minutes gone in the round.
Shimasaki definitely looks more muscular than last time we saw him fight.
Mullen has control of Shimasaki's right arm, working for a kimura. It's a bit of a token attempt though and Shimasaki regains control of the situation pretty easily.
Mullen is working for a guillotine from mount but Shimasaki frees his head quite easily.
Mullen moves into side control, trying to work for a kimura. That looks painful! Will he finish!!?? No, Shimasaki has worked his arm free - good work by Shimasaki!
Shimasaki knows he needs to get back to his feet asap. He's simply no match for Mullen on the ground.
Mullen advances to full mount.
That's four minutes gone in the round.
Mullen trying to control but Shimasaki is having none of it.
Shimasaki manages to regain half guard. Good work.
Shimasaki is defending against the submission attempts here by Mullen.
Mullen looking for a kimura but he'll have to free his other leg if he wants to finish that. Perhaps he's just using it as a distraction technique.
The crowd cheering loudly, showing their appreciation for the quality fight we're seeing here.
As the round comes to an end the crowd are showing their appreciation for a great round of action.
Mullen is sneakily working for an arm triangle but Shimasaki sees it coming and defends easily.
And thats the end of the round the fighters go back to their corners.
Ava Mullen dominated that round.
That's time! Shimasaki's corner gives him a slap on the ass as he gets ready to fight.
Shimasaki is looking to clinch.
Shimasaki dances in quickly and lands a nice inside leg kick on Mullen. That did some damage!
Shimasaki fakes low and throws an overhand right that catches Mullen on the side of the head.
Good leg kick by Shimasaki there. It's the ones that make that thud noise that hurt and that was an almighty thud.
Wow, both these guys are really going for it!
Mullen misses with a takedown attempt. He shot from a bit too far out.
Shimasaki gets in close and instigates a clinch.
Mullen has dropped down and is looking to force the takedown but it's defended by Shimasaki after a bit of a struggle.
Mullen lands a takedown into guard.
Shimasaki looking for a sweep. Not yet Shimasaki, not yet.
Mullen wants to control from the top but Shimasaki keeps moving.

Mullen gets to his feet. Shimasaki looking to butt scoot but the ref puts an end to that. On your feet son!
We've seen a great period of action over the last minute or so - credit to both fighters for going all out!
Shimasaki instigates a clinch.
Shimasaki breaks the clinch and we're back to striking at distance.
That's one minute gone in the round.
Ouch! a nice leg kick from Shimasaki, right into the meat.
Shimasaki scores with a slapping inside leg kick.
Shimasaki tries to clinch there but Mullen circles away.
Mullen shoots for a double leg takedown but Shimasaki sprawls well. He's pushed Mullen's face into the mat and manages to get back to his feet relatively easily.
Nobero Shimasaki has stuffed three takedown attempts in the round now. That's going to take a lot out of Ava Mullen.
Shimasaki moves into the clinch successfully.
Shimasaki misses with a knee strike.
Mullen goes for a takedown in the clinch but Shimasaki prevents it.
Shimasaki lands a takedown into guard.
Mullen is breathing heavily.
Mullen has his foot on Shimasaki's thigh. He's trying to push off and get in position for a triangle, I think. Shimasaki works his way back into a safe position though.
Shimasaki throws an elbow that misses. Mullen uses the momentum to reverse the position. He's now in Shimasaki's guard. Nice move by Mullen!
The crowd cheering loudly, showing their appreciation for the quality fight we're seeing here.
Shimasaki wants to stand and escape but Mullen is having none of it.
That's two minutes gone in the round.
Mullen wants to pass the guard but Shimasaki is keeping the position.
Mullen stopping the sweep attempt from Shimasaki.
Mullen wants to pass the guard but Shimasaki is keeping the position.
Shimasaki is trying to control the position from the bottom.
Shimasaki keeping full guard, as Mullen tries to pass.
That's three minutes gone in the round.
Mullen drops back for a leg but he's not going to get it - he lets go and Shimasaki dives on top into guard.
Mullen has a closed guard, preventing Shimasaki from standing up.
Mullen had isolated an arm as going for a kimura. Shimasaki defends it easily.
Our spies down at at Personal Training inform us that Mullen has really been working on his submissions in the buildup to this fight. Will it pay off?
Shimasaki trying to control the position from guard on top but Mullen is wriggling around, looking for whatever he can.
Mullen escapes his hips to the side and looks to be working for an armbar. Shimasaki gives him a little smile and shakes his head. No chance.
A big thud reverberates around the arena there as Shimasaki accidentally thumps the mat. Hopefully he's not broken his hand.
That's four minutes gone in the round.
Shimasaki got a little sloppy there for a moment and Mullen has worked his way into a loose triangle - can he finish it?! No, Shimasaki has managed to get both his arms back between Mullen's legs - danger averted.
Mullen throwing his legs up looking for a triangle.
The fans in attendance giving it up for the two fighters, who have really let it all hang out in the last minute or so!
Shimasaki postures up to throw the ground and pound strikes but they don't connect.
Shimasaki stands up and looks to throw the legs aside to pass to side control. Mullen swivels though and keeps the full guard.
Mullen keeping moving, preventing Shimasaki from controlling successfully.
Shimasaki tries to free his leg and advance position but Mullen is retaining full guard.
As the round comes to an end the crowd are showing their appreciation for a great round of action.
Mullen working the defensive guard well to avoid strikes from Shimasaki.
Mullen had isolated an arm as going for a kimura. Shimasaki defends it easily.
Shimasaki wants to stand but Mullen has a closed guard, so he can't escape.
And thats the end of the round the fighters go back to their corners.
That was a close second round but I would say that Nobero Shimasaki will probably get the nod.
That's time! Back to the action! This is the final round!
Mullen is on the wrong end of a nice combination from Shimasaki.
Shimasaki tries to clinch but is not successful on this occasion.
Shimasaki misses with a few strikes there.
Shimasaki throws a low kick, looking for Mullen's leg but Mullen calmly moves out of range.
Shimasaki has Mullen up against the cage in a clinch.
Shimasaki misses the knee to the body. Nice hip positioning from Mullen.
Shimasaki breaks the clinch and we're back to striking at distance.
Shimasaki throws out a powerful jab.
Shimasaki looks to throw the jab but Mullen is out of range.
The fight stays on the outside here - Shimasaki looks like he's thinking about clinching though.
Shimasaki throws a quick head kick that skims the top of Mullen's head.
Mullen forces Shimasaki back against the cage and clinches.
This has been an exciting period of action!
Mullen tries for a takedown but Shimasaki manages to get underhooks.
That's one minute gone in the round.
Shimasaki lands a takedown into guard.
Mullen looking for submissions off his back, moving his hips, looking for an opening.
Mullen has his foot on Shimasaki's thigh. He's trying to push off and get in position for a triangle, I think. Shimasaki works his way back into a safe position though.
Mullen working from the bottom, still in full guard. He's managed to get a loose triangle. Shimasaki doesn't seem to be doing much to defend here, obviously he feels comfortable in the position. Shimasaki manages to throw the legs off his shoulder and he's back into guard - no problem.
The crowd are loving this. Great action here.
Shimasaki postures up in Mullen's guard and throws a big left but Mullen blocks it.
Mullen is active off his back here, looking for submissions.
Mullen takes a big intake of breath there - he's definitely tired.
Mullen looking for a guillotine here but Shimasaki defends easily.
Shimasaki wanted to stand there but Mullen had control of the position.
That's two minutes gone in the round.
There's a bit of a scramble here and now Mullen is on top in guard.
Mullen is sitting in guard, working some ground and pound.
Mullen should think about turning a few of those tyres round his middle into muscle if he wants people to take him seriously as an athlete.
Mullen drops back for a leg but he's not going to get it - he lets go and Shimasaki dives on top into guard.
Shimasaki slips nicely into half guard.
The ref warns both fighters not to hold the cage as they work up against the meshing.
Shimasaki is working for submissions here but there's nothing on.
Mullen is refusing to be controlled, as Shimasaki sits in half guard.
That's three minutes gone in the round.
Shimasaki tries to stand but his hand is stuck under Mullen.
Shimasaki seems very keen to just sit and control from half guard but Mullen does not like that idea so much and is remaining active off his back.
The fighters are battling for position here. Mullen manages to regain full guard. Nice work.
Mullen trying to strike off his back.
Mullen is active off his back here, looking for submissions.
Shimasaki tries to stand but Mullen is controlling from the bottom.
Mullen is looking for a guillotine. You can't force these things though and Shimasaki defends well.
Ava Mullen has got the better of the ground game so far.
Mullen is looking for a triangle here but Shimasaki uses the submission attempt to pass into side control.
That's four minutes gone in the round.
Shimasaki working the head with strikes.
Wooooo! Give it up for these two warriors! They are putting on a show!
Mullen tries to buck Shimasaki off but Shimasaki is having none of it.
Mullen manages to land a sweep and he's now on top! Lovely Jiu Jitsu!
Shimasaki is looking to improve his position.
Shimasaki missing with punches from the bottom.
The crowd are going absolutely nuts as the round comes to an end - what a fantastic round of action!
Shimasaki is not content to let Mullen control the position.
Mullen passes the guard and advances to mount!
And that's the end of the fight!
I would just about give that final round to Ava Mullen.
I think Mullen has won this one but let's see whether the judges agree with me. Over to the ring announcer for the scorecards.
Ladies and gentlemen, after 3 rounds of action, we go to the scorecards for a decision.
Judge George Francis scores the fight 28:29
Judge Frank Dennis scores the fight 28:30
Judge Chris Downing scores the fight 27:30
In favor of your winner, by unanimous decision... Ava Mullen!
An out of breath Ava Mullen thanked his loyal fans in his post fight interview, giving them credit for his success over the course of his career.
Nobero Shimasaki was interviewed post fight and said 'Battle Lost but the War continues Team Goroshi - Tokyo United Fightwear - Zombie Nutrition'.
|
|
|
|
|
|
|
|
|
|
|
|
|
|
|
|
|
|
|
|
|
|
|
| S |
C
A |
G |
S |
C
B |
G |
|
S |
C |
G |
|
energy
A | B |
|
hype
A | B |
|
pop
A | B |
|
mgr
A | B |
|
FIGHT
RATING
100% |
|
|
|
|
|
|
|
Undercard bout
|
Coming up we have a heavyweight MMA rules bout between David James (ranked 0 p4p, 0 weight class) and Stepan Stepanov (ranked 0 p4p, 0 weight class). Stepanov has chosen 13 Tries - Tell Me as his entrance music. Stepan Stepanov will no doubt be trying to keep this one on the feet, where he has a distinct advantage.
 |
|
 |
| 185 cm
22
240 lbs
6 - 2 - 0 |
|
190 cm
26
255 lbs
4 - 3 - 0 |
BJJ Brown Belt
Basic striking
Cardio machine |
|
BJJ Blue Belt
Decent boxing
Solid chin |
|
| |
|
Ladies and gentlemen. This fight is 3 rounds, in the heavyweight division.
Introducing the fighter to my left, fighting out of the red corner.
With a record of
6 - 2 - 0, fighting out of Las Vegas, David James!
And introducing the fighter to my right, fighting out of the blue corner.
With a record of
4 - 3 - 0, fighting out of Las Vegas, Stepan Stepanov!
The judges for this bout are Gwen Towbar, Daniel Franklin and Stewart Dunkirk.
The bell rings for round one and we are underway!
Stepanov connects with a hook to the side of his opponent's head.
James has been working on his boxing with his coaches at VENDETTA Elite Gym in the buildup to the fight.
James looks to score with a combo but nothing lands.
James stuffs the takedown attempt from Stepanov. Stepanov gets slowly back to his feet.
James shoots in looking for a takedown. Stepanov tries to sprawl out of it but James keeps driving through. The fighters are pinned against the cage. Stepanov manages to get underhooks and after a bit of a struggle, circles away and we're back to standing.
Stepanov misses with a left hand
and James holds on and brings the fighters into a clinch.
Stepanov manages to break the clinch.
James is looking for a takedown here. He's shot in and has managed to get it, finishing up in Stepanov's half guard.
This is a great period of action - very entertaining stuff!
Stepanov is trying to control but can't.
Stepanov looking to work for a kimura from the bottom.
James trying to control from half guard but Stepanov is working away.
Stepanov is looking to sinch up a guillotine here but James pulls his head out easily.
James is working for a kimura but Stepanov is defending it quite comfortably.
James seems to be looking for submissions.
That's one minute gone in the round.
Stepanov wants to control but James is keeping busy and won't allow it.
James is looking for a kimura. It's going to be difficult to finish that from half guard though and Stepanov defends it well.
Stepanov tries to strike from the bottom but it doesn't land.
The ref warns both fighters not to hold the cage as they work up against the meshing.
James is looking for a kimura here.
Stepanov felt the need to train up his defensive grappling in the buildup to the fight. Presumably he was expecting to be in a difficult position like this, so let's see if he can get out of it.
James scores with a couple of good hammerfists.
James wants to take a breather but Stepanov is having none of it.
James is looking for a kimura but he's never going to get it from there.
Stepanov is trying to get back to full guard.
That's two minutes gone in the round.
James looks towards his corner to check for any instructions. The corner give him nothing to work with, so he cracks Stepanov with a short hammerfist. I guess that's as good as any advice he could get in this position.
James passes the guard and advances to mount!
Stepanov working to try and regain half guard.
The crowd cheering loudly, showing their appreciation for the quality fight we're seeing here.
James with good strikes from the mount here!
Stepanov tries to hold on but James pushes him away.
Stepanov really trying hard to get back to half guard here.
James wants to control the pace but Stepanov is squirming around nicely.
James is really struggling to control Stepanov but he's trying to hold on to the position.
Both fighters really going for it on the ground here!
That's three minutes gone in the round.
Stepanov manages to regain half guard. Good work.
Stepanov actively working from the bottom here.
Stepanov trying to control but James postures up.
James seems like he's working for an arm triangle here. He's freed his trapped foot and he's rotating nicely. Stepanov is in big trouble! He's tapping out! This one is aaaaaaaaaaaall over!
Ladies and gentlemen, after 3:47 of round 1, we have a winner by way of Submission (Arm Triangle). David James!
An out of breath David James thanked his loyal fans in his post fight interview, giving them credit for his success over the course of his career.
In defeat, Stepan Stepanov stepped up to the mic, saying 'I did not good today, but my sponsor is always does good things - lookup Cold Blooded Kemists!'.
|
|
|
|
|
|
|
|
|
|
|
|
|
|
|
|
|
|
|
|
|
|
|
| S |
C
A |
G |
S |
C
B |
G |
|
S |
C |
G |
|
energy
A | B |
|
hype
A | B |
|
pop
A | B |
|
mgr
A | B |
|
FIGHT
RATING
54% |
|
|
|
|
|
|
|
Undercard bout
|
Coming up we have a super heavyweight MMA rules bout between Hawk Hamilton (ranked 0 p4p, 0 weight class) and Tony Lopez (ranked 0 p4p, 0 weight class). The atmosphere really building for this one as we go over to our ring announcer for the fighter introductions!
 |
|
 |
| 225 cm
26
300 lbs
2 - 0 - 0 |
|
198 cm
30
300 lbs
13 - 7 - 0 |
Good wrestling
Solid boxing
Good in bed |
|
Good wrestler
Basic striking
Determined |
|
| |
|
Ladies and gentlemen. This fight is 3 rounds, in the super heavyweight division.
Introducing the fighter to my left, fighting out of the red corner.
With a record of
2 - 0 - 0, fighting out of Hilo, Hawk Hamilton!
And introducing the fighter to my right, fighting out of the blue corner.
With a record of
13 - 7 - 0, fighting out of Las Vegas, Tony Lopez!
The judges for this bout are Daniel Franklin, Alan Glass and Robert Twigg.
The bell rings for round one and we are underway!
Lopez shoots in but Hamilton avoids the takedown attempt easily.
Lopez darts in looking for a takedown but Hamilton gets double underhooks and turns Lopez into the cage.
Lopez lands a nice trip takedown into half guard.
Lopez is looking for a kimura here.
Hamilton tries to kick Lopez off but Lopez keeps his base steady and stays in half guard.
Lopez slips a nice elbow through Hamilton's hands, connecting with Hamilton's forehead.
Hamilton wants to improve his position but Lopez is controlling well.
Lopez passes to side control.
Lopez content to control the pace. The referee will try and keep them active though.
Lopez advances to full mount.
Fantastic stuff here - a very entertaining period of action, which has drawn cheers from the crowd.
Lopez is still in mount, landing shots to his trapped opponent. Hamilton can't stay in a position like this for much longer.
The fighters are pressed up against the cage, both looking to find a bit of space to work.
That's one minute gone in the round.
Hamilton is squirming around, avoiding Lopez's attempts to control the action.
Hamilton has been talking about how he's improved his wrestling in the run up to the fight so let's see if that's enough to sway the balance.
Hamilton takes a big shot to the head but keeps on trying to improve his position.
Lopez landing shots from mount.
Lopez working for a submission here. He's tucked his head under his opponent's arm, looking for an arm triangle. He's hopped off into side control, looking to tighten the submission... is it going to work? He's given up a good position looking for it. Hamilton looks OK. Oh, I spoke too soon, he's out! That must have been tighter than I thought! Excellent work there by Lopez! Submission of the night perhaps?
Ladies and gentlemen, after 1:35 of round 1, we have a winner by way of Submission (Arm Triangle). Tony Lopez!
Tony Lopez looked relieved post fight as he said the following; 'Hamilton is a good fighter, but I am better. Another win would give me the chance for a title shot so let's get it on.'.
|
|
|
|
|
|
|
|
|
|
|
|
|
|
|
|
|
|
|
|
|
|
|
| S |
C
A |
G |
S |
C
B |
G |
|
S |
C |
G |
|
energy
A | B |
|
hype
A | B |
|
pop
A | B |
|
mgr
A | B |
|
FIGHT
RATING
71% |
|
|
|
|
|
|
|
Co-main event
|
Coming up we have a light heavyweight MMA rules bout between Sam Rothstien (ranked 0 p4p, 0 weight class) and Mike Nickels (ranked 0 p4p, 0 weight class). The crowd seem to be enjoying Nickels's choice of entrance music: Hail To The King. Mike Nickels has the power to score a knockout today if he connects clean with Sam Rothstien's chin.
 |
|
 |
| 188 cm
21
212 lbs
3 - 2 - 0 |
|
188 cm
23
218 lbs
8 - 3 - 0 |
BJJ Purple Belt
Solid boxing
Cardio machine |
|
BJJ Purple Belt
Excellent boxer
Good gas tank |
|
| |
|
Ladies and gentlemen. This fight is 3 rounds, in the light heavyweight division.
Introducing the fighter to my left, fighting out of the red corner.
With a record of
3 - 2 - 0, fighting out of Las Vegas, Sam Rothstien!
And introducing the fighter to my right, fighting out of the blue corner.
With a record of
8 - 3 - 0, fighting out of Los Angeles, Mike Nickels!
The judges for this bout are Stewart Dunkirk, Alan Glass and Frank Dennis.
The bell rings for round one and we are underway!
Rothstien takes a shot to the eye socket. That's gotta hurt.
Rothstien fails in his attempt to clinch.
Rothstien tries to clinch there but Nickels circles away.
Nickels has been spending a lot of time sparring his boxing in the run up to the fight, trying to sharpen up those hands and look for a knockout.
Nickels avoids the clinch attempt nicely.
Nickels slaps away a takedown attempt from Rothstien, before circling back to the center of the mat.
Nickels stuffs the takedown attempt from Rothstien. Rothstien gets slowly back to his feet.
Rothstien with a poor takedown
and Nickels counters with a stiff right hand.
It looks like Sam Rothstien has been cut.
That's three failed takedown attempts in the round for Sam Rothstien. That's going to take a lot out of him.
Nickels fakes high and swings low for a body shot but Rothstien manages to avoid it.
Rothstien shoots for a takedown but Nickels saw that one coming a mile off and avoided it easily.
Nickels drops Rothstien with a straight left! Oh this is bad for Rothstien! Nickels dives in and starts dropping bombs - the referee has no choice but to step in and save him!
Ladies and gentlemen, after 0:40 of round 1, we have a winner by way of TKO (Strikes). Mike Nickels!
A relieved looking Mike Nickels thanked the fans for their support and gave the usual line about them being amazing. They seemed to believe that he actually meant it.
|
|
|
|
|
|
|
|
|
|
|
|
|
|
|
|
|
|
|
|
|
|
|
| S |
C
A |
G |
S |
C
B |
G |
|
S |
C |
G |
|
energy
A | B |
|
hype
A | B |
|
pop
A | B |
|
mgr
A | B |
|
FIGHT
RATING
63% |
|
|
|
|
|
|
|
Main event
|
Coming up we have a heavyweight MMA rules bout between Eddie Duncan (ranked 0 p4p, 0 weight class) and Lou The Tooth (ranked 0 p4p, 0 weight class). Both fighters look fresh as a daisy as they make their way towards the cage.
 |
|
 |
| 185 cm
20
240 lbs
5 - 1 - 0 |
|
183 cm
27
291 lbs
8 - 3 - 0 |
Good wrestling
Brawler
Good chin |
|
Good wrestler
Good elbows
Granite chin |
|
| |
|
Ladies and gentlemen. This fight is 3 rounds, in the heavyweight division.
Introducing the fighter to my left, fighting out of the red corner.
With a record of
5 - 1 - 0, fighting out of Las Vegas, Eddie Duncan!
And introducing the fighter to my right, fighting out of the blue corner.
With a record of
8 - 3 - 0, fighting out of Montreal, Lou The Tooth!
The judges for this bout are Robert Twigg, Frank Dennis and Stewart Dunkirk.
The bell rings for round one and we are underway!
The Tooth drives through and clinches with Duncan against the cage.
Duncan wants a takedown.
Duncan is working for a takedown up against the cage. He can't get it on this occasion though.
The Tooth is looking to score with knees to the body. Maybe he'll change it up and go body then head. Duncan is defending well for now.
The Tooth taking a break, stalling in the clinch.
Knees in the clinch landing for The Tooth.
Duncan jumps guard but The Tooth turns him against the cage and keeps the fight standing.
That's three failed takedown attempts in the round for Eddie Duncan. That's going to take a lot out of him.
Duncan tries to score a body lock takedown but The Tooth shows good agility there to stay on his feet.
The Tooth landing knees to the body. They look like they could hurt.
Duncan goes for a takedown in the clinch but The Tooth prevents it.
Duncan is trying to pull guard but The Tooth has him pressed against the cage.
The Tooth is defending well against a takedown attempt.
The Tooth slows down the pace here.
Duncan has been talking about how he's improved his wrestling in the run up to the fight so let's see if that's enough to sway the balance.
The Tooth prevents the takedown attempt.
That's one minute gone in the round.
The referee calls for The Tooth to work.
The Tooth tries to land a knee to the body but he is off balance and Duncan avoids it.
The Tooth pushes off and circles away, back to the middle of the mat.
The Tooth gets a clinch.
Duncan tries for a takedown but The Tooth manages to get underhooks.
The Tooth trying to land knees to the body.
The Tooth content to slow the pace in the clinch.
Duncan tries to break the clinch but The Tooth is controlling the position.
The Tooth misses the knee to the body. Nice hip positioning from Duncan.
Duncan misses with a short punch on the inside.
Duncan can't get the takedown.
That's two minutes gone in the round.
The Tooth has Duncan pressed against the cage, preventing Duncan from circling away and getting back to striking at range.
Duncan is looking for a takedown up against the cage. The Tooth gets underhooks though and prevents the takedown attempt.
Duncan takes an elbow to the temple.
It looks like Eddie Duncan has been cut.
The Tooth prevents the takedown attempt.
Duncan blocks an uppercut.
The Tooth trying to land knees to the body.
Duncan tries to pull guard but The Tooth forces him back to his feet, against the cage.
The Tooth unloads a knee to the mid-section. Duncan lets out a prehistoric sounding urrrrgh.
This is a great period of action - very entertaining stuff!
The Tooth landing some nice looking knees to the body.
Duncan is breathing heavily.
Duncan drops down looking for an ankle pick but The Tooth pulls his leg out and moves away.
Duncan will have to do better than that with his takedown attempts.
The Tooth clinches with his opponent.
Knees in the clinch landing for The Tooth.
Duncan takes a knee to the side of the body.
That's three minutes gone in the round.
The Tooth controlling the action here for a moment.
The Tooth landing some nice looking knees to the body.
The Tooth avoiding damage.
The Tooth misses with a hook to the ribs.
Duncan avoiding damage as The Tooth throws knees to the body.
The Tooth slowing the pace effectively.
Kneeeeees! The crowd are calling for knees to the body. The Tooth obliges.
The Tooth lands a knee to the body.
The Tooth lands an elbow inside that Duncan shrugs off.
The crowd are loving this. Great action here.
The Tooth keeps control of Duncan as he tries to wriggle out of the double underhooks.
Duncan is trying to drag The Tooth to the mat but The Tooth just about manages to keep his footing. He used the cage to his advantage there.
The Tooth manages to break the clinch.
That's four minutes gone in the round.
The Tooth fails with an attempt to clinch.
The Tooth pushes Duncan up against the cage in a clinch.
Nice elbow from The Tooth.
The Tooth pushes off and circles away, back to the middle of the mat.
The Tooth tries to clinch there but Duncan circles away.
Duncan fails with a takedown attempt.
Duncan gets tackled into the cage by The Tooth. The Tooth maintains the clinch.
Duncan on the defensive, avoiding the knees to the body.
The Tooth gets double underhooks to prevent a takedown attempt from Duncan.
The Tooth trying to land knees to the body.
The crowd are going absolutely nuts as the round comes to an end - what a fantastic round of action!
The Tooth trying to land knees to the body.
And thats the end of the round the fighters go back to their corners.
Lou The Tooth dominated that round.
The cut man is working on Eddie Duncan's cut.
The fighters get back to their feet, the hooter sounds and we're back to the action!
The Tooth motions for Duncan to come forward. The Tooth throws a leg kick but it misses it's target.
Duncan tries for a takedown but The Tooth sees it coming a mile off and avoids it easily.
Eddie Duncan is looking to throw some combinations by the looks of things.
Duncan is looking to clinch but The Tooth is avoiding it.
The Tooth slaps away a takedown attempt from Duncan, before circling back to the center of the mat.
Duncan shoots in but no luck this time.
That's three failed takedown attempts in the round for Eddie Duncan. That's going to take a lot out of him.
A chopping leg kick lands by The Tooth.
The Tooth clinches up with Duncan and pushes him back against the cage.
Duncan is looking for a takedown.
The Tooth putting his Muay Thai to good use. He has Duncan in a tight clinch and is doing some damage with knees to the body.
The Tooth crunches a lovely knee into Duncan's ribcage.
The Tooth breaks the clinch and we're back to striking at distance.
The crowd are loving this. Great action here.
The Tooth tries to clinch up.
The fight stays on the outside here - The Tooth looks like he's thinking about clinching though.
The Tooth tries to clinch but Duncan is having none of it.
The Tooth darts in and clinches Duncan up against the cage.
Duncan fails to pull guard.
Both fighters are absolutely exhausted here.
That's one minute gone in the round.
The Tooth breaks the clinch.
The Tooth misses with a low kick.
The Tooth moves into the clinch.
The Tooth using the Thai clinch to land knees to the body.
Duncan is trying to work out of this bad position, with his back against the cage.
Duncan tries to score a body lock takedown but The Tooth shows good agility there to stay on his feet.
The Tooth has been the more effective fighter overall so far.
Duncan tries to score a body lock takedown but The Tooth shows good agility there to stay on his feet.
Duncan tries for a takedown. No joy.
The Tooth landing some nice looking knees to the body.
The Tooth taking a break, stalling in the clinch.
The Tooth tries to land knees in the clinch but Duncan avoids the damage to the body.
The Tooth holding his opponent close, against the cage.
Duncan takes a knee to the side of the body.
Fantastic stuff here - a very entertaining period of action, which has drawn cheers from the crowd.
The Tooth lands a nice knee to the body.
That's two minutes gone in the round.
Duncan avoiding damage as The Tooth throws knees to the body.
Duncan goes for a takedown attempt but The Tooth pushes him away and we're back to fighting at a distance.
The Tooth fails with an attempt to clinch.
A good leg kick by The Tooth.
The fight moves into the clinch position.
Duncan blocks a punch to the side of the head.
Duncan wants a takedown.
The Tooth working Duncan over with knees to the body.
The Tooth using the Thai clinch to land knees to the body.
The Tooth tries a body shot but Duncan blocks it.
The Tooth's corner calls for him to break the clinch, which he does.
The Tooth tries to clinch up against the cage, rushing in to close the distance. Duncan manages to break the clinch and circles back to the middle of the mat.
The fight stays on the outside here - The Tooth looks like he's thinking about clinching though.
That's three minutes gone in the round.
The Tooth takes the fight into the clinch.
Duncan tries to score a body lock takedown but The Tooth shows good agility there to stay on his feet.
The Tooth's corner are urging him to control the action in the clinch for a moment, rather than mount any serious offense. I'm sure the crowd appreciate those instructions... not.
Duncan wants a takedown but no success here.
The Tooth slows down the pace here.
The Tooth breaks the clinch.
Duncan shoots in for a double leg but The Tooth sprawls well. That's going to sap some energy.
The Tooth feints and then cracks Duncan's leading leg with a nice low kick. He's obviously looking to slow Duncan down.
Lou The Tooth is looking to keep the fight on the feet at all costs.
Duncan fails with a rather predictable takedown attempt.
That's four minutes gone in the round.
The Tooth forces Duncan back against the cage and clinches.
Duncan blocks a body shot from The Tooth.
Duncan blocks a knee to the body. He'll have a nicely bruised forearm in the morning.
This is turning into a torrid day at the office for Duncan. He's trying desperately to land a takedown but he's failing miserably and getting slapped silly on the feet to compound his misery.
Duncan on the defensive, avoiding the knees to the body.
The Tooth gets an overhook and lands an elbow to the side of the head.
Duncan wants a takedown but no success here.
The crowd are loving this. Great action here.
The Tooth misses with a body punch.
Duncan managing to block the knees to the body from The Tooth.
Duncan throws a knee to the head but misses.
The Tooth escapes the clinch and we're back to striking.
The Tooth pushes Duncan up against the cage in a clinch.
The crowd are going absolutely nuts as the round comes to an end - what a fantastic round of action!
The Tooth tries to throw a body punch but Duncan avoids it by throwing The Tooth back against the cage.
Lou The Tooth seems to be working more effectively in the clinch in the fight so far.
The Tooth trying to land knees to the body.
Duncan has dropped down and is looking to force the takedown but it's defended by The Tooth after a bit of a struggle.
And thats the end of the round the fighters go back to their corners.
Lou The Tooth showed his class in that round. I'd imagine he'll take it on all the scorecards.
The cut man is working on Eddie Duncan's cut.
OK. That's time! The bell goes and we're back to the action. This is the final round!
The Tooth tries to clinch there but Duncan circles away.
The Tooth wants to clinch.
The Tooth instigates a clinch.
Duncan misses with a punch on the inside.
Duncan blocks a body shot from The Tooth.
Duncan is trying to force a seperation but The Tooth has the dominant position.
Knees to the body from The Tooth.
Duncan tries for a takedown but The Tooth manages to get underhooks.
The Tooth tries to throw a body punch but Duncan avoids it by throwing The Tooth back against the cage.
Duncan is looking for a takedown.
The Tooth landing knees to the body.
Duncan tries to score a body lock takedown but The Tooth shows good agility there to stay on his feet.
That's three failed takedown attempts in the round for Eddie Duncan. That's going to take a lot out of him.
Duncan tries to pull guard but The Tooth holds him up against the cage and eventually Duncan drops back down to his feet.
Both fighters are breathing heavily.
Duncan prevents a body shot from The Tooth.
That's one minute gone in the round.
Duncan blocks a knee to the body. He'll have a nicely bruised forearm in the morning.
The Tooth tries a body shot but Duncan blocks it.
Duncan wants a takedown.
The Tooth blocks a punch to the side of the head.
The Tooth misses with a punch to the body.
Duncan is trying to break the clinch but The Tooth has him pressed against the cage.
Duncan tries to jump guard but he falls flat on his backside. The Tooth smiles and moves away.
The Tooth moves into the clinch successfully.
Duncan can't get the takedown.
Duncan goes for a takedown attempt but The Tooth pushes him away and we're back to fighting at a distance.
The Tooth scores with a leg kick.
That's two minutes gone in the round.
The Tooth tries to clinch up.
The Tooth moves in looking to clinch but Duncan pushes him off.
Duncan fails with the takedown.
The Tooth clinches.
A hook to the body from The Tooth.
The crowd cheering loudly, showing their appreciation for the quality fight we're seeing here.
Duncan blocks a knee to the body. He'll have a nicely bruised forearm in the morning.
Duncan is working for a takedown up against the cage. He can't get it on this occasion though.
The Tooth is looking to score with knees to the body. Maybe he'll change it up and go body then head. Duncan is defending well for now.
The Tooth using the Thai clinch to land knees to the body.
The Tooth breaks from the clinch.
Wow, both these guys are really going for it!
The Tooth closes the distance and clinches.
The Tooth using the Thai clinch to land knees to the body.
A short right from The Tooth on the inside.
The Tooth pressing his opponent against the cage.
The Tooth misses with the head strike.
That's three minutes gone in the round.
The Tooth lands a nice knee to the body.
The Tooth prevents a takedown attempt there.
Eddie Duncan has stepped it up - he knows he needs a finish here!
The Tooth tries a body shot but Duncan blocks it.
Duncan tries to score a body lock takedown but The Tooth shows good agility there to stay on his feet.
The Tooth taking a break, stalling in the clinch.
Knees to the body from The Tooth.
The Tooth escapes the clinch and we're back to striking.
The Tooth gets in close and instigates a clinch.
Duncan tries for a takedown. No joy.
The Tooth lands a hook to the body. It's hard to tell if that hurt Duncan or not.
The Tooth's corner calls for him to break the clinch, which he does.
That's four minutes gone in the round.
Duncan tries to keep at a distance but The Tooth has taken the fight into the clinch.
Lou The Tooth is fighting for a decision - hopefully he's judged it right and he's actually winning the fight.
This has been an exciting period of action!
Duncan misses with some punches.
The referee is keeping an eye on The Tooth - much more stalling and he will separate the fighters.
The Tooth goes for a body shot but it's blocked.
Duncan goes for a takedown in the clinch but The Tooth prevents it.
Duncan goes for a takedown in the clinch but The Tooth prevents it.
The Tooth crunches a lovely knee into Duncan's ribcage.
The crowd are going absolutely nuts as the round comes to an end - what a fantastic round of action!
Duncan wants a takedown but no success here.
Knees in the clinch landing for The Tooth.
The Tooth unloads a knee to the mid-section. Duncan lets out a prehistoric sounding urrrrgh.
Duncan pushes off and fires off an elbow that misses, before clinching up again, against the cage.
And that's the end of the fight!
Lou The Tooth comfortably won the final round on my scorecard.
Well The Tooth has outworked and out performed his opponent in all aspects of the game today. He was simply too good and the decision should be no more than a formality. Over to the ring announcer for the scorecards.
Ladies and gentlemen, after 3 rounds of action, we go to the scorecards for a decision.
Judge Robert Twigg scores the fight 27:30
Judge Frank Dennis scores the fight 27:30
Judge Stewart Dunkirk scores the fight 27:30
In favor of your winner, by unanimous decision... Lou The Tooth!
Jumping up and down and very excited, Lou The Tooth waved his t-shirt featuring Meet the Future's logo in front of the cameras.
|
|
|
|
|
|
|
|
|
|
|
|
|
|
|
|
|
|
|
|
|
|
|
| S |
C
A |
G |
S |
C
B |
G |
|
S |
C |
G |
|
energy
A | B |
|
hype
A | B |
|
pop
A | B |
|
mgr
A | B |
|
FIGHT
RATING
100% |
|
|
|
|
|
|
|
|
|
|
